Logging In
When you log in, you can choose single sign-on (SSO) and sign in via your Git provider, or you can use a MyKinsta account that is not linked to a Git provider.
For added security, you can enable Two-Factor Authentication (2FA) on your user account, which requires an additional verification code from your mobile device or password management app.
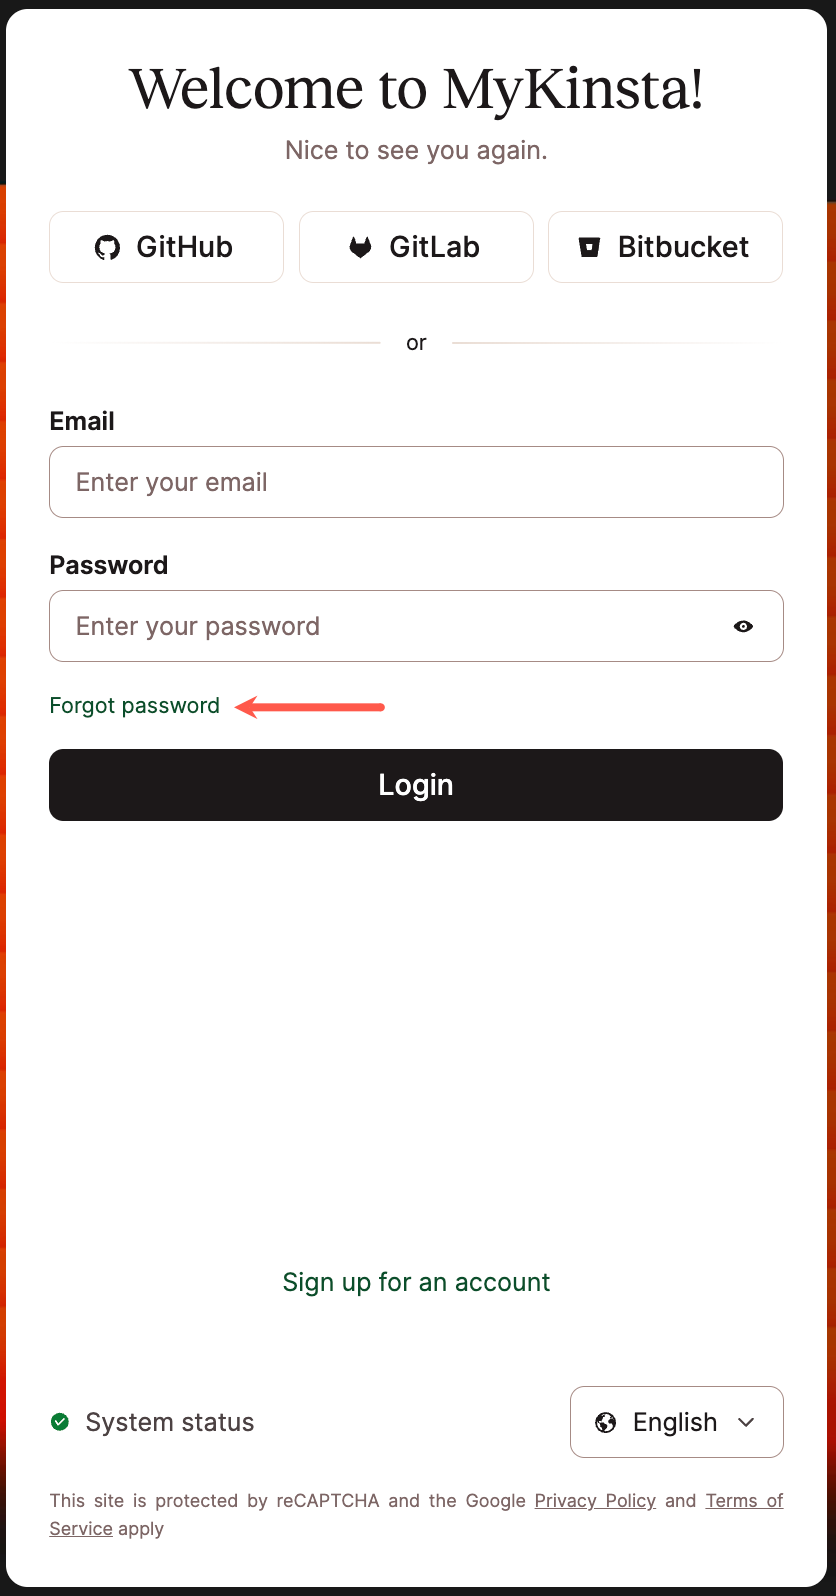
If you need to reset your MyKinsta password on your user account, you can start the process on the MyKinsta login page.
Single Sign-On (SSO)
Single Sign-On (SSO) saves you time by letting you log in with your Git service provider login without signing up separately for a Kinsta account.
Access MyKinsta With Your Git Provider Login
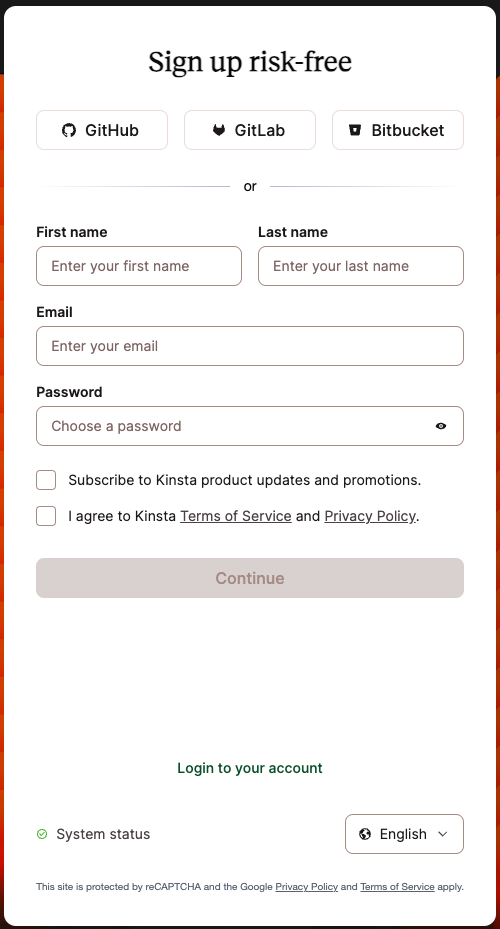
- To get started, head over to the Kinsta Signup page.
- Select your Git provider (GitHub, GitLab, or Bitbucket).
- When prompted, log in to your Git provider and connect Kinsta to your account.
- Depending on your provider, when you are returned to the signup page, you may need to enter your email address and name to continue logging in to MyKinsta.
Link Your Git Service to Your MyKinsta Account
- Log in to MyKinsta, click on your username in the top right corner, then click User Settings in the dropdown menu that appears.
- On the My Account page, scroll down to the Connect with Git service section and click on the Git service provider you want to connect to and use for SSO with your MyKinsta account.

Connect your Git service to MyKinsta. - When prompted, log in to your Git provider and connect Kinsta to your Git service account.
- Now you can use SSO or your MyKinsta email address and password to log in to MyKinsta.

Disconnect Your MyKinsta User From a Git Provider
- Log in to MyKinsta, click on your username in the top right corner, then click User Settings in the dropdown menu that appears.
- In My Account scroll down to the Connect with Git service section and click Revoke access for the Git service you want to disconnect from MyKinsta.

Remove access to your Git service.

Enable Two-Factor Authentication (2FA)
Keeping your MyKinsta account as secure as possible is very important. In addition to using a strong password for MyKinsta, we recommend setting up two-factor authentication, or 2FA, and asking all users in your company to do the same. With 2FA enabled, all MyKinsta login attempts will require an additional verification code from your mobile device or password management app.
This makes your account more secure because malicious actors will no longer be able to gain access with just your username and password. Here at Kinsta, we support authenticator-based 2FA for all of our customers. In this article, you’ll learn how to set up two-factor authentication to protect your MyKinsta account.
Enable 2FA in MyKinsta
All Kinsta users have access to authenticator-based two-factor authentication in MyKinsta. Compared to SMS-based 2FA, authenticator-based 2FA is more secure because it doesn’t rely on mobile phone numbers that can be SIM swapped. It’s also more convenient because it can be used with an authenticator app or popular password managers like 1Password and LastPass.
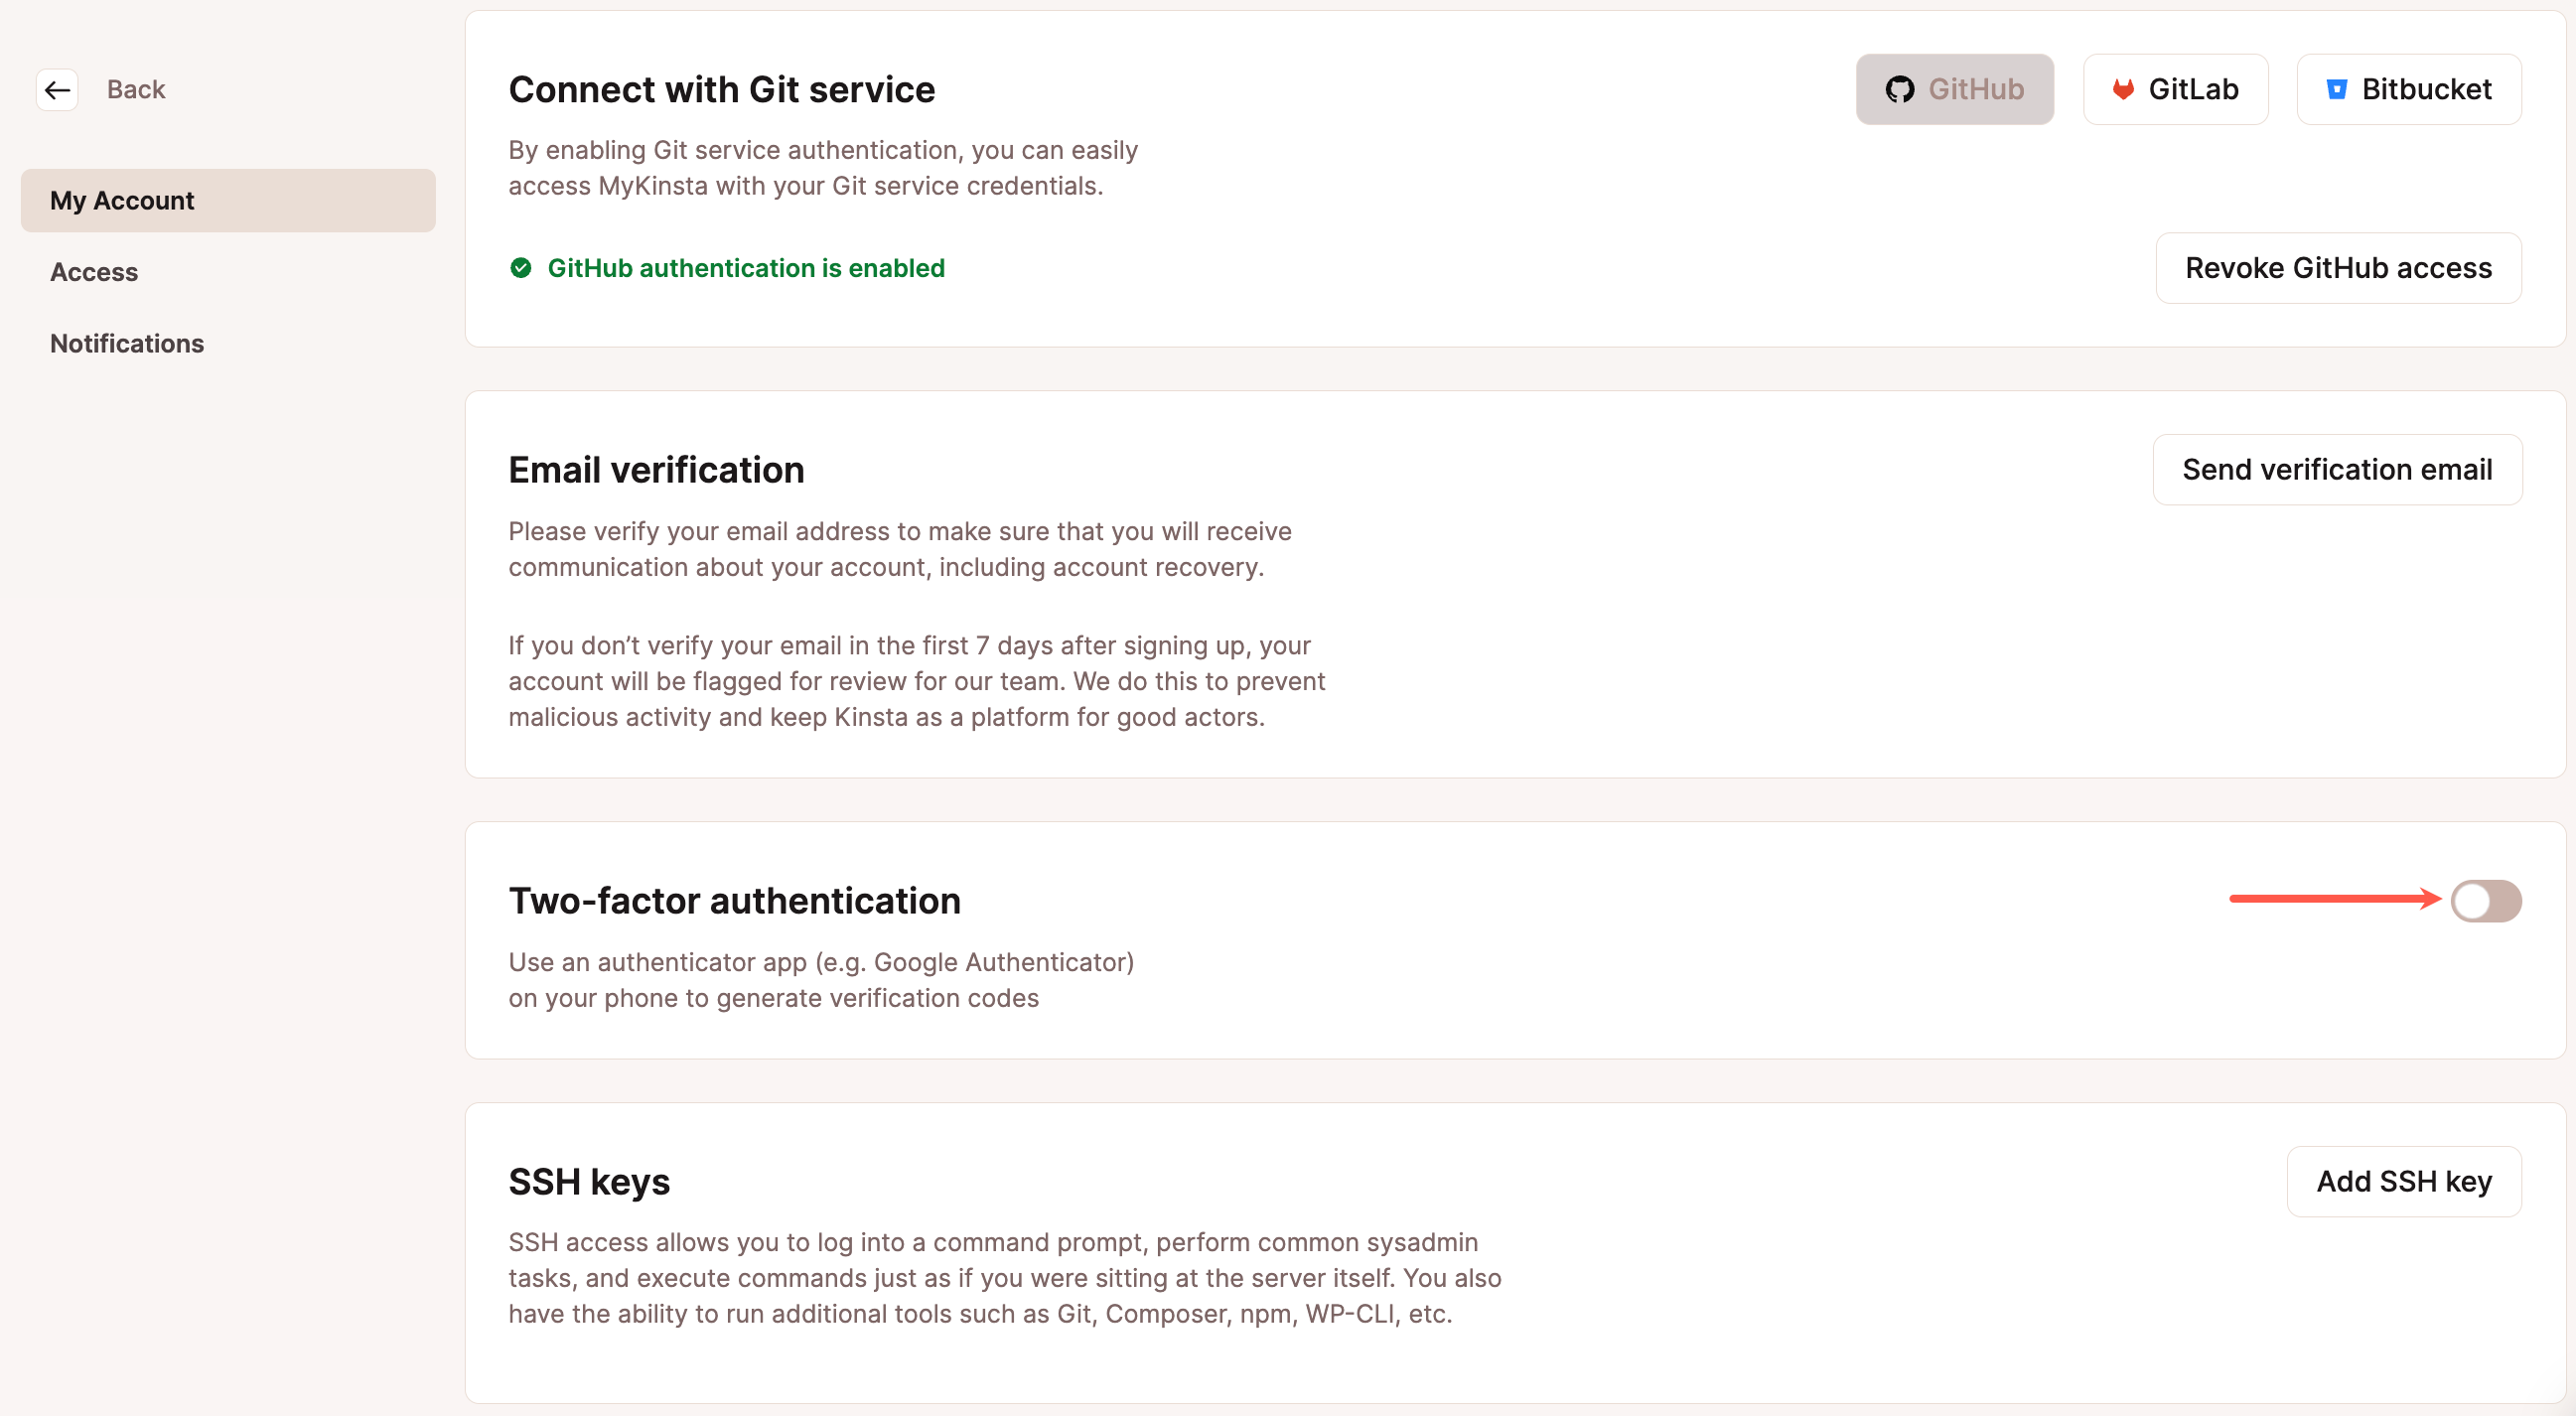
To enable 2FA, click on your username in the top right corner, then click User Settings in the menu that appears.

On the My Account page, scroll down and click Enable Two-Factor Authentication.
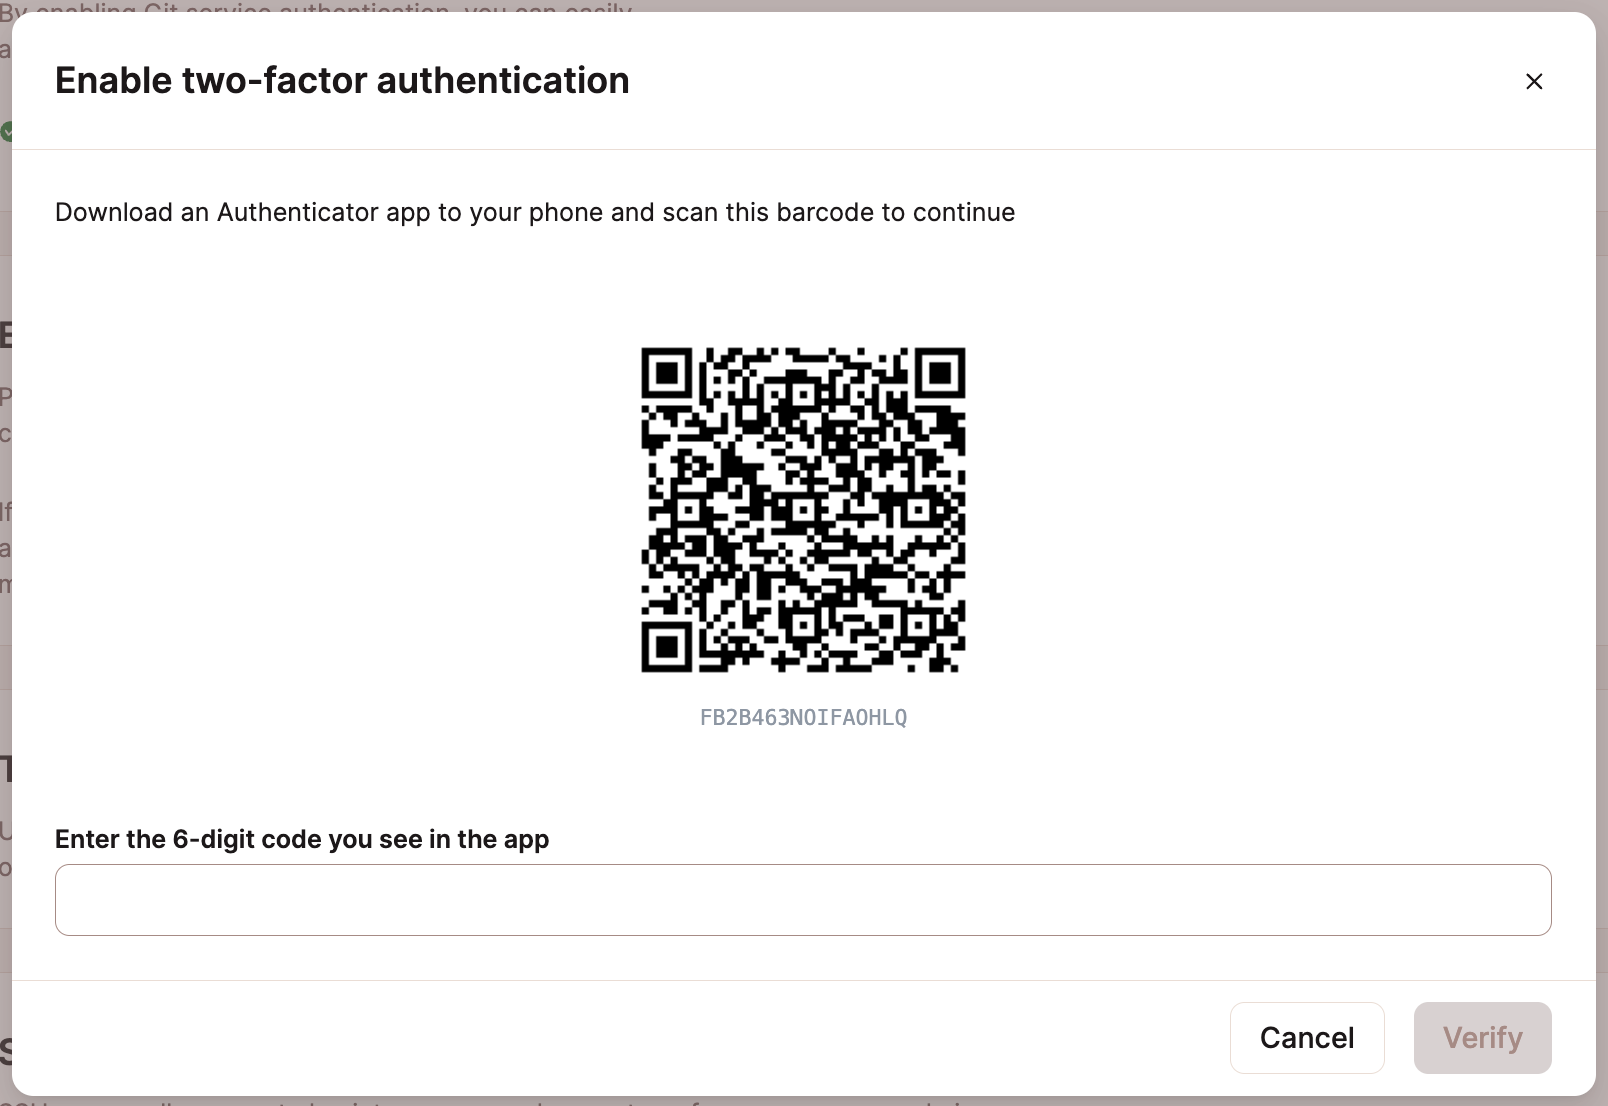
You will then be prompted to scan the 2FA QR code with an authenticator app. If you’re using a password manager like 1Password or LastPass, we recommend using the built-in 2FA feature in those apps. Otherwise, Google Authenticator is a good option as well.
How to Add MyKinsta 2FA to 1Password
If you’re already using 1Password to manage passwords, we recommend using the built-in two-factor authentication feature to add your MyKinsta 2FA.
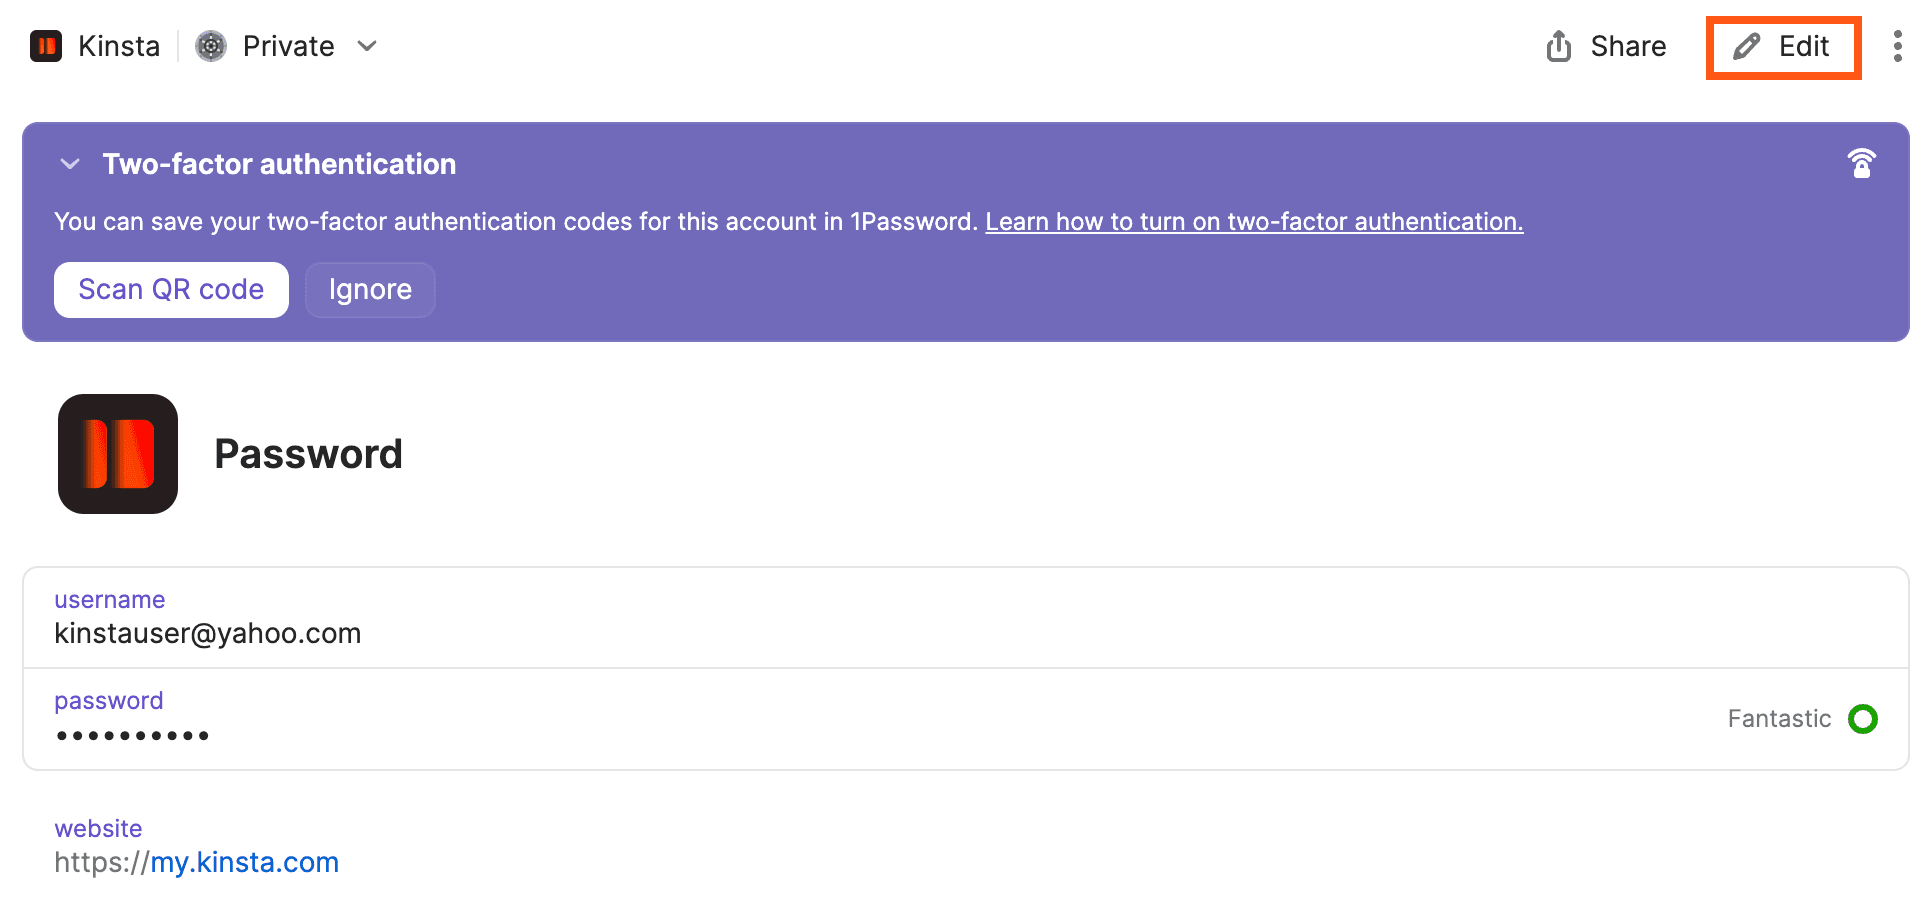
In the 1Password app, navigate to the login profile for your MyKinsta account and press Edit.
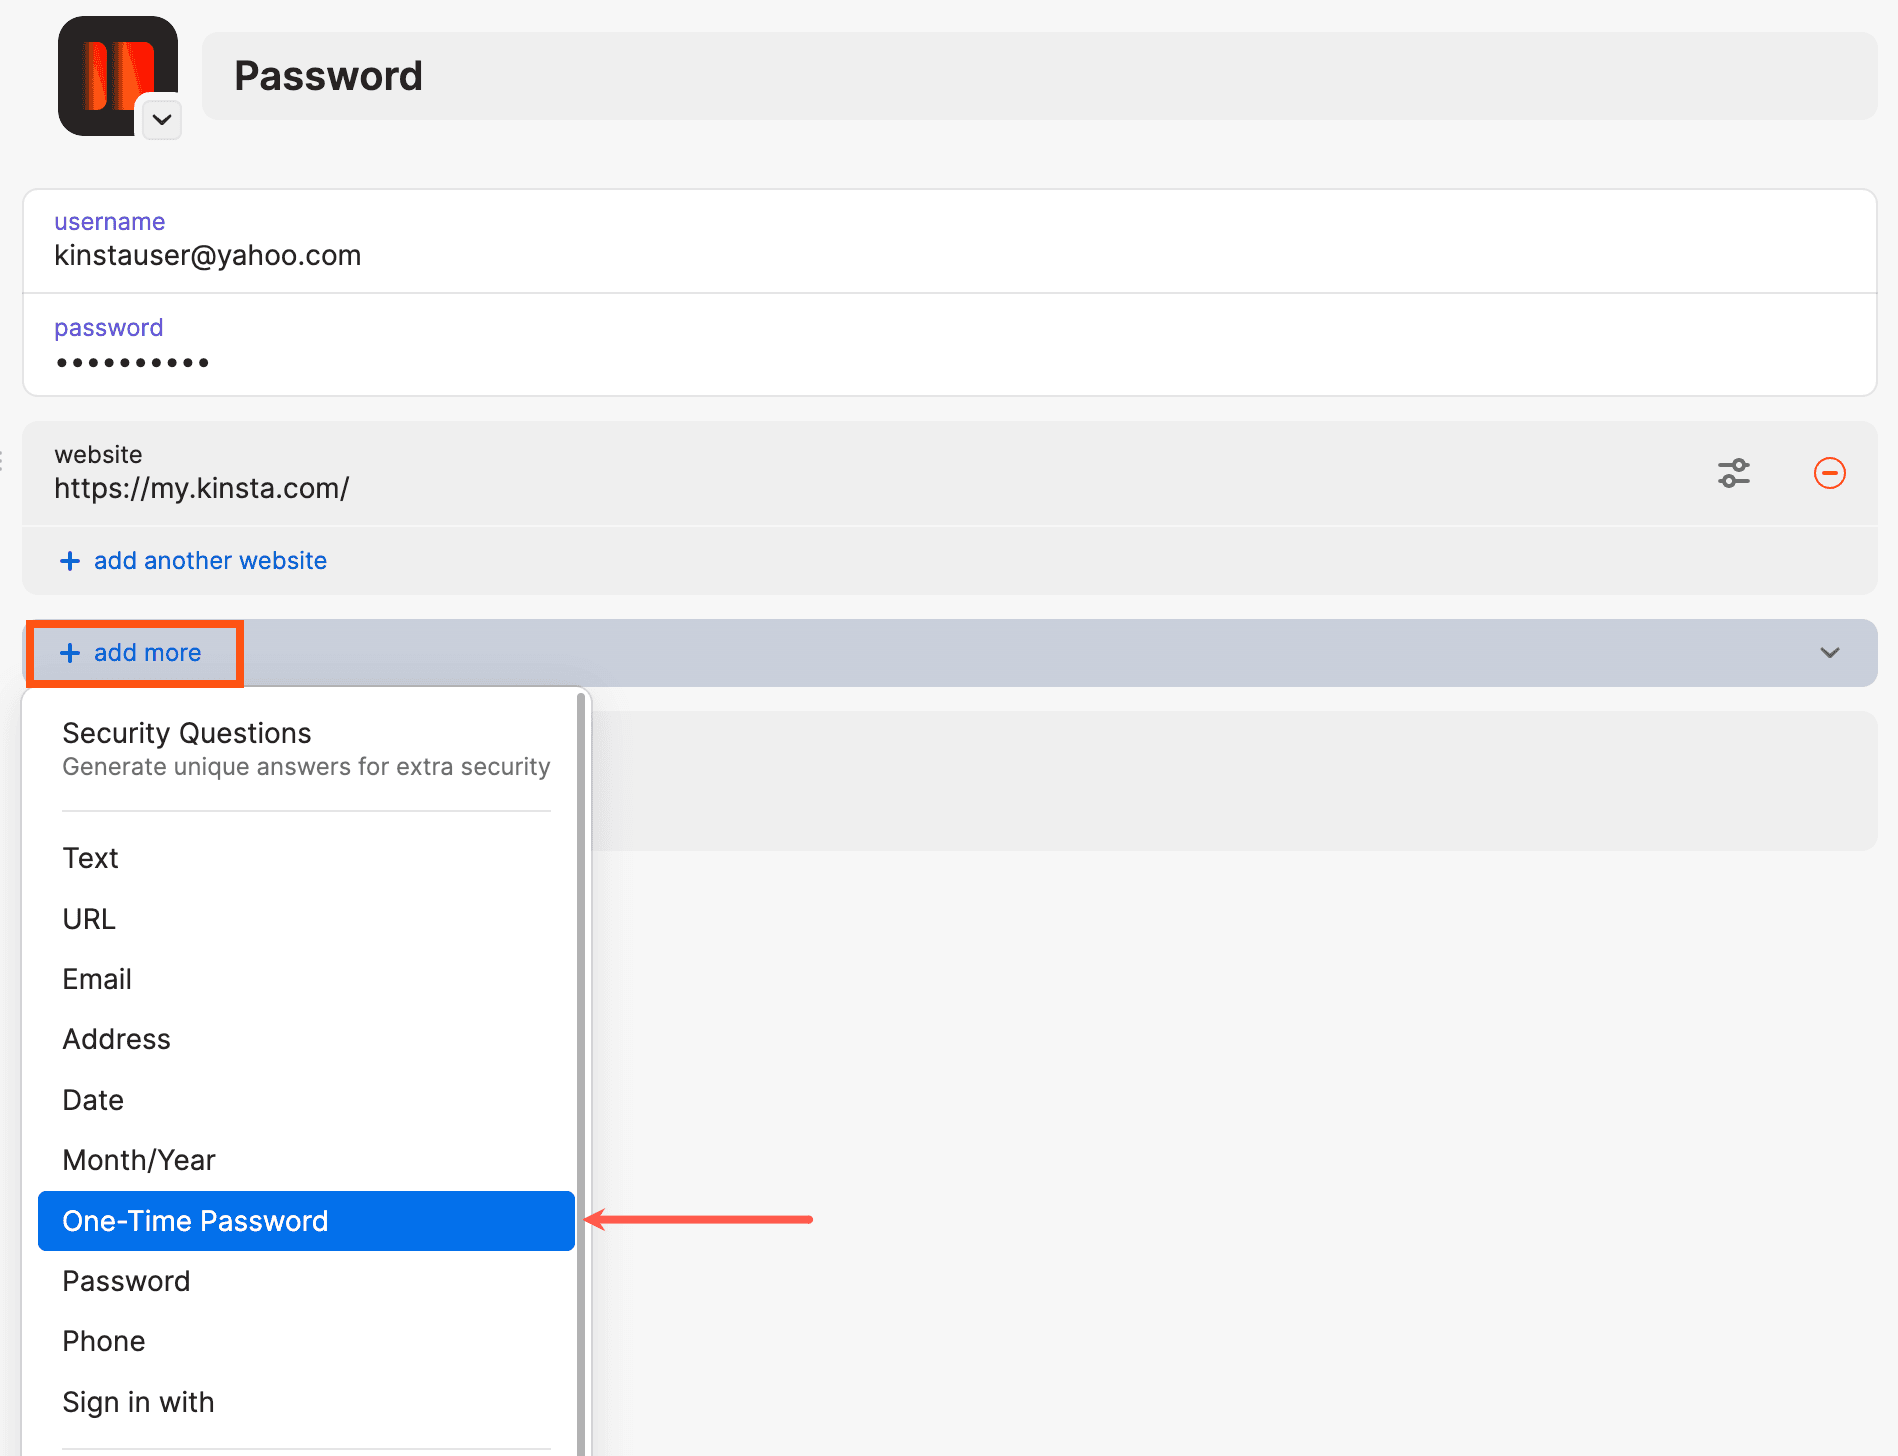
Next, click on the New Field dropdown and select the One-Time Password option.
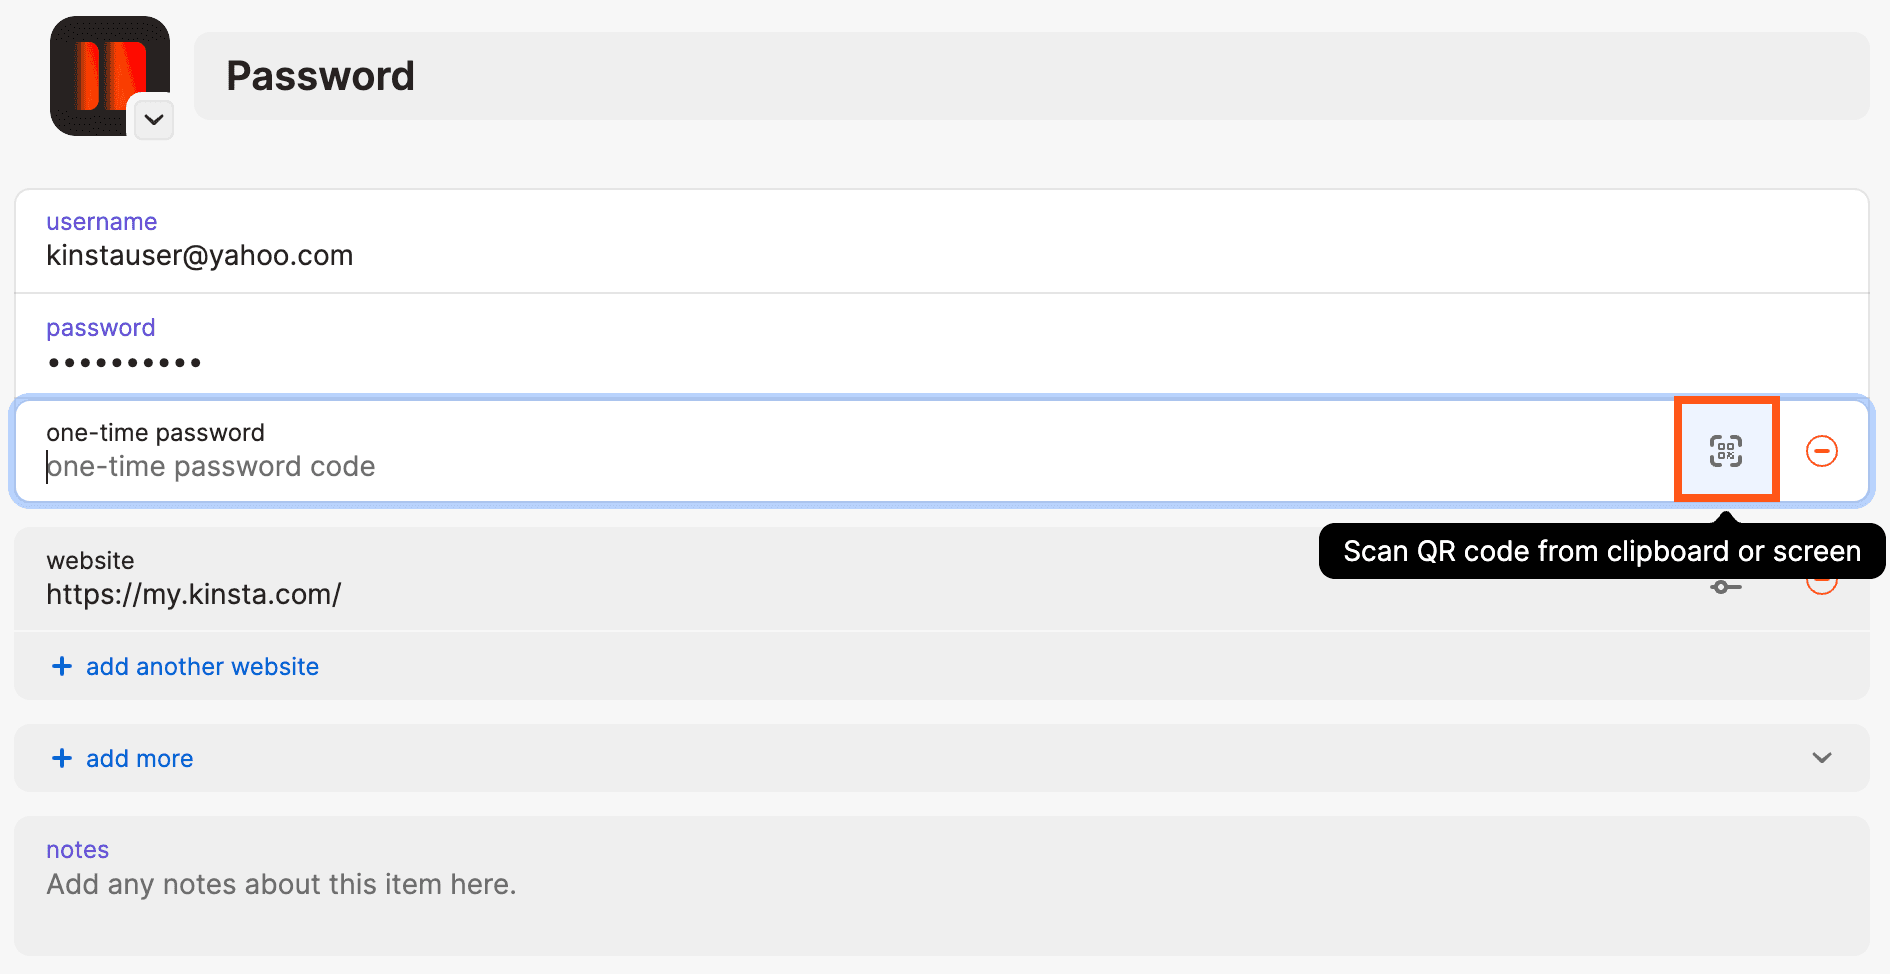
Next, click on the QR code icon in the newly created One-Time Password field to activate 1Password’s QR code scanner.
Position the 1Password Code Scanner over the QR code until the highlighted corners turn green, and it scans your code. When your 2FA code is all set up, click Save in 1Password.
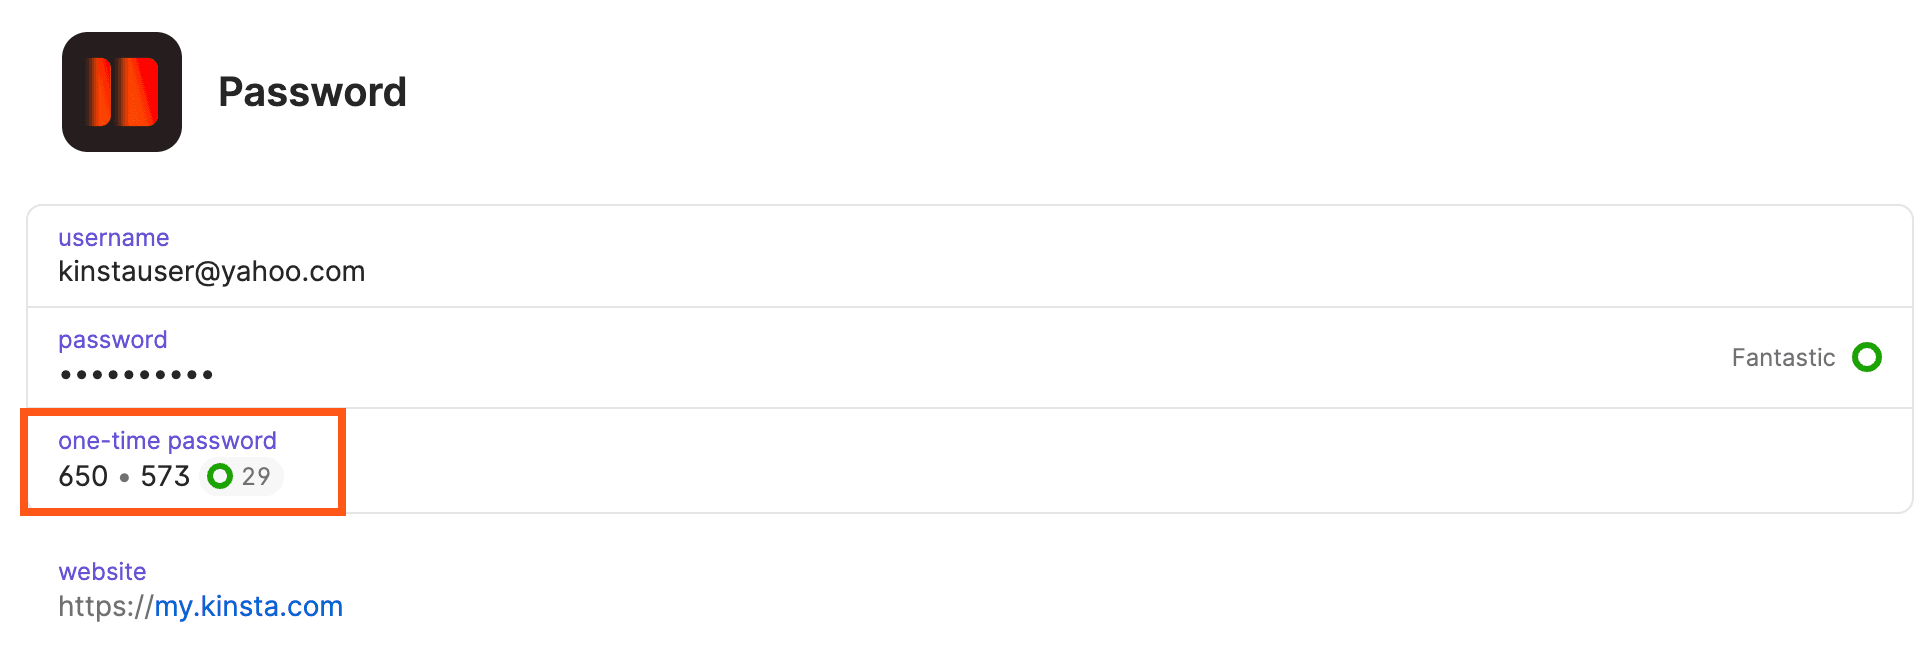
You should now see a one-time password field in the 1Password login profile for your MyKinsta account. To finish the 2FA setup process in MyKinsta, copy the one-time password into the Enter the 6-digit code you see in the app field in MyKinsta, and press Verify.
How to Add MyKinsta 2FA to Google Authenticator
Google Authenticator is a 2FA app that’s available for both iOS and Android devices. To add MyKinsta 2FA to Google Authenticator, press the + button in the upper right corner of the Google Authenticator app and press Scan Barcode.
Next, use the camera on your mobile device to scan the QR code in MyKinsta. After scanning the QR code, type in the six-digit code from Google Authenticator into the Enter the 6-digit code you see in the app field in MyKinsta, and press Verify.
About MyKinsta Two-Factor Authentication
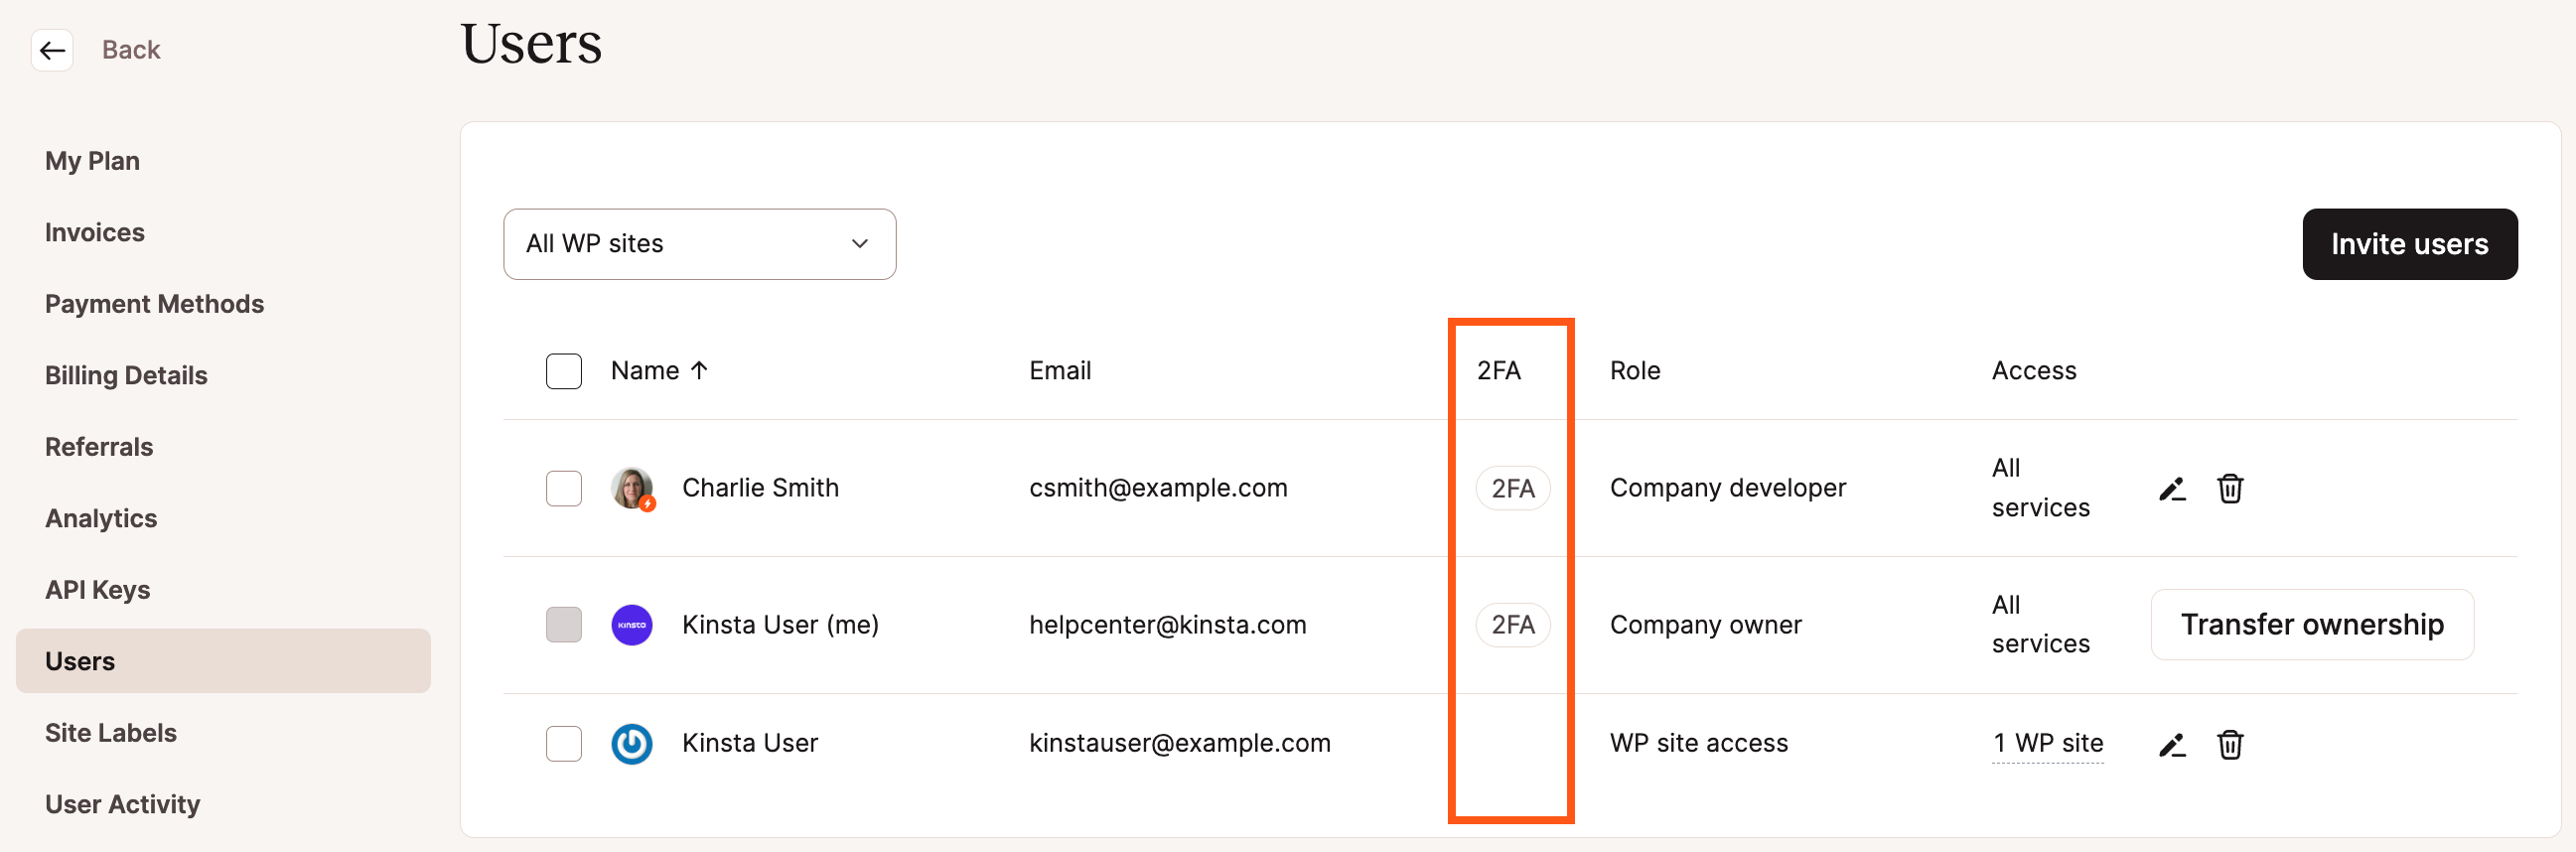
When 2FA is enabled, you will see it under the 2FA column in the User Management screen. If 2FA is disabled on your account, you will receive an instant email notification. If you get one of these notifications and you didn’t disable 2FA yourself, please reach out to our Support team right away.
The next time you log in to MyKinsta, you’ll be prompted for a six-digit verification code. If you’re using an authenticator app, open it, find the 2FA code, enter it into the 6-digit verification code field, and press Login. If you’re using a password manager like 1Password, the code should be automatically placed in your clipboard so that you can paste it in after the first login page.
How to Recover Your 2FA-Protected MyKinsta Account
If you have lost access to your 2FA device and cannot log in to MyKinsta, our Support team can help you regain access to your account.
To recover your 2FA-protected account, follow the steps below.
- Send an email to [email protected] from the email address on file in your MyKinsta account. If you use [email protected] to log in to MyKinsta, send us an email from [email protected]. In the email, let us know you’ve been locked out and need to regain access to your account.
- Our Support team will verify your email address to make sure it matches the one we have on file.
- Our Support team will ask you to provide the last 4 digits and the expiration date of the credit card we have on file for the account.
- After successfully verifying your email address and credit card details, our Support team will remove the 2FA protection from your account. You can then log in to MyKinsta and reconfigure 2FA.
Summary
Over the past decade, cyber attacks have increased significantly in frequency and complexity. In addition to targeted brute-forcing attempts, databases full of usernames and passwords are also routinely dumped on the Internet for everyone to see.
With that in mind, it’s easy to see why adding an additional layer of protection with 2FA is important. We recommend enabling 2FA for all your Internet services that support it. With 2FA set up in MyKinsta, you can rest easy now, knowing that your Kinsta account is much more secure!
QR Code is a registered trademark of DENSO WAVE INCORPORATED in the United States and other countries.
Reset Your MyKinsta Password
If you need to reset your MyKinsta password, you can start the process on the MyKinsta login page.
- Click the Forgot password link on the MyKinsta login page.
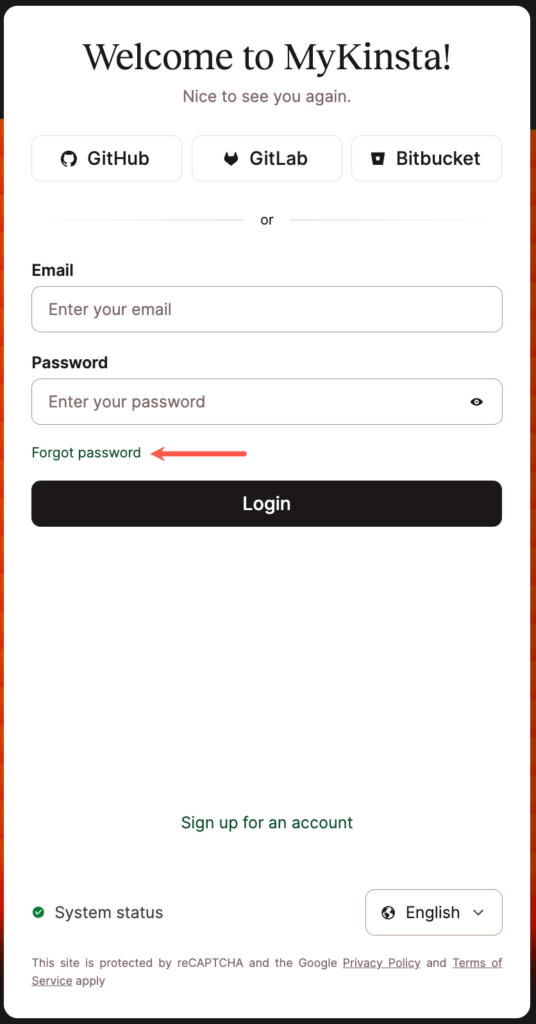
Click the forgot password link on the MyKinsta login page. - Enter your email address, and click the Reset password button.

Enter your email address in the password reset modal/pop-up. - Check your email for the reset password message from
[email protected]with the subject “Password reset in MyKinsta” (should arrive within 15 minutes or less) and follow the instructions provided.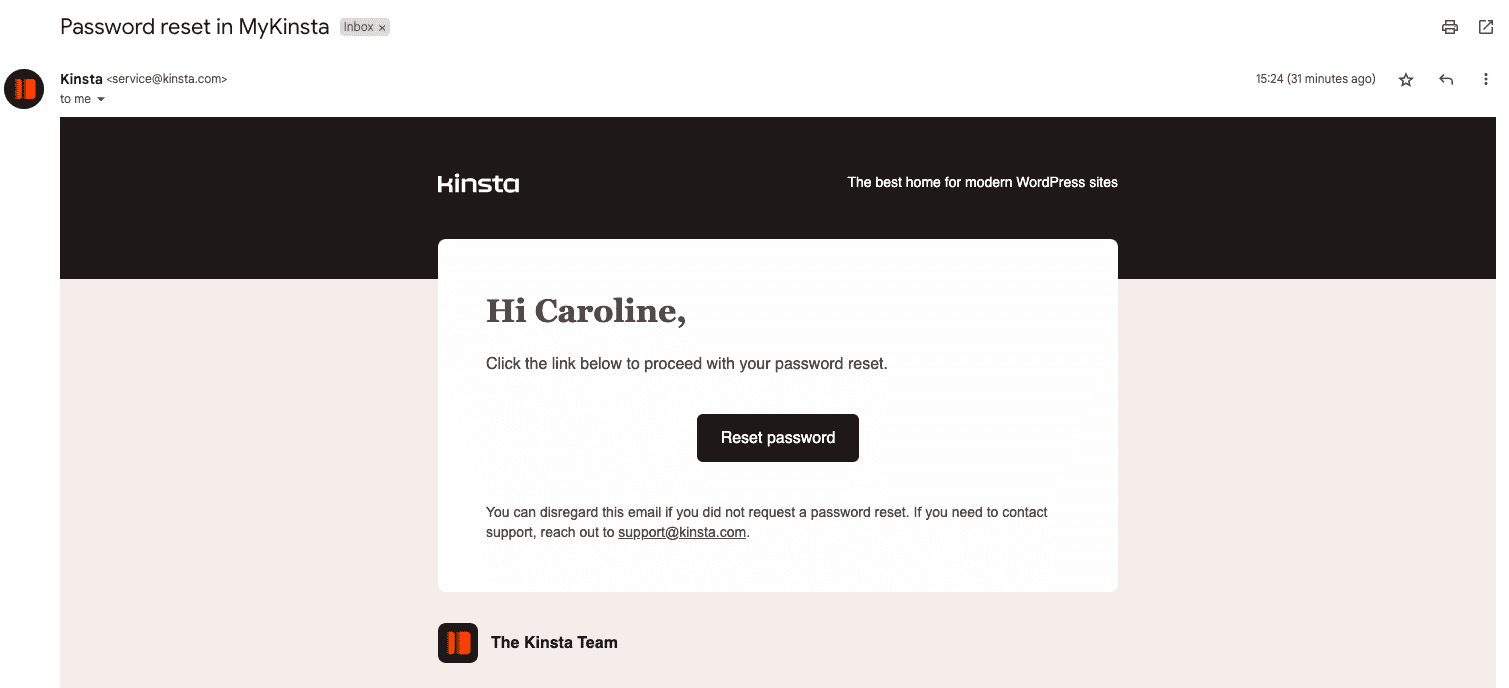
Password reset email from [email protected]