
WordPress is the most widely-used Content Management System in the world for building self-hosted websites. Chances are if you’re not already, you’ve decided to use WordPress for your own website. But do you know how to install a WordPress theme?
Understanding how WordPress themes are added to your website is not complicated at all, no matter which method you choose to use — and there are a few! The great thing is, once your theme is installed, you’re ready to start creating a standout website right away.
In today’s post, we’ll dig deeper into how to install a WordPress theme. Let’s get started!
Prefer to watch the video version?
Where to Find WordPress Themes (Both Free and Paid)
Learning how to install a WordPress theme on your website isn’t hard to do. What is hard, though, is choosing the right theme for your needs. But before we look at what you need to successfully achieve that, let’s have a quick look at where you can find WordPress themes.
Right now, the WordPress Repository is one of the most common places to find reliable and free plugins and themes to extend the design and functionality of your WordPress website. In fact, there are over 7,400 themes in the WordPress Repository alone.
Adding to that, there are also thousands of free and premium themes available for WordPress users that can be found in marketplaces such as MOJO Marketplace, CSS Igniter, and StudioPress. That said, the most famous theme marketplace to date is Themeforest, which currently has over 46,000 WordPress themes to choose from.
How to Choose the Right WordPress Theme
So, how are you supposed to know which WordPress theme is right for you?
Here are some tips to help:
1. Decide Between a Free or Premium WordPress Theme
The free vs paid WordPress theme debate has been around for a long time. This makes it tough to know whether you should save your money and go for a free theme or invest a small amount of money for a premium one and reap the benefits. If you come across a WordPress site with a theme that you like, you can use our theme detector tool to find out what theme it uses.
It really does come down to your budget, there are some things to consider before making a final choice:
Pros of Using a Free WordPress Theme
Using a free WordPress theme comes with plenty of advantages:
- They’re free to use, which means if you end up not liking it and want to change your WordPress theme, you’ve lost no money for giving it a try.
- The free themes in the WordPress Repository are officially approved after going through a strict review process.
- Free themes found at WordPress.org will be compatible with all the free plugins found in the same place.
That said, free themes do come with some disadvantages too.
For example, they typically have a limited feature set, are used by many people (making it hard to create a unique website), and there’s usually little to no prompt support if there are issues. Not to mention, free themes found outside the WordPress Repository may be poorly coded, which opens your site up to vulnerabilities and attacks.
Pros of Using a Premium WordPress Theme
Just like using a free theme, premium themes come with their own set of benefits:
- You get support for it to help you with things like bugs, technical issues, and customization (suggested reading: How to Customize Your WordPress Theme).
- You’ll receive frequent updates, which come with increased security and features.
- The feature sets range from mild to wild, so you can design your site to look and do whatever you want.
- If from a trusted theme marketplace, company, or developer, you’ll know your premium theme is up-to-date with all the latest versions of WordPress, HTML, CSS, and PHP.
Premium themes do, however, cost money. Some paid themes require a yearly payment, and others require a one-time payment. This means if you buy one, and later decide to change, you’re out whatever money was spent.
2. Know Your Niche
WordPress caters to all kinds of websites, so you can expect WordPress themes to do the same. Knowing your niche before you decide on a theme will help you find WordPress themes that will have the design and functionality you need.
For example, if you’re starting a WordPress food blog, you’ll want to be on the lookout for a WordPress blogging theme that caters to food websites. Better yet, if you think you might want to sell products and services to fellow foodies like yourself, you might want to check out some ecommerce themes that come with the functionality to start both an online food business and blog.
To make a good decision, think about the type of content you want to publish, key features your theme will need, your target audience, and what industry you want to be in, so you can narrow your options and make deciding a little easier.
3. Use Credible Sources
Anyone that can develop a WordPress theme and make a profit off it, will. But the thing is, just because someone has created a WordPress theme doesn’t mean it’s free from bad code, viruses, or even spam links.
If you’ve decided to use a free WordPress theme, the best place to look is the WordPress Repository. If you need a premium theme or want to use a free one from a third-party theme company, check for the following:
- Author reputation
- Frequency of updates
- Positive customer reviews
- Number of sales
In the end, it doesn’t matter what type of WordPress theme you need. What really matters is that you avoid using nulled WordPress themes, so you don’t have problems in the future with site security, downtime, and lost site visitors.
4. Keep It Simple
It’s easy to get caught up in the appeal of popular multipurpose WordPress themes such as Avada or X. And while these themes may have the features and design some people need, the truth is, simple is often better.
This is especially true for those just starting out. Sometimes multipurpose themes come with too many features, have a high learning curve, and affect your site’s speed and performance.
It’s best to use a theme that has just what you need and nothing more.
5. Look for Responsive Design
Not to be confused with mobile-friendly design, responsive design is necessary for giving your mobile site visitors exceptional user experience.
Having a mobile-friendly WordPress theme means that no matter what device your site visitor accesses your website from, it will appear the same. The site visitor will be able to see all your site’s content, navigate the site easily, and click the CTA buttons you want them to. That said, none of the elements on your website will change, no matter the device or screen size accessing your site.
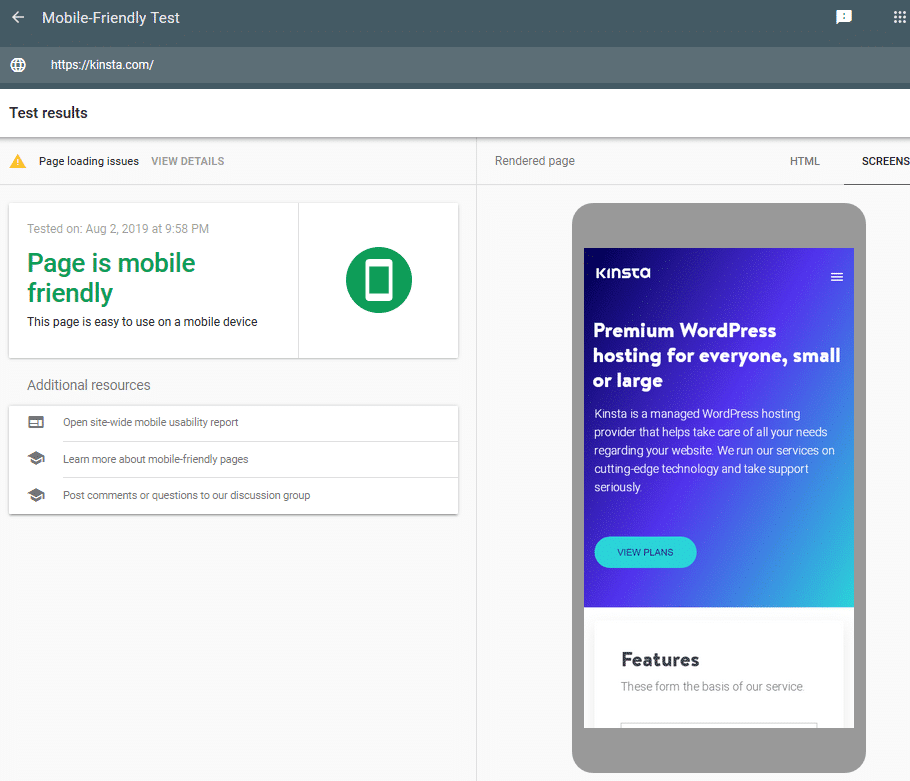
To check for mobile-friendliness, use Google’s Mobile-Friendly test.
On the other hand, having a WordPress theme with responsive design means that when your site visitors click on your website using a mobile device, your website will adjust according to the screen size. Elements on your website will change to render seamlessly for site visitors so they can access your site content with ease.
To check for responsive design, use the free Responsive Checker tool:
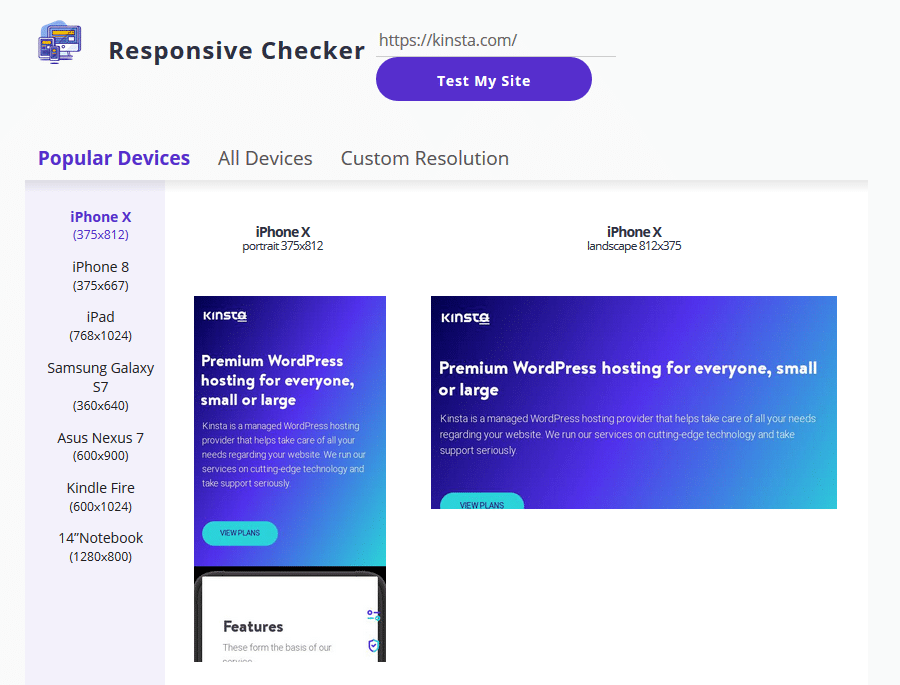
The neat thing about this online tool is that you can evaluate your website using multiple device types, including laptops, tablets, and mobile phones. In addition, you can navigate the site as if you were really accessing it using a mobile device to make sure your site looks and functions the way you want it to for site visitors.
6. Evaluate the Theme Support
There may come a time when you need support while using your WordPress theme. That’s why being able to get in touch with the theme developer or their support team is crucial.
Find out what kind of support is offered before deciding on a WordPress theme. And remember, most free WordPress themes come with very little support, if any at all.
7. Consider the Features
Lastly, you should definitely consider the features your WordPress theme comes with. Here are some of the best things to look for in any theme you choose, whether it’s free or premium:
- Social media sharing
- Built-in SEO
- Cross-browser compatibility
- Inclusive WordPress page builders for easier site creation
- Popular WordPress plugin compatibility
- Multilingual and translation ready
- Ecommerce support
Of course, every person needs different things for their website. However, the above-mentioned considerations will help point you in the right direction and help you make a decision.
Now, let’s take a look at how to install a WordPress theme onto your website after you’ve chosen the perfect one.
How to Install a Free WordPress Theme
If you want to use a theme found in the WordPress Repository on your website, the easiest way to do this is on the backend of your website.
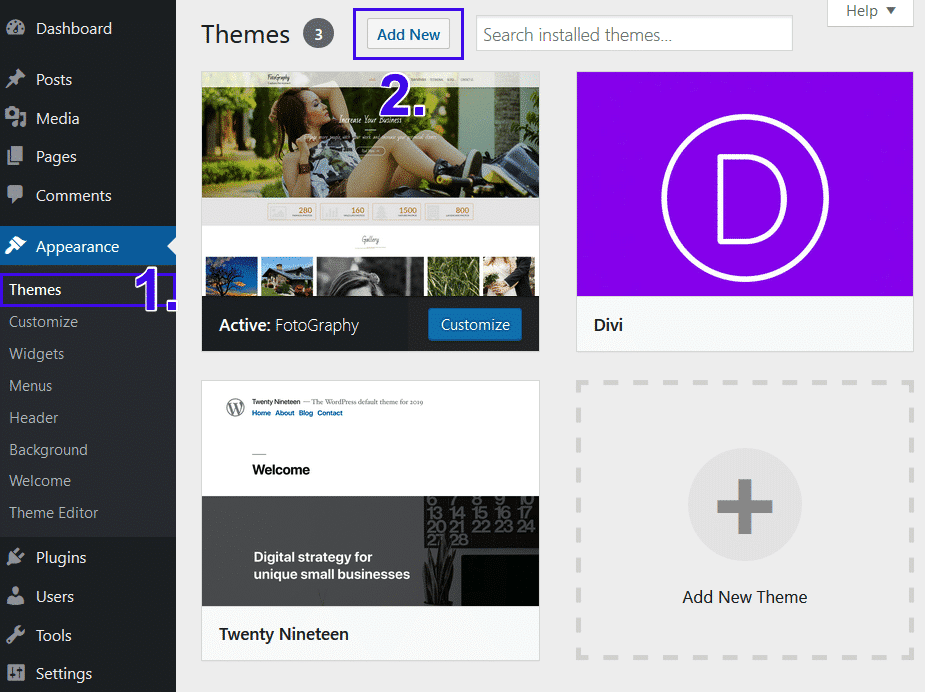
To start, log into your WordPress website and go to Appearance > Themes in the WordPress dashboard and click Add New.
From there, you can filter the results based on:
- Featured
- Popular
- Latest
- Favorites
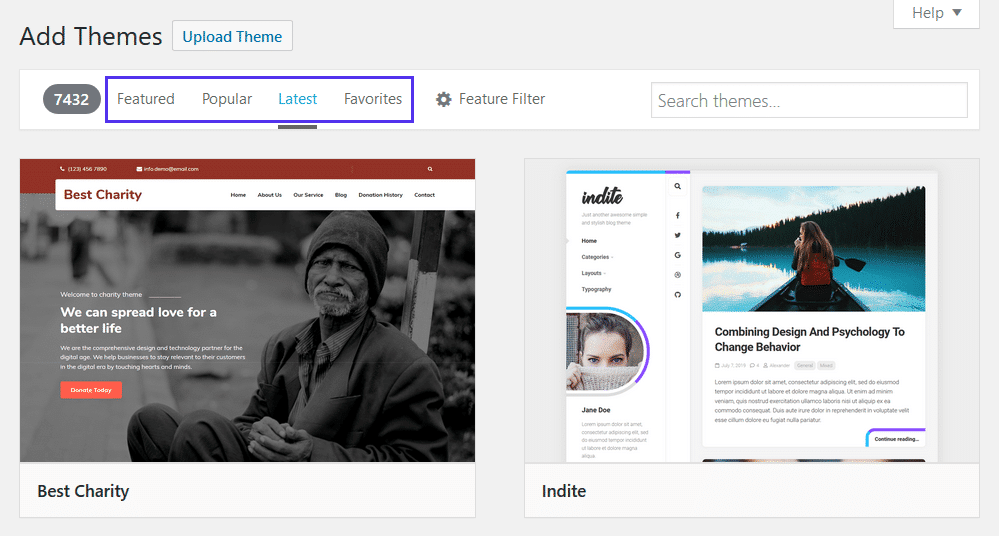
Or, you can use the Feature Filter button to filter the theme results based on specific features.
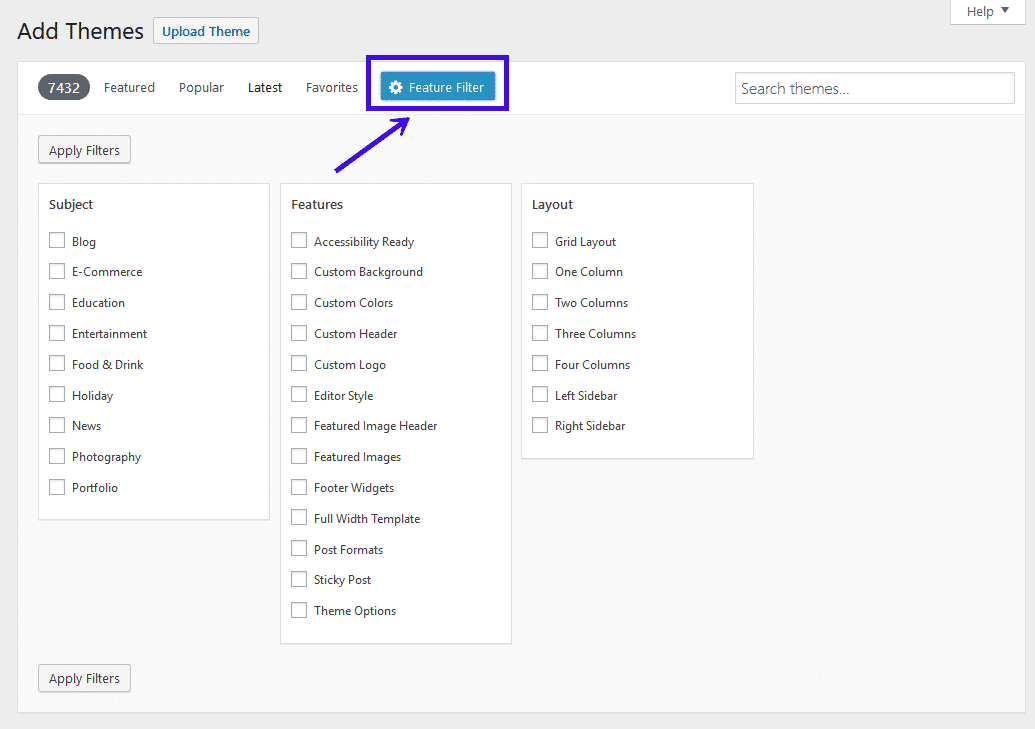
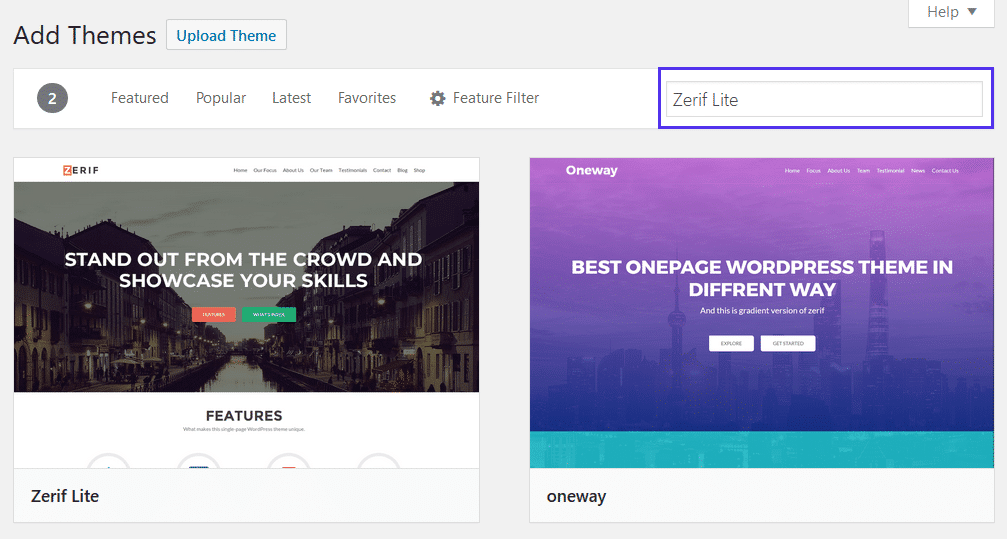
Lastly, you can search for a specific WordPress theme if you know the name of it by entering the theme’s name into the search bar:
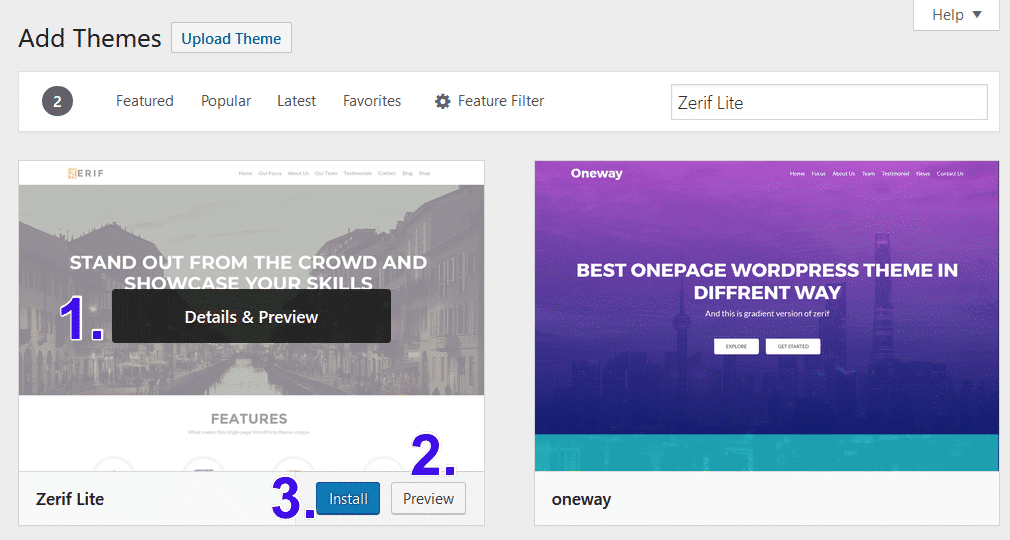
Once you find a theme you might want to use, you can click Details and Preview to see more information about the theme, Preview to see a preview of the theme in action, or Install to install the theme onto your WordPress site:
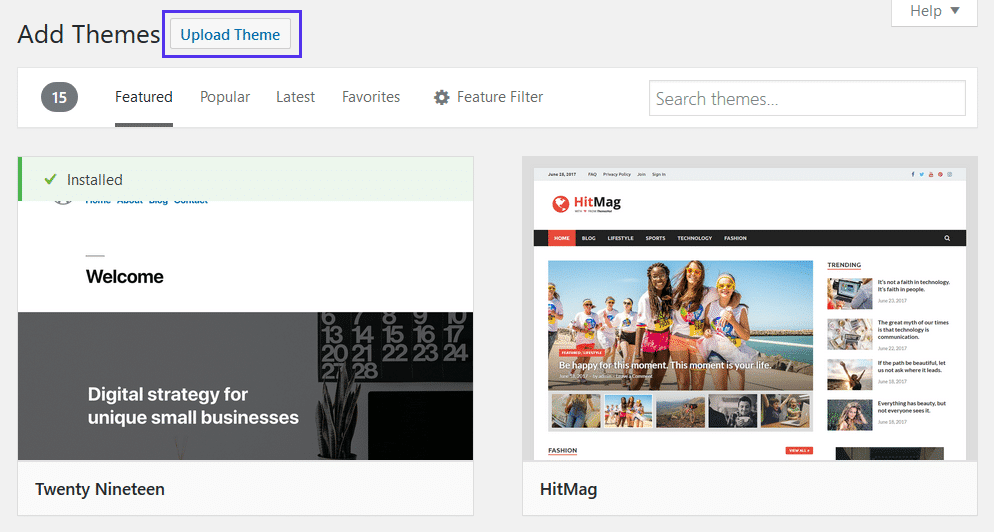
When you decide you want to use a theme found in the WordPress Repository, click Install.
Then, click on Live Preview first to see how your site will look using the theme. This makes it easier to decide if the theme you’re interested in is the one for you or not. When you’ve made the decision, click Activate to finish adding it to your website.
Your WordPress theme is now installed on your website and you can start publishing content right away.
How to Install a Premium WordPress Theme
If you’ve purchased a premium WordPress theme, you’ll need to use the upload method from your WordPress dashboard to install your theme.
To start, download the theme you purchased from the theme marketplace or company you bought it from. Save the downloaded zip file to your computer.
Next, log into your WordPress website and go to Appearance > Themes in the WordPress dashboard and click Add New:
Next, click Upload Theme to upload the zip file of your premium WordPress theme to your website from your computer:
Click Browse to select the zip file from your computer.

Then, click Install Now to add the theme to your website.

WordPress will install your premium theme on your website. If you want to see how your website will look using the uploaded theme, click Live Preview.
Lastly, click Activate to make the theme ready to go on your website.
The upload method will work for any premium WordPress theme you have saved as a zip file. It will also work when you need to import a theme from ThemeForest. Just download the zip file that’s saved on your computer and follow the same steps above.
How to Install a WordPress Theme Using FTP
The last method we’re going to show you is using FTP (file transfer protocol), which is the standard network protocol used for transferring computer files between a client and server on a computer network. In other words, an FTP helps you upload files between you and your website’s servers.
There are several FTP clients you can use, but we’re going to use FileZilla, which is easily downloaded on your computer. It’s free to use and has a simple interface. Keep in mind, however, this is an advanced way of installing a WordPress theme on your website and is not recommended for beginners.
Step 1: Secure FTP/SFTP Credentials
To get started, you’ll need to get your FTP or SFTP credentials to enter into FileZilla so it can connect to your site’s servers (learn the difference between FTP and SFTP). This information is usually found in your web hosting account. If you have trouble finding it, reach out to your host and have them help you.
If you use Kinsta hosting, first log into your MyKinsta account and click on Sites in the dashboard and then on the Info to get the credentials needed:
When you do this, you should see your credentials under SFTP/SSH. You’ll need your username, password, and port:
Step 2: Enter Credentials into FileZilla
After you’ve found your FTP/SFTP credentials, open up FileZilla.
Here is the information you’re going to need to enter:
- Host: from your MyKinsta dashboard (or your site’s IP address preceded by “sftp://” for other hosting providers)
- Username: from your MyKinsta dashboard
- Password: from your MyKinsta dashboard
- Port: from your MyKinsta dashboard
This is what it will look like at the top of the FileZilla screen:

After you’ve entered your credentials, click Quickconnect. FileZilla will then connect to your site’s servers.
Step 3: Upload WordPress Theme Files
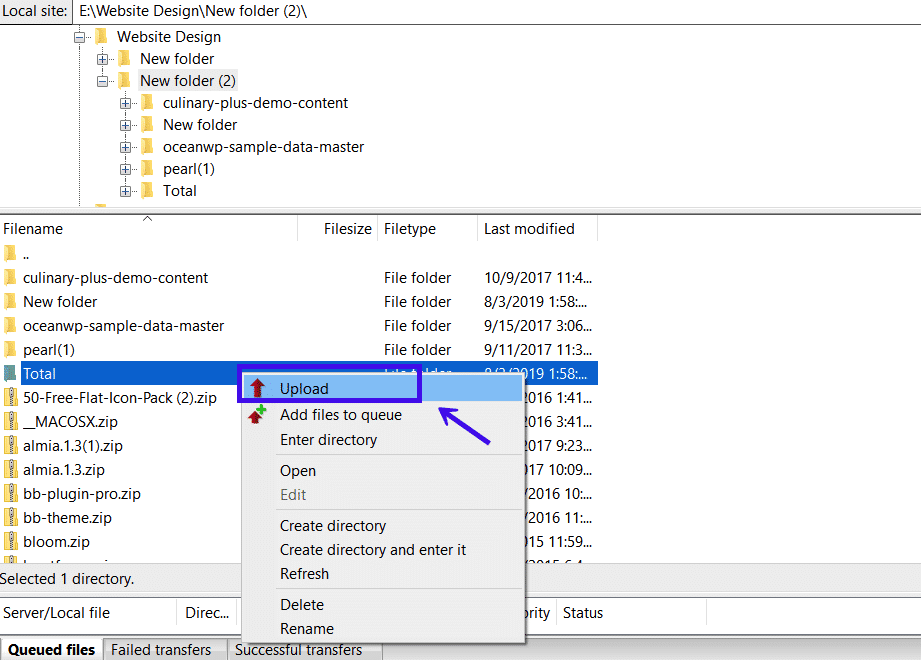
After you’re connected to your FTP, it’s time to install a WordPress theme on your website. Keep in mind that the left side of FileZilla is how you’ll access your computer files, and the right side of FileZilla is how you’ll access your site’s files that are stored on your host’s servers.
To open up your site’s files, click on the folders in the right-side panel until you find the one labeled Themes:
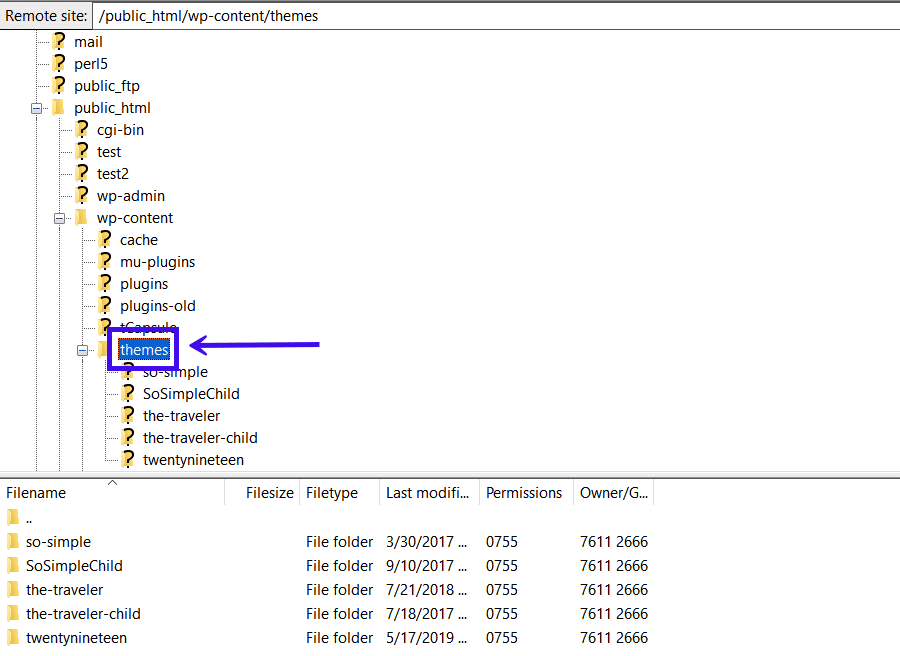
When you do, any WordPress themes already installed on your website will appear underneath the file folders.
Next, go to the left-side panel in FileZilla and search for the zip file of the WordPress theme you want to install. When you find it, right-click on it and select Upload:
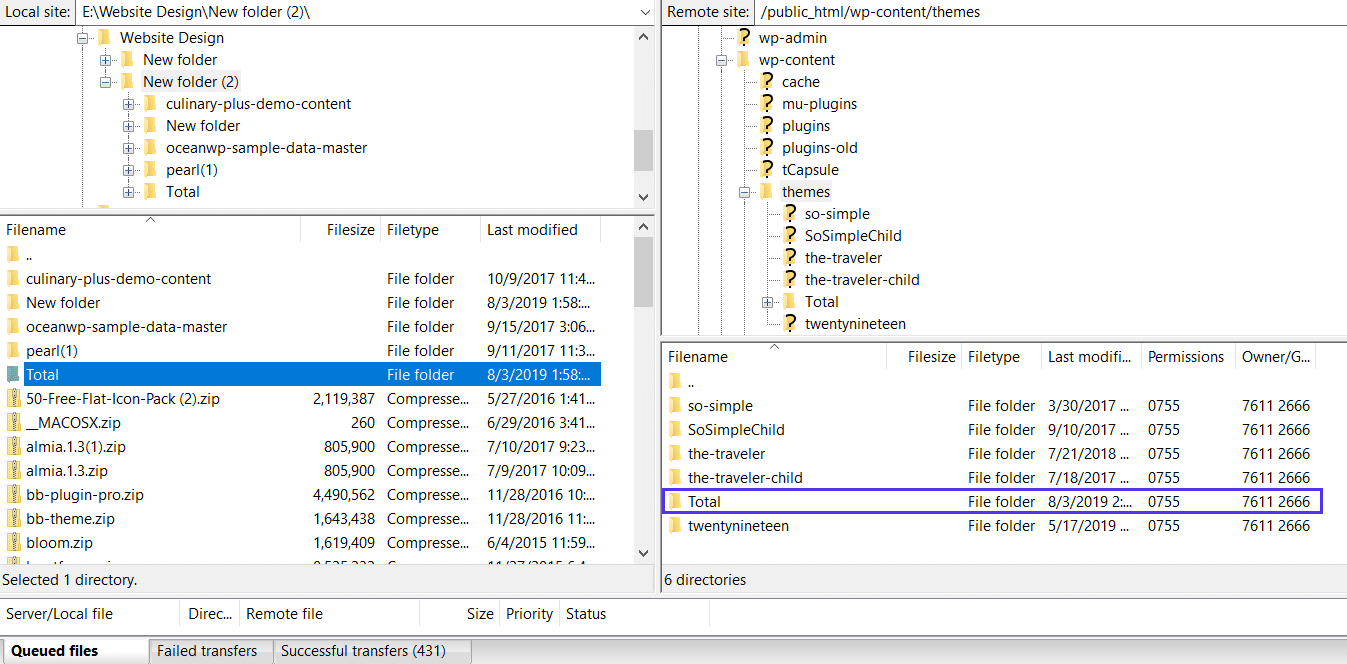
When the files are done uploading to your site’s servers (this may take a while depending on the size of the file), you’ll see the files on the right-side panel in FileZilla.
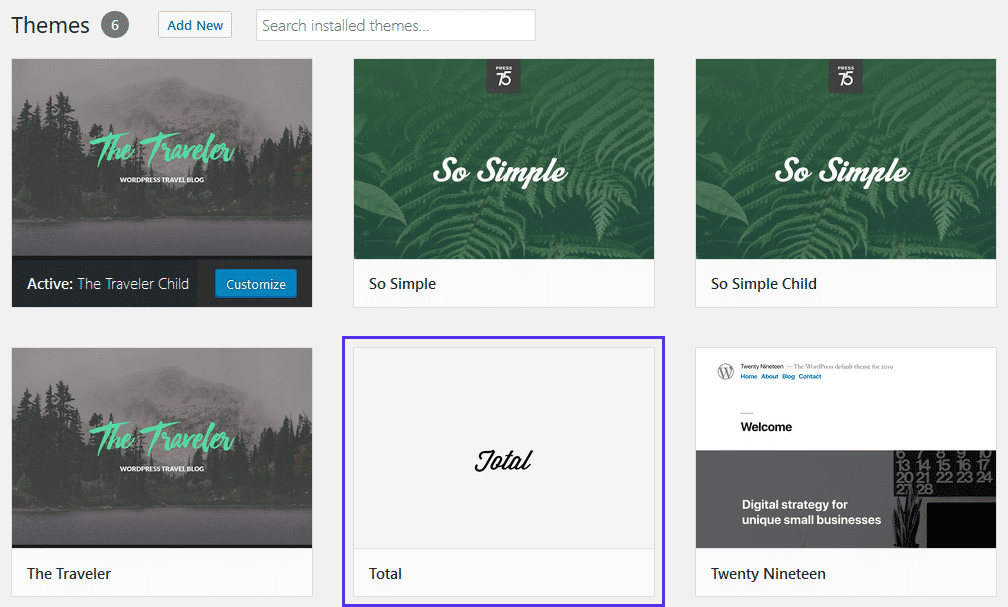
Lastly, log into your WordPress website and go to Appearance > Themes. You’ll notice your newly uploaded theme is right there, waiting for you to activate and use on your website.
Summary
If you’re going to use WordPress as your Content Management System, you’re going to need to know how to install a WordPress theme. And chances are, you’ll go through a few WordPress themes until you find the one you like and has everything you need.
Luckily for you, there are not only several methods to choose from for installing WordPress themes, but all of them are also relatively easy, even for novice website owners:
- You can install a theme through the Appearance > Themes > Add New option directly from within WordPress.
- You can install a theme by uploading it as a zip file via the Upload Theme feature.
- You can install a theme Using an FTP client.
So, perform a little research and find the perfect WordPress theme for your blog, online business, or ecommerce store. Then, install it on your WordPress site so you can begin building a unique website that represents your brand.

Head of Content at Kinsta and Content Marketing Consultant for WordPress plugin developers. Connect with Matteo on Twitter.


Thanks for the information!
It really helped me in installing my WordPress theme!
I have never used or know anything about WordPress prior to reading this article today.
I need to know how to change the contents (mainly text parts) of a website (not to change anything else) very quickly. For example, change 2019 to 2020 or change a some names, etc.
Any help or guidance you may provide is greatly appreciated.
Hey, there are a lot of free resources online available if you are starting with WordPress. Plenty of blog posts, tutorials or even videos. I’d suggest to start with these and follow the steps they provide.
Thanks for sharing! Which WordPress Premium theme sites do you recommend?
Hello, when I need to find a premium theme, I usually go on Themeforest as they have a very wide selection of themes.