Deployments
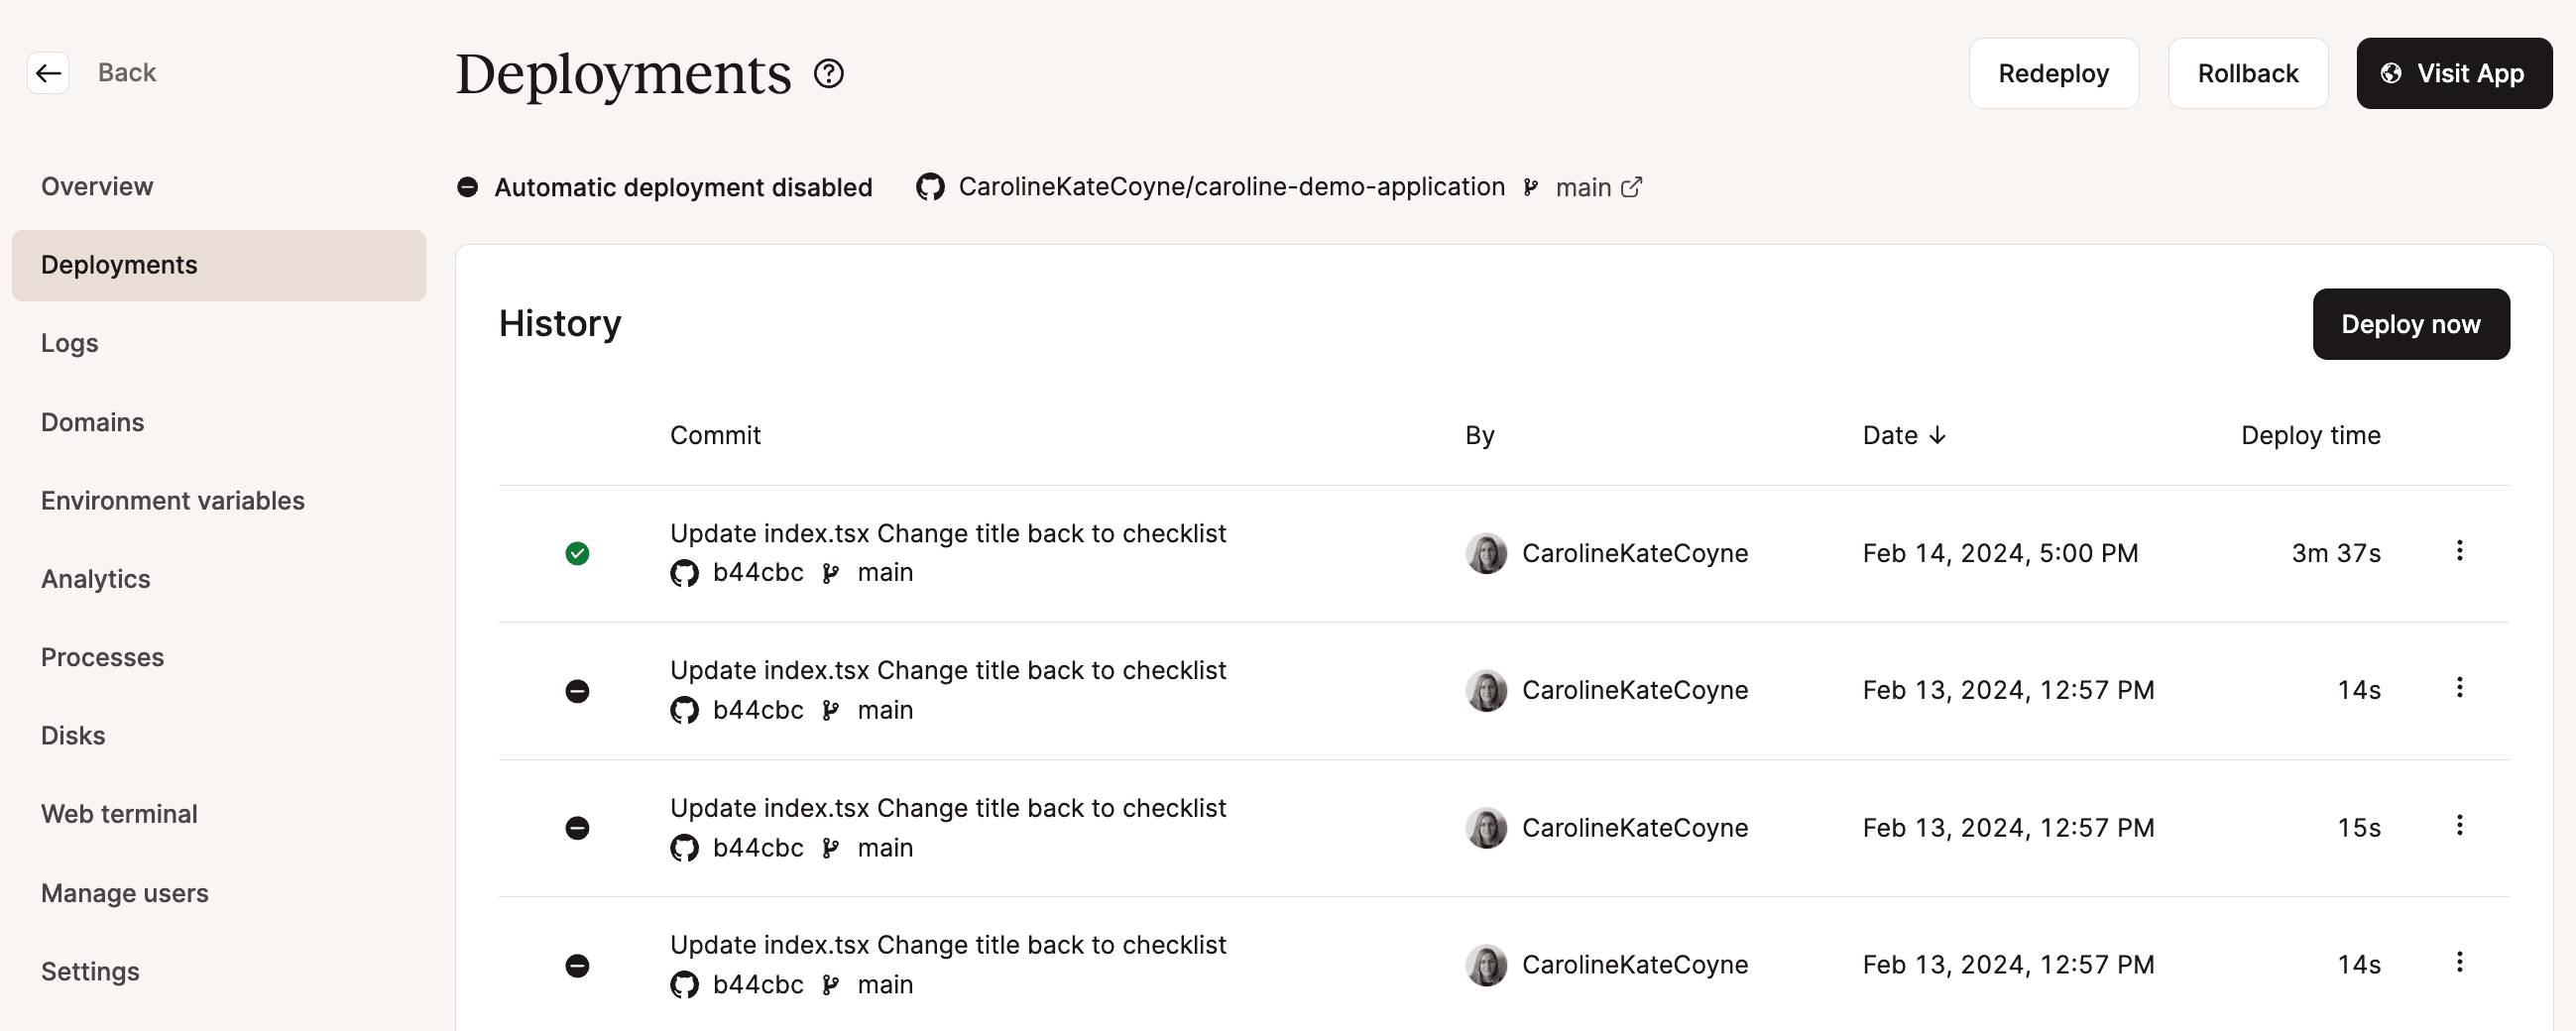
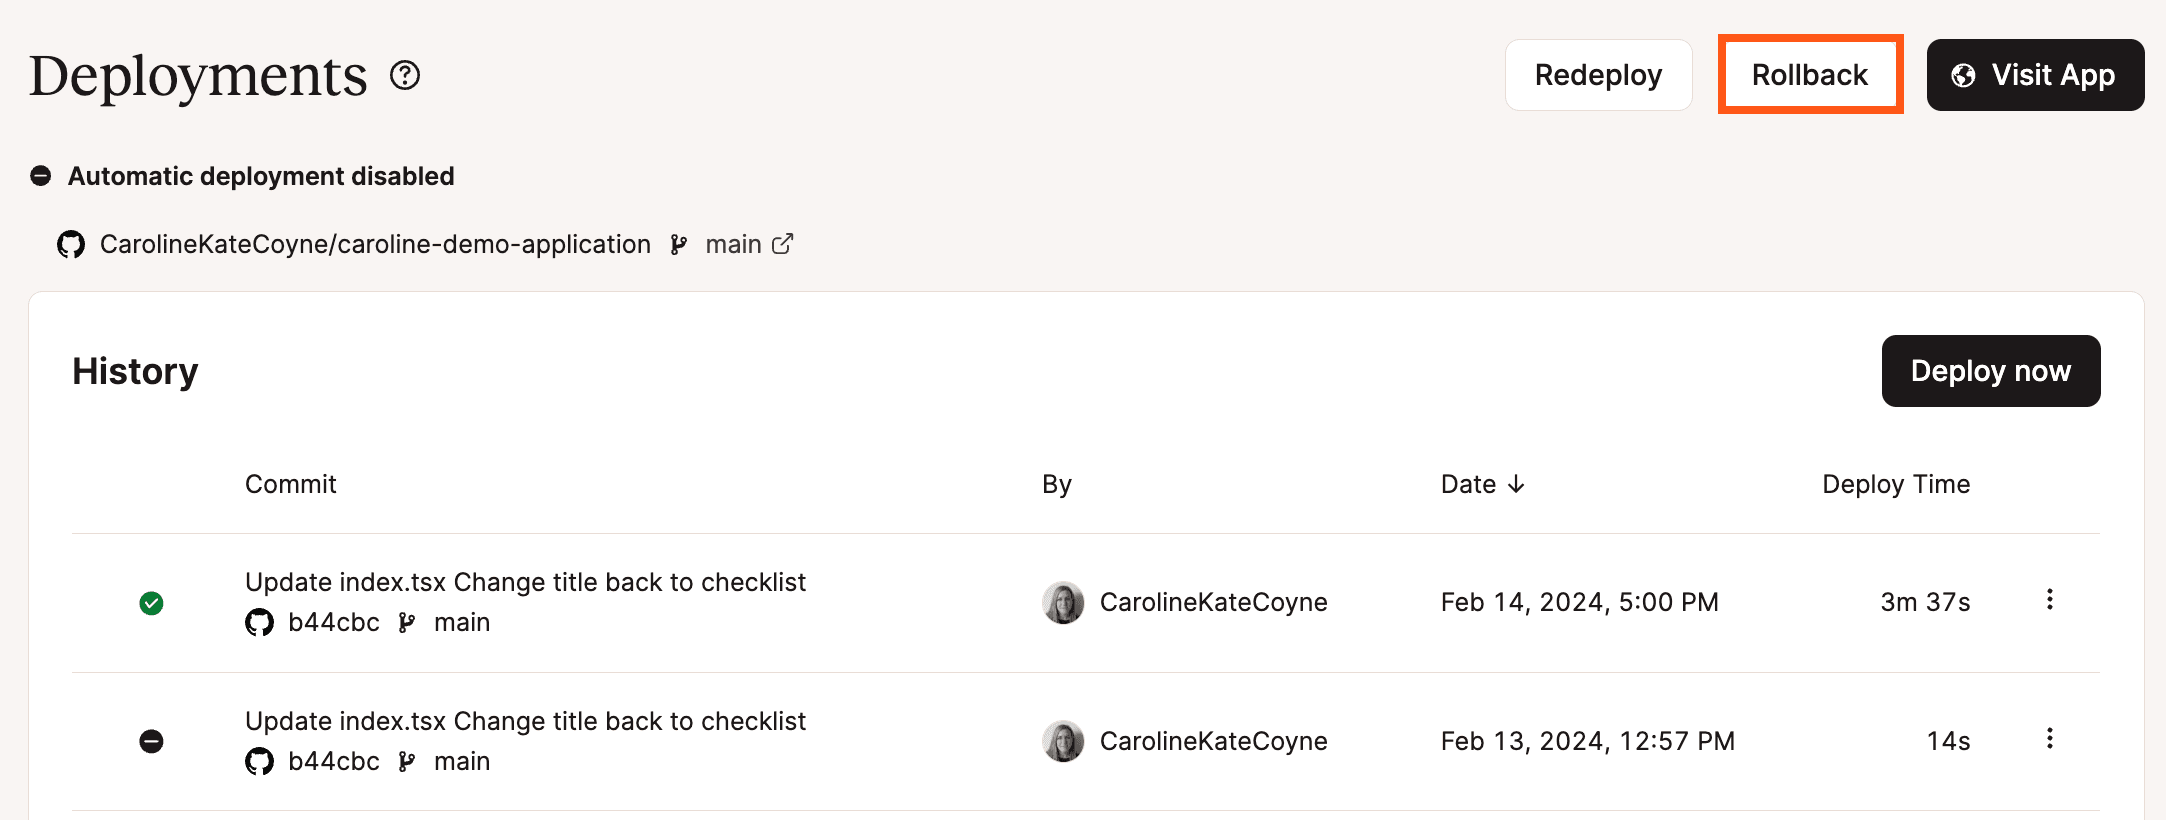
The Deployments page shows your application’s deployment history. You can see where the application is deploying from, including the branch, and if automatic deployments are enabled or not. If automatic deployment is enabled, the application deploys every time a commit is made to the branch in the Git repository. You can enable or disable automatic deployments in the application’s Settings.
To deploy the most recent commit again, click Redeploy.
To roll back to the most recent successful deployment, click Rollback.
Click Visit App to open your application.
Zero Downtime with Healthcheck
If your application includes a healthcheck and you have defined the healthcheck path within the web process, there is zero downtime between deployments. When the application deploys or redeploys, the old pods continue to run until the new pods are ready.
Healthcheck monitoring is also active during the application’s runtime; Kinsta checks the healthcheck path every 10 seconds and if the check fails to respond 3 times in a row, it restarts the pods.
History
In this section, you can see a list of all the previous deployments. You can also manually deploy the application by clicking Deploy now.
To deploy a previous commit again, click the kebab (three-dot) menu for that commit and click Redeploy.
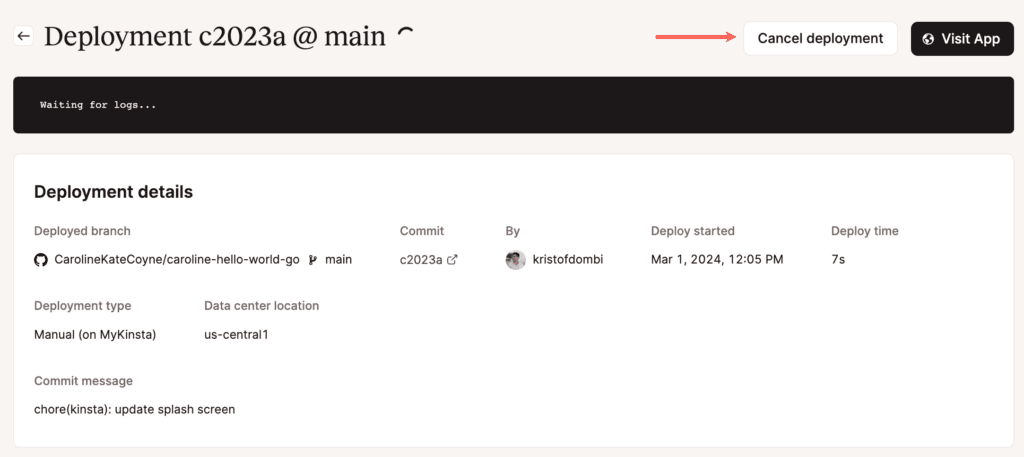
When a deployment is in progress, the Deploy now button is replaced with a Cancel deployment button. If you cancel a deployment, depending on which step the deployment is in, either the build or the rollout of the deployment is canceled.
Individual Deployment Details
If you click on any of the previous deployments, you’ll be brought to a dedicated page that shows the deployment log and Deployment details for that specific deployment. If the deployment fails, check the deployment log to identify where the process may have failed.
Deployment Log
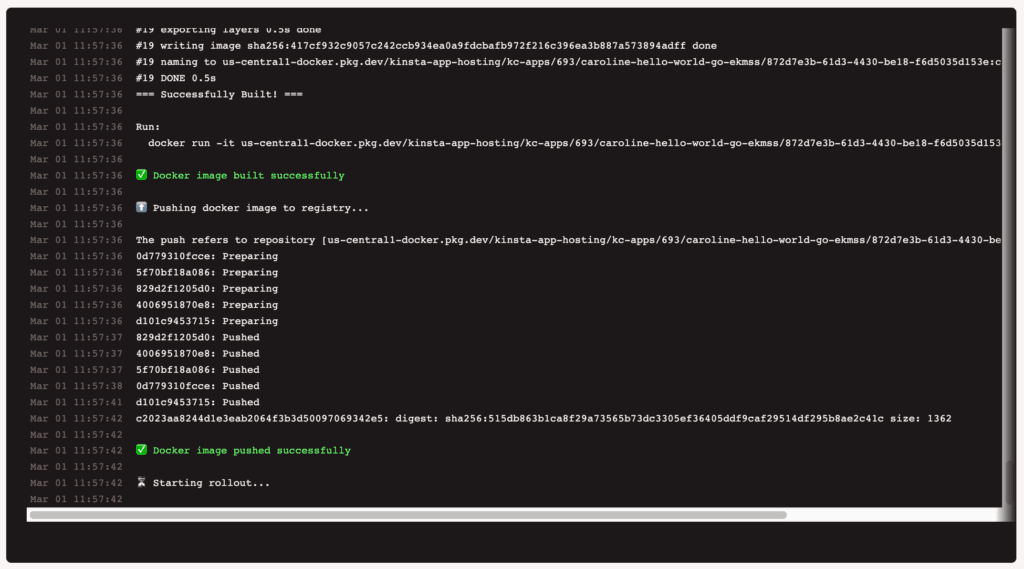
When you deploy your application to Kinsta, the deployment log shows each step of the deployment and whether it is successful or not. For example, an application using Nixpacks shows the following steps in the deployment log:
- Fetching source code from github.
- Source code fetched successfully.
- Building docker image using nixpacks.
- Docker image built successfully.
- Pushing docker image to registry.
- Docker image pushed successfully.
- Starting rollout.
- App has been deployed successfully.
If the deployment fails at any stage, the logs show an error message indicating why the deployment has failed. For information about how to troubleshoot the errors, refer to Failed Deployment.
Deployment Details
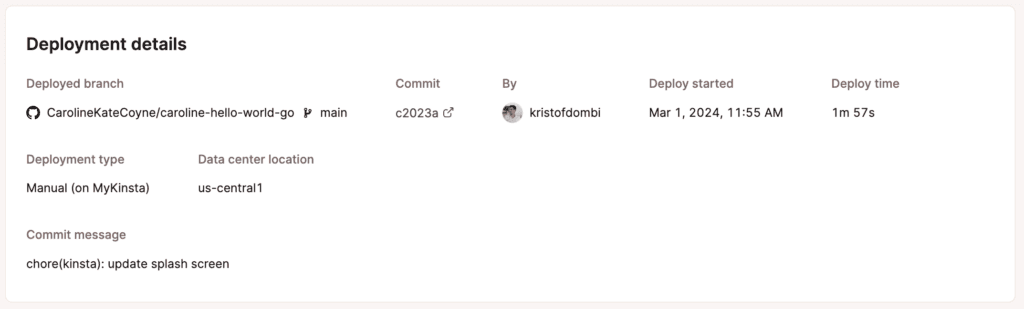
This shows information such as:
- The name of the Git repository and branch.
- The Commit ID, with a link to the commit at the Git service provider.
- Who initiated the deployment.
- The deployment start date and time.
- The time it takes for the deployment to finish (Deploy time).
- The deployment type is either manual or automatic. Automatic deployments only occur if you have selected Automatic deployment on commit.
- The data center location.
- The commit message.
If you want to change the resource settings to increase or decrease the CPU and RAM for the build process, you can do so within the application’s Settings.
To redeploy the application from this commit, click Redeploy.
Cancel a Deployment
There may be times when you need to cancel a deployment of your application. You may want to change the code, or perhaps the deployment is taking longer than expected, and you want to investigate your application’s code.
To cancel a deployment, in the Deployment details, click Cancel deployment.
When the confirmation modal/pop-up appears, click Cancel deployment to confirm the cancellation. If needed, you can roll back to the most recent successful deployment or redeploy a previous deployment.
Roll Back a Deployment
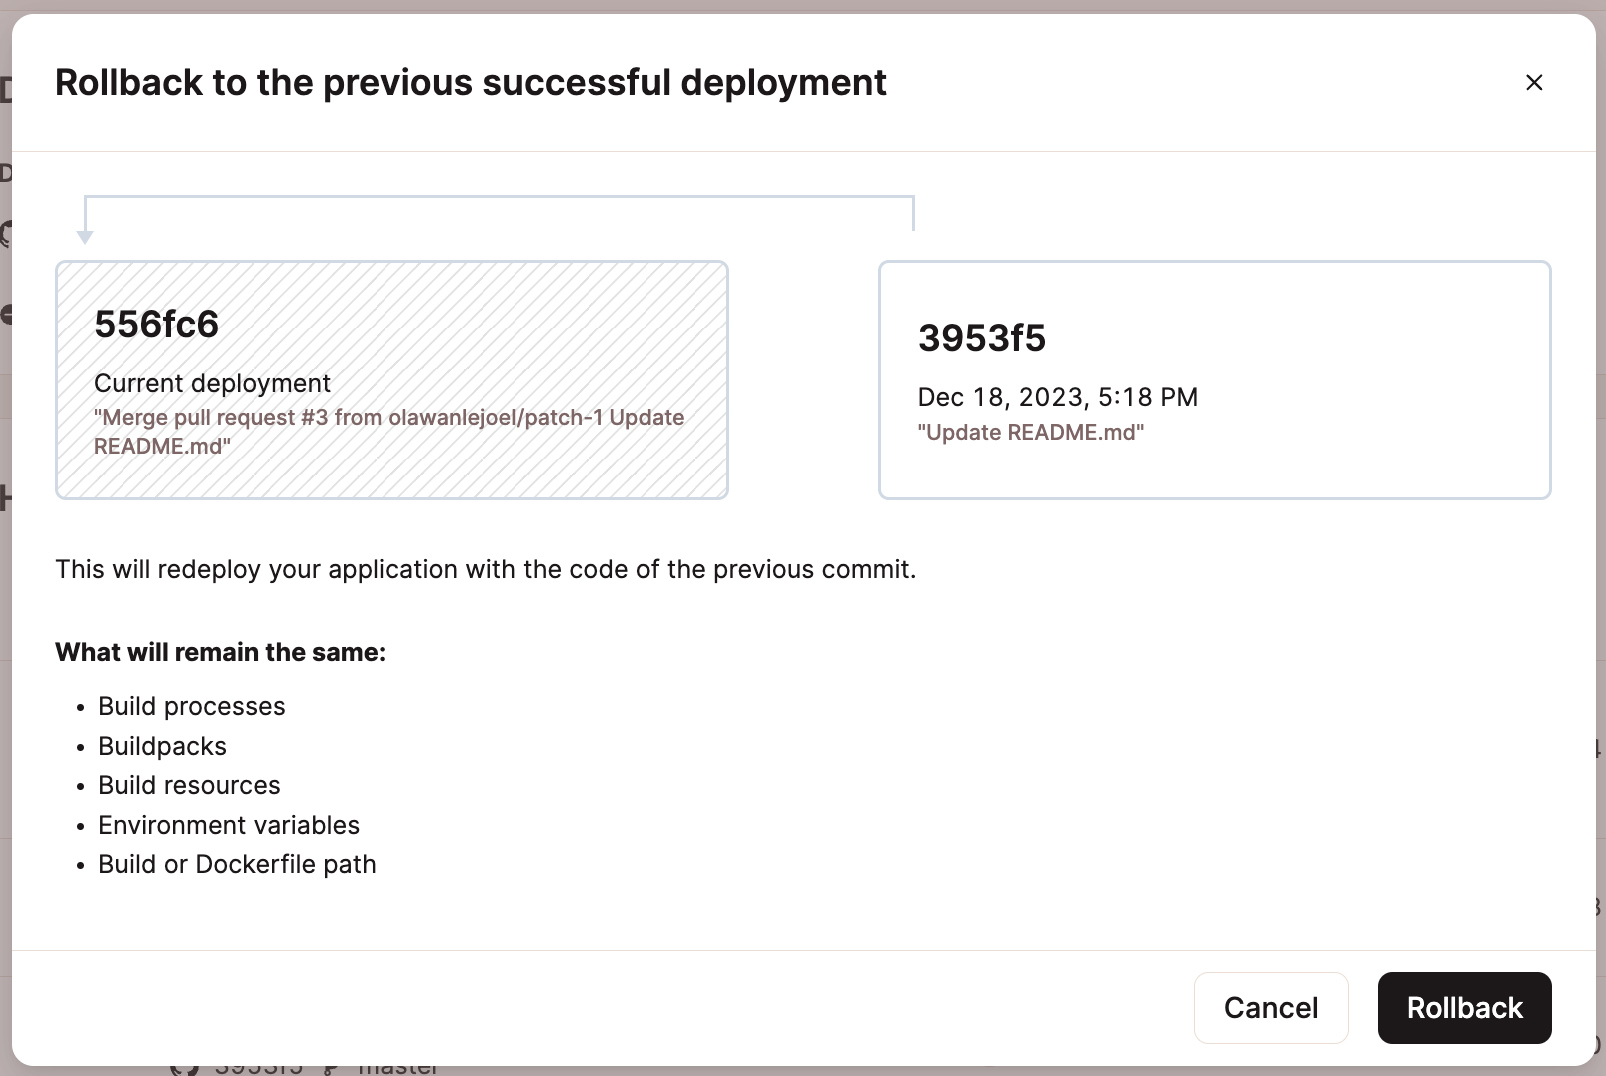
If you encounter any unexpected bugs or issues in the latest version of your application, the Rollback feature can help minimize downtime. With this feature, you can quickly roll back to the most recent successful deployment.
The Rollback feature uses the existing build image from your most recent successful deployment to redeploy your application, essentially skipping the build step. This helps get your application back up and running quickly.
Rollback does not change any of the following:
- Build processes
- Buildpacks
- Build resources
- Environment variables
- Build or Dockerfile path
To roll back a deployment, go to Deployments > Details and click Rollback.
In the confirmation modal that appears, click Rollback again.
If you want to deploy an older version of your application, you’ll need to Redeploy that specific deployment.