
Docker is a popular tool for developing and deploying software in packages known as containers. Ubuntu is one of the most popular Linux distributions and is an operating system that is well-supported by Docker.
Installing Docker on Ubuntu creates an ideal platform for your development projects, using lightweight virtual machines that share Ubuntu’s operating system kernel.
This tutorial will get you started by explaining 4 ways to make that happen.
Check Out Our Video Guide On Installing Docker on Ubuntu
More About Docker
Docker helps make applications portable by letting you build and run them on any Docker host. A container image can be used without modification anywhere Docker’s available — from your laptop to the cloud. This simplifies the developer experience by eliminating differences between runtime environments. The container format is also easy to distribute across multiple physical machines, enabling you to easily scale applications in response to changing demand.
Docker includes everything you need to build and run container images, whether they’re from Docker Hub and other public registries, or your own Dockerfiles.
Getting Ready To Install Docker on Ubuntu
You can install the latest Docker release on Ubuntu versions 18.04, 20.04, 21.10, and 22.04. The x64_64/AMD64, ARMhf, ARM64, and S390x architectures are supported.
There are several ways you can install Docker, and your choice will depend on the functionality you need and your preferred approach to package management. You’ll learn all the possible options in this guide.
Selecting a Docker Flavor
Docker on Linux was traditionally terminal-only. A functioning installation comprises Docker Engine, a daemon that runs your containers, and the docker command-line interface (CLI) for interacting with the daemon.
Docker Desktop is an alternative way to use Docker. Historically only available on Windows and Mac, it was launched for Linux in May 2022. Docker Desktop on Ubuntu requires an AMD64 processor and either Ubuntu 21.10 or 22.04. It provides a graphical interface for managing your containers, an integrated Kubernetes cluster, and support for third-party extensions. Docker Desktop also gives you the docker and Docker Compose CLIs.
Docker Desktop is different than Docker Engine in that it uses a virtual machine to run your containers (which is why Docker Desktop is required for Windows and MacOS users). Although it’s possible to use both flavors side-by-side on Ubuntu, you might find conflicts between docker CLI versions. It’s best to pick one and stick to it. Choose Docker Engine if you’re comfortable in your terminal and want the best support and performance. Docker Desktop’s VM makes it slightly heavier but is the better choice if you want an integrated UI or plan on using Kubernetes.
Installing Docker Engine on Ubuntu
Docker Engine is the standard way to run Docker on Ubuntu. It works with all supported versions and environments, from a local Ubuntu Desktop machine to your Ubuntu Server cloud host. Make sure you’re running an Ubuntu release that’s 18.04 or newer before you continue.
Docker Engine has 3 different installation methods:
- An official Ubuntu
aptrepository - A standalone Debian package (
.deb) - An automated installation script
Option 1, the Ubuntu apt repository, is the most commonly used. It adds Docker to your package list so you can easily install future updates by running apt upgrade. Option 2 doesn’t support automated updates, but is ideal for installing Docker on air-gapped offline systems. The automated installation script is the simplest method to get started, but is configured for development use only. Docker advises against using it in production environments.
Use the apt repository when you’re working with a production system, want easy updates, or need to use the same mechanism in all environments.
Use the automated installation script if you want a quick setup experience while experimenting with Docker on your own machine.
1. Installing Docker Using the apt Repository
Docker publishes packages to its own apt repository. You’ll need to add this repository to your apt sources list, otherwise, your apt installation won’t be able to find the Docker packages.
Begin by updating your existing package list and installing some dependencies for the following steps. The ca-certificates, curl, gnupg, and lsb_release tools will be used to download the correct Docker apt repository details and the signing key for your system. Although you’ve probably already got these packages, it doesn’t hurt to make sure that they’re available.
$ sudo apt update
$ sudo apt install ca-certificates curl gnupg lsb-release
Next, register Docker’s GPG keyring with apt. This will let apt validate the Docker packages you install.
$ sudo mkdir -p /etc/apt/keyrings
$ curl -fsSL https://download.docker.com/linux/ubuntu/gpg | sudo gpg --dearmor -o /etc/apt/keyrings/docker.gpg
$ sudo chmod a+r /etc/apt/keyrings/docker.gpg
The curl command downloads Docker’s GPG key for Ubuntu, converts it back to standard OpenGPG encoding, and saves it to apt’s keyring directory. chmod is used to set the permissions on the keyring file so that apt detects it reliably.
Now you can add the Docker package source to your system. Run the following command:
$ echo "deb [arch=$(dpkg --print-architecture) signed-by=/etc/apt/keyrings/docker.gpg] https://download.docker.com/linux/ubuntu $(lsb_release -cs) stable" | sudo tee /etc/apt/sources.list.d/docker.list > /dev/null
This uses shell substitution to automatically detect your system’s architecture, such as AMD64 or ARM64, and download the appropriate package list. It will be verified using the GPG key added earlier. The repository is added as a new package list inside the apt /etc/apt/sources.list.d directory.
Update your package lists again so apt knows the Docker packages exist:
$ sudo apt update
Now you can use the apt install command to add Docker’s components to your system. You’ll be installing the latest version of Docker Community Edition (CE). There are three packages to install:
docker-ce: the Docker Engine daemon.docker-ce-cli: the Docker CLI that you’ll interact with.containerd.io: the container runtime known as containerd that starts and runs your containers.
$ sudo apt install docker-ce docker-ce-cli containerd.io
2. Installing Docker Using the Debian Package
The official .deb package is simple to set up but you’ll have to manually download and install each new release. Packages are hosted on a simple file server. First navigate to Docker’s release notes page to find the latest available version number, such as 20.10.20. Next, head to containerd’s GitHub page to check its version number, too. It will look like 1.6.8.
Now you can run the following sequence of commands to download the right set of packages for your platform. Replace <DOCKER_VERSION> and <CONTAINERD_VERSION> with the current Docker and containerd version numbers respectively.
$ curl https://download.docker.com/linux/ubuntu/dists/$(lsb_release --codename | cut -f2)/pool/stable/$(dpkg --print-architecture)/docker-ce_<DOCKER_VERSION>~3-0~ubuntu-focal_amd64.deb -o docker-ce.deb
$ curl https://download.docker.com/linux/ubuntu/dists/$(lsb_release --codename | cut -f2)/pool/stable/$(dpkg --print-architecture)/docker-ce-cli_<DOCKER_VERSION>~3-0~ubuntu-focal_amd64.deb -o docker-ce-cli.deb
$ curl https://download.docker.com/linux/ubuntu/dists/$(lsb_release --codename | cut -f2)/pool/stable/$(dpkg --print-architecture)/containerd.io_<CONTAINERD_VERISON>-1_amd64.deb -o containerd.deb
You can also download the files and inspect all the available releases by visiting the directory listing for your Ubuntu version in your browser.
Once you’ve downloaded the Docker CE, CLI, and containerd packages, use the following command to install them:
$ sudo apt install ./docker-ce.deb ./docker-ce-cli.deb ./containerd.deb
Adjust the filenames if you’ve manually downloaded the packages without using the script provided above.
3. Installing Docker Using the Installation Script
Docker’s convenience script automates the installation of all Docker components. It’s non-interactive, so you can sit back and wait while your system is prepared for you.
First download the script:
$ curl -fsSL https://get.docker.com -o get-docker.sh
Now run the script with root privileges:
$ sudo sh get-docker.sh
Executing docker install script
...
Wait until the script reaches completion. You should see a confirmation message showing that Docker is installed.
The script is meant to be a one-size-fits-all solution. You can’t customize what it does without directly modifying the script’s source. It also isn’t designed to perform Docker updates, as it won’t bring dependencies up to their latest versions.
Making Sure Docker Engine Is Working On Ubuntu
Whichever installation method you used, you should ensure everything’s working by starting a container:
$ sudo docker run hello-world
You’ll see the Docker client pull the hello-world:image to your machine, from the Docker Hub repository:
Unable to find image 'hello-world:latest' locally
latest: Pulling from library/hello-world
2db29710123e: Pull complete
Digest: sha256:7d246653d0511db2a6b2e0436cfd0e52ac8c066000264b3ce63331ac66dca625
Status: Downloaded newer image for hello-world:latest
A new container will then start automatically. The “hello-world” starter image is configured to run a simple command that outputs some basic information about Docker and then immediately exits:
Hello from Docker!
This message shows that your installation appears to be working correctly.
To generate this message, Docker took the following steps:
 1. The Docker client contacted the Docker daemon.
 2. The Docker daemon pulled the "hello-world" image from the Docker Hub.
 (amd64)
 3. The Docker daemon created a new container from that image which runs the
 executable that produces the output you are currently reading.
 4. The Docker daemon streamed that output to the Docker client, which sent it
 to your terminal.
Seeing the output shown above means Docker is ready to use. The daemon successfully pulled the hello-world:latest image from Docker Hub, and started a container using it. Everything from the “Hello from Docker” line onwards was emitted by the process inside the container.
Setting Docker Engine Permissions on Ubuntu
A fresh Docker Engine installation usually requires root privileges to run docker CLI commands. You need to prefix each command with sudo, which is inconvenient.
You can avoid this requirement by adding yourself to the docker group after you’ve installed Docker Engine using the steps above. This optional change gives you the permissions to run docker commands as a regular user, without sudo, which simplifies your CLI experience.
Make sure the docker user group exists:
$ sudo groupadd docker
Then add yourself to it:
$ sudo usermod -aG docker $USER
If you’ve previously run any docker command with sudo, you’ll need to fix the permissions on your ~/.docker directory:
$ sudo chown $USER:$USER /home/$USER/.docker -R
$ sudo chmod g+rwx $HOME/.docker -R
This ensures your own user account is allowed to read and write files in the directory.
Log out of your system and back in again so that your new group membership takes effect. Try running a docker command without sudo:
$ docker run hello-world
This post-installation step completes the Docker on Ubuntu setup process. The daemon’s already configured to start automatically so you don’t have to manually set up a service. If you’re planning on an advanced installation, refer to the Docker user manual for instructions on how to configure customized networking, logging, and volume storage management.
Adding Docker Compose To Your Ubuntu Installation
Docker Compose is a popular Docker companion tool that makes it easier to work with applications that use multiple containers. While the docker CLI only targets one container with each command, docker compose can start and stop several containers with each action. This simplifies managing systems where you’ve got separate frontend, backend, and database services.
Docker Compose is now available as part of the docker CLI. The Compose V2 plugin is included when you use the official installation script to install Docker. It’s also available in apt if you used that method:
$ sudo apt install docker-compose-plugin
Alternatively, you can download the latest .deb archive and install it manually:
$ curl https://download.docker.com/linux/ubuntu/dists/$(lsb_release --codename | cut -f2)/pool/stable/$(dpkg --print-architecture)/docker-compose-plugin_2.6.0~ubuntu-focal_amd64.deb -o docker-compose-plugin.deb
$ sudo apt install -i ./docker-compose-plugin.deb
Check that Compose is working by trying the docker compose version command:
$ docker compose version
Docker Compose version v2.6.0
Installing Docker Desktop on Ubuntu
While Docker Engine is restricted to a CLI-only experience, Docker Desktop provides a graphical management interface, built-in Kubernetes support, and optional third-party extensions that can help simplify your container workflows. It’s a great choice when you’re seeking ease of use at your own workstation.
To install Docker Desktop, first install some dependencies using apt:
$ sudo apt update
$ sudo apt install ca-certificates curl gnupg lsb-release
Next, run the following set of commands to add Docker’s apt repository. Although Docker Desktop is not included in the repository, packages within it are referenced as dependencies by Desktop’s Debian archive.
$ sudo mkdir -p /etc/apt/keyrings
$ curl -fsSL https://download.docker.com/linux/ubuntu/gpg | sudo gpg --dearmor -o /etc/apt/keyrings/docker.gpg
$ sudo chmod a+r /etc/apt/keyrings/docker.gpg
$ echo "deb [arch=$(dpkg --print-architecture) signed-by=/etc/apt/keyrings/docker.gpg] https://download.docker.com/linux/ubuntu $(lsb_release -cs) stable" | sudo tee /etc/apt/sources.list.d/docker.list > /dev/null
$ sudo apt update
The curl command downloads Docker’s GPG key for Ubuntu, converts it back to standard OpenGPG encoding and saves it to the apt keyring directory. chmod is used to set the permissions on the keyring file so that apt detects it reliably.
Download the Docker Desktop Debian archive from the link in the documentation. This will provide the latest stable release of Docker Desktop for Linux. Use apt to install the package, substituting in the version number you downloaded:
$ sudo apt install ./docker-desktop-4.11.0-amd64.deb
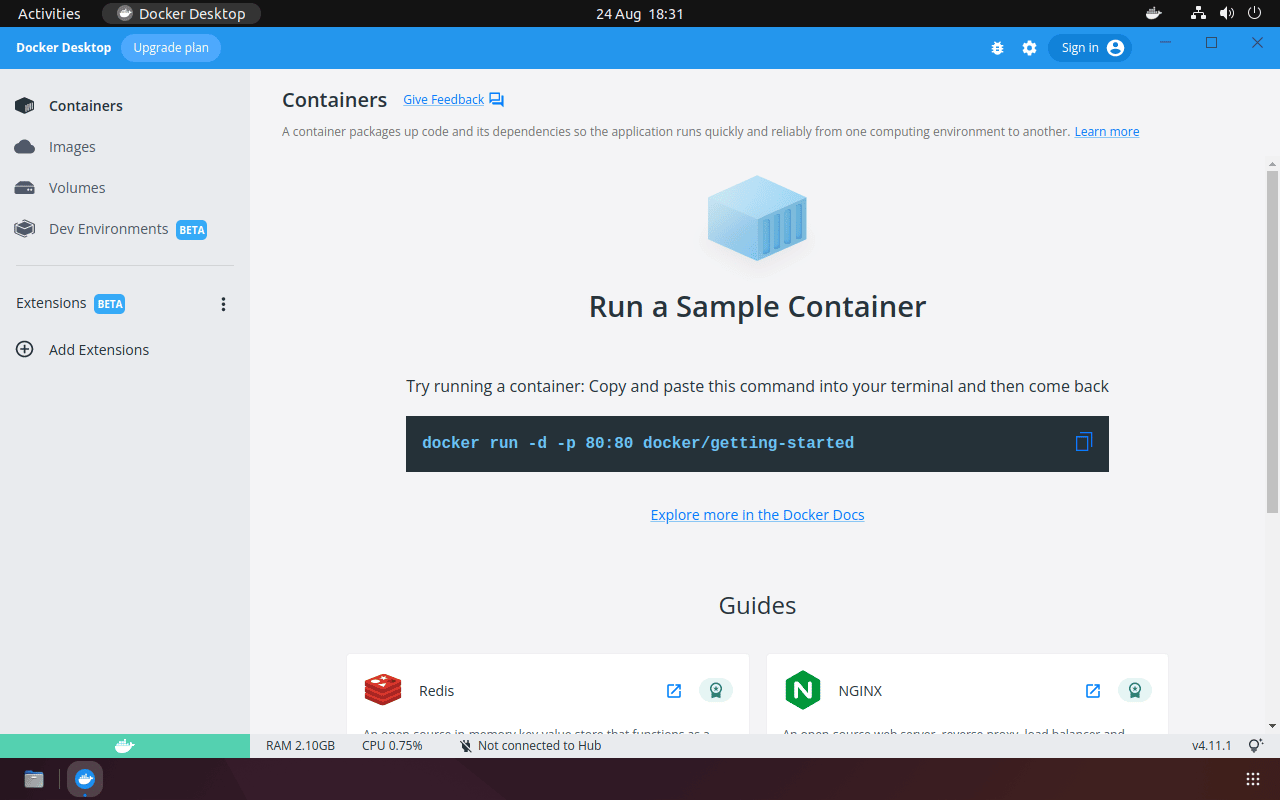
Docker Desktop will now show up in your app launcher. Use your launcher to start Docker Desktop and open the UI. You’ll be able to run docker, docker compose, and kubectl commands in your terminal, too. The application also adds a menu to your shell tray that shows the current Docker Desktop status and lets you perform some quick actions.
You’ll be prompted to accept a service agreement the first time you run Docker Desktop. Press the Accept button if you consent, and wait while Docker Desktop starts its virtual machine.
After a few moments, the dashboard will load. It provides shortcuts to create new containers from popular images, avoiding lengthy terminal commands.
DevKinsta: Docker Desktop for WordPress
Specialized solutions built atop Docker’s foundation provide an even easier experience for specific technologies. DevKinsta is a free local development tool for building WordPress themes and plugins that uses Docker to fully isolate and secure your WordPress sites. It makes it quick and simple to start and customize a new WordPress project without setting up servers yourself. Once you’re ready, you can push directly to the Kinsta platform to deploy your live site.
You can install DevKinsta on MacOS, Windows, and Ubuntu.
Summary
Docker is how most developers start out using containers. You can easily install Docker on your Ubuntu system, either as Docker Engine or the new Docker Desktop. Once you’ve got Docker installed, you’ll be fully equipped to build and run containers, letting you simplify development and reduce discrepancies between environments.
If you’re developing WordPress themes and plugins, DevKinsta can simplify creating a local development environment and deploying your site.

James Walker is the founder of Heron Web, a UK-based software development studio providing bespoke solutions for SMEs. He's experienced in delivering custom software using engineering workflows built around modern DevOps methodologies. James is also a freelance technical writer and has written extensively about the software development lifecycle, current industry trends, and DevOps concepts and technologies.


Thank you for this article!!!!