Multisite is a great way to manage all your WordPress sites from a single installation. However, a very common issue that WordPress multisite administrators face is how to set up domain mapping. By default, additional sites setup within your multisite network are created as either subdomains of the root site (e.g.subsite.network.com) or subfolders (e.g. network.com/subsite).
Naturally, these don’t look very good and so by implementing domain mapping, you can point a site to an external domain, such as domain.com. To other visitors, this will then appear as a normal website.
Prefer to watch the video version?
WordPress Multisite Domain Mapping
When it comes to setting up WordPress multisite domain mapping you do have a few options. We are going to walk you through the entire Multisite setup here at Kinsta as this can sometimes be confusing.
If you already have WordPress Multisite up and running, feel free to skip to Step 5 to start mapping your new subsite domains.
Below we will be setting up the following:
- kinstamulti.com (main subsite)
- kinstasub1.com (additional subsite)
- kinstasub2.com (additional subsite)
- kinstasub3.com (additional subsite)
Step 1 – Install WordPress Multisite
If you are doing a fresh installation of WordPress you can automatically configure WordPress multisite when you add a new site in MyKinsta. Simply select “This is a multisite installation” and choose either the subdirectory or subdomain option.
In this example, we’ll be using the subdomain multisite option. When adding a new site, select the “Install WordPress” option.
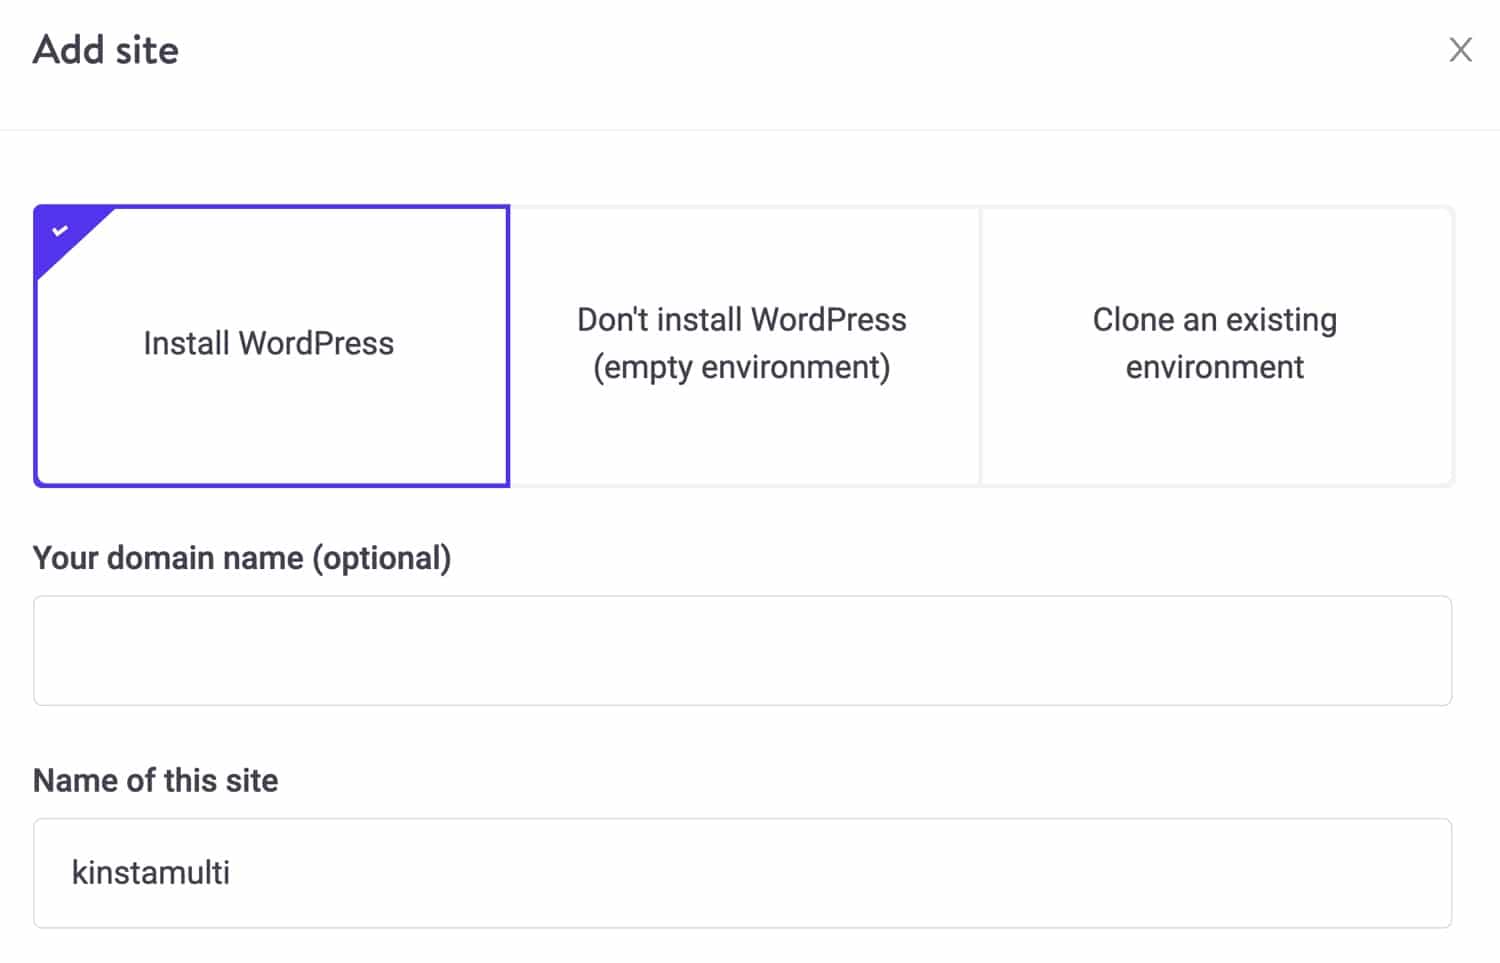
After filling in the site details, be sure to select the “Should we install WordPress multisite?” option, and specify whether you want to create a subdirectory or subdomain multisite.

- A subdirectory multisite is one that’s loaded from a subdirectory of a root domain (e.g. domain.com/multisite/).
- A subdomain multisite is one that’s loaded from a unique subdomain (e.g. multisite.domain.com).
If you opt for a subdirectory multisite after creating a subdomain multisite, a rule will need to be added by the Kinsta support team for it to work properly.
As setting up multisite correctly is complicated and requires special attention, you should anticipate working with a qualified WordPress developer if you wish to switch an established site from single-site mode to multisite mode.
Step 2 – Add Domains to MyKinsta Dashboard and Point DNS
The next thing to do is add your main site’s domain to the MyKinsta dashboard. To do this, go to your site’s “Domains” page, click Add Domain, and add the necessary domain. Be sure to select the “add domains with and without www” option if you want to add the www version of your domain as well.
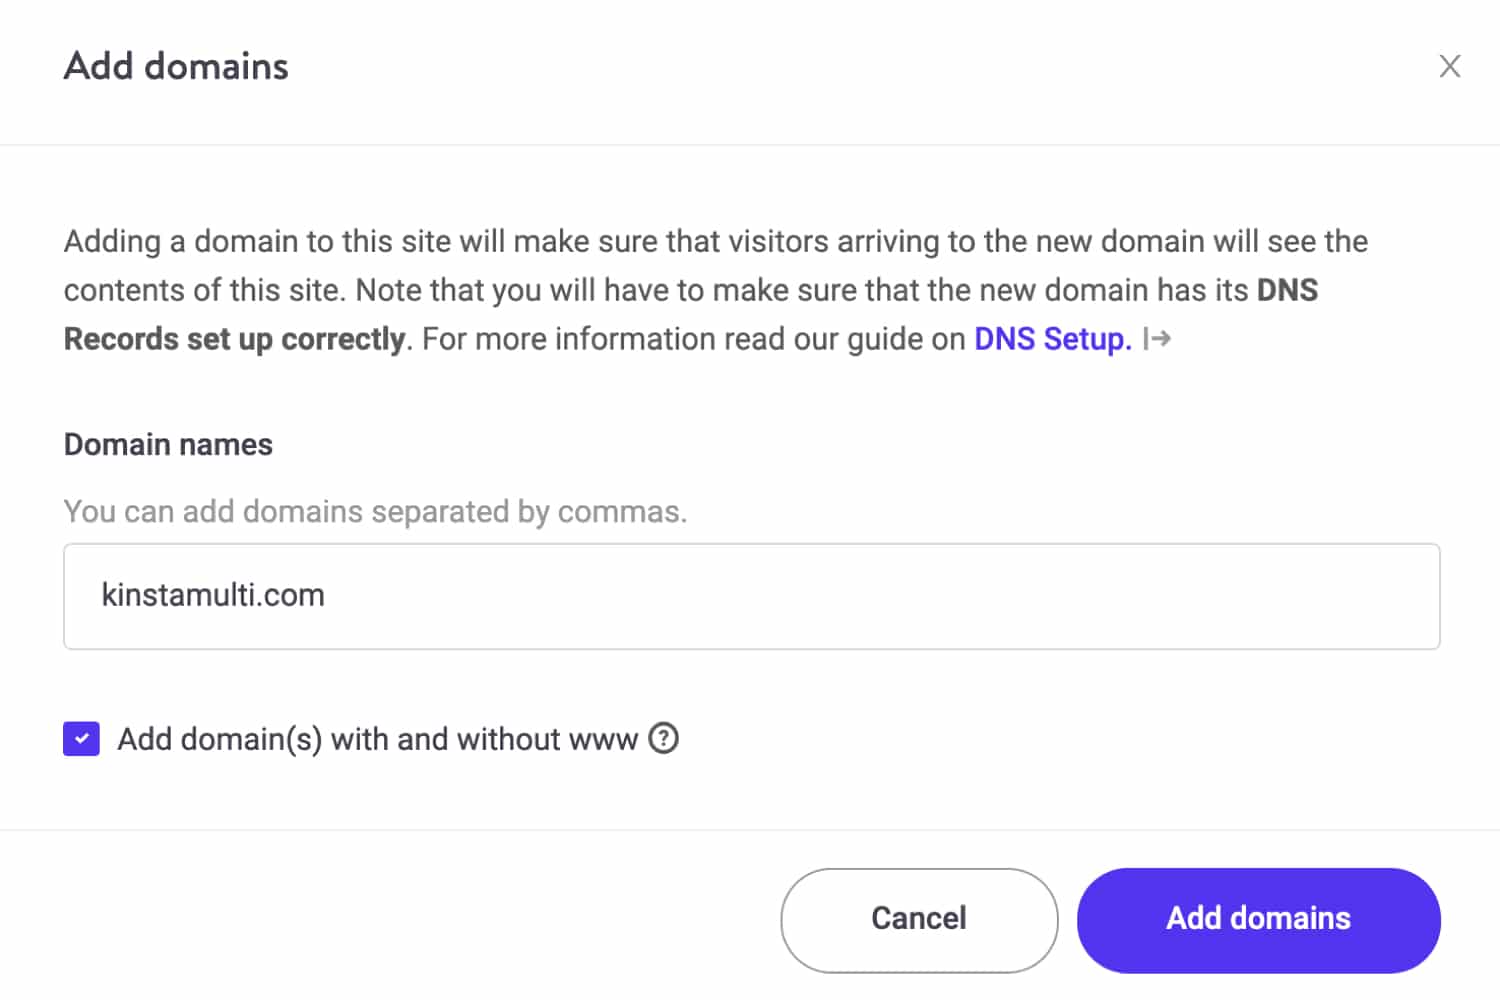
After adding your domain(s) to Kinsta, be sure to add the necessary DNS records to point your domain name to Kinsta. For non-www domains, you’ll need an A record. If you’re using a www domain as well, add an A record or CNAME pointing to Kinsta.
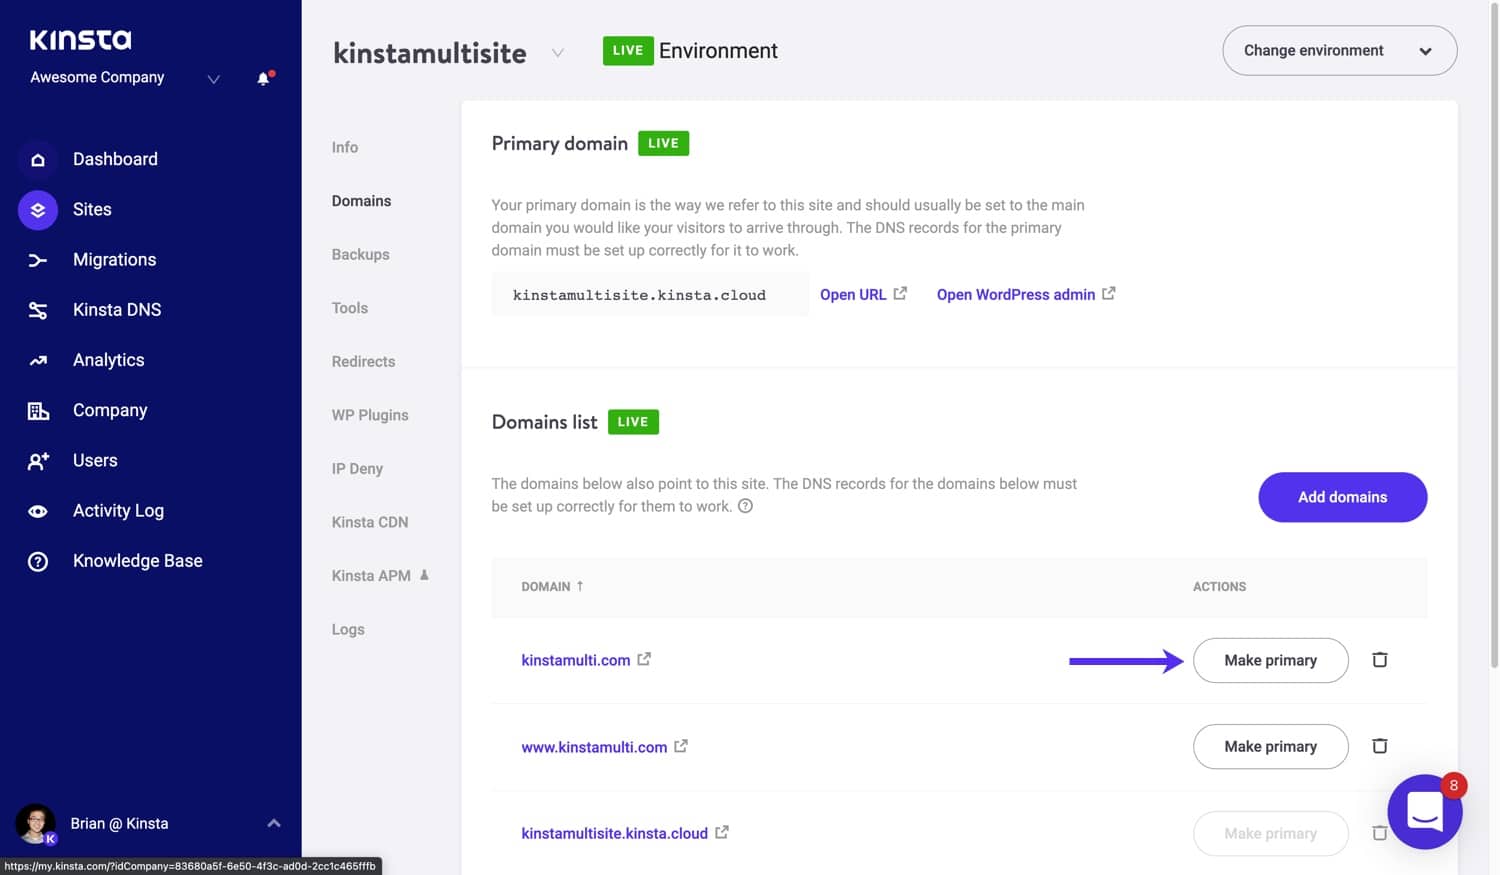
Finally, after adding your DNS records, click “Make Primary” next to your main site’s domain name in MyKinsta to switch your site’s primary domain.
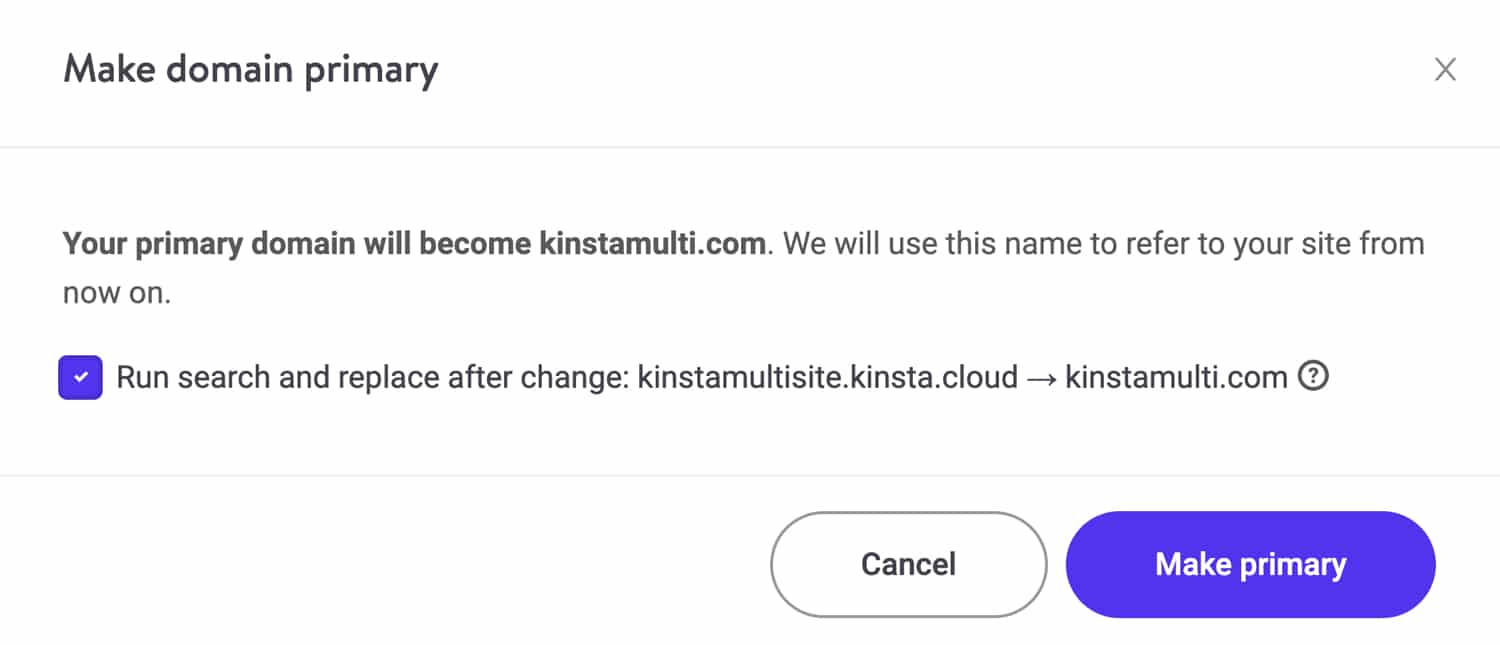
During the process of switching your primary domain, you’ll be asked whether you want to run a search and replace to change all instances of your old domain in your WordPress database to your new domain. We recommend checking this option to avoid having to manually run the search and replace later on.
If you need to run a manual search and replace to switch your domain, check out our knowledgebase article on how to use our search and replace tool in MyKinsta.
Step 3 – Update wp-config.php File
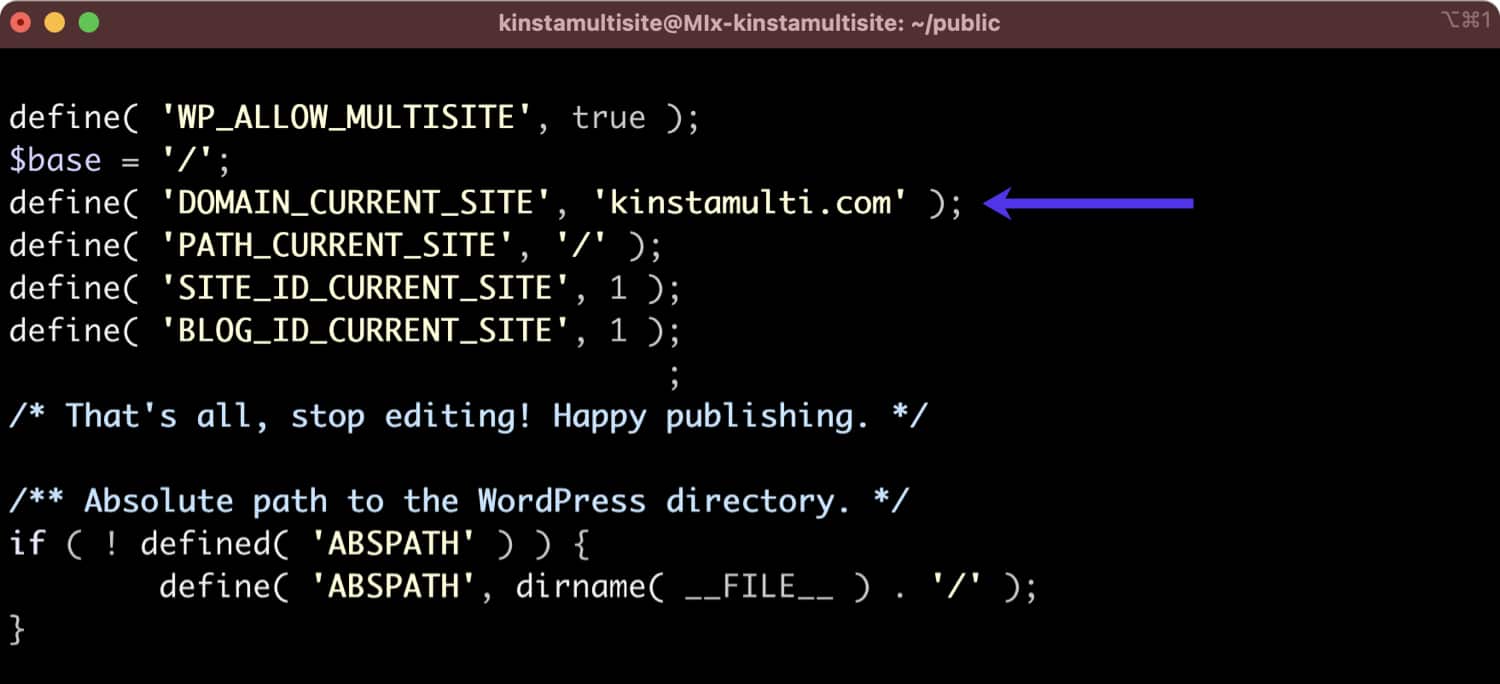
The next step is to update your wp-config.php file and add/update a few variables. The wp-config.php file is typically located at the root of your WordPress site and can be accessed via SFTP or SSH.
First, update 'DOMAIN-CURRENT_SITE' to your domain name (by default this will have a temporary kinsta.cloud URL on new installations).
Next, add the line below to ensure logins work. We recommend adding it below the line containing the ‘BLOG_ID_CURRENT_SITE’ variable.
define('COOKIE_DOMAIN', $_SERVER['HTTP_HOST'] );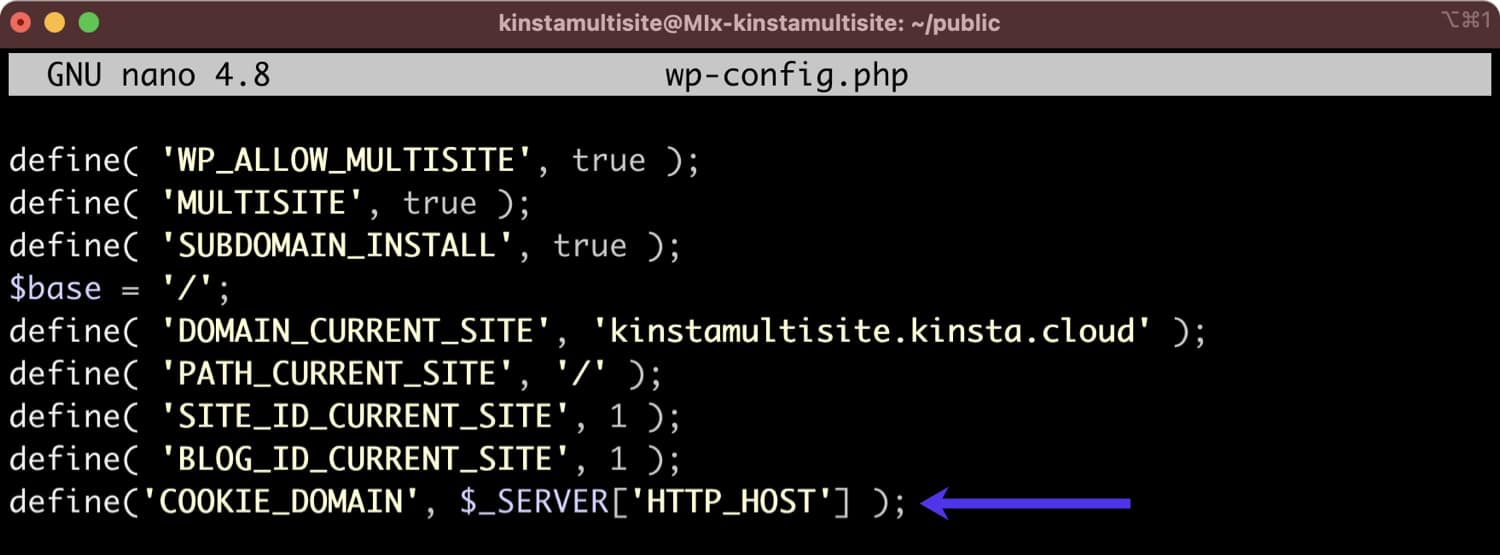
Step 4 – Create New Subsite Installs
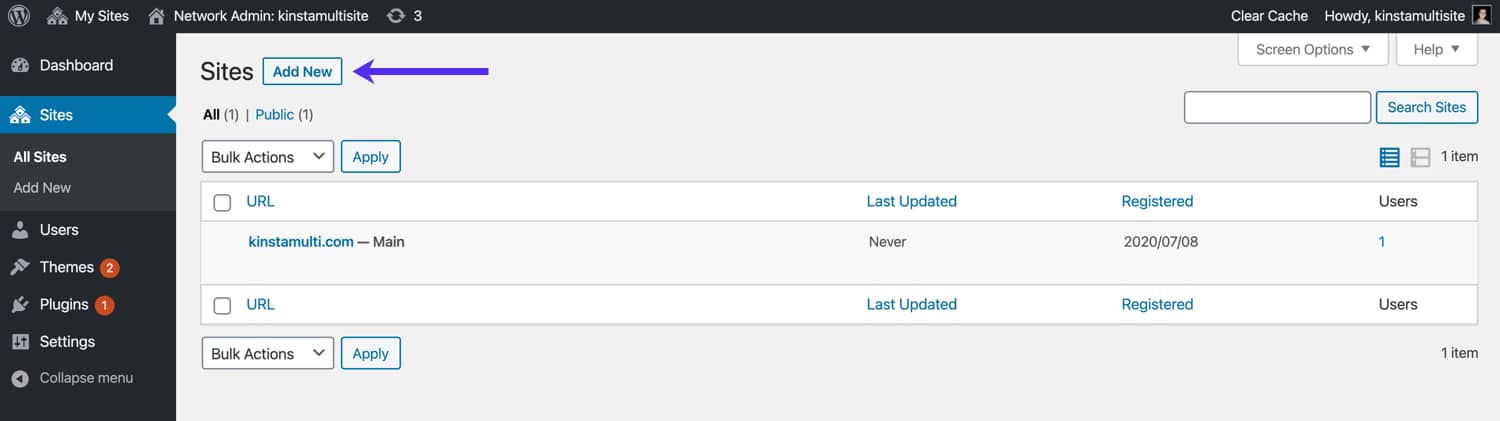
You can then create new subsite installs. To do this, log in as the Network Admin (the user account you created during your Kinsta site creation). Under “My Sites” in the top left corner of the WordPress admin dashboard, navigate to Network Admin > Sites. On the “Sites” page, click on Add New to add a new subsite.
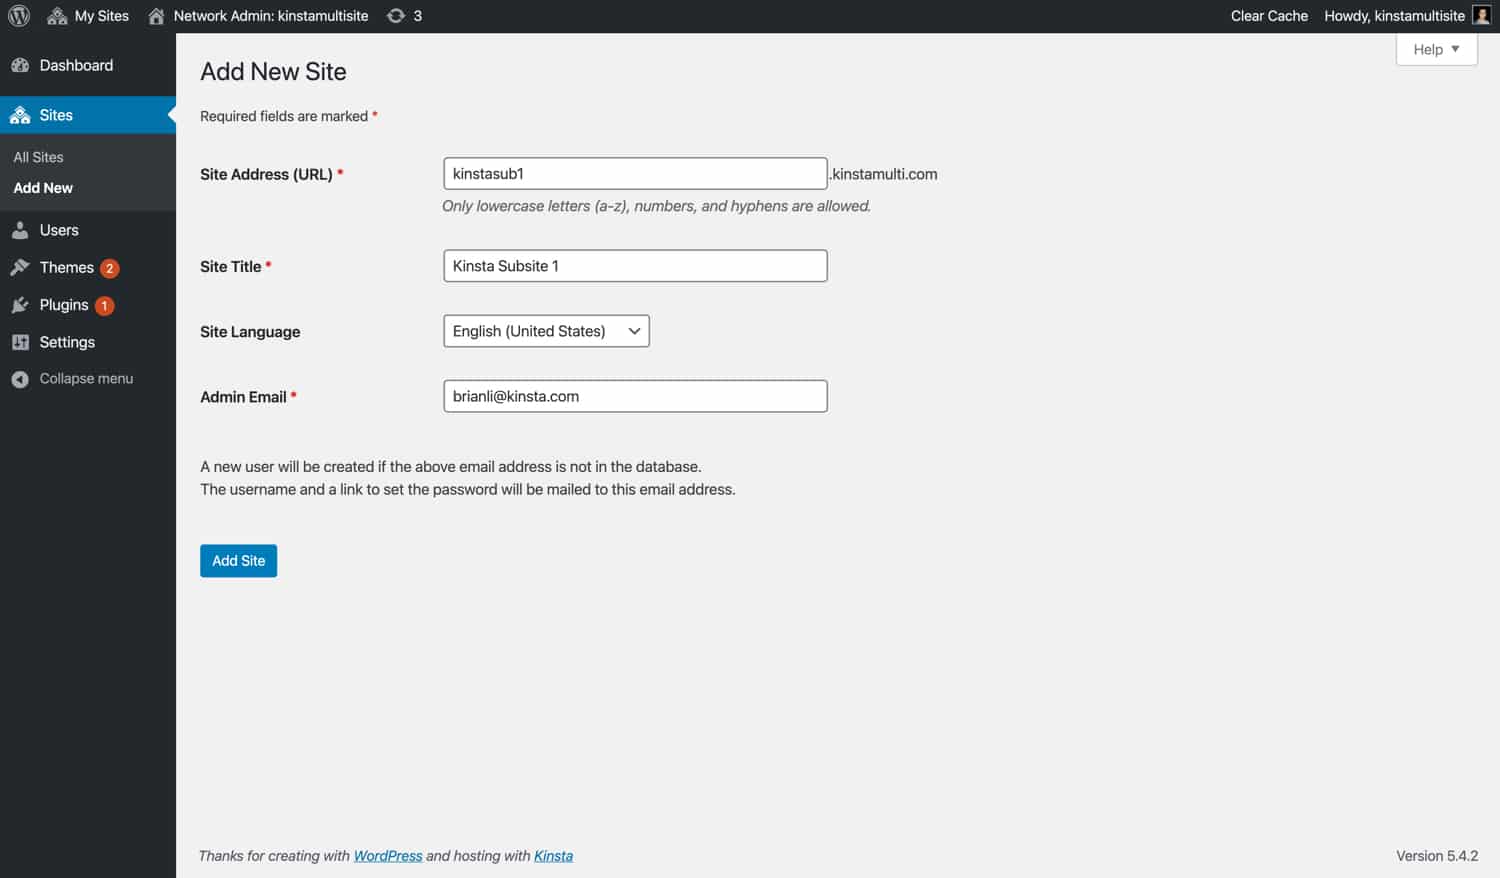
You’ll be prompted to specify the subsite’s site address, site title, site language, and admin email. As mentioned above, we want our first subsite to be kinstasub1.com. When creating a new subsite, the “Site Address” field only allows domains that are a subdomain of the main site’s domain. For now, we’ll just use “kinstasub1.kinstamulti.com” and change it to kinstasub1.com later on.
If needed, you can repeat this step to add additional subsites.
Step 5 – Map Domains To New Subsite Installs
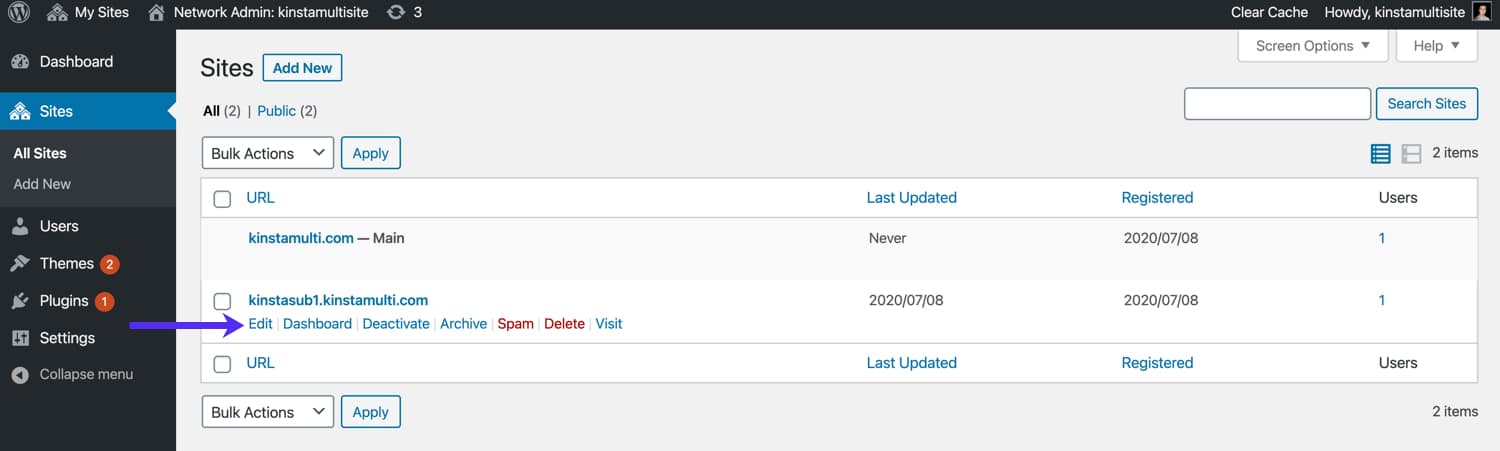
Now that you have your new subsite setup, you need to map your live domain to it. To do this, go to Sites > All Sites in the WordPress admin sidebar, and click Edit under your subsite.
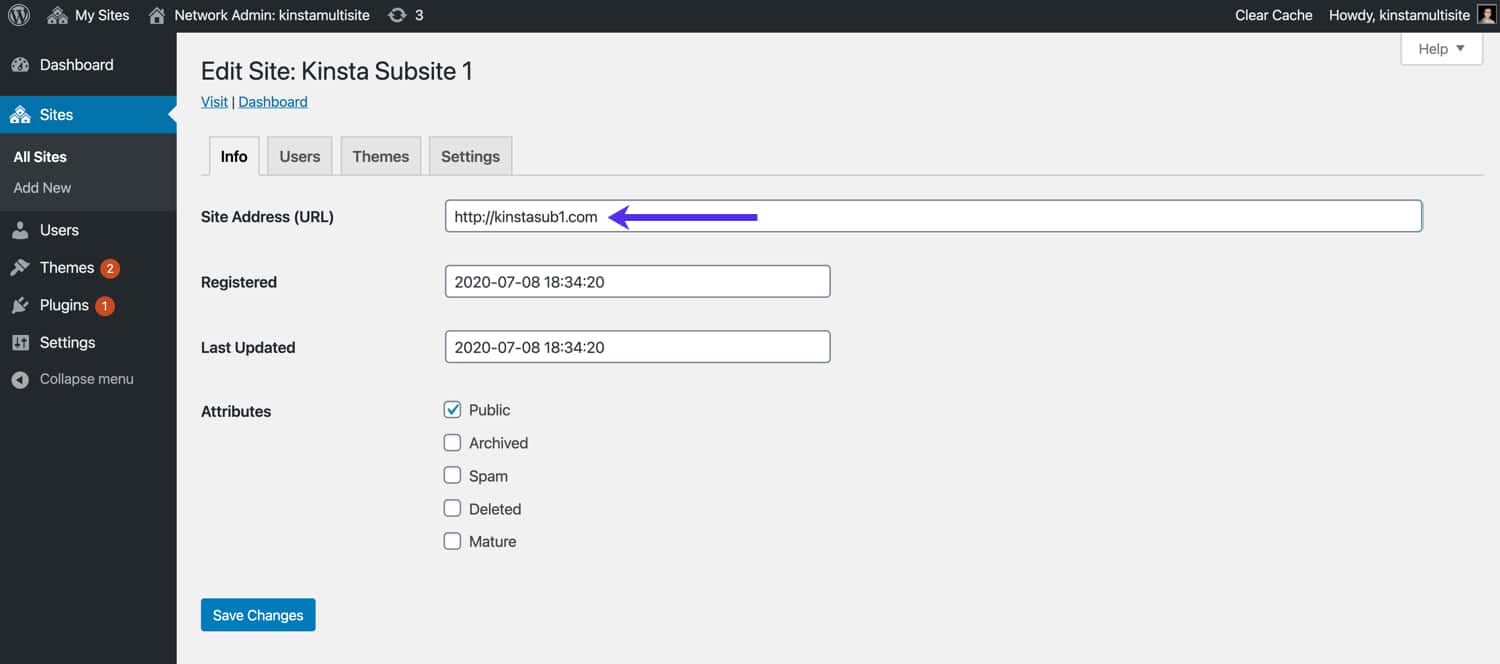
In the “Site Address (URL)” field, replace the existing subsite domain with your live subsite domain. In our case, our live subsite domain is kinstasub1.com.
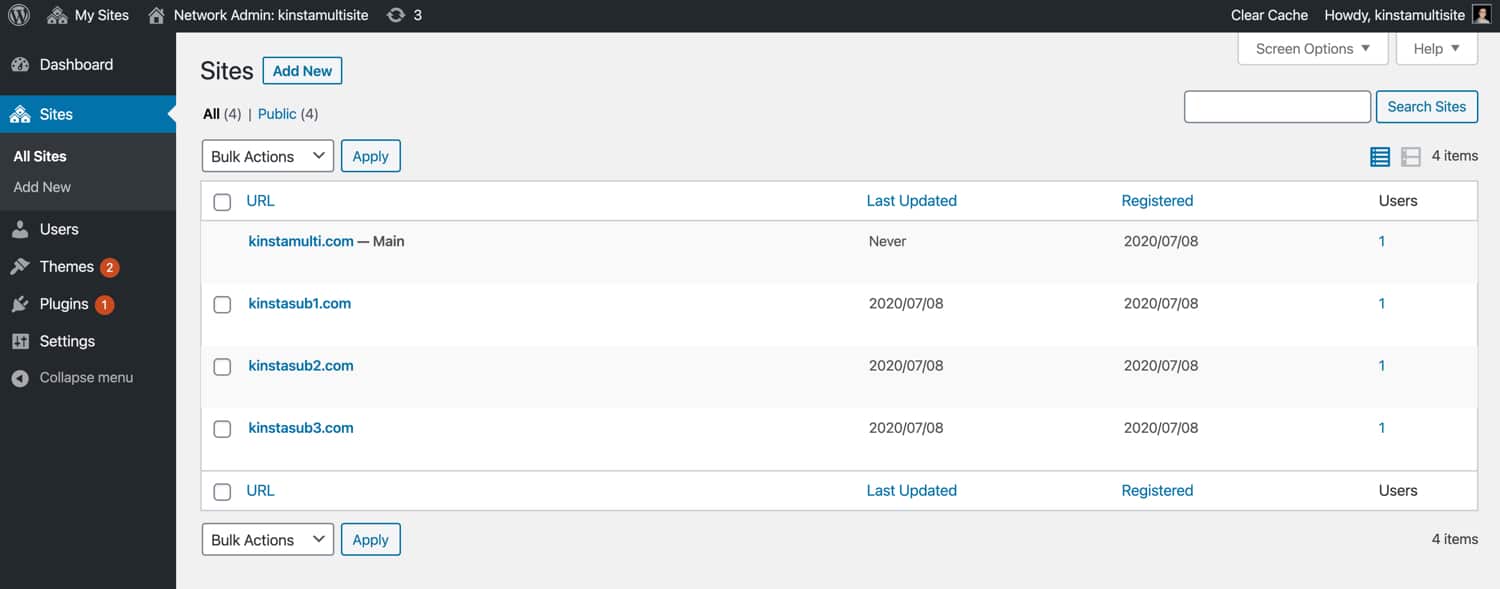
If needed, you can repeat this step to map domains for additional subsites. In our case, we wanted our main site with three subsites. Here’s what our completed subsite setup looks like.
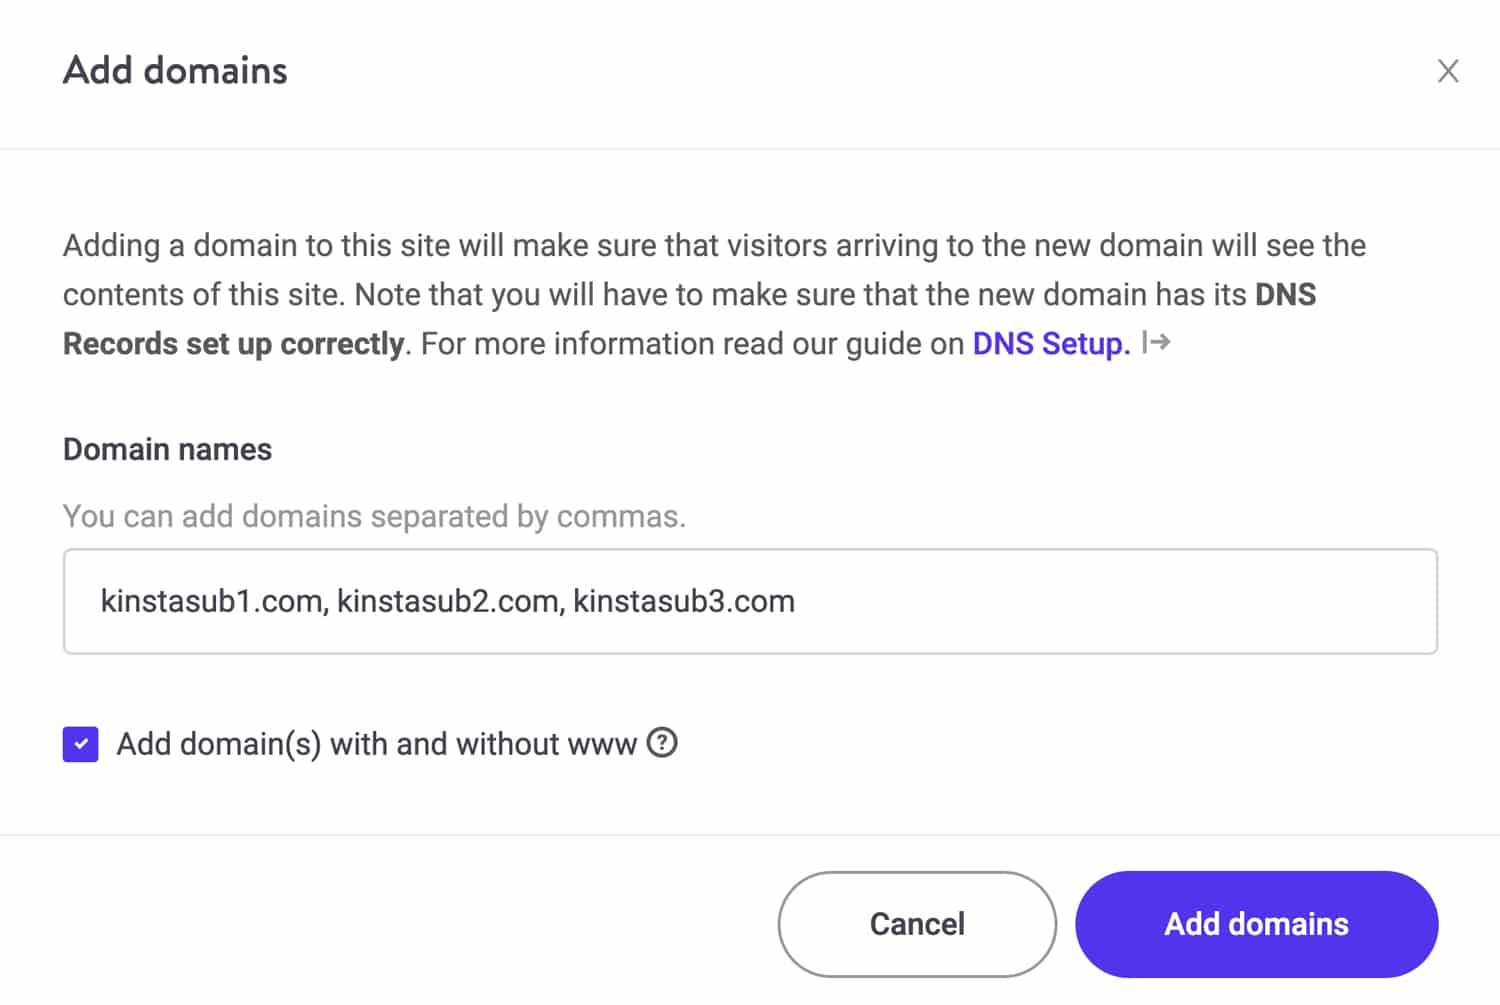
Step 6 – Add Subsite Domains to MyKinsta and Point DNS
You will then need to repeat step 2 above and add any additional subsite domains to MyKinsta. In MyKinsta, go to your site’s “Domains” page and add your subsite domains. Again, be sure to check the “add domains with and without www” option if it applies to you.
Step 7 – Generating an SSL Certificate for Your Multisite
At Kinsta, all verified domains are automatically protected by our Cloudflare integration, which includes free SSL certificates. If you’re running a multisite, just be sure to add and verify each subsite’s domain in MyKinsta.
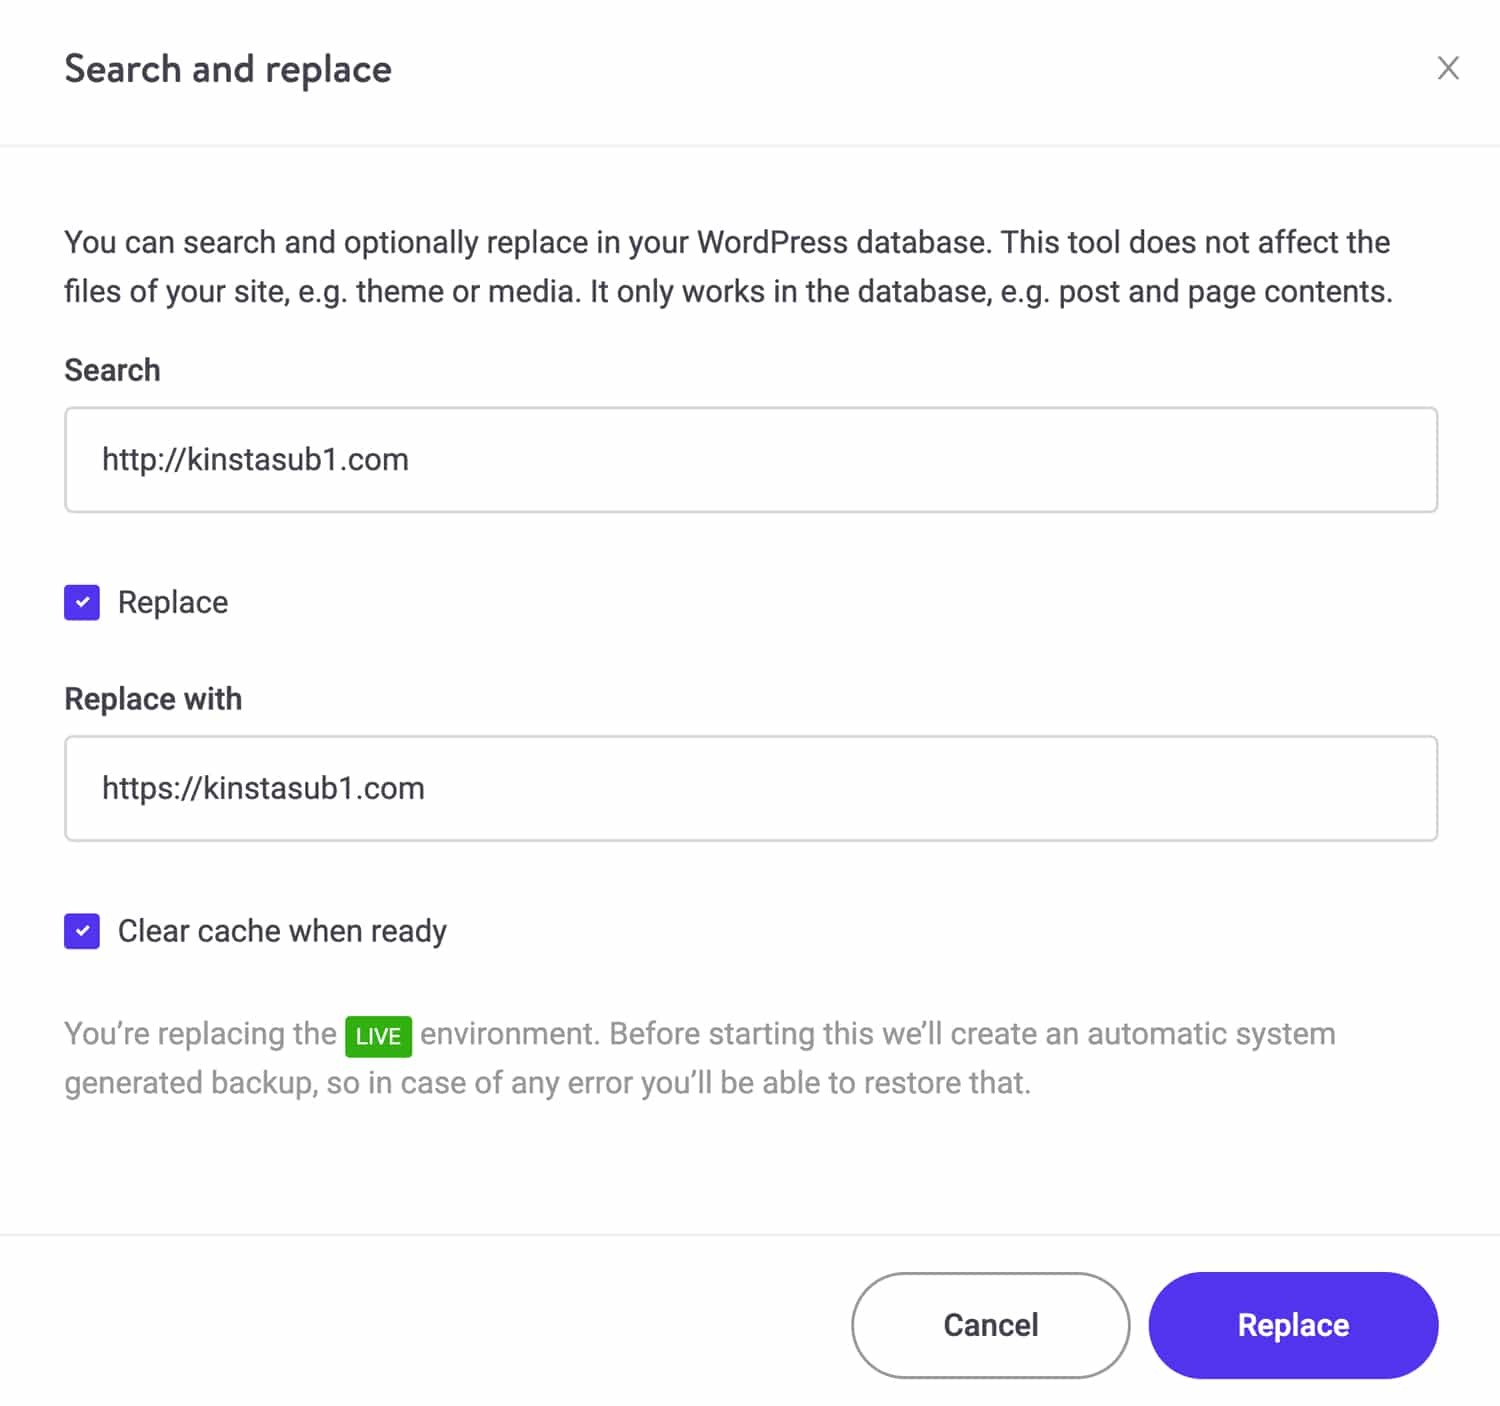
In case you have any HTTP URLs in your database, you’ll want to run a search and replace for your main site and each one of your subsites to replace HTTP URLs with HTTPS ones. To do this, go to your site’s Tools page in MyKinsta and click “Search and Replace”. Be sure to check the “Replace” checkbox and specify your search term (HTTP URL) and replacement term (HTTPS URL).
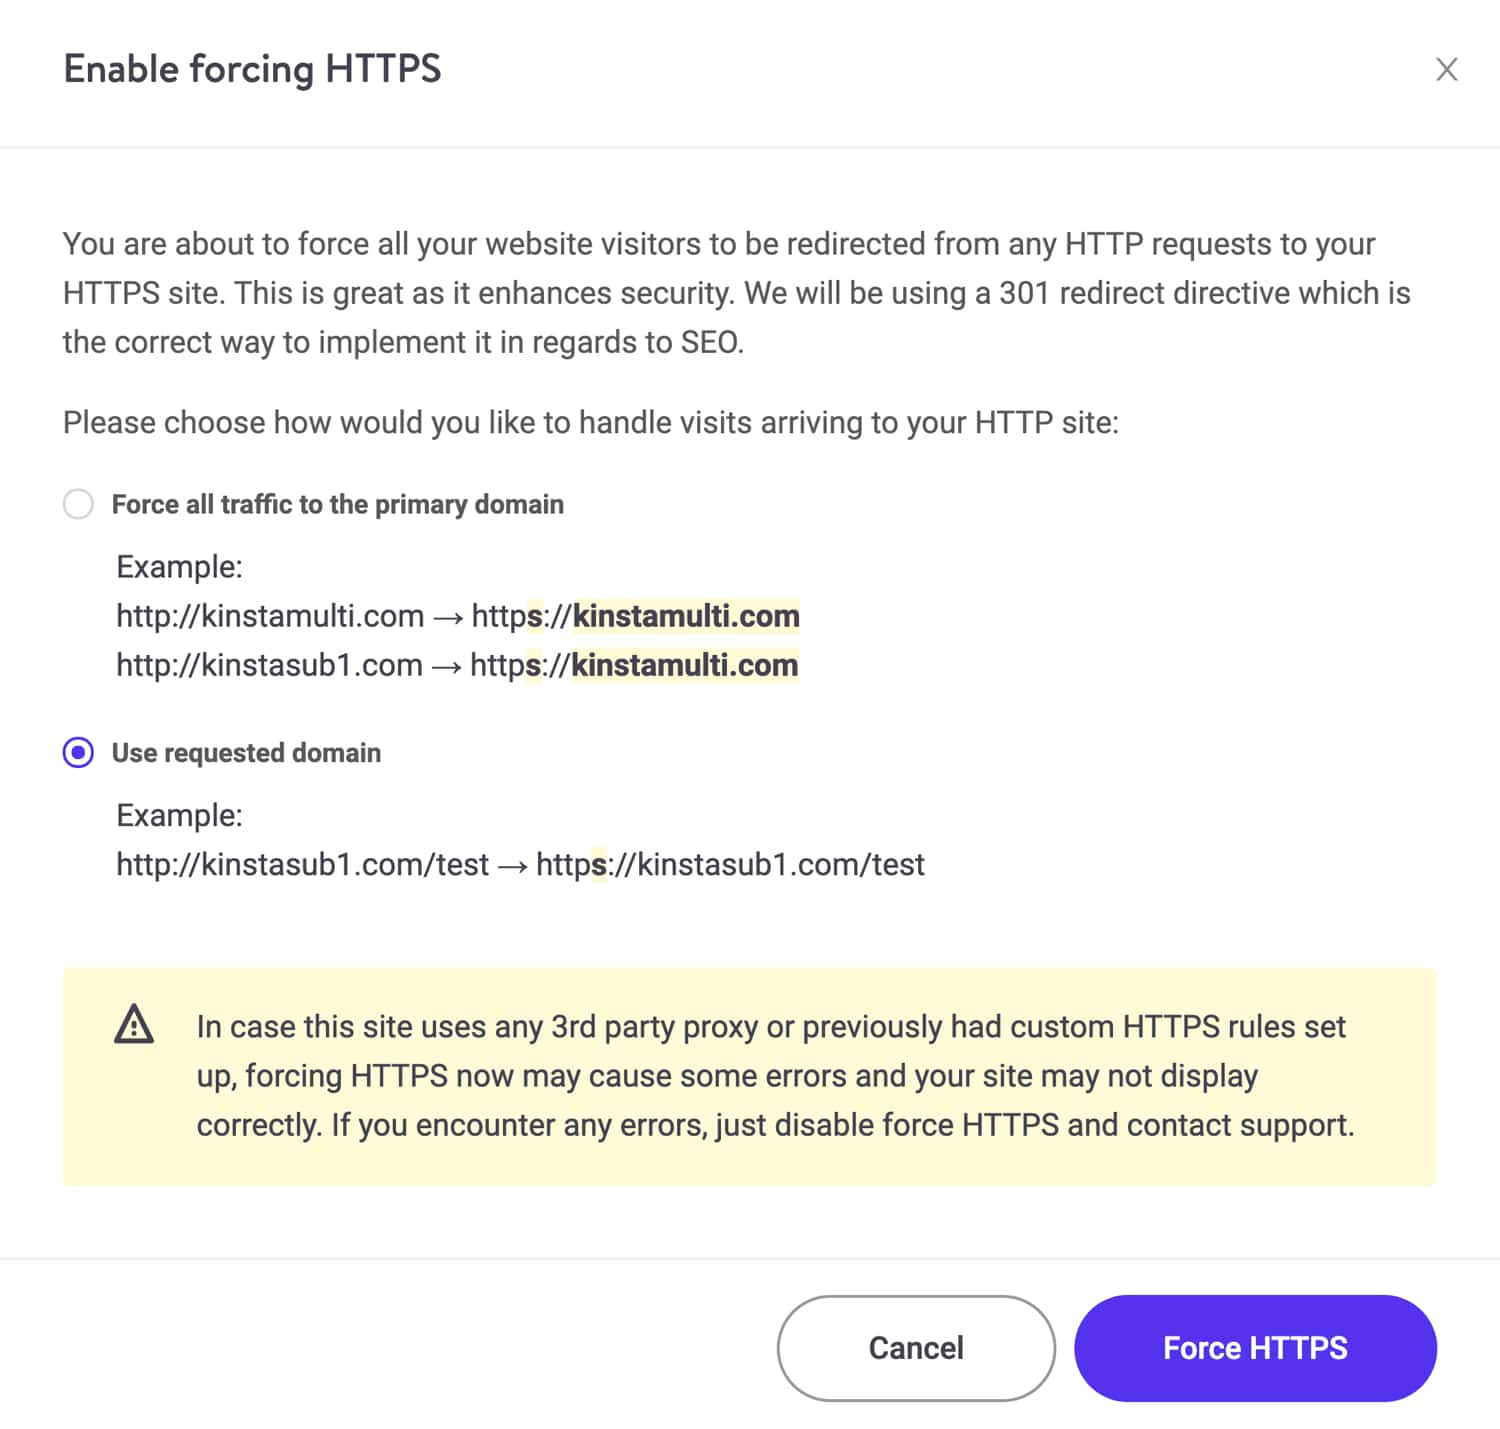
Next, you’ll want to enable Force HTTPS in MyKinsta to redirect all HTTP requests to HTTPS requests at the server level. To do this, click Enable under the “Force HTTPS” tool on your “Tools” page in MyKinsta. Be sure to select the “requested domain” option. If you select the “primary domain” option, all requests will be redirected to your primary domain instead.
Summary
As you can see, setting up domain mapping for a WordPress multisite can be an involved and time-consuming process. If you require assistance in configuring any aspect of your multisite, we recommend working with an experienced WordPress developer. We hope you found this multisite walkthrough helpful, and let us know in the comments below if you have any questions!