Being WordPress developers ourselves, we are always trying to figure out ways to speed up development workflows. Many of you utilize SSH here at Kinsta on a daily basis. Whether it is to perform common sysadmin tasks or run tools such as Composer, WP-CLI, etc.
We are excited to let you know that we’ve now added the ability to add your SSH keys in the MyKinsta dashboard. SSH keys provide a more secure way of logging into a server and eliminate the need for a password. Although you can further protect your login by adding a passphrase.
Add SSH keys
To add your public SSH key, follow the steps below.
Step 1
Click into your user profile on the bottom left-hand side, and click on User Settings.

Step 2
In the My Account tab, click on the Add SSH key button.

Step 3
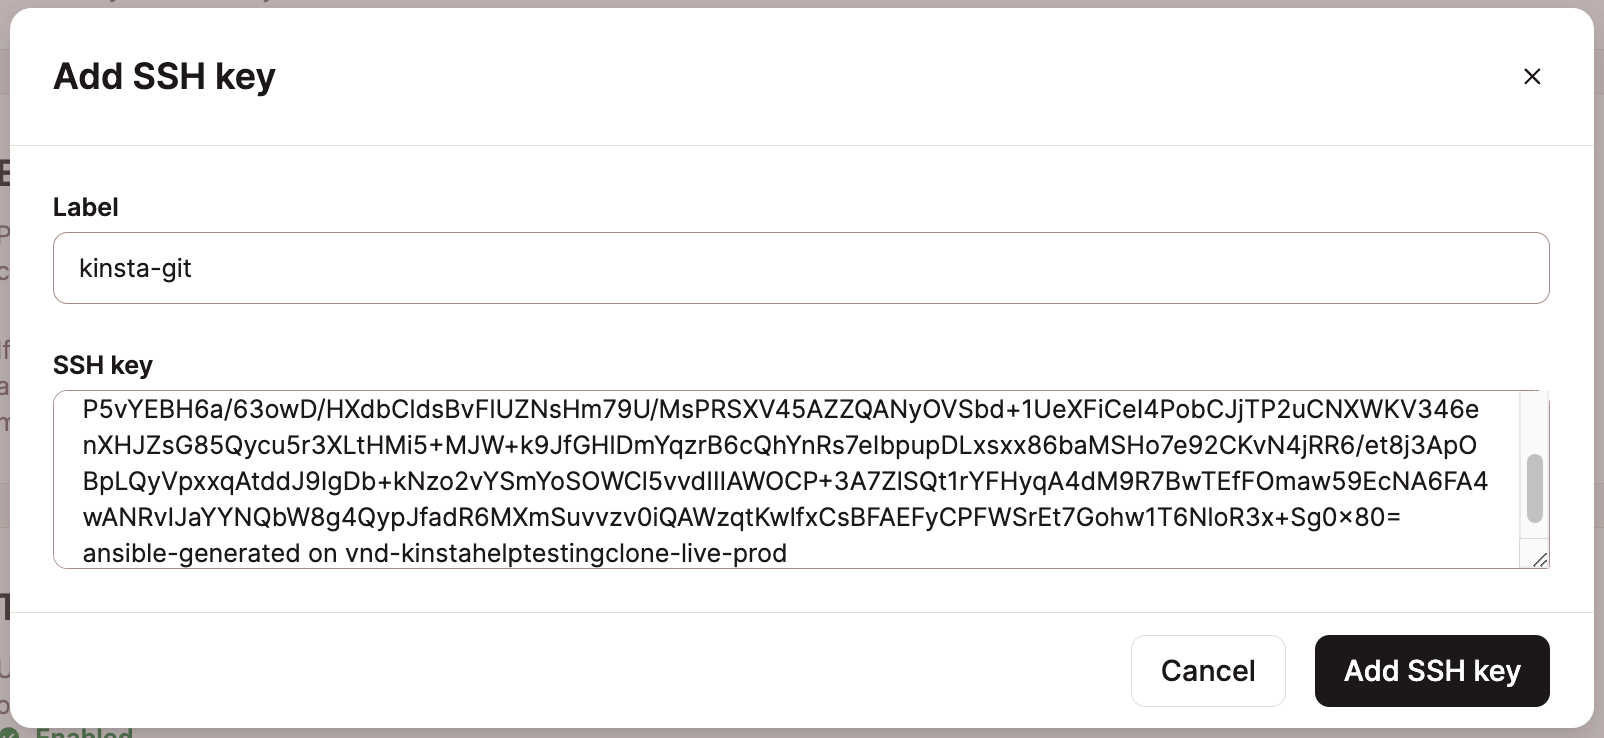
Enter text for a descriptive Label, paste your SSH key, and click the Add SSH key button.
Check out our knowledge base article for more details on how to connect to SSH at Kinsta and how to generate your public key.