The Domain Name System (DNS) is the key to locating a website on the Internet. With so much at stake, making changes to your DNS records can be a nerve-wracking experience.
Fortunately, there is a way to test DNS-related changes without editing your live records. By modifying your local hosts file, you can preview how your domains will function on a new server without putting your live site at risk.
In this post, we’ll explore what hosts files are and share some reasons why you may want to modify them. We’ll then show you how to edit hosts files on Windows 10. Let’s get started!
An Introduction to the Hosts File
A hosts file is a local plain text file that maps your server or hostnames to Internet Protocol (IP) addresses. Every time Windows 10 connects over a network using a hostname, it’ll refer to the hosts file. If Windows finds an entry in this file, then it’ll contact the specified server.
If it doesn’t find a relevant hostname, Windows 10 will resolve the hostname using a Domain Name Service (DNS). This is the process used to obtain the server IP address behind a domain name.
Each hosts file entry has its own line, with the numerical IP address, a space or a tab character, and finally the hostname or domain. Let’s look at an example of a hosts file entry:
120.0.0.0 example.com #Example
In the above example, the first section denotes the IP address where this request will be redirected to (120.0.0.0). The second section designates the location that we want to redirect a request from (example.com). The final section specifies a comment for this entry. We‘re using a hashtag to tell Windows 10 to ignore the comment when reading the local hosts file.
After adding the domain information, your system will resolve to the IP address you specified. In the above example, we’re associating the domain name example.com with the IP address 120.0.0.0.
It’s worth noting that some software employs its own techniques to look up hostnames. This means there’s always a chance that it may ignore the hosts file completely.
What Happens When You Modify a Hosts File?
When you modify your hosts file, it causes your local machine to look directly at the IP address specified by you. For example, if you wanted to point mywebsite.com to the IP address 1.2.3.4.5, you’d add the following:
1.2.3.4.5 mywebsite.com
Now, every time you try to visit mywebsite.com, you’ll find yourself at 1.2.3.4.5 instead. By editing your hosts file, you can override the DNS for a domain on your specific machine only.
In this post, we’ll be focusing on opening your hosts file and adding individual entries. However, it is also possible to replace this file entirely. This can be an easy way to block malicious or spammy websites in bulk. There are even sites that have published ready-made lists of IP addresses associated with advertisements, hijackers, page counters, and other unwanted connections.
You can download one of these pre-prepared lists and copy/paste its contents into your existing hosts file. Alternatively, you might replace your native hosts file with the newly-downloaded file. If you do opt for the latter, then we recommend keeping a copy of your original file, just in case you encounter any strange behavior with its replacement.
Why You May Want To Modify the Windows 10 Hosts File
You can use your hosts file to test DNS-related changes without having to alter your DNS records. For example, imagine you’ve migrated to a new server. Before updating your DNS settings, it’s a good idea to verify how your domains will look and function on this new server.
However, if you enter your current domain name, then it’ll resolve to your old server. In this scenario, you can modify your hosts file to point the domain to the new server’s IP.
This file can also help test how your website looks on a different server when your DNS hasn’t propagated yet. At Kinsta we provide a temporary URL (sitename.kinsta.cloud), but this cannot mimic everything. For example, by default, a CDN won’t work on a temporary URL.
You can also use the hosts file to block certain websites. This can be useful for employers who want to ensure that their staff isn’t wasting time on unauthorized sites such as Facebook, Twitter, or YouTube.
While there are fewer technical ways to block access to unauthorized websites, many of these methods are relatively easy to reverse. For example, a tech-savvy child may have little problems bypassing parental controls, but modifying the hosts file requires a higher level of technical knowledge.
You might take this a step further and block all websites that serve up advertisements. If you map the addresses of all the major ad providers to an unused internal IP address, then Windows 10 will be unable to resolve these addresses. You can then enjoy the web, advertisement-free.
Finally, some malicious third parties may set up redirects by altering your hosts file. This is known as a hosts file hijack. If you’re encountering strange redirects, then it may be worth checking your hosts file for suspicious entries.
How To Make Firefox Honor the Windows 10 Hosts File
If you’re using Firefox for Windows, then Mozilla’s browser resolves IP addresses slightly differently compared to the other major browsers. By default, Firefox uses DNS-over-HTTPS (DoH).
This is a protocol for performing remote DNS resolution via HTTPS. With this setting enabled, Firefox will use the DOH server as the primary name resolver, rather than checking your local hosts file or DNS resolver.
As a result, the website displayed will always point to the IP address that the Internet deems authoritative for that domain. Even if you edit your hosts file, your changes won’t have any effect if the DoH server returns a working IP address.
There are plenty of great web browsers that are compatible with Windows 10 and that honor the hosts file out-of-the-box. However, if you want to stick with Mozilla Firefox, you can always disable DoH.
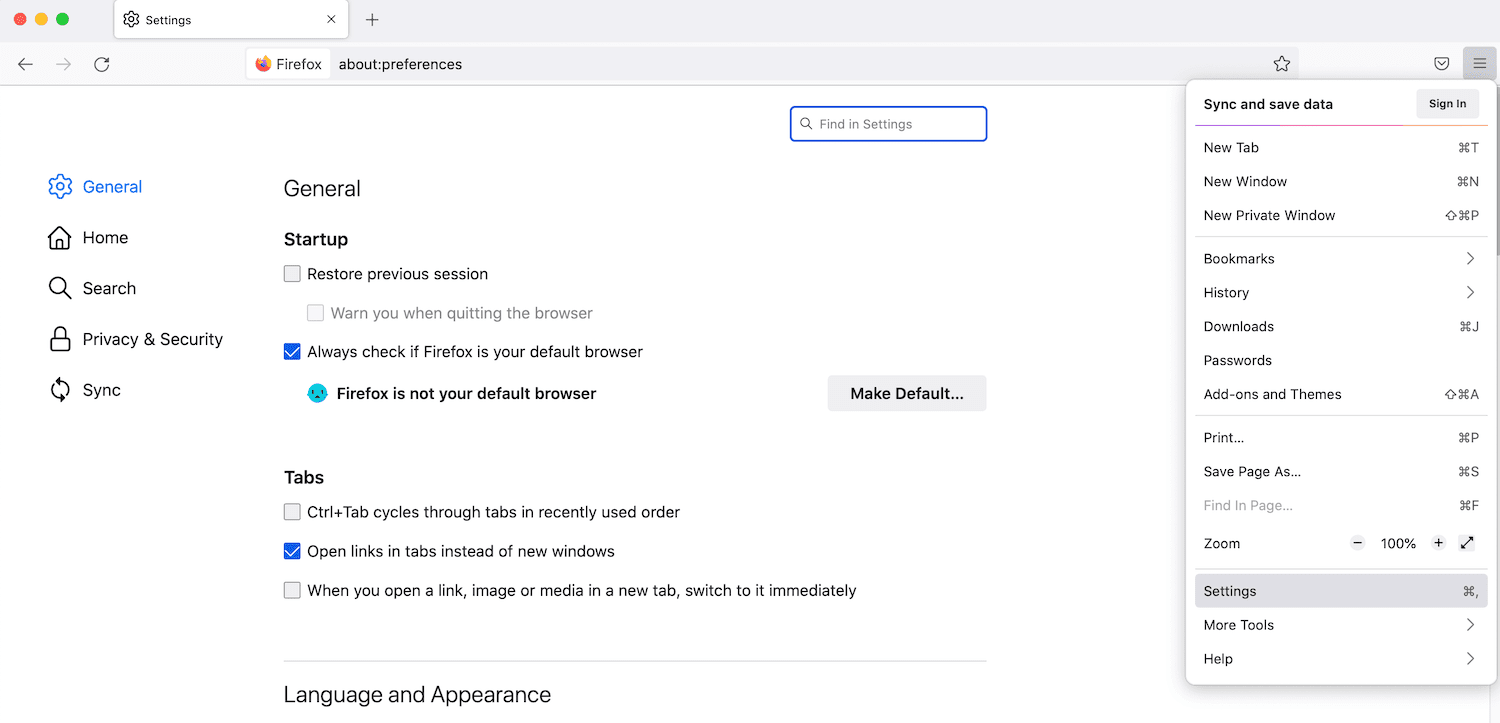
To start, select the Menu button in the Mozilla Firefox browser and go to Settings.
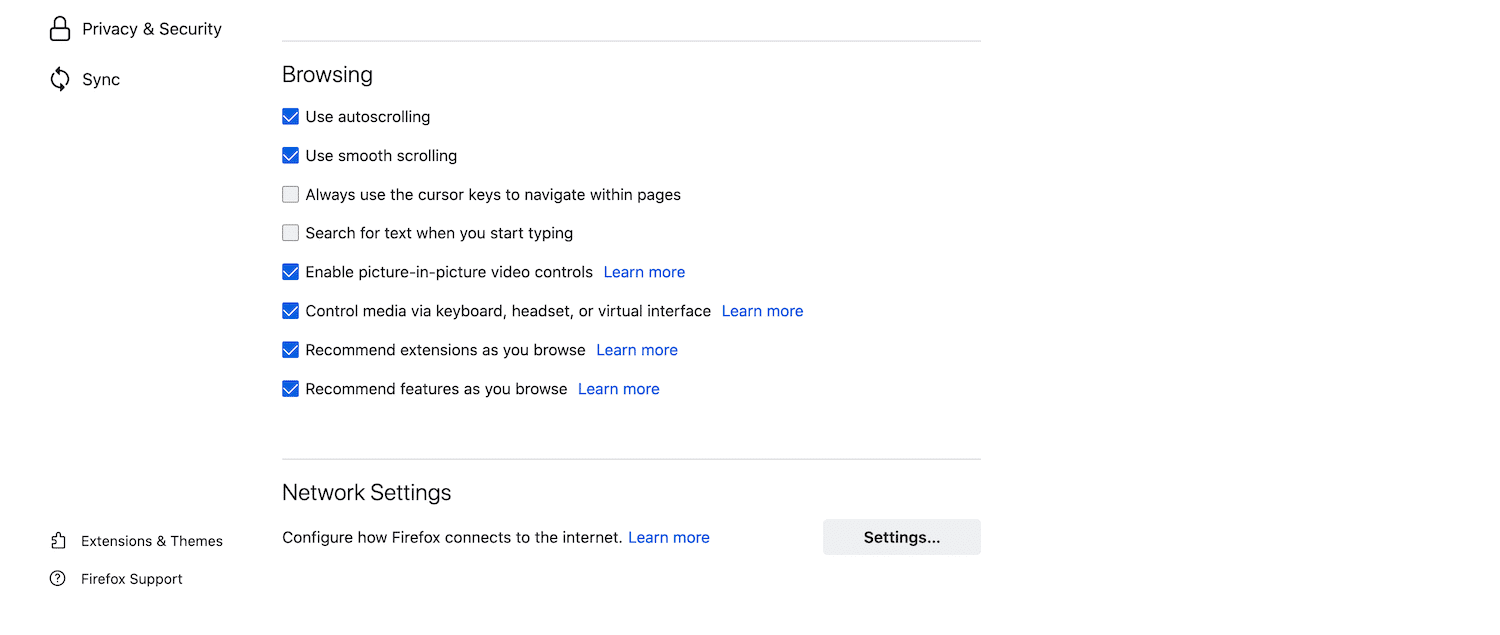
In the subsequent tab, make sure General is selected. Then, scroll to the Network Settings section and click on Settings.
In the popup that appears, scroll to Enable DNS over HTTPS. Then, uncheck the accompanying box.
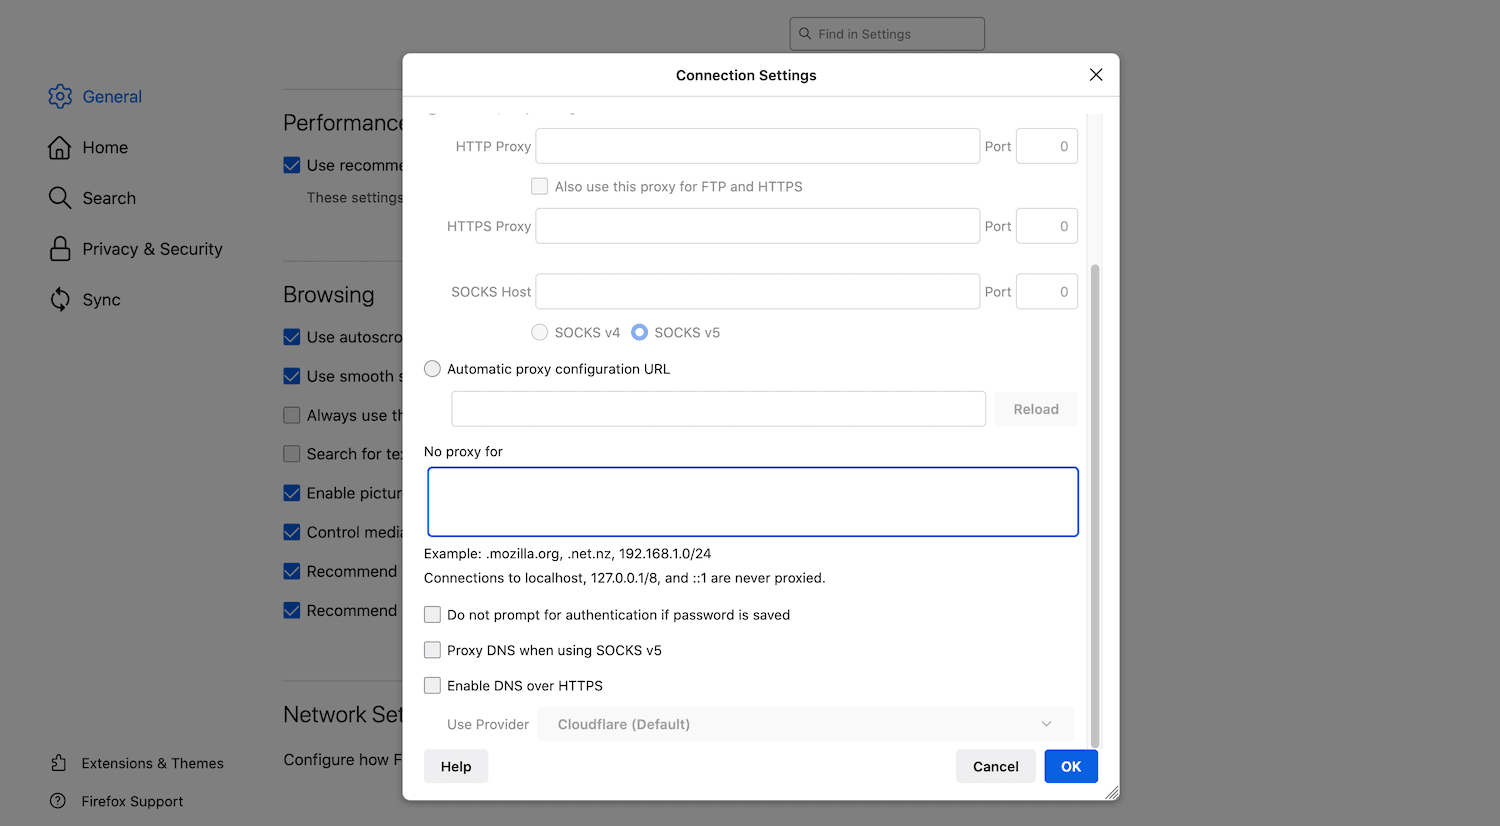
To save your changes, click on OK and then exit this window. From this point onwards, Firefox will honor any custom addresses that you add to your Windows 10 hosts file.
How To Edit Your Windows 10 Hosts File (In 3 Steps)
There are many reasons why you might need to edit this important file. Regardless of whether you want to block advertising networks, verify a new domain, or perform other DNS-related tests, the process will be exactly the same.
Let’s look at how to add custom addresses to the Windows 10 hosts file.
1. Find Your IP Address
Often, you’ll want to change how Windows 10 resolves the IP address of a site that you own. To make this modification, you’ll need to know your website’s IP address.
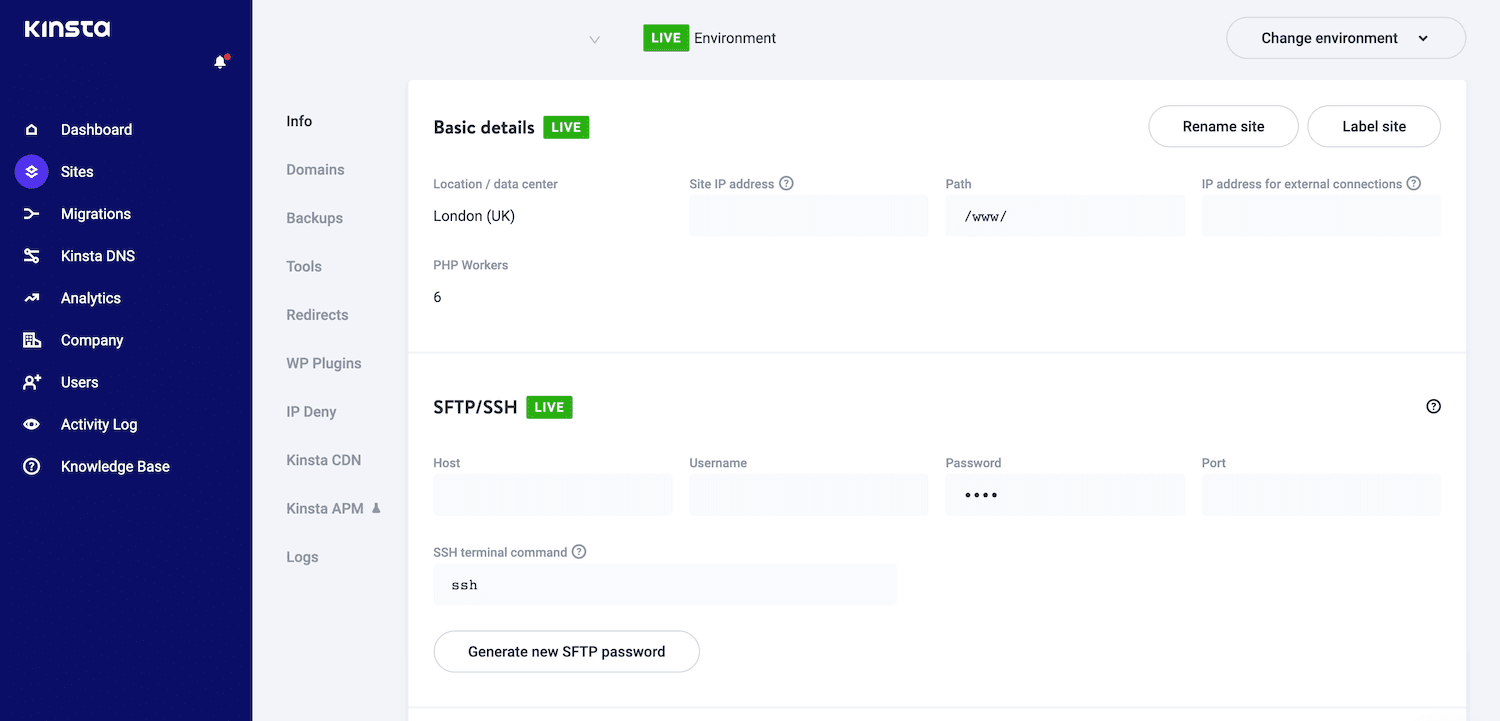
If you’re a Kinsta customer, you can retrieve this information easily using the MyKinsta dashboard.
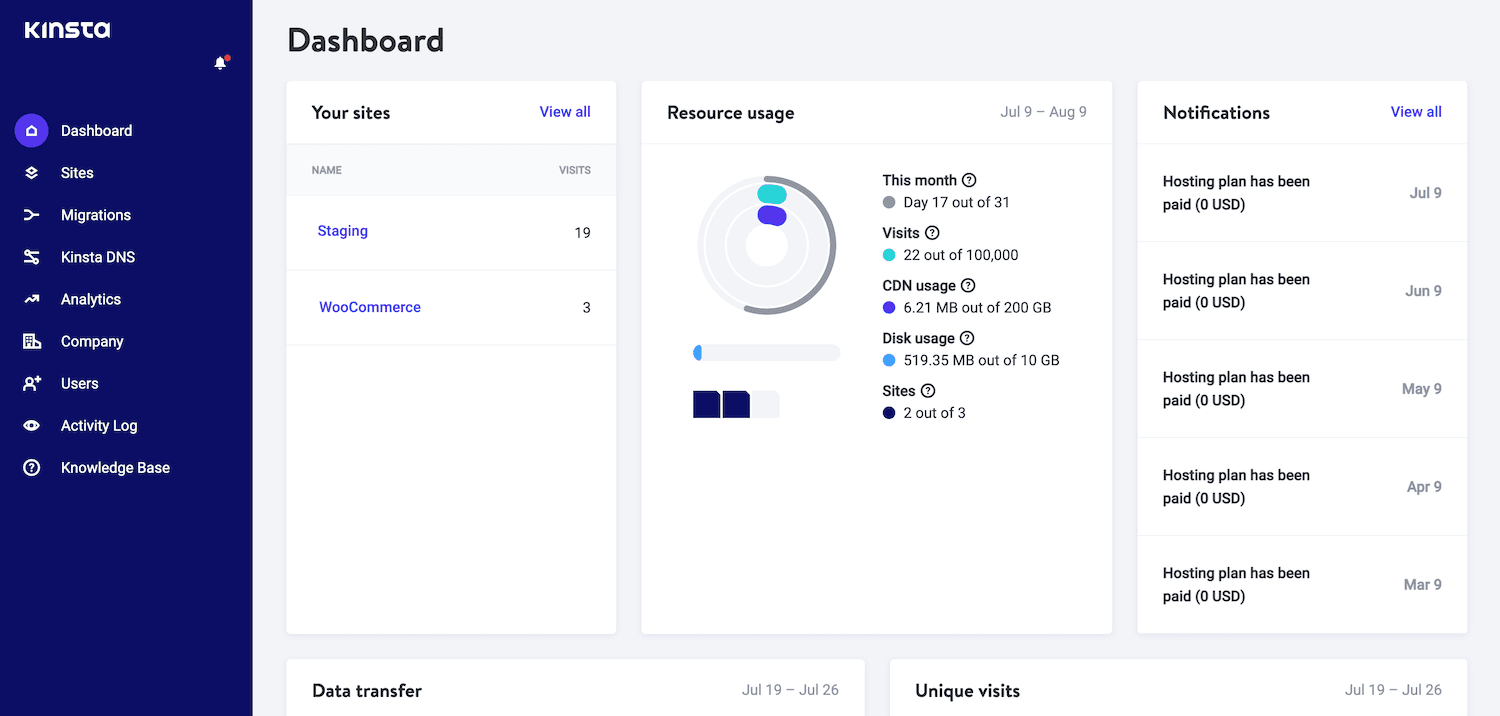
Find the domain that you want to work with and click on it. On the next screen, you’ll find some information about this domain, including your IP address.
Alternatively, you might want to modify how Windows 10 resolves a third-party IP address. You can retrieve any website’s IP address using tracert.
Tracert is typically used as a network diagnostic tool to help resolve network connectivity issues. However, you can also use it to trace the paths a data packet takes from its source to its destination, which will reveal the IP address of the destination website.
To launch tracert, click on the Start icon, then type command prompt into the search bar.
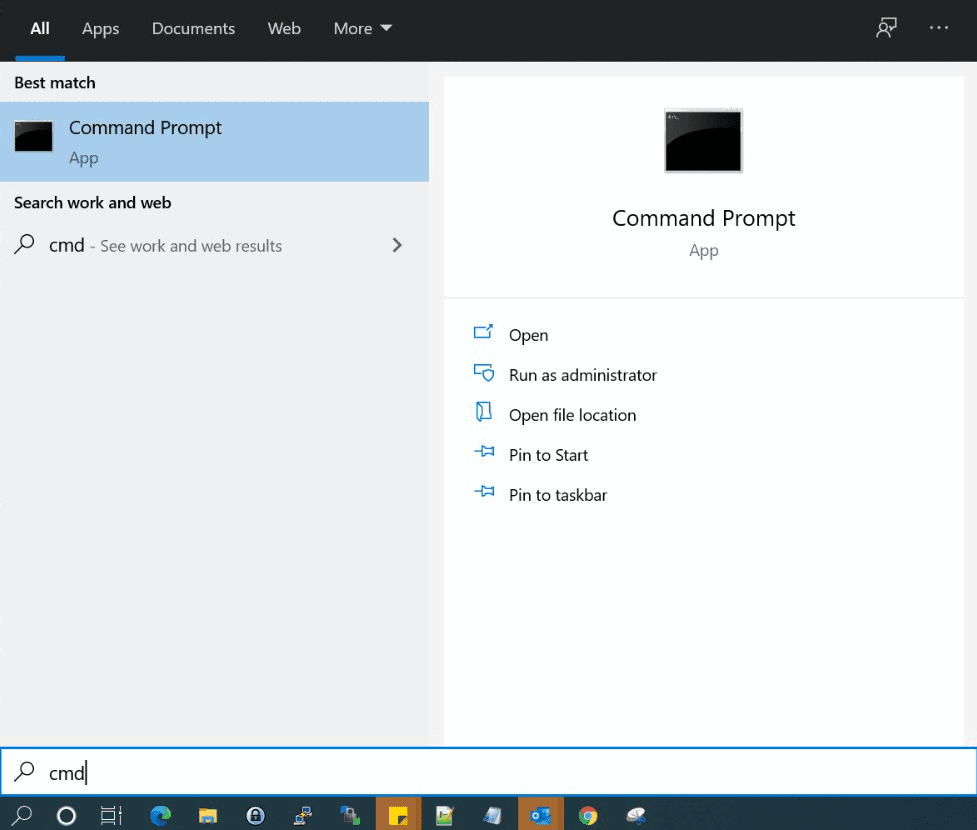
When the command prompt icon appears, give it a click. In the subsequent window, type tracert followed by the URL of the website in question, for example:
tracert website.com
Next, press the Enter key on your keyboard. The command prompt will then display the IP address of website.com in a bracket alongside the URL.
2. Run Notepad as an Administrator
In Windows XP and earlier, editing your hosts file was relatively straightforward. You could simply add an exception to your antivirus, open the hosts file in the Notepad application, and then make your changes.
However, Windows 10 added some security measures to prevent users from accidentally modifying this important file. This makes sense, as editing the hosts file could potentially make your favorite websites inaccessible. In the worst-case scenario, it might even make the Internet unusable on your machine.
In Windows 10, the hosts information is stored in a plain text file in the internal System32 folder. While you should have no problems opening this file, when you try to save your edits you might encounter the following error: “You don’t have permission to save in this location. Contact the administrator to obtain permission”.
If you want to save your changes, you’ll need administrator access. The quickest way to gain this is to use a text application that has elevated privileges. In this post, we’ll be using Notepad.
To start, press the Windows key and type Notepad into the search field.
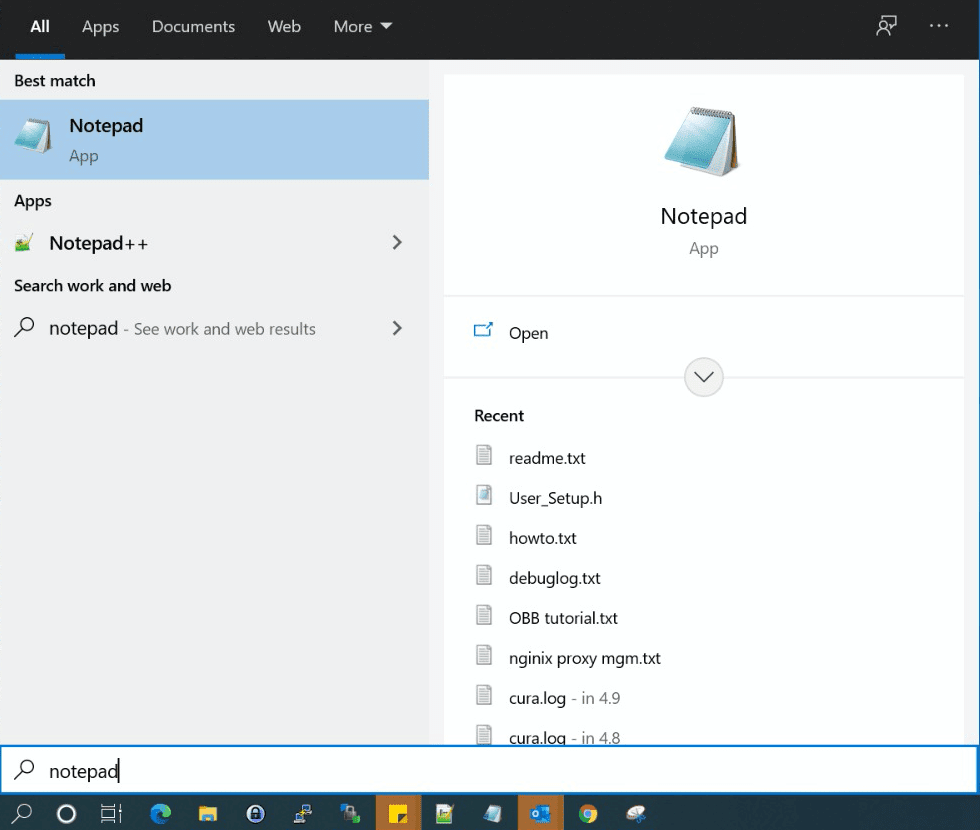
Next, right-click on Notepad and select Run as Administrator. Windows 10 will now ask whether you want to allow this application to make changes to your device. Select Yes.

This launches a privileged instance of the Notepad application. Note that you may be asked to enter an administrative password in order to re-authenticate yourself.
3. Make Your Changes
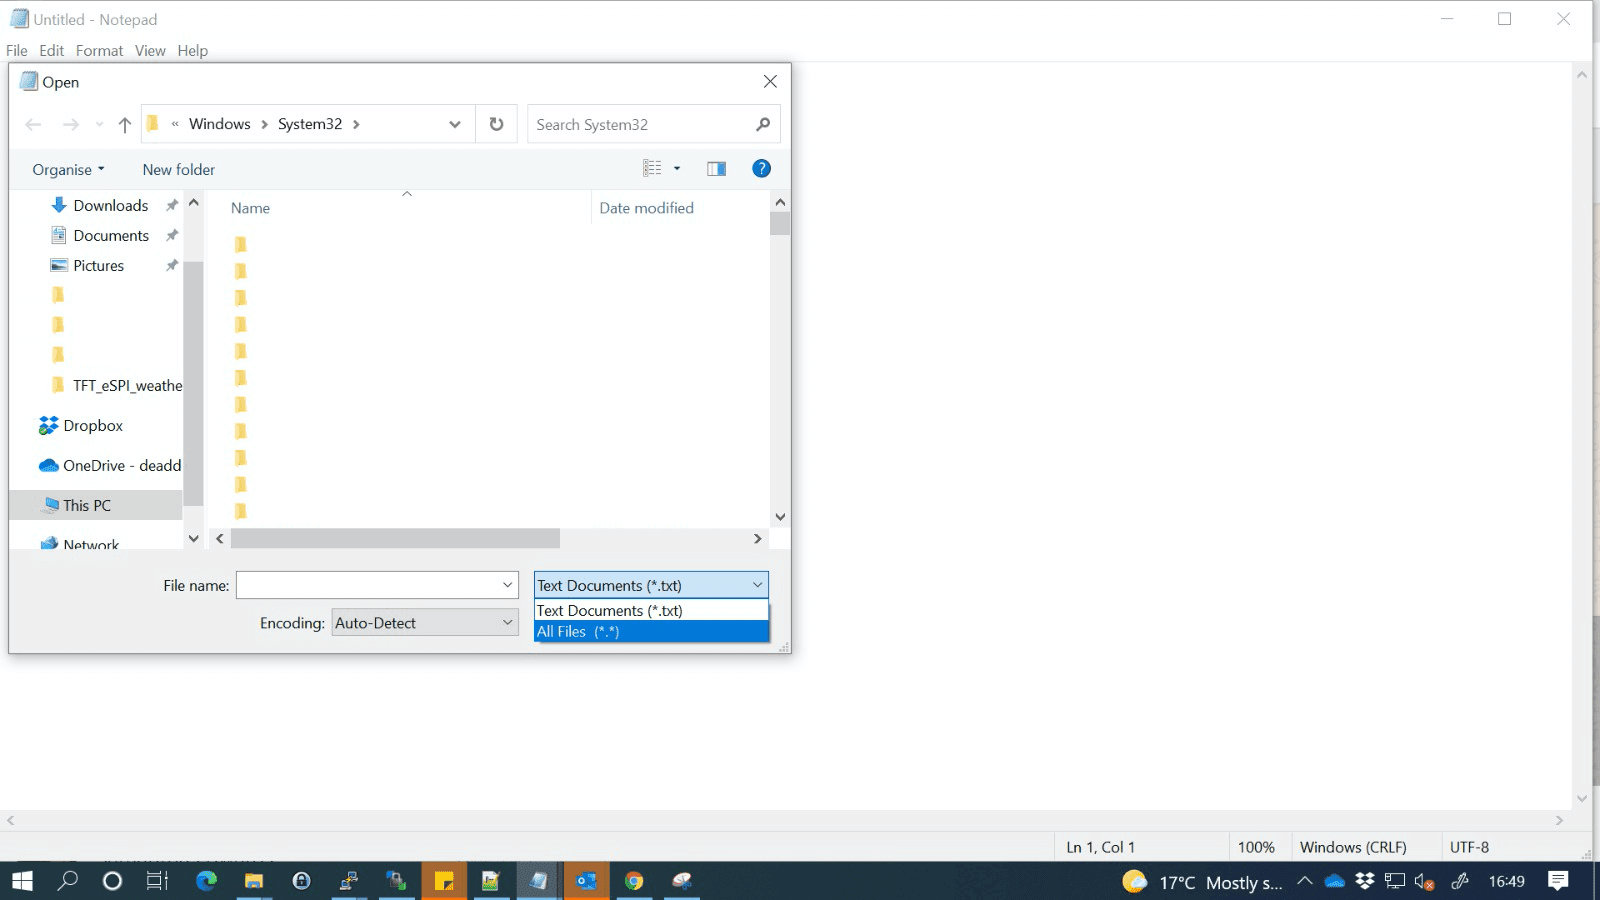
Once you have Notepad open in administrator mode, you’re ready to edit the hosts file. In the Notepad toolbar, select File > Open.
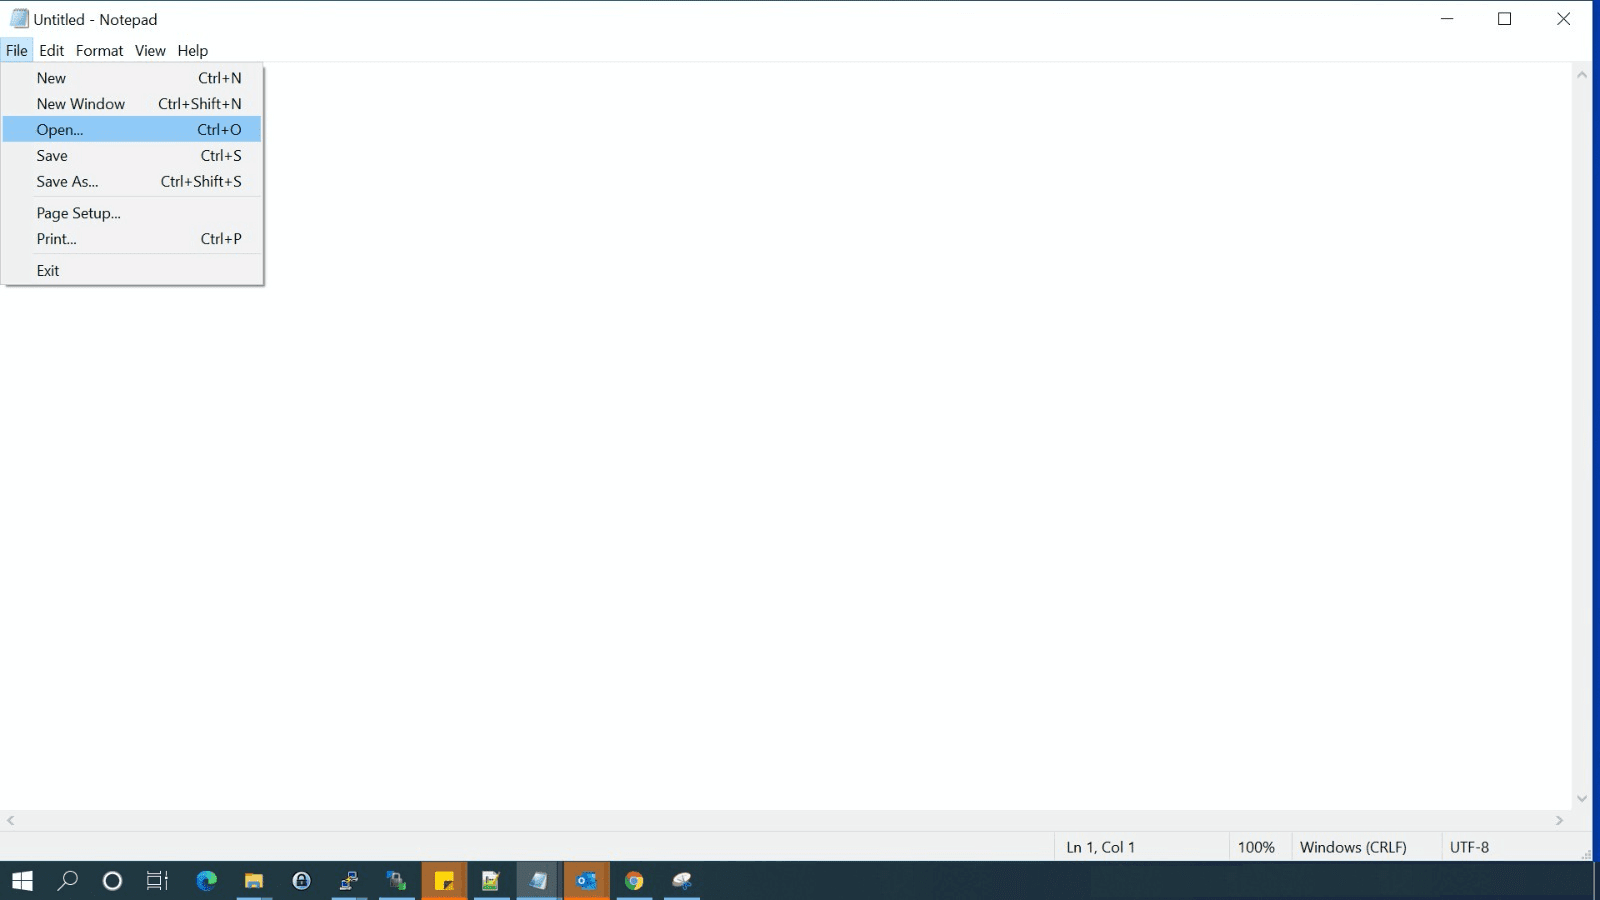
Then, navigate to C:WindowsSystem32driversetchosts. Alternatively, you can copy/paste this file path into the address bar and then press Enter.
If you don’t see the hosts file in your /etc directory, you may need to change the file filter type. In Notepad, open the File name dropdown and choose All Files.
Once you have the hosts file in your sights, you’re ready to edit. If this is your first time opening this file, you’ll see some text describing the file’s purpose and how to make modifications, for example:
# This file contains the mappings of IP addresses to host names. Each

# entry should be kept on an individual line. The IP address should

# be placed in the first column followed by the corresponding host name.

# The IP address and the host name should be separated by at least one

# space.
You can now add your custom IP address and hostname to the end of this file. If you’re adding multiple entries, remember to place each entry on a separate line. Once you’re happy with your changes, you can save and close the hosts file.
To make sure your computer recognizes your edits, it’s a good idea to flush the DNS cache. If you don’t currently have a command prompt window open, click on the Windows button and search for command prompt. In the subsequent window, type the following:
ipconfig /flushdnsTo flush the DNS cache, press the Enter key. Once this process is complete, Windows 10 should be using your new hosts file settings. Alternatively, restarting your computer should have the same effect.
How To Lock Your Hosts File on Windows 10
By default, you cannot edit the hosts file without administrator privileges. However, it isn’t impossible to acquire these privileges, especially for tech-savvy individuals.
If you’re worried about unauthorized edits, you can add an extra layer of security to your hosts file. For example, you might be using the hosts file to prevent staff from accessing social media sites and you’re concerned about them bypassing your restrictions. You might also be worried about hosts file hijack attacks.
In these scenarios, you might want to consider locking your hosts file. While this security precaution isn’t bullet-proof, it will dissuade third parties from tampering with the file.
To lock your hosts file, navigate to C:WindowsSystem32driversetchosts. Then, right-click on the file and select Properties.
In the Properties window, mark the hosts file as Read-only. This will lock the file and prevent anyone from modifying it.
If you want to remove this lock at any point, simply navigate back to the Properties window. You can then remove this Read-only restriction.
How To Reset Your Windows 10 Hosts File
You can always remove individual entries from your hosts file. Simply open the file in Notepad and delete the line in question.
However, sometimes you may need to revert your hosts file to its original state. For example, you might have made multiple adjustments to your file and don’t particularly want to unpick each of these changes manually. You may also be encountering strange redirects, which suggests that your hosts file has become corrupted.
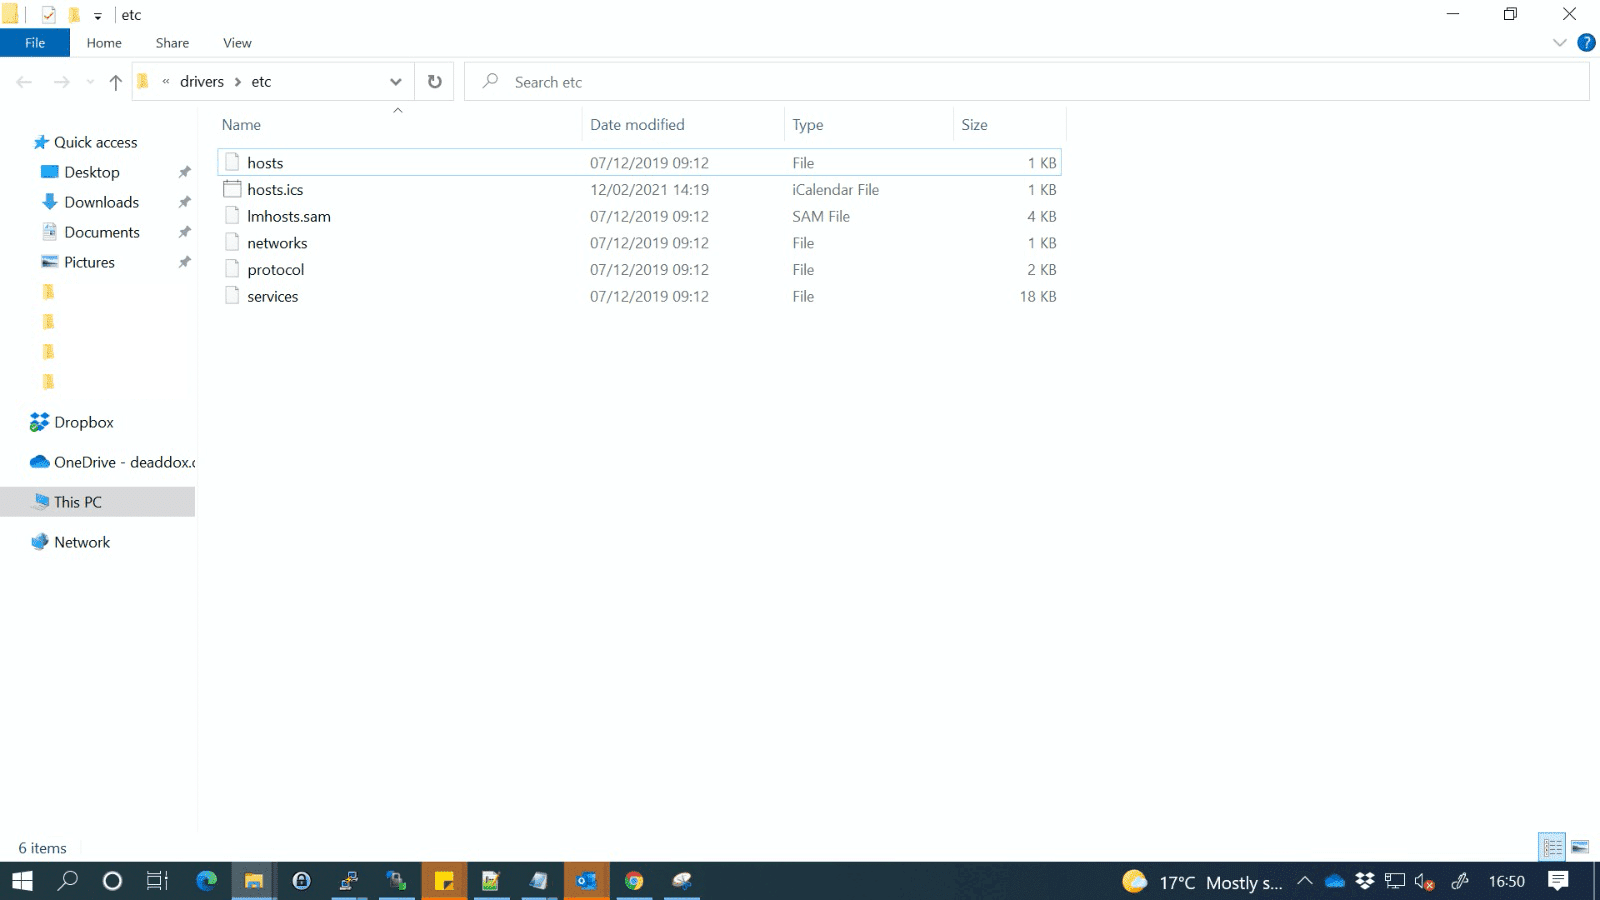
To reset your hosts file back to its original state, open your File Explorer. In the address bar, either type or copy/paste the following:
%systemroot% system32driversetcThen, press the Enter key on your keyboard. At this point, we recommend renaming your original hosts file. This file will then serve as a backup, just in case you encounter any issues with your new hosts file.You may be required to take ownership of this file first, depending on how privileges are configured on your computer.
The next step is creating a new default hosts file. To achieve this, create a text file in the %WinDir%system32driversetc directory, and name this file hosts.
You can now copy/paste the text from Windows’ default hosts file, which is provided by Microsoft:
# Copyright (c) 1993-2009 Microsoft Corp.

#

# This is a sample HOSTS file used by Microsoft TCP/IP for Windows.

#

# This file contains the mappings of IP addresses to host names. Each

# entry should be kept on an individual line. The IP address should

# be placed in the first column followed by the corresponding host name.

# The IP address and the host name should be separated by at least one

# space.

#

# Additionally, comments (such as these) may be inserted on individual

# lines or following the machine name denoted by a '#' symbol.

#

# For example:

#

# 102.54.94.97 rhino.acme.com # source server

# 38.25.63.10 x.acme.com # x client host

# localhost name resolution is handled within DNS itself.

# 127.0.0.1 localhost

# ::1 localhost
Save this file. As always, you may need to reset your computer or flush your DNS cache in order for these changes to take effect.
Summary
Making changes to your DNS records can feel like a stressful endeavor. However, as we discussed in this article, you can safely test your local hosts file without putting your live records at risk. In Windows 10, you can do this by finding your IP address, running Notepad as an administrator, then making your changes.
If you enjoyed this tutorial, then you’ll love our support. All of our hosting plans include 24/7 support from our world-class WordPress developers and engineers. We can provide the help you need to succeed, regardless of whether it’s 2:00 a.m. or 2:00 p.m.