Repetitive and recurring tasks are the enemy of efficiency, yet they’re part of your daily life as a web professional working with and managing applications. Think of:
- Sending reports via email on the first Monday of each month at 8:15 am.
- Performing monitoring at 5:00 am and 5:00 pm every weekday.
- Creating a backup every 30 minutes.
- Running your multi-task script on the first day of every month.
You know you don’t need to wake up at 5 am every day of the week (unless you want!) to run that task.
You can take care of running these background processes at the time and frequency you need thanks to Cron jobs, which allow you to schedule processes at specific intervals for your applications and enable you to automate repetitive tasks.
Let’s see how you can harness them at Kinsta!
Introducing Cron Jobs
Before this release, Kinsta customers who needed to set up a background worker or Cron job for their application had to compromise on the fact that the process would always run. But that’s no longer the case!
Starting today, you can add a Cron job when you add an application or at any time within Processes. There is no limit to the number of Cron job processes you can add; however, each process requires at least one pod to run.
The process to add a new Cron job is pretty simple:
- Log into MyKinsta
- Navigate to Applications and then click the application you’d like to add a cron job to
- Click Processes on the left-hand sidebar
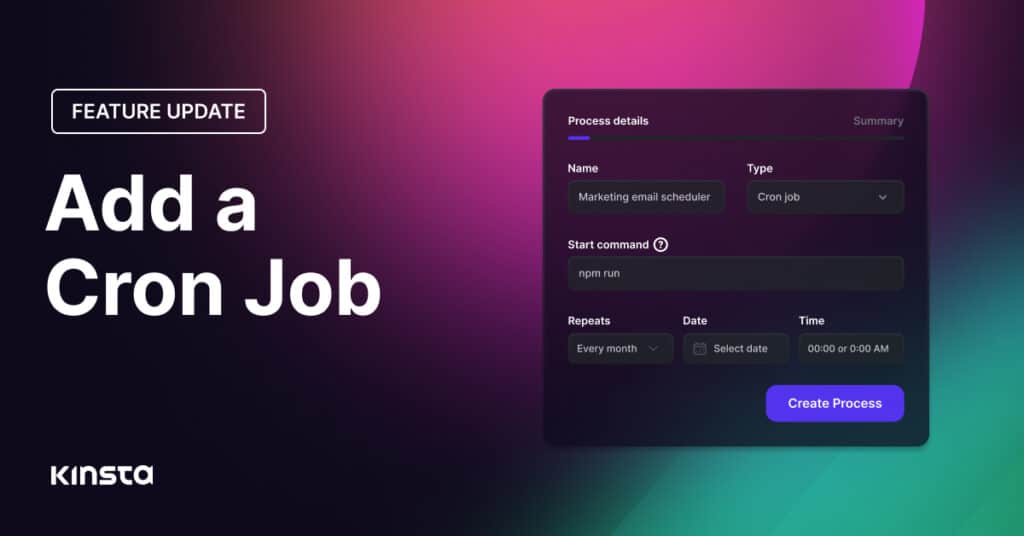
- Click the Create process button on the top-right corner and complete the fields as follows:
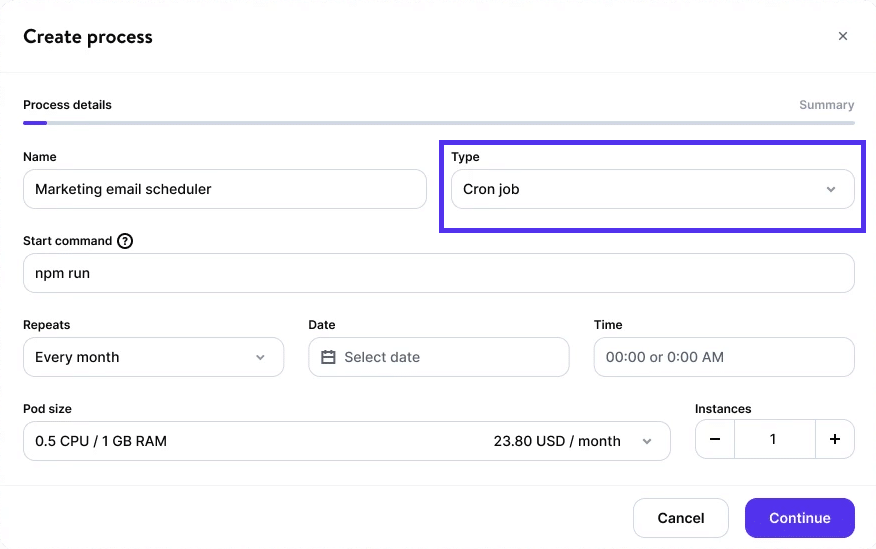
- Name: the process name, for example, Marketing email scheduler.
- Type: choose Cron job.
- Start command: the command required to start the process, for example, npm run process.
- Repeats: choose how often you want the process to run from every minute, hour, day, week, month, or year. When you choose how often you want the process to occur, you can then choose a specific minute, time, day, date, or month, depending on your first selection.
- Pod size: this determines the CPU and RAM dedicated to the process.
- Instances: the number of instances required, up to a maximum of 50. Each instance represents one pod, and the instances all use the same pod size; you cannot define a different pod size for each instance.
You can change the details of your process, including the size of your pod (vertical scaling) and the number of pods that run simultaneously (horizontal scaling). Any changes you make, except for the name, automatically trigger the rollout process for the application.
Would you like to give this feature a try? You can do that for free!