
Digital images are an inherent part of the web, and it’s hard to create any content without some media. The humble still image is a terrific way to offer extra context to your writing.
However, an image can be enormous in file size without optimization. Lossy vs lossless compression is a common consideration because each can reduce the size of an image, although there are quality trade-offs to consider too.
You will almost always need to apply some compression to an image. This keeps the quality at a level you specify as acceptable while keeping file sizes down. Choosing the right compression level will depend on your end goals and requirements.
For this post, we will look at lossy vs lossless compression. Throughout, we’ll talk about the process an image takes to get “into shape,” what compression is, and many other aspects of optimizing your images.
Check Out Our Video Guide to Lossy vs Lossless Compression
Differences Between Lossy vs Lossless
When it comes to any digital image compressions, there are several different formats to choose from. Sometimes these will have other names depending on many factors. However, at a core level, you’ll find two types:
- Lossy compression: The aim here is to provide the smallest file size possible for an image. As such, image quality is often low down the list of priorities.
- Lossless compression: You’ll still find a substantial reduction in file size with this compression format, but the image won’t suffer from artifacts and other issues.
In most cases, your decision about which format to use will come down to your end goal: Do you want tiny files, or is your focus on preserving quality?
Lossy compression will remove data it deems unnecessary from the image permanently. It uses many different techniques to achieve this, resulting in much tinier file sizes.
Lossless compression also removes data, but it can restore the original if needed. The goal is to keep quality high, yet reduce the file size.
There are a few ways to achieve this, but the result is often the same. To find out the right option for your needs, let’s first take a step back and review the basics of images and compression in general.
Elements of a Digital Image
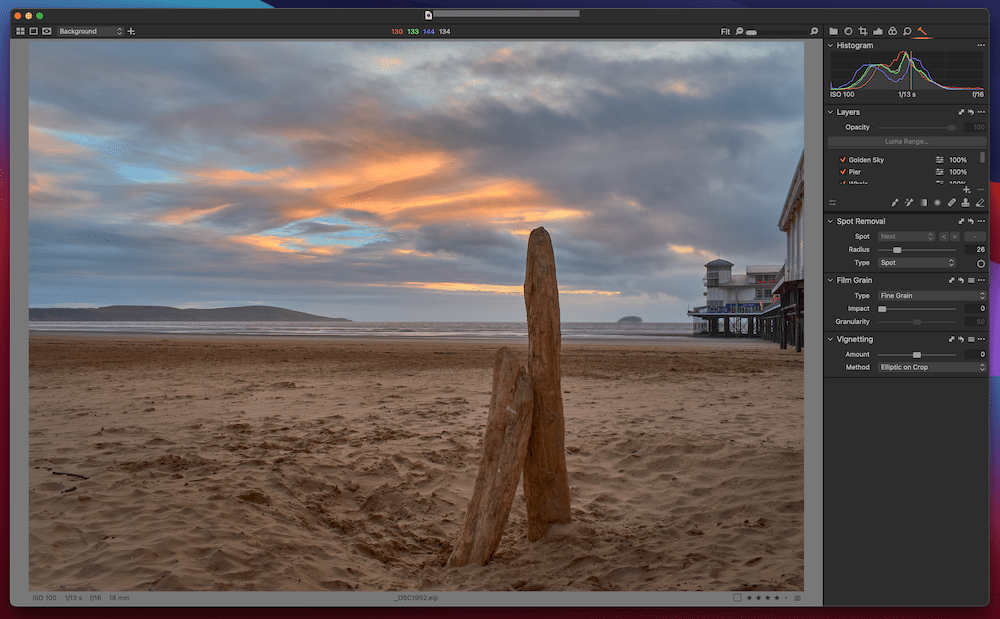
Like software and web development, there’s often a “stack” to take an image from the camera to the web.
An image starts as “raw” data (hence the name RAW). This is akin to an app’s code: The snippets, lines, and values translate into backgrounds with color, image placeholders, dynamic elements, and more.
For an image, the RAW file presents a slightly different image representation based on the camera manufacturer, editing software, color space algorithm, and more. From there, you edit the image and export it as one of several file formats (more on these later):
There are a few different elements that make up a standard digital image:
- File type: Different types will provide qualities that may or may not suit your final image. The key is to choose the most suitable file type for the application.
- Resolution: You’ll often see this expressed as megapixels (MP), but you’ll also use pixels per inch (PPI) or dots per inch (DPI). Higher resolutions offer greater quality, but they also increase the initial file size
- Bit depth: This aspect determines the color information in an image. A low bit depth will render only a few colors, while a high bit depth could potentially render millions of colors at once. Generally, higher is better.
- Dimensions: This is the physical space an image takes up. For example, 1,000 pixels x 500 pixels could define the total size of an image.
- Color space: This is an algorithm that determines how colors display. Each color space is set up differently, and it often comes down to the photographer’s preference.
These elements combine to deliver a final image of varying quality. For example, a large, high-resolution, high-bit-depth JPEG photograph will offer supreme quality and sharpness:

In contrast, even an image with large dimensions and the ability to display a lot of colors can look poor at a low resolution:

This balance is how you develop the core image before applying compression. However, the format you use for the image has a big part in the final quality.
How Web Image Optimization Works
Because image compression is the same in a general sense under the hood, you can apply standard rules to the way you optimize images for the web.
We cover a lot of these concepts elsewhere on the Kinsta blog, but it’s worth giving a quick summary for reference:
- Use 72 PPI resolution, as this is the standard for the web. You can use a higher PPI/DPI for archival reasons, but we assume you’re publishing to the web.
- Set the “long edge” of the image to 2048px, as this is optimal for many different applications.
- Use an 8-bit color depth if you get the option.
- Run an image through a compression and optimization tool before you publish.
It’s a simple format that can give you consistent results, although the compression and optimization is something we’ll expand on over the rest of this article.
To that end, let’s look at the benefits and drawbacks of lossy vs lossless compression.
How Image Compression Can Help Your Web Images
In general terms, “compression” squeezes the minimum and maximum closer together. For example, compression raises the lowest volume in music and reduces the highest. This makes the average level louder to the ear.
For images, compression is more of a reductive process. This means there’s a greater emphasis on taking away data from your image to reduce the file size, while keeping the quality as high as possible.
There are lots of different proprietary algorithms to help reduce image file sizes. In many cases, these are proprietary to a specific company. You’ll find lots of “lossy” and “lossless” compression standards, each with unique descriptors:
All that said, there are plenty of benefits to applying image compression that aren’t exclusive to a particular format:
- You can keep file sizes low, which improves your site’s performance.
- By extension, your site’s server will have less work to do, impacting performance.
- Small file sizes help to cut down on server emissions. As such, you help to contribute to a sustainable and ethical future.
- You’re able to display near-perfect and comparable quality depending on the algorithm and compression quality you choose.
Much like creating a shareable image, playing with various compression values, using a specific company, and choosing the correct algorithm are vital in finding results that work for you.
Pros and Cons of Lossy Compression
Lossy compression reduces the image’s file size, almost to the exclusion of all other aspects. The way the algorithm works is to remove data permanently. This can be as destructive as it sounds.
While we won’t get into the nuts and bolts too much, know that some of the data lossy compression removes is visible in the image. The idea is to offer the best representation of the original, high-quality image at a lighter weight — and this means some data won’t make the cut.
In general, there are a couple of benefits in using lossy compression:
- The file sizes will be small — in some cases, under 10 kilobytes (KB).
- The loss of quality will be acceptable in many cases, despite artifacts.
This brings us to the negatives for using lossy compression — that the image quality will reduce with any amount of compression:
You’ll find that color banding — where color shades don’t render in the right way — and a loss of edge clarity will be visible in some cases. Images with fewer colors will show less of this, but the reduction in clarity will still be present.
Also, image degradation is a permanent feature of the compression process. This means there’s no way to reverse the effects at a later date.
Despite the drawbacks, lossy compression is excellent for the web and your site’s performance. The tiny file sizes don’t always result in grainy images, although you can (of course) take things to extremes:

However, lossy isn’t the only option. Lossless compression is an alternative for the quality-conscious site owner.
Pros and Cons of Lossless Compression
Lossless compression does what it says on the label: It compresses an image’s file size as much as possible without affecting the visible quality. It does this by removing image metadata, which can take up unnecessary space:
The lossless compression algorithm also looks for repeating pixel sequences, then encodes a shortcut to display them. For example, take “Command Line Interface.” You will often define its acronym once, then use “CLI” (or your chosen acronym) to reference it at lightning speed
Lossless compression works in the same way in that it’s less destructive. While removing the metadata won’t be reversible, some of the compression will be, making it a flexible algorithm for many uses.
The pros of using lossless compression revolve around retaining quality:
- Lossless compression preserves the most quality in an image compared to all other algorithms.
- Lossless is fantastic for archival purposes. For example, a photographer may balance storage resources with an image that preserves the most data.
- Lossless is the preferred compression algorithm for visual arts: photography, graphic design, digital art, and more. Combining a lossless algorithm with the proper depth and resolution can achieve almost a “one-to-one” copy.
However, there is something to note about how well lossless compression serves specific niches: The range of applications is small. This reduces its overall availability.
Here are some other cons of lossless compression to consider:
- If a website uses many images, lossless compression might not be optimal to display them. This is because you’ll want to value smaller file sizes in these types of situations in most cases.
- Although compression reduces file sizes, lossless algorithms don’t alter image data as much as lossy. Because of this, you may only see marginal reductions in size rather than extreme slimming results.
Next, we’ll look at the fastest (and potentially best) way to do so.
How to Choose Between Lossy vs Lossless
At this point, you understand the difference between lossy vs lossless compression. However, you still may not know which is the best algorithm to use on your site.
There are two situations to consider:
- For most use cases on the web, lossy compression is acceptable to use.
- If you want to display photography or photographed art, lossless compression will serve you better.
These considerations rely on using one of the standard web image formats, such as JPEG, PNG, or GIF. However, your compression needs may differ with more modern formats like HEIC and WebP.
We’d go as far as to say that unless you display photography on your site, lossy compression should be your default choice. WordPress compresses images by default, which goes far to illustrate that lossy compression is suitable for almost every application.
Using an Online Compression Service to Optimize Your Images
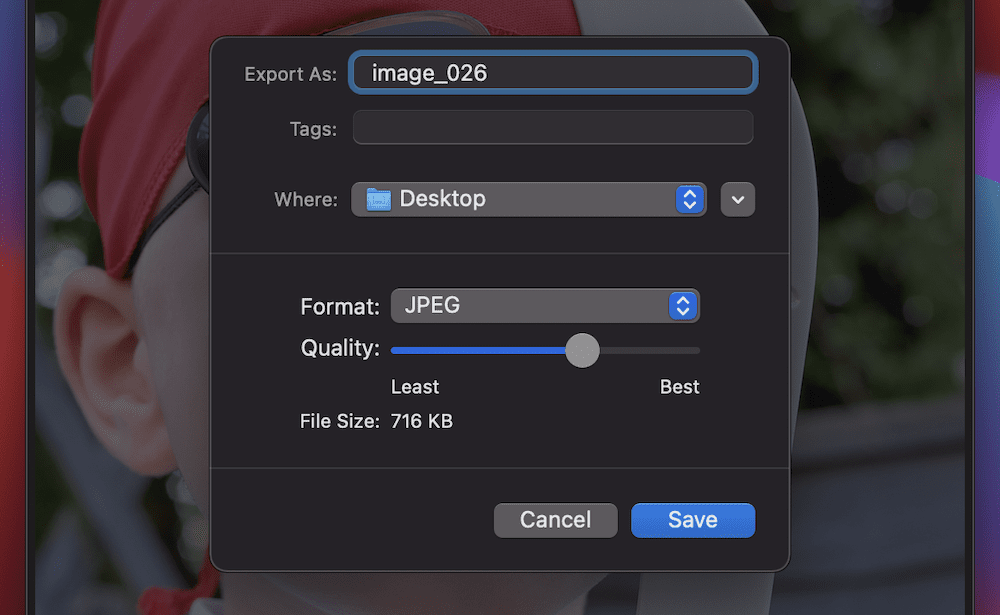
There are many ways you’ll compress your images before you show them on your site. For example, you might choose to apply compression at the editing stage. This could be a by-product of converting from RAW formats anyway.
Some premium hosts like Kinsta even offer built-in services that can help you optimize your image files automatically. Kinsta’s Image Optimization feature, which is free for all customers, creates WebP versions of your images, then delivers the smaller one to your visitors using Kinsta’s blazing-fast CDN. You can choose between lossy and lossless compression, and you can also switch the feature on or off at will.
Aside from built-in tools, though, a popular choice is one of many online services. Each one will offer a selection of algorithms and an exemplary user interface (UI). What’s more, most have some free service, at the least to try out the app before you commit.
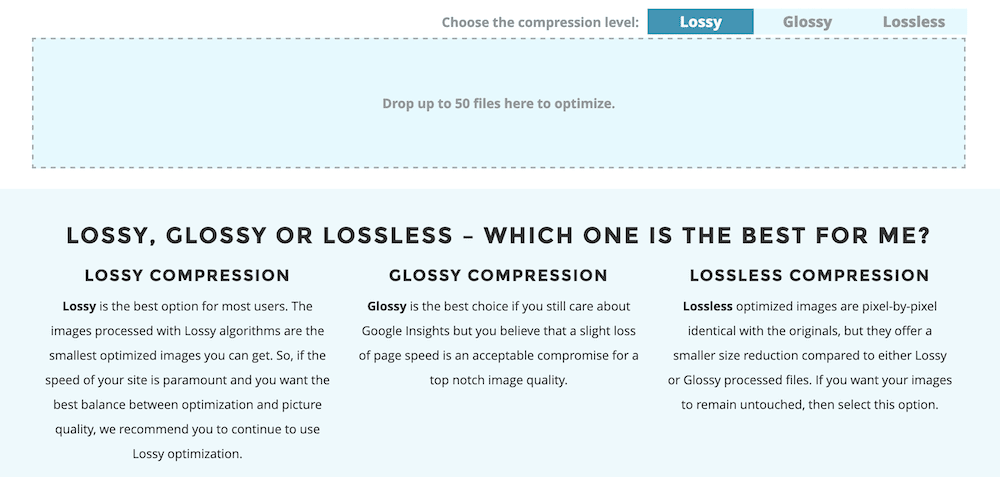
We cover a few options in our article on image optimization, although these are WordPress-specific plugins that connect to an application programming interface (API). The good news is that lots of these plugins provide an online interface too. For example, consider ShortPixel:
Here, you’ll drag images onto the uploader, then wait for the app to compress and process them. However, you’ll want to choose the algorithm first, as the process will begin straight away.
The choice is simple: Two forms of lossy compression (“Lossy” and “Glossy”), and a lossless option. ShortPixel’s interface does a good job of explaining the difference between each algorithm, and you can download the images within seconds.
Although both can cope with your demands, the Imagify interface looks slicker and more professional than ShortPixel’s. There are also three “compression levels” here — Normal, Aggressive, and Ultra:
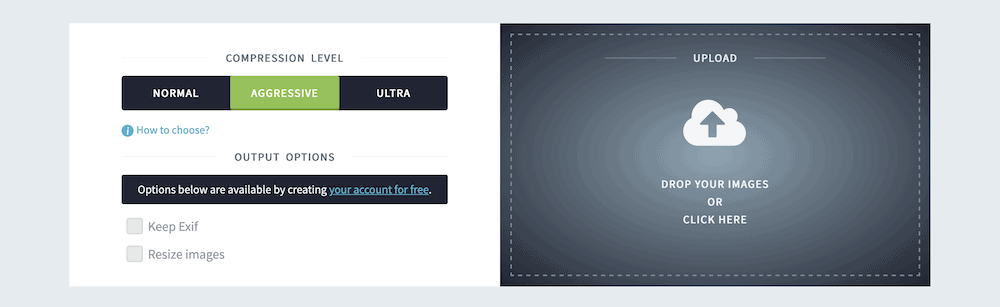
The slight difference here is that Imagify starts with lossless compression, and works its way up to a lossy algorithm with heavy artifacts. However, there are a couple of other options you won’t find in other solutions.
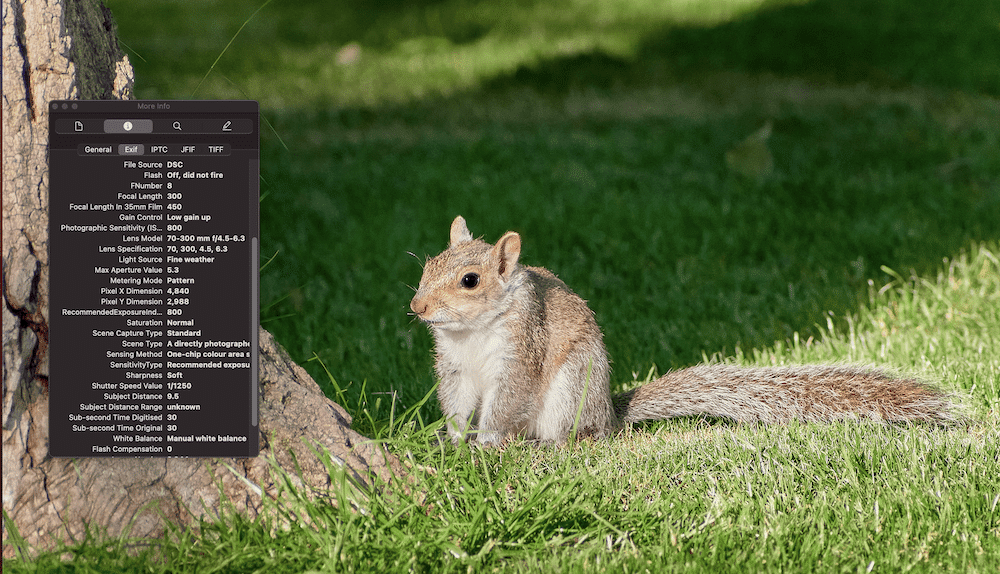
For starters, you can keep the EXIF data intact for your image, and even resize them after conversion. This is invaluable at times, especially if you want to apply a level of compression that may otherwise remove EXIF data or limit how you resize an image.
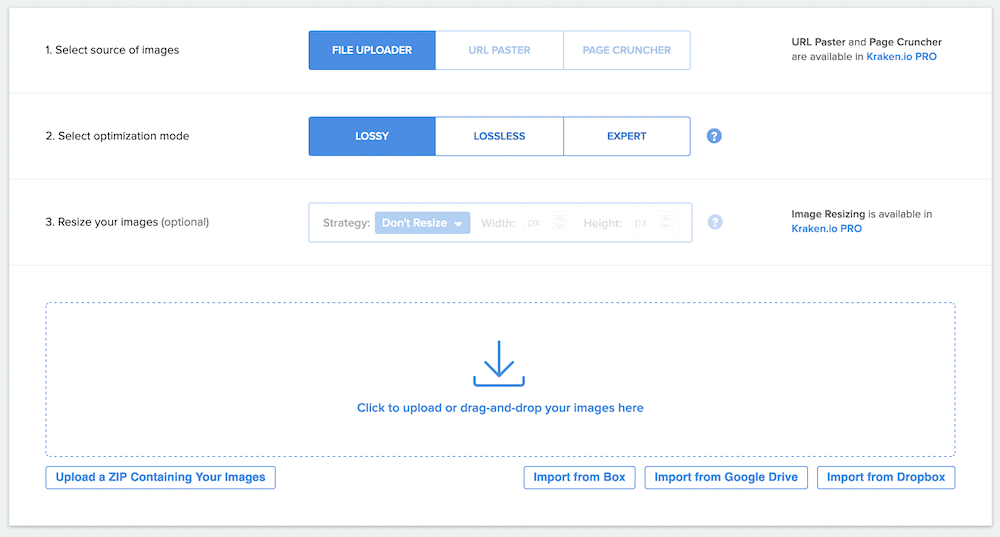
Much like its mythical namesake, Kraken can wrangle your images and apply various types of compression. Most users will opt for either the Lossy or Lossless types.
However, there is also an Expert mode:
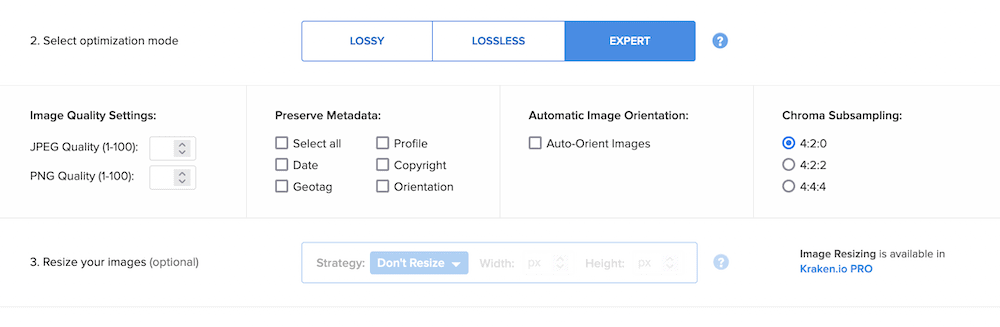
This lets you adjust the compression to your own needs, among other options. For example, you can adjust both JPEG and PNG compression levels, choose to preserve metadata from the image, and even work with chroma subsampling to change the colors further.
Summary
Images can seem like a simple aspect of your site: You take a file, upload it to WordPress, then add an Image Block to display it.
However, there’s a lot more that goes into the process of preparing an image for the web than you may realize. The compression format you choose can impact file size, image quality, and more.
This post has looked at lossy vs lossless compression and summed up which one you should choose. Despite walking a tightrope of quality vs size, lossy compression is perfect for most use cases on the web. Photographers or those concerned about tampering with the quality of images will want to use lossless compression, although there are fewer benefits concerning file size.
What side do you stand on in the battle between lossy vs lossless compression? Let us know your thoughts in the comments section below!


