Looking for the correct Outlook SMTP settings?
With an Outlook SMTP server, you can configure your preferred email client to send emails using your Outlook account. Or, if you have a WordPress site, you can also configure WordPress to send its emails using your Outlook account to improve the reliability of your site’s emails.
In this post, we’re going to cover everything you need to know about the Outlook SMTP settings. We’ll start by sharing the actual SMTP settings themselves, along with the POP3 and IMAP settings (to receive emails in addition to sending).
For WordPress users, we’ll also explain how to configure WordPress to send emails using Microsoft Outlook.
Check Out Our Video Guide to Setting Up Outlook SMTP Settings To Send Emails
How Do I Configure My Outlook SMTP Settings?
- SMTP Server: smtp.office365.com
- Port: 587
- Requires SSL: Yes
- Requires TLS: Yes (if available)
- Authentication: Yes (choose Login if multiple options available)
- Username: Your full Outlook email address (e.g. [email protected])
- Password: Your Outlook password (the same one you use to log in to the Outlook website)
- Sending Limits: 300 emails a day or 100 recipients a day.
These are the details that you’ll need to configure your email client or WordPress website to use the Outlook SMTP server.
Pro tip: learn more about SMTP ports in our blog post.
Outlook POP3 Settings
While the Outlook SMTP server lets you send emails using your Outlook account, POP3 and IMAP let you import emails that other people have sent you. We’ll cover IMAP in the next section.
If you want to use an email client, it’s also important to add either the POP3 or IMAP credentials to receive emails from Outlook in your email client. In general, IMAP is better than POP3 if you want to access emails from multiple devices (e.g. desktop and mobile) because it allows two-way syncing. However, POP3 can be a better choice if you’re only using one device.
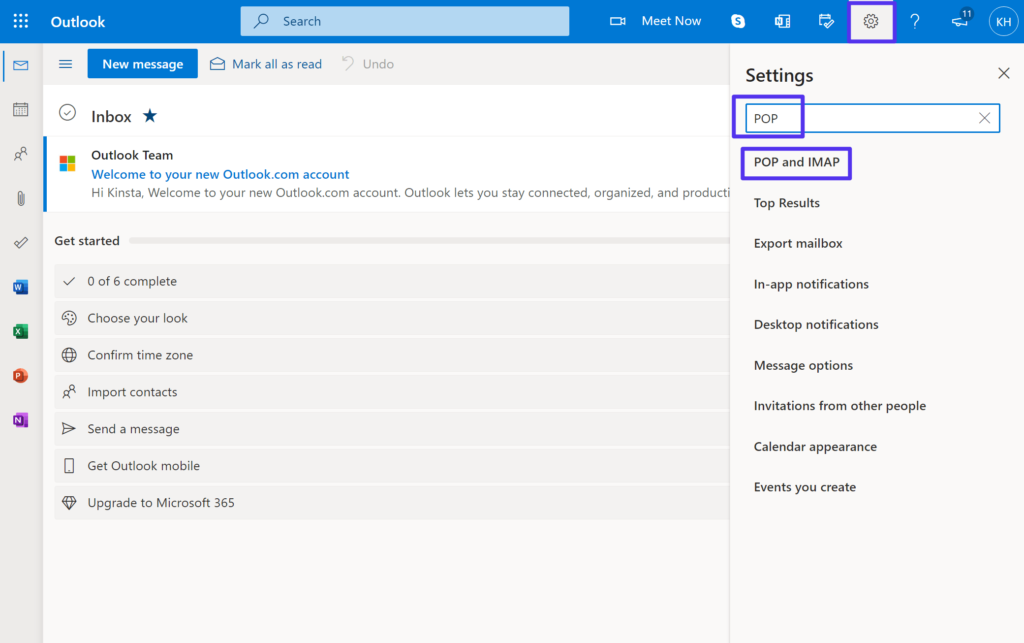
You should note that Outlook disables POP3 by default. To enable it, click on the gear icon in the top-right corner of the Outlook interface and search for “pop.” Then, click the result for POP and IMAP (or you can click this link to go directly there).
Under the POP options area, select Yes under the Let devices and apps use POP option. You can then choose whether or not to let apps and devices delete emails from Outlook or preserve them permanently.
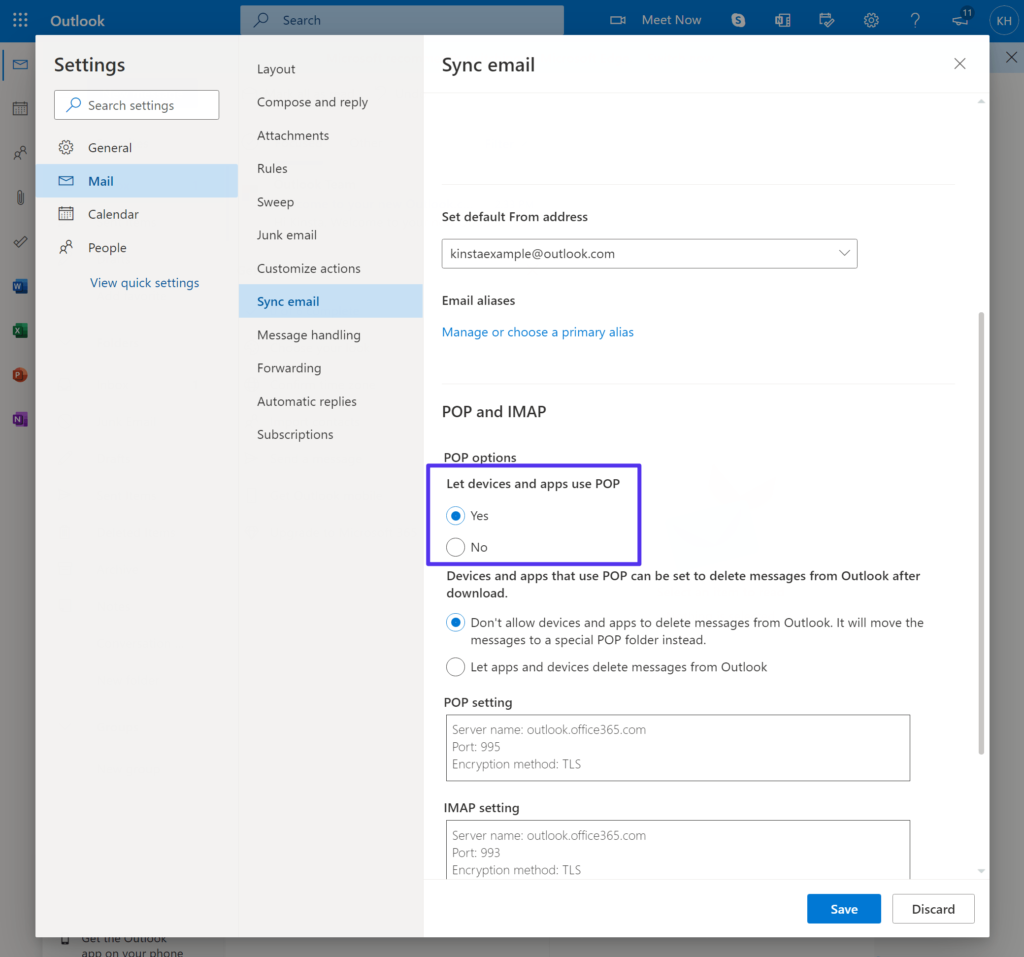
Once you save the changes to enable POP3 access, you can use these settings:
- Server: outlook.office365.com
- Port: 995
- Encryption method: TLS
Outlook IMAP Settings
As we mentioned above, IMAP is usually a better option if you want to access emails from multiple devices. Outlook enables IMAP access by default, so all you need to do is use these settings:
- Server: outlook.office365.com
- Port: 993
- Encryption method: TLS
How to Configure Outlook SMTP for WordPress Sites
Suppose you want to improve the reliability of the emails that your WordPress site sends. In that case, you can also configure your WordPress site to send its emails using the Outlook SMTP server to take advantage of the generous sending limits (300 emails per day to up to 100 recipients).
The setup process mainly involves plugging the Outlook SMTP server settings into a WordPress SMTP plugin (shown below). However, if you encounter any issues, there are also many other free SMTP servers to choose from, including the free Gmail SMTP server.
1. Install Post SMTP Plugin and Set “From” Details
To configure WordPress to use an SMTP service, you need a WordPress SMTP plugin.
There are several popular options, but we recommend the Post SMTP plugin because it’s 100% free and includes features to debug any potential issues you might have with your site’s emails.
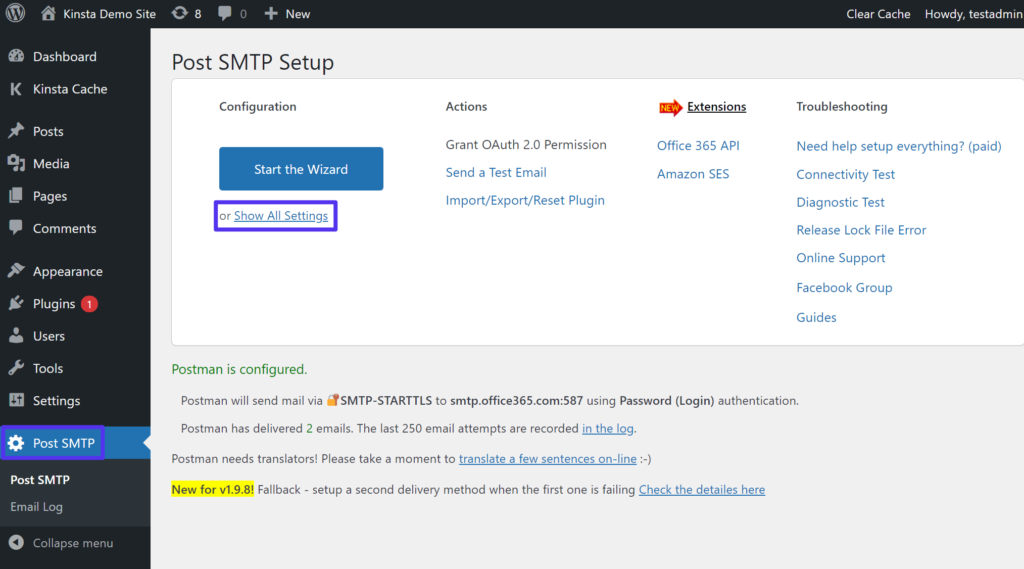
To get started, install and activate the free plugin from WordPress.org. Then, go to the new Post SMTP area in your WordPress dashboard and click the option to Show All Settings:
Then, go to the Message tab and enter your “From” email address and name. The email address should be your Outlook account email, while the name can be whatever you want your recipients to see:
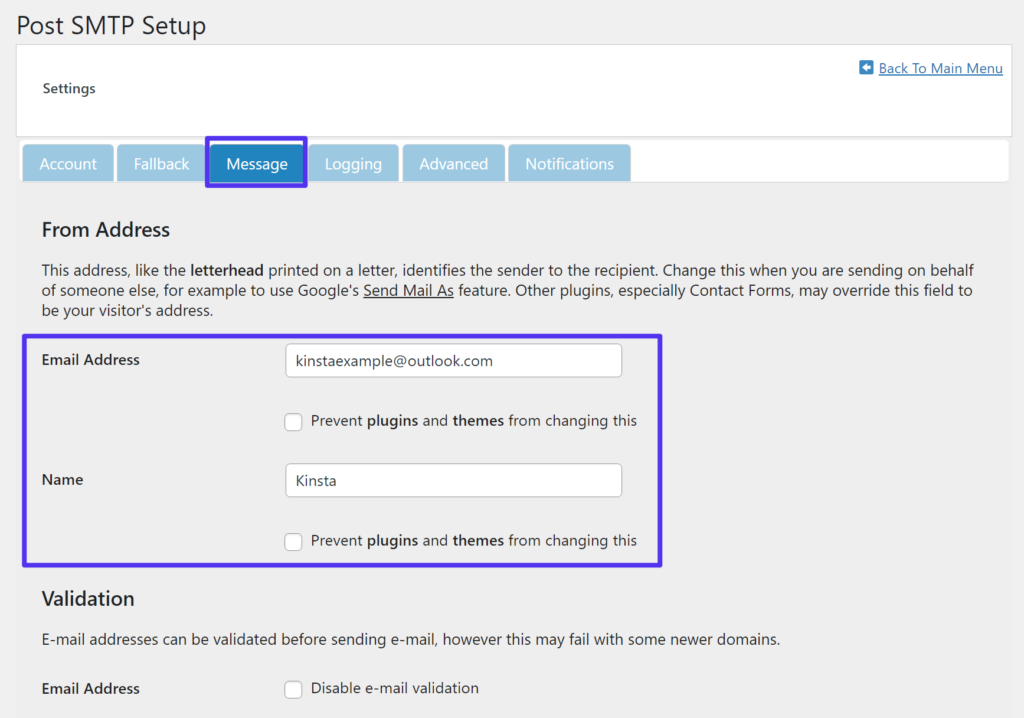
Make sure to save your changes when done.
2. Add Outlook SMTP Server to Plugin’s Settings
Next, open the full settings again by clicking the Show All Settings link.
In the Account tab, choose SMTP from the Type dropdown and make sure the Mailer Type dropdown shows PostSMTP.
You should now see an expanded set of options below the Outlook SMTP server details field. Enter them as follows:
- Outgoing Mail Server Hostname: smtp.office365.com
- Outgoing Mail Server Port: 587
- Envelope-From Email Address: Add your Outlook email address. If you use a different email address, you might experience errors.
- Security: STARTTLS
- Authentication: Login
- Username: Your full Outlook email address.
- Password: Your Outlook password — the same one you use to log in to the Outlook website.
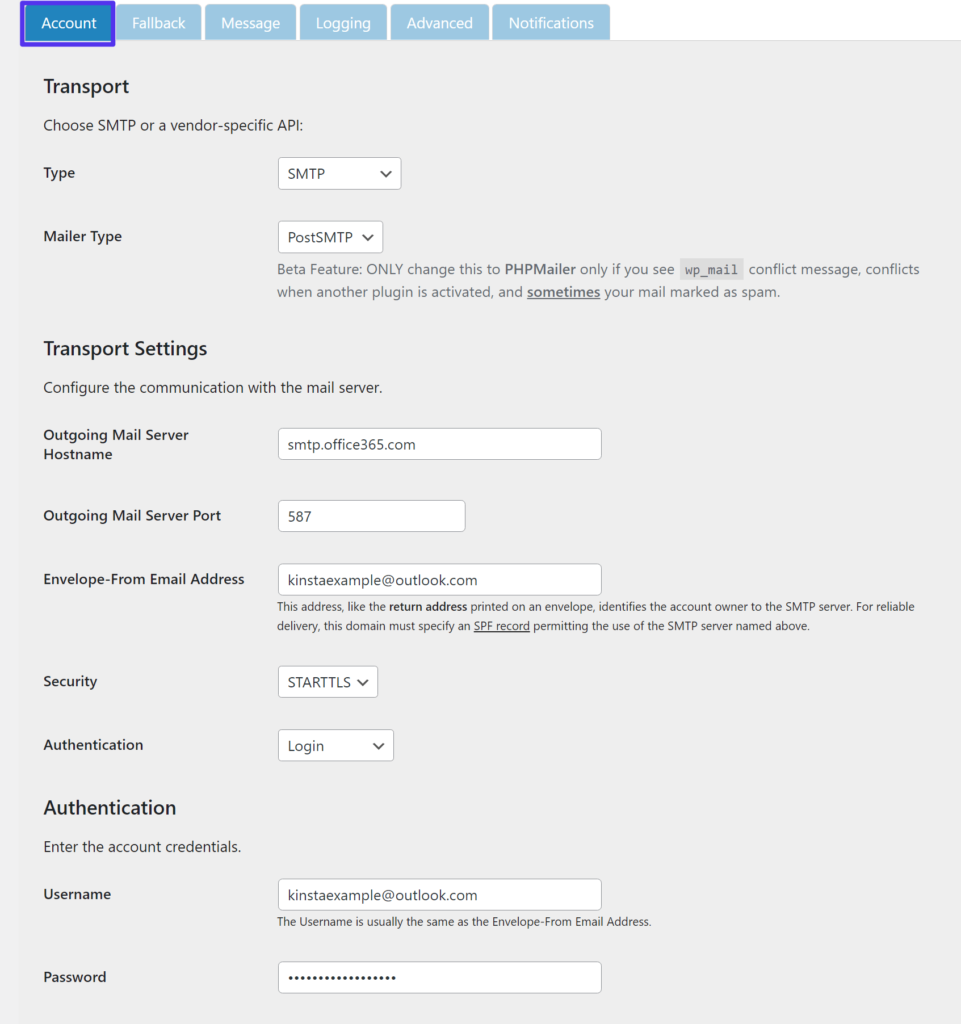
Make sure to save the settings once you’ve added all the details.
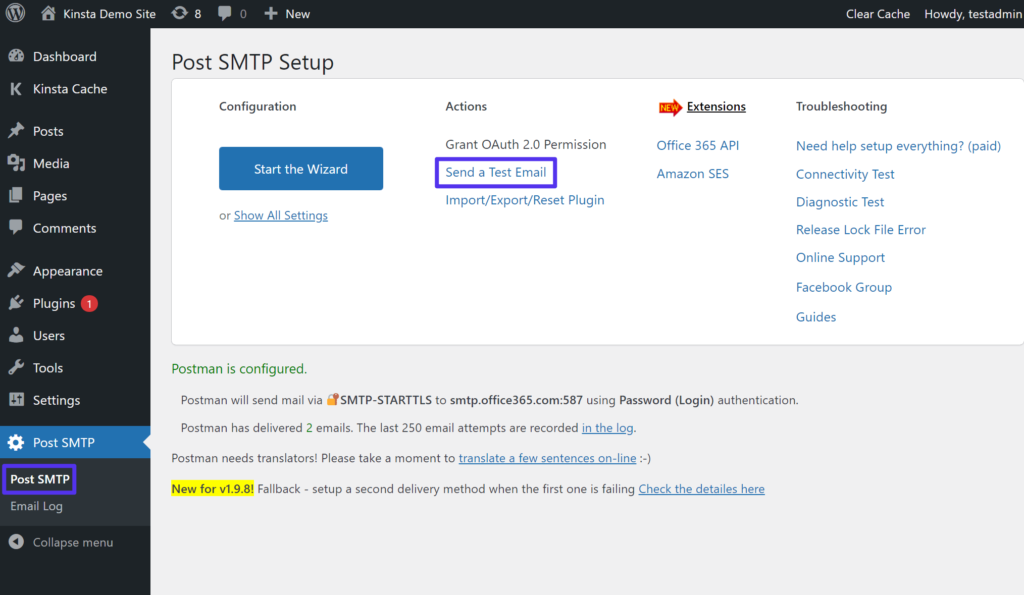
3. Send a Test Email
Now, you’ve finished configuring your WordPress site to send emails using the Outlook SMTP server.
To ensure that everything is working correctly, the plugin includes a feature to send a test email.
To do this, go to the Post SMTP area and click the Send a Test Email option:
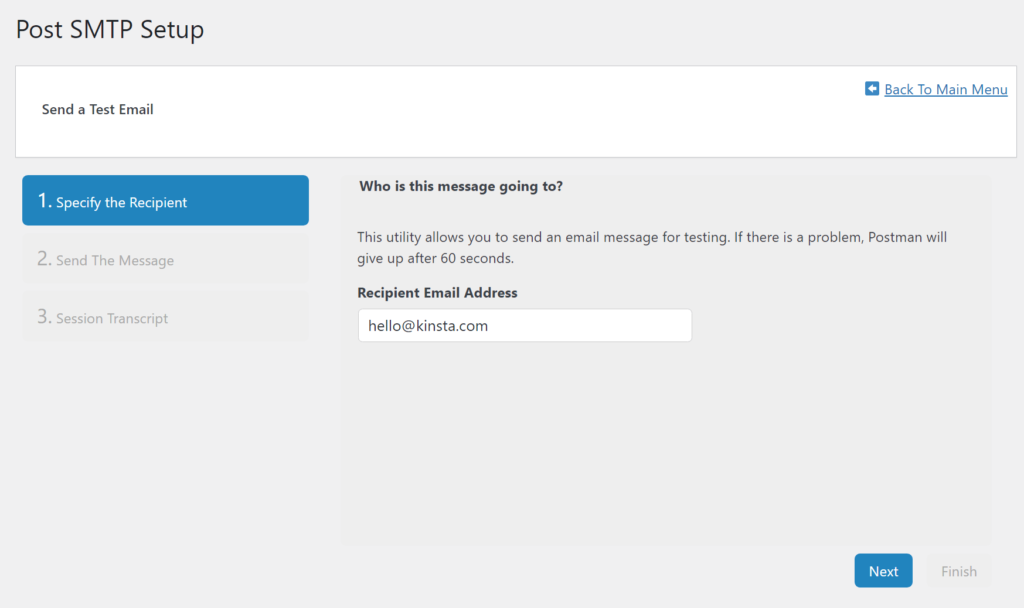
Enter the email address to which you want to send a test email and click Next:
If you entered the details correctly, you should see a success message:
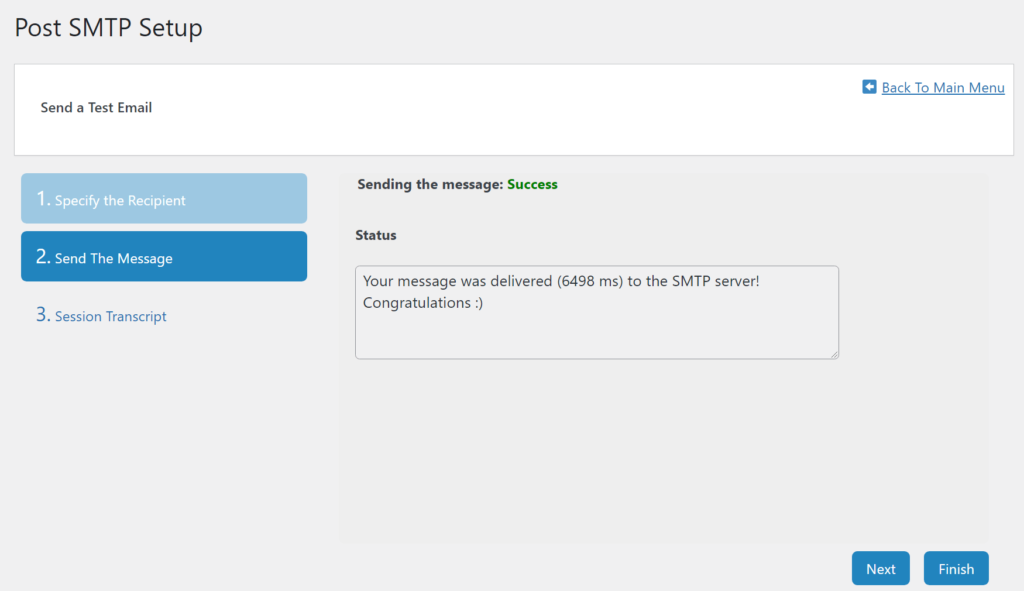
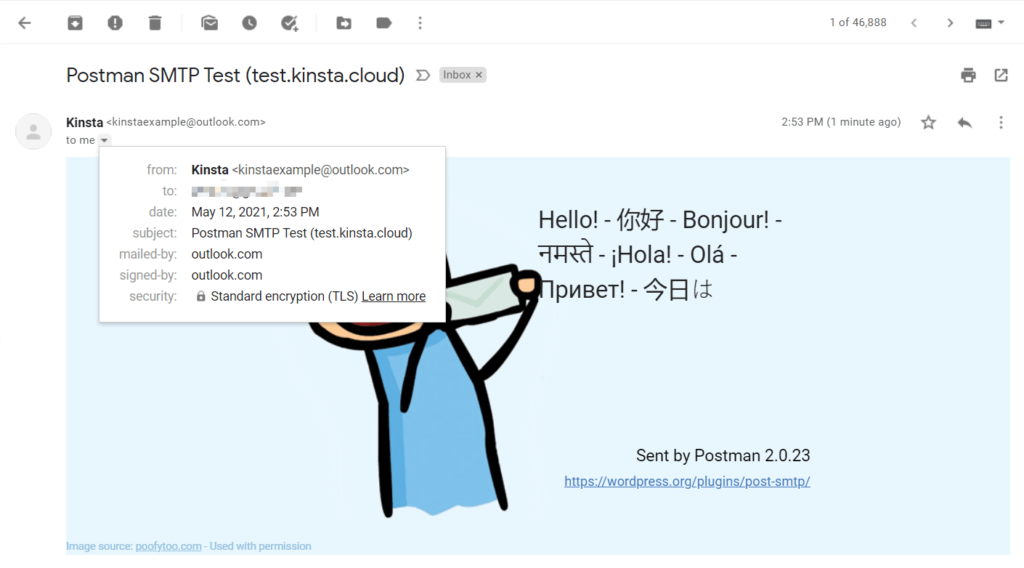
Additionally, you should see a new email at the email account that you sent the test message to:
If everything worked, you’ve finished with the setup!
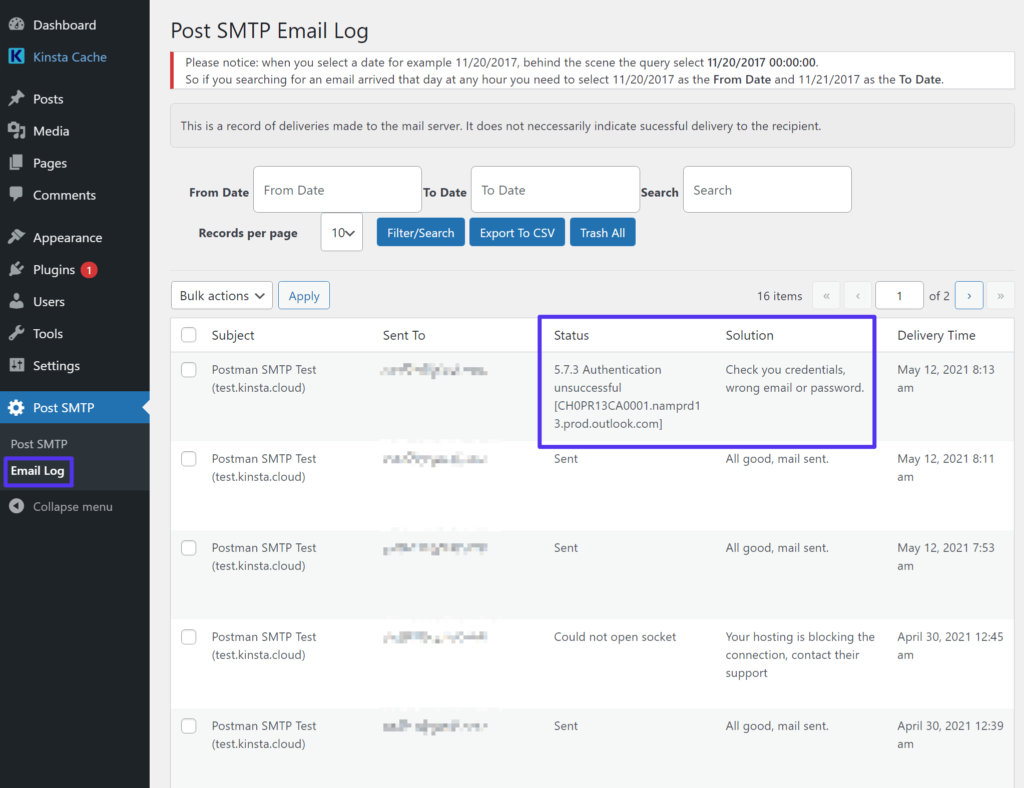
If you have a problem, you can debug it by going to Post SMTP > Email Log and viewing the specific error message for failed emails. The plugin will also suggest a solution. For example, if you entered the wrong password, it will tell you to double-check those details:
If you can’t figure out what’s going wrong, you can consider using another free SMTP server, such as the free Gmail SMTP server.
Summary
The Outlook SMTP server allows you to configure your favorite email client or your website to send emails using your Outlook account.
For WordPress users, the benefit here is that it improves the reliability of your site’s emails because you get to use Outlook’s optimized SMTP servers. In addition, the daily sending limit of 300 emails should be more than enough for most WordPress sites.
For email clients, the SMTP server lets you send emails using your client’s interface. If you combine it with POP3 or IMAP, you’ll also be able to receive your Outlook emails in your email app or client of choice.
Be sure to check out DevKinsta, our free local development testing tool, which comes in super handy when configuring SMTP settings for your site.
Do you still have any questions about the Outlook SMTP settings or how to use them with your WordPress website? Please let us know in the comments!