
You can’t visit a website without first accessing a Domain Name Server (DNS). In the process, you might be met with a message such as “DNS server not responding.” This means that the decentralized naming systems responsible for turning hostnames into IP addresses failed to respond.
There are a variety of reasons these types of DNS errors can occur. Fortunately, most of them have simple resolutions. In fact, fixing the issue could be as easy as restarting your computer or changing web browsers.
This post explains what the “DNS server not responding” message means and some common causes for it. It then walks you through several solutions for how to fix it, both on Windows and macOS devices.
Let’s get started!
What does “DNS server not responding” mean?
A DNS is a naming system that takes alphanumeric domain names (or “hostnames”) and turns them into numeric IP addresses. Essentially, DNS servers act as translators.
When you input a web address into your browser, it is forwarded to a DNS server from your router, where it’s then dissolved and returned as an IP address. However, if the DNS server is unable to properly complete this name resolution process, the end result is usually a message indicating that the DNS server is not responding.
“DNS server not responding” means that your browser was unable to establish a connection to the internet. Typically, DNS errors are caused by problems on the user end, whether that’s with a network or internet connection, misconfigured DNS settings, or an outdated browser. They can also be attributed to a temporary server outage that renders the DNS unavailable.
Therefore, it’s possible that you might be able to resolve the problem simply by switching browsers. In other cases, you may need to disable connections, change DNS servers, or flush the DNS cache.
How to fix the “DNS server not responding” error in Windows and macOS (11 methods)
Now that you understand what this message means and are familiar with some potential causes, it’s time to get to work resolving it. Let’s take a look at eleven potential ways you can fix the error on Windows and Mac devices.
1. Switch to a different browser
The first step is to troubleshoot the issue by testing your DNS connections. Fixing this problem might be as simple as switching or updating your web browser.
How do I switch to a different browser?
To do this, try accessing the web from a different browser. For example, if your default browser is Safari or Google Chrome, visit the desired website from Mozilla Firefox or Microsoft Edge instead.
If switching browsers works, you’ll likely need to update your default browser to the latest version or uninstall and reinstall it. However, if you still see the “DNS server not responding” error, you can rule out your browser as the source of the issue.
2. Connect with a different device
If your browser is not the problem, maybe your current device is. That is why it might be interesting to connect to a second device and access the site you’re unable to see.
How do I connect to a different device?
Grab your phone and try to access the site you’re having trouble with using the same network as before.
Still getting the “DNS server not responding” error? Then this might indicate that your router is the issue here.
Not so sure about it? Connect to the site using your mobile data. If it works, you have the answer that the problem is on your end and not on the site’s end.
3. Start your computer in safe mode
If your operating system is not functioning properly, it can result in the “DNS server not responding” error message. Therefore, you may want to try booting your Windows device in safe mode to see whether this resolves this issue.
Doing so will limit the files and resources used for running Windows, and can be an effective way to troubleshoot problems.
How do I start my computer in safe mode?
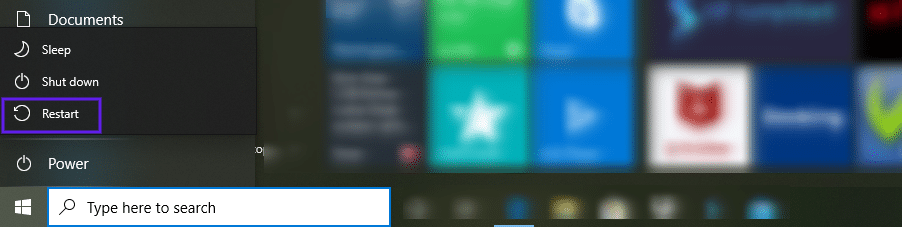
To start your Windows 10 computer in safe mode, first select the Windows button, and then hover over the Power icon:

Next, while you’re holding down the Shift key, select Restart:
In the window that appears, click on Troubleshoot > Advanced. Under Advanced options, select Start-Up Settings, followed by Restart. More options will appear. You can press 4 or 5 to Enable Safe Mode or Enable Safe Mode with Networking respectively. Your computer will then restart in safe mode.
If you’re using Windows 7 or earlier, you can restart it in safe mode by going to Power > Restart. Then, while it’s booting up, hold down the F8 key.
The process is similar on macOS devices.
While the machine is restarting and booting up, hold down the Shift key. Once the Apple logo appears, you can release it. Your device will then start in safe mode.
Once your computer is in safe mode, try to access the website again. If there doesn’t seem to be a network connection issue, the source of the problem may be a third-party software or installation, such as an antivirus application.
4. Temporarily disable your antivirus software and Firewall
If switching browsers doesn’t resolve the “DNS server not responding” error, the next step is to temporarily deactivate your firewall. Antivirus software and firewalls are critical for safeguarding your devices, but they can sometimes cause issues that interfere with network connections.
How do I temporarily disable my antivirus software and firewall?
For Windows users, you can do this by going to your control panel and navigating to Update & Security > Windows Security > Virus & Threat Protection > Manage Settings.
Mac users can find this option by navigating to System Preferences > Security & Privacy > Firewall.
Once your firewall is deactivated, try visiting the website again from your browser. If this resolved the issue, you might consider switching antivirus programs or reconfiguring the settings of your existing application. Either way, remember to reactivate your firewall once you’re done.
5. Disable secondary connections
If disabling your antivirus software or firewall didn’t do the trick, another potential solution is to disable any secondary connections available on your device. You want to make sure that only the connection you’re currently using is active.
How do I disable secondary connections?
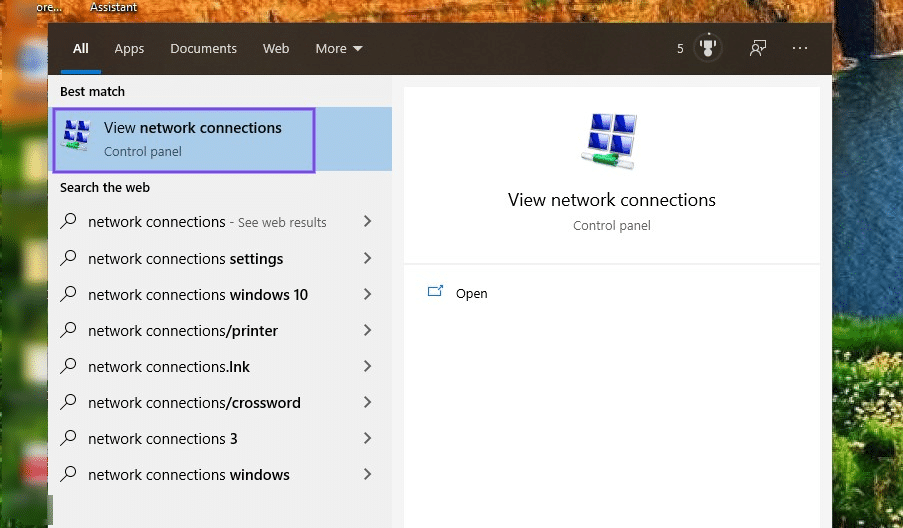
To do this in Windows, type “Network connections” into the search box of your desktop taskbar. Next, click on View network connections:

This will bring you to the Network Connections page. Any connections you’re not currently using will have a red (X) next to them. Right-click on one, and then select Disable:
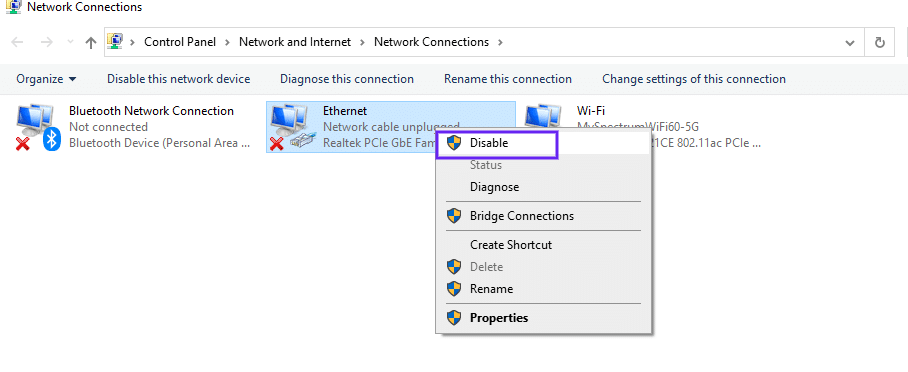
Repeat this for any other connections that are not currently active. When you’re done, restart your browser and try visiting the website again.
If you’re using a macOS, you can do this by clicking on the Apple icon, then navigating to System Preferences > Network. Your connections will be listed on the left side of the window.
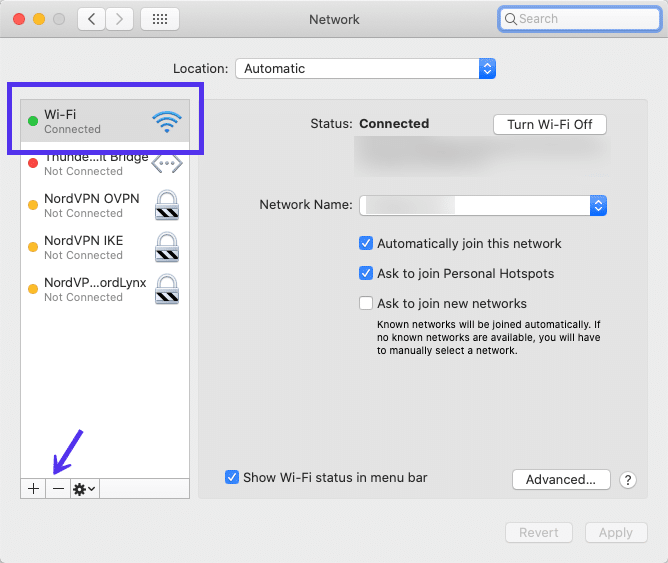
To disconnect or disable one, select it, and then click on the (–) sign at the bottom of the window.
6. Disable the Windows peer-to-peer feature
If you’re using Windows, and disabling your firewall or secondary connections hasn’t resolved the “DNS server not responding” error message, there’s one more option you can try: the peer-to-peer (P2P) feature. Note: This is something you’ll only find in Windows 10.
This feature helps preserve your device’s download bandwidth. Essentially, it lets you download a Windows update one time, then use your device to spread or share the updated version across other computers included in your local network.
Unfortunately, it can also sometimes interrupt DNS processes. Therefore, it’s worth disabling to see if this resolves the error message you’re currently facing.
How do I disable the Windows peer-to-peer feature?
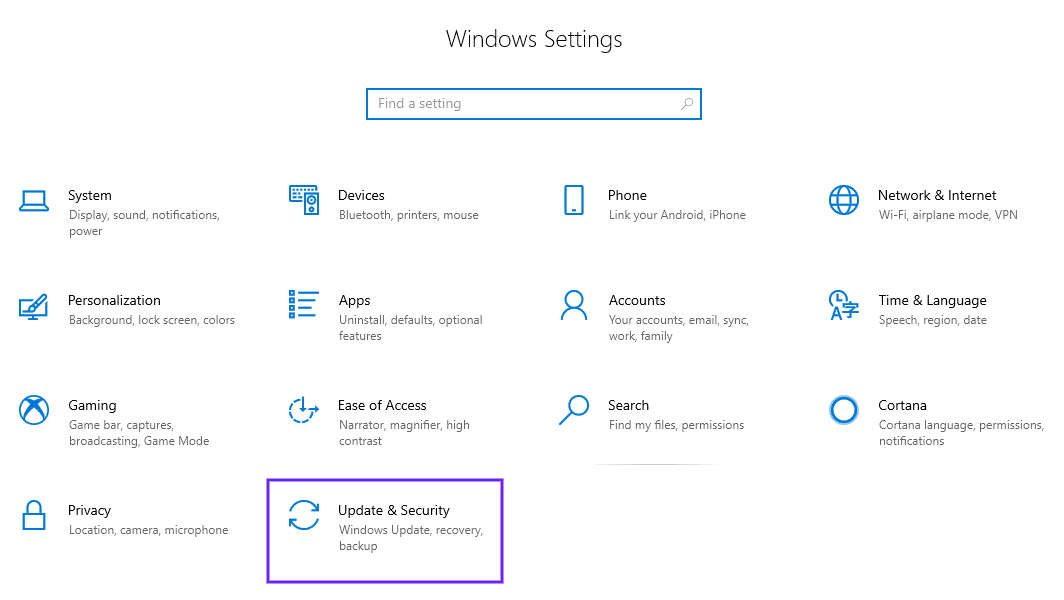
To do so, click on the Windows icon, followed by the Settings (gear icon) > Update & Security:
In the window that opens along the left-hand side, select Delivery Optimization:
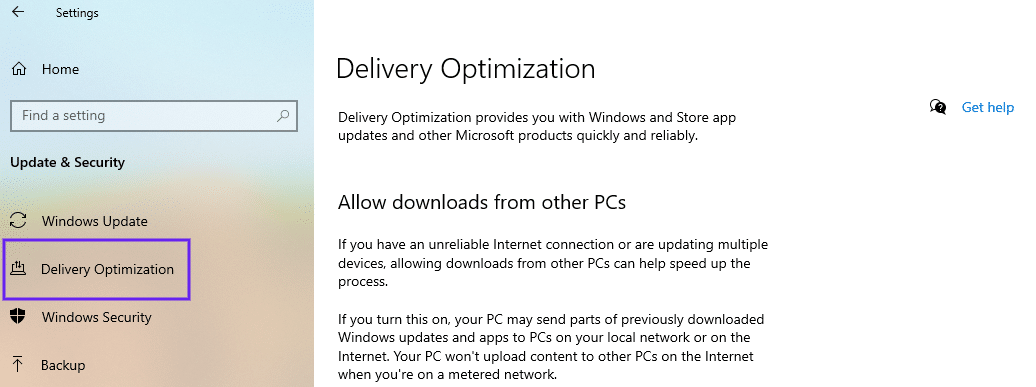
Next to the ‘Allow downloads from other PCs’ option, toggle the switch to disable it:

When you’re done, restart your computer and try accessing the website again. If this doesn’t work, don’t worry. We still have more solutions to try.
7. Restart your router
The next troubleshooting step is to restart your router. Doing so will flush your router’s cache and could be the solution for resolving the “DNS server not responding” message.
How do I restart my router?
Most modems come with a power button that enables you to quickly power them off. After a minute or so, turn your modem back on and wait for it to re-establish a connection. Once it does, check to see whether you’re able to access the internet from your browser.
Note that sometimes simply restarting the router isn’t enough. You may want to reboot it by unplugging it entirely, and then waiting at least 30 seconds before plugging it back in and powering it on again.
8. Install updated network adapter drivers on your computer
Another reason you may be seeing the “DNS server not responding” message is if your current Windows network adapter driver is old or outdated. If this is the case, getting a new adapter driver or updating yours may be the solution you need.
How do I install updated network adapter drivers?
There are a couple of ways to update your network adapter driver. One is to do it manually, which you should only do if you are at least somewhat familiar working with drivers. Alternatively, you can do it using an automated tool such as Driver Easy or Snappy Driver Installer (SDI):

Either of these solutions will automatically recognize your system and locate the appropriate drivers for you to use with it. We recommend this method because it eliminates the risk of human error, such as downloading or installing the wrong driver on your device.
Once you download SDI and finish installing the updated drivers, restart your computer. Then try reconnecting to the internet, to determine whether this resolved the issue.
9. Flush your DNS cache and reset your IP
If you’ve eliminated your browser, antivirus software, and router as the source of the issue, it’s time to turn your attention to your DNS settings. As with the router cache, it may be that your DNS needs to be cleared before it can properly make a connection to the internet, or your IP might need a reset.
How do I flush the DNS cache and reset my IP?
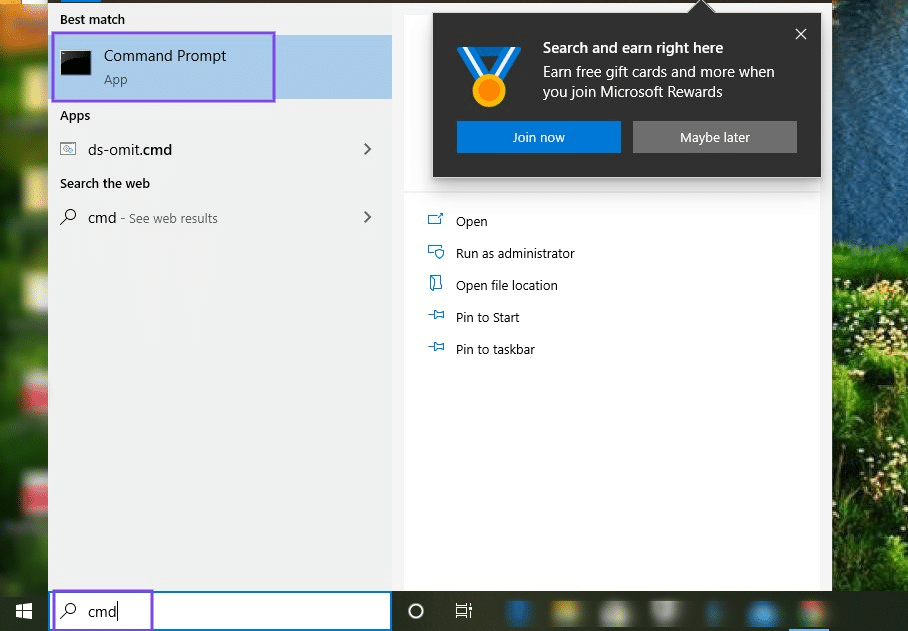
If you’re using Windows, start by typing “cmd” into the search field along the taskbar, and then selecting the Command Prompt app:
In the window that opens, enter “ipconfig/flushdns” (no quotations), and hit Enter:
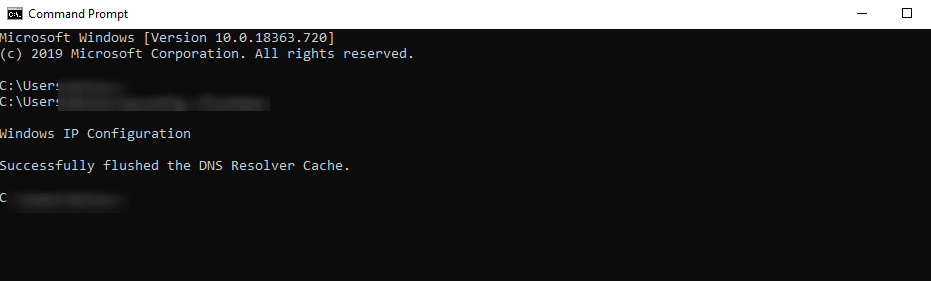
When the process is finished, it will display a message letting you know that the DNS cache was successfully flushed. Repeat this process for the following commands:
ipconfig /registerdns
ipconfig /release
ipconfig /renew
If you’re using a Mac device, you can flush your DNS cache by opening the Terminal application (press the Command + Space keys, and then type “Terminal” into Spotlight). In the Terminal application window, enter the following:
dscacheutil -flushcachePress the Enter key. There won’t be a success message as there is on Windows devices. However, simply running this command will flush the DNS cache. For further guidance, you can refer to our full guide on how to flush your DNS cache in Windows, Mac, and Chrome.
10. Disable IPv6
IPv6 is the latest Internet Protocol version that helps route traffic between networks and the internet. Unfortunately, it may also be behind the “DNS server not responding” error you’re currently seeing.
Therefore, another potential solution to try is disabling IPv6 on your computer.
How do I disable IPv6?
To do this in Windows, open your Network Connections control panel, then right-click on your current connection. In the drop-down menu, select Properties:

Under the Networking tab of the panel that opens, scroll down until you see Internet Protocol Version 6 (TCP/IPv6):
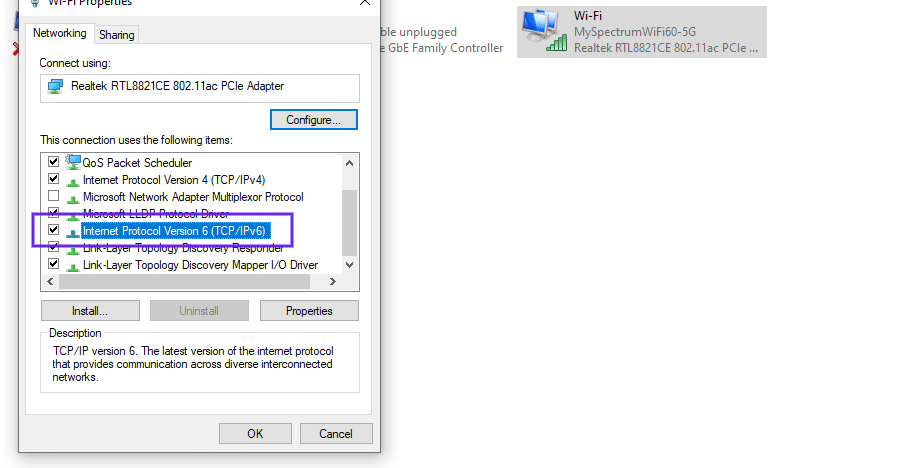
If it’s selected, unselect the box, then click on OK. Refresh your browser and try connecting to the internet again.
To disable IPv6 in macOS, you first need to determine what network interface you’re using. To do this, open the Terminal application, then issue the following command:
networksetup -listallnetworkservicesIf you want to disable IPv6 for a wireless connection, you would use the following command:
networksetup -setv6off Wi-FiFor an Ethernet connection, you would use:
networksetup -setv6off EthernetThen hit the Enter key, and refresh your browser to see if the issue is resolved.
11. Change the default DNS server on your Windows computer
Another solution you can try in order to fix “DNS server not responding” in Windows is to change your default DNS server. To do this in Windows 7, 8, or 10, the first step is to access your network connection properties.
How do I change the default DNS server?
Start by clicking on the Windows button in the bottom-left corner of the task bar. In the search field, type “Network connections”, and then select View network connections in the menu that appears:
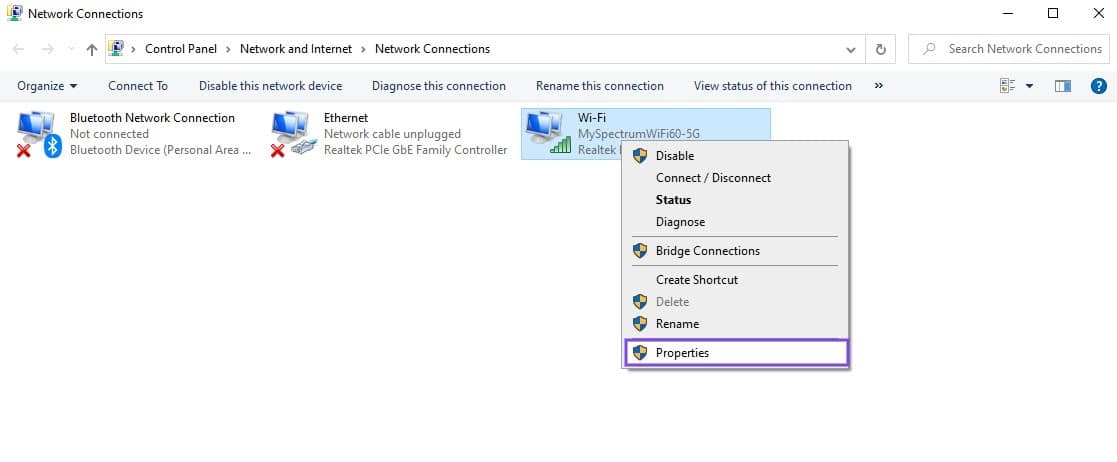
Next, choose the internet adapter you’re currently using (WLAN for wireless network connections or LAN for ethernet cable connections). Right-click on the internet adapter, followed by Properties:
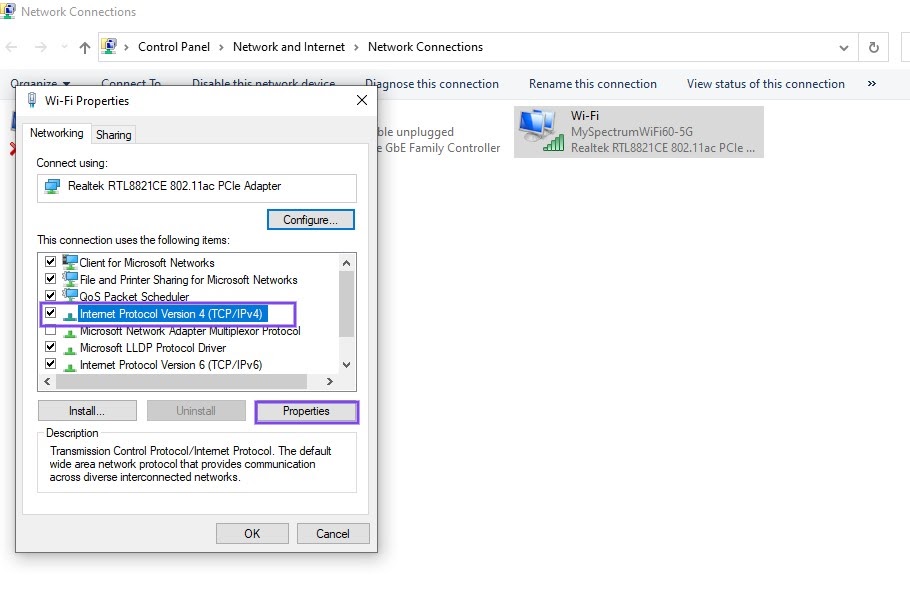
In the window that opens, choose Internet Protocol Version 4 (TCP/IPv4), and then click on the Properties button:
To manually assign a different DNS server address, select Use the following DNS server addresses and input the address of an alternative server:
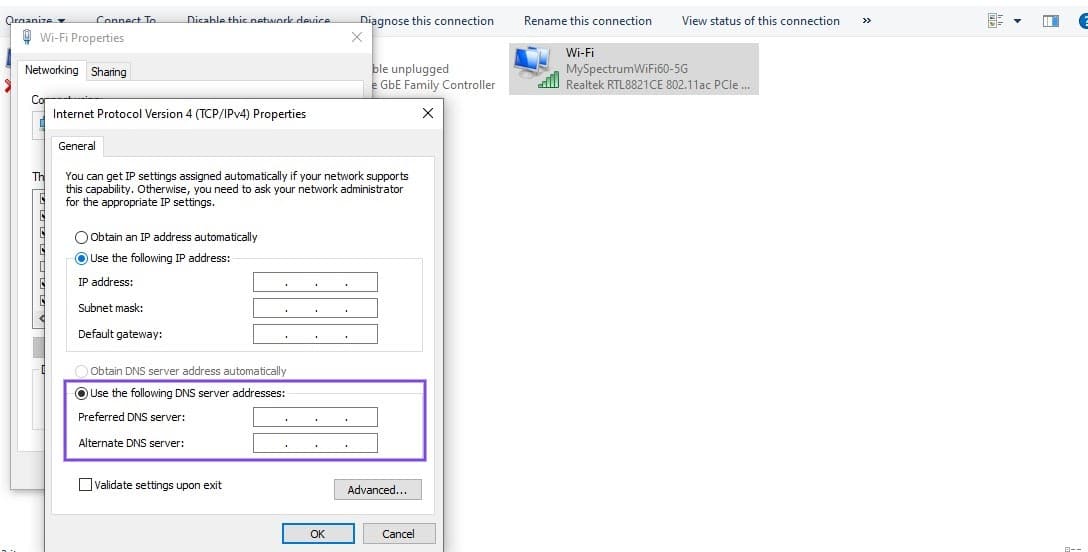
For example, you can enter Google’s DNS server, which is “8.8.8.8”, under Preferred DNS server. Then you can add “8.8.4.4” under Alternative DNS server, and hit OK.
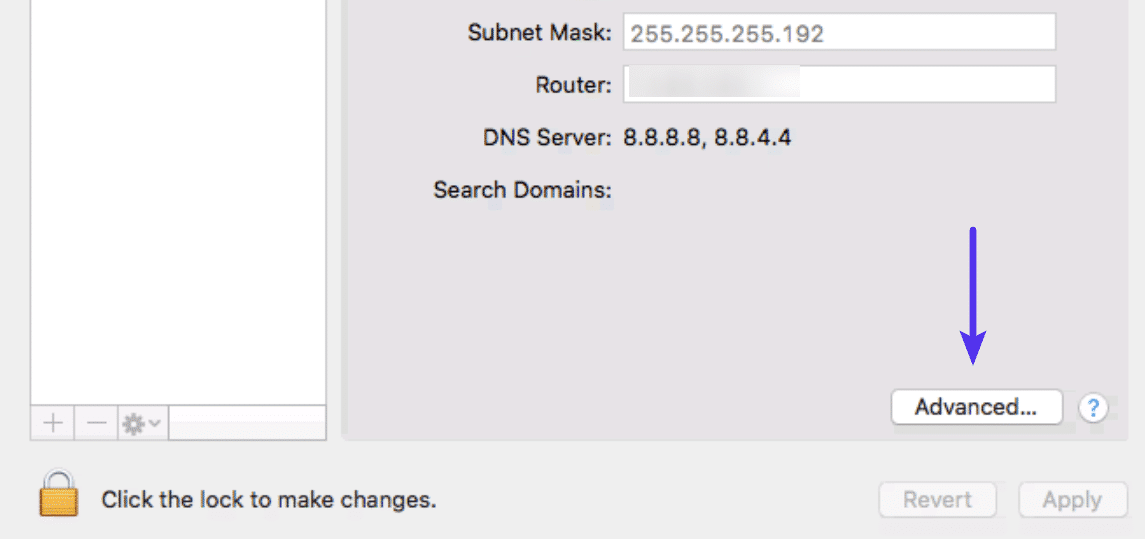
If you’re running macOS, you can locate these settings by clicking on the Apple icon followed by System Preferences:

Next, select the Network icon. Choose your current network, and then click on the Advanced button:
Under the DNS tab, click the (+) button next to “IPv4 or IPv6 addresses”, and hit Enter:
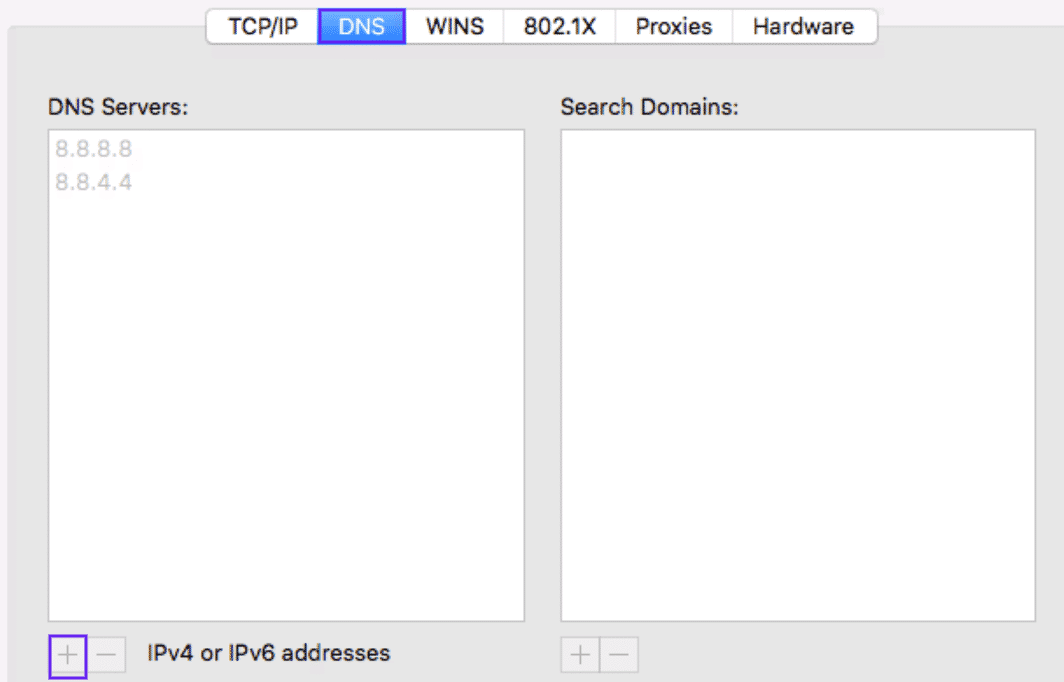
After you enter the new DNS information, click OK followed by Apply. Restart your web browser, and then visit the website you were trying to access. You should find that the “DNS server not responding” error is now resolved.
Summary
Trying to access a website only to be met with a “DNS server not responding” error can be both frustrating and concerning. While there are a variety of reasons this error may occur, the good news is that most have simple resolutions.
As we discussed in this article, there are 11 potential solutions you can use to fix a “DNS server not responding” error, in both Windows and macOS:
- Switch to a different browser, and if necessary, update your default browser to the latest version.
- Connect With a Different Device
- Start your computer in Safe Mode.
- Temporarily disable your antivirus software and firewalls.
- Disable secondary connections.
- Disable the Windows Peer-to-Peer feature.
- Restart your router.
- Install updated network adapter drivers on your computer.
- Flush your DNS cache and reset your IP.
- Disable IPv6.
- Change the default DNS server on your computer.
Suggested reading:


