
When you’re browsing online, encountering an error message that prevents you from accessing a website is incredibly frustrating. One such error is the ‘DNS_PROBE_FINISHED_BAD_CONFIG’ message. It can occur regardless of your browser or Operating System.
If you run into this error when trying to open a site, don’t panic. It simply means that the Domain Name System (DNS) wasn’t able to resolve the IP address properly, which can happen for a variety of reasons.
Fortunately, as with most DNS-related issues, there are some simple solutions you can try to fix this problem.
In this article, we’ll explain what the DNS_PROBE_FINISHED_BAD_CONFIG error code means and some common causes of it. Then we’ll walk you through seven solutions for fixing it in Windows, macOS, Android, and Ubuntu.
Let’s get started!
What Is the DNS_PROBE_FINISHED_BAD_CONFIG Error?
To understand what this error means, it’s helpful to first get a general idea of the important role the DNS plays in helping users access websites. In a nutshell, the DNS directs traffic on the internet and is responsible for translating and connecting nameservers, URLs, and IP addresses with web servers.
All websites have unique IP addresses, such as 218.3.120.12. Rather than requiring you to memorize and enter the IP address any time you want to visit a website, the DNS makes it so you can use a more user-friendly domain name, such as kinsta.com.
When you input the URL into your browser, it begins the process known as DNS name resolution. This is where the DNS essentially looks up the URL/IP address and connects it with a web server. However, if for whatever reason the DNS is not able to successfully complete this process, it can return an error message instead.
DNS_PROBE_FINISHED_BAD_CONFIG is a network connection error that displays when there is a problem with the DNS configuration, which prevents it from connecting to a network. It is not specific to any one browser or system, meaning you could come across it in Google Chrome, Windows, or macOS, on an Android mobile device, etc.
Similar DNS Error Messages
A DNS error message occurs when your DNS or network settings are misconfigured. The DNS_PROB_FINISHED_BAD_CONFIG error is just one of them, and there are other similar messages you may run across.
For example, you might see the DNS_PROBE_FINISHED_NXDOMAIN error:
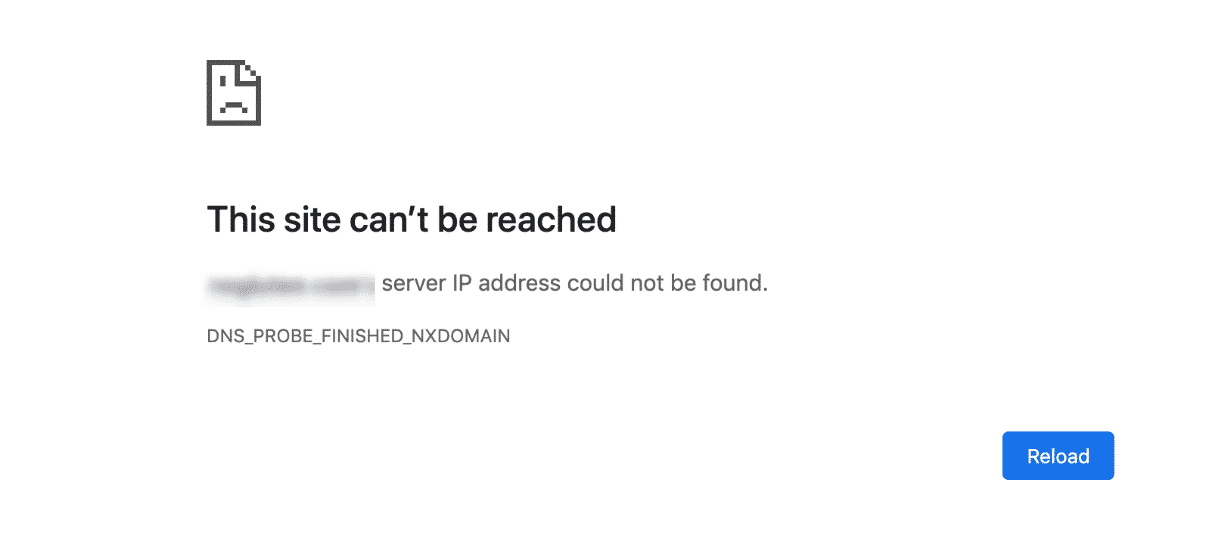
In this error message, “NXDOMAIN” stands for “Non-Existent Domain”. In other words, the domain name that was queried doesn’t exist.
Another similar DNS error is DNS_PROBE_FINISHED_NO_INTERNET:
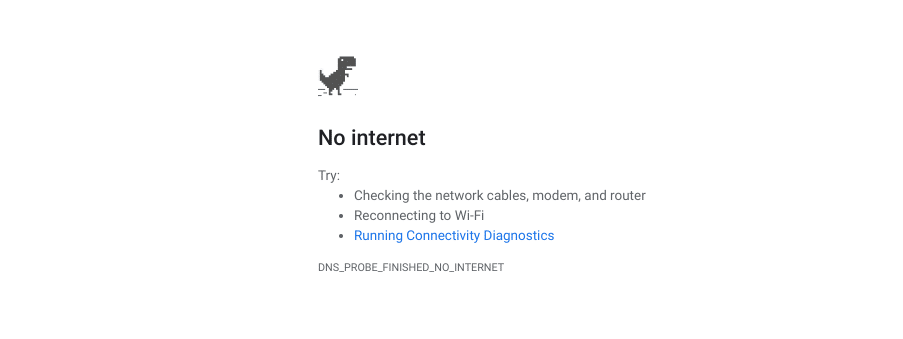
This error message indicates that a problem occurred while establishing an internet connection, or that the connection was lost.
Any of the above DNS errors can vary depending on the browser you’re using. So your message might also include phrases such as:
- This web page is not available.
- This site can’t be reached.
- Safari can’t find the server.
- We’re having trouble finding the site/web page.
- There is no internet connection.
As you can see, although they’re slightly different, all of these errors indicate a DNS or network misconfiguration. Therefore, they share many of the same solutions, as we’ll see shortly.
Common Causes of DNS_PROBE_FINISHED_BAD_CONFIG
While there are a handful of reasons you might be seeing this message, the good news is that you can at least narrow it down to a DNS or network issue. Some of the most common causes of DNS_PROBE_FINISHED_BAD_CONFIG include:
- Network settings that were accidentally changed
- Router settings changed through an unauthorized app
- Browser plugin(s), such as a VPN app, interfering or messing with the IP or DNS address
- Problematic firewall or antivirus software
- Corrupted files on your device
It’s also possible that the underlying issue is much simpler. For example, the error message may stem from a malfunctioning internet cable or a website that’s temporarily down.
How to Fix the DNS_PROBE_FINISHED_BAD_CONFIG Error Code (7 Ways)
Now that you have a better idea of what this error means, it’s time to get to work.
Before attempting any of the following solutions, we recommend first making sure your internet cables, modem, and router are properly connected. It’s also smart to refresh the web page, just to make sure there wasn’t a temporary glitch with the connection.
Once you eliminate those options, you’re ready to dive in. Let’s take a look at seven potential solutions you can use to fix the DNS_PROBE_FINISHED_BAD_CONFIG error.
1. Restart Your Router
Even if your router is securely hooked up, it may need a quick reboot to reset the IP address. Therefore, the first step is to restart your router.
To do so, simply hold down the power. After leaving it off for at least one minute, power it back on. While it’s restarting, you may also want to restart your computer.
Once both devices are back on, connect to your Wi-Fi or LAN network and try accessing the website again. If you’re still seeing DNS_PROBE_FINISHED_BAD_CONFIG, it’s time to move on to the next method.
2. Clear Your Browser Cache
While this likely isn’t what’s causing the DNS error, it doesn’t hurt to eliminate it as an option. You might want to first try accessing the website from a different browser than the one you’re currently using.
If you can do so successfully, the next logical solution is to clear the cache of the problematic browser.
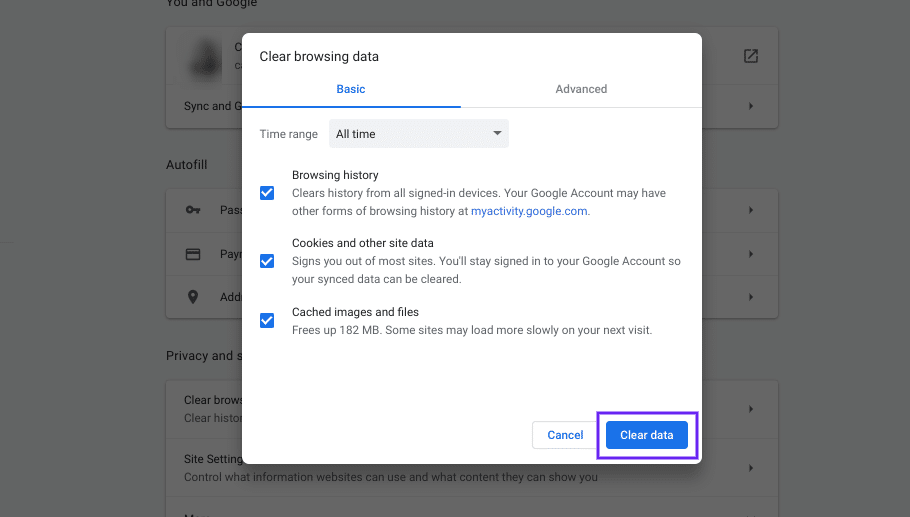
The process for doing so will look slightly different, depending on your OS and browser. For detailed guidance, you can refer to our post on how to clear your browser cache.
3. Flush the DNS Cache and Renew Your IP Address
If there was a change recently made to your DNS, whether maliciously or accidentally, your system could be trying to use the local cache to connect to the network.
When this is the case, it makes sense that you might receive the DNS_PROBE_FINISHED_BAD_CONFIG message.
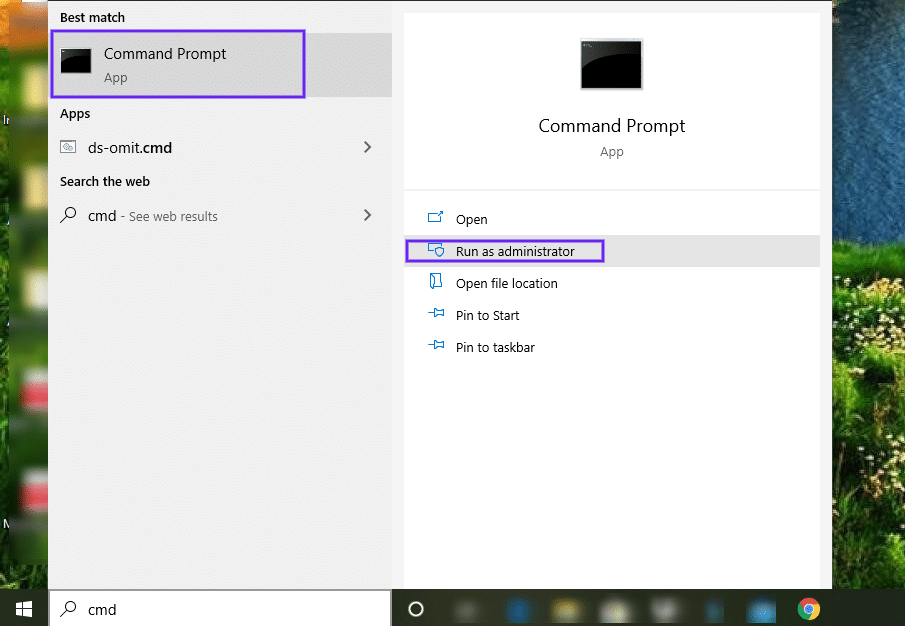
Therefore, the next solution to try is flushing your DNS cache, as well as releasing and renewing your IP address. If you’re using Windows 7 or Windows 10, you can do this through the Command Prompt app.
To open Command Prompt, click on the Windows icon/Start button and type “cmd” into the search field. Under Command Prompt, select Run as administrator:
In the Command Prompt window, type in the following commands, hitting the Enter key after each:
ipconfig /flushdns
ipconfig /release
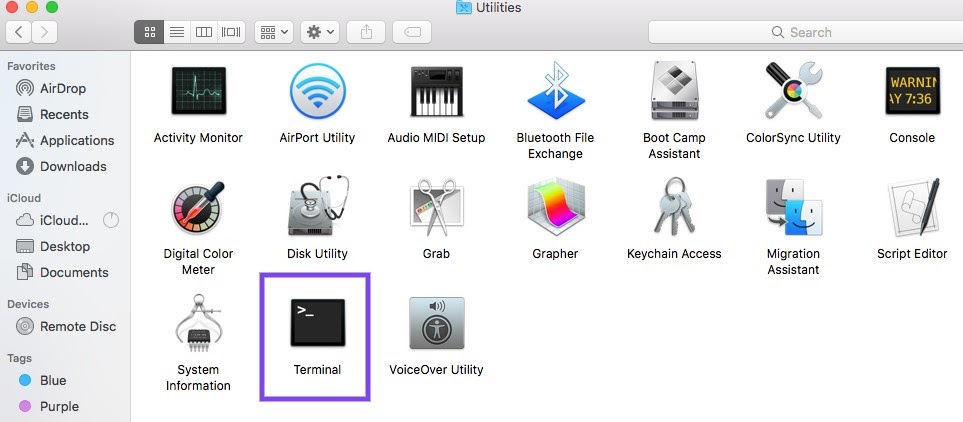
ipconfig /renewOn macOS, you can do this through the Terminal command-line interface. To locate it, click on the Apple icon, followed by Applications > Utilities > Terminal:
In the Terminal interface, the specific command you’ll use varies depending on your macOS version:
-
sudo killall -HUP mDNSResponder(macOS v10.11 or later)
-
sudo discoveryutil mdnsflushcache(Yosemite v10.10 through v10.10.3)
-
sudo killall -HUP mDNSResponder(Mavericks, Mountain Lion and Lion)
-
sudo dscacheutil -flushcache(Snow Leopard)
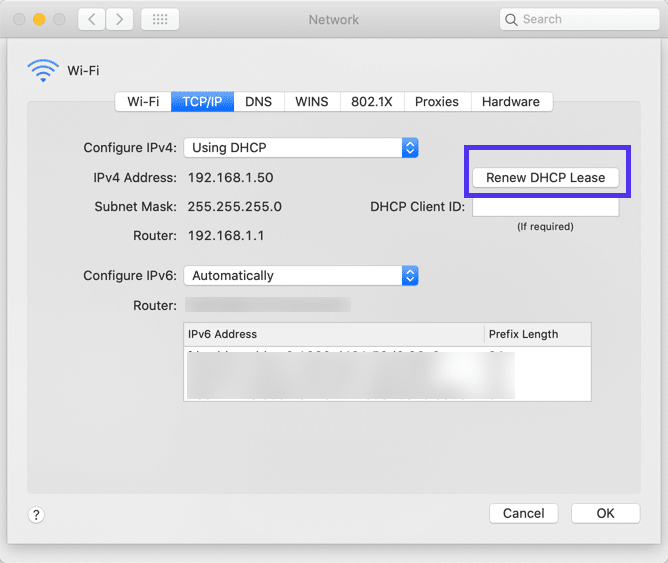
To release and renew the IP address, navigate to the Apple menu icon > System Preferences > Network > Advanced > Renew DHCP:
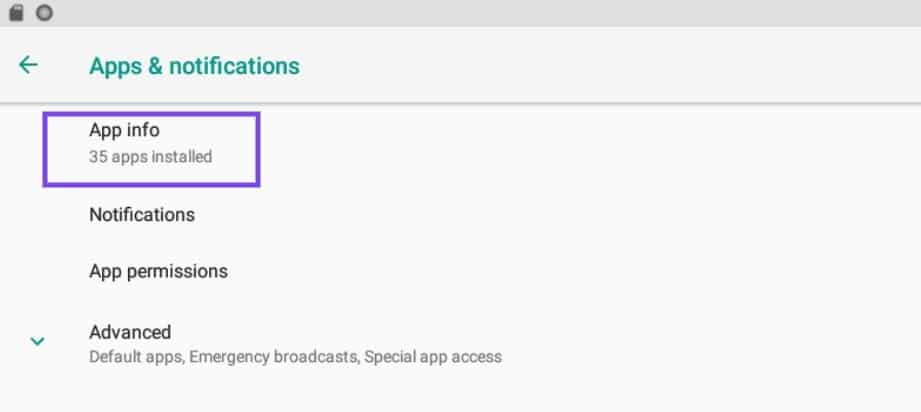
If you’re using an Android device, you can clear your DNS cache by going to Settings > Applications > App info:
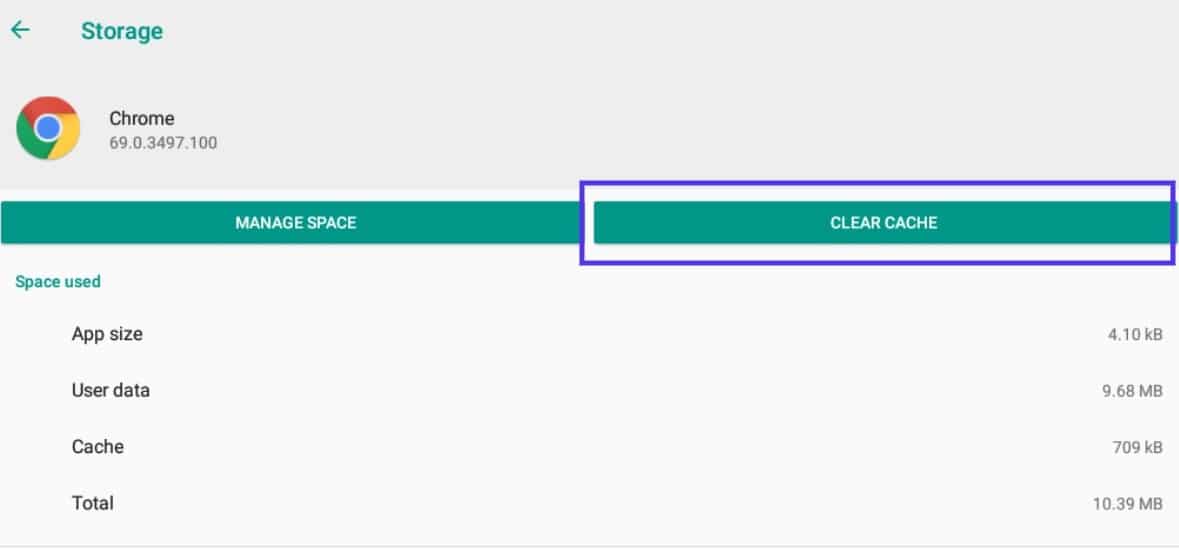
From the list of apps, select Chrome (or whatever browser app you’re using), followed by Storage. On the Storage page, click on the Clear Cache button:
Ubuntu users can launch the command Terminal by pressing CTRL + ALT + T, and then input the following command:
sudo systemd-resolve --flush-cachesFor more detailed guidance, refer to our guide on how to clear your DNS cache.
4. Manually Change the DNS Settings
If you’re still seeing the DNS_PROBE_FINISHED_BAD_CONFIG error message in your browser, the next thing you can try is changing your DNS settings. Your ISP assigns DNS servers by default.
However, you can temporarily switch to a public DNS server such as Google.
To do this in Windows, right-click on the network icon in the bottom right-hand corner of your screen, then select Open Network and Sharing Center.
Once the Network window opens, right-click on your network connection and select Properties from the drop-down menu:

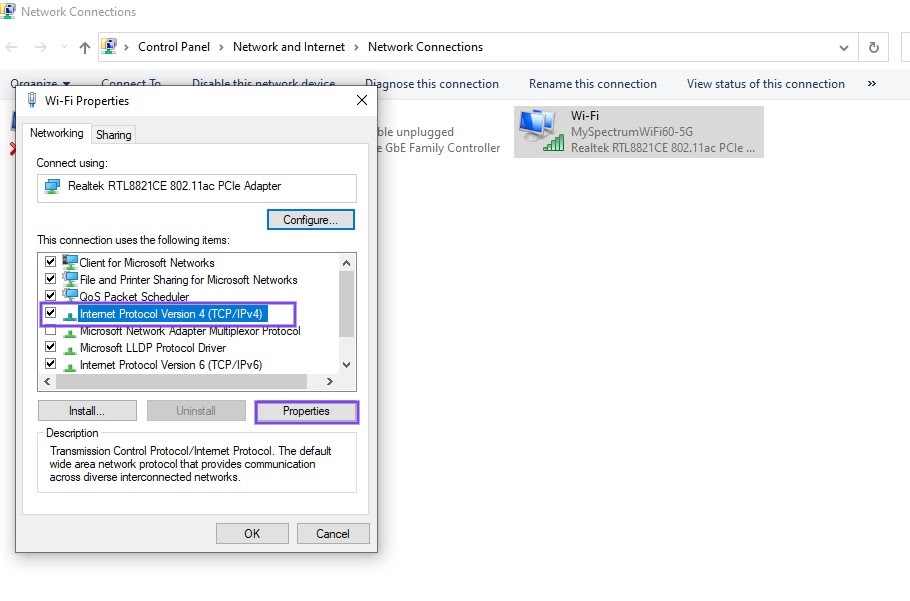
In the panel that opens, under the Networking tab, select “Internet Protocol Version 4 (TCP/IPv4)” followed by the Properties button:
Under “Use the following DNS server addresses”, enter the following:
- Preferred DNS Server: 8.8.8.8
- Alternate DNS Server: 8.8.4.4
When you’re done, click OK. Refresh your browser and try accessing the website again.
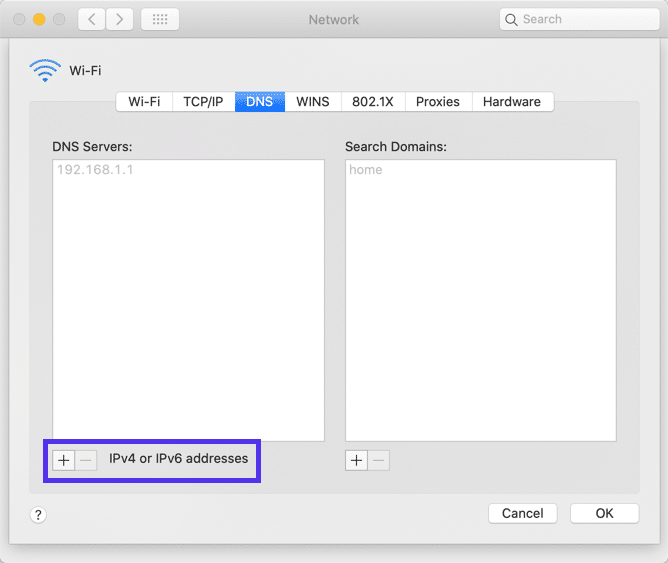
To change your DNS settings for macOS, click on the Apple menu icon, followed by System Preferences > Network. Select your network connection. You can add the new DNS addresses by clicking on the (+) icon:
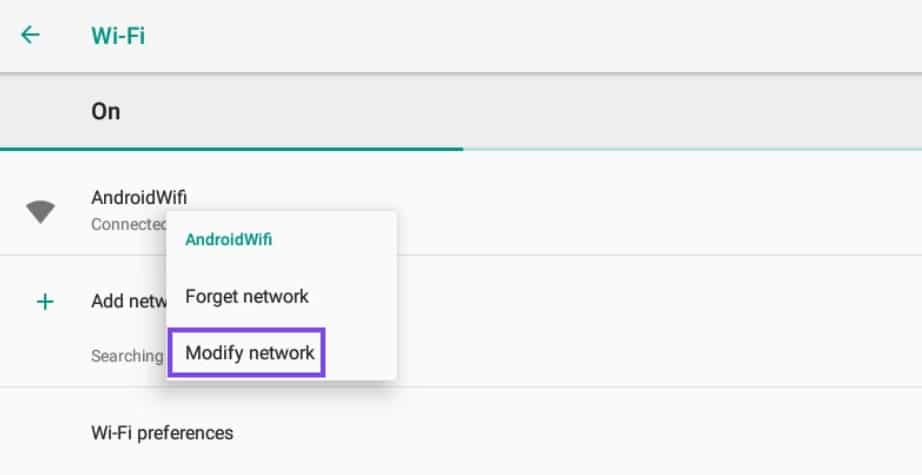
Android users can locate this option by navigating to Settings > WiFi. Press and hold the network, then click on Modify network:
Click on Advanced options, then under IP settings, select Static:
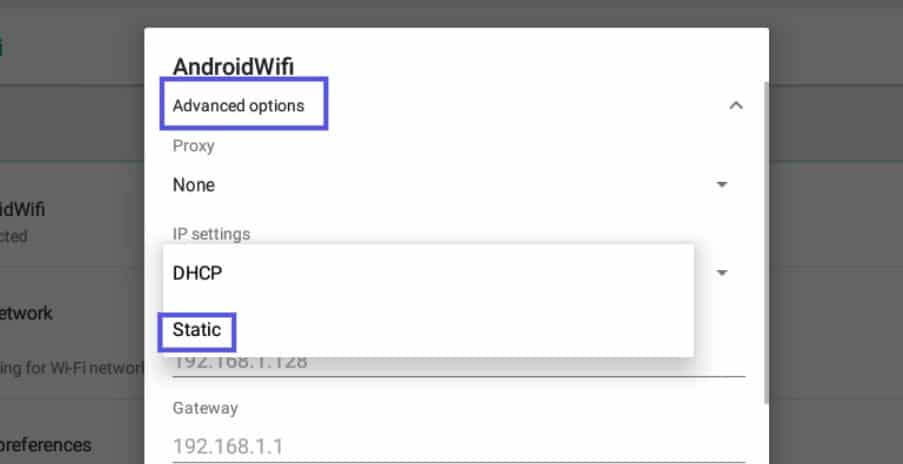
Enter the IP addresses into the respective fields, and save your changes.
If you’re running Ubuntu OS, you can change your DNS settings by clicking on the gear icon next to your network. Under IPv4 tab, there will be a text field to enter new DNS server addresses:

After you enter them, separating each with a comma, click on the Apply button.
5. Trash Temporary Files
Most browsers and systems will save temporary files to your device to use later.
However, if one of those files is corrupted, it may be what’s causing the DNS_PROBE_FINISHED_BAD_CONFIG error. Therefore, another solution we recommend is deleting your temporary files.
To do this in Windows, type “%temp%” into the search field along your desktop toolbar, and then hit Enter:

This will bring you to the “temp” directory on your computer, where you can view a list of temporary files:
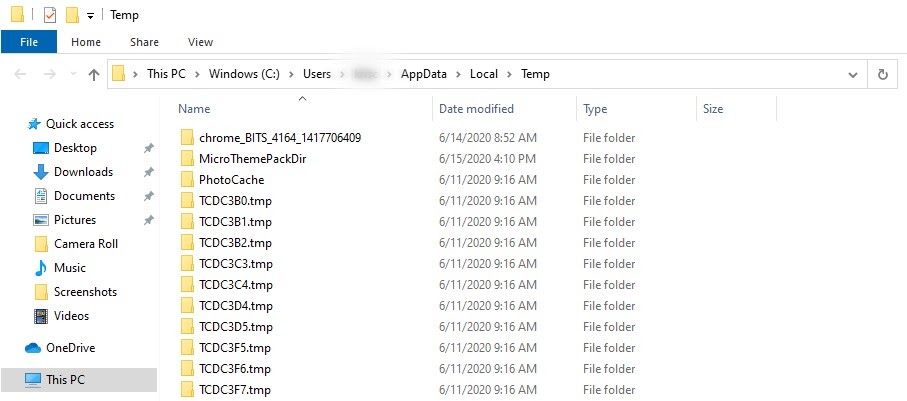
Select all of them and delete them.
On macOS, you can do this by first clicking on Finder and selecting Home (this may be your username instead). Next, hit cmd + shift + . (the period key). This should make your hidden files visible, so you can delete them.
Alternatively, you can try opening Finder and using the Shift + Cmd + G keys. Then, in the text field of the window that opens, enter “~Library/caches”, followed by Enter. This should show you the relevant folders, which you can then delete.
Ubuntu users can skip this step entirely, since the /tmp folder is automatically emptied every time the system is rebooted.
6. Disable Antivirus Software and Firewalls
One of the common issues with antivirus software, firewalls, and VPNs is that they can sometimes conflict with network settings. More specifically, they can interfere with your DNS servers.
Therefore, if you’ve reached this point and the DNS_PROBE_FINISHED_BAD_CONFIG error persists, your next course of action should be to temporarily disable your antivirus software and firewall applications.
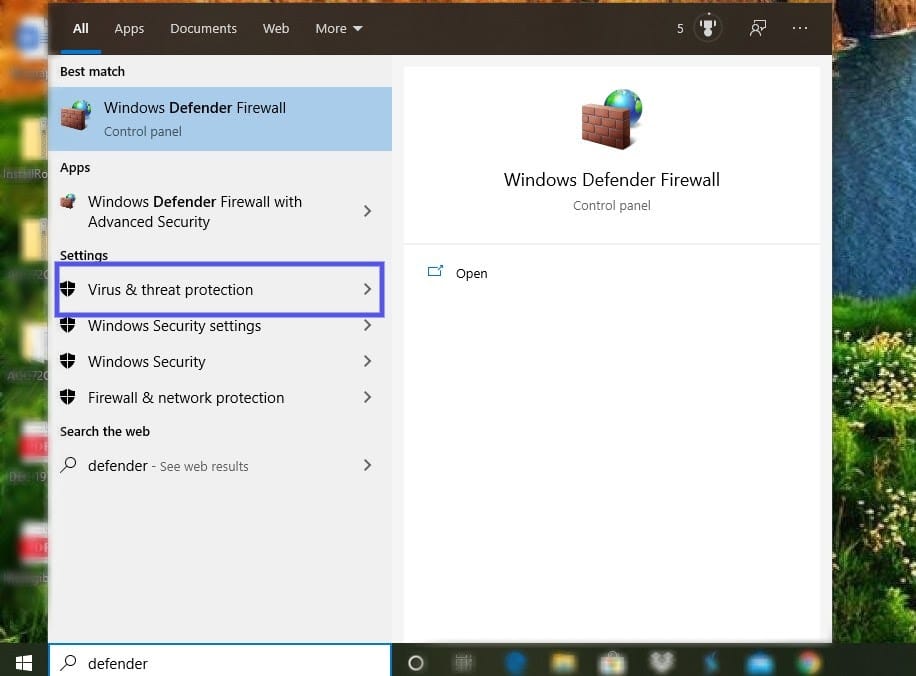
Here’s an example using Windows. Click on the Windows icon, then typing “defender” into the search field. Click on Virus & threat protection:
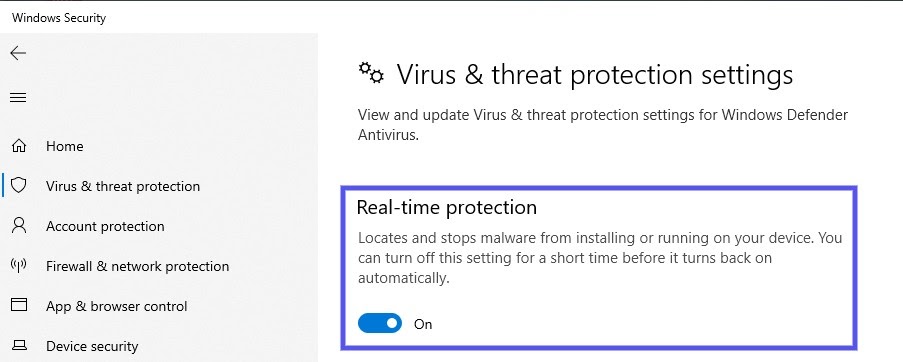
Navigate to Real-time protection, and toggle the switch to Off:
When you’re finished with that, in the left-hand panel, click on Firewall & network protection > Domain network:
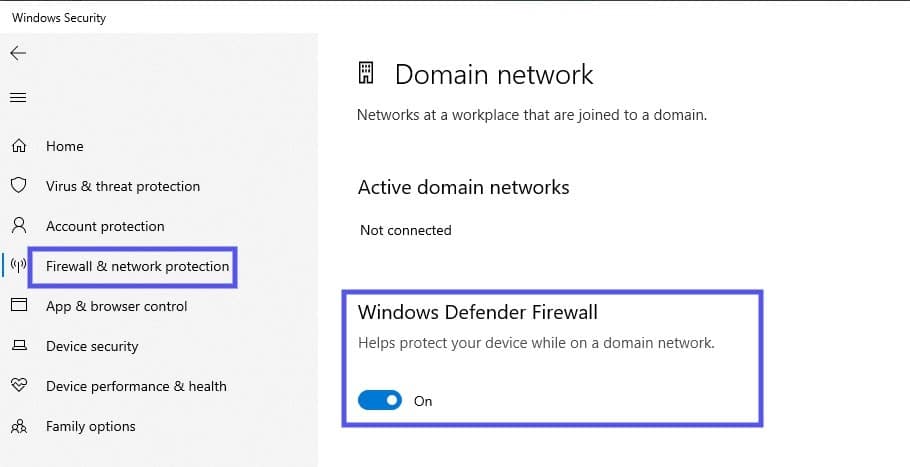
Under Windows Defender Firewall, toggle the switch to disable it. Now try accessing the website again.
Of course, the process for doing this will vary based on what system you’re using, as well as what antivirus and firewall software you have installed. If in doubt, check out the developer documentation for your specific software for more details.
You may also want to disable any WordPress security plugins you’re using, on the off chance that they’re causing an issue while you’re working on your website.
7. Update Your Network Drivers
If you’ve made it to this point on the list, it’s likely because you’re still seeing the DNS_PROBE_FINISHED_BAD_CONFIG error message after trying the above fixes. Fortunately, we have one more solution to try: updating your network drivers.
Outdated or corrupted network drivers can cause a variety of issues, including DNS and network interruptions. Windows Updates typically handle the necessary updates for you. However, you can double-check to see whether you can upgrade to the latest version manually.
To do so, type “device manager” into the search field of your taskbar, then click on the Device Manager control panel:
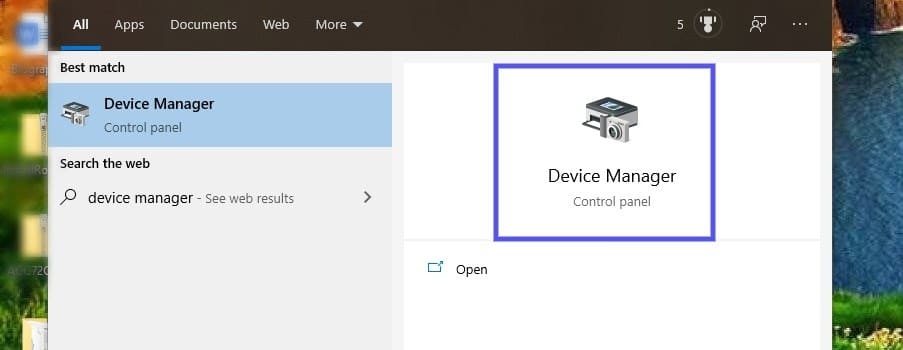
Click on Network adapters, then right-click on the network driver and select Update driver:

Restart your computer, and then try accessing the website again. You should no longer see the DNS_PROBE_FINISHED_BAD_CONFIG message!
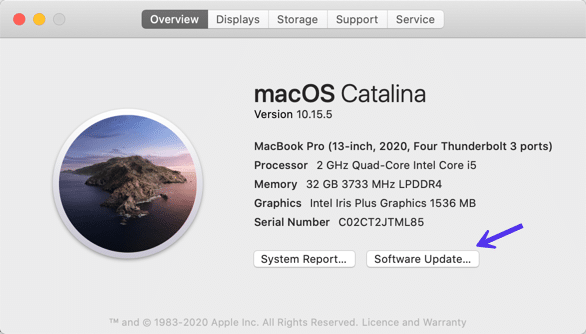
Apple handles system and driver updates as well, so this isn’t something you usually have to worry about on macOS. However, if you want to make sure your system is updated, you can do so by navigating to the Apple menu icon > About this Mac and then clicking on Software Update:
If you’re using Android, you can update your device by going to Settings > About Phone/Tablet/Phone/System > System Updates. The path may look slightly different, depending on the type of device you’re using and your version of Android.
Summary
There’s nothing fun about trying to access a website, only to find yourself staring at an error message. While irritating, DNS errors are actually quite common.
Fortunately, they’re also relatively easy to resolve and if you’re dealing with the DNS_PROBE_FINISHED_BAD_CONFIG error, here’s how to fix it:
- Restart your router.
- Clear your browser cache.
- Flush the DNS cache and renew your IP address.
- Manually change the DNS settings.
- Trash temporary files.
- Disable antivirus software and firewalls.
- Update your network drivers.

Head of Content at Kinsta and Content Marketing Consultant for WordPress plugin developers. Connect with Matteo on Twitter.

