
GoDaddy is one of the world’s most popular domain registrars with over 40 million domain names under its management.
If you purchased your domain name through GoDaddy, you have two different options to point your domain name towards Kinsta (or any other host). You can either edit or add a new A record, which is what this article focuses on. Or, you can use Kinsta’s premium DNS feature with Amazon Route 53 and change your nameservers at GoDaddy.
In this article, you’ll learn how to edit or add an A record at GoDaddy.
How To Add or Edit an A Record at GoDaddy
Follow the steps below to add or edit an A record at GoDaddy.
Step 1: Copy Your Site IP Address
Begin by locating and copying your Site IP address (IPv4) in MyKinsta under your site’s Info tab. This is the IP address you’ll need to point your domain to at GoDaddy.
Step 2: Navigate to DNS Management in GoDaddy
Next, log in to your GoDaddy account. If you’re not automatically taken to the Products where you can see your domain (you may need to scroll down the page a little), click on My Account near the upper left corner and select Domains under Quick Links.

Alternatively, you can click on your name near the upper right corner and select My Products from the dropdown menu.

Click on the kebab (three-dot) menu for your domain and select Manage DNS from the dropdown menu.

Step 4: Add or Edit Your A Record
Choose one of the options below to either edit an existing A record or add a new one to your DNS at GoDaddy.
Edit an Existing A Record
On the DNS Management page, look for the Records section and the A record under the Type column. It should be the first option in the list with @ in the Name column.
If you do not see an existing A record for your domain, skip to the Add a new A Record section below.
If you see an existing A record for your domain, click the Edit button next to the record.

Replace the IP address in the Value field with your Site IP address from MyKinsta and click the Save button.

Add a New A Record
If there isn’t an existing A record for your domain (or if you accidentally deleted it instead of editing), click the Add button and enter the following details:
- Type: A
- Name: @
- Value: Your Site IP address from MyKinsta
Click the Add record button to save your new A record.

How To Point Your WWW CNAME to Kinsta
We also recommend pointing the www version of your domain to Kinsta by making sure the www CNAME is pointed to your root domain.
Step 1: Check for an Existing www CNAME
In the Records section of the DNS Management page, look for a CNAME record under the Type column, with your root domain (example.com) in the Data column.

Step 2: Edit Your CNAME if Necessary
If you have a www CNAME and it is pointed to something other than your root domain, edit the record and change the Value to @, unless that needs to be pointed elsewhere (which isn’t common).
Step 3: Add a CNAME if Necessary
If you do not see a www CNAME for your domain, click the Add button and enter the following details:
- Type: CNAME
- Name: www
- Value: @
Click the Add record button to save your new CNAME record.

How To Add or Edit a Subdomain a Record at GoDaddy
To add or edit an A record for a subdomain at GoDaddy, follow the steps above to either add or edit an existing A record, but use the corresponding subdomain instead of @ in the Name field.
For example, to add blog.yourdomain.com as a subdomain, enter blog in the Name field when adding the new A record.

If you’ve previously added the blog.yourdomain.com subdomain, look for and edit that existing subdomain in your DNS records.
What If You Don’t See the Full Records Section at GoDaddy?
If you would prefer to manage your DNS at GoDaddy, you’ll need to point your name servers back to GoDaddy so you can manage DNS there.
To do that, look for the Nameservers section on the same DNS Management page and click the Change button.
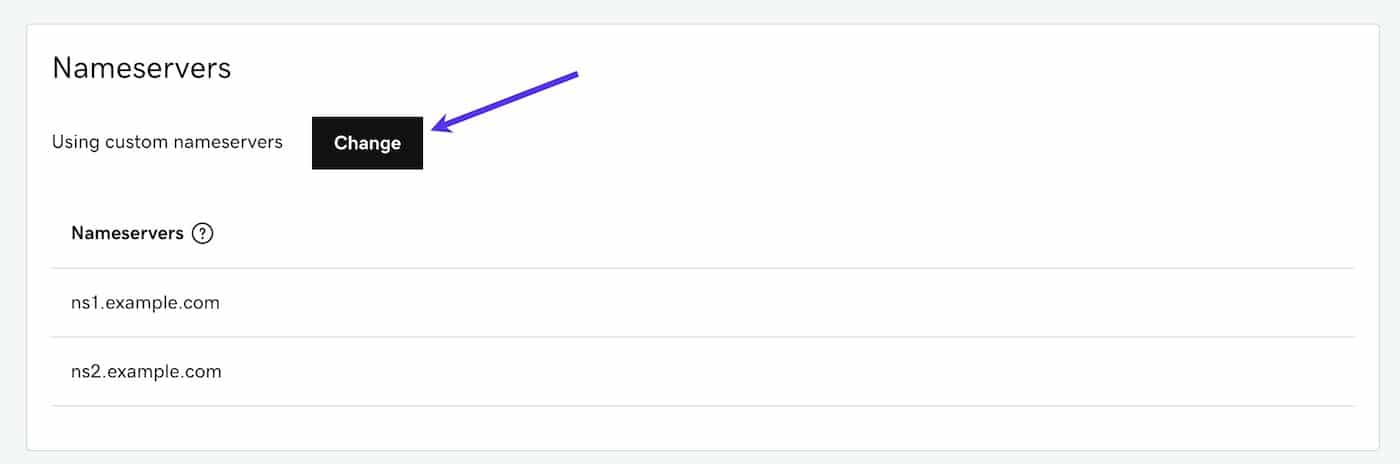
In the Edit Nameservers pop-up that appears, select the I want to use GoDaddy default nameservers (recommended) option and click Save when prompted.


Brian has a huge passion for WordPress, has been using it for over a decade, and even develops a couple of premium plugins. Brian enjoys blogging, movies, and hiking. Connect with Brian on Twitter.

