XAMPP is a useful platform for WordPress developers who are looking for a localhost solution. However, some issues can show up when you’re using this tool. These errors could stall your workflow and leave you unsure how to get XAMPP running again, especially because everything may appear to be in order on the surface.
Fortunately, once you identify the reason XAMPP is not starting for you, it often takes just a few tweaks to fix it. You can then get right back to work on your latest development project.
In this article, we’ll provide a brief overview of what XAMPP is for those who are new to the platform. Then we’ll show you how to check your error logs and resolve three common problems that may keep your local server from starting. Let’s dive in!
A Brief Introduction to XAMPP
XAMPP is a free local development tool. It essentially functions as a server on your computer that you can use to host websites — much like DevKinsta, our own free local development app.
Note that these sites are not publicly available to users on the open Internet. Rather, they’re meant to be used locally for development and testing purposes. If you wish, you can migrate each project to a live server once it’s finished.
XAMPP is a handy solution because it prevents visitors from finding your project while it’s still in progress. Plus, since the site is hosted on your computer, its performance should top-notch and you can work offline.
You can use XAMPP on any major Operating System (OS), including Windows, macOS, and Ubuntu Linux. It uses the open source Apache server and MySQL, and comes with several built-in tools such as phpMyAdmin and FileZilla.
When it comes to WordPress in particular, XAMPP is one of the top localhost solutions because it meets all of the Content Management System’s (CMS’s) requirements. These include:
- PHP 7.4
- MySQL 5.6
- HTTPS support
- Apache or NGINX server
If you’re interested in installing XAMPP, you can check out our tutorial on installing WordPress locally, which includes directions for this task.
How to Check Your XAMPP PHP Error Log
In the event that you’re developing a WordPress site locally using XAMPP, and you can’t get the platform to start up, your first step should be to check your error logs. This may point you in the direction of the problem’s cause.
If you know why the issue is occurring, you should be able to resolve it much faster than troubleshooting it by trial and error. Logs are accessed using different paths, depending on your OS and version. Fortunately, there’s a simple way to find the path for your setup.
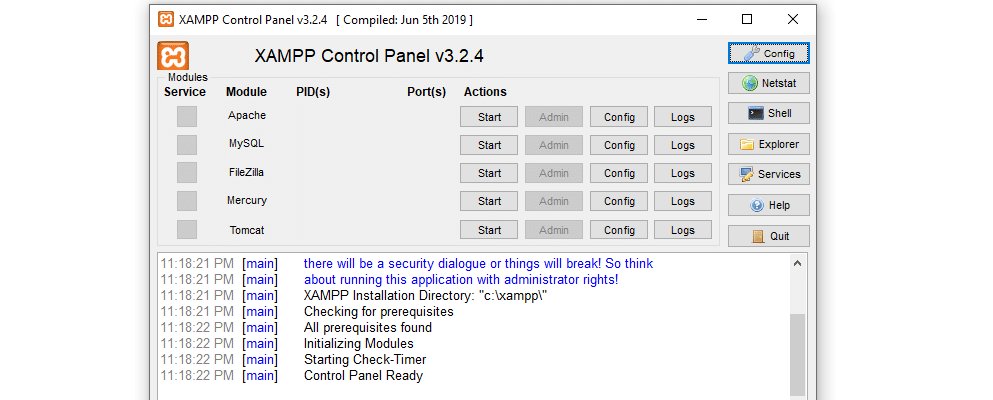
On Windows, the XAMPP activity log appears in the lower half of the control panel dialog box. You can also access the error log by by clicking on the Logs button next to the Apache Config button:
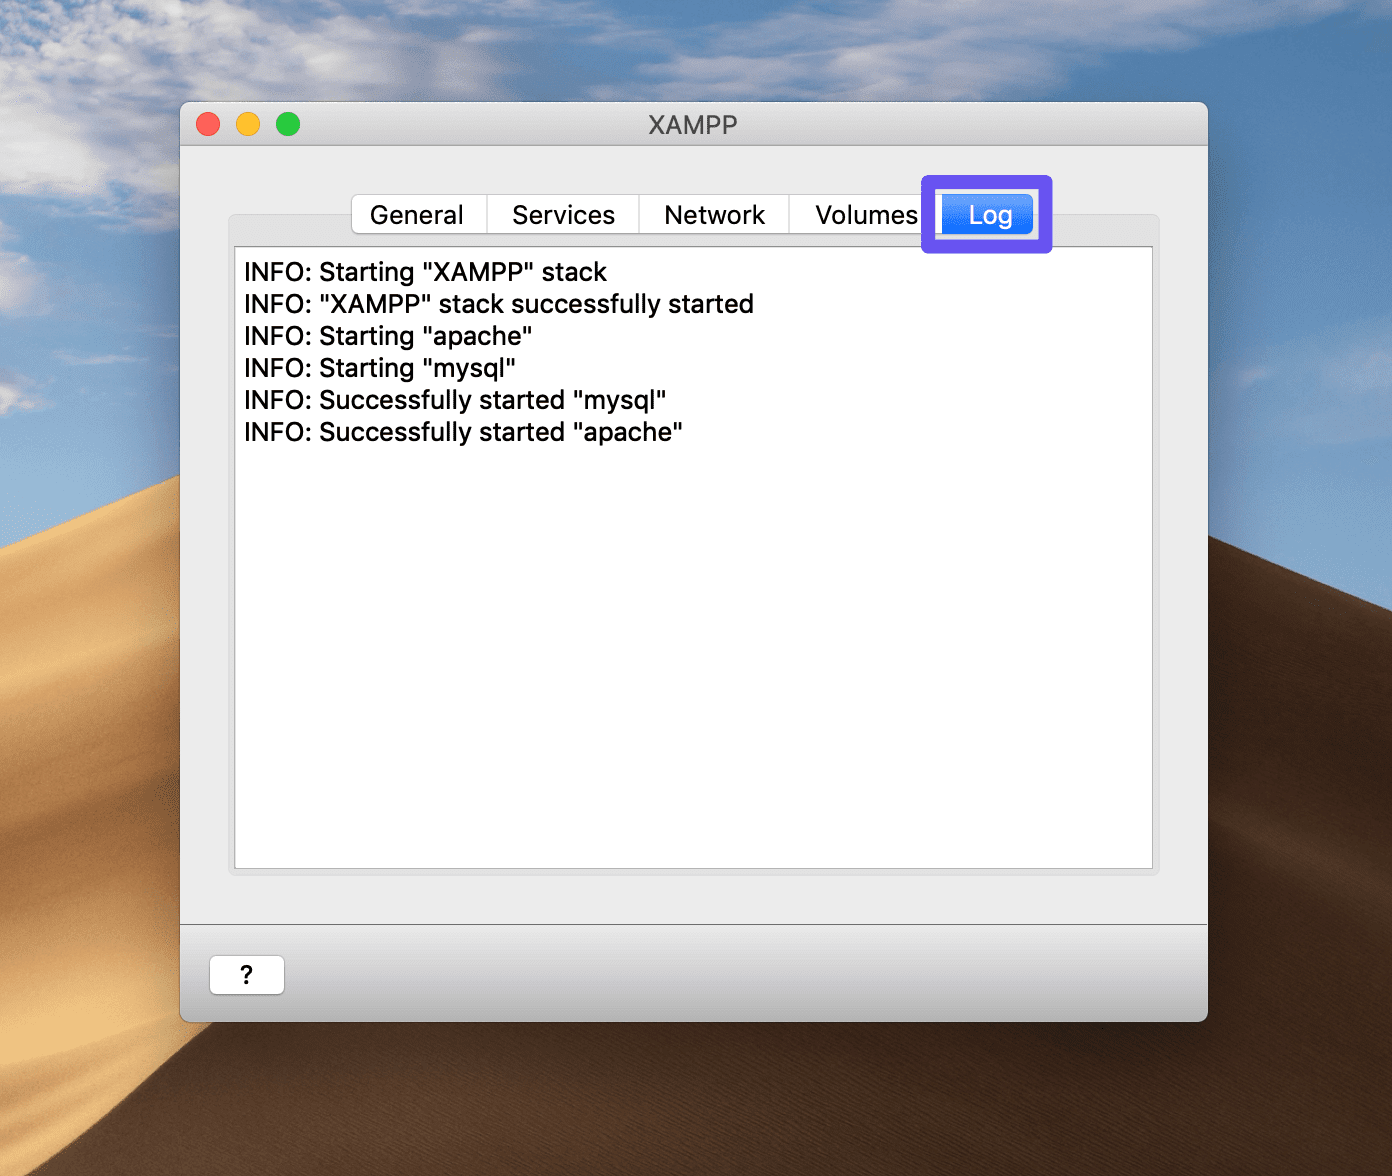
On macOS, click on the Log tab in the control panel to see the activity log:
You can then take a look through your logs to see if there’s anything suspicious and follow any directives provided to resolve the issue(s).
In some cases it may be beneficial to have access to your PHP log as well, although this is usually more helpful for troubleshooting WordPress errors than those for Apache or MySQL.
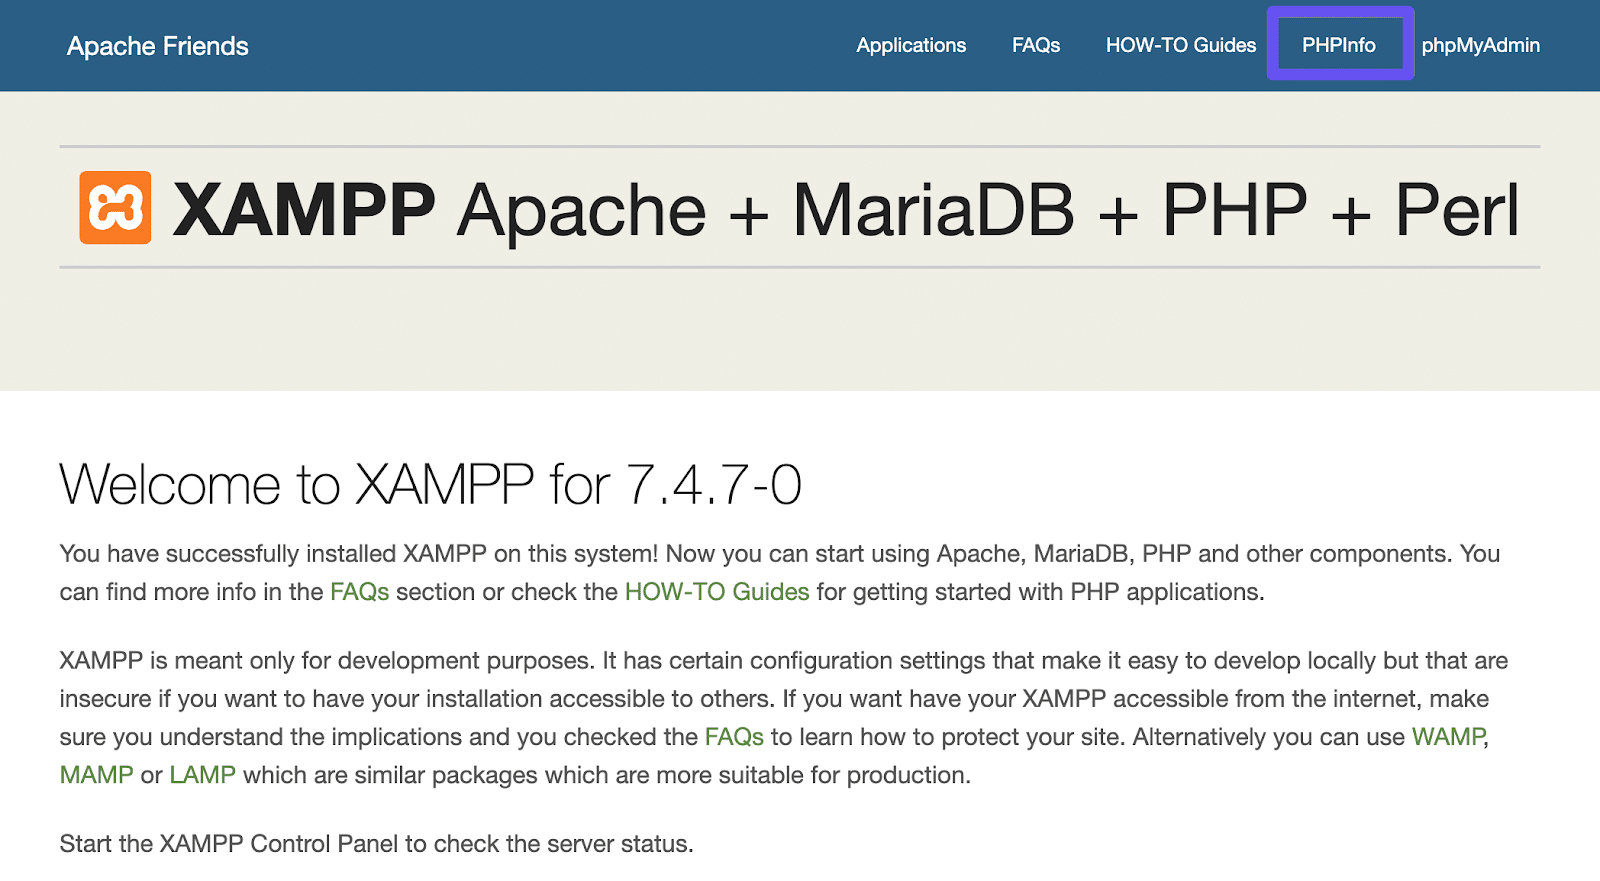
To locate your PHP error logs, open the XAMPP dashboard by typing http://localhost into your browser’s address bar. There, click PHPInfo at the top of the screen:
Then search for “error_log”. This will reveal the path you need to enter in your address bar to view the log:
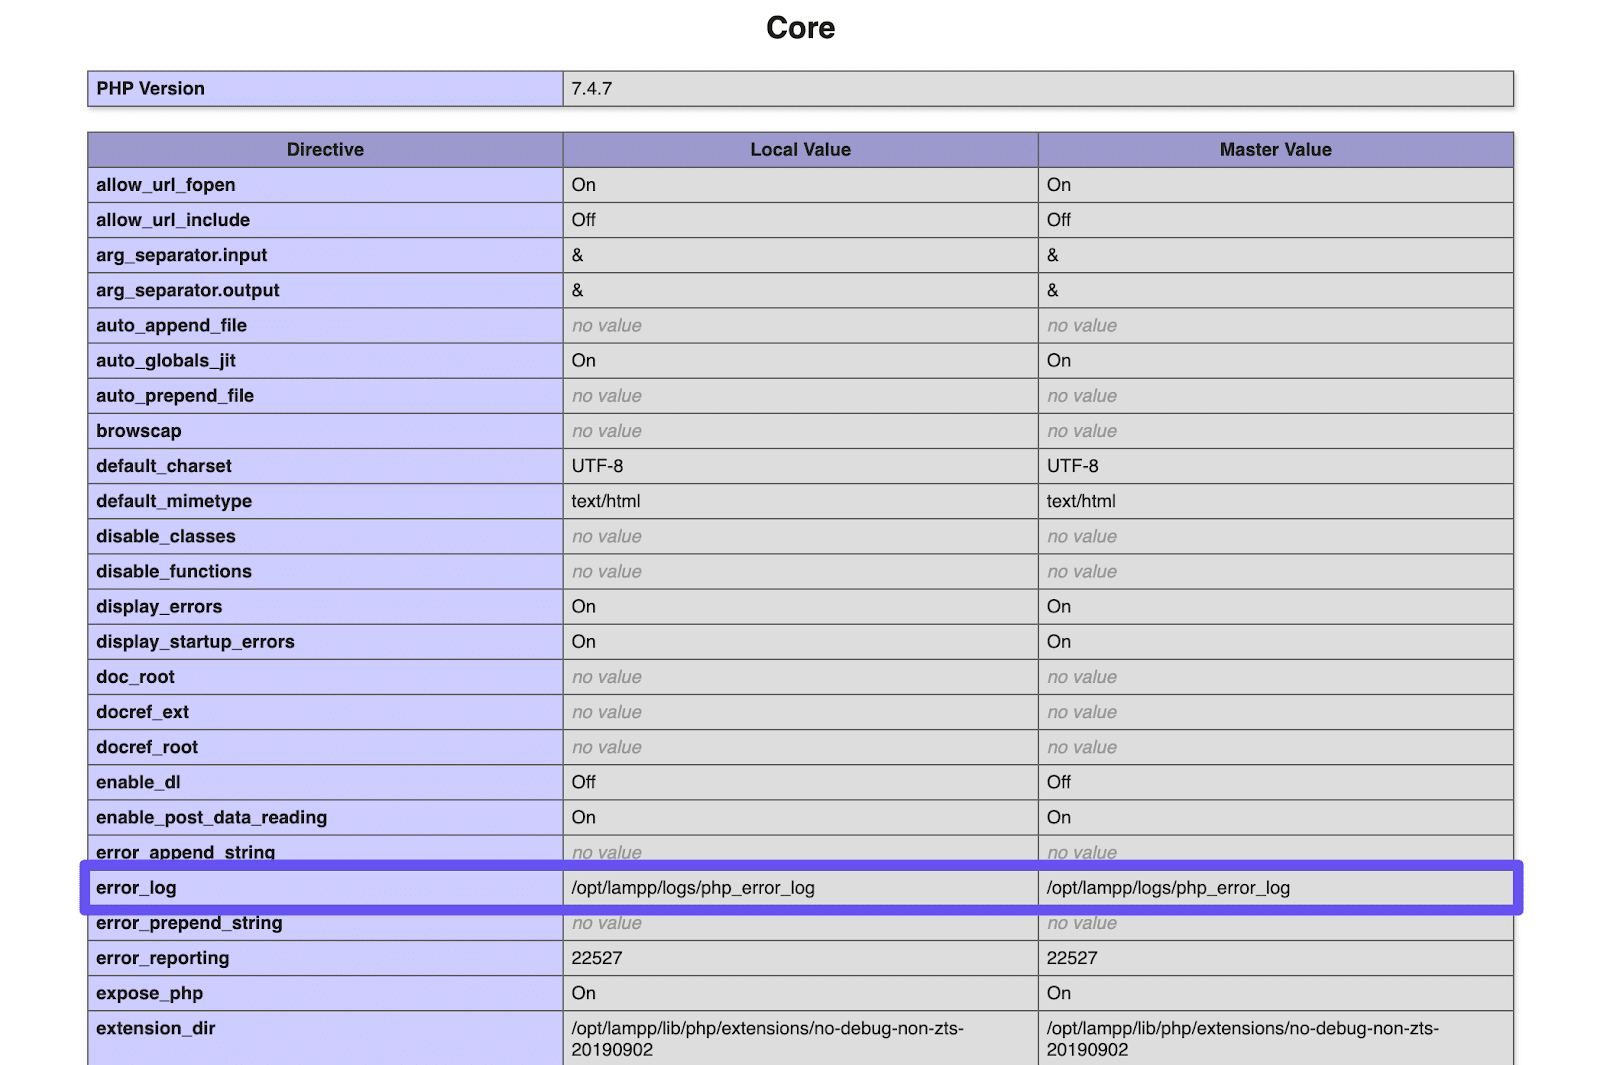
You should be able to simply type this path into your browser after http://localhost to view the PHP log.
Accessing Your XAMPP-VM for Mac PHP Logs
There are actually two versions of XAMPP for Mac users – “XAMPP for macOS” and “XAMPP-VM“. The latter enables you to run XAMPP for Linux on your Mac, using a virtual machine.
It’s important to know which version you’re using because it determines how you access key files we’ll be referencing throughout this post. For instance, if you’re using XAMPP for OS X, you can simply open Finder, go to Applications > XAMPP, and look for the logs folder to find your PHP log.
However, if you’re using XAMPP-VM, you first need to open the XAMPP control panel, click on the Volumes tab, and select Mount:
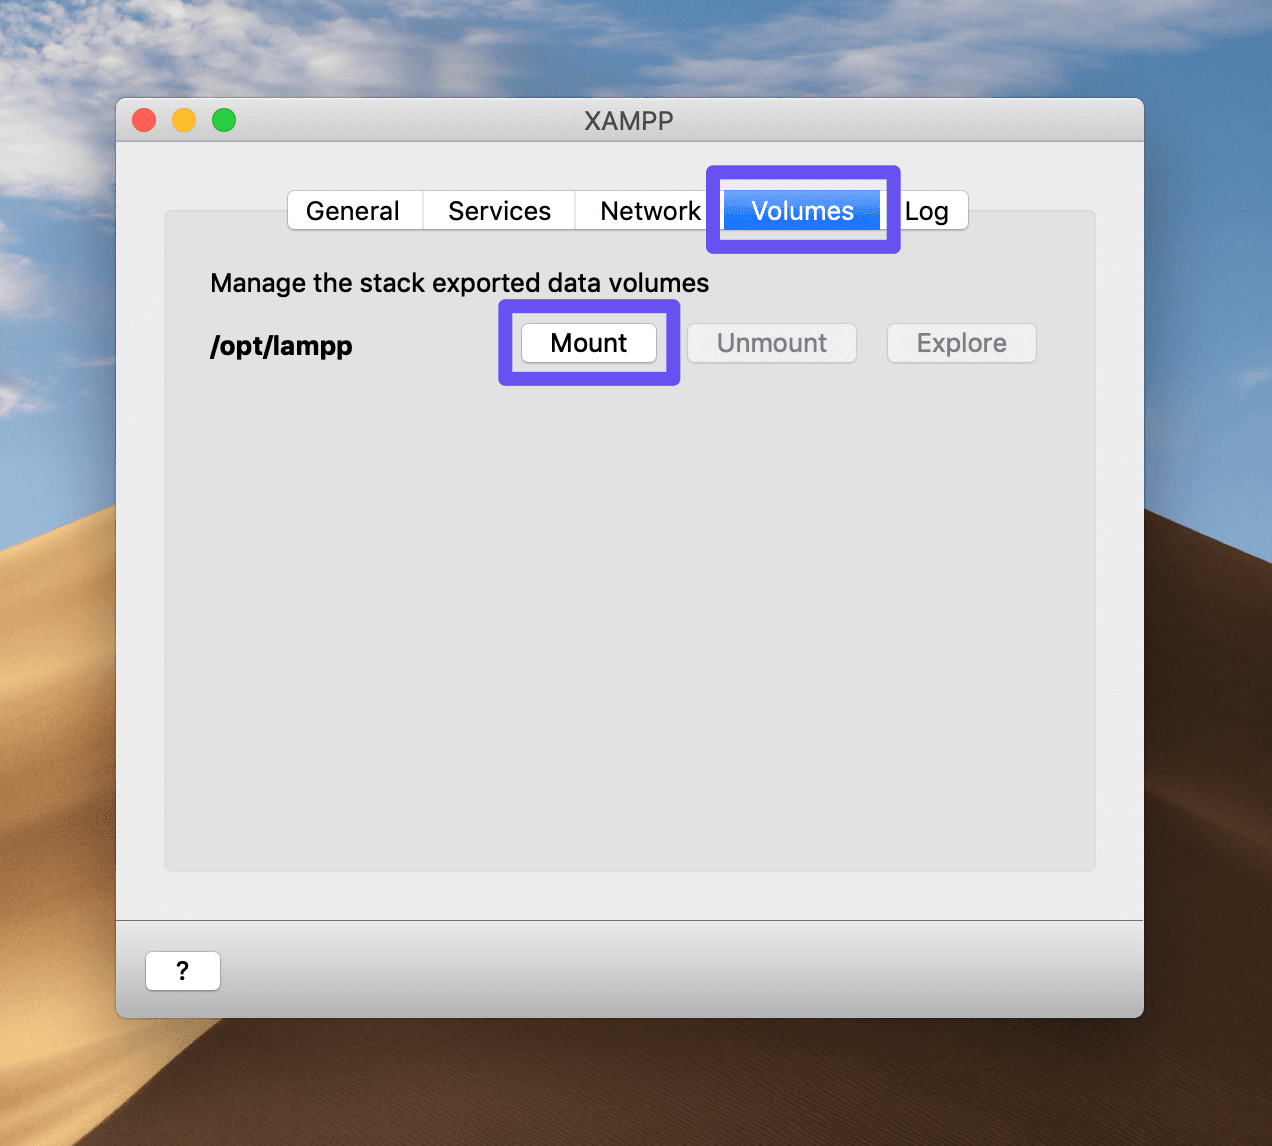
Then, when you launch Finder, click on your IP address in the left-hand menu and open the lampp folder. This is where you’ll find all your XAMPP files, including your PHP error logs.
How to Fix XAMPP If It’s Not Working (3 Common Solutions)
If your error logs are not forthcoming about the cause of the problem, you can try these solutions to get XAMPP working again. These tips also elaborate on some of the instructions your error log may be showing.
1. Resolve Apache Port Conflicts
If Apache cannot start, you won’t be able to access your XAMPP dashboard or any sites you have installed on the platform. A port conflict may be the underlying problem.
By default, Apache connects over port 80. If you see an error message that says this port is already in use, another application is blocking the connection (Skype is a frequent offender).
If you click on the Netstat button in the XAMPP control panel, it should show you all the ports that are currently in use, and which applications are using them. You may want to check this if XAMPP Apache is not starting:
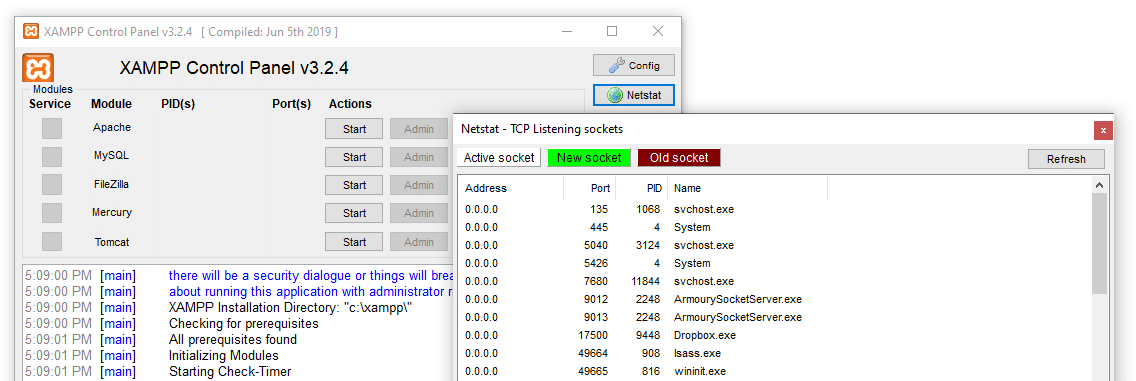
If you know which program is the problem and can unblock the port by removing the application that’s in the way, this will solve the issue immediately. However, you can also change the Apache listening port for XAMPP, so that you connect while leaving your other platforms intact.
First, you’ll need to find your httpd.conf file. This process is slightly different depending on your OS and which version of XAMPP you’re using.
Changing Your XAMPP Apache Port on Windows
On Windows, open the XAMPP control panel and click on the Config button:
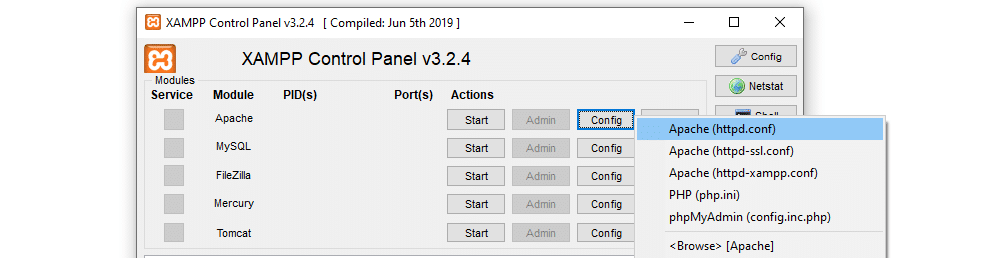
Then select httpd.conf. Search in this file for the line that reads “Listen 80”, and change it to “Listen 8080”. This will enable you to connect to Apache over port 8080 instead of the default option.
You’ll also need to look for the line that reads ServerName localhost:80, and change this to ServerName localhost:8080. Save and close the file.
Then try starting Apache again. If this was your only problem, the platform should run as intended. However, note that if you have a WordPress installation hosted via XAMPP, you’ll need to find and replace all mentions of “localhost” with “localhost:8080”, including those in your database.
Changing Your XAMPP Apache Port on Mac
If you’re running XAMPP for macOS, you can find your httpd.conf file by going to Applications > XAMPP in Finder. Once you find the file, you can carry out the same steps to change your port as we described for Windows users.
For those using XAMPP-VM, scroll back up to the section where we explained how to access your error logs to learn how to find your XAMPP files. Once you access the lampp directory, you’ll find httpd.conf in apache2 > conf.
2. Include the Listening Port in the Address When Accessing Localhost
Normally, you can simply type http://localhost into your browser’s address bar to access your XAMPP-hosted sites or dashboard. The platform automatically connects to Apache over its default listening port, 80.
However, if you’ve changed your XAMPP installation’s listening port (or someone else with access to your computer did so), it won’t be able to connect. You may also see this occur if there’s an Apache port conflict, as described above.
This problem can be quite confusing because the XAMPP control panel may show that Apache and MySQL are both running. However, you won’t be able to access your site or tools such as PHPInfo or phpMyAdmin.
This error can take a few different forms. If you’re trying to access your local WordPress site, you may see a 404 error page. Chrome users may see ERR_CONNECTION_REFUSED instead:
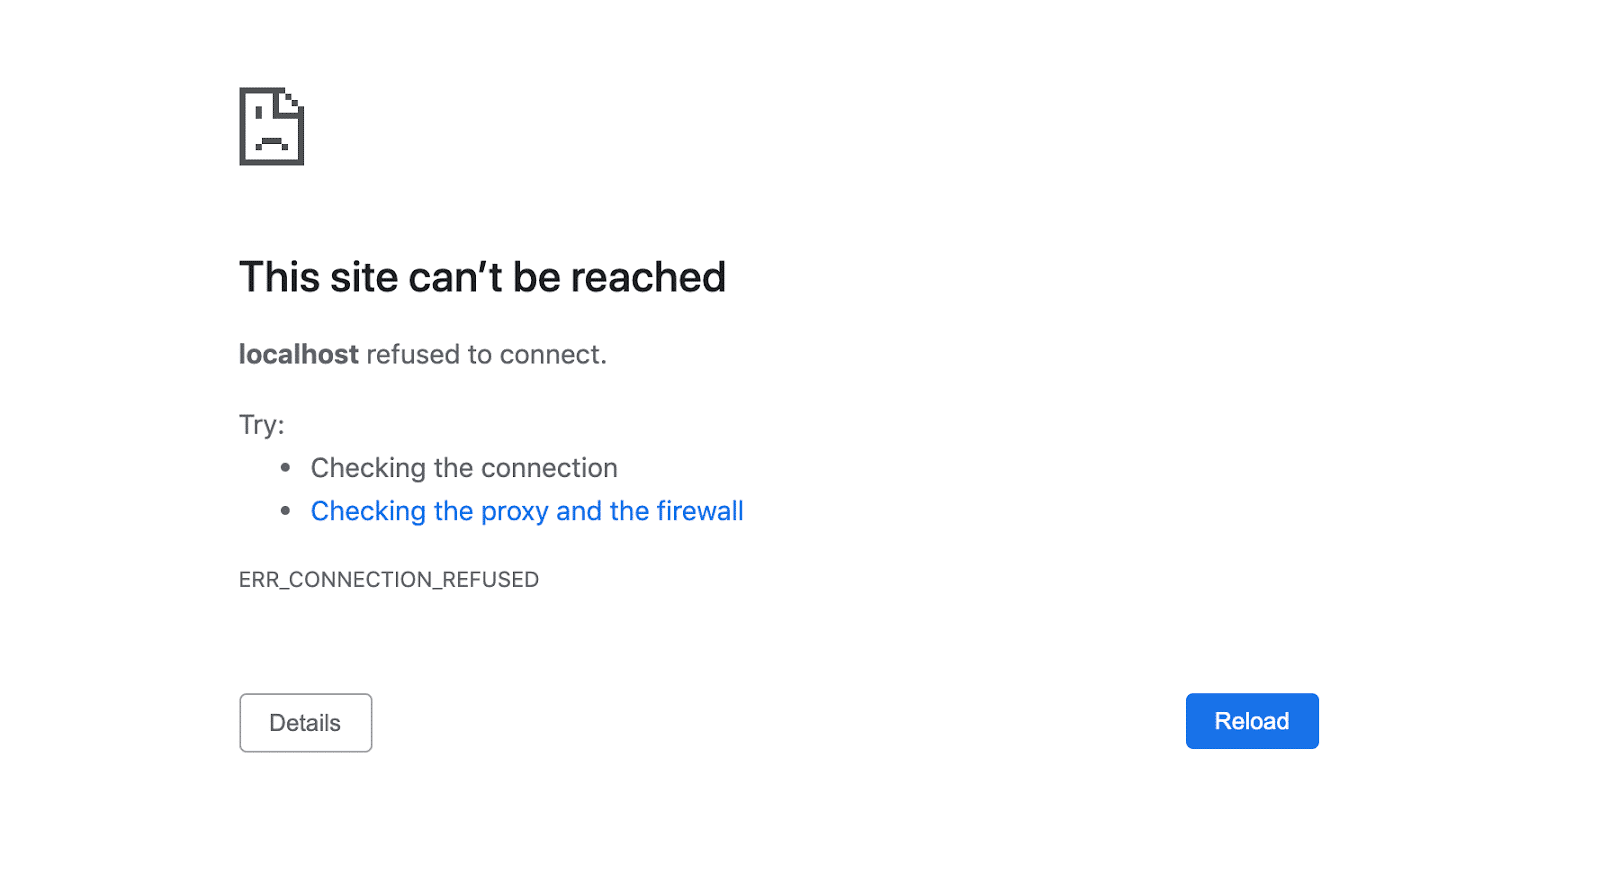
Fortunately, the solution is fairly simple. You simply need to append the listening port to the address. For example, if you’re using the most common alternative port, you would enter http://localhost:8080 instead of just http://localhost.
However, if you would like to be able to simply enter localhost even though you have changed your Apache listening port, you can do so.
Changing the Default Port on Windows
Windows users change the XAMPP Apache default port to their new listening port so that you don’t have to specify it in the address bar. To do so, click on Config > Service and Port Settings > Apache in the XAMPP control panel:
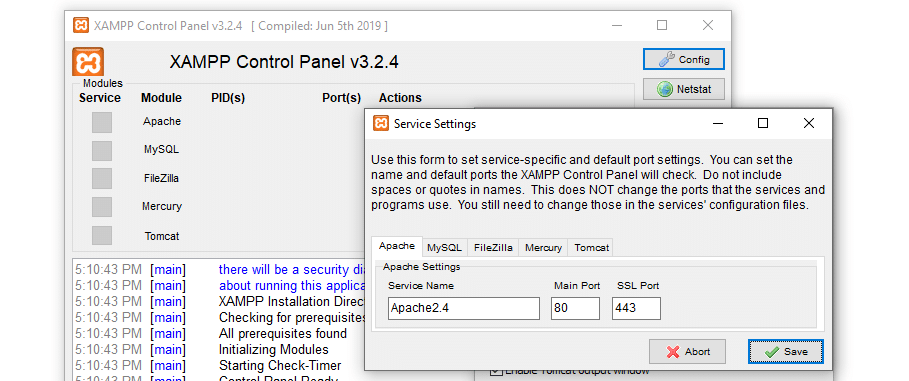
Then replace the Main Port value with the new Apache port you configured and save your changes.
Set Up Port Forwarding on macOS
On macOS the process is quite different. In your control panel, click on the Network tab. Here you can set up port forwarding rules:
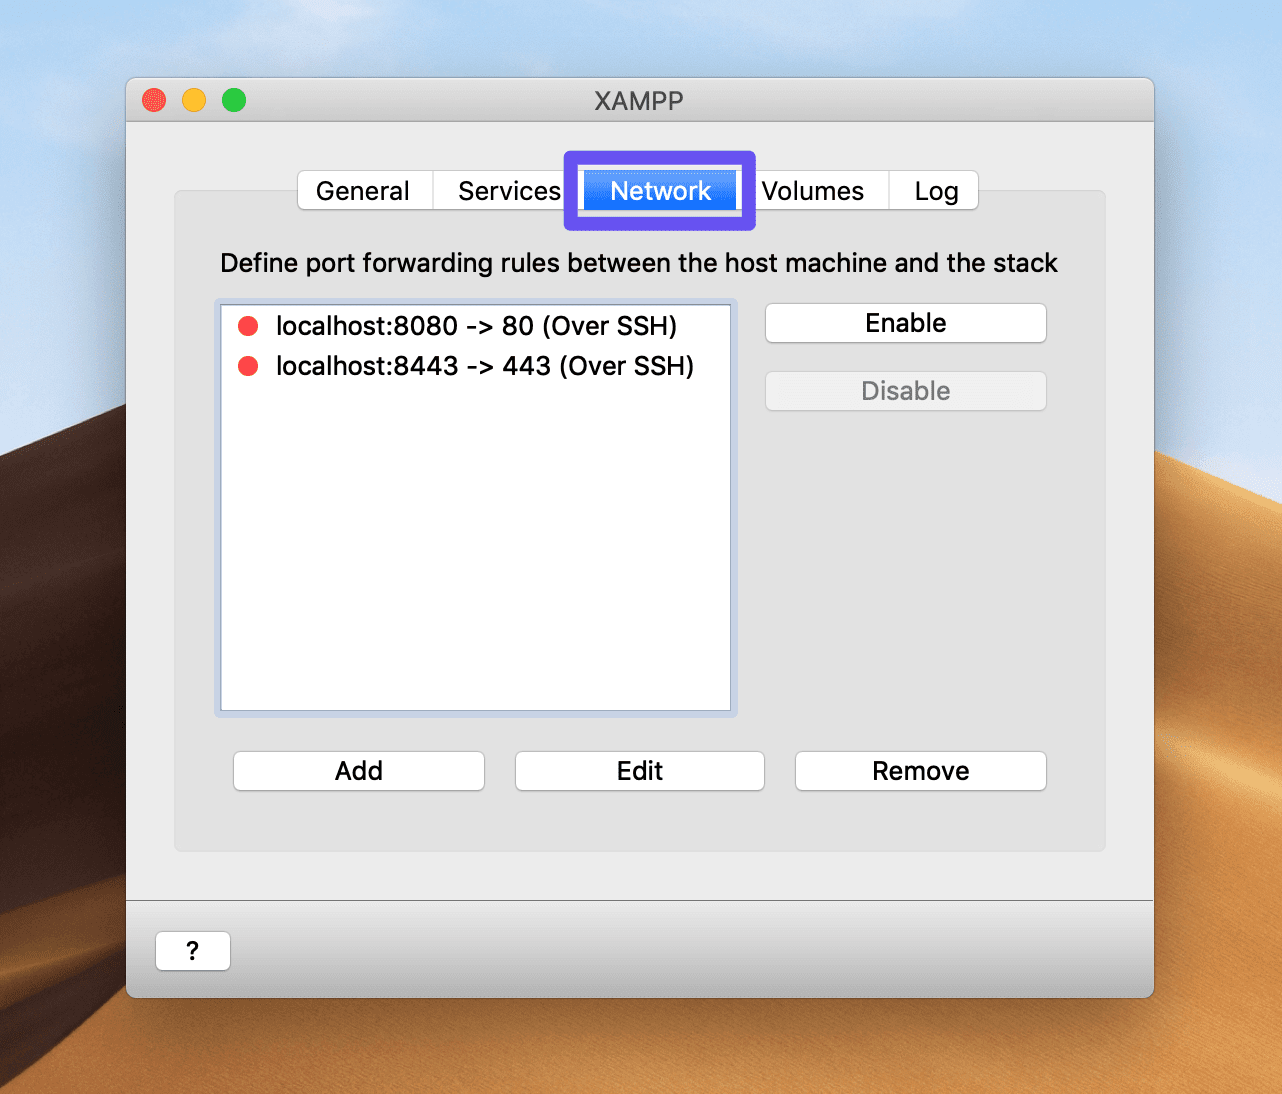
You’ll want to add a new rule that redirects traffic to the default port to your new Apache listening port. If you click on Add, you’ll be able to enter these values in the relevant fields:
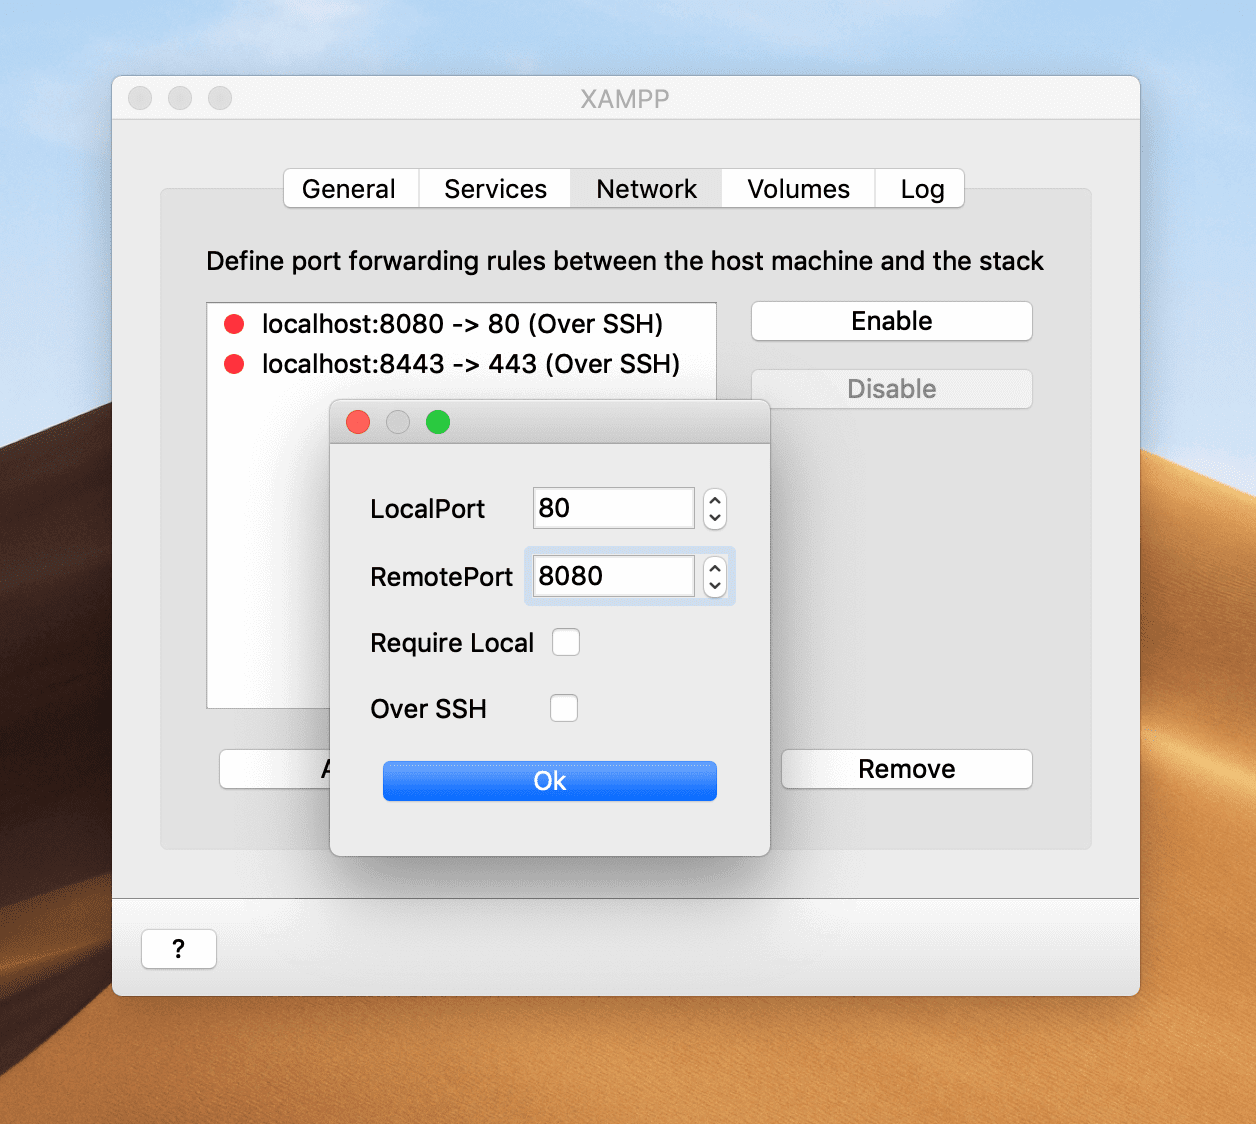
Select the rule from the list and click on the Enable button to start using it.
3. Change Your MySQL Port
Finally, sometimes XAMPP is not working due to an issue with MySQL, rather than Apache. However, the problem is still often a port conflict, which means that by now you should have a good idea on how to fix it.
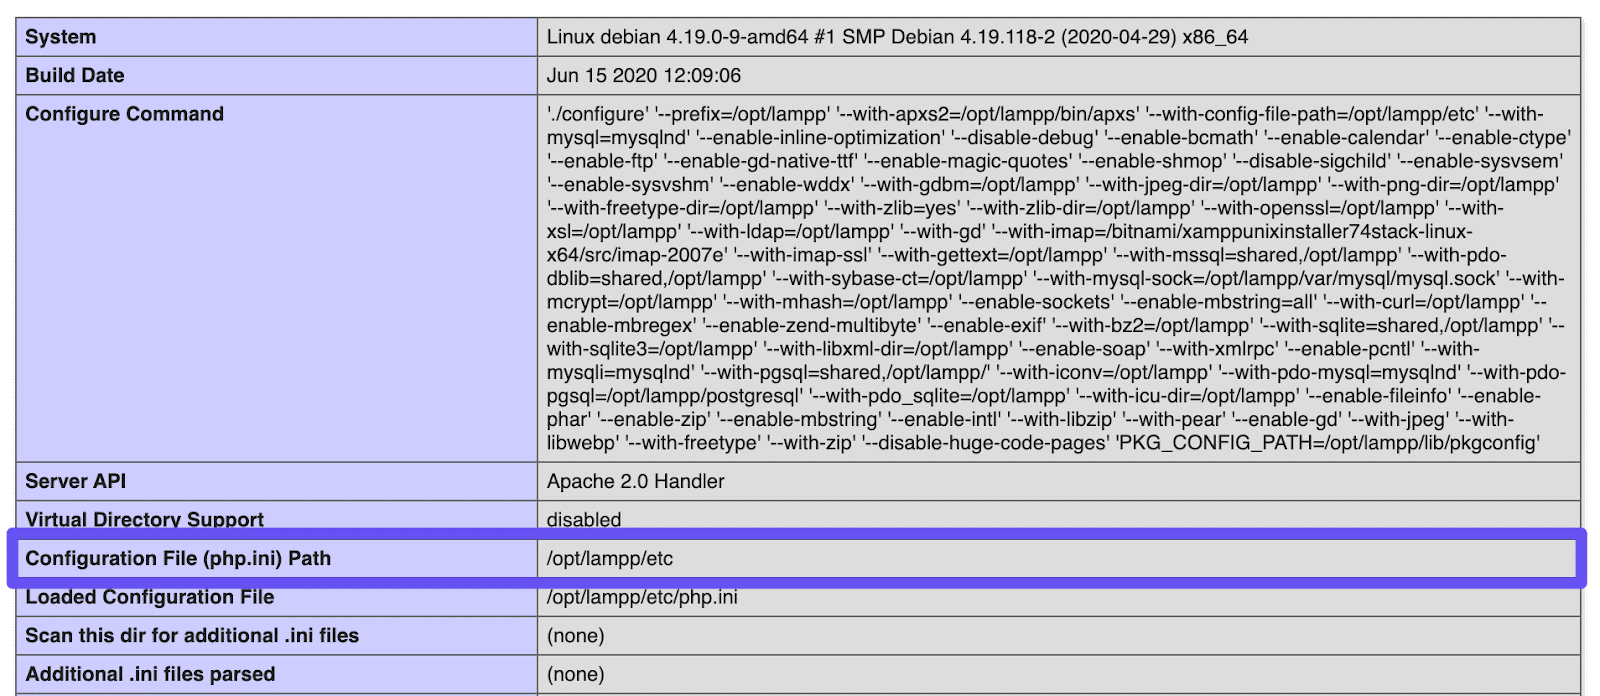
In this case, you’ll need to access your php.ini file instead of your configuration file. Navigating to your XAMPP dashboard and clicking on PHPInfo as we described earlier in this post will enable you to find the path to this file for your installation:
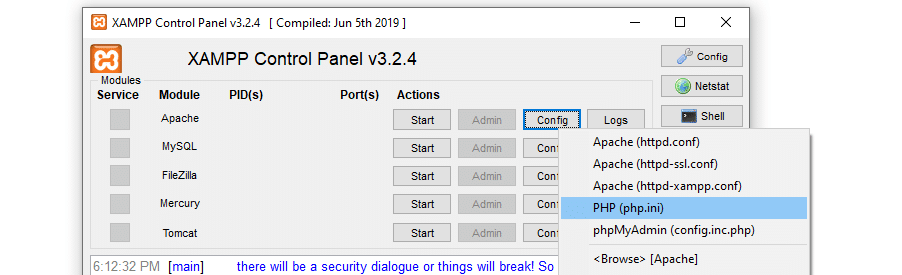
Alternatively, if you’re using XAMPP for Windows, you can access this file from the control panel by click on Config > PHP (php.ini):
Once you find and open php.ini, look for the lines that read port = 3306, and change them to read port = 3307. Save and close the file, and then restart MySQL.
Summary
XAMPP is a helpful tool to have in your corner, but it can be frustrating to troubleshoot certain errors that prevent you from accessing your local WordPress site. Fortunately, these are often port conflicts that you can quickly implement workarounds for.
In this article, we showed you what to do if XAMPP isn’t working due to a problem with Apache or MySQL:
- Resolve Apache port conflicts by changing your listening port to 8080.
- Include the listening port in the address when accessing localhost.
- Change your MySQL port to 3307 if another application is blocking the default port 3306.
Don’t forget to check out DevKinsta as an alternative to XAMPP.

Head of Content at Kinsta and Content Marketing Consultant for WordPress plugin developers. Connect with Matteo on Twitter.