Fixing the ERR_CONNECTION_REFUSED Error
In a digital world hooked on instant gratification, one of the last things you want to experience when browsing is an error message, such as ERR_CONNECTION_REFUSED. This can be incredibly frustrating, and may even be a sign that something serious has gone wrong.
For average users, the really confusing errors are the ones where it can sometimes hard to distinguish between a problem with your site and something else, such as a networking or browser issue.
The “ERR_CONNECTION_REFUSED” message is an especially common and usually non-WordPress site related error message you’ll sometimes see in Chrome. Fortunately, it’s relatively easy to pinpoint the cause of this problem.
In this post, we’ll explain what the message means and how to fix it. But first, let’s take a deeper look into what this error actually means.
| Error Code | ERR_CONNECTION_REFUSED |
| Error Type | Connection |
| Error Variations | This site can’t be reached Unable to connect Hmmm…can’t reach this page |
| Error Causes | Internet connection issues Cache issues Antivirus, firewall, or VPN interference Faulty Chrome extensions |
What Is the ERR_CONNECTION_REFUSED Error?
The ERR_CONNECTION_REFUSED is a connection error that may appear in Google Chrome. It happens when the user tries to access a page, but the browser refuses to connect. This is a client-side issue that is likely to be caused by a poor internet connection.
Unfortunately, encountering errors like this comes hand-in-hand with using the internet. There are hundreds of possibilities, from the white screen of death to the classic 404 error , the ERR_CONNECTION_TIMED_OUT error or the ERR_CACHE_MISS.
Trust us, our support team deals with all sorts of errors on a daily basis. So this is nothing new for us.
What Causes the ERR_CONNECTION_REFUSED Error?
Like we said, the cause for this issue can be quite simple. If you have a poor internet connection, you may be seeing this message in Google Chrome. But there are also other reasons for the ERR_CONNECTION_REFUSED error:
- Chrome extension issues
- Antivirus and firewall interference with browser
- Incorrect internet settings
- Cookies Issues
- DNS Cache Issues
- Outdated version of browser
How to Fix the ERR_CONNECTION_REFUSED Error?
Although the range of potential causes can make troubleshooting tricky, it is possible to fix the ERR_CONNECTION_REFUSED error. Let’s walk through nine steps you can take, starting with the ones most likely to provide an answer.
1. Check the Status of the Website
Your first port of call should be to check the status of the website you’re trying to access. As we’ve already mentioned, the ERR_CONNECTION_REFUSED error can sometimes be caused by the site’s server, rather than your own internet connection.
A simple way to check whether this is the case is to visit another web page. If the error message occurs again, the problem most likely originates with your connection. If the second page loads correctly, however, the first site was probably at fault.
You can also use Down For Everyone Or Just Me:
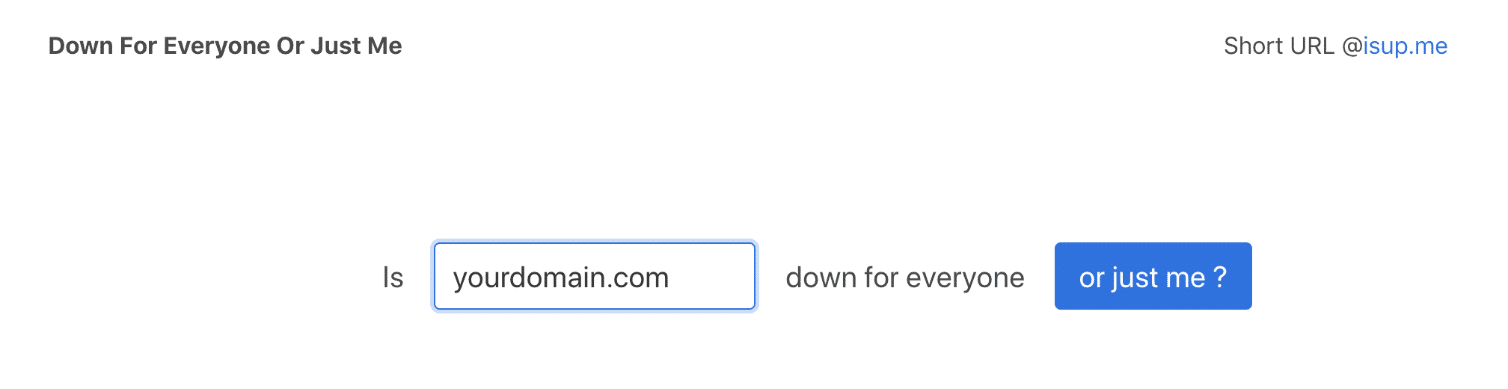
Enter the address of the non-functioning page, and click on Or just me?. This site will then assess whether the page is offline (down), or online (up). Unfortunately, when a page is down, the only thing you can do is wait for it to be fixed. However, if the page is up and is still not loading for you, it’s time to do some further troubleshooting.
2. Restart Your Router
As a tried-and-tested method for fixing many internet-related issues, your next step will be to try ‘turning it off and back on again’. Restarting your home or office router doesn’t come with a 100% success guarantee. However, the process takes just a few minutes, so it’s more than worth a try when you’re dealing with a potential connection issue.
To do this, disconnect the power supply to your router. You’ll then need to wait for about 30 seconds, before plugging it back in. Once the router has booted up again, try to access the page that returned an error. If it loads, then you’re good to go. If not, there’s likely another cause at play.
3. Clear Your Browser’s Cache
Like any good internet browser, Chrome will store information in its cache on your computer or device. This includes your browsing history, saved login data, and cookies – all of which are recorded in order to load the relevant pages more quickly the next time they’re visited.
Although they’re useful, caches can cause numerous issues when they become outdated. This is because the cached version of a page is likely to no longer match the current, live version. Fortunately, this problem is easily solved by clearing your cache.
But before you do that, you can easily check to see if it’s a browser cache issue by first opening up your browser in incognito mode. Or you can try a different browser. If you’re still seeing the error, then you will want to proceed with clearing your cache.
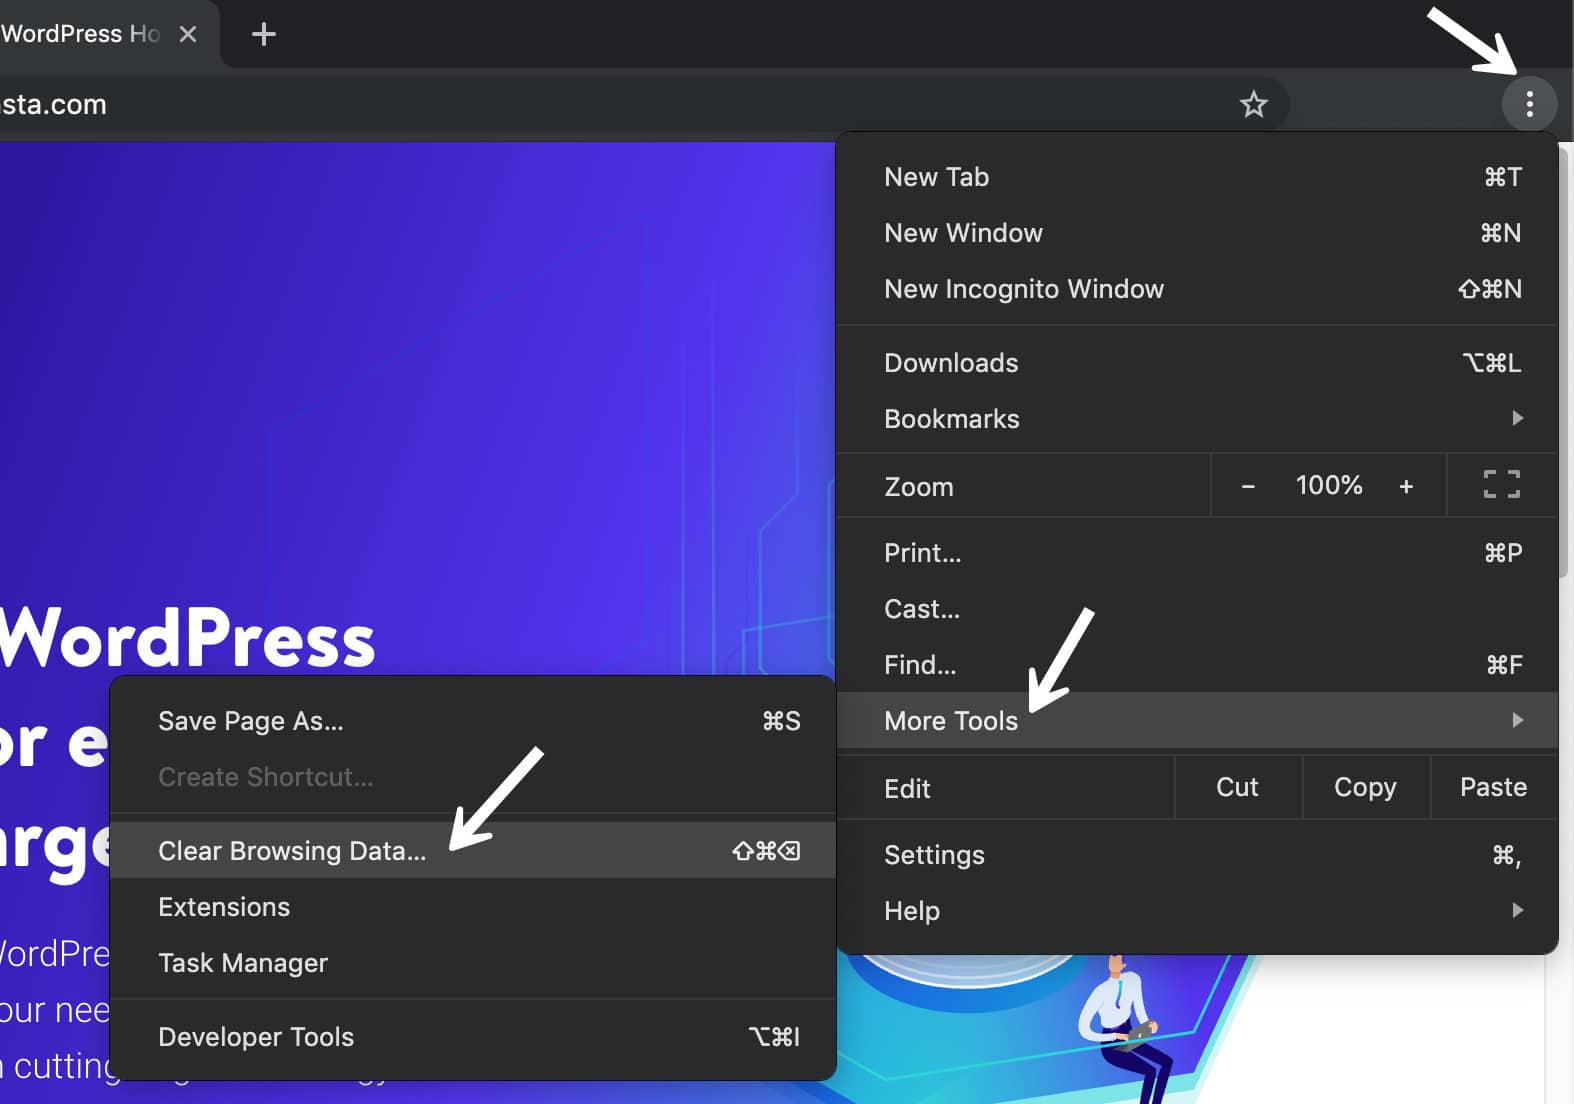
To do so, begin by opening up Chrome’s primary menu (in the top-right corner of your browser window). From there, select More Tools: You can then click on Clear browser data.
On the resulting page, you’ll need to make sure that all listed file categories are selected. If they aren’t, Chrome won’t be able to empty the entire cache. Instead, it will simply remove the most recent entries, which won’t result in the desired effect:

An alternative method of completing this process is to enter the following URL into your address bar:
chrome://settings/clearBrowserData
The resulting screen should grant you access to the same options we’ve outlined above. Here are some other helpful links for clearing cache.
- How to Force Refresh a Single Page for All Browsers
- How to Clear Browser Cache for Google Chrome
- How to Clear Browser Cache for Mozilla Firefox
- How to Clear Browser Cache for Safari
- How to Clear Browser Cache for Internet Explorer
- How to Clear Browser Cache for Microsoft Edge
- How to Clear Browser Cache for Opera
4. Assess Your Proxy Settings and Adjust Them as Needed
With security threats consistently on the rise, it’s no wonder that many people are now using individual solutions to protect their sensitive data. A popular way of doing this is through the use of proxy servers.
A proxy lets you go online under a different IP address, and acts as an intermediary between your browser and the websites you visit. As well as keeping your IP address private, it can also help to filter cache data and server communications.
Just as with caching, a proxy server can be useful, but it can also cause the ERR_CONNECTION_REFUSED message. For example, a web server might reject the IP address attached to a proxy server, and then reject the actual connection as a result.
It’s also possible that the proxy is offline, or incorrectly configured. In short, if the error message in question occurs, it’s worth checking out your proxy settings.
Chrome actually has its own proxy section, which can make this step a particularly simple process. After all, you won’t need to spend any time searching for the correct tools in your browser.
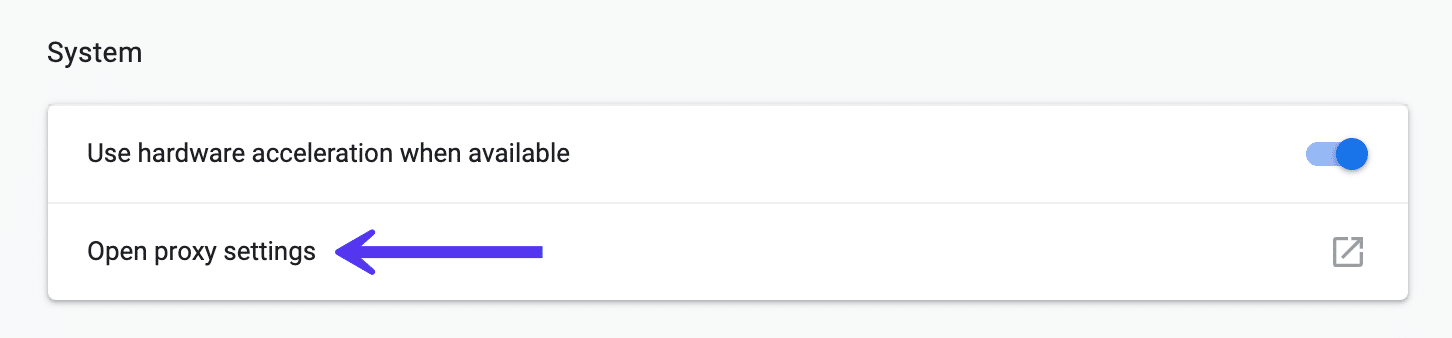
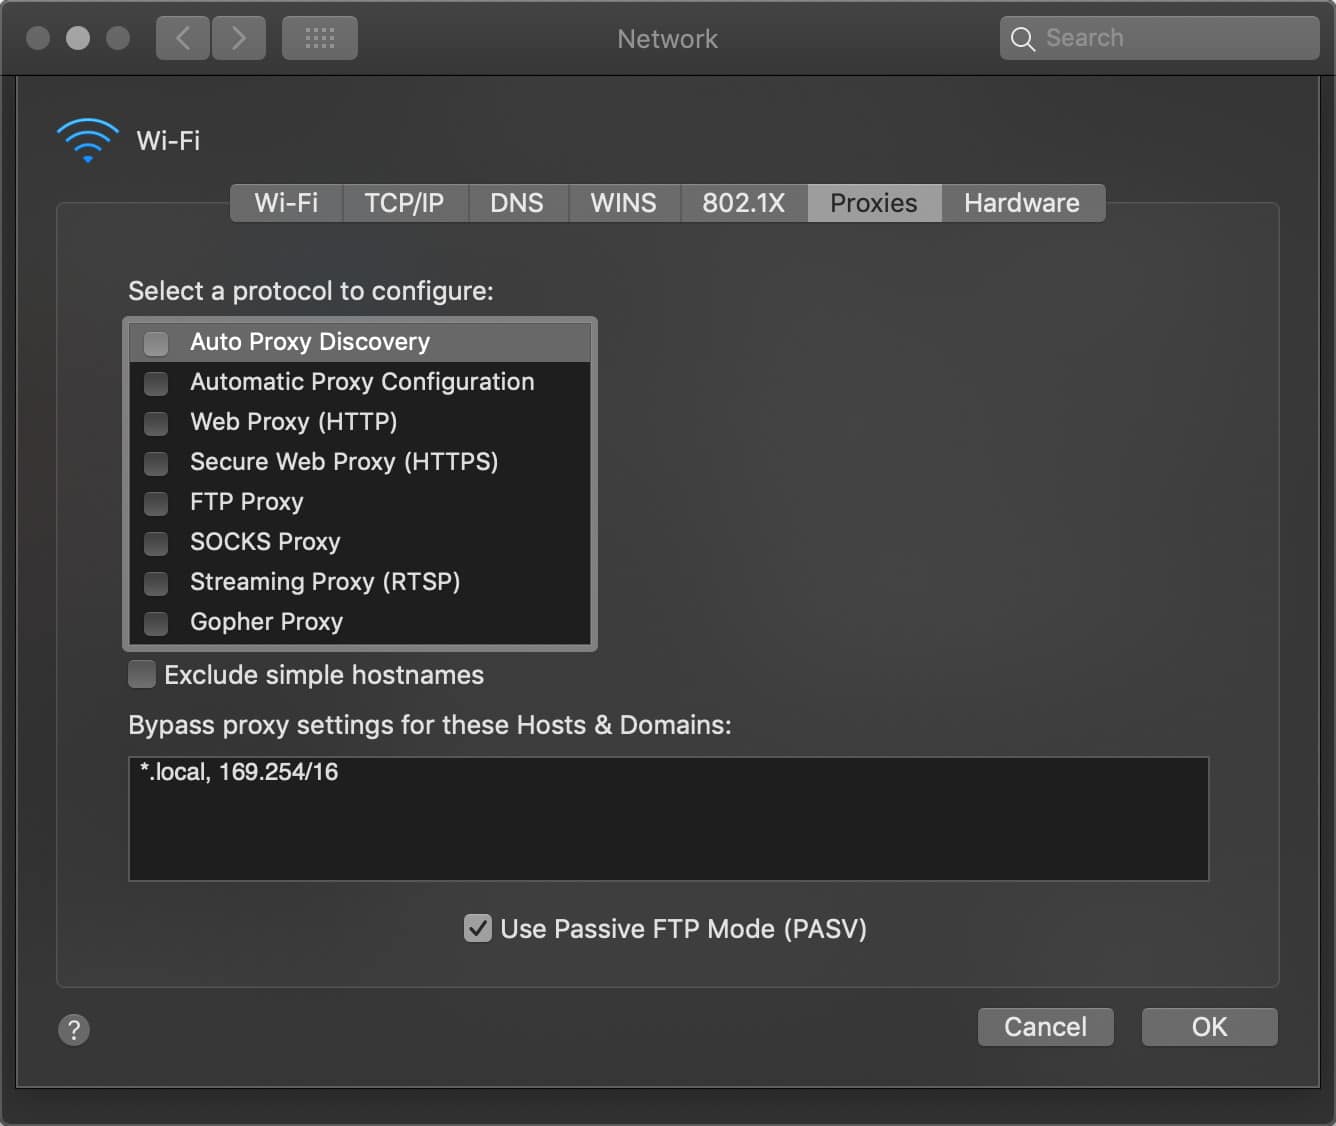
To get started, access the Settings menu in your Chrome browser. This will open up the complete menu of options. Under the System section (you’ll need to click Advanced at the bottom to see this), you should find an entry titled Open proxy settings. By selecting it, you’ll be taken to the corresponding menu:
Your next step depends on the system you’re currently using. Windows users will want to click on LAN Settings, and uncheck the Use proxy server for LAN option. If you’re a Mac user, you should immediately find yourself in the relevant menu. You’ll then have to uncheck all selectable proxy protocols, and check to see if the ERR_CONNECTION_REFUSED message has been resolved.
5. Disable Firewall and Antivirus Software Temporarily
Firewalls and antivirus software are intended to protect users and their systems. They scan your device regularly, and automatically block any suspicious activity. You may start to notice a recurring theme here, however, since (much like with caching and proxy servers) this type of advanced security can at times lead to connection issues.
This is because firewalls can often block pages they don’t need to, or reject content that is completely safe. To check whether this is the case for you, try disabling your firewall and antivirus programs. Of course, this is only advised if you know for sure that the site you’re intending to visit is safe.
Additionally, you should only disable this kind of software temporarily. Switch it back on after you’ve finished checking to see whether the error has been resolved, so you don’t become vulnerable to attacks. If you repeatedly encounter errors because of your firewall or antivirus software, you may want to consider changing what you’re using.
6. Clear Your DNS Cache
As somewhat of an extension to an earlier troubleshooting step, your next task will be to clear your DNS cache. Although most people are aware that their browser creates a cache, not as many know that their operating system does the same thing.
For example, your DNS cache contains all of the temporary entries for pages you’ve accessed with your browser. These entries store key information related to the domain names and addresses of the pages you’ve visited.
The purpose of this feature is similar to that of other types of caches. It accelerates the loading process, as it eliminates the need to contact a site’s DNS server repeatedly. This will save you time in the long run. However, you may occasionally see some short-term issues.
If a stored entry no longer matches the current version of the website it refers to, technical errors like the ERR_CONNECTION_REFUSED message are not unusual. Fortunately, clearing your DNS cache is a quick and easy solution.
Again, how you’ll do this will depend on your operating system.
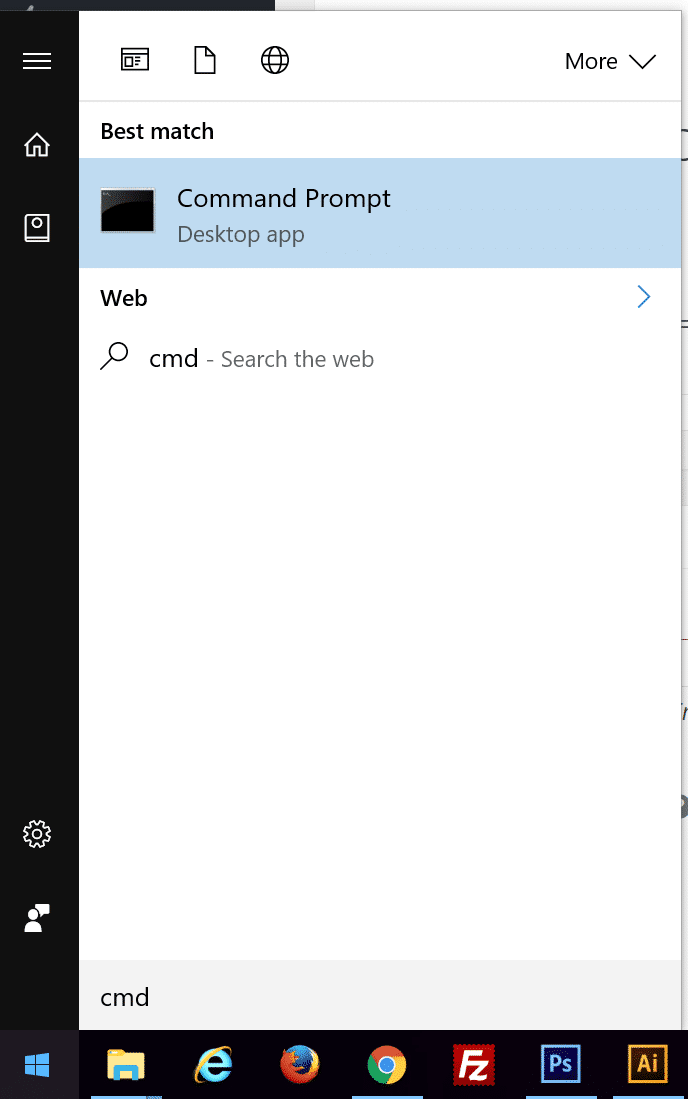
Windows
Launch the start menu by pressing the Windows key and search for “CMD.” This should return the command prompt.
In the command prompt run the following command:
ipconfig /flushdns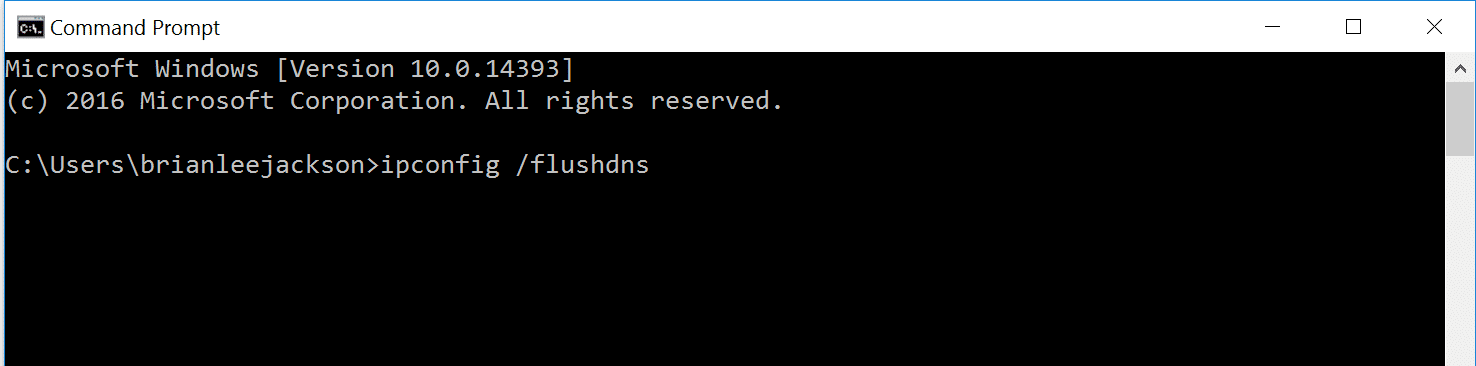
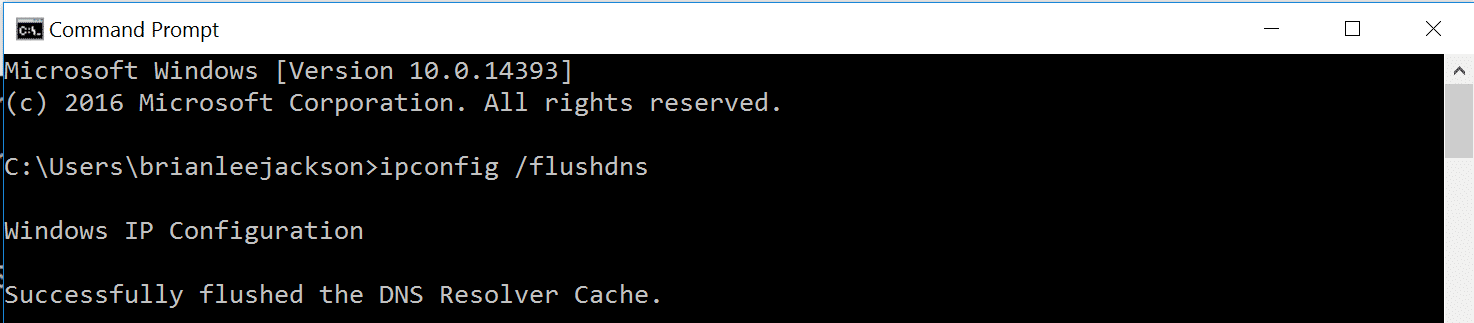
You will then see a confirmation that it has successfully flushed the DNS resolver cache.
For the purposes of this article, we’ll talk you through the process when you’re using a Mac – although you’ll be able to find numerous helpful resources online if you’re a Windows fan.
Mac
On a Mac, you’ll need to do the following:
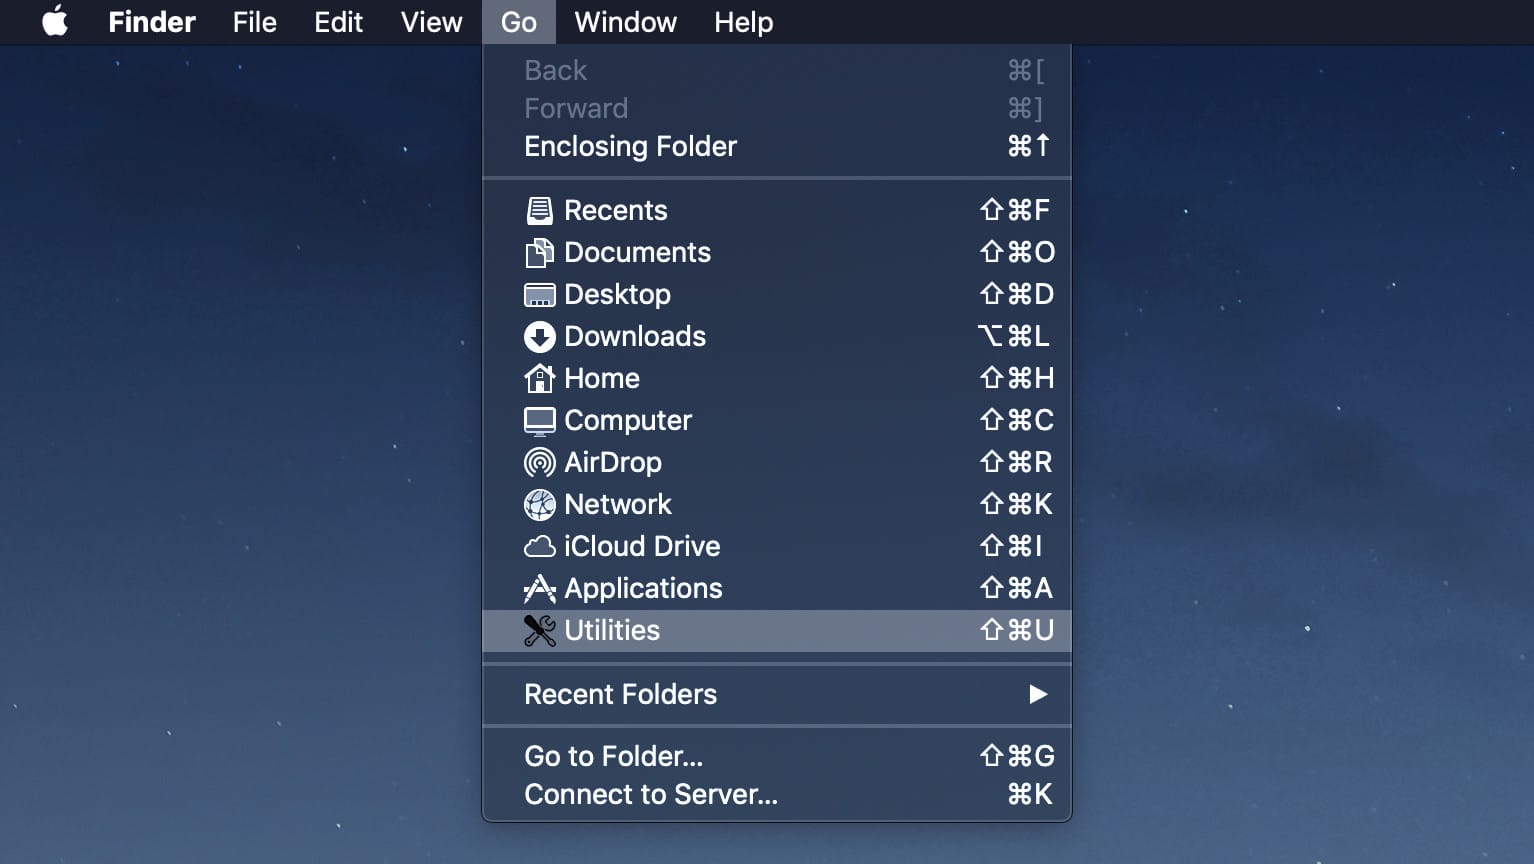
Click “Go” up in the toolbar and then “Utilities.” (Shift-Command-U)
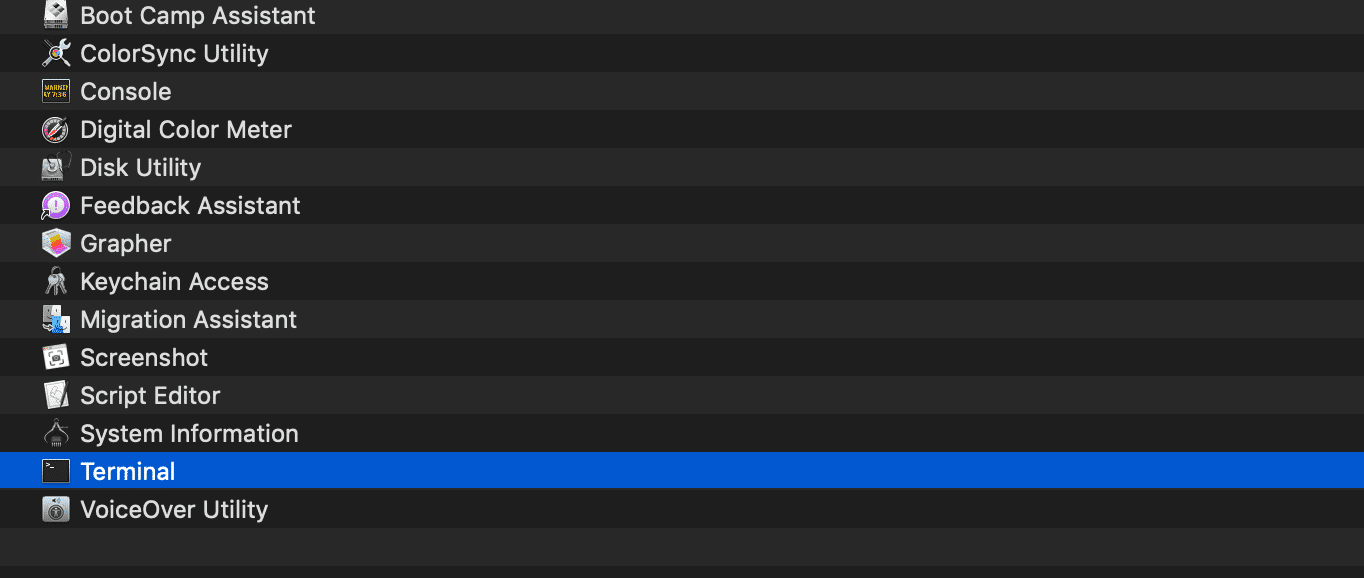
Open the Terminal.
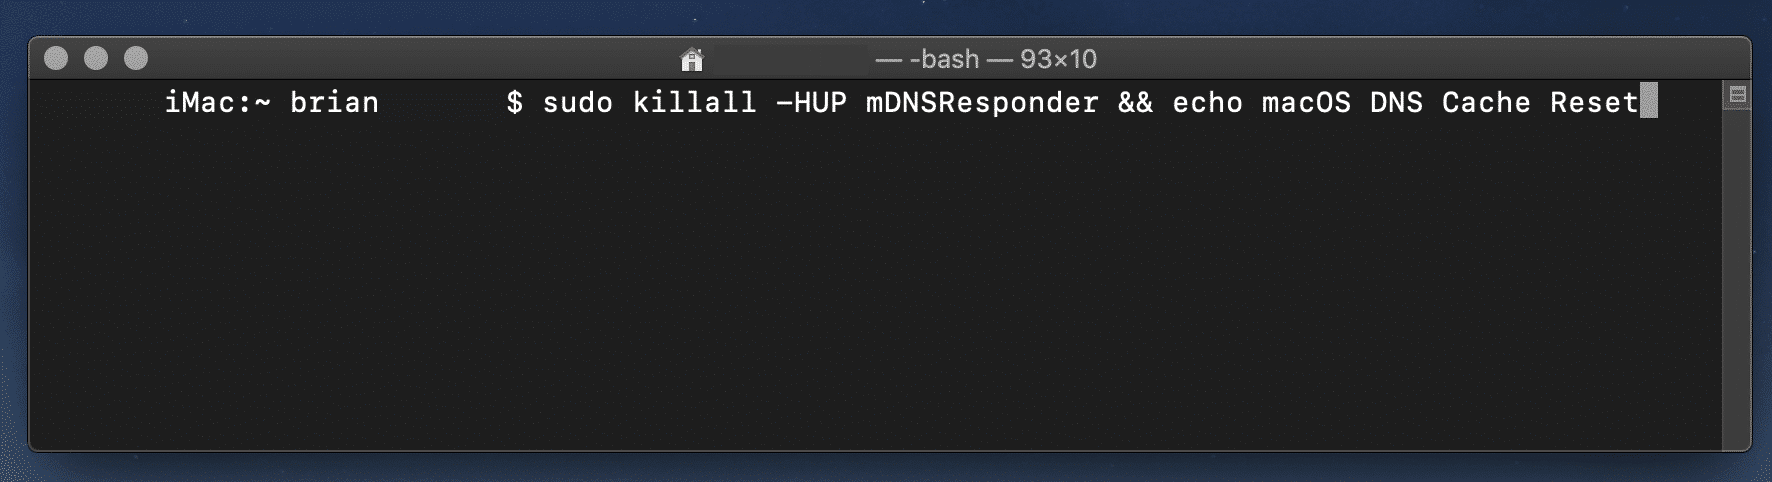
Run the following command. You will need administrator access to do this.
sudo killall -HUP mDNSResponder && echo macOS DNS Cache Reset
When you’ve done that, try accessing the problem site again. Hopefully, if you’ve followed all of our advice, it should be working by now. If not, your DNS may require some more attention.
7. Change Your DNS Address
As we discussed above, an outdated DNS cache entry is a potential source of issues like the ERR_CONNECTION_REFUSED message. However, the DNS address itself can also be responsible for these kinds of problems. This is because it can often become overloaded, or even go completely offline.
In the majority of cases, your DNS server address is automatically obtained from your internet provider. However, you can also change it if required. How you’ll do this will again depend on the operating system you’re using.
Let’s explore how Mac users can complete this process. First, you’ll need to open up System Preferences. On the resulting screen, select the option marked Network. You’ll then need to click on Advanced:
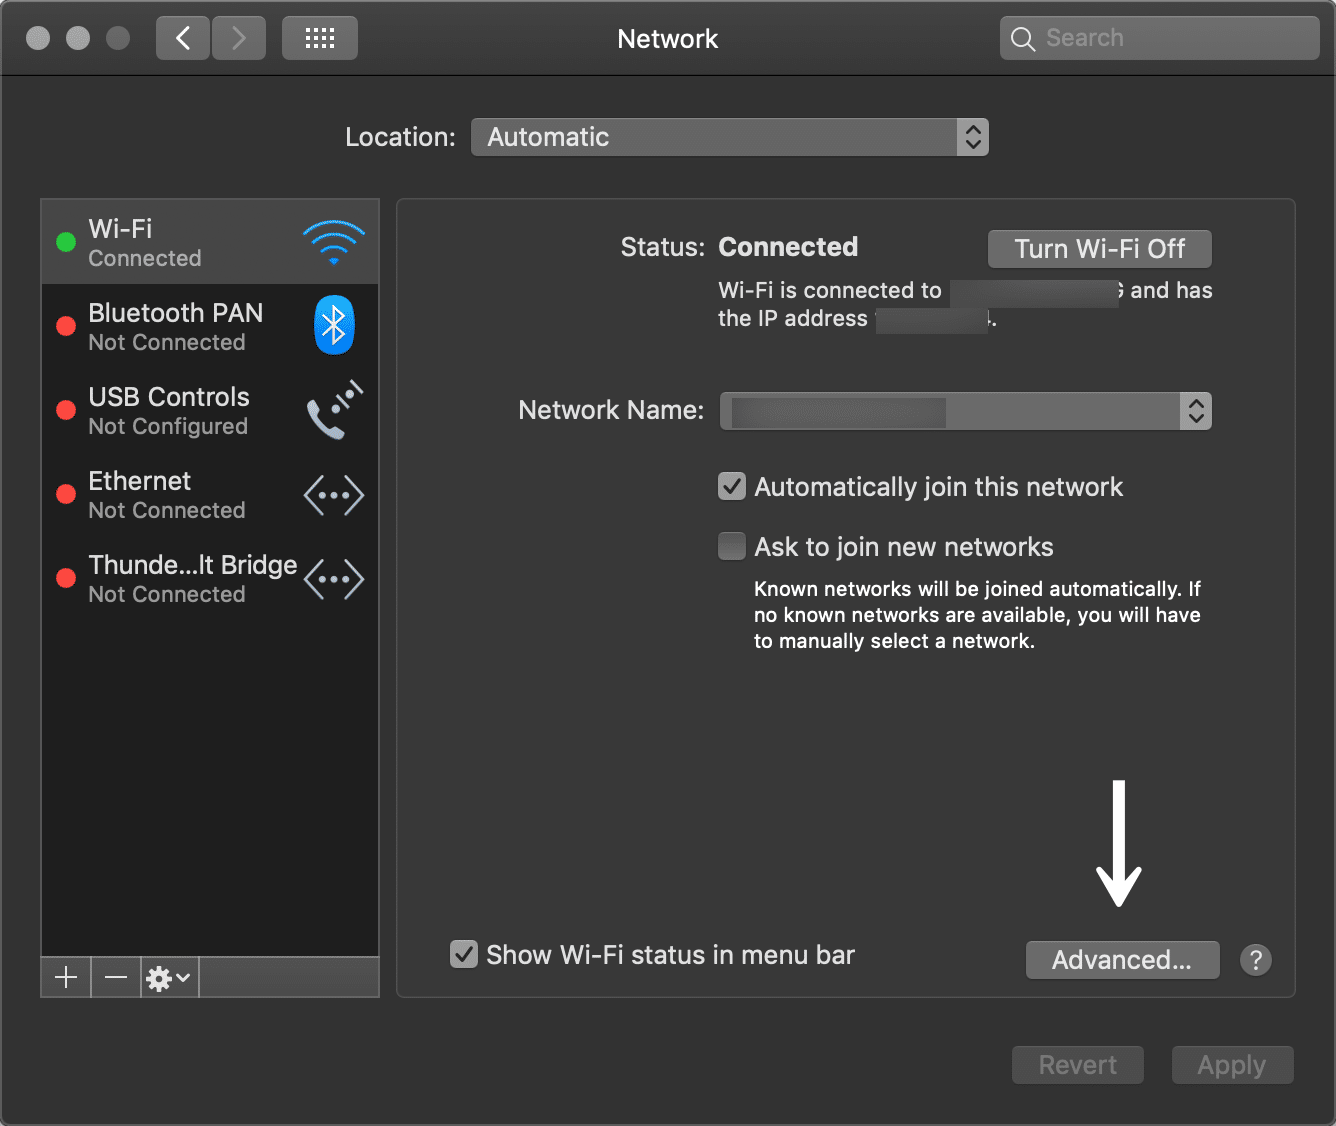
From there, select the DNS option found at the top of the screen. To add a new DNS server, click on the + button. To edit an existing DNS server instead, double-click on the DNS IP address you wish to adjust:
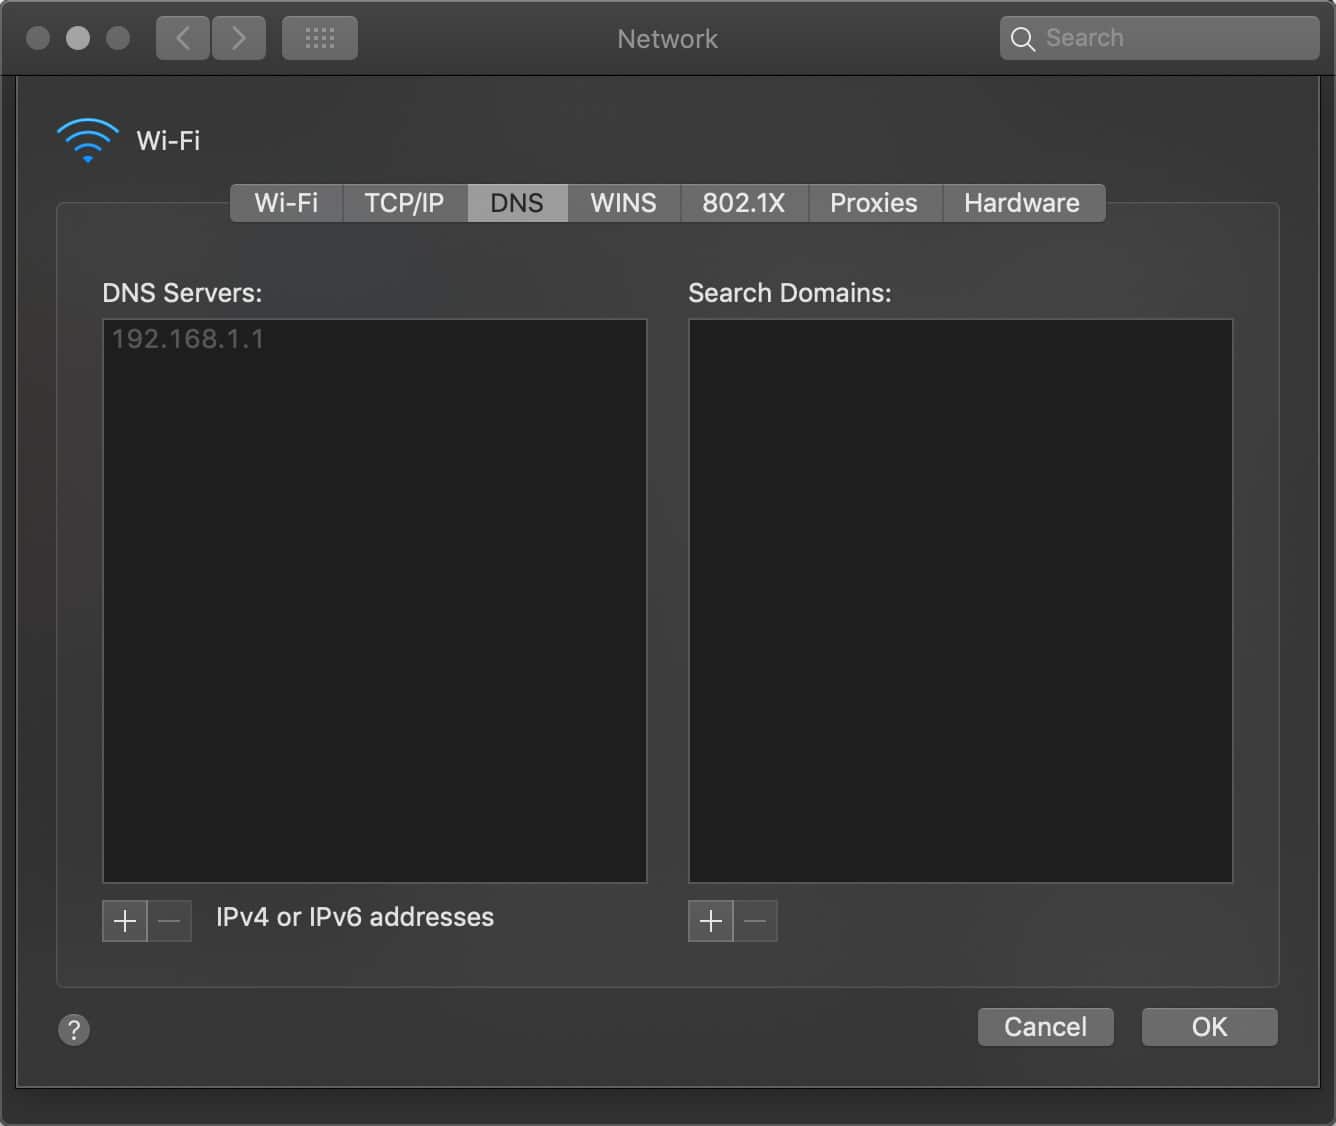
You can try temporarily changing these to a public DNS server, such as Google or Cloudflare.
- Some prefer to use Google’s public DNS (8.8.8.8 and 8.8.4.4) long-term due to them sometimes being more reliable.
- Cloudflare also offers its secure and blazing fast free DNS (1.1.1.1 and 1.0.0.1).
Tip: If you’re already using a free DNS server and having issues, removing it and defaulting back to your ISP’s DNS servers also sometimes fix things. Google and Cloudflare aren’t perfect 100% of the time and there have been a few instances where we’ve noticed switching back has resolved the issue.
You can then attempt to access the site again – and cross your fingers.
8. Disable Any Chrome Extensions
There’s no denying that installing extensions often contributes to a more well-rounded Google Chrome experience. The many extensions on offer can add key features, and even help to automate complex processes.
However, a large number of the extensions available for Google Chrome are not developed by the browser’s developers. Instead, they’re usually created by third parties. This can mean there’s no real guarantee they’ll work as you intended, or that they will be correctly updated over time.
Incorrect or outdated extensions are likely to cause numerous issues – including the ERR_CONNECTION_REFUSED error message. For this reason, it’s important to regularly audit the extensions that are attached to your browser.
To do that, first open the Extensions menu in your Chrome browser. You can then begin to assess each of your installed extensions in turn. Start by questioning whether you actually need each one. If an extension is no longer necessary, you can simply remove it.
Next, find out when each extension that you want to keep was last updated. Ideally, it should have been updated within the last three months. Anything longer than that could be a sign that the extension is being neglected by its developers. If possible, you’ll want to remove those extensions and replace them with newer alternatives.
Of course, new (and fully updated) extensions can still sometimes cause problems. If you suspect that this is the case, begin by disabling all of your attached extensions. If the site you’ve been trying to access loads after doing this, you’ll know that at least one of them is at fault. You can then reactivate one extension at a time, until you’ve honed in on the problem software.
9. Reinstall the Chrome Browser
As with any other application, Chrome itself is never going to be completely bug-free. Your installation of the browser can contain various issues, especially if it hasn’t been updated in a while. What’s more, problems between your browser and operating system are surprisingly common.
As a result, sometimes the only solution is to completely reinstall Chrome. You can do this by removing the current installation from your device. You can then download the most recent version of the browser by visiting the official Chrome website.
What to Do If None of These Solutions Work?
If none of the solutions we’ve walked you through fixes the ERR_CONNECTION_REFUSED message, it’s usually a sign that something more serious has gone wrong on the server-side (in other words, with the website itself).
Unfortunately, in this scenario, the only thing you can do is be patient. It’s likely that the website’s owners are working hard to resolve any issues, and it will resume business as usual before too long.
If accessing the site is a matter of urgency, you could try reaching out to its owners directly. There are numerous ways to do this, although social media and email are particularly effective – and unlikely to be affected by any website downtime.
Explain the problem you’re facing, and mention that you’ve tried several solutions to no avail. Hopefully, the team behind the website should get back to you and discuss the best course of action. You may even be doing them a favor, if you happen to make them aware of an issue they didn’t know was preventing access to their site.
If you’re a Kinsta client and it’s your own site that is having the issues, feel free to reach out to our support team. We are here to help 24/7.
What Are the Different Variations of the ERR_CONNECTION_REFUSED Error?
The ERR_CONNECTION_REFUSED Error appears differently depending on the browser. Here are some examples of the forms that this error can take:
- This site can’t be reached
- Unable to connect
- Hmmm…can’t reach this page
Google Chrome (This site can’t be reached)
In Google Chrome users may also be familiar with the ERR_CONNECTION_REFUSED page. You will see a message saying:
This site can’t be reached or This webpage is not available.
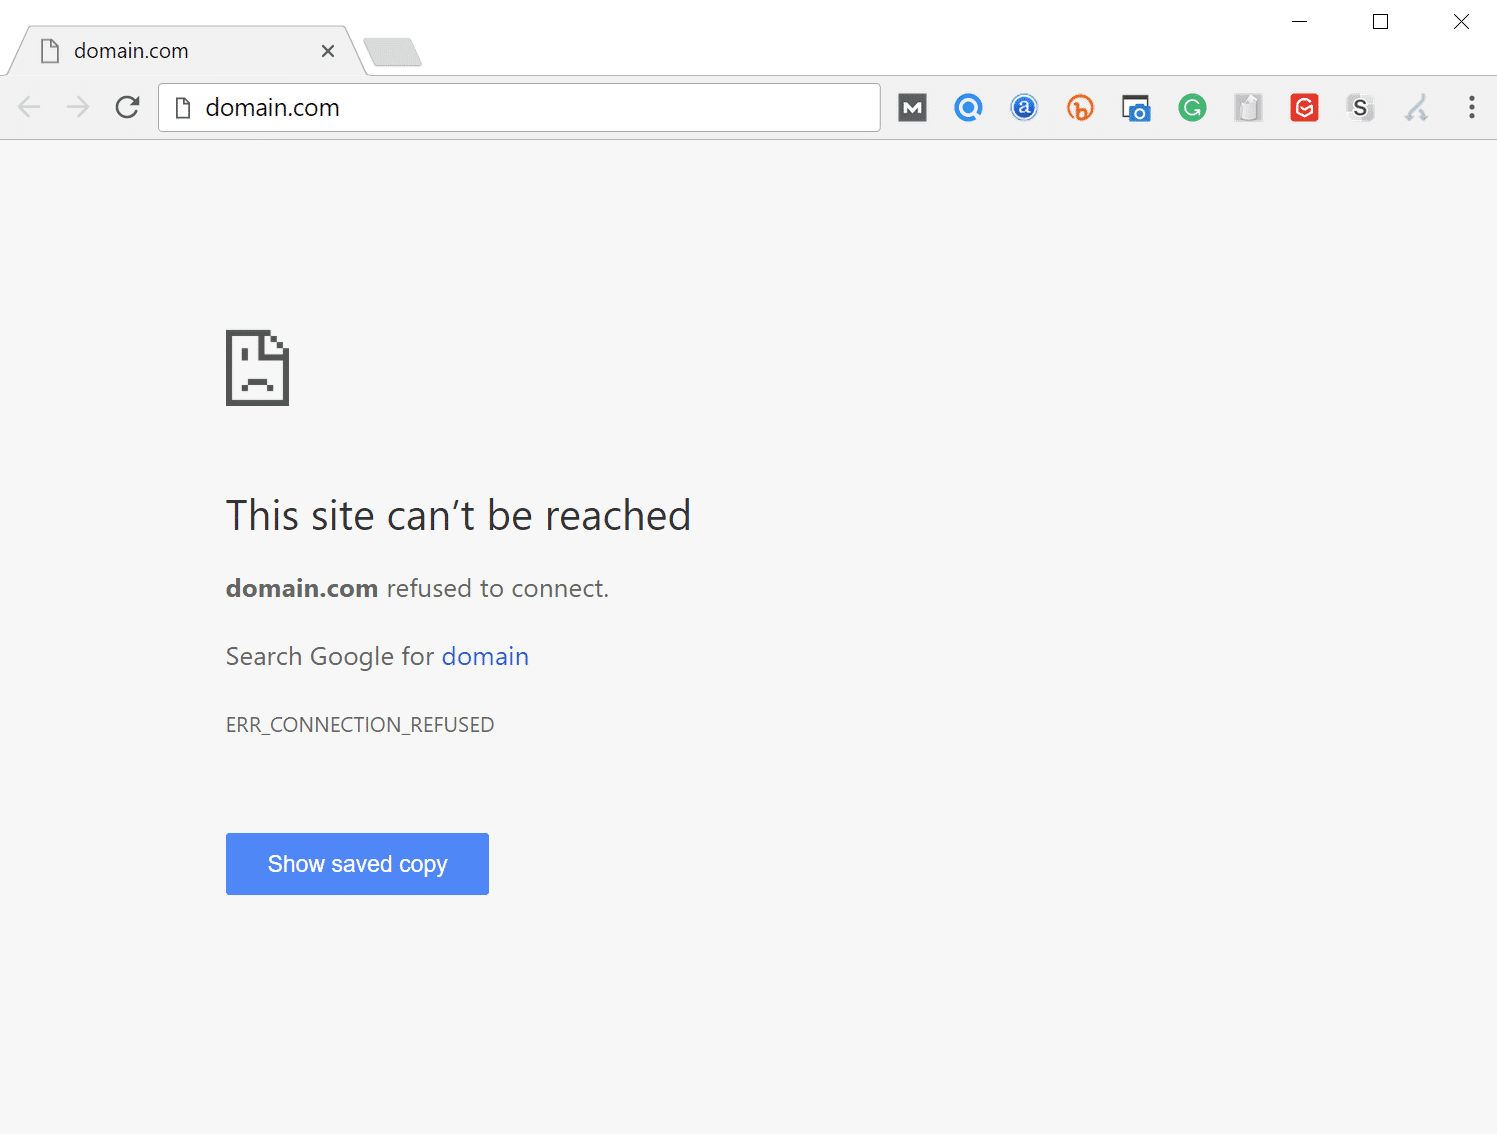
When you visit a website using Google Chrome and encounter this message, it means that your attempt to connect was refused. This error code also appears in other browsers, albeit in different forms.
A similar message that may also appear here is the DNS_PROBE_FINISHED_NXDOMAIN error, which is a DNS error which signals that the requested domain name does not exist.
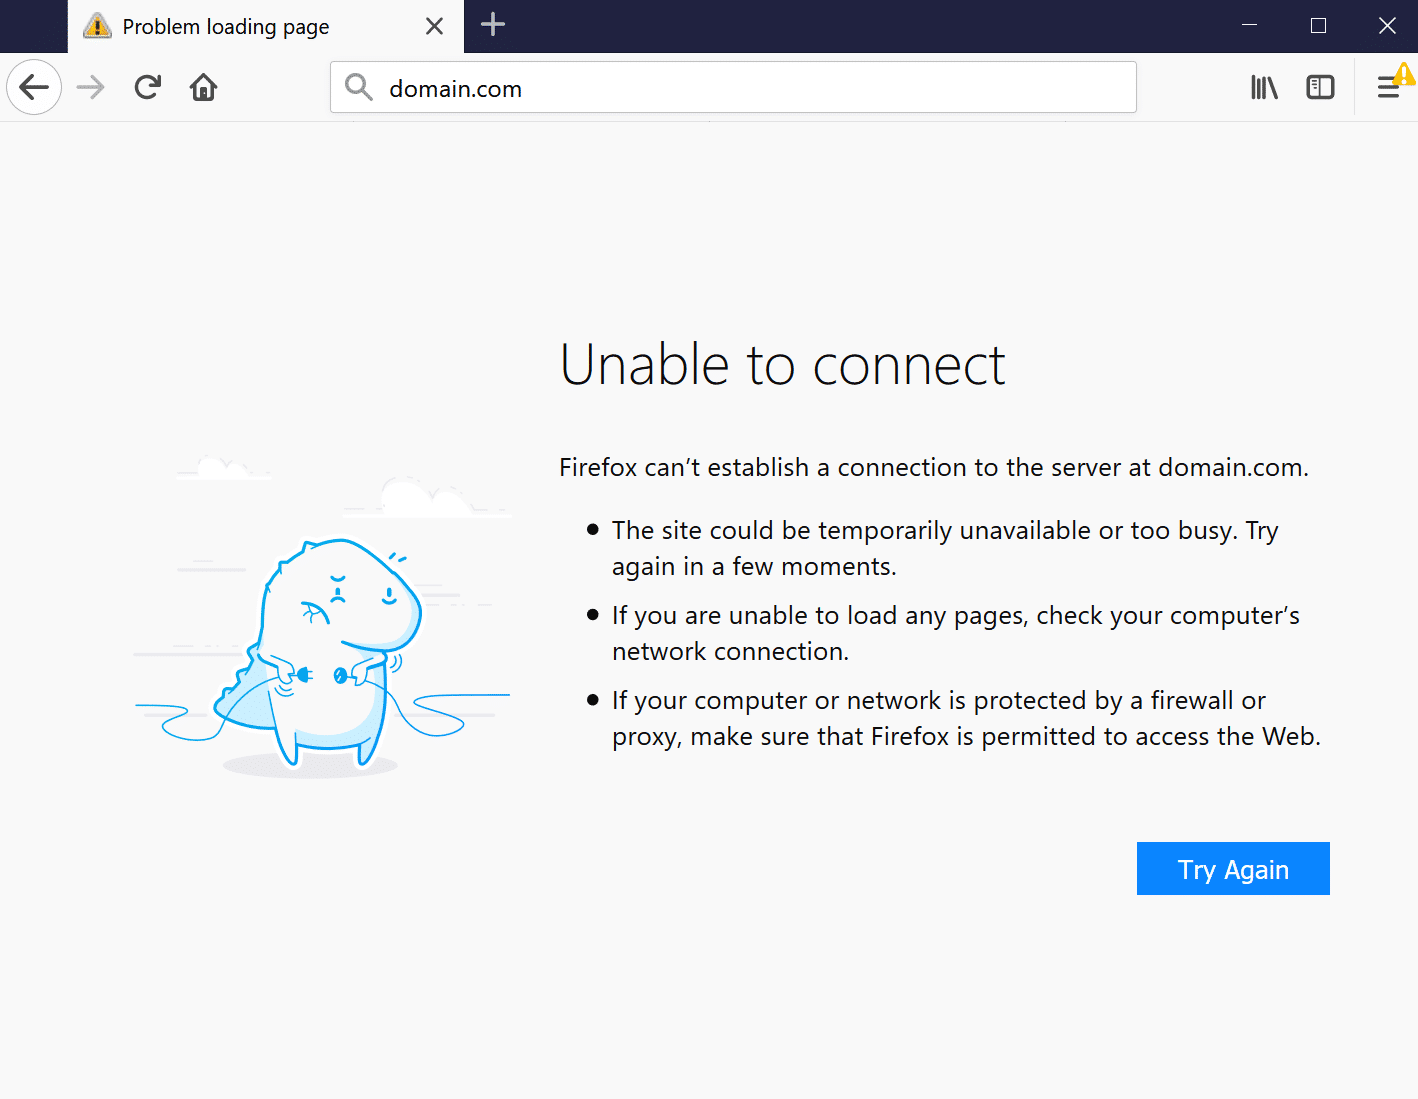
Mozilla Firefox (Unable to connect Error)
In Mozilla Firefox it will simply show as Unable to connect.
Firefox can’t establish a connection to the server at domain.com.
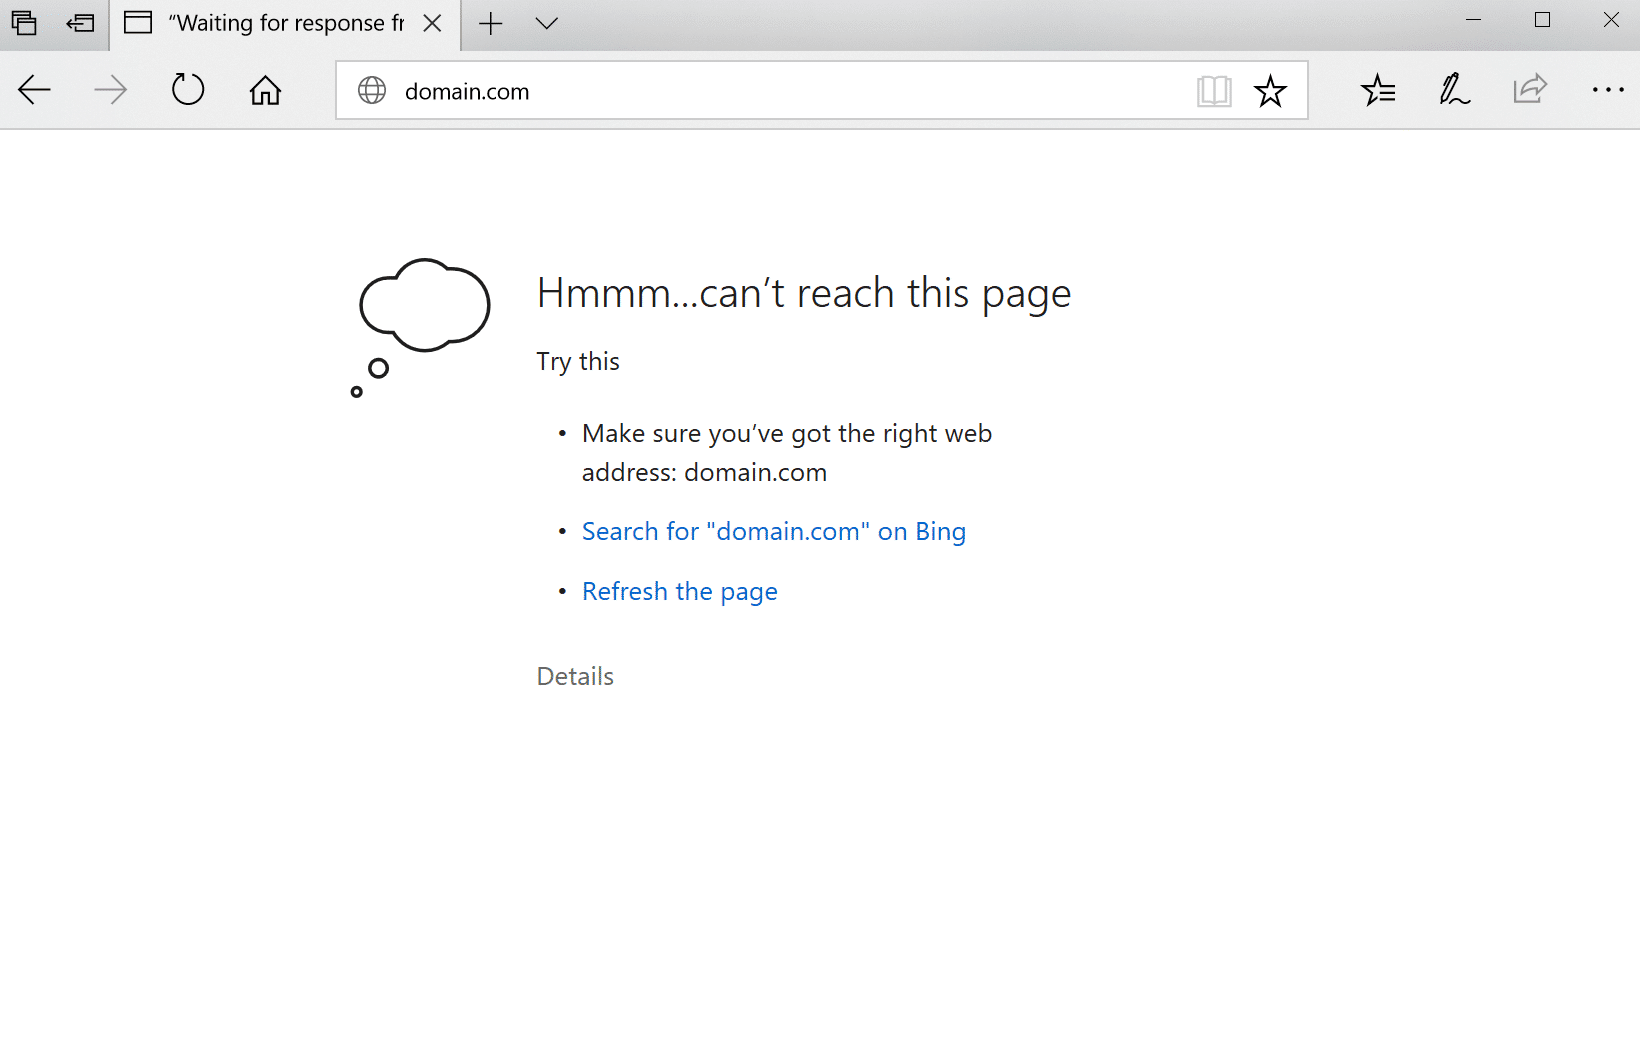
Microsoft Edge (Hmmm…can’t reach this page Error)
In Microsoft Edge, it will simply show as Hmmm… can’t reach this page. Which isn’t very helpful.
Make sure you’ve got the right web address: domain.com.
The ERR_CONNECTION_REFUSED error is sometimes caused by a server-side problem, rather than an issue with your individual attempt at connection. It’s usually nothing serious, and can simply be the result of incorrect firewall or server settings. However, it can also be a sign that something more significant has gone wrong – such as a malware attack, or unexpected downtime. An unreliable internet connection can also contribute.
As with most error messages, ERR_CONNECTION_REFUSED lets you know that something has gone wrong, without being kind enough to tell you why it’s happened. This means it’s up to you to find and resolve the root issue (if possible).
Summary
Although connection errors are endlessly frustrating, it’s important to remember that they can often be fixed. Your first port of call should always be to check whether the issue lies with the web page itself. If the problem is with your own connection, on the other hand, you’ll need to put in a little work to get things back up and running.
Do you have any more questions about this particular error message, or is there another commonly-encountered problem that you’d like us to explore? Let us know in the comments section below!

Brian has a huge passion for WordPress, has been using it for over a decade, and even develops a couple of premium plugins. Brian enjoys blogging, movies, and hiking. Connect with Brian on Twitter.

