
XAMPP is a fantastic free tool for creating a local WordPress installation. You can use it to perform tests and try out new ideas or updates before taking them to your live site. However, like any software solution, errors may occasionally come up, such as the confusing “Server certificate does NOT include an ID which matches the server name” message.
This sneaky error message pops up in the XAMPP error log from time to time, often when you are troubleshooting other issues. While it doesn’t cause any problems on its own, it might indicate a deeper issue that could eventually grow into something more serious, so fixing it is important.
In this article, we’ll explain this error in more detail. Then we’ll walk you through how to fix it in three simple steps. Let’s dive in!
An Introduction to the “Server Certificate Does NOT Include an ID Which Matches the Server Name” Warning in XAMPP
The elusive “Server certificate does NOT include an ID which matches the server name” error message doesn’t appear on the front end of a site. Instead, you can find it in the XAMPP error logs:

Typically, what happens is that another issue brings you to the error log, and then you’ll notice the server certificate warning accidentally. The initial problem could involve crashing XAMPP components (usually Apache) or MySQL errors. You check the XAMPP logs for clues about this problem and find the “Server Certificate Does NOT Include an ID Which Matches the Server Name” message, often multiple times.
It’s important to note that this notification is most likely not related to whatever initial issue that brought you to the error logs. In fact, it’s more of a warning than an actual error. Your site can still operate normally.
With that being said, warnings still aren’t ideal because they indicate that something is wrong with your installation. Correcting this issue can help your local XAMPP environment run as smoothly as possible and prevent future problems.
The “Server certificate does NOT include an ID which matches the server name” message indicates an error with the Secure Sockets Layer (SSL) configuration for your Apache installation (Apache is part of XAMPP). Fortunately, resolving it is surprisingly easy—much more so than some other XAMPP errors. It’s as simple as editing a single line in the Apache files.
How to Fix the “Server Certificate Does NOT Include an ID Which Matches the Server Name” Issue (In 3 Steps)
Now that you understand more about this error message, it’s time to get to work on fixing it. The process involves editing a configuration file.
Step 1: Open the xampp/apache/conf/extra Directory
The first step is to open up the correct Apache directory in a file browser. The most straightforward way to do this is to launch the XAMPP Control Panel from your system tray, and then click on Explorer on the right side of the window:
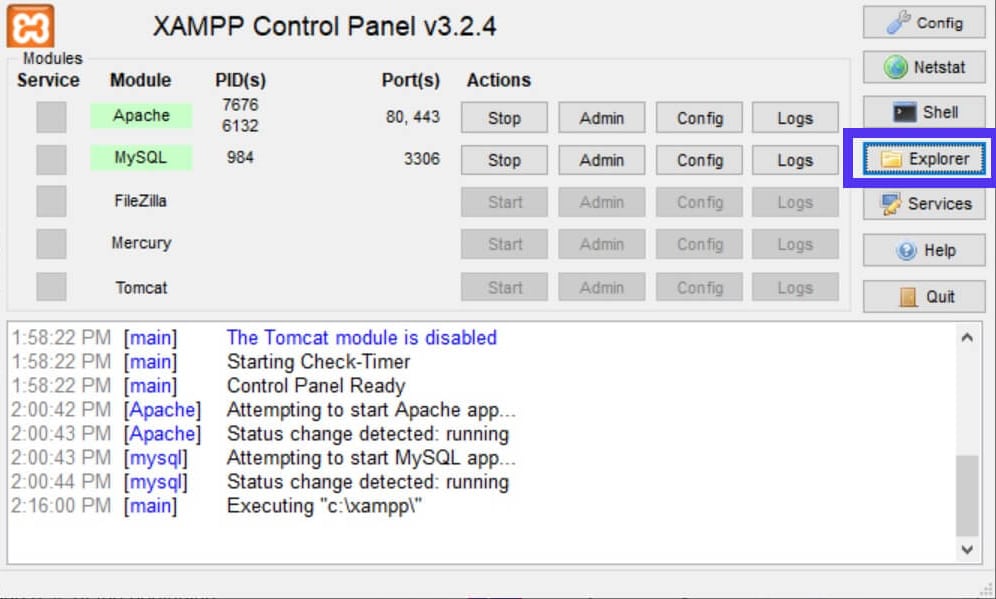
This will open a file browser window in the XAMPP folder:
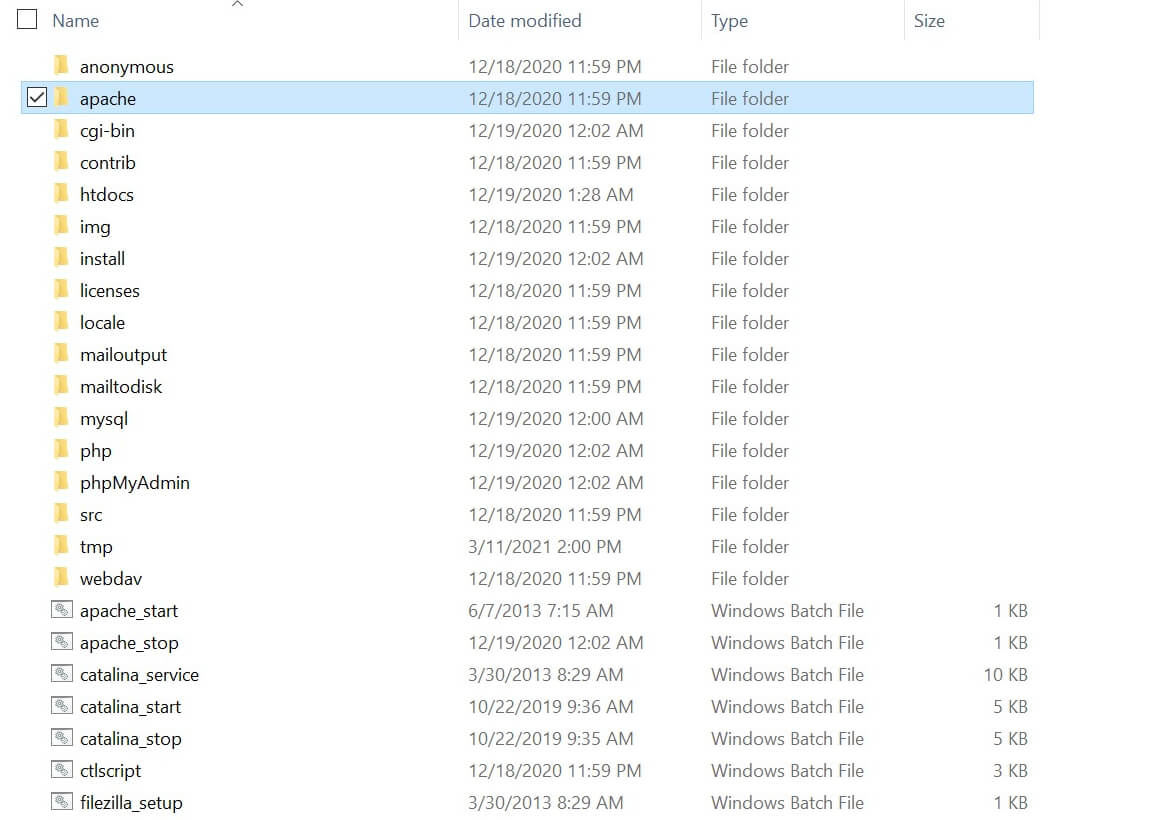
From here, you can navigate to apache > conf > extra. The full directory path is xampp/apache/conf/extra. Once there, you can proceed to the next step: opening and editing a key Apache file.
Step 2: Edit the httpd-ssl.conf File
Inside the xampp/apache/conf/extra folder, the file you’re looking for is called httpd-ssl.conf:
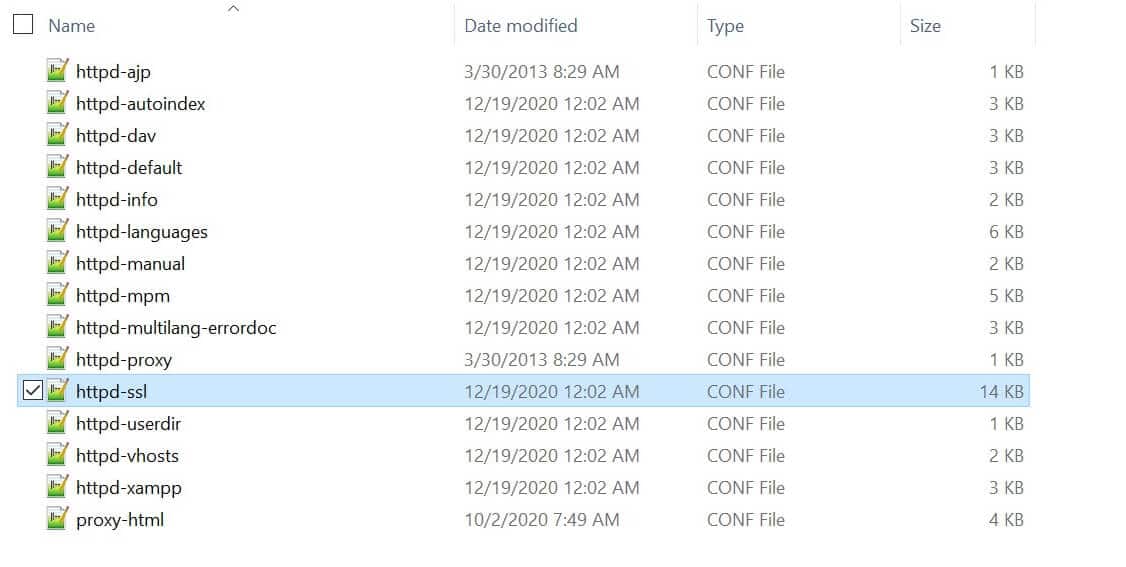
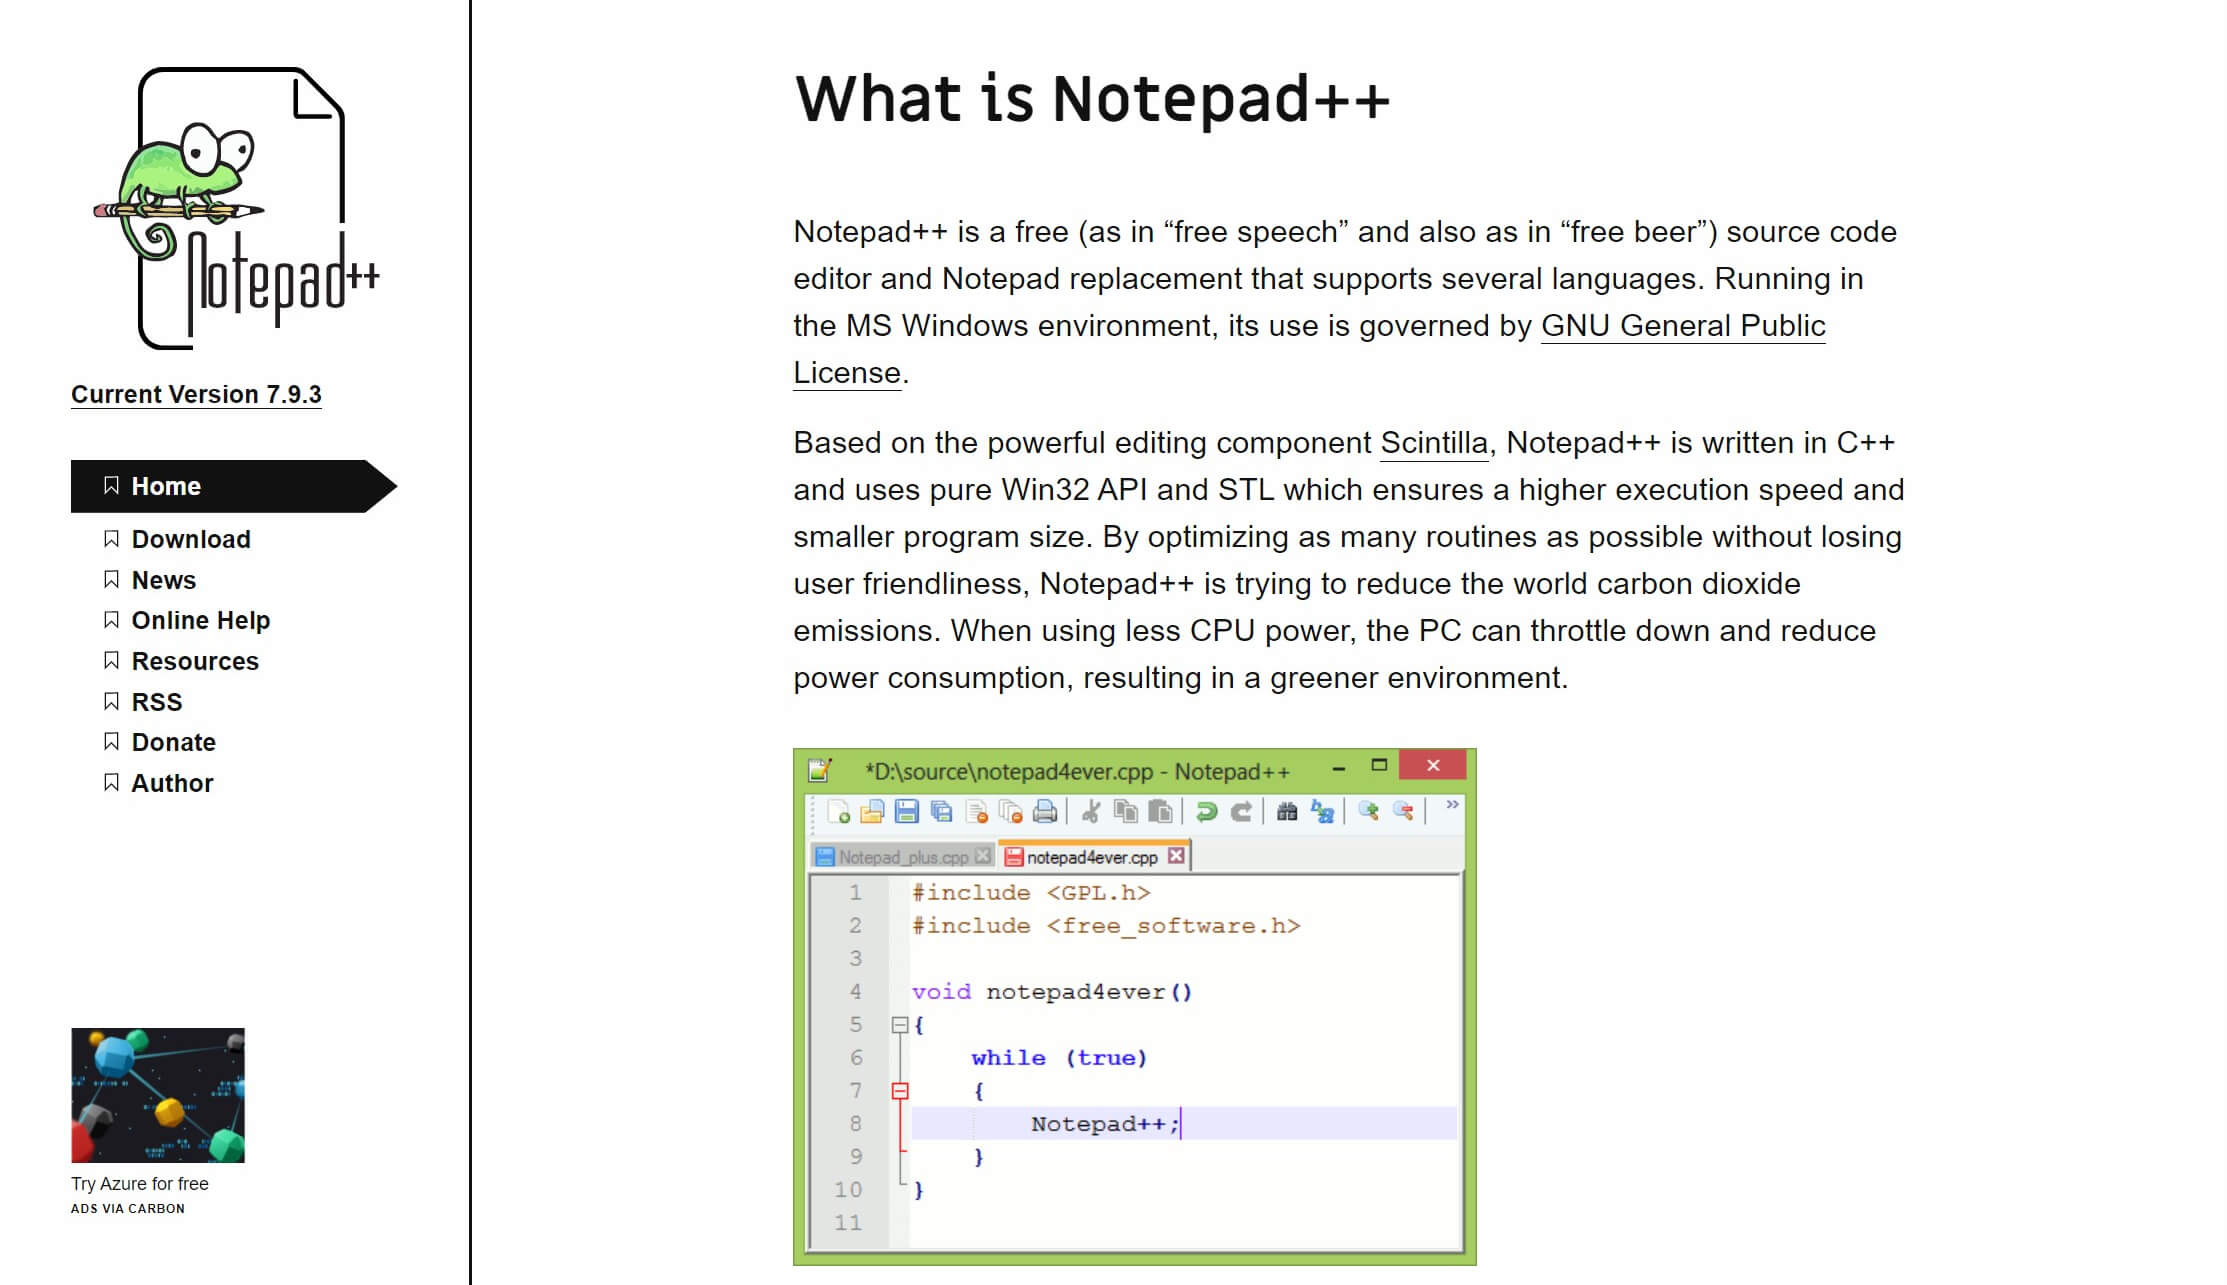
This file deals with the SSL configuration for your XAMPP Apache installation. Once you’ve located it, go ahead and open it in a text editor. If you’re on a Mac, the default TextEdit works just fine. On Windows, we recommend using Notepad++:
With the file open, look for the line that reads “ServerName www.example.com:443”. It should be located under the “General setup for the virtual host” section (line 125 by default):
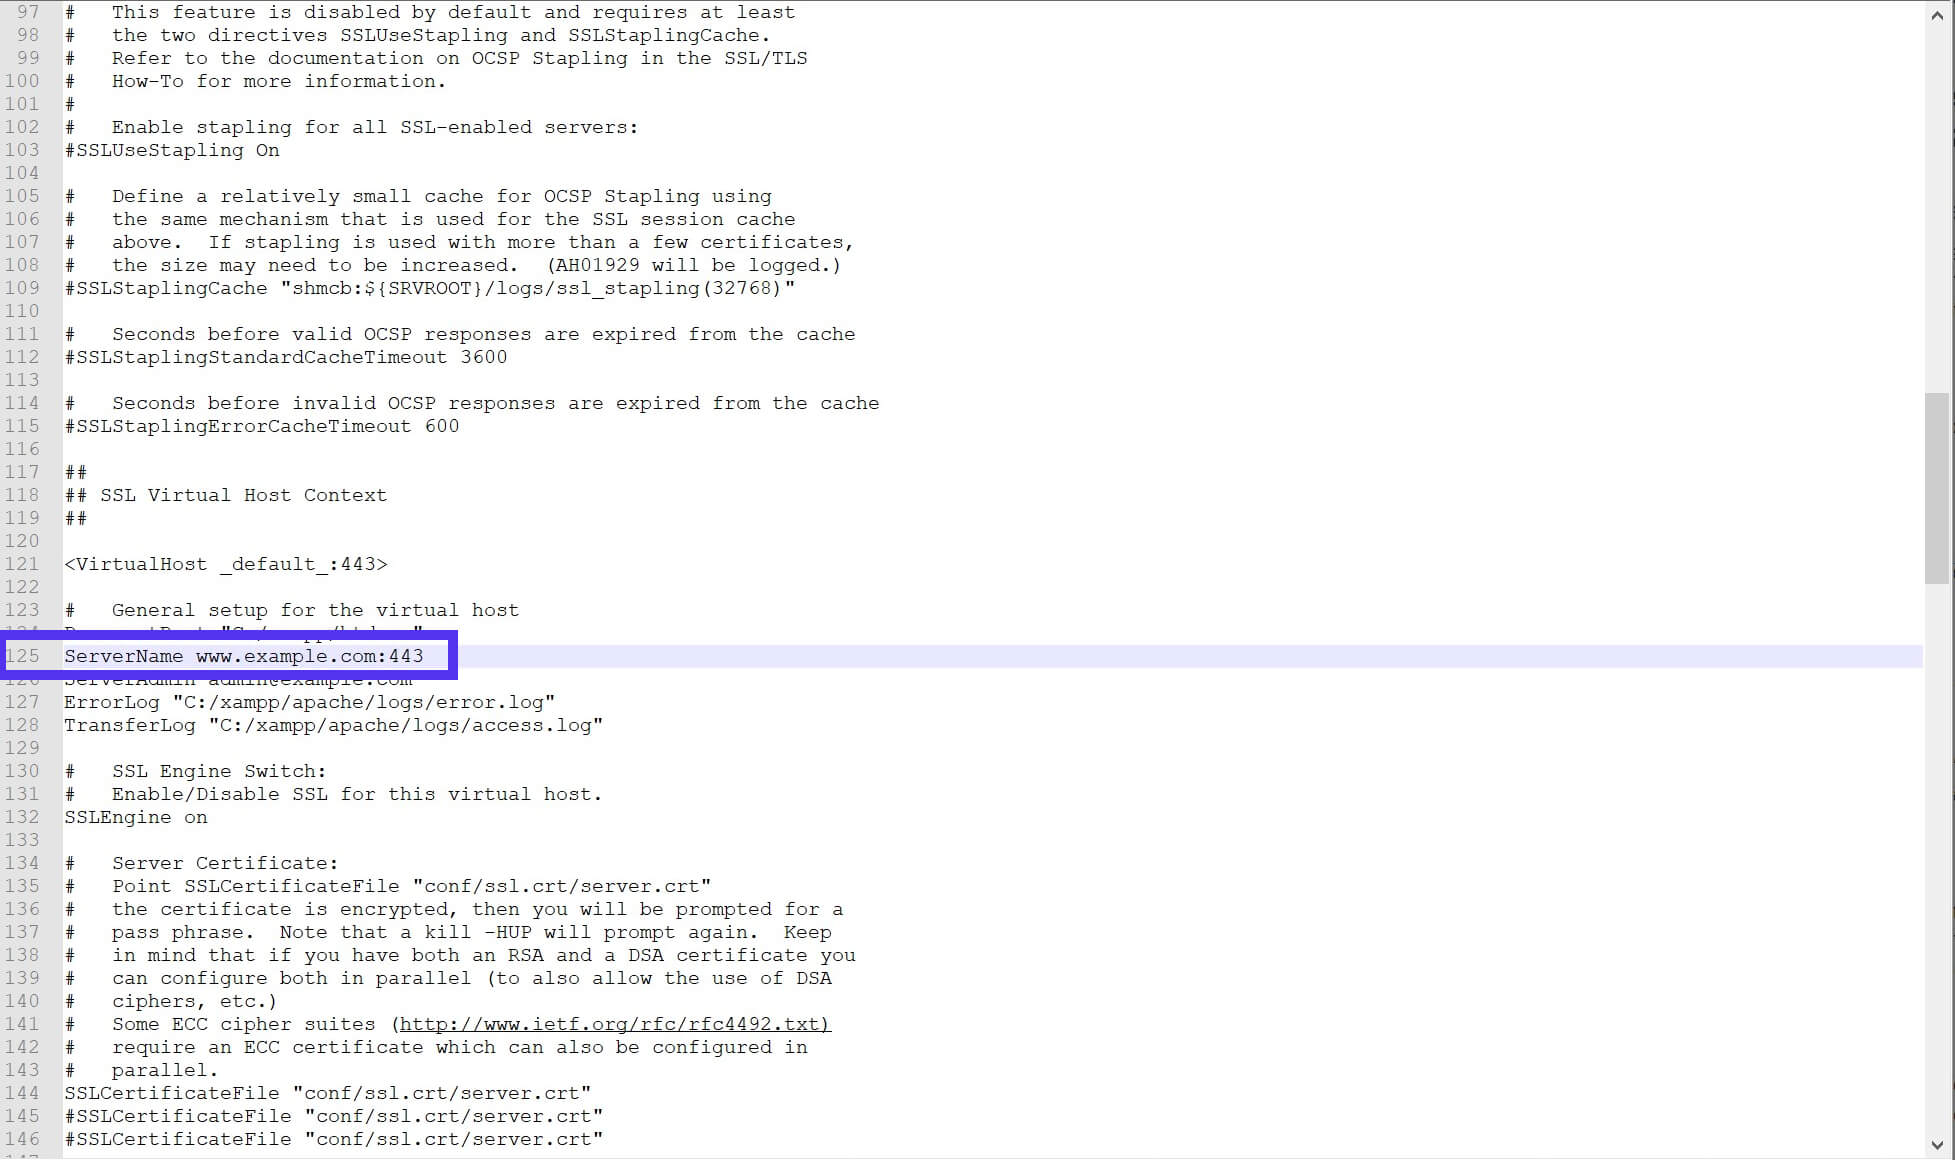
When you find this line, add a “#” at the front of it. This is known as “commenting out“, and it tells the software to ignore that line when reading the file.
Next, you can add the text “ServerName localhost” on the line directly below it:

Once you’re done, you can save the file and close the text editor. Then proceed to the next step.
Step 3: Restart Apache
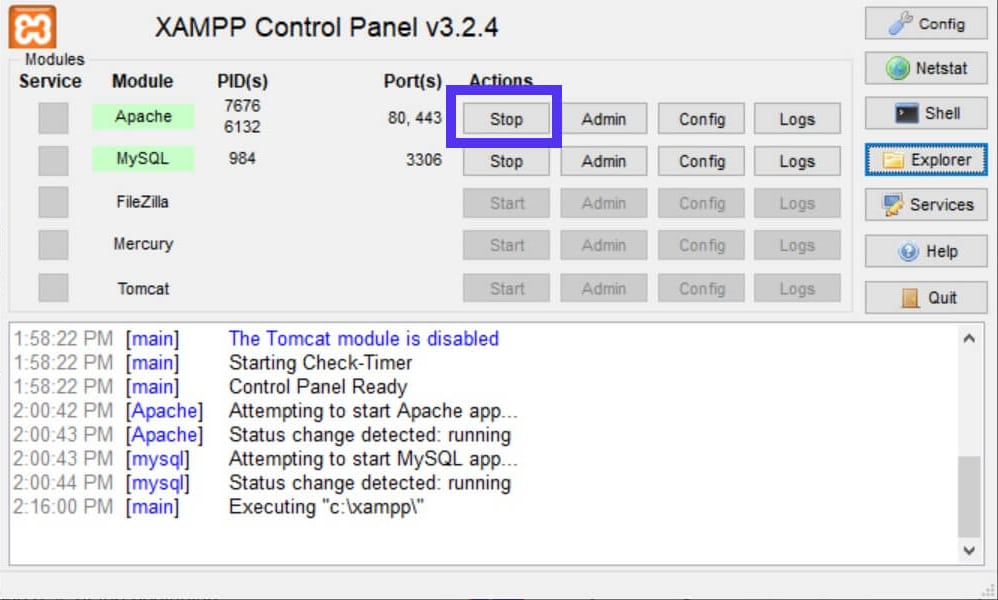
With the httpd-ssl.conf file edited and saved, the final step is to restart Apache. To do so, head back to the XAMPP Control Panel and click on the Stop button next to Apache:
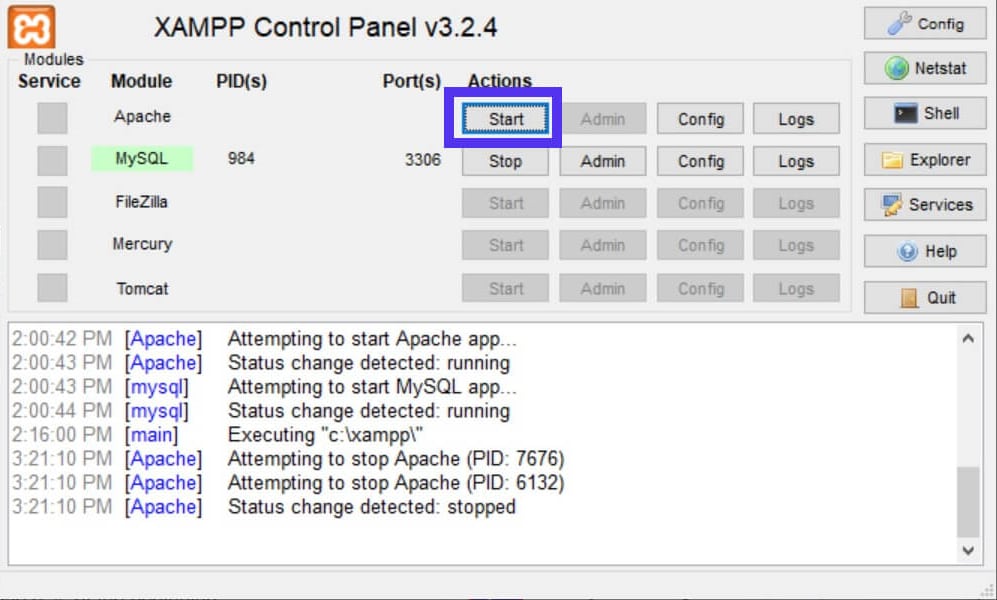
Give the program a moment to finish the operation. Then go ahead and click on Start to restart the module:
That’s it! At this point, the error should be resolved. You can go back to enjoying your XAMPP installation and getting work done.
However, if you want to verify that the issue is in fact resolved, you can navigate back into the error log once Apache has restarted. To access the log, open the XAMPP Control Panel and click on Logs:
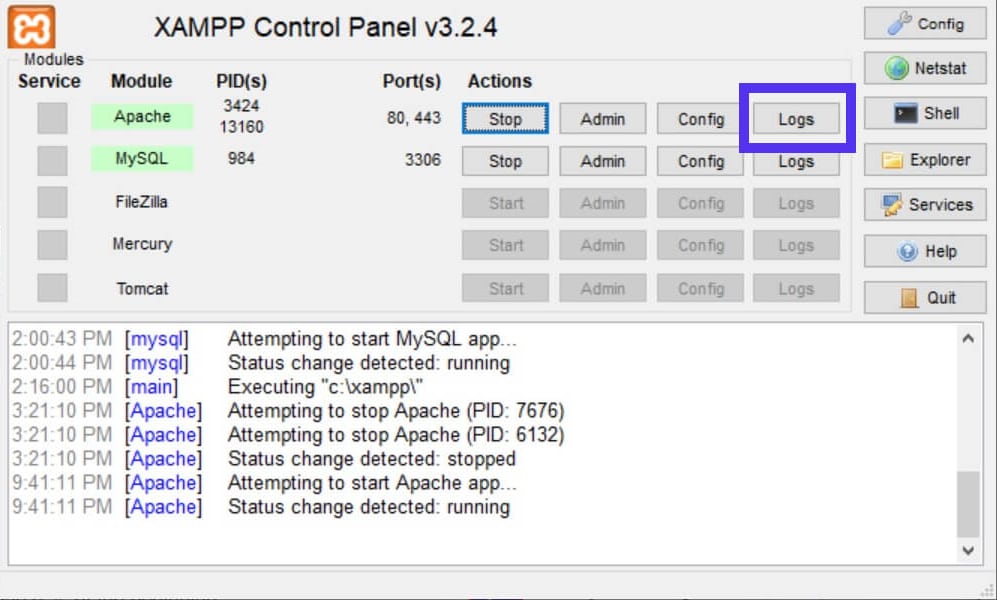
In the pop-up menu, select Apache (error.log). This will open the log file in a text editor:
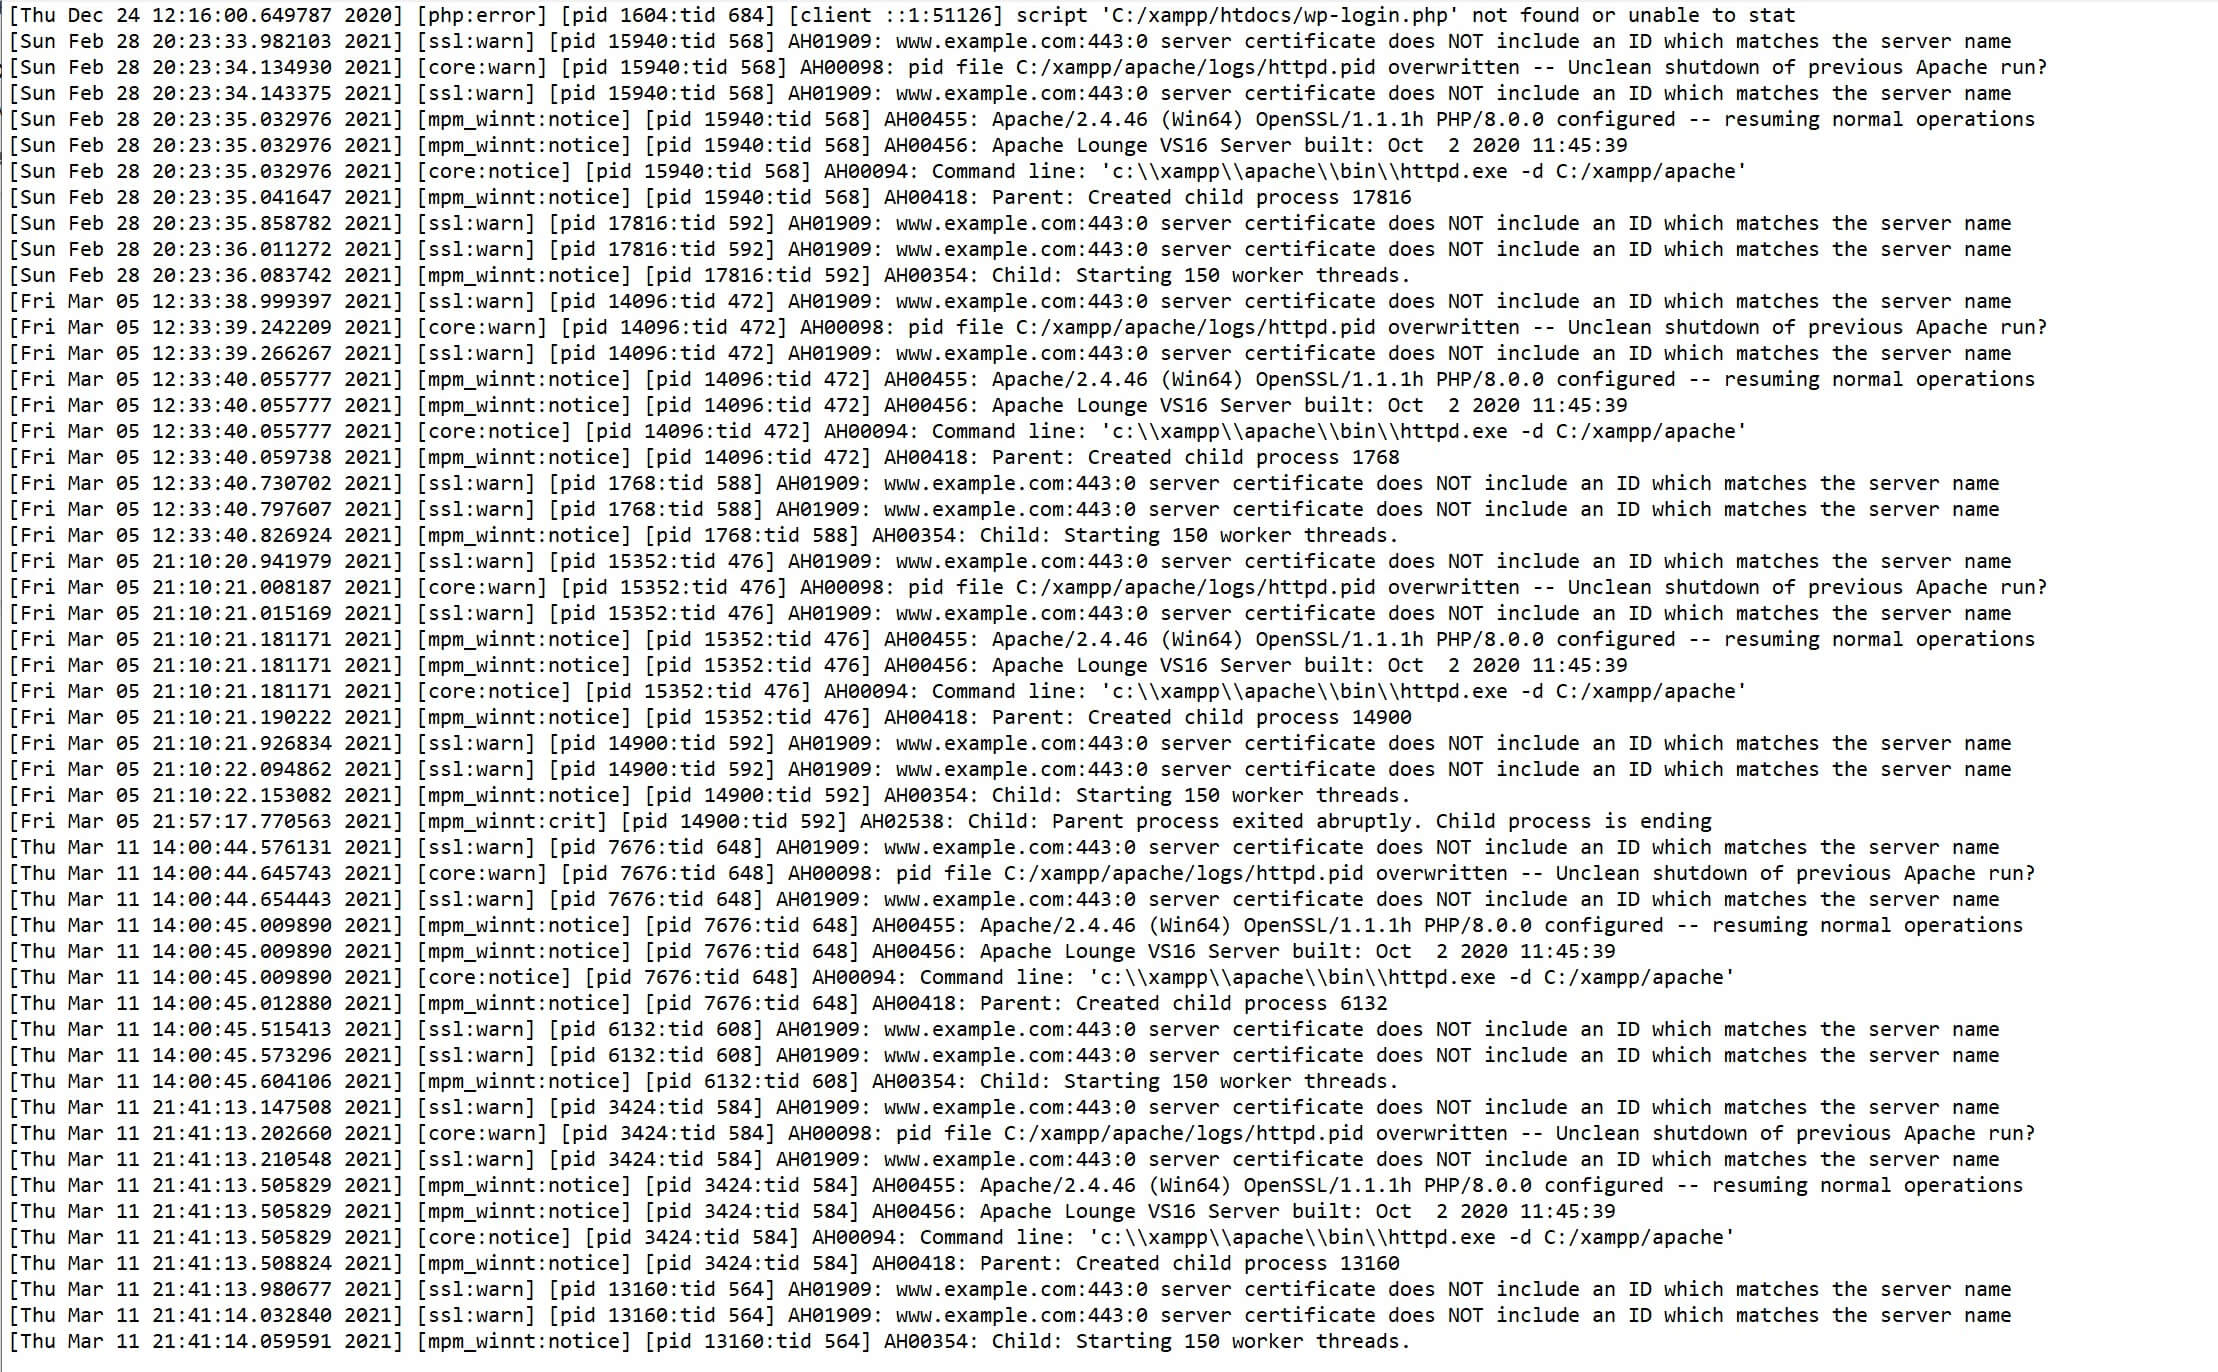
The log is in chronological order. You can scroll to the bottom to see the most recent entries, and check to see if any new occurrences of the error have appeared since you changed the file.
Summary
Error messages are never fun—and when they occur in a testing environment, they can be even more frustrating. After all, it’s hard to test exciting new website features when your installation is misbehaving.
Fortunately, the “Server certificate does NOT include an ID which matches the server name” issue is fairly benign and easily fixed. All it takes is a quick edit to a single file, httpd-ssl.conf, and you should be back to an error-free log.
If you want to ensure that your live sites run as smoothly as your XAMPP installation, consider hosting with Kinsta. Whether you’re starting a new blog or growing your business, we’ve got a plan that can help!

Brian has been a WordPress user for over 10 years, and enjoys sharing his knowledge with the community. In his free time, Brian enjoys playing the piano and exploring Tokyo with his camera. Connect with Brian on his website at brianli.com.

