Postgres, also known as PostgreSQL, stands as a cornerstone in object-relational database management. With decades of work put into its development, Postgres is a reliable, flexible database that delivers high performance.
This hands-on guide explores how to create databases and tables and delete databases in Postgres. Furthermore, it shows how to accomplish the same tasks using a database administration tool such as Adminer.
Getting Started With Postgres
To start, make sure you have Postgres installed on your system. If it’s not there, download the necessary file and follow the installation instructions.
Keep in mind that the commands shown here are demonstrated on macOS, but they’ll work seamlessly on any OS.
Once Postgres is installed, enter this command in your terminal to verify everything’s up and running smoothly:
postgres -VThis command should return the version number of your Postgres installation:

How To Connect to PostgreSQL Database Server
So you’ve installed Postgres on your system and are ready to create databases. But how do you access your database? This is where the Postgres interactive terminal, popularly called psql, comes in. Psql is a terminal-based frontend to Postgres that allows you to issue queries to Postgres and then view the query results.
During installation, Postgres creates a default superuser on your operating system (OS) that has ultimate access within the database. You can log in to the psql terminal as the default superuser using this command:
psql postgresAfter running this command, you should see your terminal change to postgres=#, indicating you’re logged in as the default superuser.
One of the biggest advantages of using psql is meta-commands. These powerful tools let you perform database administrative tasks, such as connecting to databases or displaying tables, without knowing the exact SQL commands.
To use a meta-command in psql, start with a backslash (\) followed by the command. Here are a few examples:
\c <database-name>— Connects you to a specific database.\l— Lists all databases on the server.\dt— Displays all tables in a database.
How To Create Postgres Databases
When working with databases, it’s a good practice to follow the principle of least privilege by creating a new user with specific permissions. However, for the sake of simplicity in this guide, let’s create and manage databases using the default superuser.
Firstly, execute the following meta-command to list all users on your Postgres server:
\duIf you haven’t added any new users, you should only see the default superuser:

The default superuser might appear as either Postgres or your OS username, depending on your system’s configuration.
By default, the superuser doesn’t have a password. However, for database administration later on, set a password using this command:
\password <superuser-name>Enter your password when prompted and confirm it. Now, you’re ready to begin creating databases on your Postgres server. The syntax to create a database is CREATE DATABASE <database-name>.
Let’s start by creating a database named sales:
CREATE DATABASE sales;The following appears after successful database creation:

Now, create two more databases, customers and employees, with these commands:
CREATE DATABASE customers;
CREATE DATABASE employees;
Now, you’ve established three databases on your local Postgres server. To list all the databases you’ve created, use this meta-command:
\l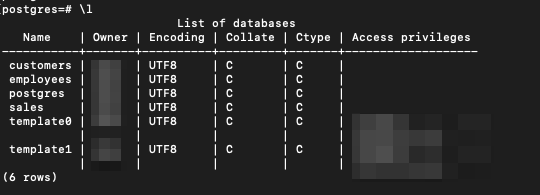
These are the three databases you’ve created so far! You can ignore the other databases in the image, as those databases come with the Postgres installation by default.
Now, you can connect to a particular database. The meta-command to connect to any database is \c <database-name>.
Run the following command to connect to the sales database:
\c salesThe following message should come up in your terminal:

Once connected to a database, you can easily switch to another database on the server with the same command. So, from the sales database, you can run the following command to connect to the customers database:
\c customersCreate Tables
To start, you’ll need to create tables to populate your database with data. The syntax for creating a table in Postgres follows this structure:
CREATE TABLE <table-name> (
<column1-name> <column1-datatype> <column1-constraint>,
<column2-name> <column2-datatype> <column2-constraint>,
<column3-name> <column3-datatype> <column3-constraint>,
…
…
<columnN-name> <columnN-datatype> <columnN-constraint>
);
Begin by connecting to the sales database.
\c salesNext, create the table products with three columns that can’t be null: product_id, product_name, and quantity_sold:
CREATE TABLE products(
   Product_id			INT     NOT NULL,
   Product_name		TEXT    NOT NULL,
   Quantity_sold		   INT     NOT NULL
);
You should see the following output if the operation is successful:

Next, use the meta-command below to verify that you’ve successfully created the products table:
\dtThis command lists all the tables in your database — in this case, one table. Since you’re connected to the sales database, you should see the following output:

Next, create two tables in the employees database. The first table will list salaries, and the second will list addresses. To create these tables, run the commands below:
\c employees

CREATE TABLE salary(
   Employee_id		INT     NOT NULL,
   Employee_name		TEXT    NOT NULL,
   Employee_salary		INT     NOT NULL
);

CREATE TABLE address(
   Employee_id		INT     NOT NULL,
   Employee_country		TEXT    NOT NULL,
   Employee_zipcode		INT     NOT NULL
);
Finally, confirm that you have created these tables by running the \dt meta-command. This is the output you should see:

How To Delete Postgres Databases
Deleting a database is as easy as creating one. The syntax to delete a database is DROP DATABASE <database-name>;.
You don’t need to connect to a particular database to delete it. So, if you want to delete the customers database, you can run this command from whichever database you are connected to:
DROP DATABASE customers;You should see this screen on successful deletion:

You can confirm that the customers database no longer exists by listing the databases on your local Postgres server using the \l meta-command.

Handling Postgres Database Operations With Adminer
At this point, you’ve learned the fundamentals of Postgres by creating databases, creating tables, and deleting databases through the command line.
However, the command line can be intimidating or tedious to use. That’s where a database administration tool like Adminer can help. You can perform all the above database operations through a GUI with Adminer. Although you can use Adminer independently, it’s also a standard component on DevKinsta.
You’ll also need to download the Adminer PHP file to manage your database with Adminer. Open your terminal once to start the built-in web server that runs PHP files, and navigate to the location where you’ve placed the Adminer PHP file:
cd path/to/Adminer php file Next, start the web server using the following command:
php -S 127.0.0.1:8000You’re all set to use the Adminer UI on your web browser. Type the following address in your web browser: http://localhost:8000/<your-Adminer-php-file.php>
You should see the Adminer user interface (UI) in your web browser:
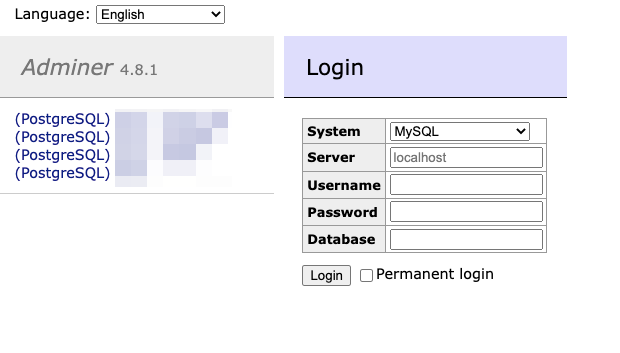
To enter your local Postgres server, follow the instructions below while filling in the fields on this page:
- Select PostgreSQL for the System field.
- Server should be pre-filled to localhost.
- For Username, type the superuser’s name, either “postgres,” or the username of your computer’s operating system.
- For Password, type the password set for the superuser in the “Create Databases” section.
- Leave the Database field empty.
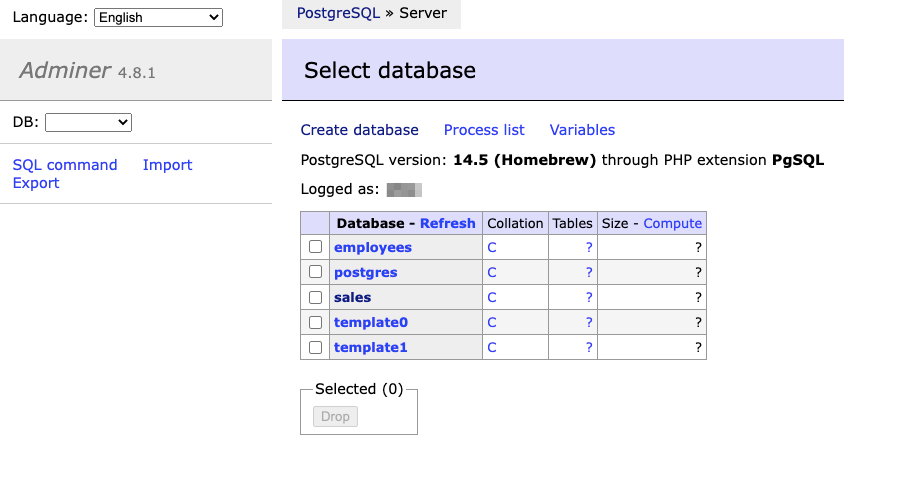
On successful authentication, you’ll see the list of all the databases you have created previously, as shown below. If you’re working with Windows, you could encounter an error that says, “None of the supported PHP extensions (PgSQL, PDO_PgSQL) is available.” If this occurs, edit the php.ini file and enable these extensions.
To create a new database, click the Create database hyperlink:
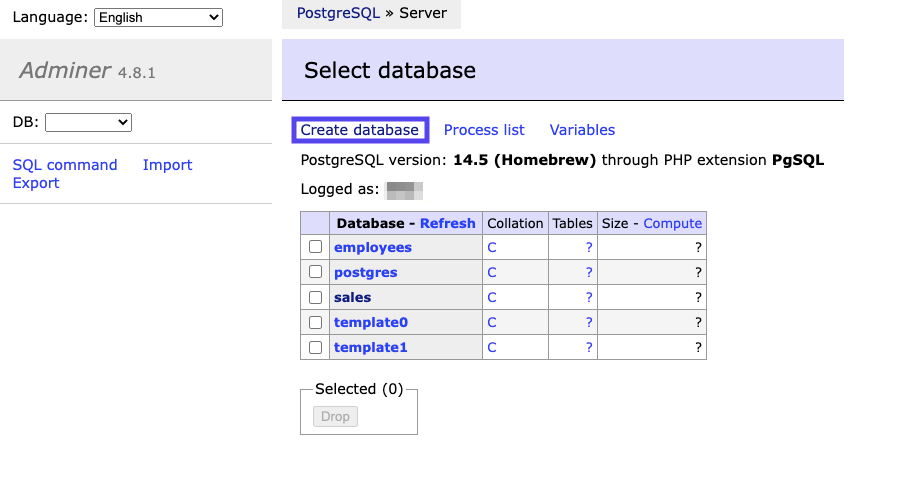
Name your database customers and click the Save button.
Then, verify that you’ve created the customers database by clicking the Server hyperlink, indicated below:
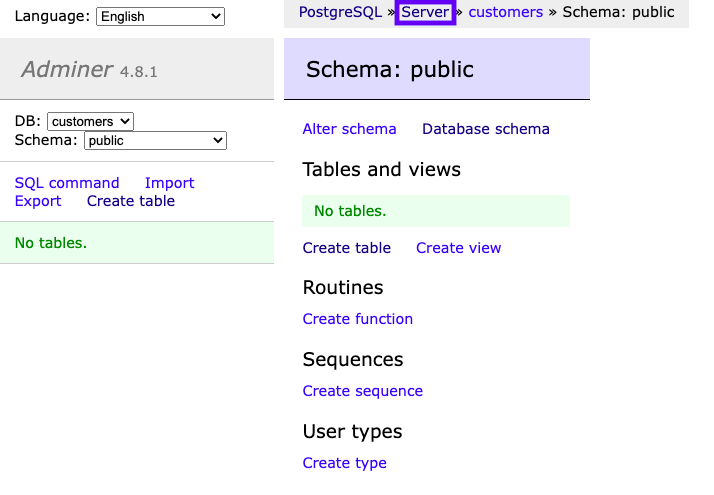
You’ll see the customers database now. Click the customers to connect to it.
As you can see, there are no tables in this database. Click the Create table hyperlink to create a new table, called locations.
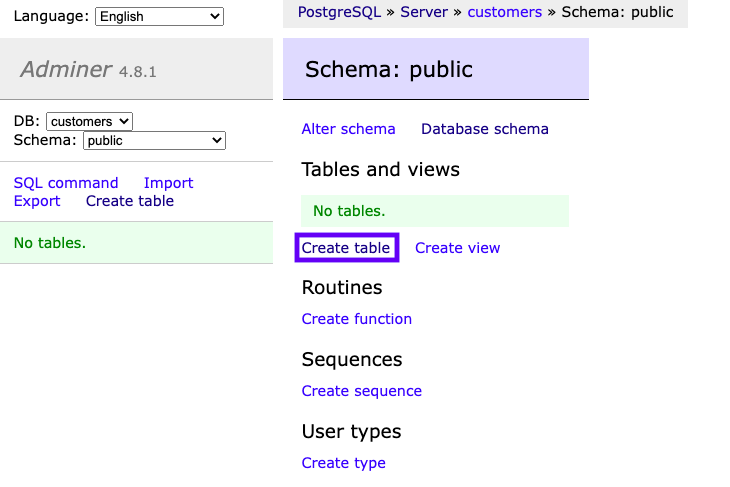
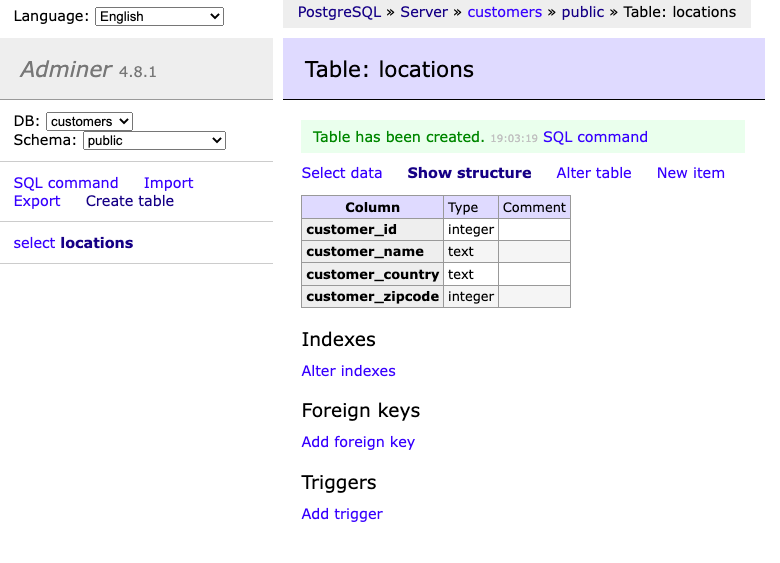
Fill in the appropriate columns to match the image below and click the Save button:

You should now be able to see the table in your customers database:
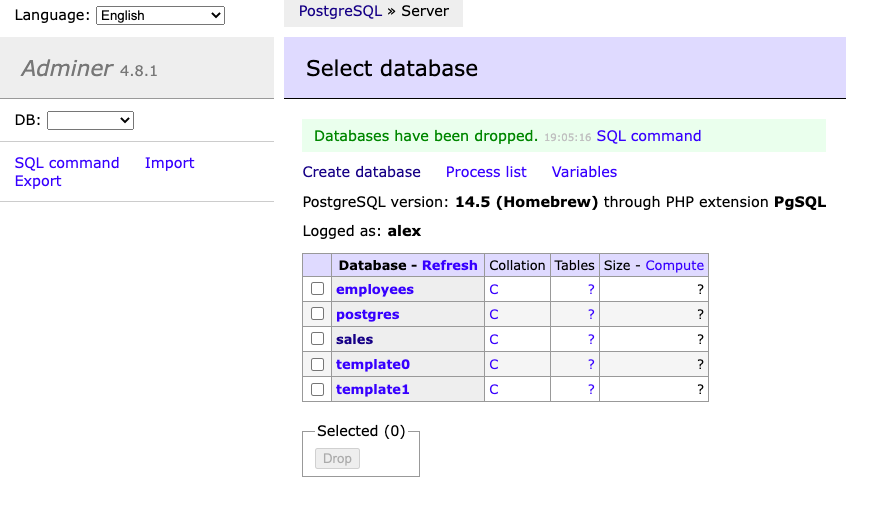
Click the Server hyperlink again to see all your databases. Tick the checkbox against customers. Ticking the customers database will enable the drop button below. Click drop to delete the database. You’ll receive a confirmation about your database deletion operation:
Summary
You’ve now learned how to create databases, create tables in your database, and delete databases on your local Postgres server via the command line. Plus, you learned how easily you can perform these tasks using a database administration tool like Adminer.
Although these and other command-line methods of database and table management are functional, Adminer’s point-and-click UI makes performing these tasks even more seamless.
As a WordPress developer, DevKinsta gives you access to Adminer and a plethora of other tools to help you manage your databases. To easily manage your Postgres databases, check out DevKinsta — it’s free forever!


