
In today’s fast-paced digital landscape, having a well-organized and visually appealing documentation or blog site is essential for grabbing your audience’s attention and keeping them engaged. But how can you achieve this without spending endless hours on web development?
This article explains how to create and customize a fast documentation and blog site using VuePress, a minimalistic yet powerful Static Site Generator (SSG).
What Is VuePress?
VuePress is an open-source framework that specializes in generating static websites, primarily geared towards documentation and blogging. It was created by Evan You, the genius behind Vue.js, and it embodies the philosophy of simplicity and ease of use that Vue.js is known for.
Why Use VuePress?
Here are some compelling reasons why VuePress might be the perfect choice for you.
- Markdown simplicity: VuePress simplifies content creation with Markdown, making it easy to write and structure content without complex formatting.
- Vue.js integration: VuePress seamlessly integrates Vue.js, enabling interactive and dynamic web elements for an engaging user experience.
- Performance and customization: VuePress offers excellent performance with quick-loading static websites and extensive customization options to match your style and needs.
Getting Started With VuePress
Before diving into VuePress, ensure you have Node.js or Yarn Classic installed on your computer. There are two ways to get started with VuePress, you either use the create-vuepress-site generator, which will help scaffold the basic VuePress site structure for you, or use manual installation.
For this article, let’s use the manual installation method.
- Create a new directory and change it:
mkdir vuepress-starter && cd vuepress-starter- Initialize with your preferred package manager. For this article, let’s use Yarn:
yarn init- Install VuePress in your project as a developer dependency:
yarn add -D vuepress- Create a docs folder to hold all your code and then create a README.md file, which serves as the index file of your project similar to index.html:
mkdir docs && echo '# Hello VuePress' > docs/README.md- Open your project in a code editor and add the following scripts to your package.json file so you can serve and build your site:
"scripts": {
    "dev": "vuepress dev docs",
    "build": "vuepress build docs"
  },
You can now serve your site by running the yarn dev command. VuePress will start your development server at http://localhost:8080.

You have now created a documentation site. You will notice that VuePress offers a clean, minimalist default theme out of the box. However, it’s highly customizable, giving you the creative freedom to craft a unique look and feel for your website.
Creating Documentation Pages
VuePress follows a straightforward directory structure for organizing documentation. Inside your project folder, you’ll find the docs directory we created, where you can create Markdown (.md) files for your documentation pages.
For example, you can create files like getting-started.md, usage.md, and troubleshooting.md. These files automatically become routes that can be accessed when you navigate to http://localhost:8080/getting-started, http://localhost:8080/usage and http://localhost:8080/troubleshooting.
To enhance the organization of your documentation, you can create dedicated folders for related documentation pages. For instance, you can create a folder called guide and organize it with specific guides like using-kinsta-stsh.md. When you employ this structure, the content in using-kinsta-stsh.md becomes accessible via a URL like http://localhost:8080/guide/using-kinsta-stsh.
You can also create a README.md or index.md file at the root level of the guide folder. This file will serve as the index page, allowing users to navigate to http://localhost:8080/guide/ and conveniently access the content with a sidebar you will learn how to configure in the next section.
In this VuePress sample repository, you will notice that all these files were created, and some markdown content is added to each file. Feel free to create your files to your preferences, either from scratch to suit your specific needs or by drawing inspiration from the content available within the repository.
Customizing VuePress Appearance
Once you’ve created your documentation site with content, you might find it challenging to navigate, especially if you have many files to manage. However, VuePress allows you to customize the navigation structure of your site to make it more user-friendly and organized.
To customize your site’s appearance and navigation, create a .vuepress folder in the root directory of your project. This folder will hold configuration files and assets related to your VuePress site.
Navigation Configuration
In the .vuepress folder, create a config.js file. You can also use other file formats like YAML (.yml), TOML (.toml), or TypeScript (.ts) for your configuration.
In your config.js file, you can define the navigation structure of your site using the themeConfig object. Here’s an example configuration:
module.exports = {
    title: 'Kinsta Vuepress',
    description: 'A VuePress QuickStart for Kinsta',
    themeConfig: {
        nav: [
            {
                text: 'Guide',
                link: '/guide/',
            },
            {
                text: 'Static Site Hosting',
                link: 'https://sevalla.com/static-site-hosting/',
            },
        ],
        sidebar: {
            '/guide/': [
                {
                    title: 'Guide',
                    collapsable: false,
                    children: ['', 'using-kinsta-stsh'],
                },
            ],
        },
    },
};
In this example, we’re configuring the site’s title and description, defining navigation links, and setting up a sidebar for the /guide/ section.
The nav array specifies navigation links at the top of your site. The sidebar object defines the sidebar structure for specific sections. In this case, it’s configured for the /guide/ section.
You can read more about navbar configuration in the VuePress documentation.
Styling
VuePress allows you to customize the appearance of your site through styles. You can either override the default styles using some defined variables or define your style. To do either, create a styles folder in the .vuepress folder
To apply simple overrides to the styling of the default preset or define some variables to use later, you can create a palette.styl file in .vuepress/styles. These are some predefined variables you can tweak:
// colors
$accentColor = #5333ED
$textColor = #2c3e50
$borderColor = #eaecef
$codeBgColor = #282c34
$arrowBgColor = #ccc
$badgeTipColor = #42b983
$badgeWarningColor = darken(#ffe564, 35%)
$badgeErrorColor = #DA5961

// layout
$navbarHeight = 3.6rem
$sidebarWidth = 20rem
$contentWidth = 740px
$homePageWidth = 960px

// responsive breakpoints
$MQNarrow = 959px
$MQMobile = 719px
$MQMobileNarrow = 419px
These variables can be used to maintain consistent styling throughout your site. VuePress also provides a convenient way to add extra styles. You can create an index.styl file in .vuepress/styles folder where you can use normal CSS syntax:
.content {
  font-size 30px
}
Read more about styling VuePress in the official documentation.
Using Components
VuePress supports the use of components to enhance the functionality and appearance of your pages. You can create Vue components and include them in your Markdown files. Create a
components folder in .vuepres, and then any *.vue files found in .vuepress/components are automatically registered as global components.
For instance, consider creating two components, HomeOptions.vue and HostingBanner.vue:
.
└─ .vuepress
   └─ components
      ├─ HomeOptions.vue
      └─ HostingBanner.vue
Within these vue.js component files, you can add CSS codes. Let’s add code to the HomeOptions.vue and HostingBanner.vue components.
Add the code below to HomeOptions.vue:
<template>
    <div class="options">
        <div class="option">
            <a
                href="https://docs.sevalla.com/templates/overview"
                target="_blank"
            >
                <h3>Quick Start Examples</h3>
            </a>
            <p>Explore quick start examples for setting up static sites.</p>
        </div>
        <div class="option">
            <a
                href="https://docs.sevalla.com/static-sites/overviewgetting-started-static-site-hosting/"
                target="_blank"
            >
                <h3>Getting Started</h3>
            </a>
            <p>Learn how to get started with static site hosting.</p>
        </div>
        <div class="option">
            <a
                href="https://docs.sevalla.com/static-sites/overviewmanage-static-sites/"
                target="_blank"
            >
                <h3>Manage Static Sites</h3>
            </a>
            <p>Discover how to efficiently manage your static sites.</p>
        </div>
    </div>
</template>

<style scoped>
    a {
        color: #2c3e50;
    }
    a:hover {
        color: #5333ed;
    }
    .options {
        display: flex;
        gap: 10px;
        margin: 40px 0;
    }
    .option {
        border: 2px solid #eaecef;
        border-radius: 5px;
        padding: 10px;
    }
</style>
Also, add the code below to HostingBanner.vue:
<template>
    <div class="banner">
        <p>Host Your Static Site With Kinsta for Free!</p>
        <a
            href="https://sevalla.com/static-site-hosting/"
            target="_blank"
            class="btn"
            >Read More</a
        >
    </div>
</template>

<style> scoped>
    .banner {
        background: rgb(156, 85, 34);
        background: linear-gradient(
            90deg,
            rgba(156, 85, 34, 1) 0%,
            rgba(32, 50, 103, 1) 42%,
            rgba(13, 18, 25, 1) 69%,
            rgba(22, 47, 60, 1) 100%
        );
        color: #fff;
        padding: 20px;
        border-radius: 5px;
        display: flex;
        justify-content: center;
        align-items: center;
        flex-direction: column;
    }
    .banner p {
        width: 600px;
        font-size: 40px;
        font-weight: bold;
        text-align: center;
        line-height: 50px;
    }
    .banner .btn {
        border-radius: 5px;
        padding: 15px;
        color: #1f1f1f;
        font-weight: bold;
        background: #fff;
        display: inline-block;
        margin-bottom: 10px;
    }
    .banner .btn:hover {
        background: #111319;
        color: #fff;
    }
</style>
Inside any Markdown file, you can then directly use the components (names are inferred from filenames):
<HomeOptions/>
<HostingBanner/>
Read more about components in VuePress in the documentation.
Customize Homepage
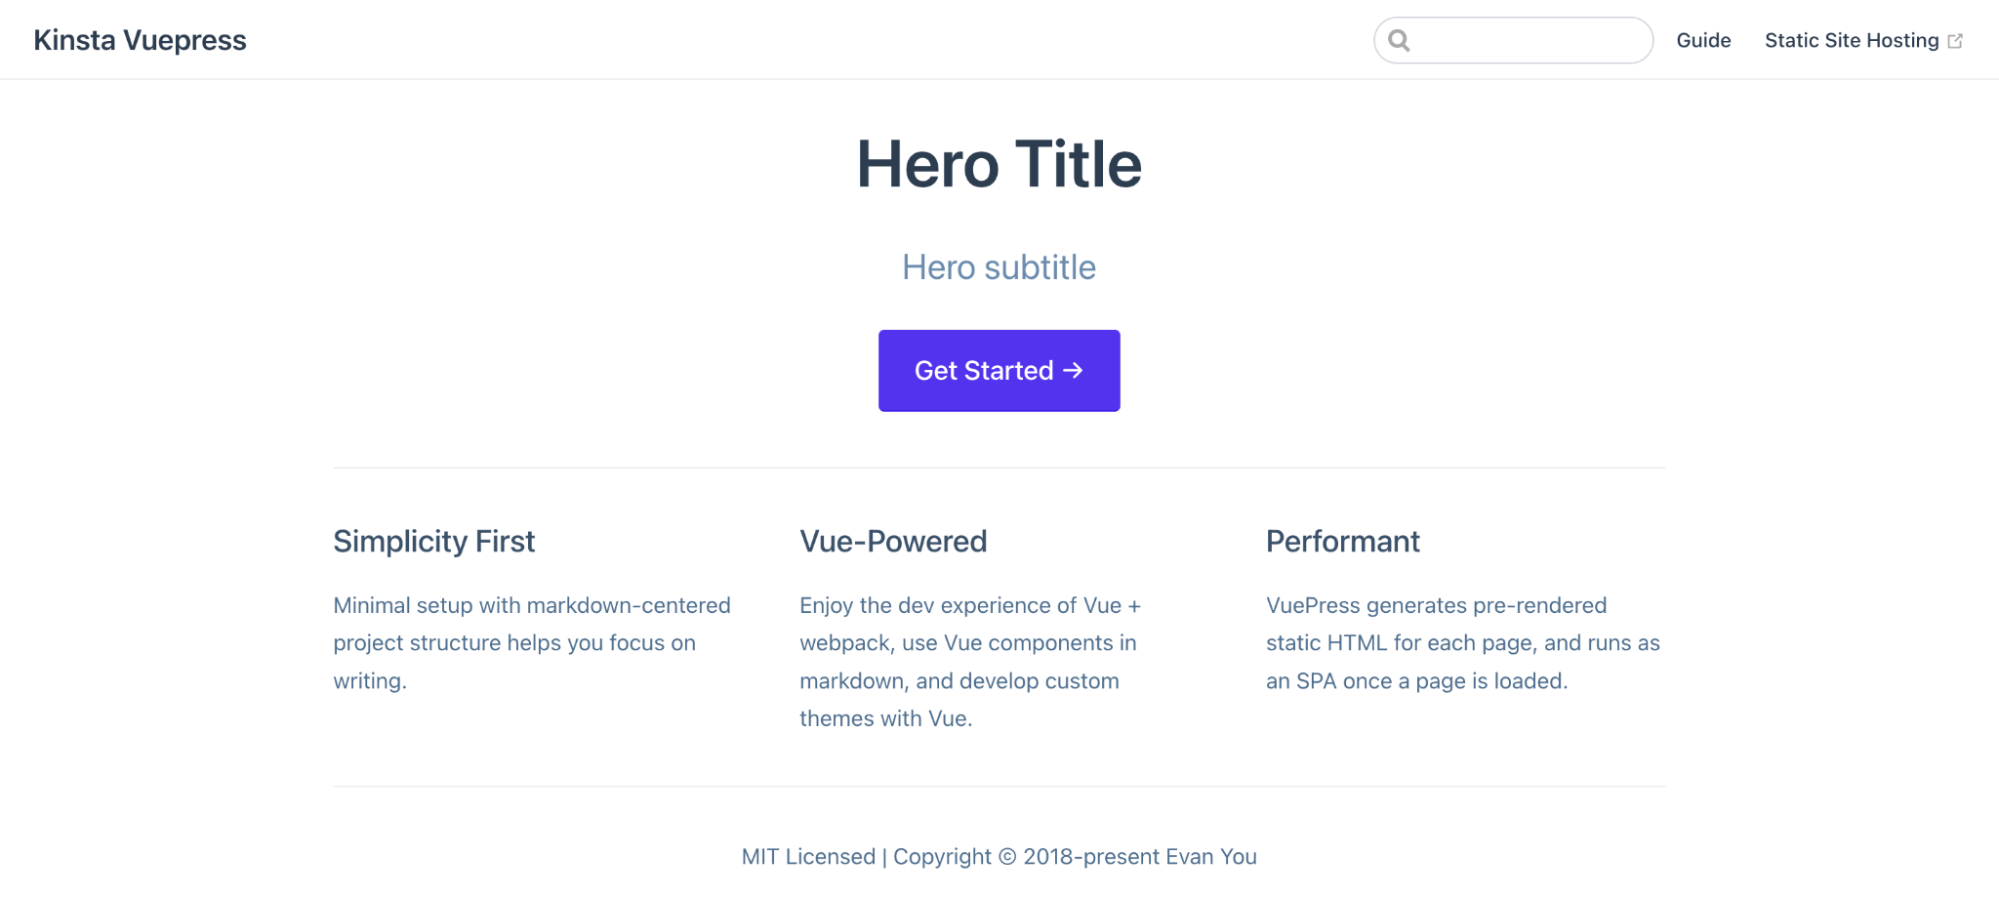
In VuePress, the default theme offers a pre-designed homepage layout that you can use to create an engaging and informative starting point for your site. To make use of this homepage layout, you need to specify home: true and include some additional metadata in the YAML frontmatter of your root README.md file.
Here’s an example of the YAML frontmatter:
---
home: true
heroImage: /hero.png
heroText: Hero Title
tagline: Hero subtitle
actionText: Get Started →
actionLink: /guide/
features:
- title: Simplicity First
  details: Minimal setup with markdown-centered project structure helps you focus on writing.
- title: Vue-Powered
  details: Enjoy the dev experience of Vue + webpack, use Vue components in markdown, and develop custom themes with Vue.
- title: Performant
  details: VuePress generates pre-rendered static HTML for each page, and runs as an SPA once a page is loaded.
footer: MIT Licensed | Copyright © 2018-present Evan You
---
All these configurations make your documentation homepage look like this:
It’s worth noting that you can disable the heroText and tagline or any other value by setting their corresponding fields to null if you prefer a simpler layout or not including it. Any content you include after the YAML frontmatter (i.e., the metadata section) will be treated as regular Markdown and will be rendered following the features section.
If you want a fully custom homepage layout, VuePress also supports Custom Layouts. Additionally, you can create a rich-text footer by using Markdown Slot Syntax, offering more flexibility in displaying footer content. Here’s an example of how to set a rich-text footer:
---
home: true
---

::: slot footer
Made with ❤️ by Kinsta. [Static Site Hosting](https://sevalla.com/static-site-hosting/)
:::
In this case, the content within the ::: slot footer section allows you to include links and additional information in the footer area of your homepage.
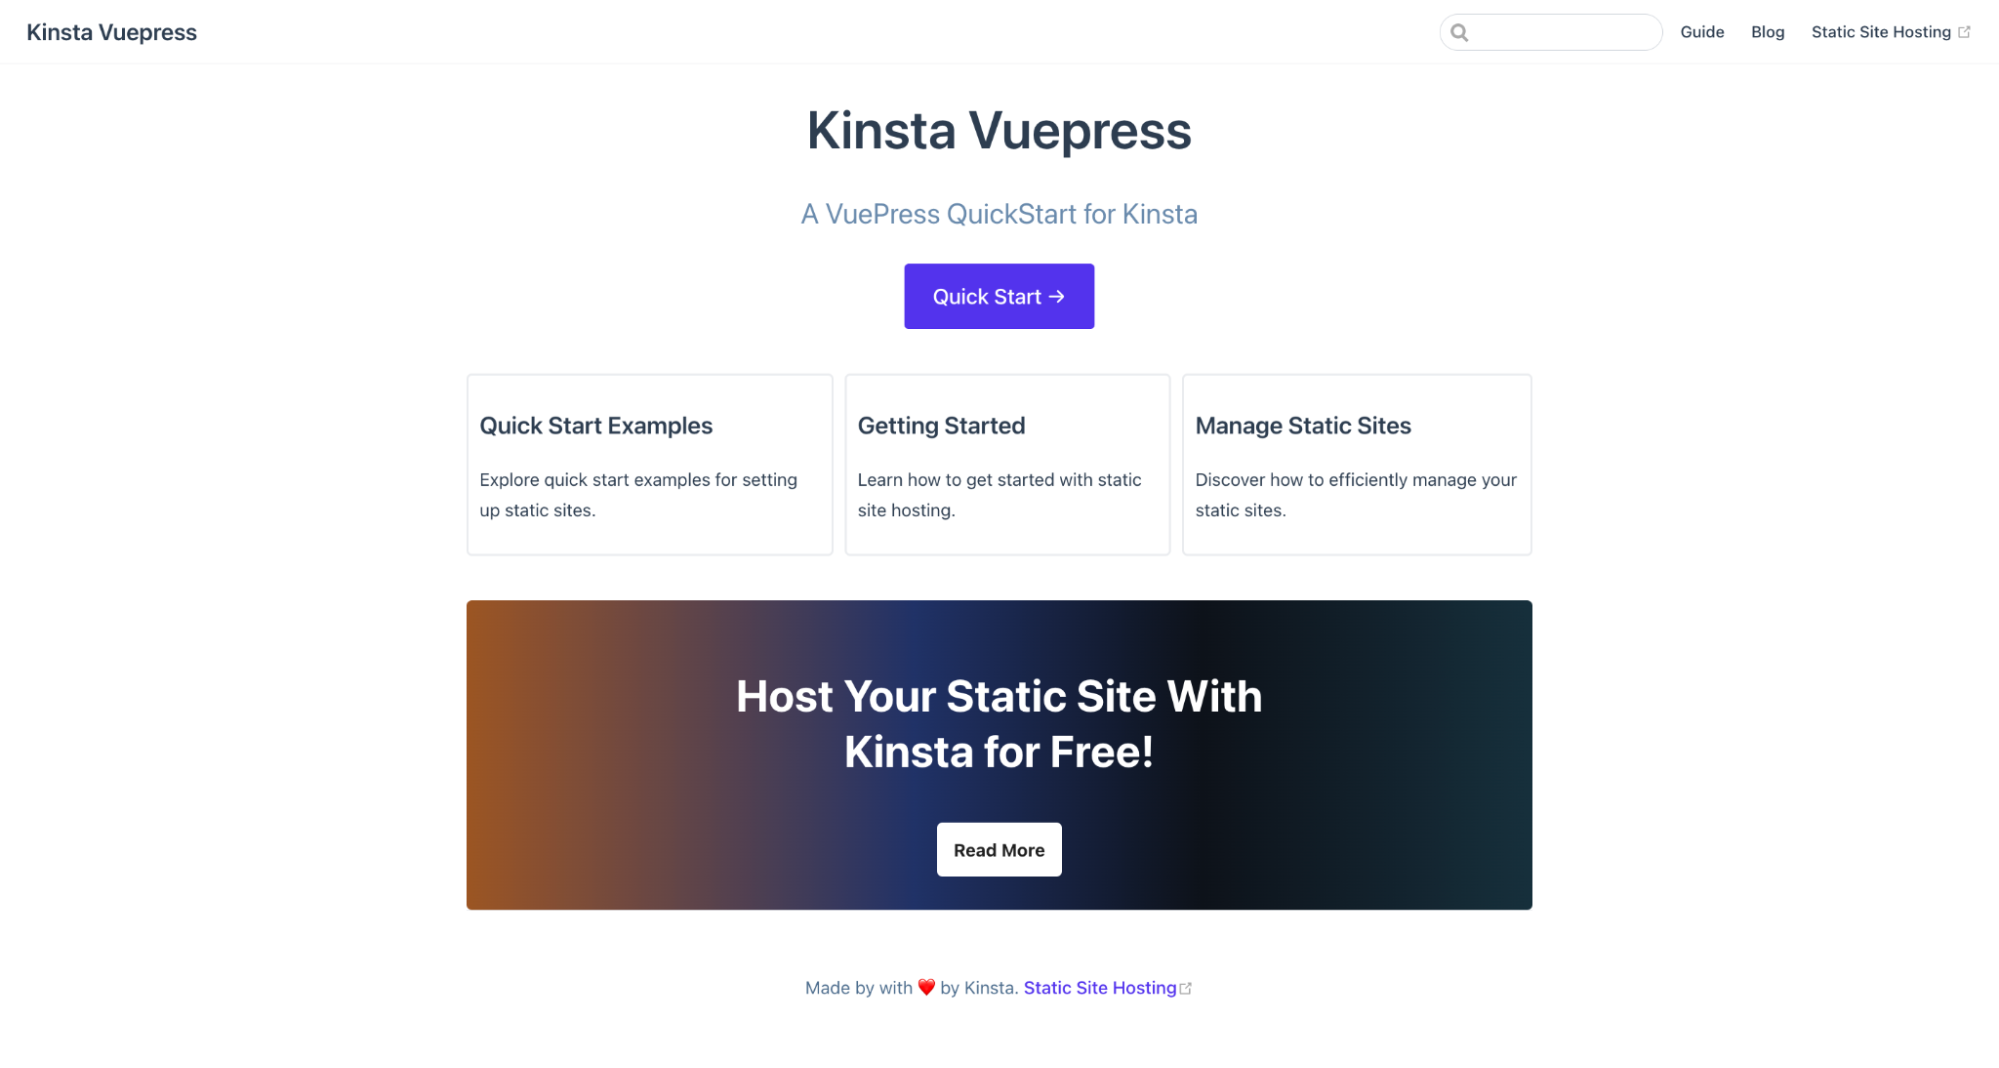
Now that you understand how to perform the above customizations, add the components created earlier to the Homepage and remove some options so the Homepage looks better:
---
home: true
tagline: A VuePress QuickStart for Kinsta
actionText: Quick Start →
actionLink: /guide/
---

<HomeOptions/>
<HostingBanner/>

::: slot footer
Made with ❤️ by Kinsta. [Static Site Hosting](https://sevalla.com/static-site-hosting/)
:::
By following these VuePress customization techniques, you can create a documentation site that not only provides valuable content but also offers an excellent user experience with organized navigation and appealing styling.
You can read more about customizing the default theme in the documentation.
Building a Blog Section With VuePress
Adding a blog section to your VuePress site is a breeze since VuePress allows you to write custom Vue components that can be inserted into any Markdown files. Let’s create a component that will render the list of blog posts.
Create a BlogIndex.vue file in the components folder and add the following code:
<template>
    <div>
        <div v-for="post in posts" v-bind:key="post.path">
            <h2>
                <router-link> :to="post.path">{{ post.frontmatter.title }}</router-link>
            </h2>
            <p>{{ post.frontmatter.description }}</p>
            <p><router-link> :to="post.path">Read more</router-link></p>
        </div>
    </div>
</template>

<script>>
    export default {
        computed: {
            posts() {
                return this.$site.pages
                    .filter(
                        (x) => x.path.startsWith('/blog/') && !x.frontmatter.blog_index
                    )
                    .sort(
                        (a, b) =>
                            new Date(b.frontmatter.date) - new Date(a.frontmatter.date)
                    );
            },
        },
    };
</script>
In the provided code snippet, you define a Vue template that loops through your blog posts using v-for, displaying the post title, description, and a “Read more” link for each post.
The script section exports a Vue component that computes and retrieves the blog posts. These posts are filtered based on their path (starting with /blog/) and the absence of a blog_index frontmatter attribute. They are then sorted by date in descending order to present the latest posts first.
When you create new blog posts, you’ll need to specify the post date as part of the frontmatter information. This will help sort the posts so that the newest posts appear first.
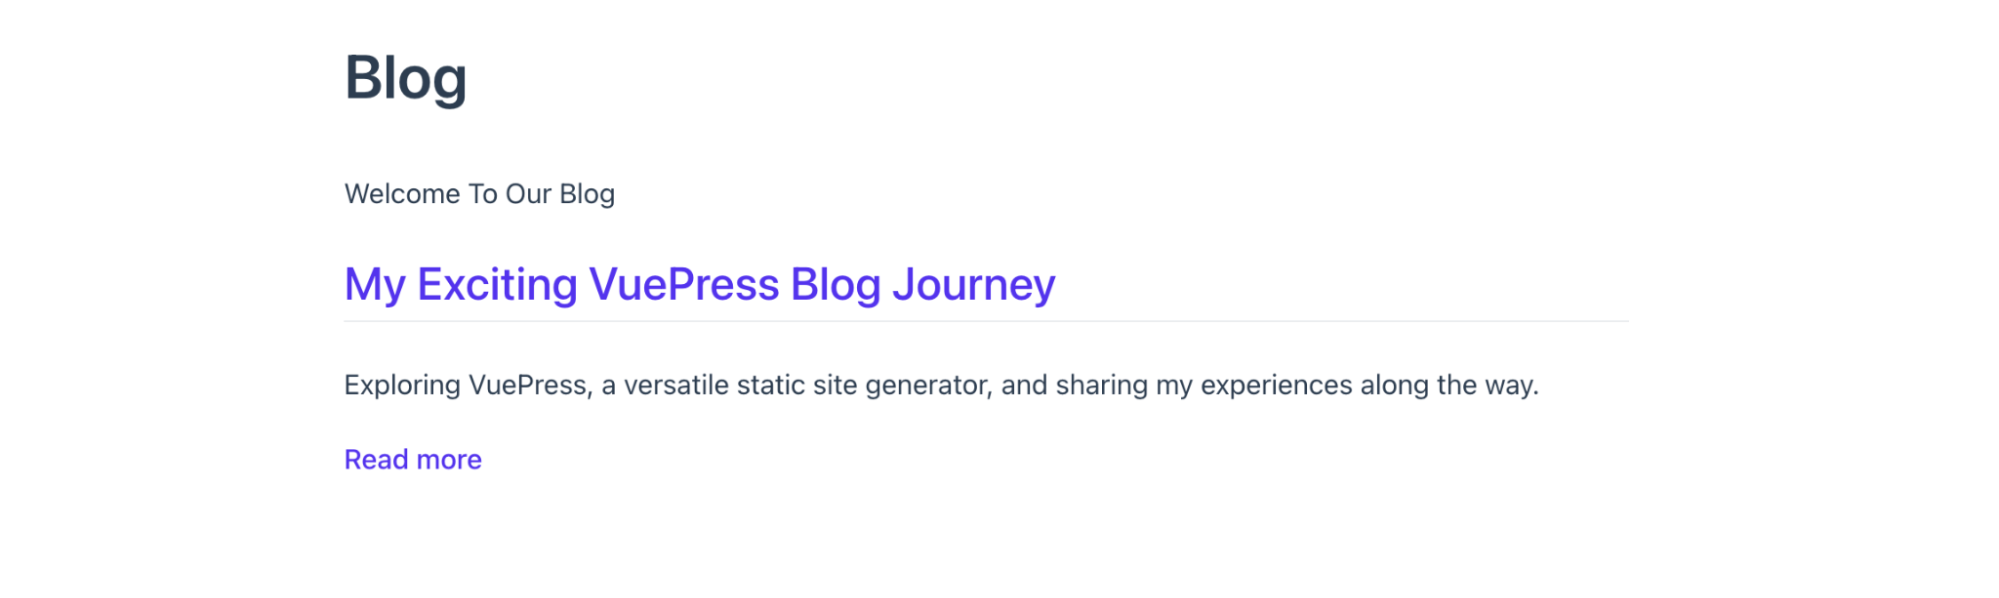
To store the blog posts, create a folder named blog at the project’s root. In this folder, add a README.md file. This is going to be the blog index, and this is where you’ll include the BlogIndex component to list all blog posts.
---
blog_index: true
---

# Blog

Welcome To Our Blog

<BlogIndex />
Ensure to add the blog_index frontmatter attribute, as it is instrumental in ensuring that the blog index itself is not listed among the individual blog posts. This attribute is utilized when filtering the posts in the posts computed property of the BlogIndex.vue component.
Next, create a blog folder at the root of your project that will store all blog posts and create each post. For example, create a first-post.md file and add the following markdown content:
---
title: "My Exciting VuePress Blog Journey"
date: 2023-09-28
description: "Exploring VuePress, a versatile static site generator, and sharing my experiences along the way."
---

# My Exciting VuePress Blog Journey

In this inaugural blog post, I embark on an exciting journey with VuePress, a powerful static site generator that's perfect for creating documentation, blogs, and more. As I delve into the world of VuePress, I'll be sharing my experiences, insights, and tips on making the most out of this fantastic tool.
For each blog post, ensure that you define essential frontmatter settings, such as the post title, date, and other relevant metadata. This meticulous organization ensures your blog posts are presented cohesively and provides a compelling reading experience for your audience.
Finally, you can add the blog navigation to your navbar in the .vuepress/config.js file:
nav: [
            {
                text: 'Guide',
                link: '/guide/',
            },
            { text: 'Blog', link: '/blog/' },
            {
                text: 'Static Site Hosting',
                link: 'https://sevalla.com/static-site-hosting/',
            },
        ],
There is a lot more you can do with VuePress, such as adding plugins, using a separate theme, or even creating your own theme.
Give It a Try
VuePress is a versatile and powerful tool for creating fast documentation and blog sites. With its simple setup, customizable themes, and plugins, you can build an informative and visually appealing platform for your audience.
And you can easily deploy your VuePress-generated static site to Sevalla, Kinsta’s PaaS product. Check the Sevalla documentation for a step-by-step guide.


