
Implementing version control would be a simple endeavor if you only worked as a solo dev with a local repo. However, this isn’t the case for many professional projects. Instead, a team will pool resources into a remote repo using a host such as GitHub. As such, it’s important to learn how to push to GitHub because it’s something you will have to do as part of your workflow.
This post will show you how to push to GitHub using the command line. Also, we look at dedicated apps to help make the process smoother. Let’s look at how you’d use GitHub for your projects.
How a Developer or Programmer Will Use GitHub
GitHub is an essential tool for developers and programmers worldwide for a number of reasons. It lets you store your code in a centralized location, which makes it easy to access and offers greater collaboration with other developers.
You’re also able to track changes made to your code and revert to previous versions if necessary. In addition, GitHub provides tools to help manage issues and bugs, and this makes it more straightforward to maintain your codebase.
Collaboration is one of the key reasons why you might use GitHub as your remote version control system (VCS) of choice. It lets you share code, track changes, and collaborate on issues without much fuss. This can help efficiency and can also lead to better code quality.
GitHub also gives you a pain-free way to manage multiple versions of a codebase, track changes, and roll them back if you need to. Large projects and open-source collaborative efforts will be just two ways GitHub will show its value.
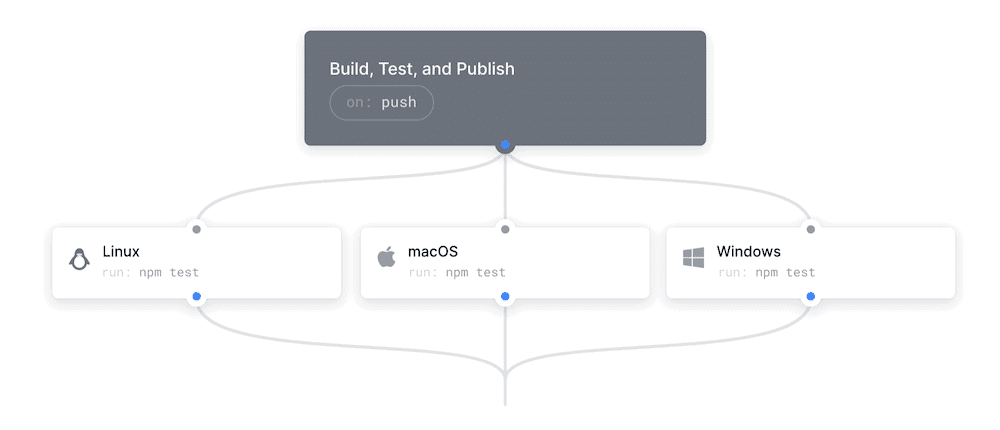
Even straightforward use cases can be ideal. For instance, you could store code for your web development project and push remote updates as you make changes. Also, continuous integration/continuous deployment (CI/CD) projects will benefit from automation in the form of GitHub Actions during build phases.
On the whole, GitHub – and other remote VCS hosts such as GitLab – provides a platform for collaboration, version control, and other development workflows. It can help streamline the development process and improve code quality. As such, you will want to learn how to push to GitHub, as this knowledge will benefit you almost every day.
How To Push to GitHub from the Terminal (Command Line)
The rest of this article will show you how to push to GitHub. It’s a process that’s simple to understand and execute.
However, you need to make sure you set your project up beforehand, otherwise, you’ll encounter errors. In our first section, we look at what tools and skills you need, then look at the process itself in detail.
What You Need to Push to GitHub
It’s important to ensure you set up your project to support using a remote repo and integrating pushing into your workflow. As such, first and foremost, you need a Git repository – a ‘repo’ to store your code in. Consider this a folder that contains the files associated with your project.
The entire version control process begins within a local environment on your computer. We have the exact steps to do this later, but you may already have this knowledge (or know where to access it.)
You also need a GitHub account. In fact, you could also use another online VCS host, such as GitLab, BitBucket, Buddy, and more. The instructions we give you here will transfer, for the most part, to other platforms. However, comparing these hosts is beyond the scope of the article.
To push your code to GitHub, you can use either the command line or a graphical user interface (GUI.) The main bulk of our post will be about the command line workflow, but there’s also a section on using a GUI, too, as some are popular. However, note that each GUI may have a different process to push to GitHub, which means you need to stick to a particular app to make the most of it.
Finally, ensure you have the right access to your repo. GitHub’s documentation is comprehensive here, and you should look to either HTTPS access tokens or Secure Shell (SSH) access. Without this, you won’t be able to do any work!
1. Create a GitHub Repository
The first step is to create a new online repo within GitHub. While you can do this from the command line, it’s just as straightforward to do it using a web browser.
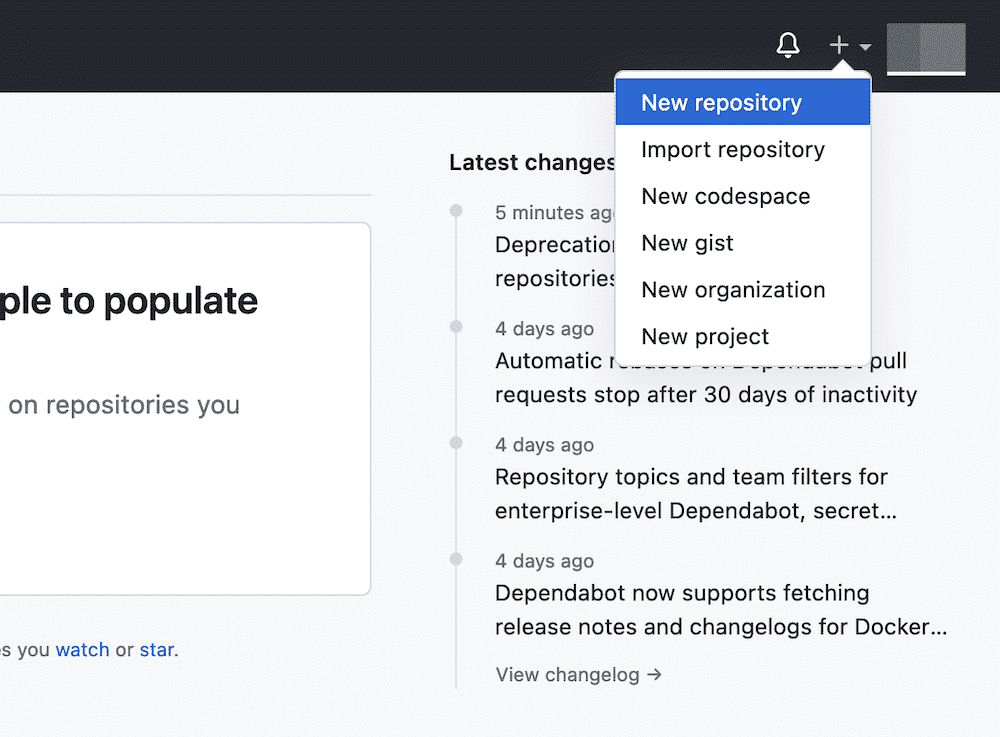
Once you log in or sign up to GitHub, head to the top-right corner of the screen and look for a Plus drop-down menu next to your profile avatar. If you open this, it will show you a few options that include New repository:
Once you click this, you come to the Create a New Repository page. This will show you a bunch of settings to help set your remote repo up:
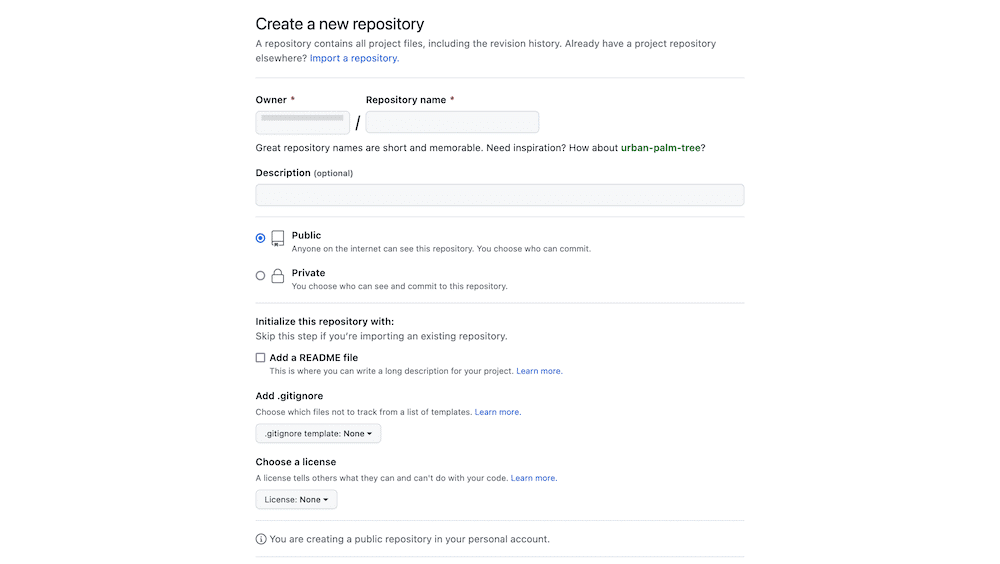
The options you set here will be unique to your project’s needs. However, if you already have a local repo to push to GitHub, we’d tick as little as possible in order to keep parity between local and remote.
From here, click the Create repository button, and GitHub will set things up under the hood. At this point, you come to the repo home page with instructions on how to set up a new local repo that links to the remote one using the command line. The path you follow will depend on whether you don’t yet have a repo or would like to clone the contents of an existing project.
If you have already initialized Git and populated your local repo, you won’t need to carry out anything from step two. Instead, you can head right to the third step, where we look at pushing code to GitHub from your local repo.
2a. Clone Your Remote Git Repo
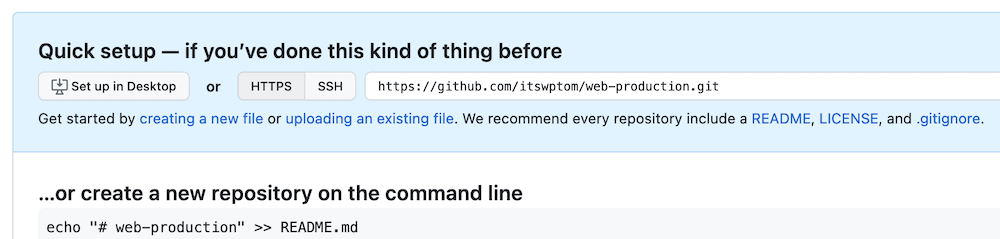
If you don’t yet have a local repo, the GitHub version will be the only one. The best way to sync both locations is by using the git clone command on your computer. However, you do need the URL for your repo.
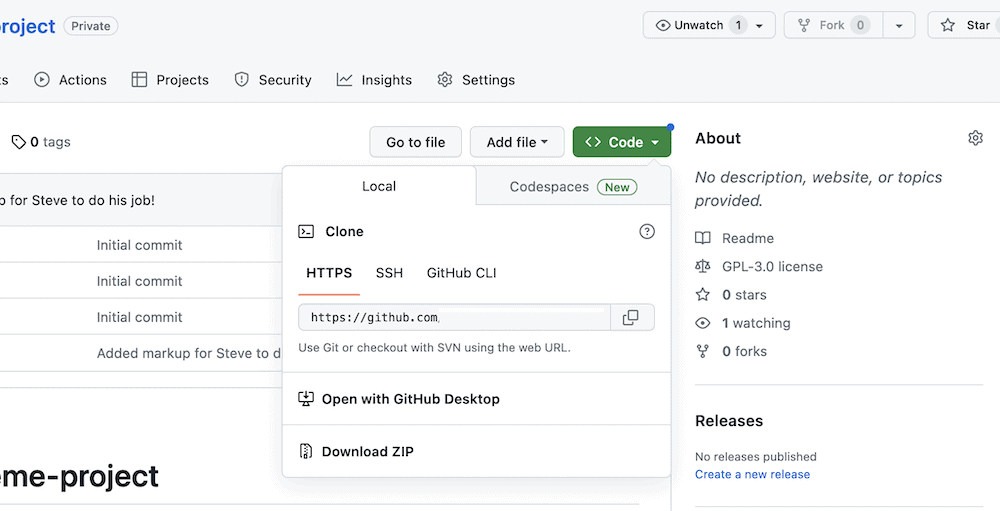
To get this, head to the repo within GitHub, and look for the green Code drop-down option above your list of files:
If you don’t see this, it’s likely because you don’t yet have a populated repo. Note that you could copy the repo URL from the blue Quick Setup box at the top of the screen. Simply switch to HTTPS using the buttons, and copy the URL.
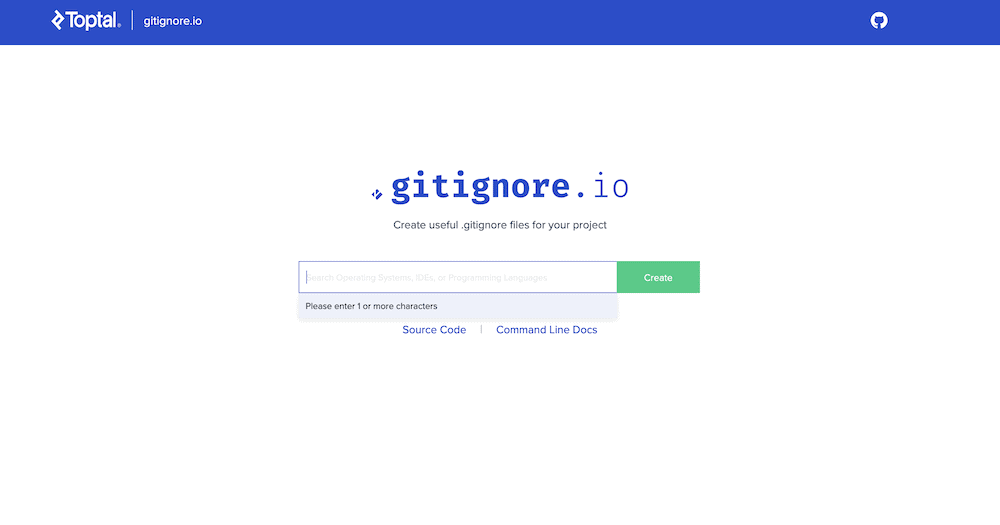
However, we’d prefer to generate a .gitignore file, as this will be something you need anyway. You can use gitignore.io to search for the tools you use and, from there, generate a complete .gitignore file to upload to the repo:
Regardless, once you can open the Code drop-down, it will show URLs for your repo. There will be options for HTTPS, Secure Shell (SSH,) and others. However, the straightforward approach is to use the HTTPS URL. You can click the small Copy icon next to the URL in question to copy it to your clipboard.
Next, head back to your Terminal or command line application, and run the following:
git clone <full-github-url>Once you run the command, Git will copy the remote repo to your local environment.
2b. Initialize Git In Your Local Project Folder
For situations where you don’t yet have a local version of your remote repo, you need to initialize one. Most of the work you do will be local, with pushing the changes to the remote server at regular intervals. Here are the steps:
- First,
cdto a folder you’d like to use for your project. - Next, run the
git initcommand. This will initialize Git in your local project folder and create a hidden .git directory. - Add your .gitignore file to the root of your project’s local folder, as you won’t want to stage some changes relating to system files.
At this point, you need to index your current files. You do this in the typical way using git add, then committing the changes:
git add .

git commit -m “Initial Commit”

git branch -M trunk
The last line changes your main branch to something else of your choosing if you haven’t yet switched from master. The latter is problematic as it has negative connotations to slavery, so it’s recommended to change it. We’ve used trunk here, but main is also acceptable. If you know this line is not one you need, you can omit it.
At this point, you’re ready to learn how to push to GitHub!
3. Add a New Remote Origin and Push Your Code to GitHub
Once you’ve created a new remote repository on GitHub, you need to add a new ‘remote origin’ to your local repository. This is essentially the link to your remote repo, so that your local one knows where to send the upstream changes.
To do this, enter the following command in your terminal:
git remote add origin <github-url>
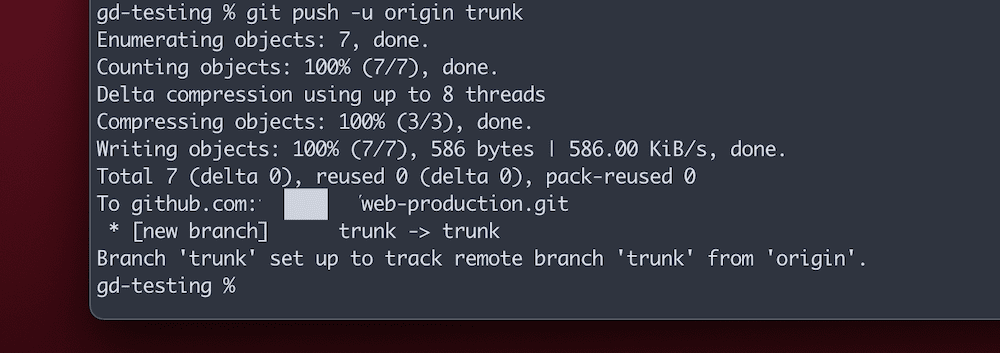
In a technical sense, the remote you add can be any name. However, most call it “origin” as you only use one remote add, and it offers absolute clarity. At this point, you can push to GitHub using the following:
git push -u origin trunk
This command will push your code to the new remote origin – named “origin” – and sets the upstream branch to “trunk.” You’re also welcome to push any branch to the remote repo if you need to.
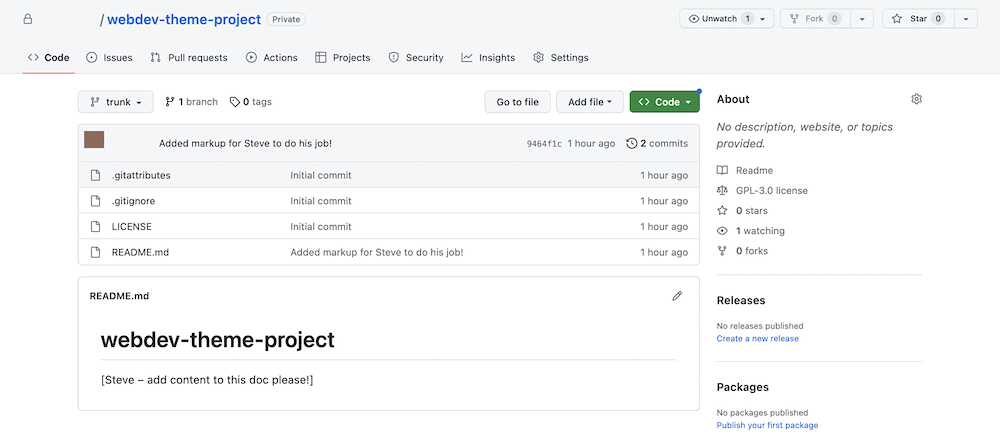
Once the process completes, you need to verify that the push was a success. There are a couple of ways to do this. For example, you can head to the repo on GitHub and check to see if the changes are live:
However, you can also run git log from the command line:
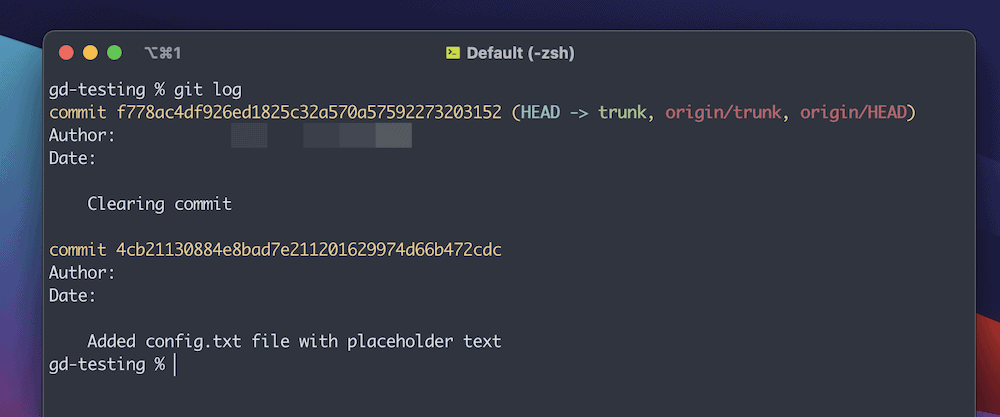
This command displays every commit for your repo, including the one you just pushed. As such, if the commit is within the log, the push was a success.
How To Push to GitHub Without Errors
In some cases, you might encounter an error when you attempt to push to code to GitHub:
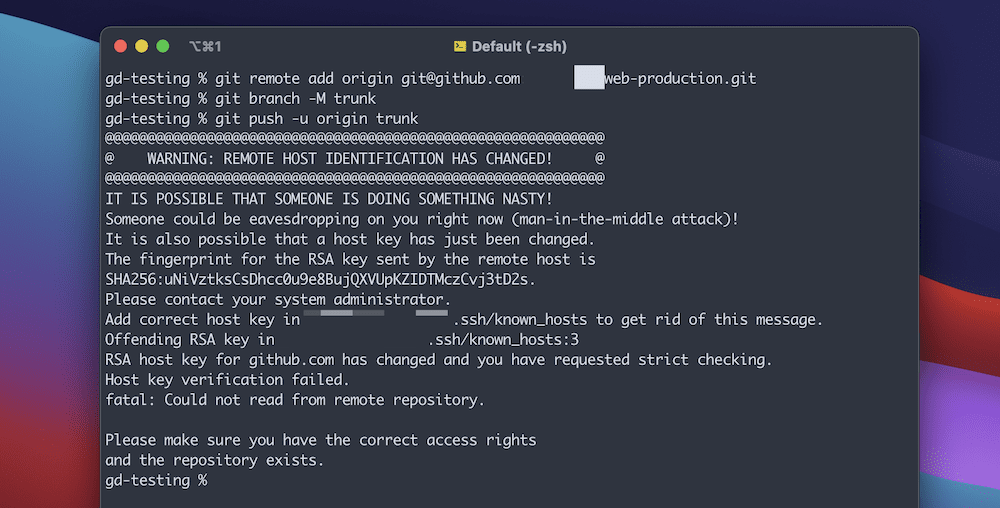
This happens when you already have a secure connection to GitHub through an old project but using an old RSA key. We have a guide on how to fix this issue in general. However, to fix this for GitHub specifically, you can run the following:
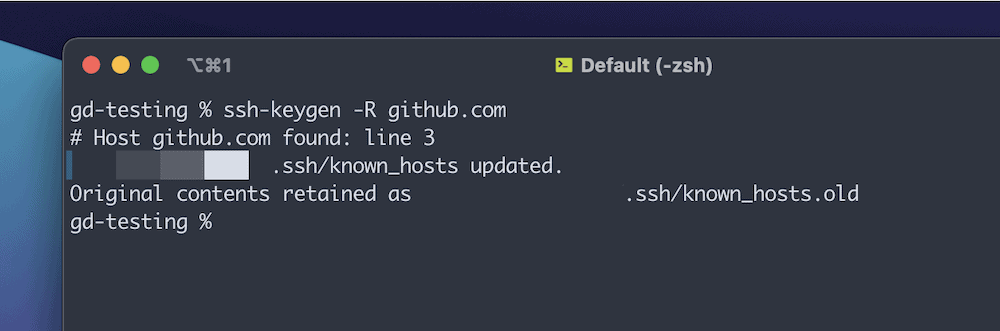
ssh-keygen -R github.com
This will update your ‘known hosts’ file, then display a confirmation message:
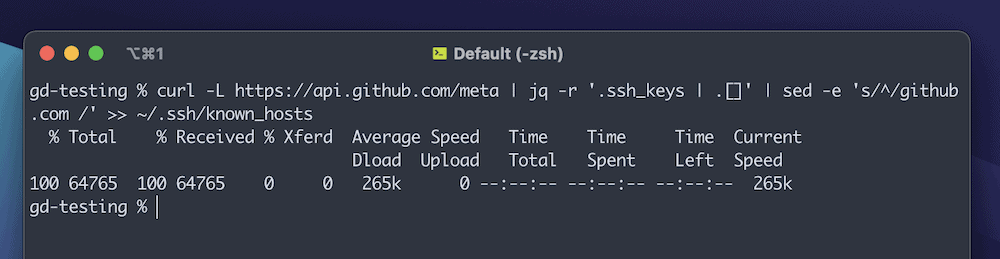
From here, run the following to add the new RSA key to your known hosts file:
curl -L https://api.github.com/meta | jq -r '.ssh_keys | .[]' | sed -e 's/^/github.com /' >> ~/.ssh/known_hosts
In fact, you may also see an error here too, relating to the jq package. If this is the case, you can run either of the following depending on your operating system:
- Windows:
curl -L -o /usr/bin/jq.exe https://github.com/stedolan/jq/releases/latest/download/jq-win64.exe - Mac:
brew install jq - Linux:
apt-get update | apt-get -y install jq
Once this installs, run the command again and wait for it to complete:
You can finally run the git push command again, and this time, you should see the process complete. If not, the issue is likely due to incorrect SSH keys or even that you need to set up secure connections using dedicated keys. We have a full guide on how to generate new SSH keys for GitHub, and GitHub’s documentation is also comprehensive here.
Using a GUI to Push Your Code to GitHub
While the process of pushing code to GitHub is simple once you set it up, there are plenty of steps, caveats, and subprocesses to consider. A GUI can simplify the process.
For instance, you have all of the functionality of the command line but using a nicer interface (with drag-and-drop in some cases.) What’s more, it’s often easier to visualize and manage changes through a GUI, especially if you’re not familiar with command line tools.
If you know you’ll never need to use your GUI app to access another remote VCS host, GitHub Desktop could be perfect.
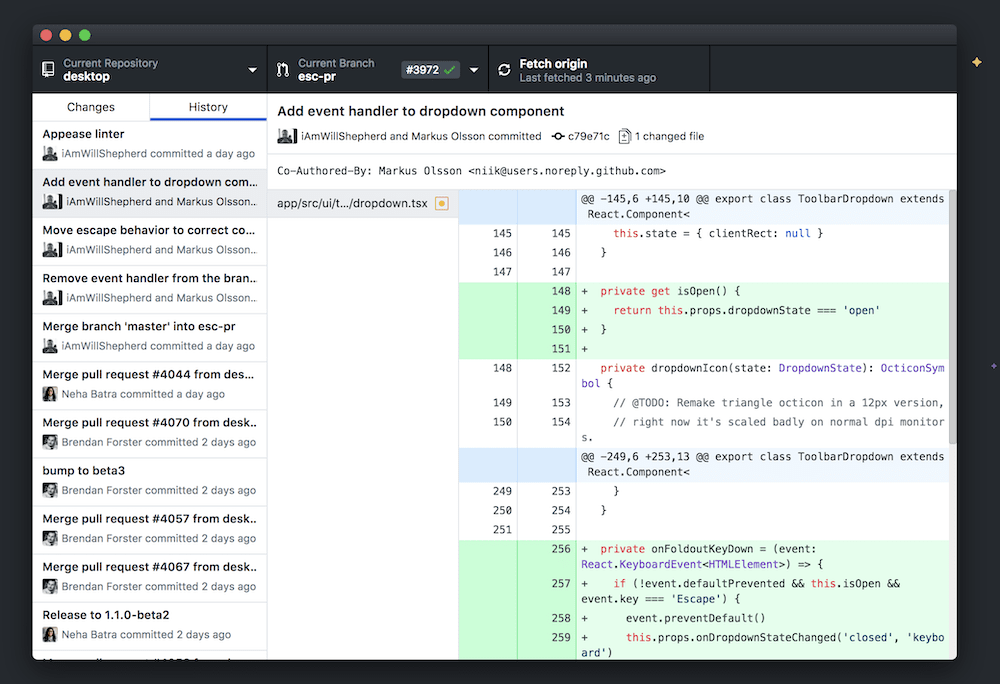
The app lets you create and manage repositories, commit changes, and push those changes to GitHub with just a few clicks. It works using drag-and-drop functionality and also has a ‘visual diff’ tool that simplifies identifying code changes between versions:
Sourcetree is another popular Git GUI that we look at in our roundup of web development tools. While the preferred VCS is BitBucket (due to it being an Atlassian product), you can still use the tool with GitHub. The merge conflict resolution tool is also handy and is one of the standout features.
GitKraken is arguably the best looking GUI app available and offers a reasonable free version for local and public repos. This supports all of the major VCS hosts – GitHub, of course, but GitLab and BitBucket, too, among others. We love its visual representation of your repo, and the solution offers thoughtful functionality for teams too.
Using GitHub Desktop to Push to GitHub
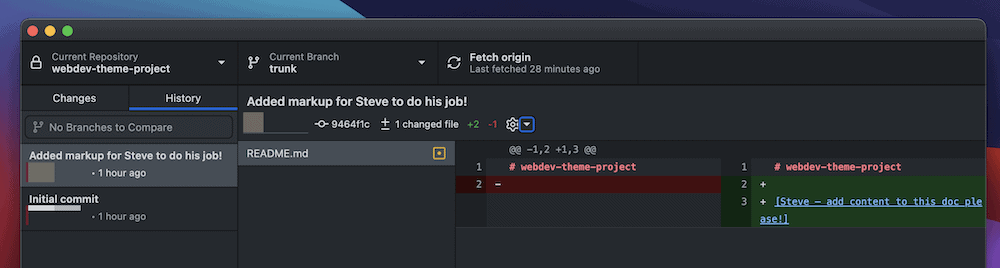
While the process for each app will be slightly different, GitHub Desktop is slick. You work within a single screen that uses various windows and panels. Once you make a change to a file (which you can open within your editor of choice from a right-click context menu), you commit using a small widget on screen:
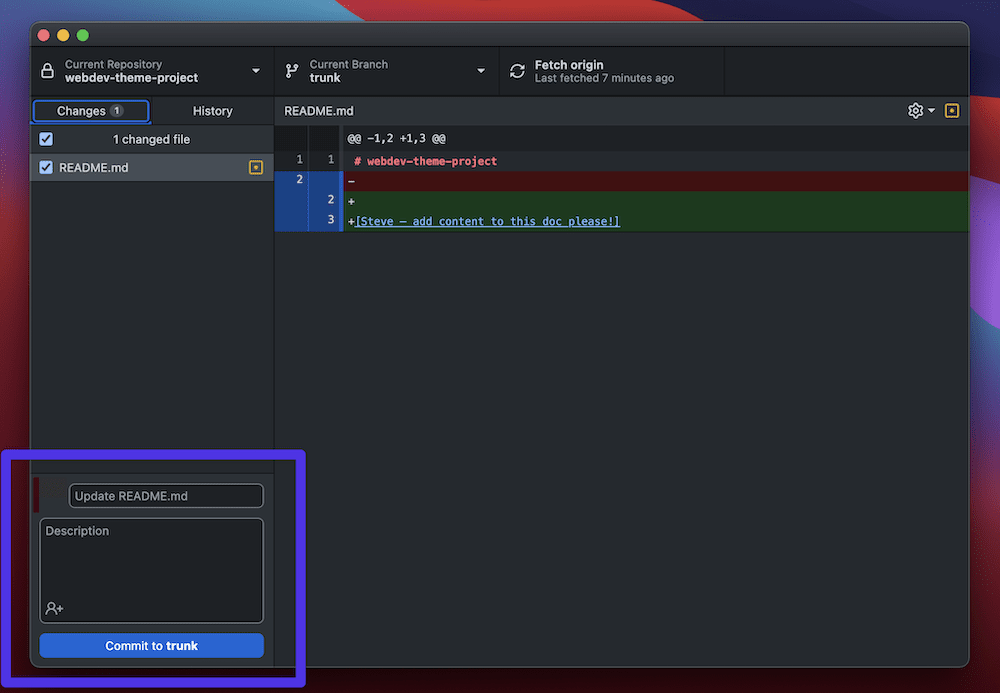
This commit will become part of the Push Origin section within the top toolbar: If you don’t have any changes to commit, there will also be a notification to push your commits to the origin remote:
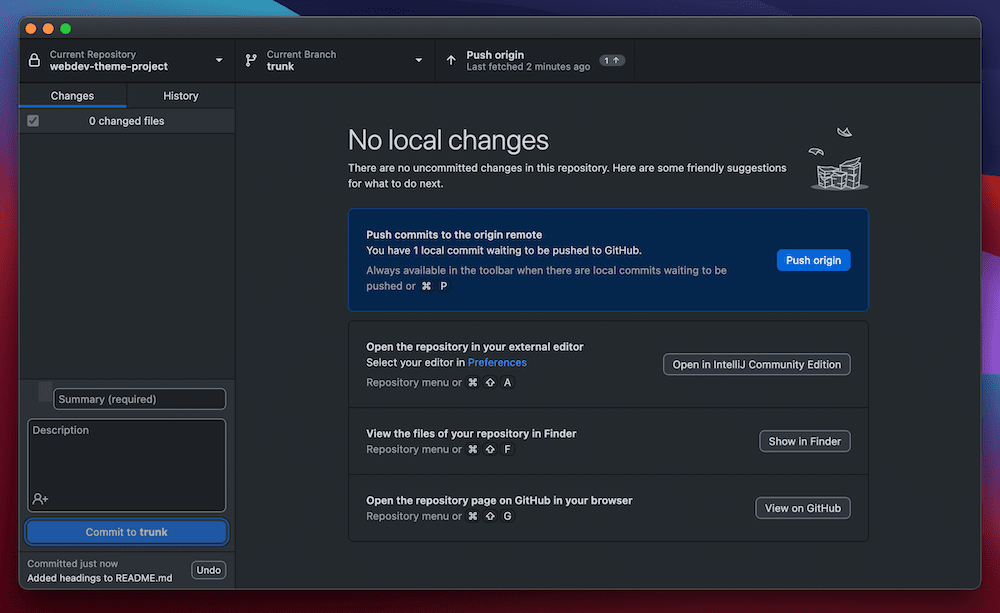
This is a one-click solution to push changes to your GitHub repo. The whole workflow is quick, painless, and simple to execute.
If you’re a Kinsta customer who loves our WordPress hosting and wants to bring your apps and databases to a platform built with the same performance standards, check out Sevalla today, Kinsta’s PaaS product.
Summary
GitHub is an essential tool for developers and programmers. It provides a centralized repository to store, track, and collaborate on code. Once you learn how to push your code to GitHub from a local repo, you can join in with that collaboration.
Using the command line, it’s simple to push your code to GitHub and will only need a handful of commands once you set everything up. However, you may want to consider a dedicated GUI app, such as GitKraken or GitHub Desktop. These can take the command line out of the equation and let you perform almost every task you need with Git from a familiar interface.
Do you have any questions about how to push to GitHub? Ask away in the comments section below!