
Nowadays, there are many browsers to choose from, which means you can find one that suits your exact needs. Brave browser is a top choice for privacy. However, as with any browser, you can run into problems such as the Disk Full Error.
Fortunately, you can resolve the Disk Full Error quickly. Whether you need to free up space on your hard drive or update your antivirus software, it’s easy to resolve the error and get the browser up and running again.
In this post, we’ll take a closer look at the Brave browser Disk Full Error. Then, we’ll explore its main causes and show you how to fix the problem. Let’s get started!
Check Out Our Video Guide to Fixing the Disk Full Error in Brave Browser
An Introduction to the Disk Full Error in Brave Browser
Brave browser provides a safe way to browse the internet by automatically blocking trackers and ads. Plus, you can access incognito windows and even use a VPN to encrypt and hide your IP address.
This makes Brave one of the most secure browsers on the market. It also has the additional benefit of super quick loading times:
Unfortunately, the 112 Disk Full Error is quite a common issue with Brave. It’s a Windows error code that typically occurs when you try to install new programs, download a file, or run updates.
Main Causes of the Brave Browser Disk Full Error
The primary cause of the Brave browser Disk Full Error is a lack of disk space on your operating system. Therefore, it’s a good idea to check your disk usage.
Unless you specify a different location, Brave browser automatically downloads new files onto your system drive. If there isn’t enough disk space, it will trigger an error.
However, this isn’t the only cause of the Disk Full Error. Another possible reason for seeing this message is having missing or outdated software on your computer, such as antivirus programs.
Alternatively, you might be using an old version of Brave, or you need to run software updates on your computer.
How To Fix the Disk Full Error in Brave Browser (in 4 Steps)
Fortunately, it’s fairly simple to fix the Brave browser Disk Full Error. Let’s look at a few easy steps you can take to resolve it.
Step 1: Free Up Space on Your System
You can get rid of the Brave browser Disk Full Error by freeing up space on your computer. When you do this, you’ll need to set some space aside for regular maintenance tasks carried out by your programs, like caching.
Clear out your system by emptying your trash. Navigate to your Recycle Bin icon on your desktop, right-click on it, and hit Empty Recycle Bin.
Then, you might want to limit the space usage for the Recycle Bin to prevent it from filling up again. To do this, right-click on it and select Properties.
If you have multiple partitions, select the Recycle Bin location that you want to configure. For instance, this might be a local disk where Windows 10 is installed.
Next, find Settings for selected location and select Custom size:
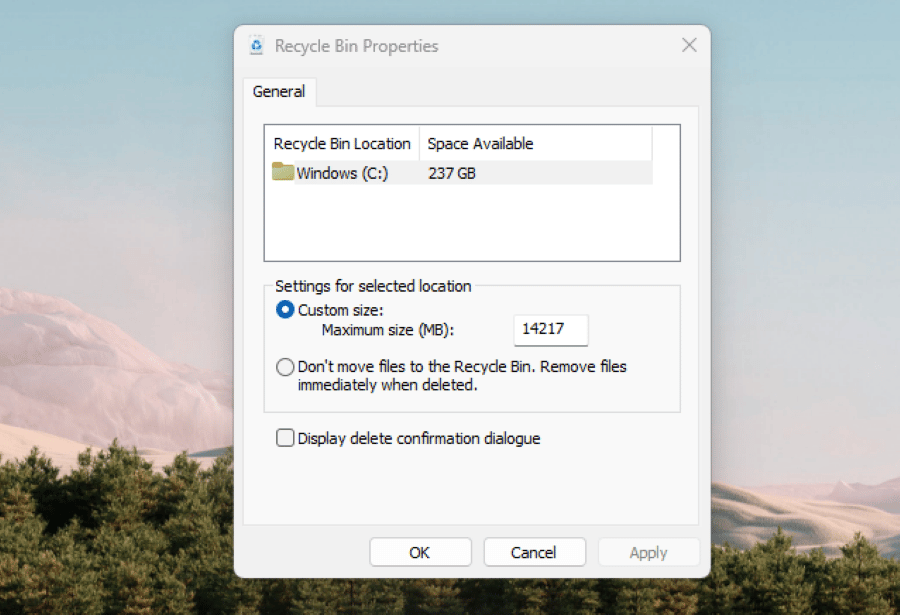
Here, you can specify the maximum hard drive space in megabytes. You can also check the box for Don’t move files to the Recycle Bin.
These settings can help you reduce storage usage and prevent Error 112 from occurring again. You might also consider uninstalling apps that you no longer need.
Step 2: Delete Temporary Files
Temporary files are typically held-up resources like OS update leftovers, temporary installation files, log data, cache, and more. These files can grow rapidly and take up lots of space on your drive.
To delete your temporary files, go to Settings > System > Storage > Cleanup recommendations. Then, choose Temporary files:
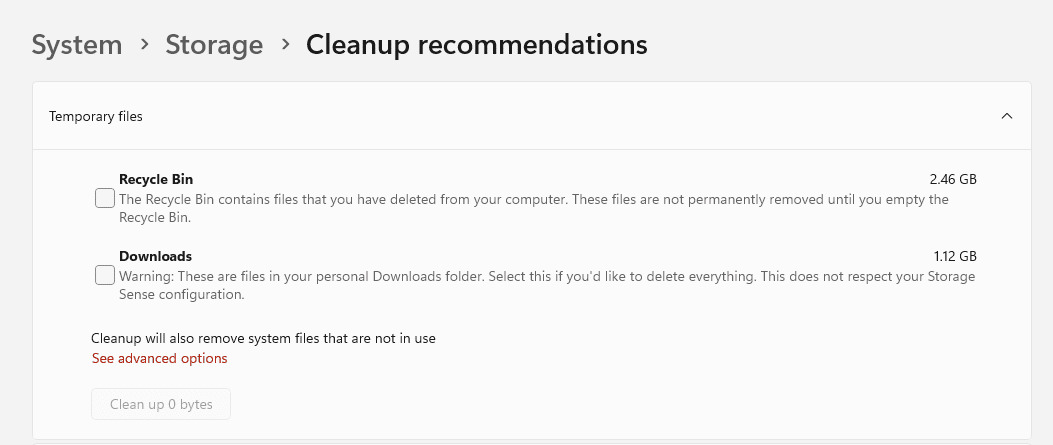
Check the box(es) to select the type of temporary storage that you want to delete and hit Clean up. Now, restart your computer and download a new version of Brave browser.
If you’re short on time, you can use the command line instead. Simply type the Windows key + R. Then, in the Run window, type “%temp%” and hit OK:
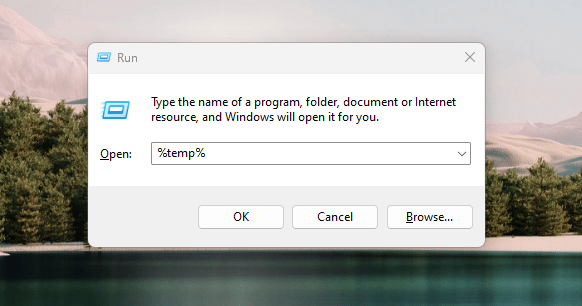
Finally, select all the files using CTRL + A and delete or move the files to another location.
Step 3: Disable or Update Your Antivirus Software
As we mentioned earlier, a lack of storage space isn’t the only cause of the Brave browser Disk Full Error. This error may also occur because your antivirus software has blocked the files that you’re trying to download to your computer.
Therefore, you may want to try disabling your antivirus. This may sound risky, but as long as you’re downloading files from a safe source, your computer shouldn’t be harmed.
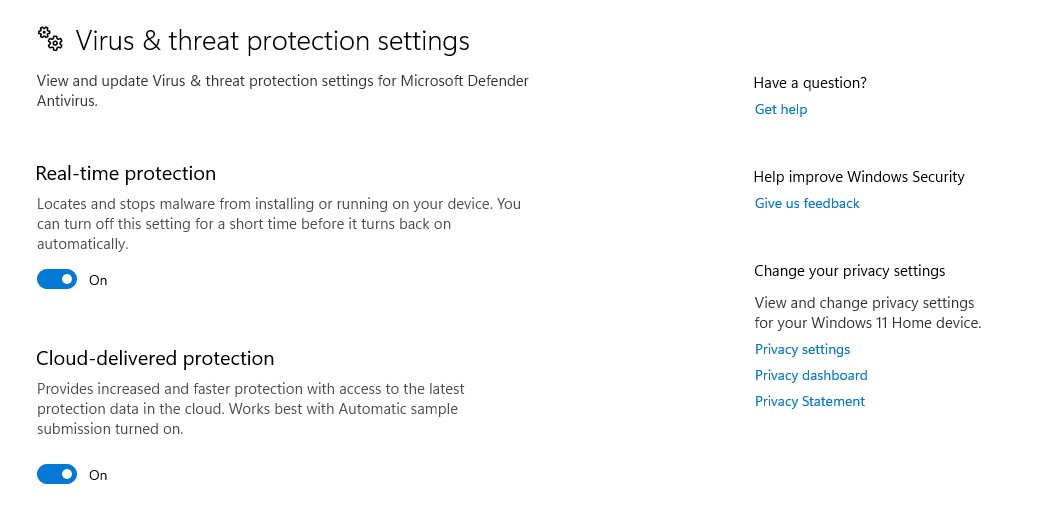
Open the Windows Security app. Then, head to Virus & threat protection > Manage Settings and use the slider to disable Real-time protection:
If this doesn’t work, it might be the case that your antivirus software is outdated. This means that it’s no longer protecting your computer.
In this instance, you’ll want to update your antivirus software to get it working again. Additionally, you can install a firewall to strengthen security.
Step 4: Run a System File Checker (SFC) Scan
The final way to fix the Brave browser Disk Full Error is to run a System File Checker (SFC) scan. If your system files have been corrupted, it could prevent you from installing new programs or downloading files.
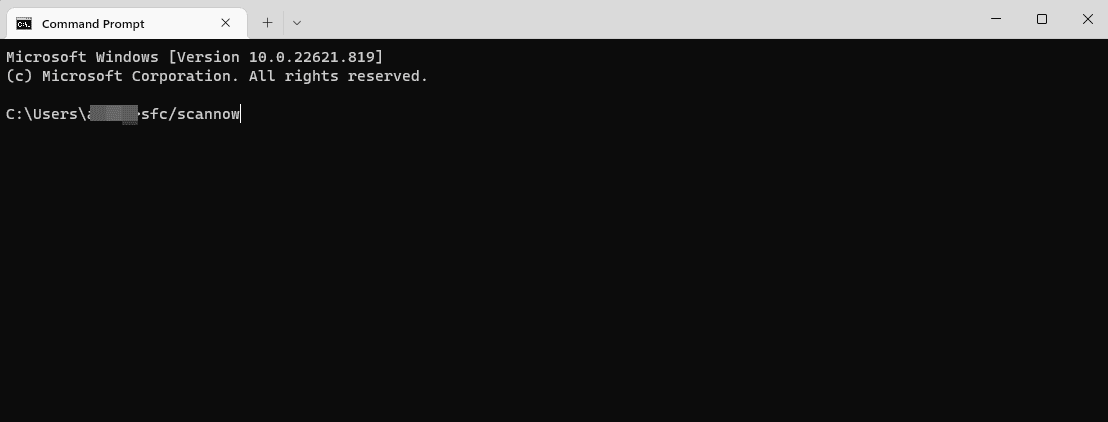
An SFC scan lets you detect and restore corrupted Windows system files. To get started, launch the Command Prompt app (you can search for it from the Windows taskbar).
Then, type in the command sfc/scannow and hit Enter:
Next, restart your computer and the Brave browser. Microsoft has a detailed article on how to run an SFC scan on different versions of Windows.
Summary
While Brave is a fast and secure browser, you may still encounter issues like the Disk Full Error. This is usually caused by insufficient disk space.
Fortunately, it’s easy to fix the error and get back to enjoying your private browsing experience.
You can start by freeing up space on your system and deleting temporary files. You may also want to disable or update your antivirus software and run an SFC scan.
Kinsta’s managed WordPress hosting makes it easy for you to spin up a site and get online.
Interested in Application Hosting and/or Database Hosting, Kkinsta has that too. Whatever your needs, join over 55,000 developers and digital entrepreneurs on Kinsta’s Platform as a Service (PaaS). Your new home for modern web applications.


