
Email marketing can be a powerful tool for your business. However, your campaigns can’t be effective if your contacts aren’t receiving your messages properly. If you’re getting a high volume of bounce-back emails, you may need to learn how to fix the DMARC fail error.
DMARC is an email authentication process designed to help combat spam and spoof messages. Therefore, if you’re seeing the “DMARC fail” notification, it means that this layer of the security check wasn’t successful. Fortunately, there are steps you can take to remedy the problem.
In this post, we’ll explain what DMARC is, how it works, and some potential causes for the failure. Then we’ll walk you through three methods you can use to resolve it. Let’s jump right in!
Check Out Our Video Guide to Fixing the DMARC Fail Error
An Introduction to DMARC
Domain-Based Message Authentication, Reporting & Conformance (DMARC) is a form of email authentication that adheres to Sender Policy Framework (SPF) and DomainKeys Identified Mail (DKIM) standards. DMARC helps ensure that the person sending messages from your email domain is valid and not actually a phisher or other type of scammer.
Put simply, the DMARC fail error message means that your email failed the DMARC authentication process. This process is used by most email marketing software and service providers.
A DMARC policy is a set of rules that dictate how receivers should handle emails that fail DMARC authentication. The three possible actions are:
- Reject: Emails are outright rejected and not delivered to the recipient.
- Quarantine: Emails are delivered to the spam folder.
- None: No action is taken, and the email is delivered to the recipient’s inbox.
When an email fails DMARC authentication, it means that the sender’s address does not match the purported sender’s domain. This can happen for a number of reasons, but the most common cause is that the email was sent from a forged or spoofed IP address.
Spoofed emails are a major problem because they can be used to steal sensitive information or spread malware. They can also be used to trick people into clicking on malicious links or opening attachments that could harm their computers.
Forged emails can also occur if someone uses your email address without your permission. This can happen if your address is compromised in a data breach or if someone simply guesses your password.
Potential Causes for a DMARC Failure
There are a few reasons an email might fail DMARC authentication. As we mentioned earlier, the most common one is that the email was sent from a spoofed address. However, there are other potential causes for DMARC failure, such as:
- DMARC alignment failure: The “From” address in the email doesn’t match the domain that’s sending the email, which can happen if you’re using a third-party email service like Gmail, Outlook, or Kinsta’s default transactional email service to send email on behalf of your domain.
- Improper DMARC alignment mode: The “From” addresses match, but DMARC is not configured correctly.
- Missing DKIM signature: The DKIM signature is a digital signature used to verify that an email was sent from the domain it claims to be from. If it’s missing or invalid, it can result in the DMARC fail message.
It’s also possible that the error is due to missing DNS TXT records. TXT records are used to store text-based data in Domain Name Systems (DNSs). As we mentioned, DMARC policy uses two TXT records: SPF and DKIM.
DMARC records are set at _dmarc.yourdomain.com TXT record, and it requires either SPF or DKIM – or better, both of them – to be set and passed verification, including a proper domain alignment with the sending server.
How To Know Whether Your Email Failed DMARC
There are two main ways that you can check to see whether your email failed DMARC.
Checking the Email Headers
Email headers are the pieces of information that are added to an email when it’s sent. They include things like the sender’s IP address, the date and time the email was sent, and other information.
Using Gmail as an example, to view the email headers, you can click on the three vertical dots next to Reply in the top-right corner of an email. Then select Show original:
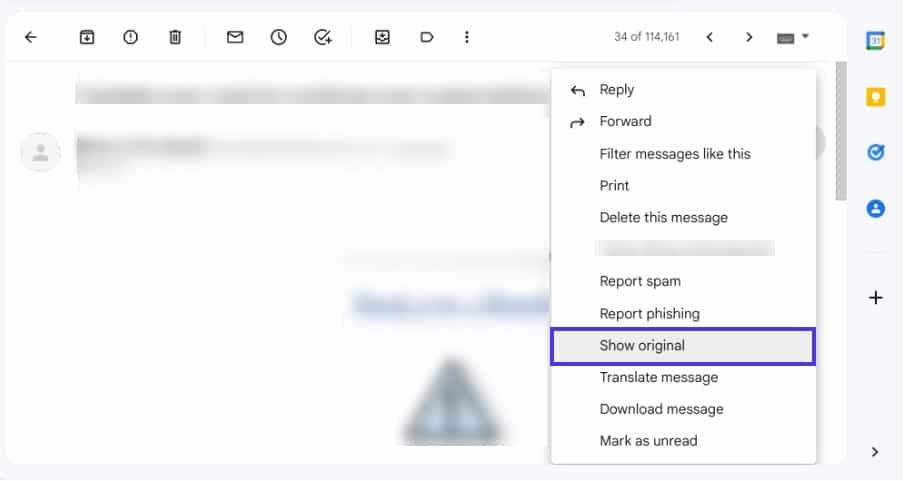
In the window that opens, you can view information about the original message, including whether it was a DMARC ‘pass’ or fail’:
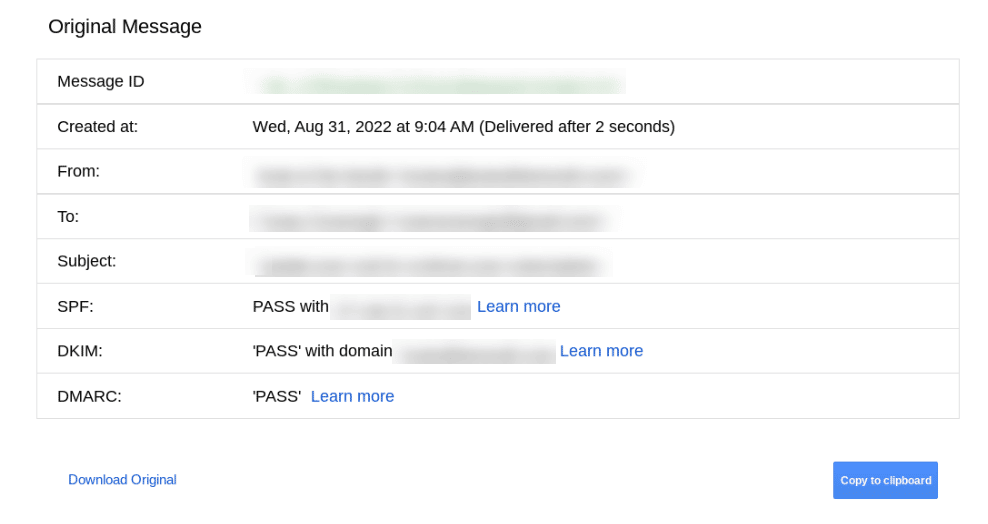
In the above example, the email authentication passed. However, if you see DMARC Authentication-Results: fail, this means that the email failed the authentication process.
If you’re using Outlook, you can view the headers by clicking on View Message Details in the top-right corner of an email. Again, scroll to the bottom to see if there’s an authentication-fail message.
Using DMARC Analysis and Reporting Tools
To make this process easier, you can use the Google Admin Toolbox Messageheader tool:
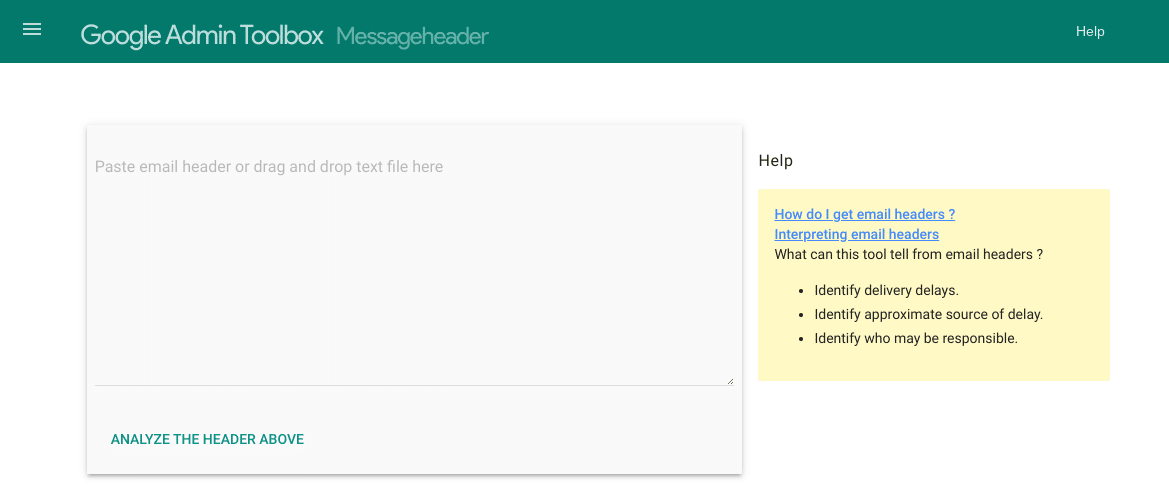
You can simply enter email headers into the text box and then click on Analyze the Header Above. It will check for SPF, DKIM, and DMARC authentication.
Alternatively, you can check for DMARC failure by using the DMARC report analysis from your email service. A report will be sent when an email fails DMARC authentication and will contain information such as the sender, recipient, and reason for failure.
This data can be used to troubleshoot issues and improve your email deliverability. Typically, the reports are sent once a day to an inbox you set up when you defined your DMARC record.
You can get a DMARC failure report by adding a TXT record to your DNS settings. For more detailed guidance on generating the necessary DNS records, we recommend checking with your specific provider.
For instance, ActiveCampaign offers a DMARC DNS Verification Tool:

Once you’ve successfully added the record, email receivers will begin sending the failure reports to the address that you specified. Then you can use them to troubleshoot delivery issues.
How To Fix the DMARC Fail Error (3 Methods)
Now that you understand more about what a DMARC failure is and what can cause it, let’s explore the solutions. Here are three methods for fixing a DMARC fail error.
1. Enable SPF and DKIM Authentication
It’s important to set up SPF and DKIM before DMARC to avoid email delivery issues. Unless you specify a DKIM signature for your domain, your email service provider will typically assign a default one to outgoing emails, such as “d=domain.gappssmtp.com” for Gmail.
This means your emails won’t match the domain in your emails’ From headers. To ensure that your DKIM and SPF records properly align with the entries of your DNS provider, you can add the following TXT record to your DNS settings:
SPF: "v=spf1 include:_spf.google.com ~all"DKIM: "v=DKIM1; k=rsa; p=[public key]"Once you’ve added these records, you can then set up DMARC by adding the following TXT record to your DNS settings:
DMARC: "v=DMARC1; p=reject; sp=quarantine; rua=mailto:[email protected]"You’ll want to replace “example.com” with your actual domain name. Again, you can check with your DNS provider to learn where to find and edit these records.
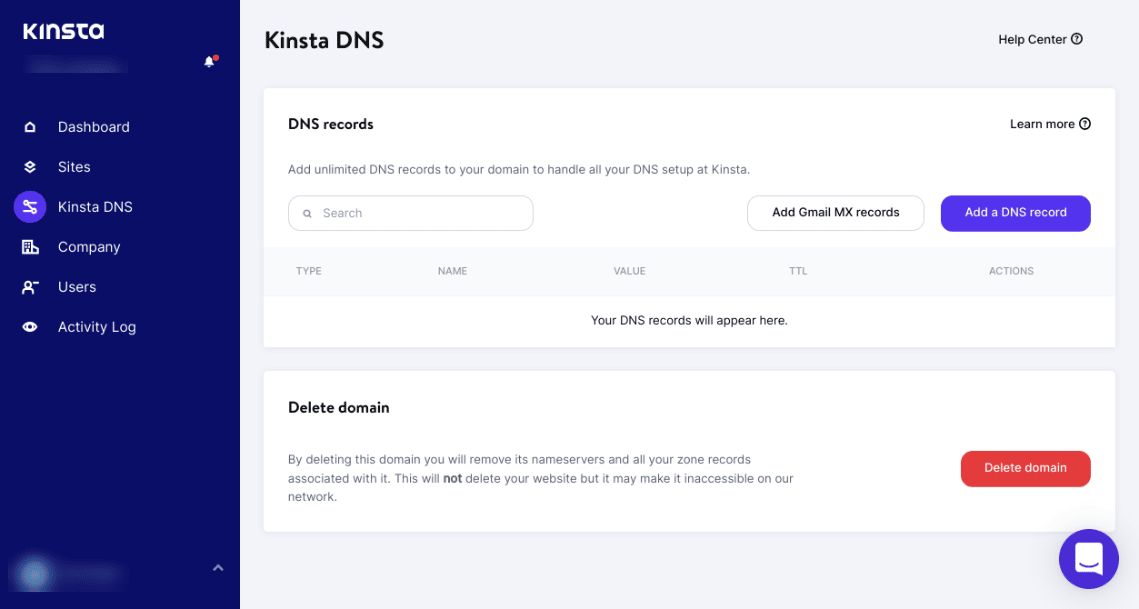
If you use Kinsta DNS, you can add DNS records through your MyKinsta dashboard. Our custom-built control panel lets you access a wide range of features and solutions for managing and troubleshooting issues, including our Application Performance Monitoring (APM) tool.
After selecting your site, you can click on the Kinsta DNS menu item:
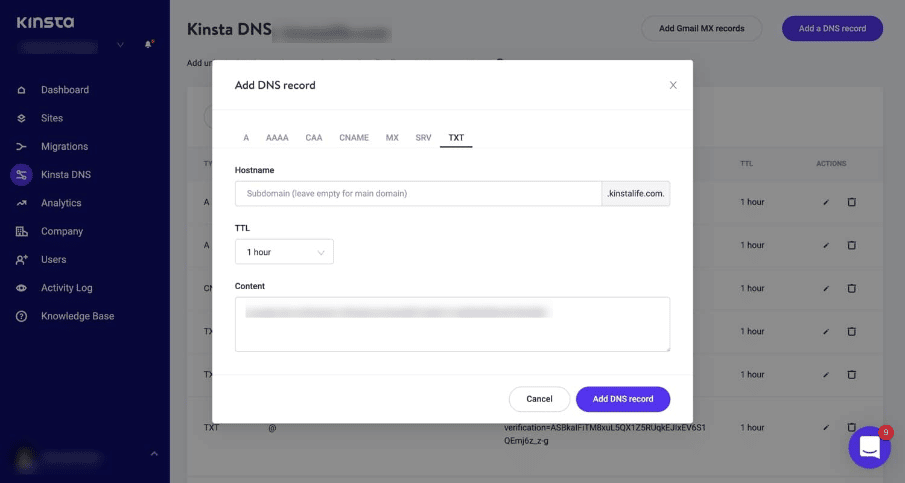
Here, you can search for a TXT record in the Type column. If you need to add an SPF TXT record, you can do so by using MailChannels. Note that we don’t have separate records for DKIM (just CNAME TXT records).
2. Change Your DMARC Policy
If you recall, there are three possible actions that result from an email failing DMARC: reject, quarantine, or none. If the policy (p) record is changed to “none”, the email will still be delivered to the recipient’s inbox even if it fails DMARC. In the other two cases, it will either end up in the recipient’s spam folder or bounce back to you.
Therefore, the next solution would be to modify your DMARC policy record to “p=none”. You can do this by adding the following TXT record to your DNS settings:
DMARC: "v=DMARC1; p=none; sp=quarantine; rua=mailto:[email protected]"Again, remember to replace the placeholder URL with your domain name. It’s worth noting that the “none” policy isn’t the most secure option, so you may only want to consider using this as a temporary solution.
3. Authenticate Your Domain
If you send marketing and transactional emails using a third-party service provider, such as Mailchimp, you’ll have to edit your DNS records to permit the provider to send emails from your domain. Pointing your DNS entries to your DNS provider will authenticate and authorize the specified servers.
To get started, you’ll first need to verify your domain. The authentication can also only be successful with a third party if the domain belongs to you (or your business) rather than a public service such as Google.
Once you locate your domain’s records, you can copy and paste the information from Mailchimp (or whatever provider you’re using) to your domain’s CNAME records. Check with your email software or service provider for detailed guidance, as the information you’ll need and specific instructions may differ.
You can access your domain records by logging into your domain registrar’s control panel. This may be cPanel or Plesk. If you’re a Kinsta user, you can access your MyKinsta dashboard and then navigate to Kinsta DNS:
Once you have this information, you can return to Mailchimp and follow its instructions for adding CNAME records and authenticating your domain. After the email service provider confirms that the records are accurate, you should receive a success or confirmation email.
Other Ways To Improve Your Mail Sending Practices
If nothing appears to be wrong with DMARC, SPF, or DKIM, there may be other reasons your emails are being sent to spam. Fortunately, there are additional strategies you can use to ensure that your emails are delivered properly and improve your overall mail-sending practices.
This includes:
- Using reliable and secure email providers
- Keeping your email list clean and updated
- Avoiding trigger words and phrases in your subject lines
- Using a consistent “From” name and address
If you continue having issues with DMARC failures, especially for certain recipients, you may want to try contacting those users directly. You can simply ask them to add your email addresses to their allowlists.
Summary
With so many cyberattacks and phishing scams plaguing the internet, it’s essential to adhere to certain security best practices. DMARC is an email authentication standard that helps protect recipients from phishing and other email-based scams, but it’s not a perfect solution.
If you find yourself repeatedly encountering the DMARC fail error message, there’s no need to panic. There are a handful of methods you can use to resolve and prevent it. Enabling SPF and SKIM authentication and changing your DMARC policy can help improve your email deliverability and keep your messages out of spam folders.
Do you want to switch to hosting that can help you better manage and monitor your website and email campaigns? Check out our Kinsta hosting plans and free WordPress migrations to learn more!


