
Troubleshooting your website can be an intimidating responsibility. When it comes to tasks like flushing your Domain Name Server (DNS) cache, it’s easy to get overwhelmed and confused before you’re even started.
Fortunately, you can perform this particular duty quickly and easily, even with little to no technical experience. In two short steps, your DNS cache will be clear, and you can continue working to resolve whatever issue you happen to be facing.
In this post, we’ll explain what a DNS cache is and in what situations you might need to clear yours. We’ll then share a real-world example from our direct experience, and explain how to carry out this troubleshooting step no matter what hardware you’re using.
Prefer to watch the video version?
An Introduction to DNS Caching
In order to understand why you may need to flush your DNS cache, there are several components we need to break down.
First, the Domain Name System (DNS) is an index of all the websites on the internet and their IP addresses. You can think of it as a directory or phone book for websites. As for ‘caching’, it’s the process of saving a snapshot of something (such as a web page) so it can be reloaded faster in the future.
So, DNS caching involves your Operating System (OS) or browser capturing recently-visited IP addresses and saving them in a database. This enables your browser to reload sites you’ve visited in the past more quickly than if it had to reference the DNS again each time.
Unfortunately, your DNS cache may become corrupted, leading you into phishing schemes. It can also simply become outdated or create internet connectivity issues. In any of these situations, clearing your DNS cache can often help you resolve the problem and get back online.
A DNS Cache Case Study
To illustrate the point further, let’s look at an example that actually happened to a Kinsta client’s website.
The client reached out to us because their images, CSS, and JavaScript weren’t loading correctly on their website.
The site appeared to be loading just fine for us, however, and the client hadn’t made any recent changes. Upon inspecting their site with Chrome Devtools, we could see that everything coming from their CDN subdomain (cdn.domain.com) wasn’t loading correctly, and instead was reporting 404 errors.
The first thing we did was ping the CDN subdomain to see if we could access it. It returned a response just as expected. We then ran the client’s CDN URL through the free whatsmydns tool.
This tool enables users to quickly check the resolution on DNS records (such as the CDN CNAME) from multiple geographical locations. We wanted to ensure that the site was loading fine everywhere, beyond just our physical location, and that it was resolving back to the client’s CDN provider.
The results showed that it was:
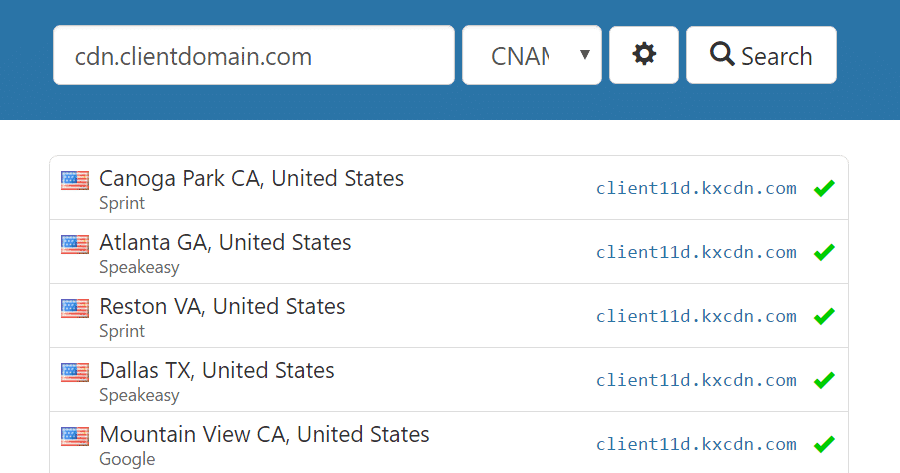
After all this digging, we confirmed that there was a small change with the client’s DNS provider that was still cached on their end. We asked them to clear their DNS cache locally on their computer and refresh the page.
At that point, everything started loading normally on their WordPress site again.
Knowing how to clear your DNS cache could help you in many similar situations, it can fix errors like 304. Let’s take a look at how it’s done.
What Is Cache? Learn This Common and Complex Technology
How to Flush Your DNS Cache on Mac, Windows, Linux, and Chrome
Clearing your DNS cache is a relatively simple process, but it varies depending on your OS. It also matters whether you need to flush it from your computer or your browser. Below, we’ve explained how to carry out this task for the macOS, Windows, and Linux Operating Systems (OSs), as well as on the Google Chrome browser.
1. How to Clear DNS Cache on macOS
In order to clear the DNS cache on a Mac, you’ll need to open the native command-line interface known as Terminal and run the appropriate command. This process varies based on which version of macOS you’re running.
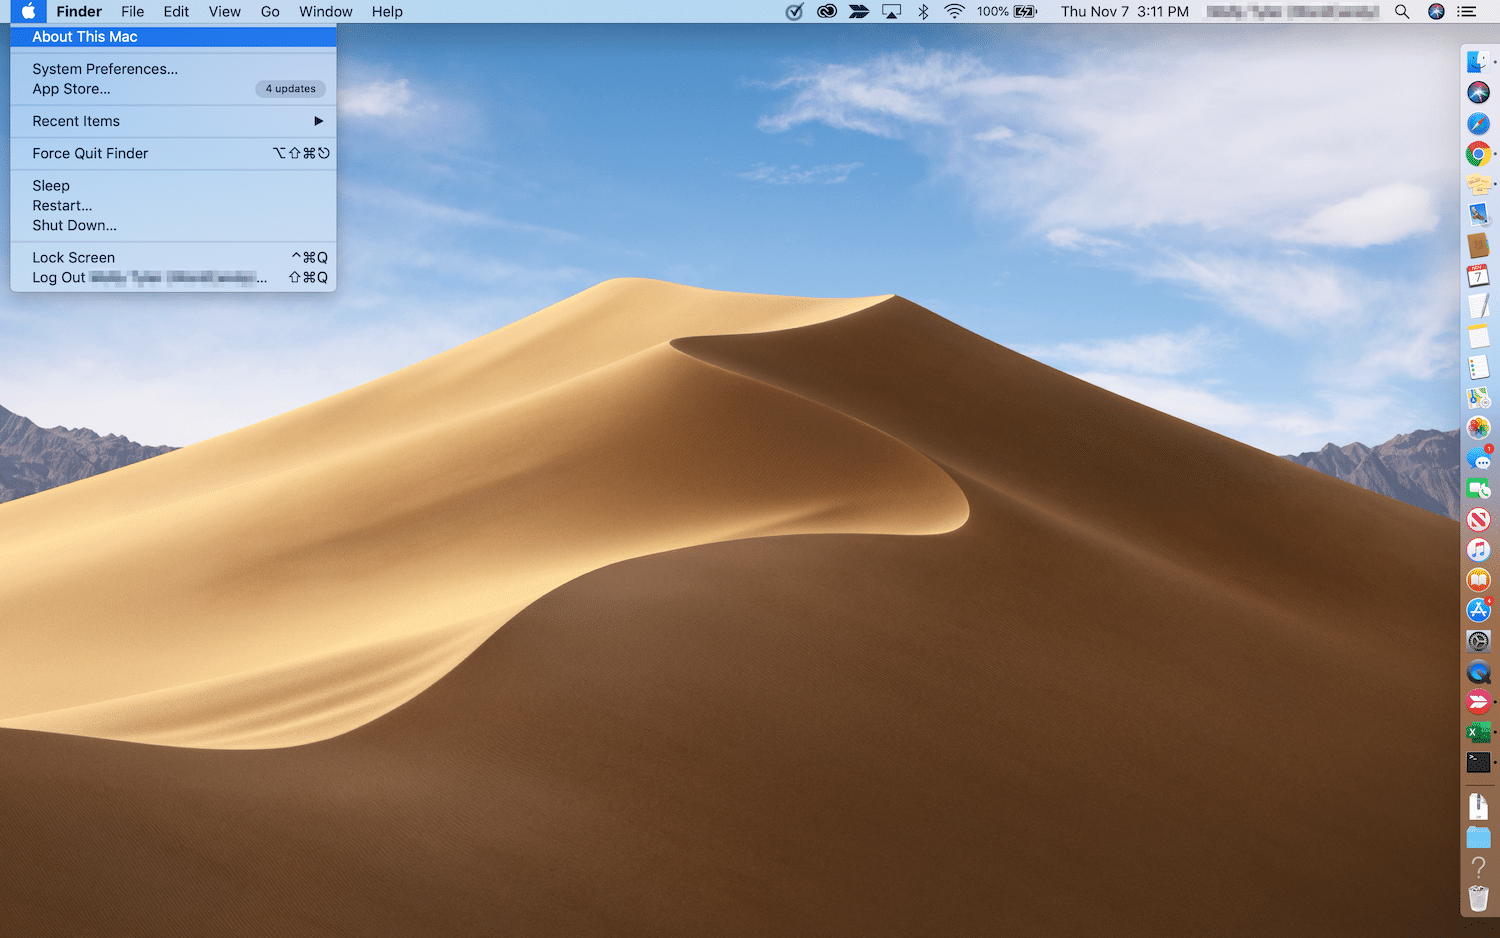
If you’re not sure what version you’re working with, click on the ‘apple’ icon in the top-left corner of your desktop, and select About This Mac:
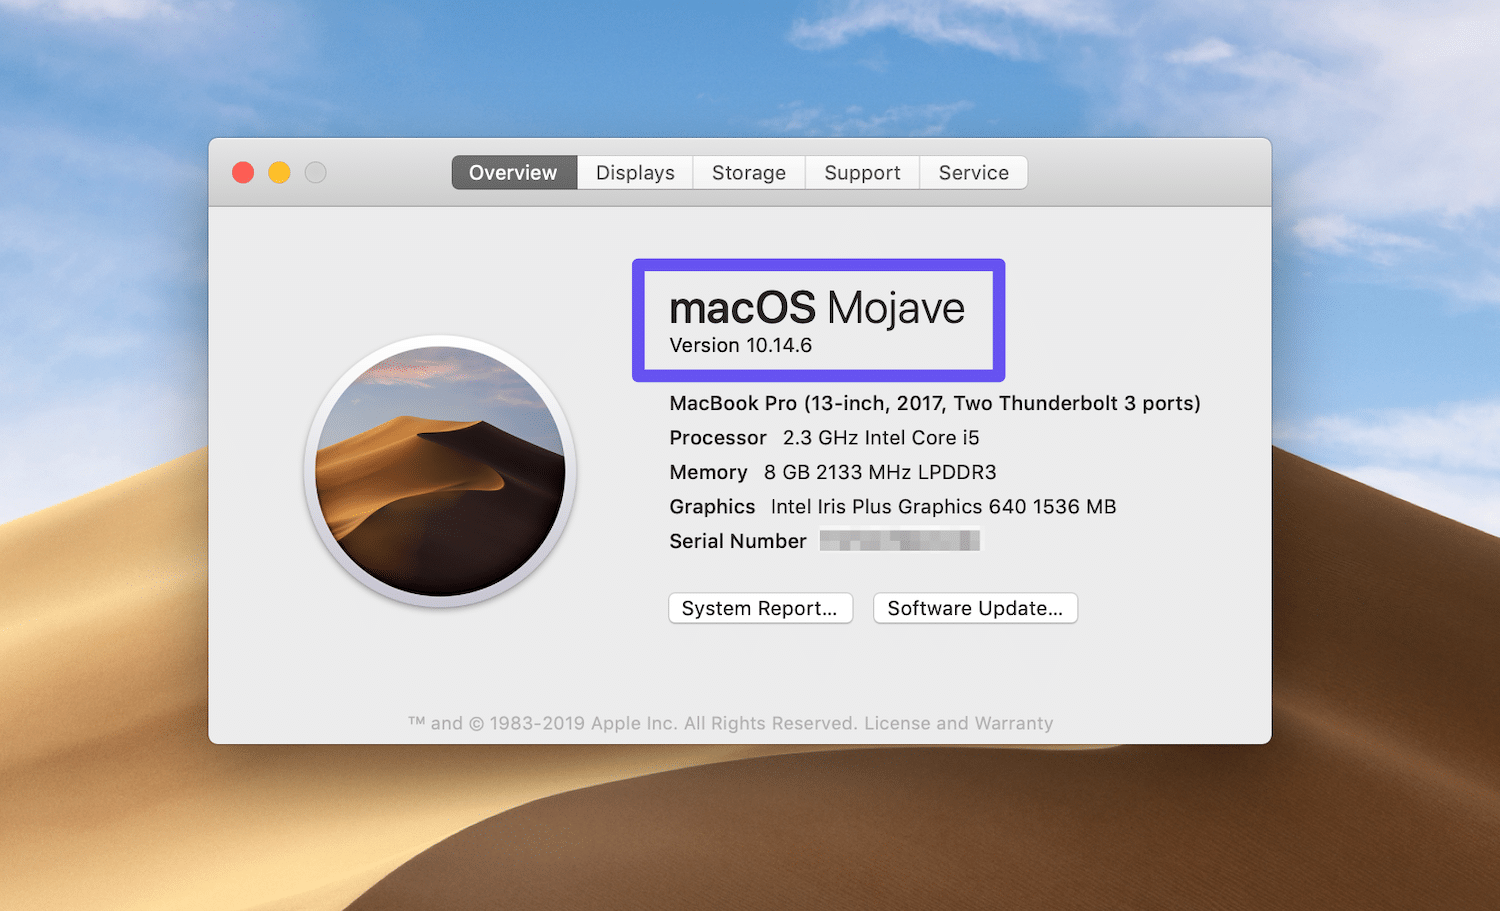
Your current version will be the first piece of information listed:
Once you know this information, you can follow the relevant steps below.
macOS El Capitan (10.11), Sierra (10.12), High Sierra (10.13), Mojave (10.14), and Catalina (10.15)
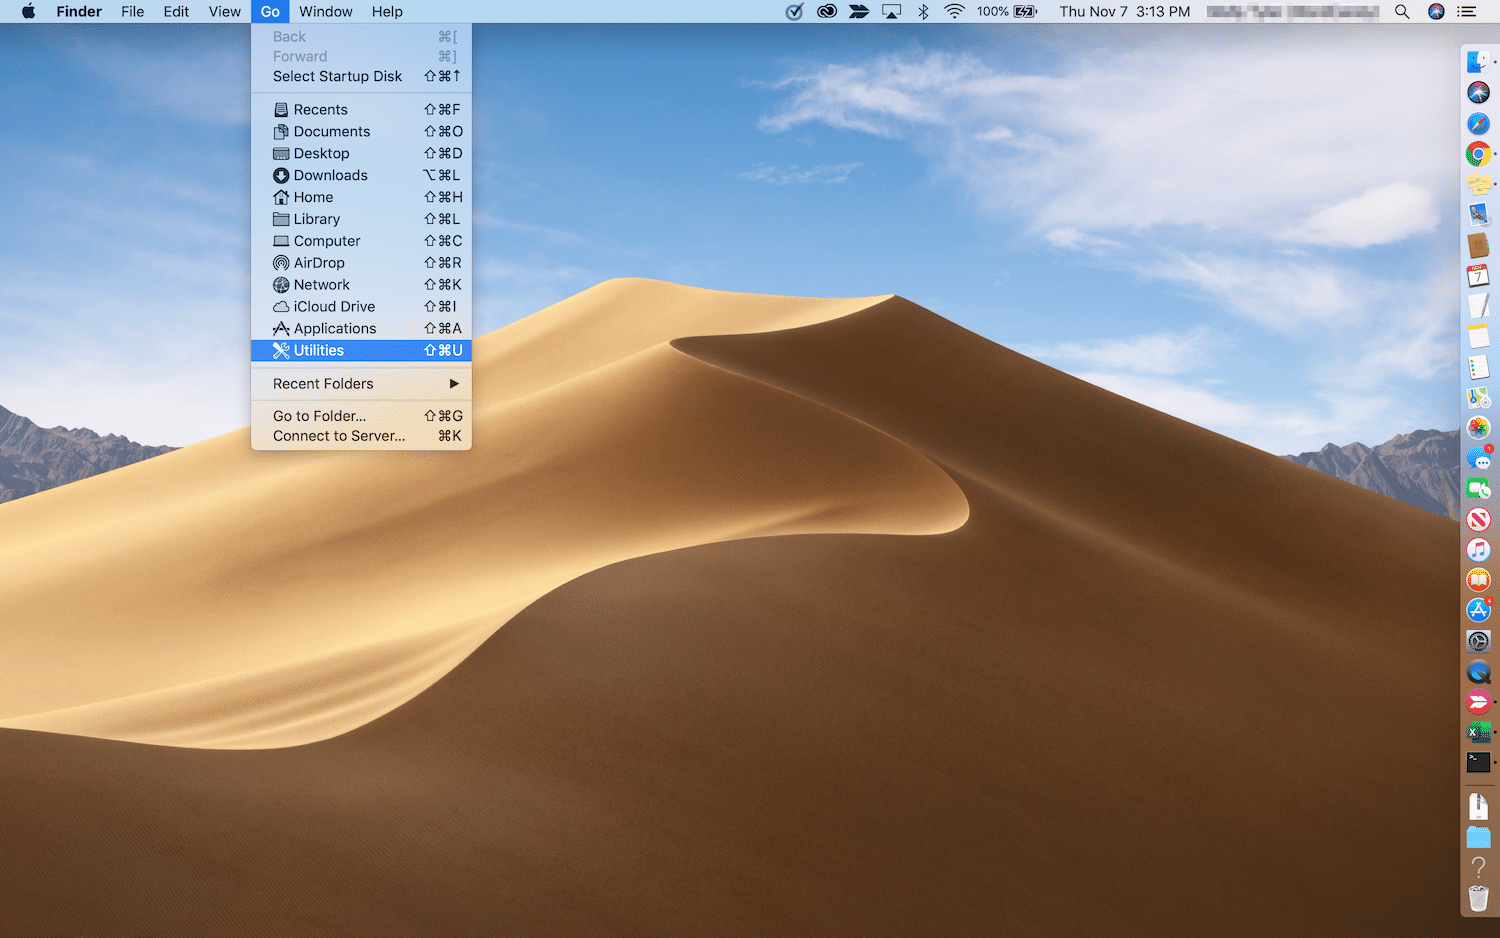
If you’re working on macOS version 10.11 or above, open the command line interface by clicking on Go > Utilities:
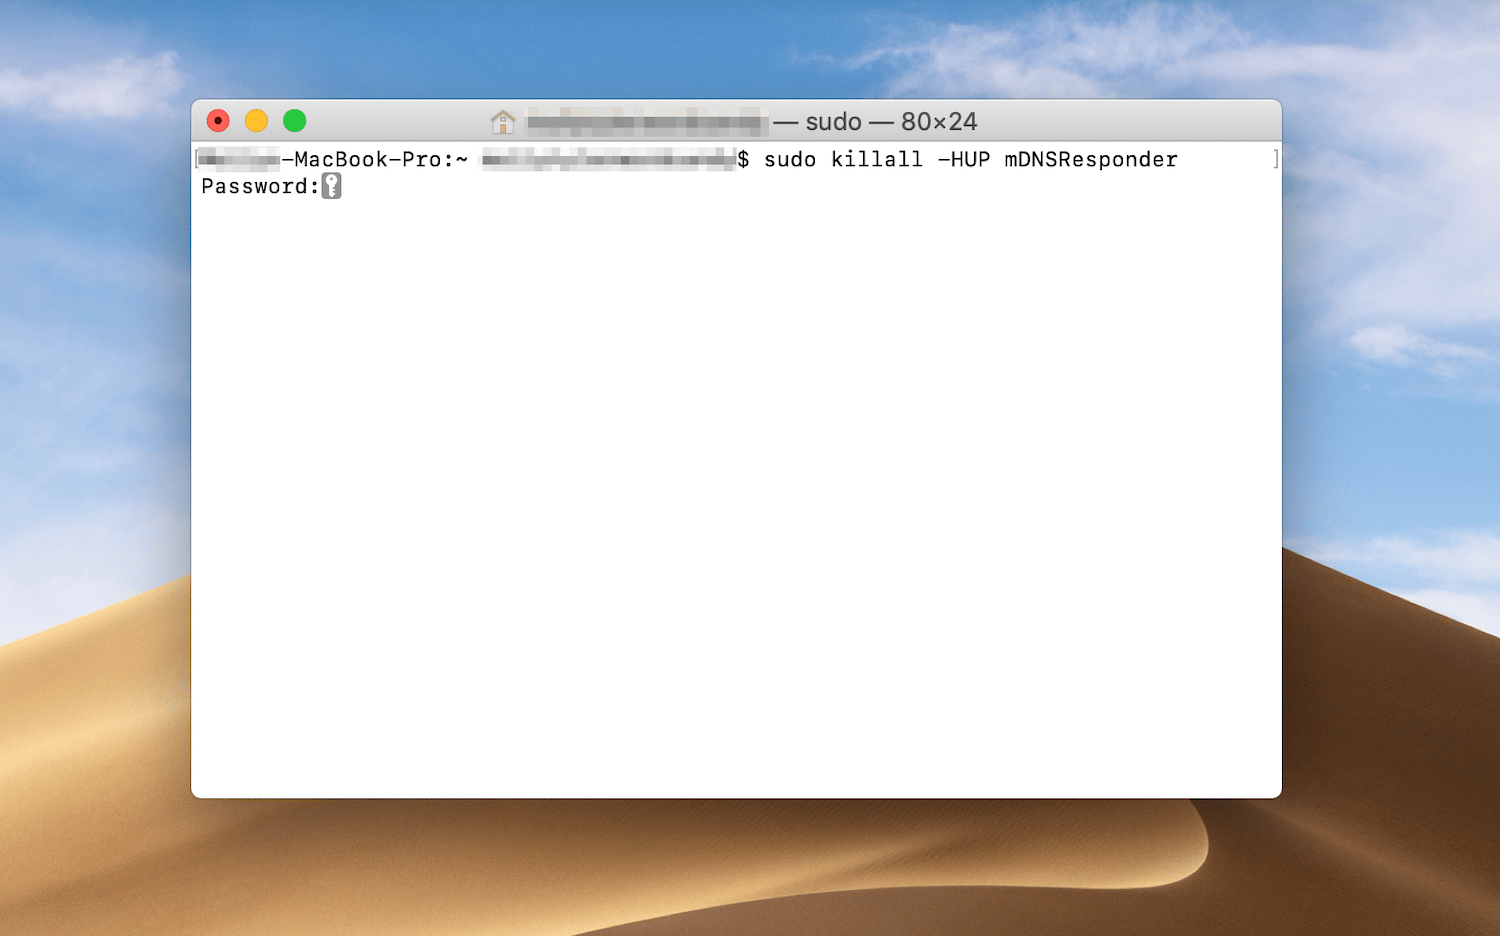
Then select Terminal. Once it opens, run the following command:
sudo killall -HUP mDNSResponder
You’ll be prompted to enter your computer password:
After you’ve done so, your DNS cache should be clear.
macOS Yosemite (10.10)
You can access Terminal by the same method described above for any macOS version. In Yosemite (10.10), once the window opens you’ll need to run the following command:
sudo discoveryutil udnsflushcaches
Enter your computer’s password and the DNS cache should successfully flush.
macOS Lion (10.7), Mountain Lion (10.8), and Mavericks (10.9)
For macOS versions 10.7 to 10.9, open up Terminal and run the following command to clear your DNS cache:
sudo killall -HUP mDNSResponder
You may notice that this is the same command used by versions 10.11 and above. Enter your password to execute it.
macOS Snow Leopard (10.6)
If you’re running macOS Snow Leopard (10.6), open Terminal and input this command:
sudo dscacheutil -flushcache
Then, enter your password to finish clearing the DNS cache.
macOS Leopard (10.5)
Finally, macOS Leopard (10.5) users should run the following command in Terminal:
sudo lookupd -flushcache
Once you enter your password, the DNS cache should be flushed.
Clearing your DNS cache is also the solution for fixing the ERR_SPDY_PROTOCOL_ERROR.
2. How to Clear DNS Cache on Windows
Flushing your DNS cache on a Windows computer is fairly simple. Here’s how to accomplish this task on Windows 10, 8, 7, and XP.
Windows 10
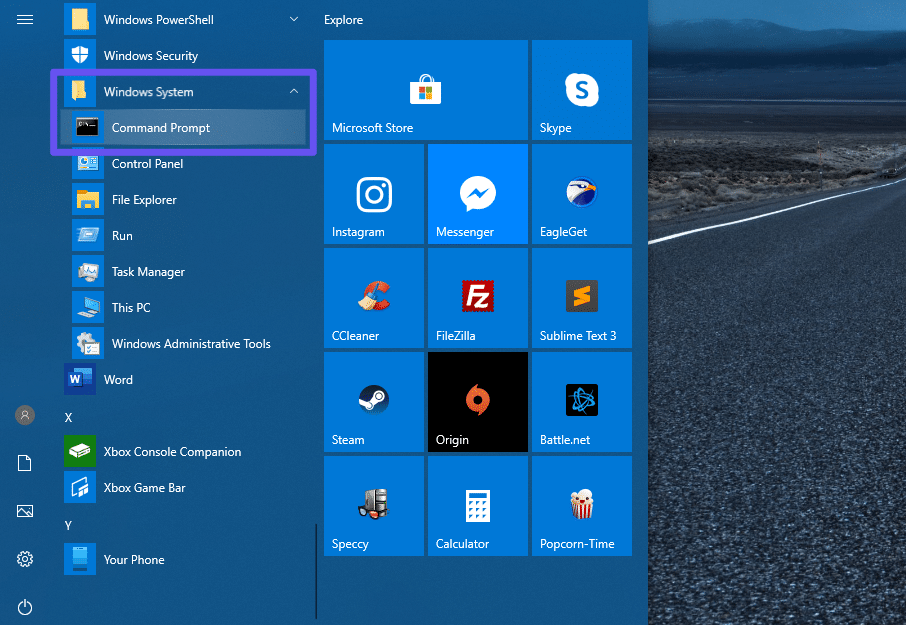
To clear your DNS cache on a Windows OS, you’ll need to open Command Prompt, the system’s command line interface. You can access this program in Windows 10 by clicking on the Start button. Then navigate to Windows Systems > Command Prompt:
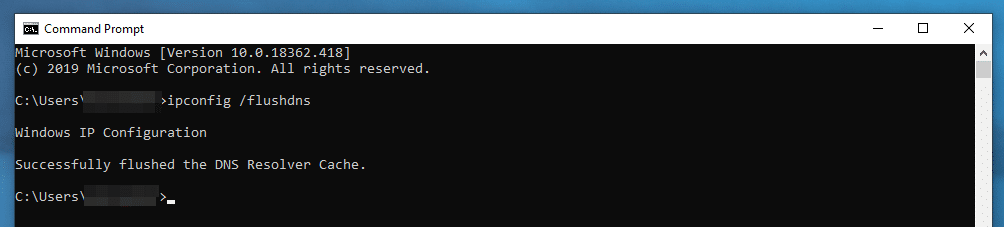
Once the command line interface is open, enter the following line:
ipconfig /flushdns
This command should return a confirmation that the DNS cache has been successfully flushed:
You can then close the Command Prompt window.
Windows 8
Clearing your DNS cache in older versions of Windows requires the same command ipconfig /flushdns. However, the steps for accessing Command Prompt are slightly different between versions.
In Windows 8, open the Apps screen. On the far right side, find Windows Systems and select Command Prompt.
Once the program opens, run ipconfig /flushdns. You should receive a confirmation once the DNS cache has been cleared successfully.
Windows 7 and Windows XP
In Windows 7 or Windows XP, click on the Start button. Navigate to All Programs > Accessories and select Command Prompt.
In the command line interface, run ipconfig /flushdns. You should receive a confirmation message once the DNS cache is flushed.
3. How to Clear DNS Cache on Linux
Flushing your DNS cache on Linux machines is fairly similar to the process of doing so on a Mac or Windows computer. Here’s how.
Ubuntu
Linux uses Terminal as its command line interface, just like macOS. To open it, click on Activities in the top-left corner of your desktop This will provide you with a search bar, where you can enter “terminal” to find and launch the program.
Once the command line interface is open, execute this command:
sudo systemd-resolve --flush-caches
Terminal will then prompt you for your password. Enter it to finish executing the command and flushing your DNS cache.
Other Distributions
If you’re using a Linux distribution other than Ubuntu, you can flush your DNS cache by opening your command line interface and running this command:
sudo /etc/init.d/dns-clean start
Once the command is executed, your cache should be clear.
4. How to Clear DNS Cache on Google Chrome
Finally, as we mentioned at the beginning of this post, you may have cause to clear your browser’s DNS cache rather than your OS’s. In Google Chrome, you can do so by entering the following into the address bar:
chrome://net-internals/#dns
Then click on the Clear host cache button:

This should flush Chrome’s DNS cache for you.
Need to clear your browser’s cache? Make sure to check out: How to Clear Browser Cache for All Major Browsers.
Summary
The prospect of clearing your DNS cache may sound daunting, especially if you’re new to troubleshooting internet connectivity or other website issues. Fortunately, the actual process is fairly straightforward.
Flushing your DNS cache only requires a few steps. First, you need to know what OS and version you’re using. Then, you can follow the relevant steps above and clear the DNS cache by entering one or two simple commands.


