As every developer knows, regularly backing up your website or application is critical to maintaining the integrity and availability of your online presence. Without backups, you run the unacceptable risk of losing your work, your data, and your user base.
Thankfully, cloud storage has emerged as an affordable, reliable solution for storing backups. It provides peace of mind in case of hacking attempts, server failure, or accidental deletion, with the added advantages of accessibility, scalability, and convenience.
With Kinsta’s external backup add-on, you can back up your WordPress site to Amazon S3 or Google Cloud Storage. In this article, we’ll show you how to set up and configure a Google Cloud Storage (GCS) bucket. If you want to use an Amazon S3 bucket, follow the steps in our Creating and Configuring an Amazon S3 Bucket guide.
You’ll first need to set up a Google Cloud Platform (GCP) account. If you already have an account, feel free to move on to the steps below.
If you don’t have a Google Cloud Platform account, sign up here.
Create a Google Cloud Storage Bucket
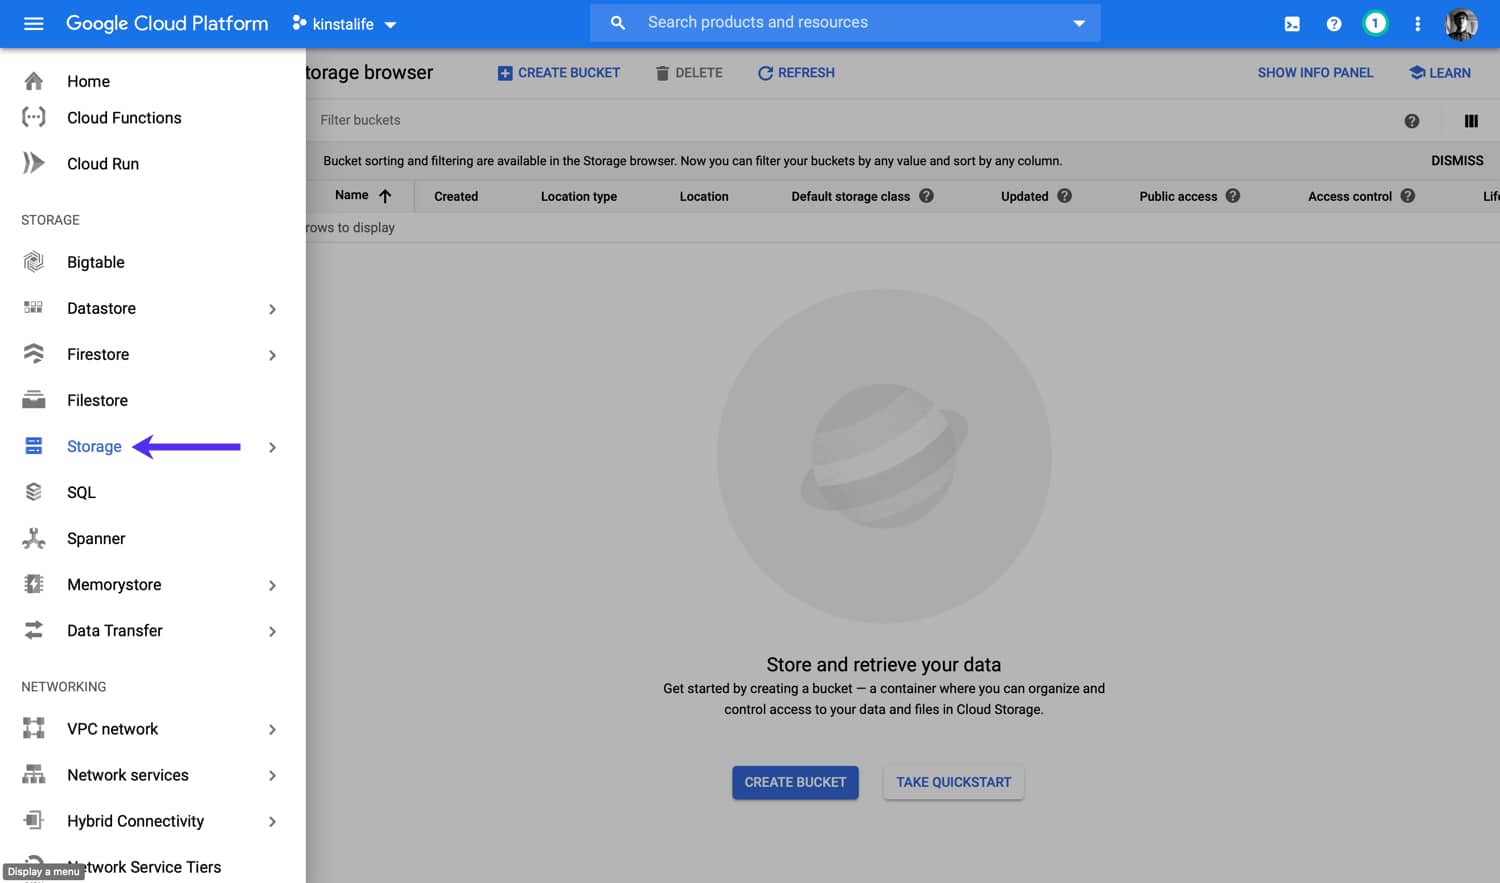
To create a GCS bucket, log into your GCP account and go to Storage in the navigation menu on the left side.
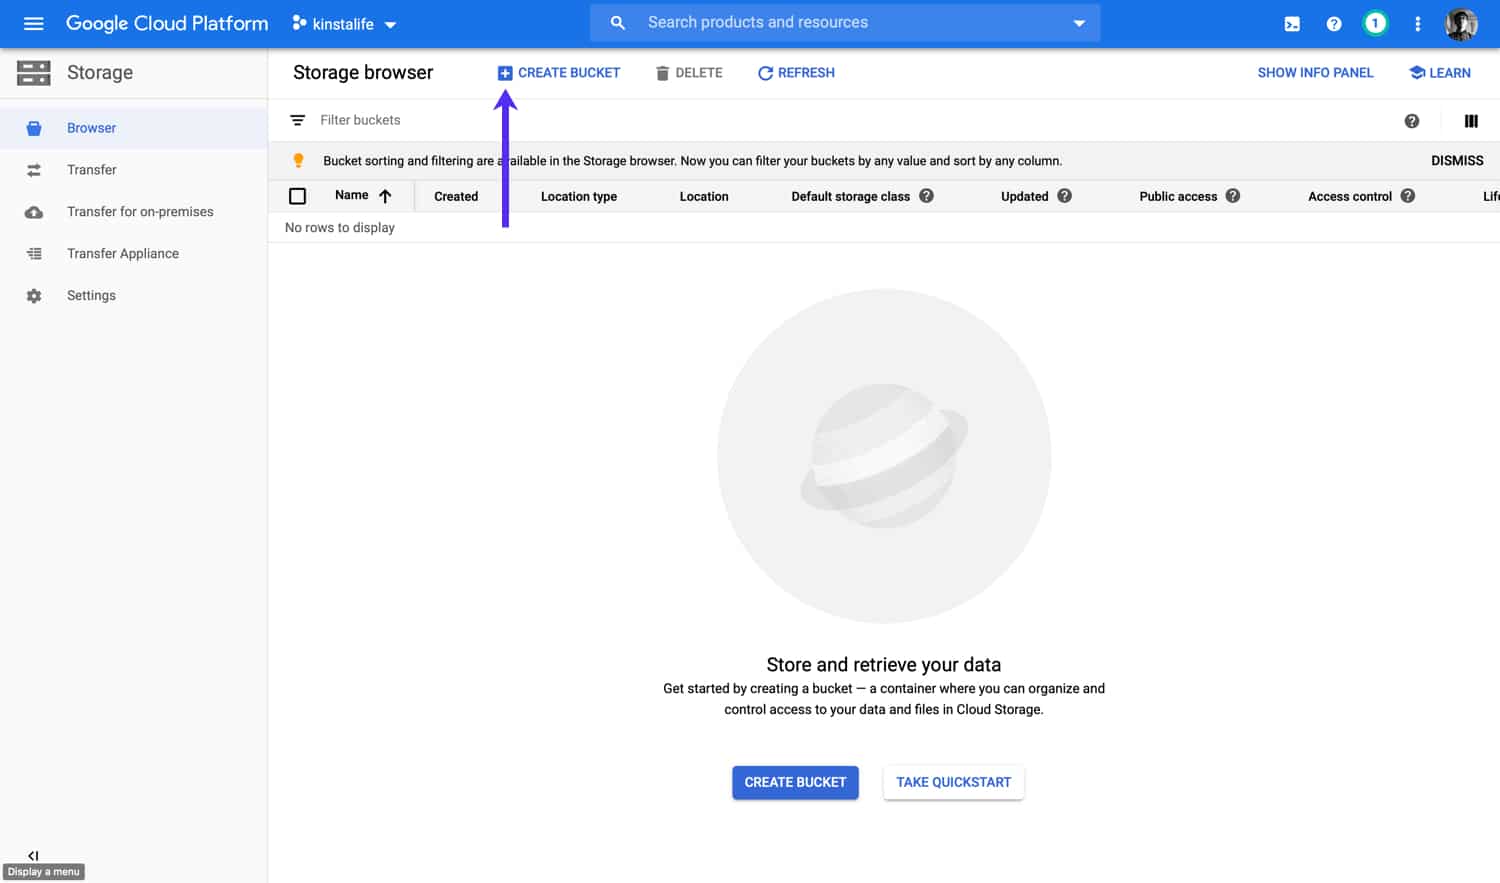
Next, click on the Create Bucket button at the top of the page.
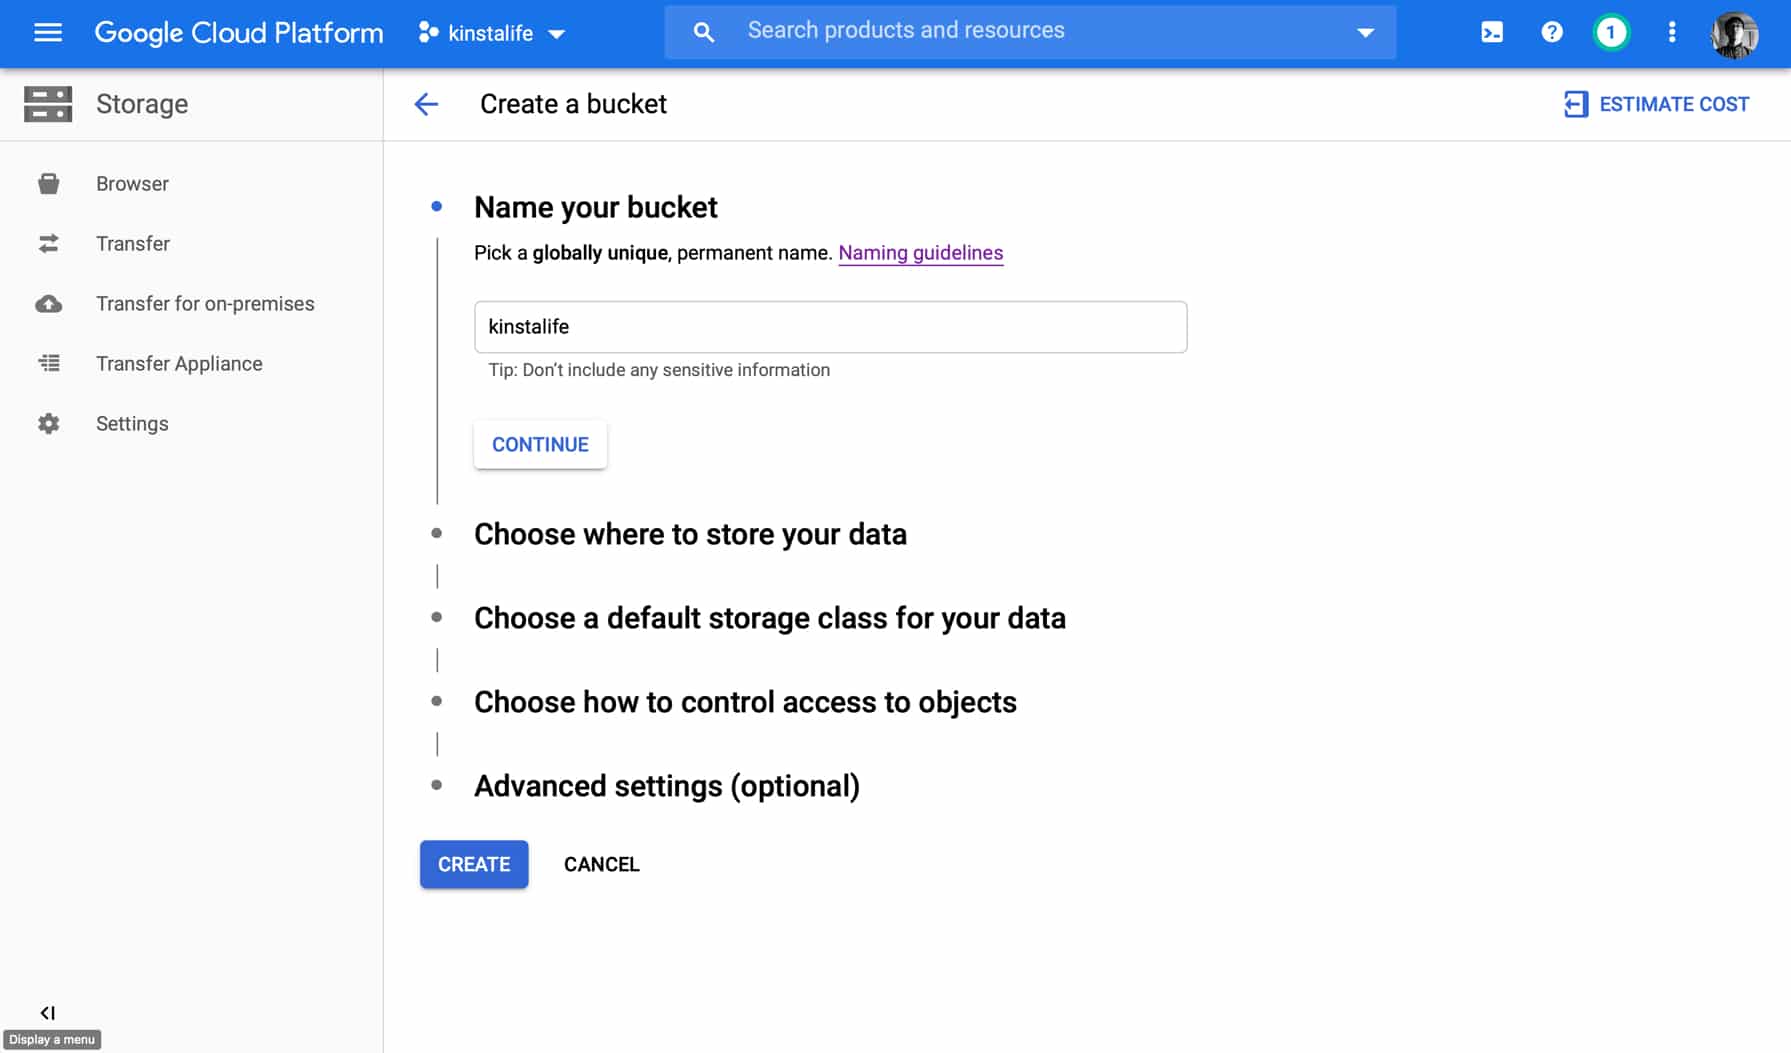
Specify a name for your storage bucket. For ours, we’ve used “kinstalife.”
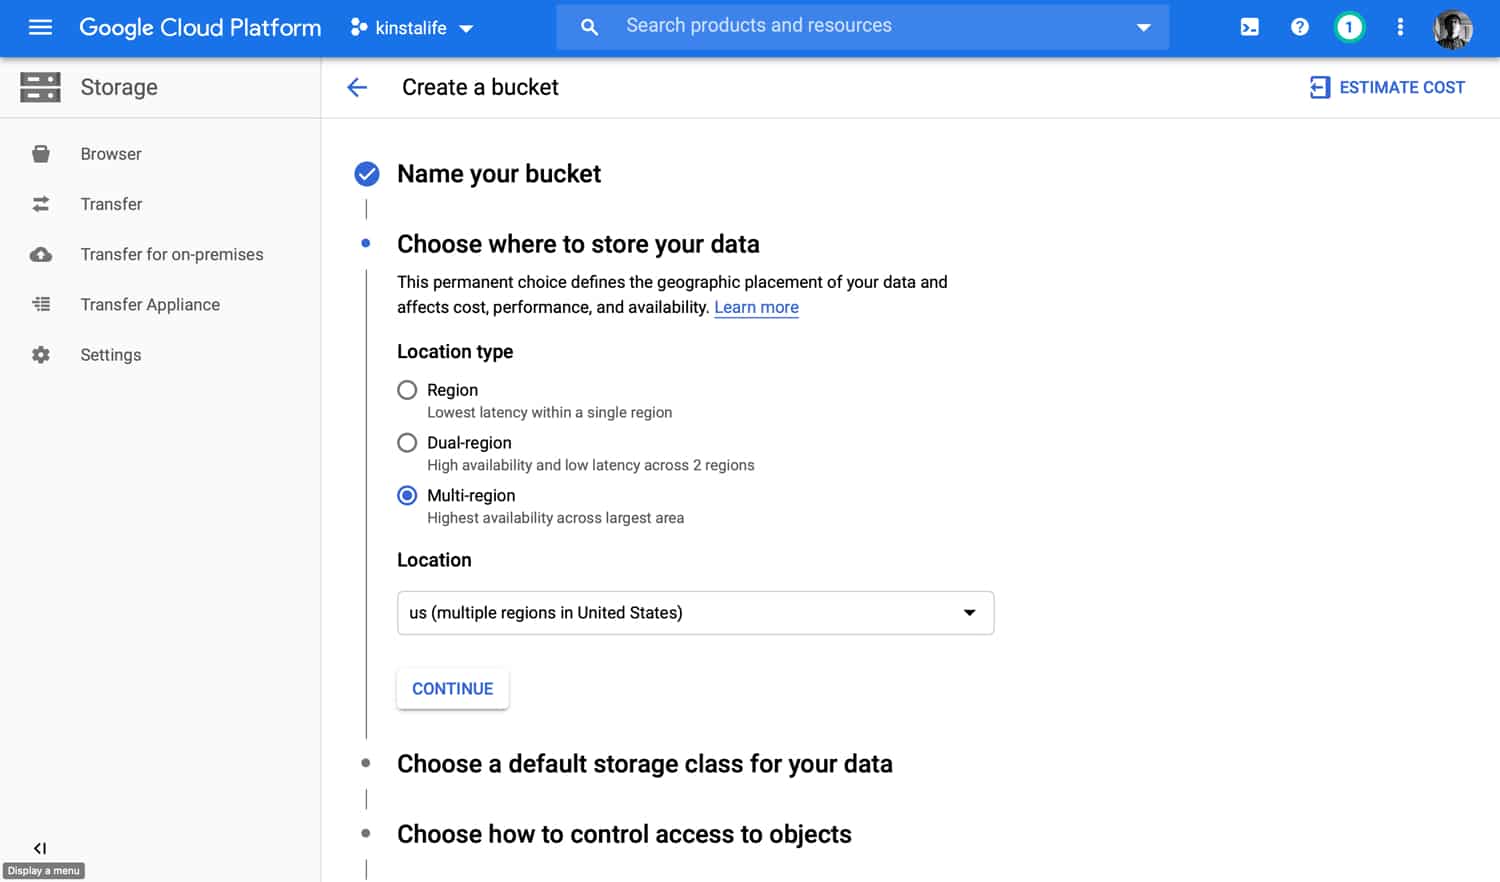
Next, select the location type and location for your external backups. Google offers three different location types – region, dual region, multi-region.
- Region – the least expensive option and stores data in a single region.
- Dual-region – stores data in two regions for higher availability.
- Multi-region – the most expensive option and stores data across multiple regions.
The location type you choose should reflect your backup needs. If you’re operating a business that requires mission-critical backup infrastructure with the highest availability and lowest latency, multi-region would be a good choice.
On the other hand, if you’re looking for a more basic and inexpensive option for once-a-month backups, region or dual-region would be fine. After selecting the location type, go ahead and select the location. Depending on which location type you choose, the location options will vary.
For example, the dual-region location type only supports Americas and Europe at this time. In general, you’ll want to select the location that is closest to you.
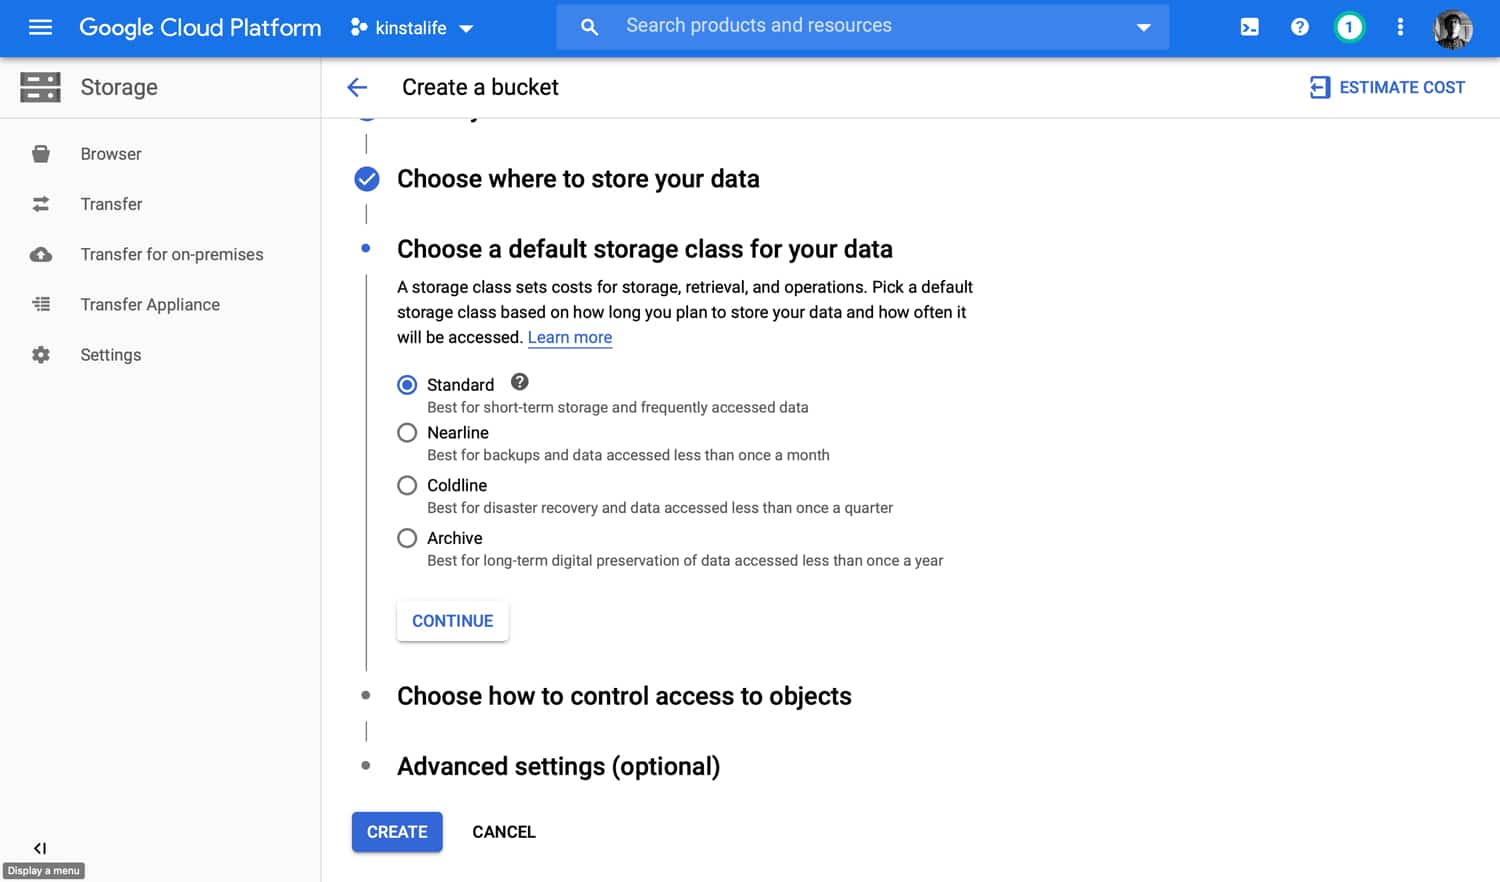
Next, select a storage class for your external backups. It’s important to select the correct storage class for your use case because each class has different storage costs.
- If you plan to access backups frequently, select Standard.
- If you plan to access backups less than once a month, select Nearline.
- If you plan to access backups less than once every three months, select Coldline.
- If you plan to access backups less than once a year, select Archive.
If you are unsure about which storage class to choose, we recommend selecting the Standard class.
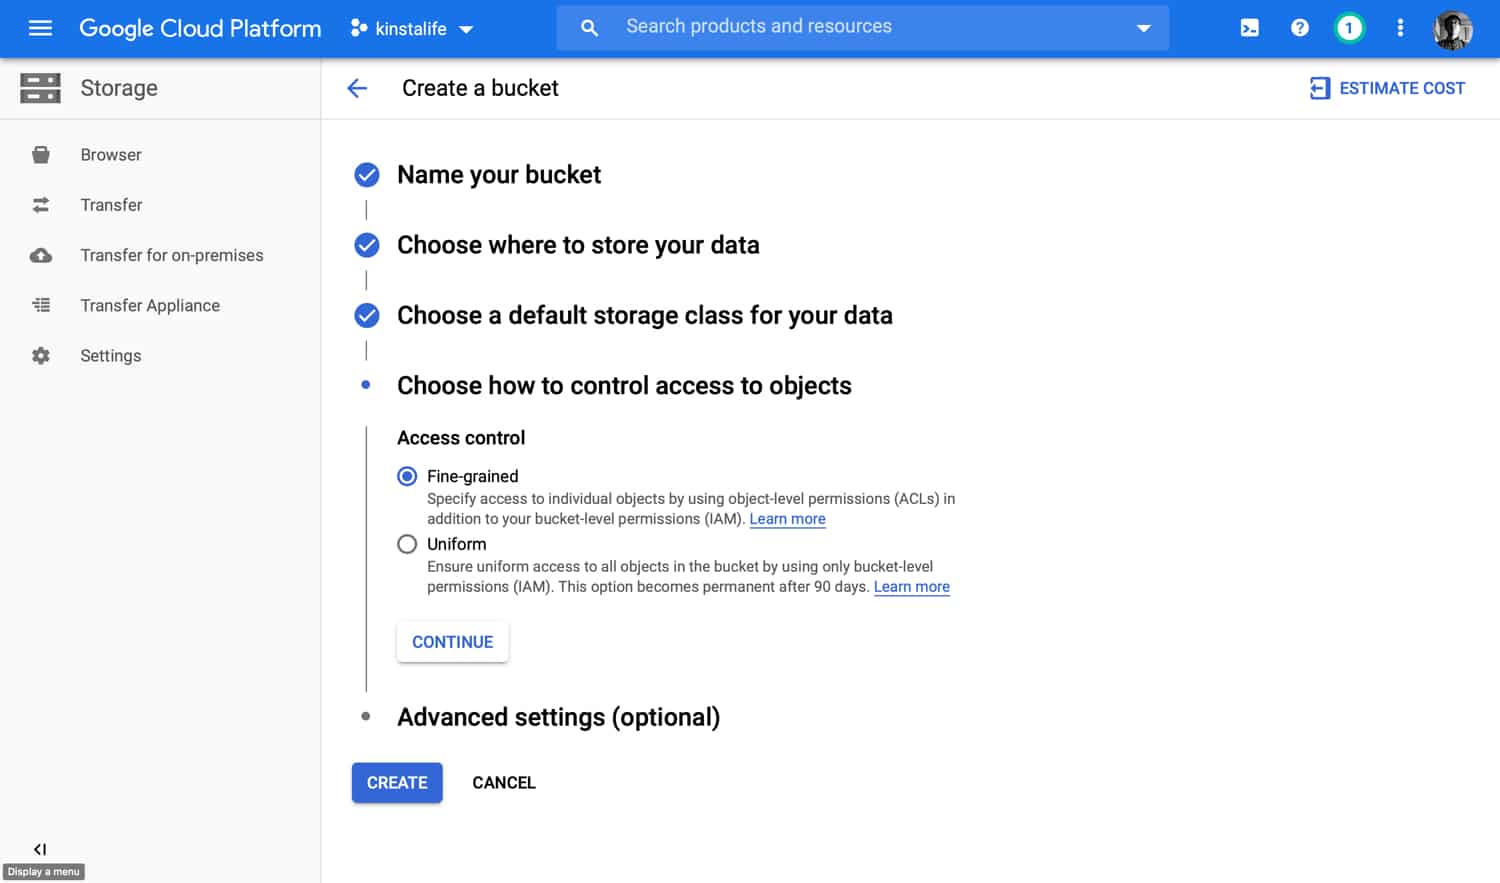
Next, choose Fine-Grained for the access control option.
The Advanced Settings section has a few miscellaneous options. These do not need to be changed. After you have reviewed your bucket settings, click Create to finalize the process.
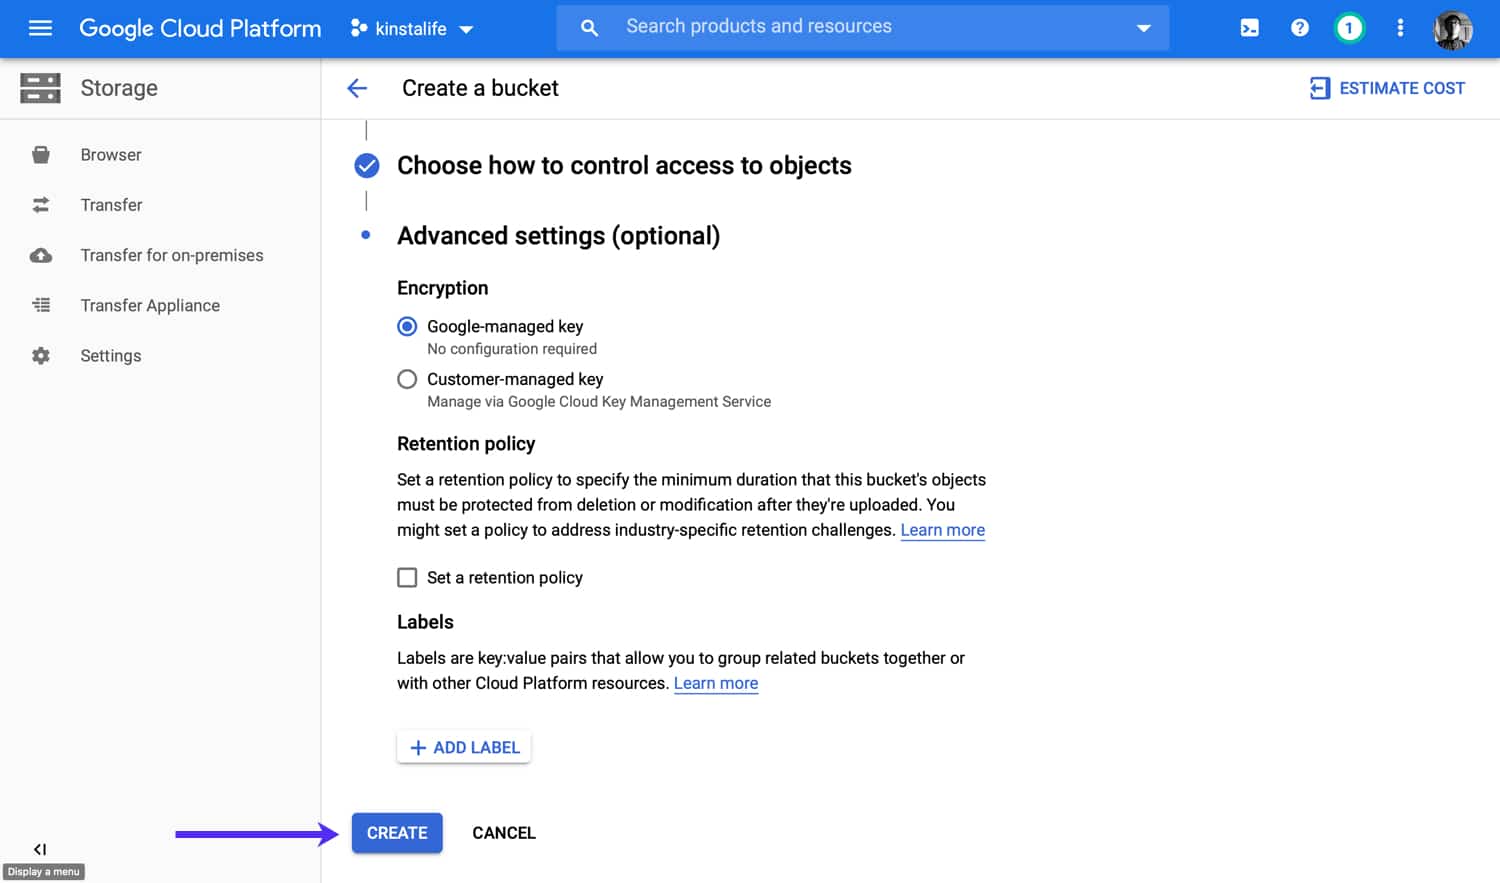
After the bucket has been created, it should be listed on the Storage browser page.

Create a Service Account
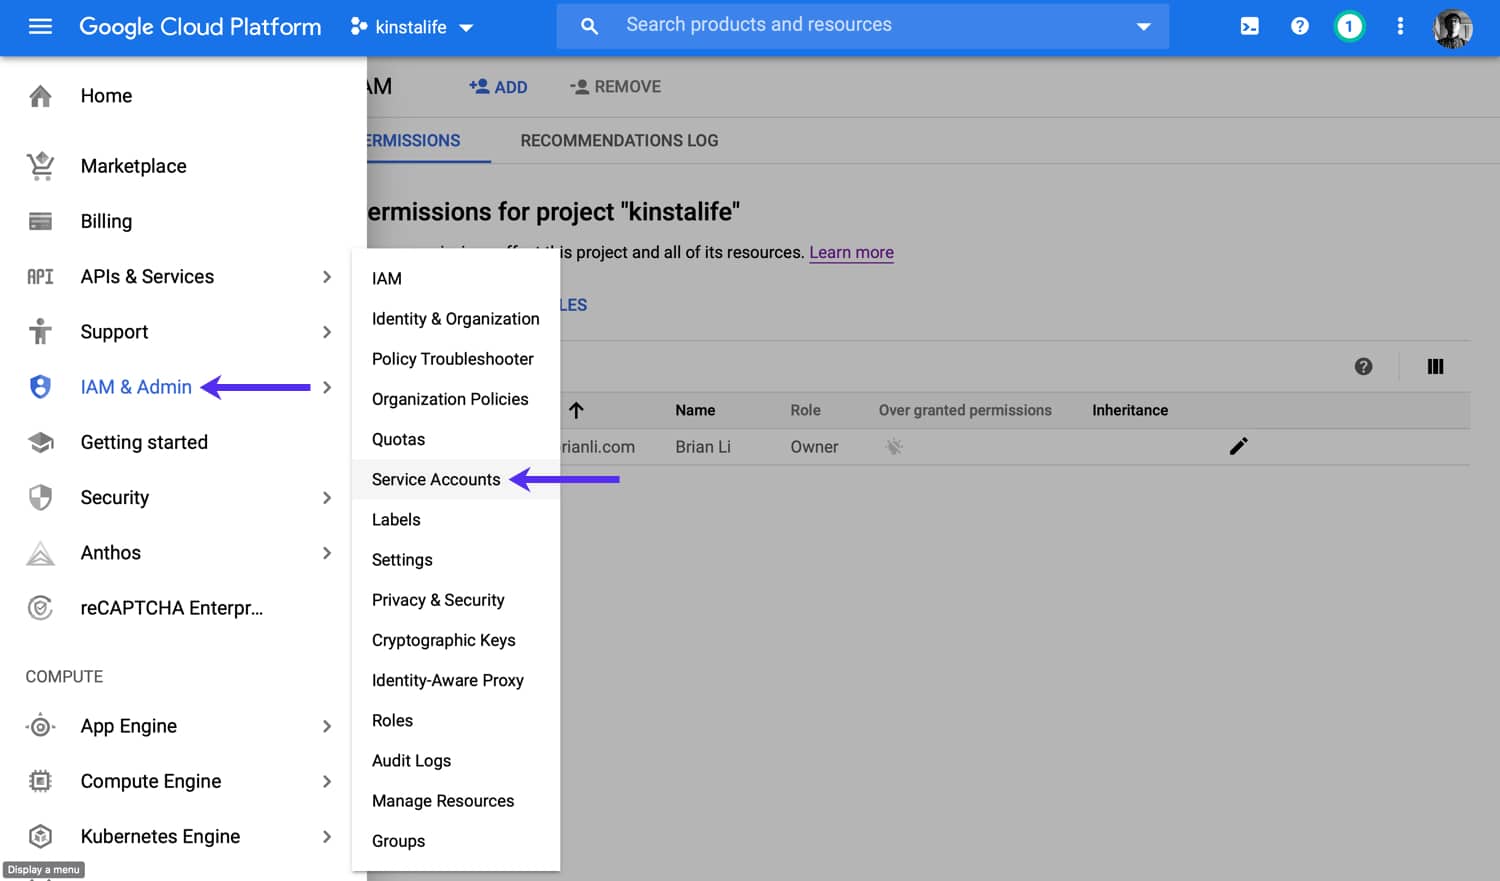
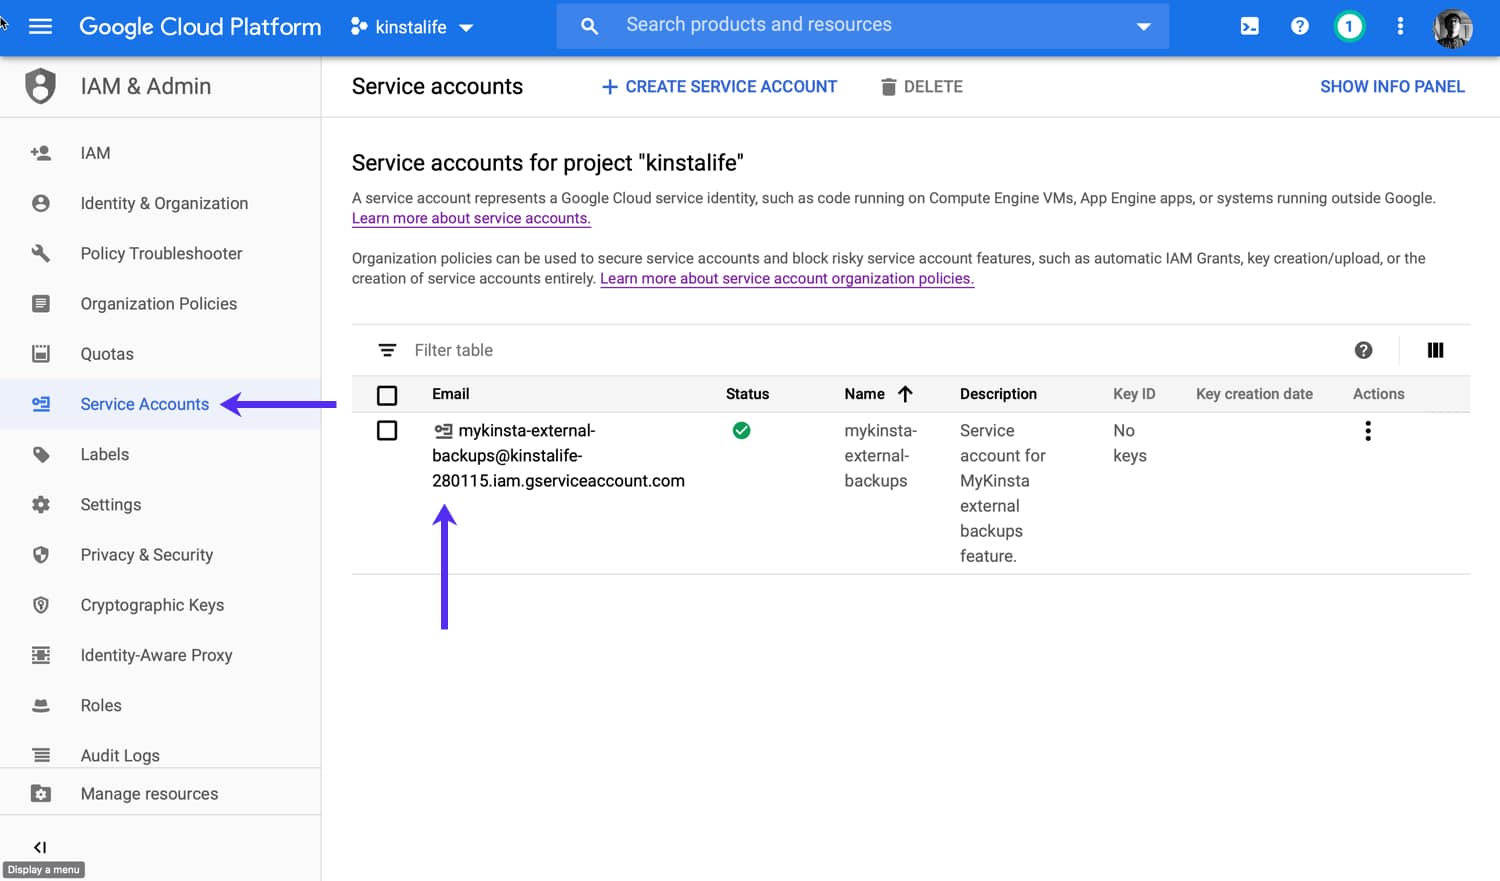
Next, you’ll need to create a service account with permissions to manage your storage bucket. Navigate to IAM & Admin in the navigation menu and click on Service Accounts.
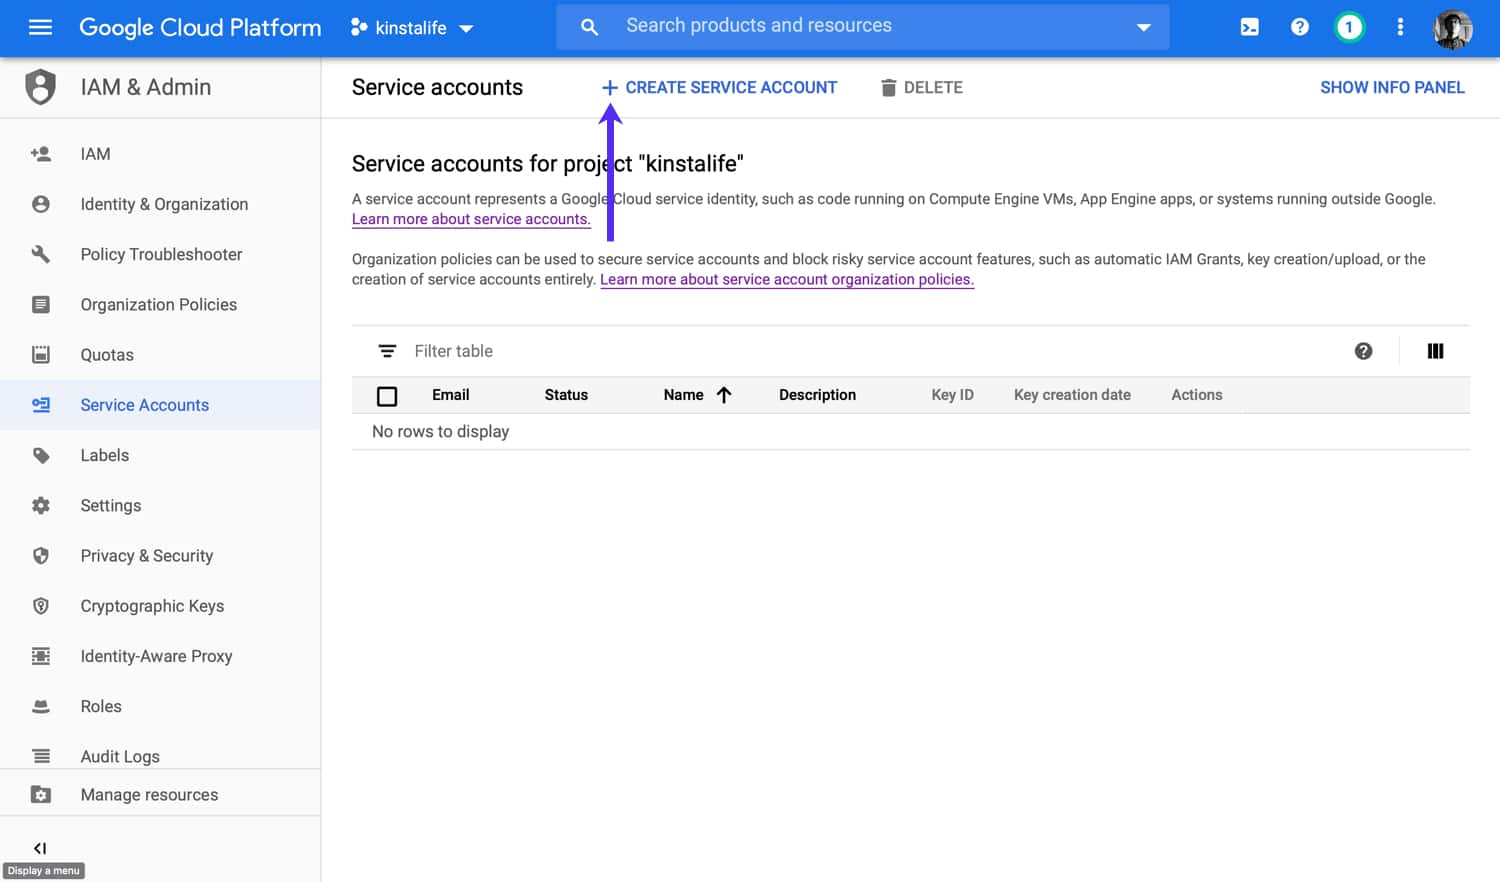
Click on the Create Service Account button.
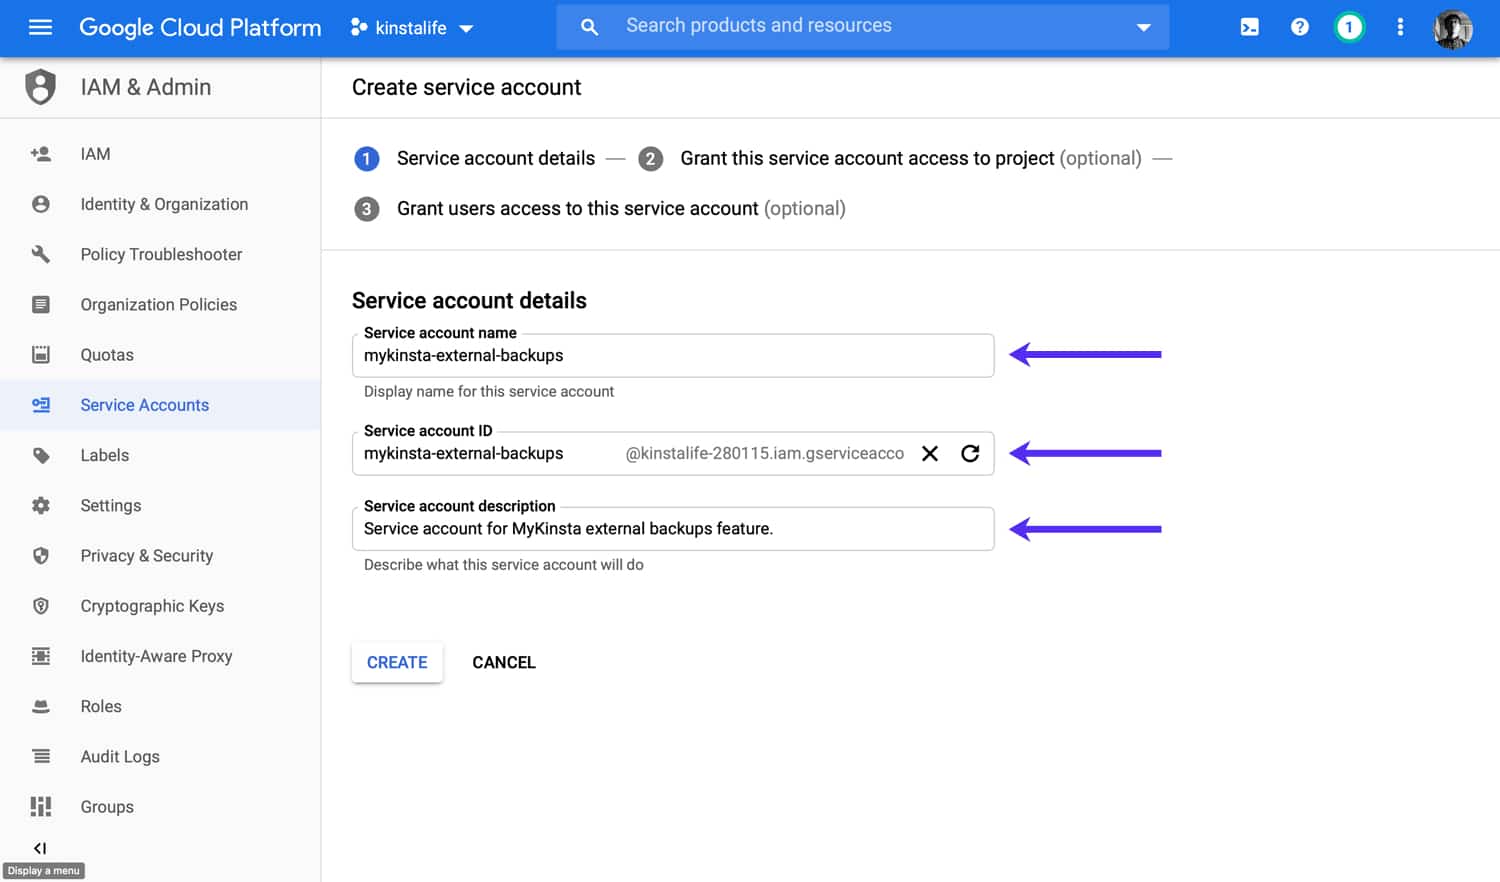
Give your service account a name, ID, and description. We recommend using “mykinsta-external-backups” or similar to make it clear that this service account is related to Kinsta’s external backups add-on. After you’ve filled out the form fields, click the Create button.
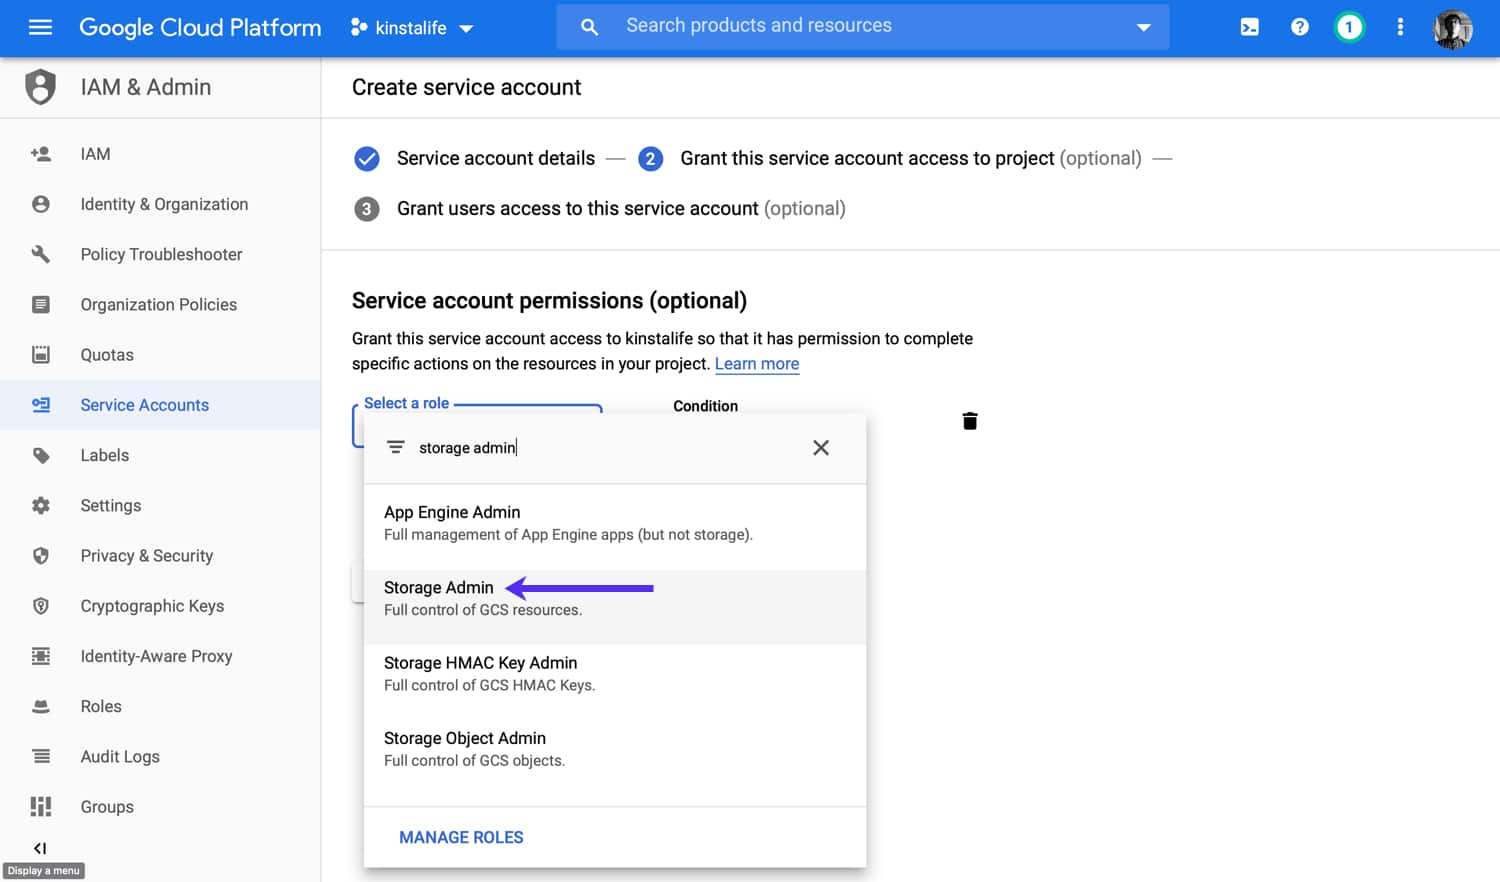
Next, you’ll need to assign Storage Admin permissions to the service account. This gives the service account the ability to manage files in your Google Cloud Storage bucket.
If you can’t find Storage Admin in the list, you can use the search function to find the correct role. After assigning the role, click Continue to proceed to the next step.
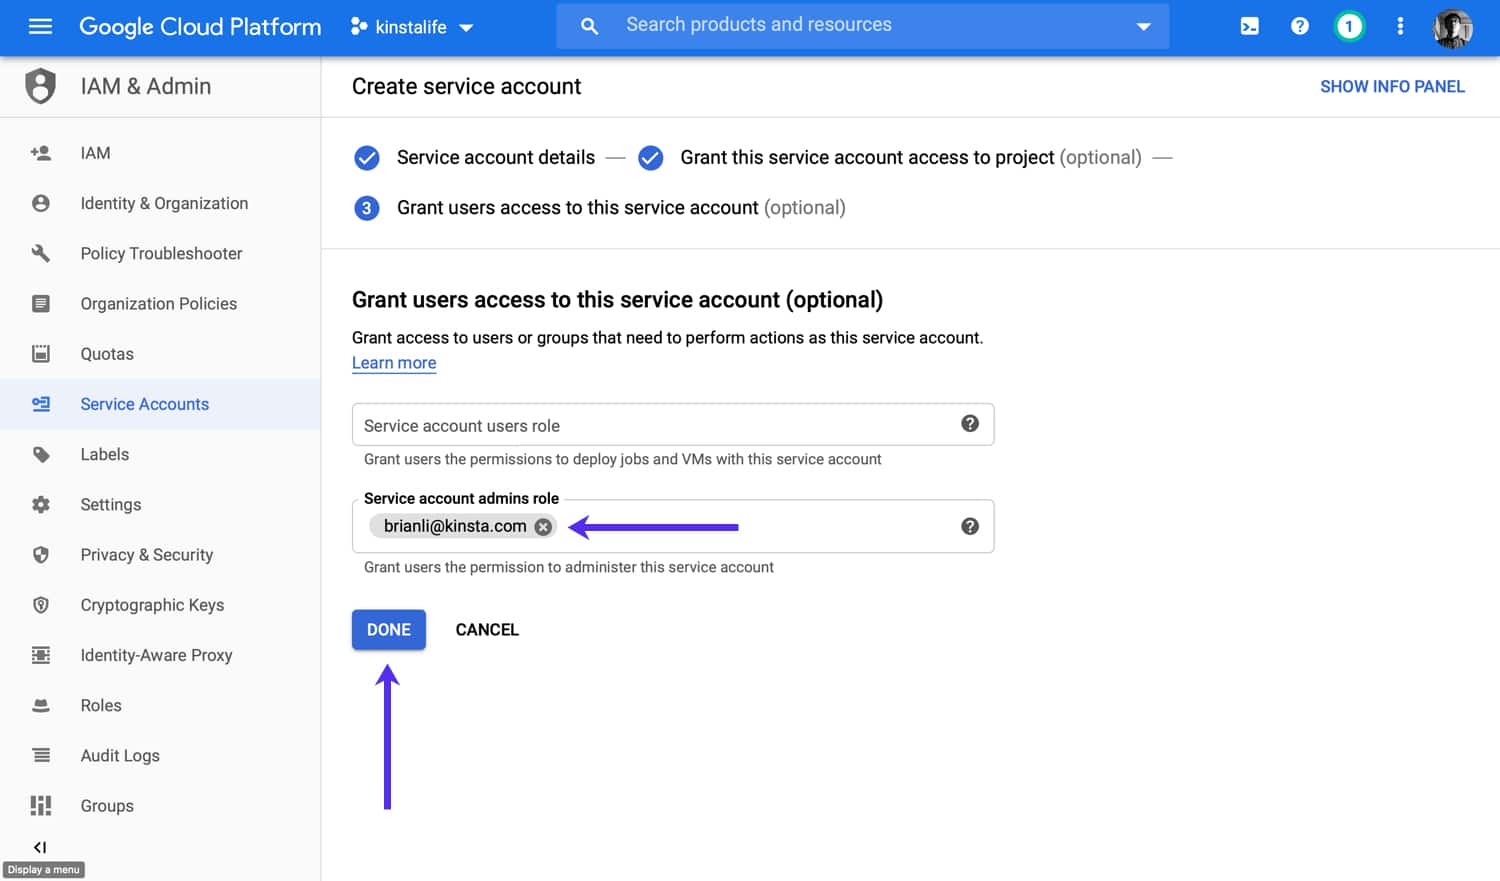
Optionally, you can add a user to serve as the administrator for the service account. While specifying the service account administrator isn’t required, it may be useful if you intend to use the service account for other things in the future.
If you’re an advanced user and have a reason to specify an administrator, feel free to do that here. Otherwise, you can leave it blank. Click Done to finalize the creation of the service account.
Create a Service Account Key Pair
Next, you’ll need to create a key pair to authenticate connections between your service account and MyKinsta. To do this, click on the service account you just created.
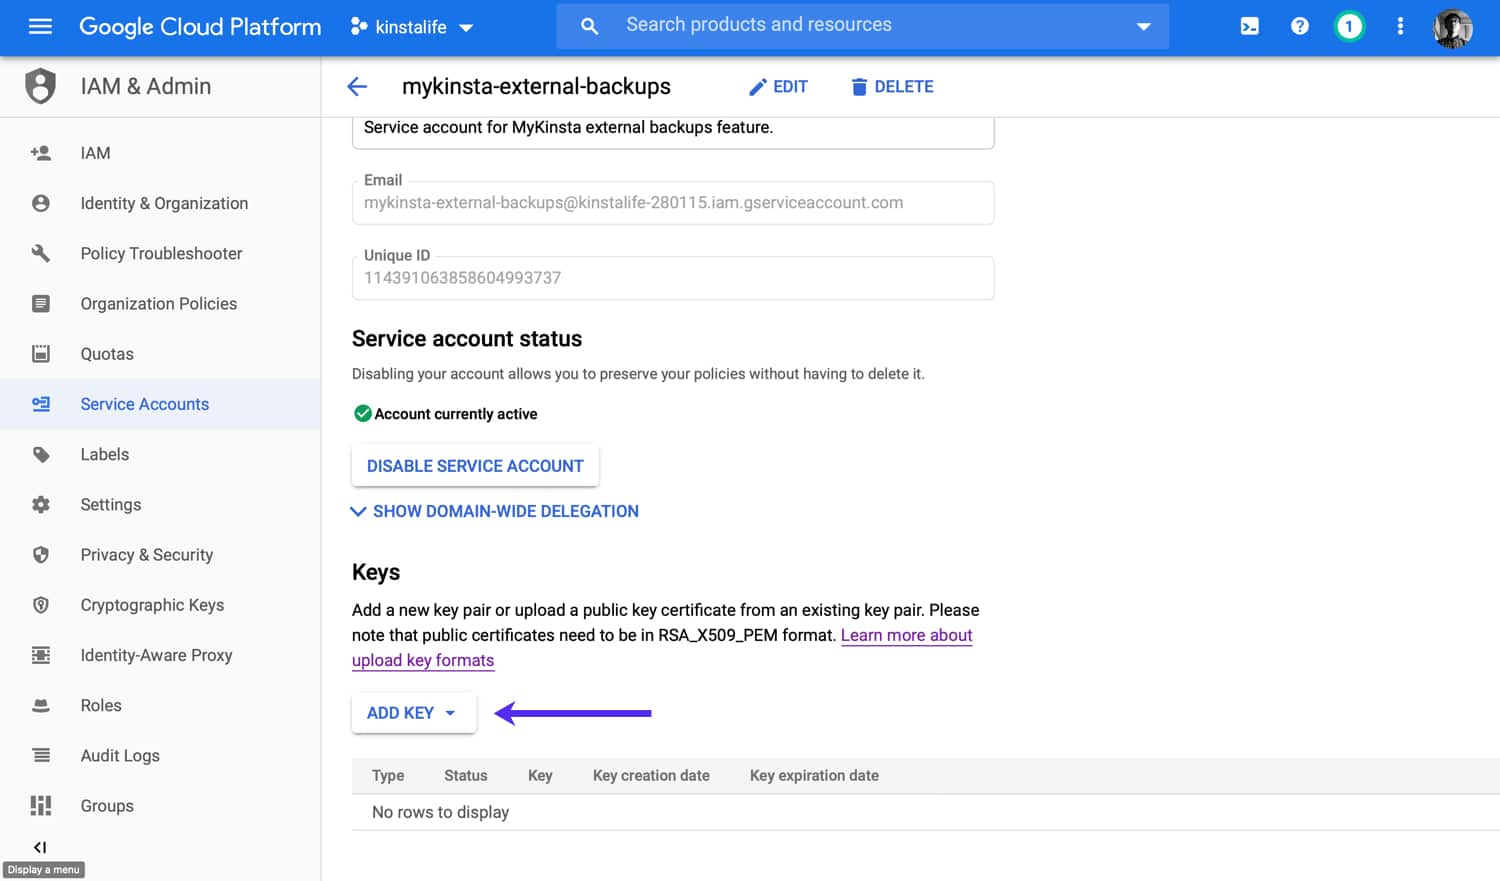
Scroll down to the bottom of the page to the Keys section, and click Add Key and Create New Key.
Select the JSON option for the key type and press Create.
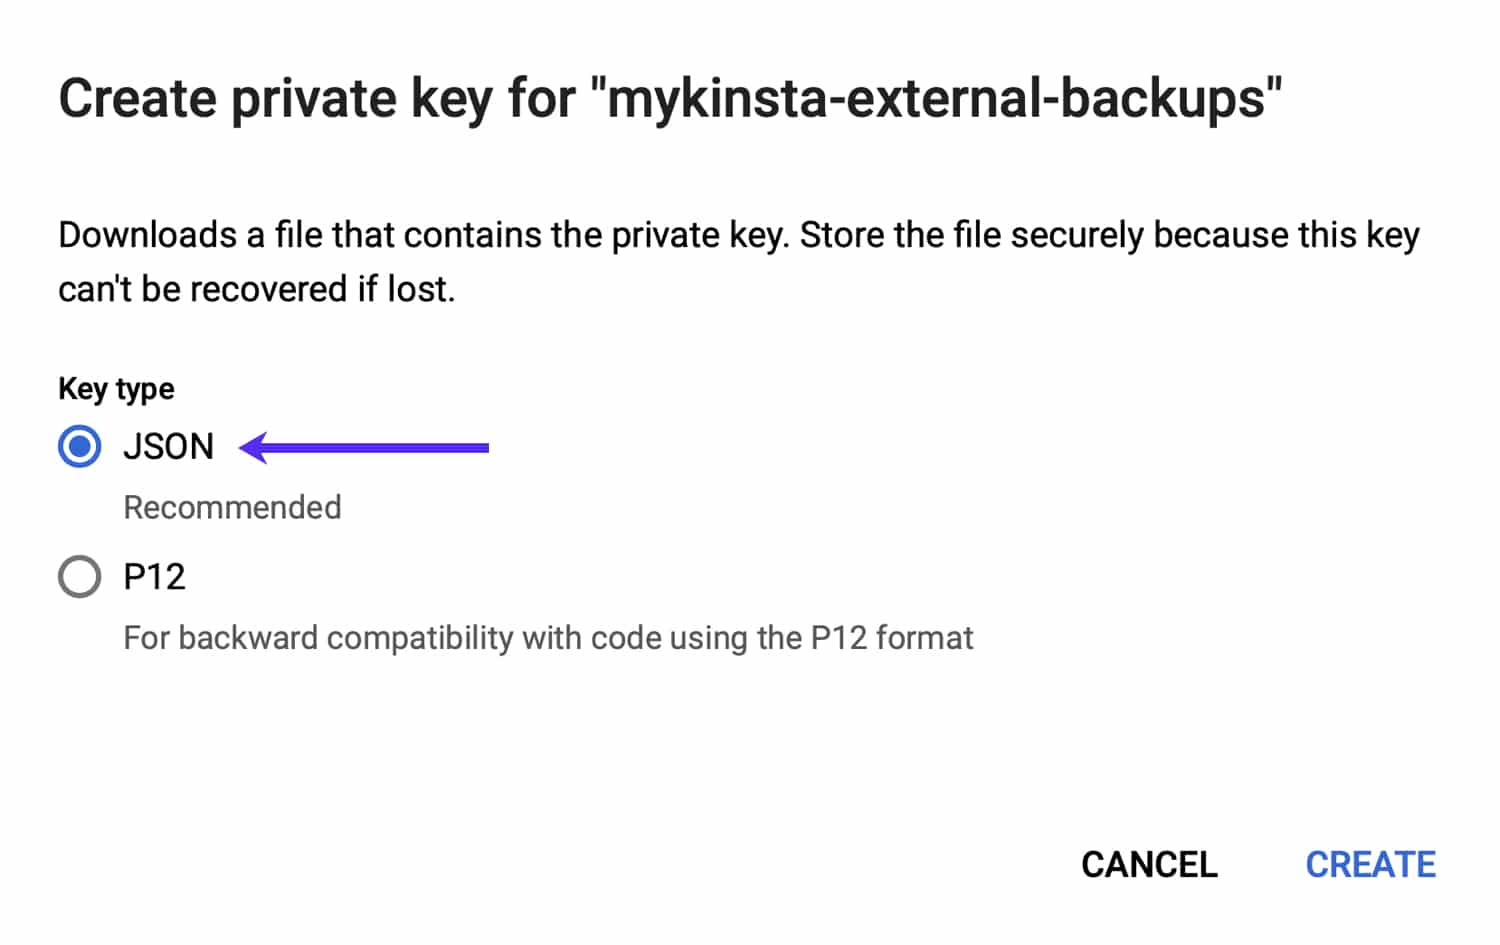
Your browser should automatically download a JSON file containing the key data for your service account. Keep in mind that this JSON file contains a private key and other important information related to your service account. Be sure to keep it in a safe place and don’t share it with anyone unless there’s a reason to do so.
The filename of the JSON file should look something like this:
kinstalife-280115-42d3c1d04a09.jsonYou’ll need the contents of this JSON file during the external backup setup process in MyKinsta. Be sure to keep it in a secure location.
Google Cloud Storage Bucket Details
You’ll need three pieces of information from Google Cloud to link your storage bucket to Kinsta’s external backups tool.
Google Cloud Bucket Name
To find your Google Cloud bucket name, go to the Storage browser page in your Google Cloud dashboard and look in the Name column. In the screenshot below, our bucket name is “kinstalife.”

Google Cloud Project ID
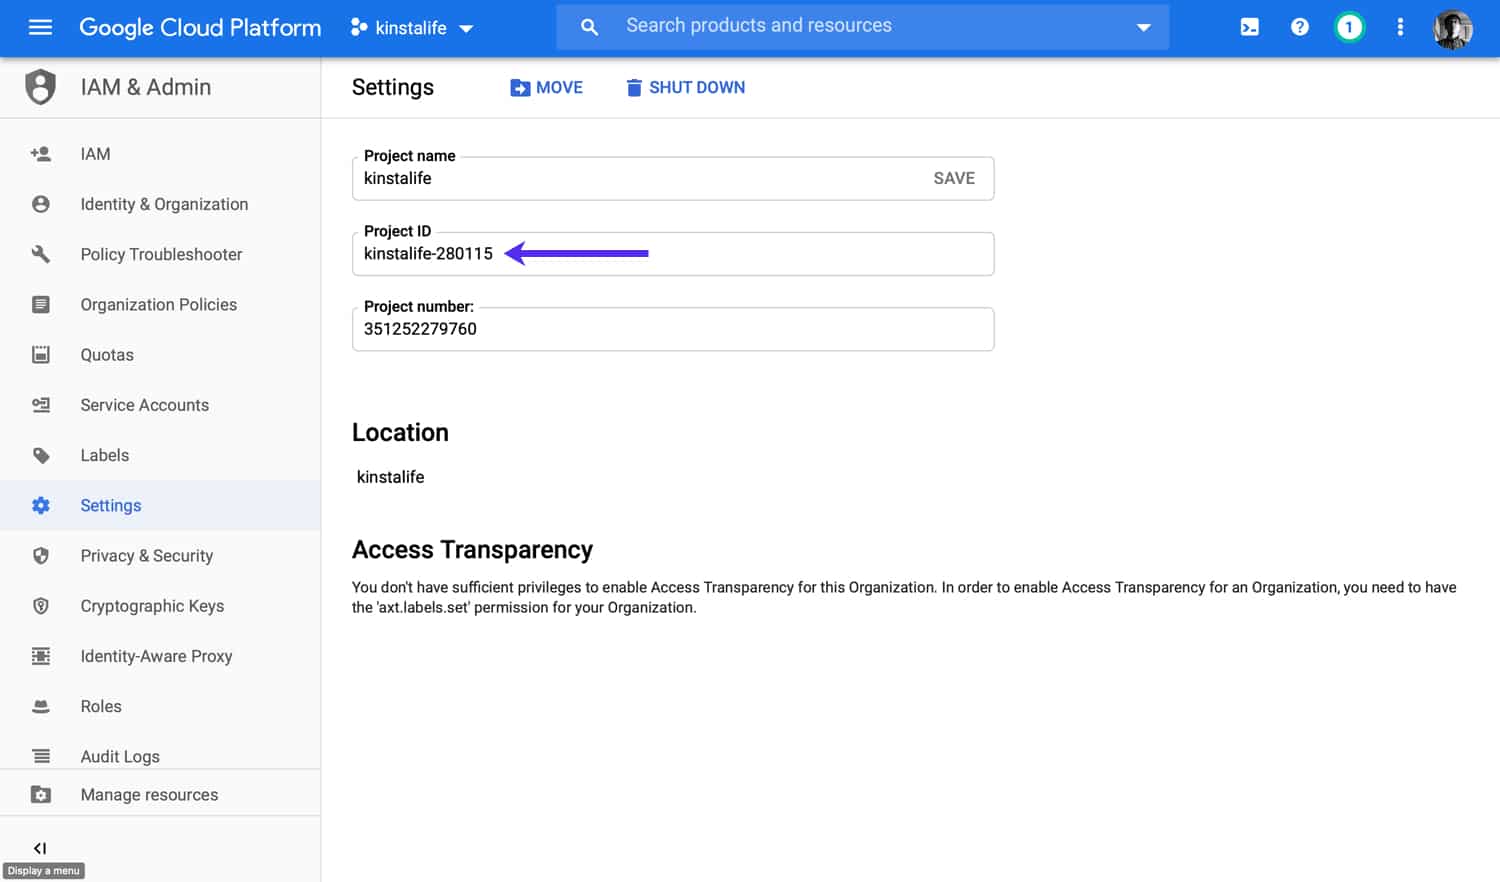
To find your Google Cloud project ID, go to IAM & Admin > Settings. The project ID can be found on this page. In the screenshot below, our project ID is kinstalife-280115.
Service Account Private Key
You can find your service account’s private key in the JSON file you downloaded when you created your service account key pair. You can open the file in a text editor so you can copy the contents of the file into MyKinsta. The contents of the file should look something like this:
{
  "type": "service_account",
  "project_id": "kinstalife-280115",
  "private_key_id": "01sxigr0jy9p5przs80gijgcd1ouacn6d417l3ia",
  "private_key": "-----BEGIN PRIVATE KEY-----nMIIEvgIBADANBgkqhkiG9w0B...n-----END PRIVATE KEY-----n",
  "client_email": "mykinsta-external-backups@kinstalife-280115.iam.gserviceaccount.com",
  "client_id": "043137139116347916375",
  "auth_uri": "https://accounts.google.com/o/oauth2/auth",
  "token_uri": "https://oauth2.googleapis.com/token",
  "auth_provider_x509_cert_url": "https://www.googleapis.com/oauth2/v1/certs",
  "client_x509_cert_url": "https://www.googleapis.com/robot/v1/metadata/x509/mykinsta-external-backups%40kinstalife-280115.iam.gserviceaccount.com"
}
Once you have these details, you’re ready to add the external backup add-on to your plan.
Summary
Now you have the information you need to configure the external backups add-on in MyKinsta to work with your Google Cloud Storage bucket. With this in place, you can rest easy knowing that your code, data, and user details are safe, secure, and accessible at any time.
If you’re not already a Kinsta customer, now’s a great time to switch. WordPress users will find endless value in Kinsta’s WordPress Hosting services. You also enjoy 24/7/365 expert support when you need a hand.
