In today’s digital age, websites and applications are the cornerstones of virtual representation. Losing your site or app due to technical issues, hacking, or human error can be devastating, even resulting in financial loss or reputation damage.
Making backups is a crucial step in protecting your online assets. By regularly backing up your online presence, you can rest assured that it can be quickly and easily restored in cases of downtime or other emergencies.
With Kinsta’s external backup add-on, you can back up your WordPress site to Amazon S3 or Google Cloud Storage. In this article, we’ll show you how to set up and configure an Amazon S3 bucket. If you want to use a Google Cloud Storage bucket, follow the steps in our Creating and Configuring a Google Cloud Storage Bucket guide.
You’ll first need to set up an Amazon Web Services (AWS) account. If you already have an account, feel free to move on to the steps below.
If you don’t have an AWS account, sign up here.
Create an Amazon S3 Bucket
To create an Amazon S3 bucket, click on Services in the menu bar. In the dropdown menu, select S3 under Storage.

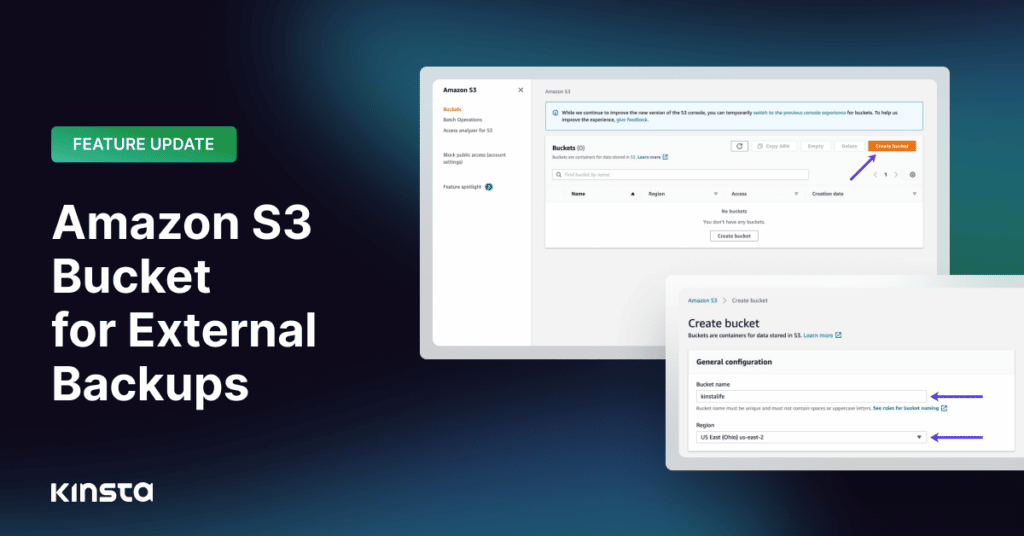
Click the Create bucket button to set up your S3 bucket for external backups.

Next, specify a bucket name and region for your S3 bucket. In the screenshot below, our bucket name is “kinstalife,” and our region is US East (Ohio) us-east-2.

Make sure the Block all public access option is selected. This will prevent your backups from being accessed publicly without authentication. Next, click the Create bucket button.

You should now see the newly-created bucket in your S3 dashboard.

Create an AWS User
Next, you’ll need to create an AWS user, which will be used to provide MyKinsta with access to your S3 bucket. To get started, click on Services in the menu bar, and click IAM under Security, Identity, & Compliance.

In the sidebar, click on Users under Access management, and click Add user.

Specify a user name for the IAM user. We recommend using a name like “mykinsta-external-backups” that clearly identifies the purpose of the user. For the Access type, select Programmatic access and click Next: Permissions to proceed to the next step.

On the IAM permission page, select Attach existing policies directly. For the policy name, choose AmazonS3FullAccess. If you cannot find the policy, you can use the search box to search for “S3”. Assigning the AmazonS3FullAccess policy will allow the associated user to access all your AWS buckets. After you have assigned the policy, click Next: Tags to proceed to the next step.

Optionally, you can add IAM tags for the user. This is useful for advanced use cases that require additional user-level metadata. If you do not need to add tags, click Next: Review to proceed to the next step.
")
Review the details for your new IAM user. If you notice an issue, you can click Previous to return to a previous step. If everything looks good, click Create user.

Copy the Access key ID and Secret access key to a secure location. Keep in mind that this pair of keys gives access to your S3 buckets, so be sure to keep it in a safe place. You will need the key pair to link your S3 bucket to Kinsta’s external backup tool later on.

Summary
Now you have the information you need to configure the external backups add-on in MyKinsta to work with your Amazon S3 bucket. Once you have your backups in place, you can cast aside any worries you have about server outages or malicious attacks; your data will remain safe, secure, and accessible at any time.
In addition to regular backups, Kinsta customers get the advantage of top-of-the-line security and support for their projects. Our WordPress Hosting services allow for significant speed boosts supported by a powerful cloud infrastructure as well as Kinsta’s CDN.