
If you’re using Android, you may run into the NET::ERR_CLEARTEXT_NOT_PERMITTED error while trying to access a website or web app. This error will block you from accessing the site, and it’s unique to this Operating System (OS).
The NET::ERR_CLEARTEXT_NOT_PERMITTED message appears because the website uses “cleartext” or unencrypted information. Fortunately, there are ways to bypass this error, whether you’re an Android developer or you’re in charge of the website in question.
In this article, we’ll introduce you to the concept of Android Webview and discuss what causes the NET::ERR_CLEARTEXT_NOT_PERMITTED error. Then, we’ll show you three ways to troubleshoot the error. Let’s get to it!
Check Out Our Video Guide To Fixing the NET::ERR_CLEARTEXT_NOT_PERMITTED Error:
What Is Android Webview?
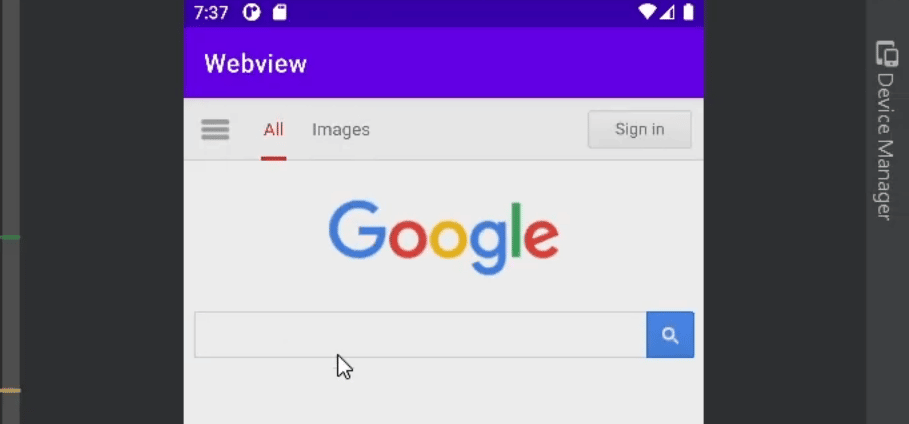
Webview is a feature within the Android OS that enables apps to display web pages without using a browser. This feature is common in web apps, which are essentially wrappers that enable websites to get installed on your phone as apps:
Although Webview enables you to access websites via apps, you don’t get the same amount of features as you do on a browser. If you’re navigating the web, a browser such as Chrome will always provide a better experience than Webview.
The NET::ERR_CLEARTEXT_NOT_PERMITTED error is unique to apps that use Webview in the Android OS. You won’t run into this error while using a browser such as Chrome. If you’re trying to access a PHP-built website over HTTP instead of a secure channel with a regular browser, you might run into other errors, such as “Not Secure” warnings.
What Does NET::ERR_CLEARTEXT_NOT_PERMITTED Mean?
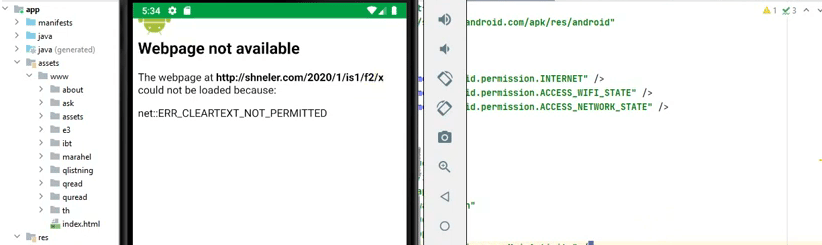
If you configure Webview to load a page that uses HTTP or contains other types of unencrypted information, the app will return the following error (we’re using an Android app development tool to show it to you):
The error doesn’t mean the website is inaccessible or suffers from technical issues. In fact, if you try accessing the same URL using another browser, you might not run into any kind of error. At most, if it’s an HTTP URL, you may see an icon that indicates you’re visiting an unsecured website.
Since the error only appears inside Android apps, it can lead users to believe there’s a problem with the app itself. However, there are ways to bypass and troubleshoot this error, whether you’re an app developer or you’re in charge of the website that’s displaying it. If you’re an end user, there’s little you can do besides trying to access the website using a browser.
What Causes the NET::ERR_CLEARTEXT_NOT_PERMITTED Message?
By default, Android prevents apps from accidentally sending unencrypted data or “cleartext.” This has been the default configuration for apps since Android 9.0.
This configuration applies to apps that use Android Webview. That’s why the NET::ERR_CLEARTEXT_NOT_PERMITTED error only appears within apps and not in browsers within the Android OS.
Since the main cause behind the error is unencrypted information, there are different ways to troubleshoot it. If you’re the app developer, you can modify configuration files that enable support for cleartext.
Alternatively, if you’re the website owner, you can configure all pages within the site to load over HTTPS. That way, users won’t have to deal with unencrypted channels, and Android apps that point toward your website won’t return the NET::ERR_CLEARTEXT_NOT_PERMITTED error.
How To Fix the “NET::ERR_CLEARTEXT_NOT_PERMITTED” Error (3 Ways)
In this section, we’ll show you how to troubleshoot the NET::ERR_CLEARTEXT_NOT_PERMITTED error directly on Android and from your website. You’ll need access to an Android device to troubleshoot the error and to check if it persists.
1. Modify AndroidManifest.xml
Every Android application includes an AndroidManifest.xml file. The file contains information about the app that is required by the OS, the Google Play Store, and some developer tools.
The AndroidManifest.xml file also includes information about key permissions and whether the app can load cleartext over Webview or not. Keep in mind that Google advises against permitting cleartext due to security issues, so this troubleshooting method should be a temporary workaround until the website you’re loading switches to encrypted traffic.
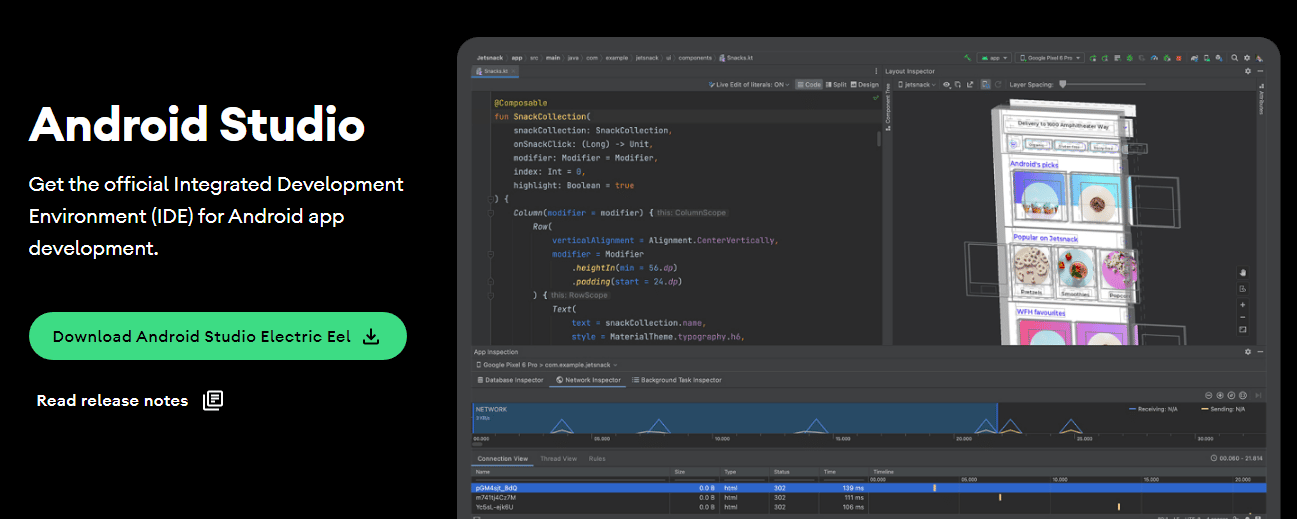
To locate and edit AndroidManifest.xml (which is similar to editing an HTML file), you’ll need access to the app’s .apk file or project source. There are several ways you can access an app’s project source files. The recommended approach is to use Android Studio, which is the official Integrated Development Environment (IDE) for Android developers:
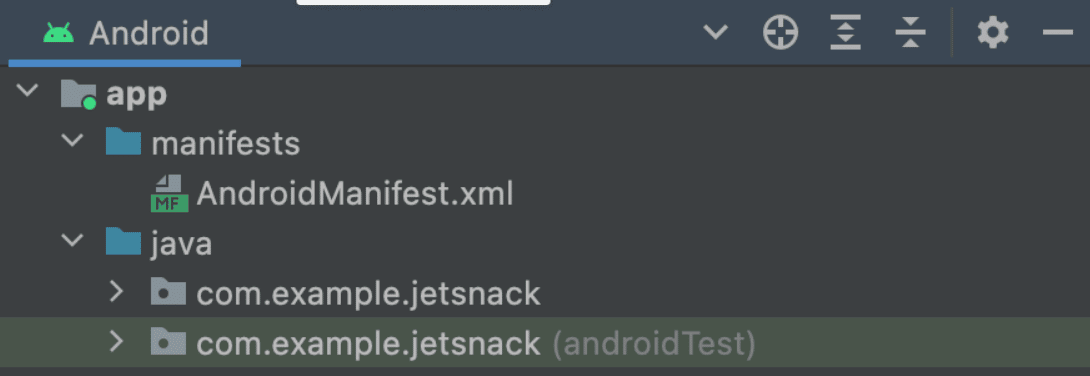
Once you open a project in Android Studio, you’ll be able to see all of its related files across standardized directories. The AndroidManifest.xml file will be located inside the manifests directory:
Open the file and search for the application sub-element, which should look like this:
<application

android:icon="@drawable/ic_launcher"

android:label="@string/app_name"

android:theme="@style/AppTheme" >

</application>
The variables inside the application sub-element might change, so you’ll need to look for the opening and closing application tags to identify them. Once you locate the tags, paste in the following line of code:
android:usesCleartextTraffic=”true”
If there’s already a usesCleartexTraffic variable set to false, change it to true. When you’re done, save the changes to AndroidManifest.xml and close the file, then save the changes to the project.
2. Allowlist the Domain Using network_security_config.xml
From Android 7.0 and onward, Google enables applications to use a network security configuration file to set permissions for specific domains and apps. In a nutshell, you can use network_security_config.xml to bypass cleartext restrictions for one or more domains.
This approach is safer than enabling cleartext support across the entire app (as shown in the previous method). However, the most secure approach would be to only link to secure pages using Webview.
Ideally, you’ll only use one of these two approaches, as enabling cleartext support across an entire app means you don’t have to allowlist specific domains. If you want to opt for the more secure approach, follow this method.
With that in mind, let’s go ahead and create a network_security_config.xml file for your app. To do this, open the app project using Android Studio (as outlined in the previous section) and navigate to the res directory.
This directory includes all the non-code files for an app project, including XML files (aside from AndroidManifest.xml), bitmap images, and more. Create a file called network_security_config.xml file within the res directory. Then, open the file and add the following code:
<?xml version="1.0" encoding="utf-8"?>

<network-security-config>

<domain-config cleartextTrafficPermitted="true">

<domain includeSubdomains="true">yourwebsite.com</domain>

</domain-config>

</network-security-config>
This code specifies that only one domain can use cleartext. You can add further “domain includeSubdomains” elements to allowlist additional URLs. However, for security reasons, we recommend you limit this configuration only to the domains that strictly need it.
Save the changes to network_security_config.xml and return to the manifests directory. For the network security configuration to work, you’ll need to edit AndroidManifest.xml again.
Open the file and look for the application sub-element. Then, add the following line of code within its tags:
android:networkSecurityConfig="@xml/network_security_config"
Close AndroidManifest.xml after saving the changes to the file and that’s it. Your app should now enable cleartext for the domain you specified.
3. Force Your Website To Use HTTPS
The most secure solution to the NET::ERR_CLEARTEXT_NOT_PERMITTED error is to configure the website that returns the error message to use HTTPS. This way, all data transmitted to and from the website is encrypted.
In the modern web, there’s no reason not to use HTTPS for your website. You can get a Secure Sockets Layer (SSL) certificate for free and set it up on your site in a matter of minutes. In fact, some web hosts (such as Kinsta) can take care of the whole process for you.
When you sign up for a Kinsta hosting plan, we automatically configure an SSL certificate for your website. Moreover, you can force your website to load over HTTPS from your MyKinsta dashboard.
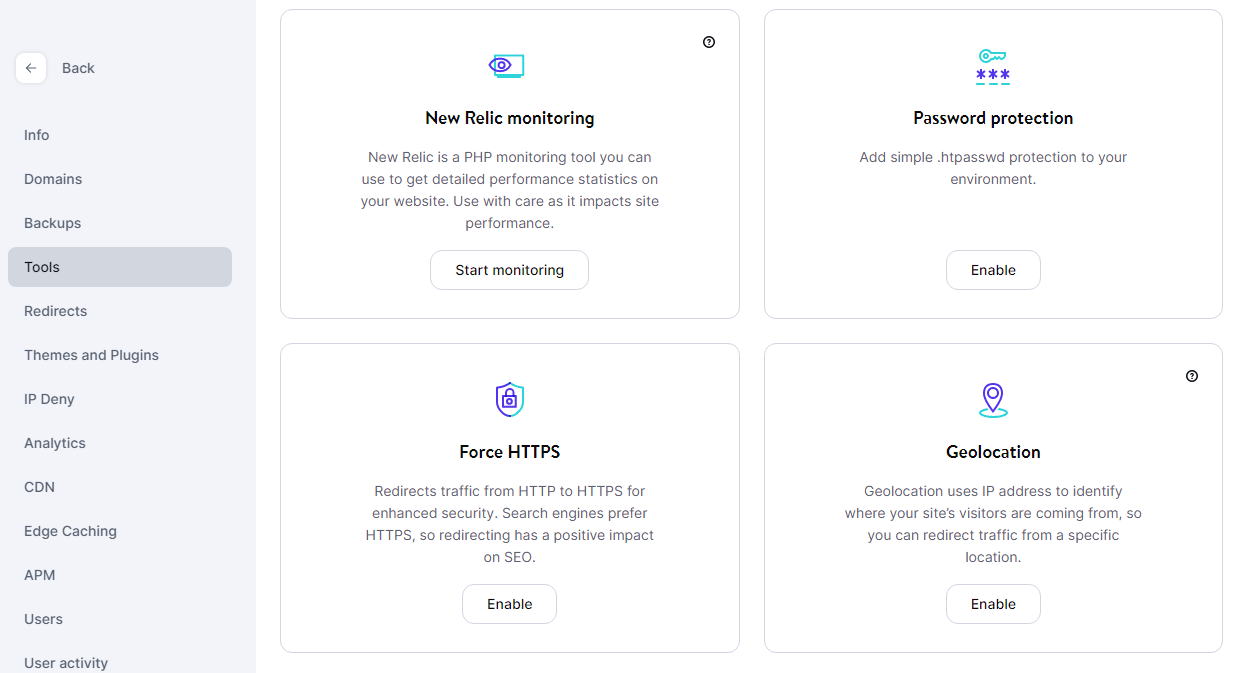
To do this, access MyKinsta, select a website, and go to the Tools tab. Look for the option that says Force HTTPS and click on Enable:
If you’re not using Kinsta, you can either modify your WordPress .htaccess file to redirect HTTP traffic through HTTPS or use a plugin that will do the work for you. If you opt for the latter, we recommend using the Really Simple SSL plugin.
You can check out this article for instructions on how to redirect HTTP to HTTPS on Nginx and Apache, and using the plugin in question. After you configure your website to use HTTPS, you shouldn’t run into the NET::ERR_CLEARTEXT_NOT_PERMITTED error anymore while using Android Webview to navigate it.
Summary
If you run into the NET::ERR_CLEARTEXT_NOT_PERMITTED error in Android, then the app you’re using is trying to access a web page that wants to transmit cleartext or unsecured information. Android blocks apps from doing this in order to avoid compromising user data.
If you’re a regular user, you’ll need to use a browser to visit the website that’s returning the error. However, if you’re the developer behind the app or the website, you can try to modify the AndroidManifest.xml, allowlist the domain through network_security_config.xml, and force your website to use HTTPS.
Kinsta users are much less likely to run into the NET::ERR_CLEARTEXT_NOT_PERMITTED error for their own websites. That’s because we automatically set up SSL certificates for new websites and enable you to redirect traffic through HTTPS with a few simple clicks. Explore our web hosting plans to find your best fit!


