
It’s safe to say that Secure Sockets Layers (SSL) is a good thing for the vast majority of websites in general. Combined with protocols such as HTTPS, they help to protect the sensitive and personal data that flows around the web. However, the “NET::ERR_CERT_REVOKED” error causes your SSL certificate to stop working. This puts an end to your safe and secure connection.
This error can show up in Chrome, Chromium-based browsers, and Firefox under different names. Regardless, fixing the error means looking at a few different methods and toggling different options within your browser’s settings.
Over the course of this article, we’re going to show you how to fix the “NET::ERR_CERT_REVOKED” error. First off, let’s discuss why this error appears in the first place.
What the NET::ERR_CERT_REVOKED Error Is (and Why It Occurs)
SSL certificates are great things. They authenticate secure connections between servers and give peace of mind to both you and your users. In fact, we cover all of the basics of SSL, including why you need it, within the Kinsta knowledge base.
Because SSL is vital to using the web in a safe way, installing a certificate is a piece of cake in most cases. When an error crops up, though, you might not know where to start.
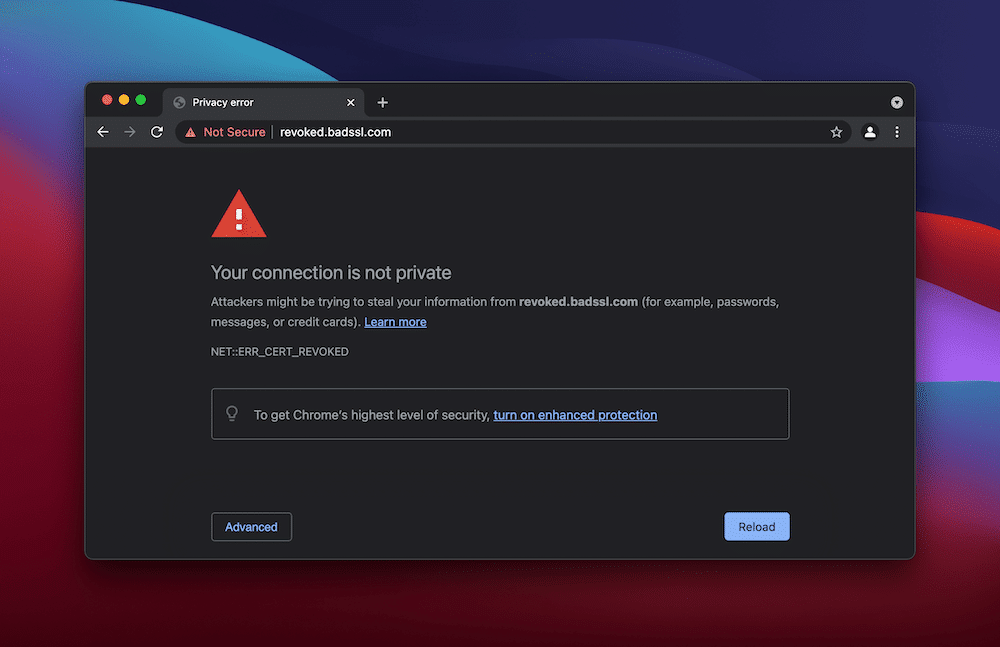
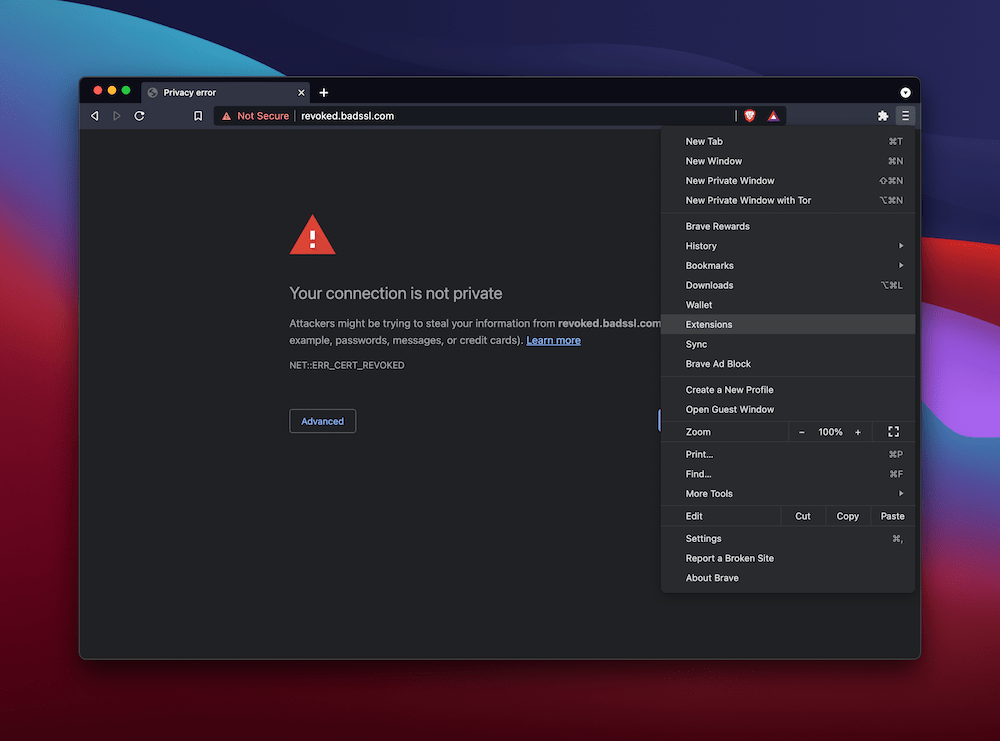
The “NET::ERR_CERT_REVOKED” error looks scary – it’s in all caps, has “ERR” and “REVOKED” in the name, and depending on your browser, it can come with a set of warning signals and other danger copy:
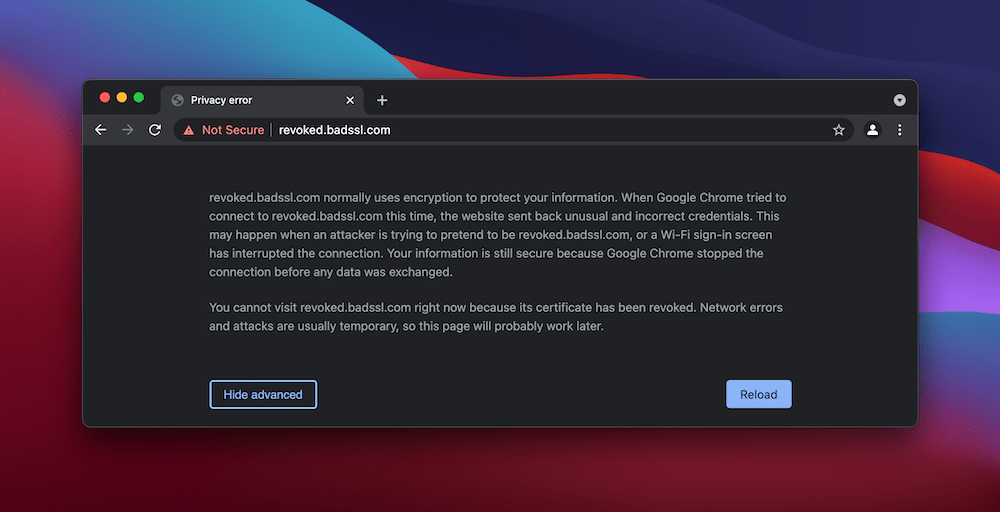
What’s more, you can also open an Advanced panel that describes the error and why it occurs, complete with more scary language:
The crux is that the SSL certificate for the site you’re trying to browse to is non-existent. To be more accurate, a certificate authority has revoked it.
As for why this is, there’s only one reason that’s a real cause for concern: Your certificate security keys have been compromised.
Other reasons are much more mundane:
- The site owner may have asked for the certificate to be revoked.
- There could be a network or Domain Name Server (DNS) issue.
- The certificate authority may find that the SSL certificate is issued to the wrong site.
In most cases, this is a server-side error. In other words, there’s not a lot you can do on the front end. We’ll cover this aspect later. Before we do, though, let’s talk about Firefox.
The NET::ERR_CERT_REVOKED Error In Firefox
The Firefox browser can also show you the “NET::ERR_CERT_REVOKED” error, although not with the same name. Instead, you’ll see “SEC_ERROR_REVOKED_CERTIFICATE” instead.
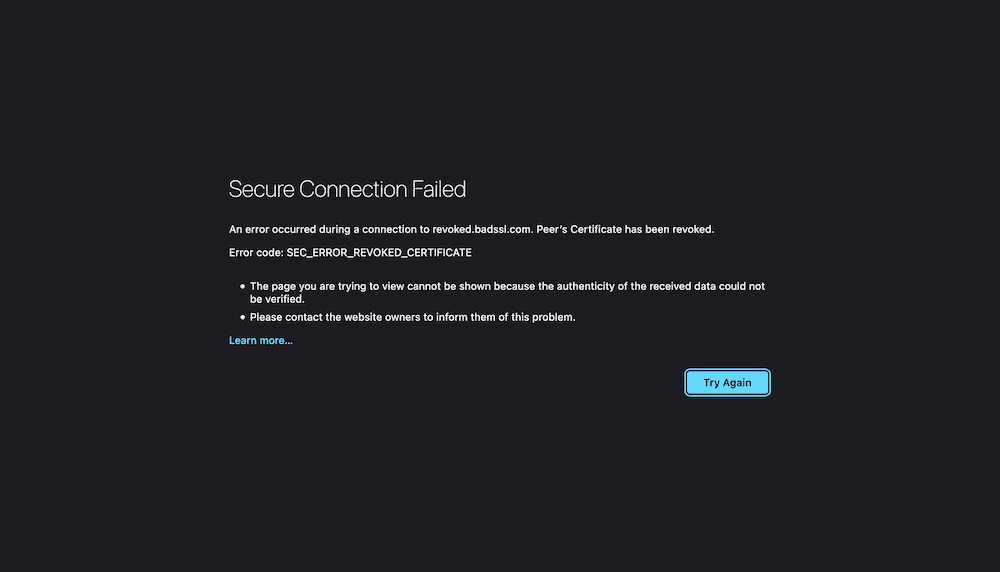
This looks “nicer” than the warning you see in other browsers, though there’s no right or wrong presentation.
In short, the error is exactly the same in Brave, Chrome, Edge, and other browsers. You handle it in the same way regardless of what tools you use. Let’s get into that part next.
How To Fix the NET::ERR_CERT_REVOKED Error (8 Methods)
Over the next few sections, we’re going to show you how to fix the “NET::ERR_CERT_REVOKED” error for a bunch of different browsers and systems. However, bear in mind that as we’ve suggested, there might not be anything an end-user can do as this is a server-side problem.
Before we get into the different systems, let’s touch on how an end-user can initiate a fix through the site owner.
Before You Begin: Contact the Site Owner
Given that the “NET::ERR_CERT_REVOKED” error is an internal site issue, it makes sense to contact the site owner in question. They might not know about the error or they could shed some light on the situation.
The best approach is to find a support channel or general information email address for the site. You could also reach out through social media if they use those channels for communication.
We suggest you take a screenshot of the page and send this to the site owner along with the domain you’re trying to get to. You might not have the capability to do anything else from your end, but these details will help the site owner check out whether the SSL certificate is verified.
Regardless, once you’ve let the site owner know, your job is done. From there, you might want to try a few of the fixes in the following sections for your operating system (OS) and/or browser.
While the “NET::ERR_CERT_REVOKED” error is often a server-side problem, there may be a cause on the client-side too.
1. A macOS-Specific Fix
First off, you might experience the “NET::ERR_CERT_REVOKED” error on your Mac. While trying the browser-based options is a good idea, there’s also something you can do within the OS itself.
You’ll need to open Keychain Access through your preferred approach – either through Spotlight or the Applications > Utilities folder. When it’s open, access the login keychain:
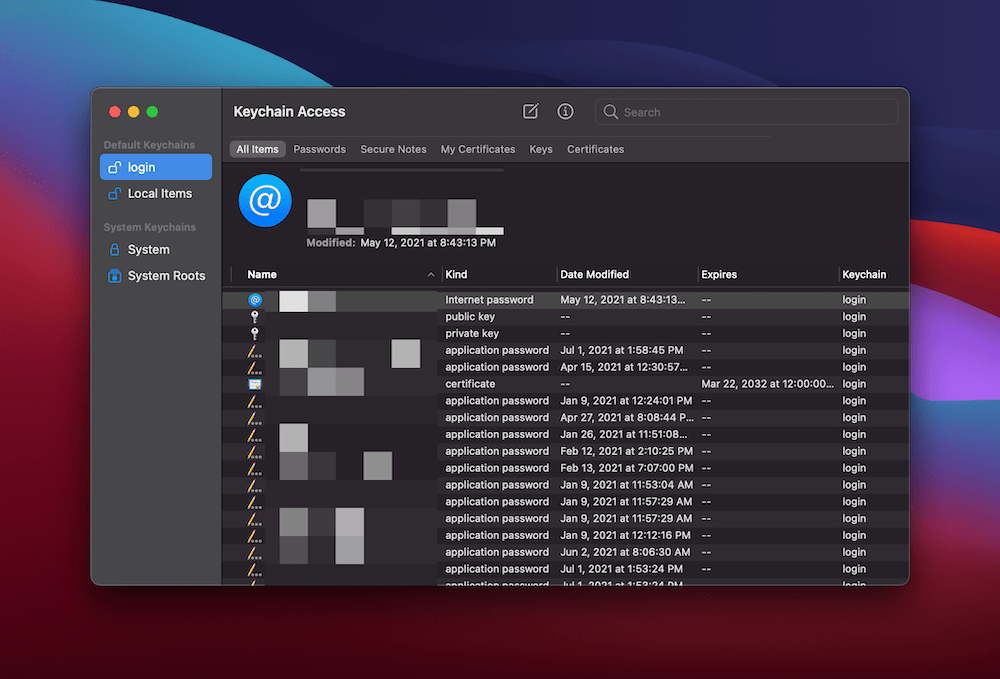
From here, use the search bar to find the following keys:
- UTN DATACorp SGC
- AddTrust External CA Root
If they exist, delete them, close Keychain Access, and restart your browser. This might fix the issue, although if not, one of the below tips might.
2. Change Your System’s Date and Time
One of the most frequent reasons for a client-server miscommunication is that the date and time aren’t in sync. It’s such a simple issue that shouldn’t be a problem under normal circumstances, due to automatic syncing.
Still, it can happen, and can also be a cause for the “NET::ERR_CERT_REVOKED” error. Of course, you can’t manipulate the server’s time and date, but you can make sure yours is accurate.
For the Mac, head to the System Preferences > Date & Time panel. You may need to click the lock to make changes here:

In the vast majority of cases, the Set date and time automatically box will be checked. As such, there might not be anything for you to do. Still, it’s good to check that the date and time are both accurate and adjust them if not.
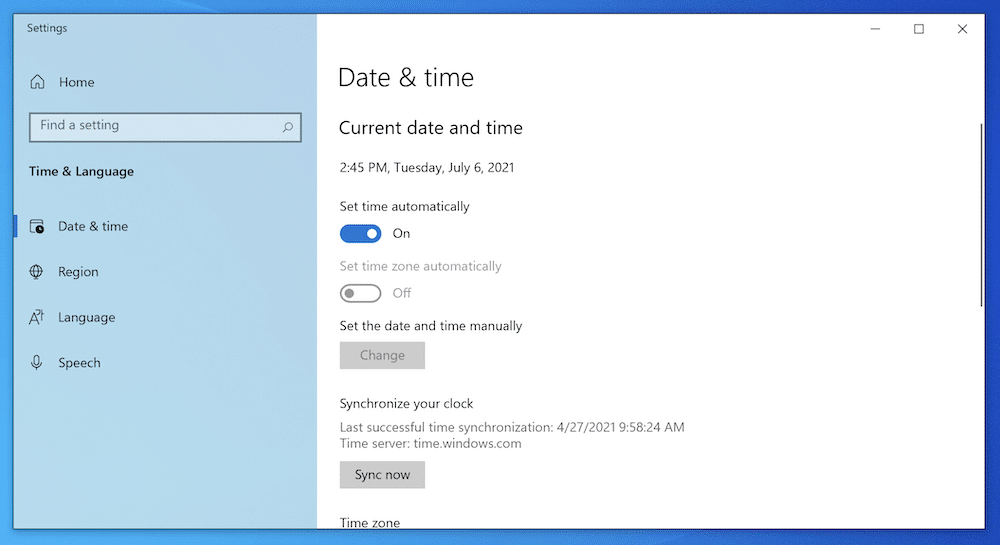
With Windows, you’ll need to open the Date & time settings. We’re using the start menu search bar to find it quickly:
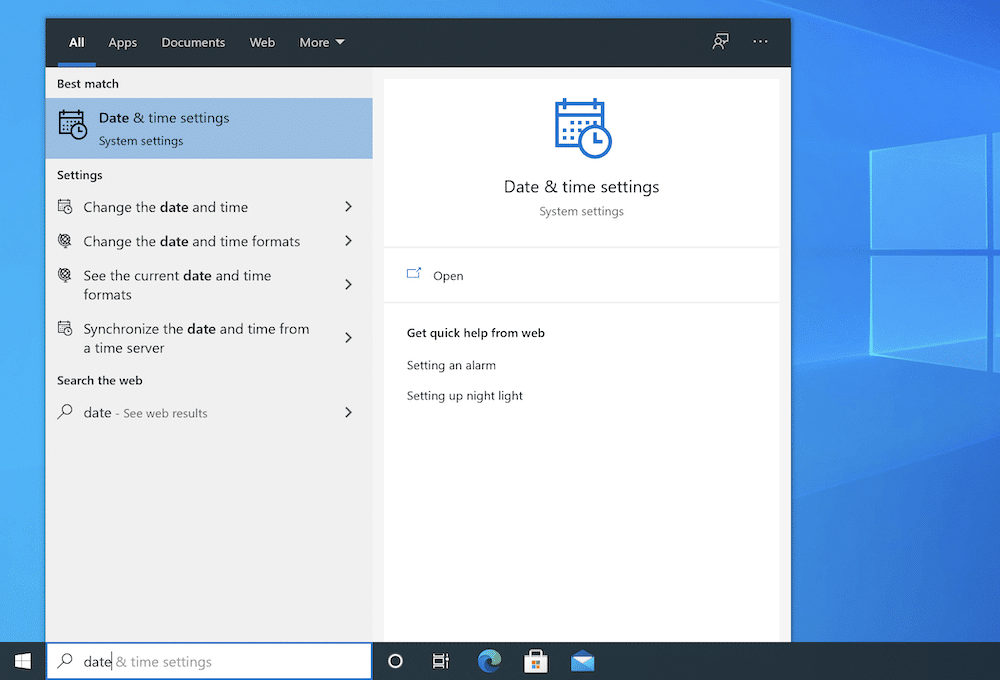
Again, the Set time automatically option will often be On by default. Still, check all of the settings here, and assess whether they correlate with an accurate time and date:
Once you’re done, close the window and restart your computer. Of course, you’ll want to finish by checking the site you want to browse to, as you will for every solution here.
3. Disable Your Antivirus and/or Firewall
While antivirus software and firewalls do a great job of protecting you and your data, there is a downside. In some situations, you might find these tools do too good a job, and block some elements you need to carry out your tasks.
Both antivirus software and firewalls can cause the “NET::ERR_CERT_REVOKED” error, so it’s a good idea to disable them on a temporary basis to ensure they aren’t having an impact.
The steps for switching off your antivirus software are going to be specific to your chosen product. As such, we can’t give you a “one-size-fits-all” approach. That said, there will often be a control panel with a marked button or switch to turn off or exit your software.
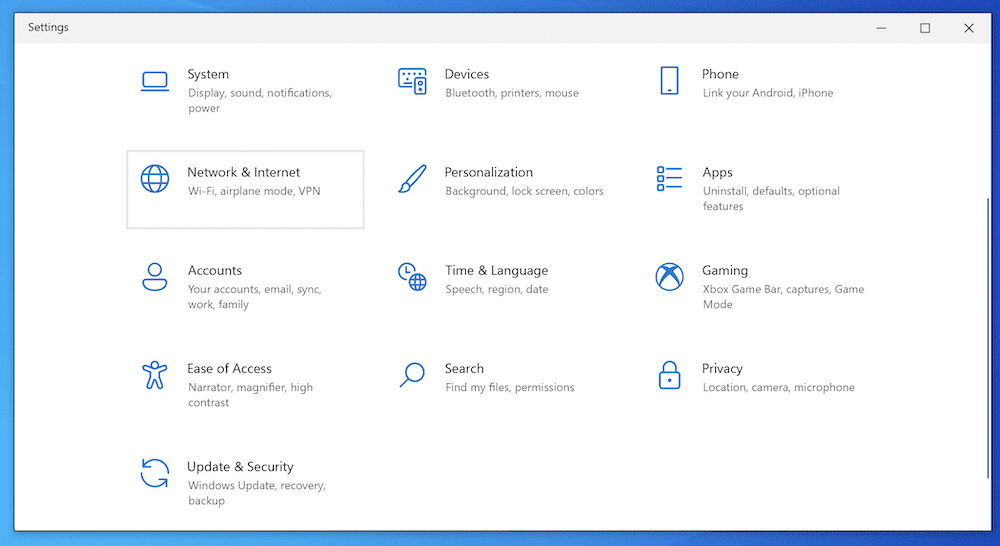
When it comes to your firewall, you will need to go into a dedicated settings panel. On Windows, you’ll want to visit the Settings > Network & Internet screen:
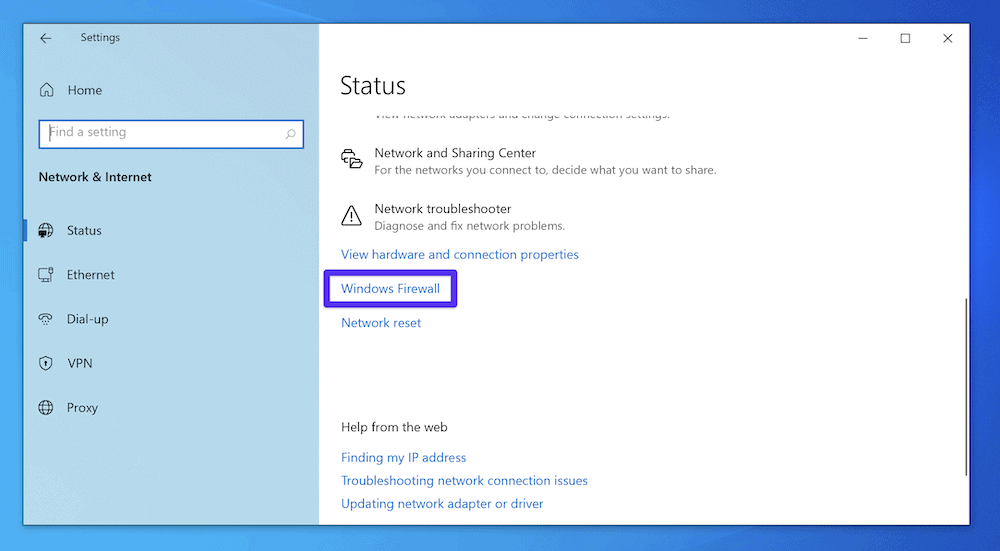
From here, scroll down and find the Windows Firewall link:
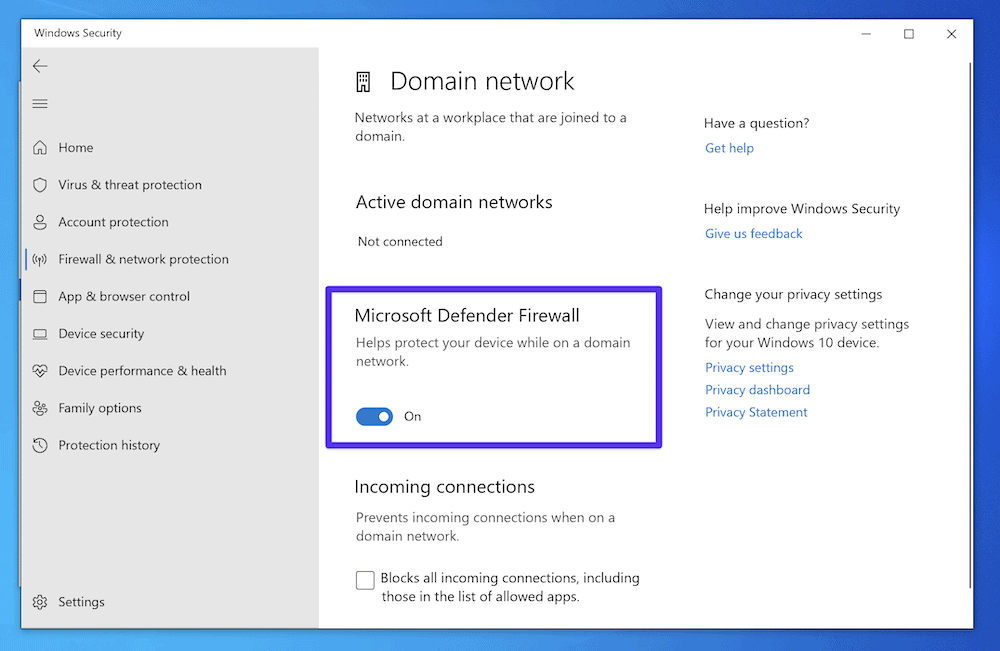
Clicking this opens the Windows Security settings specific to your Firewall & network protection. Here, you’ll see three different firewalls for domain, private, and public networks:
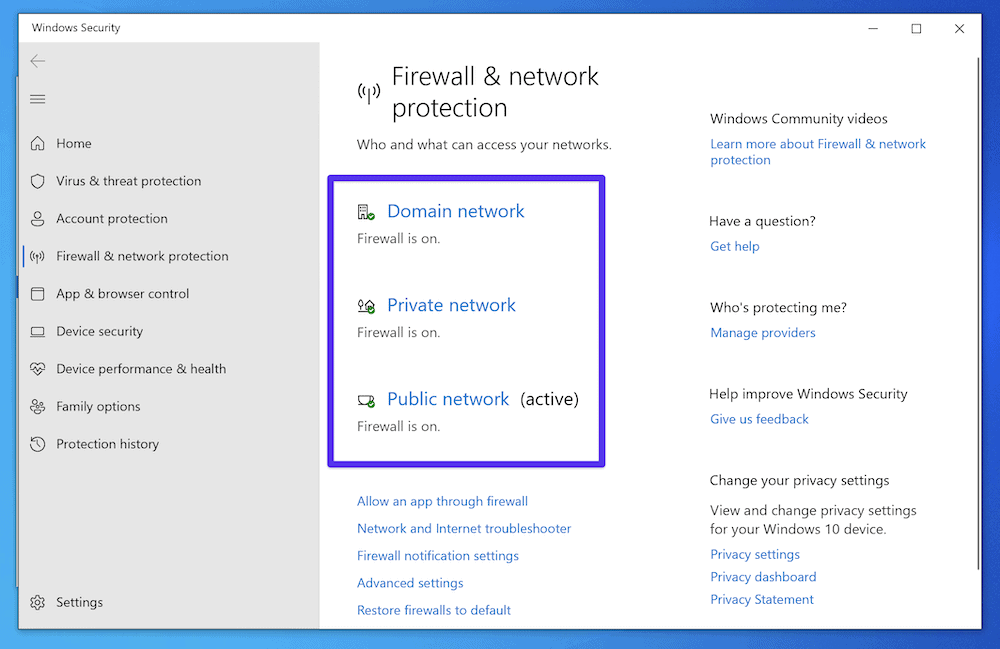
For each of these, click through and toggle the firewall off:
Once you’re finished, try to replicate the “NET::ERR_CERT_REVOKED” error. For Mac, you’ll want to go to the System Preferences > Security & Privacy page, then to the Firewall tab:
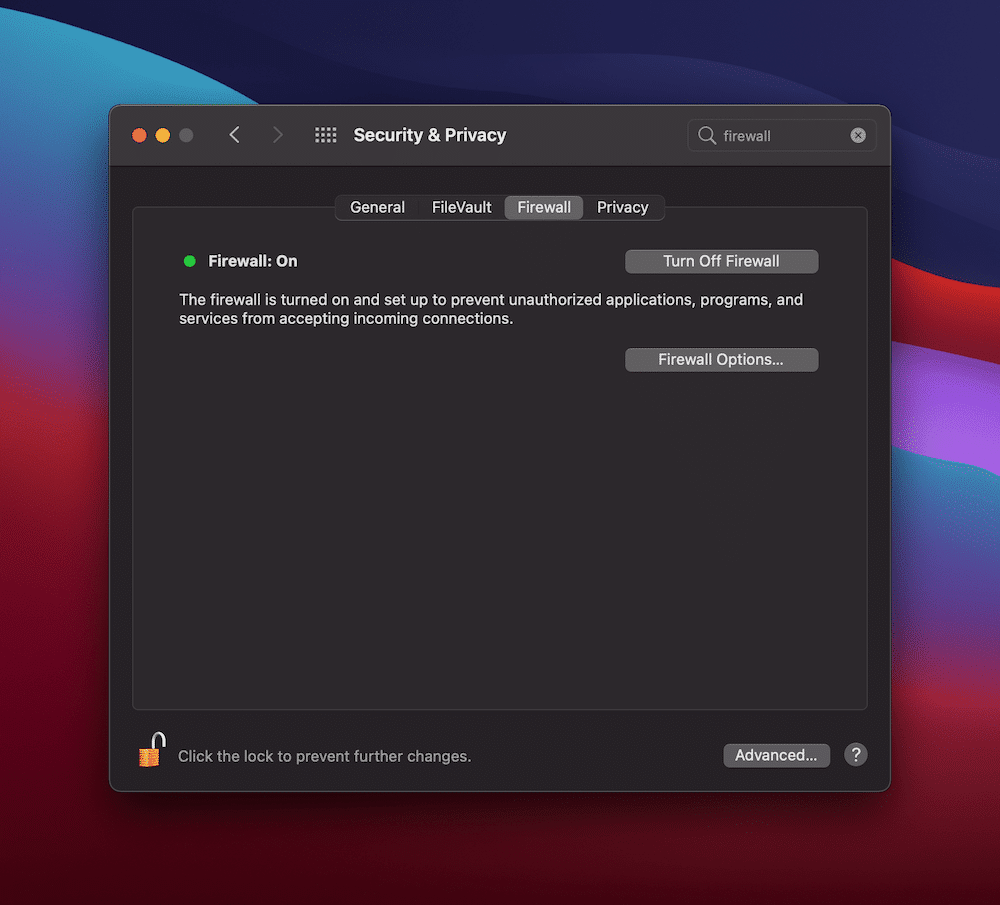
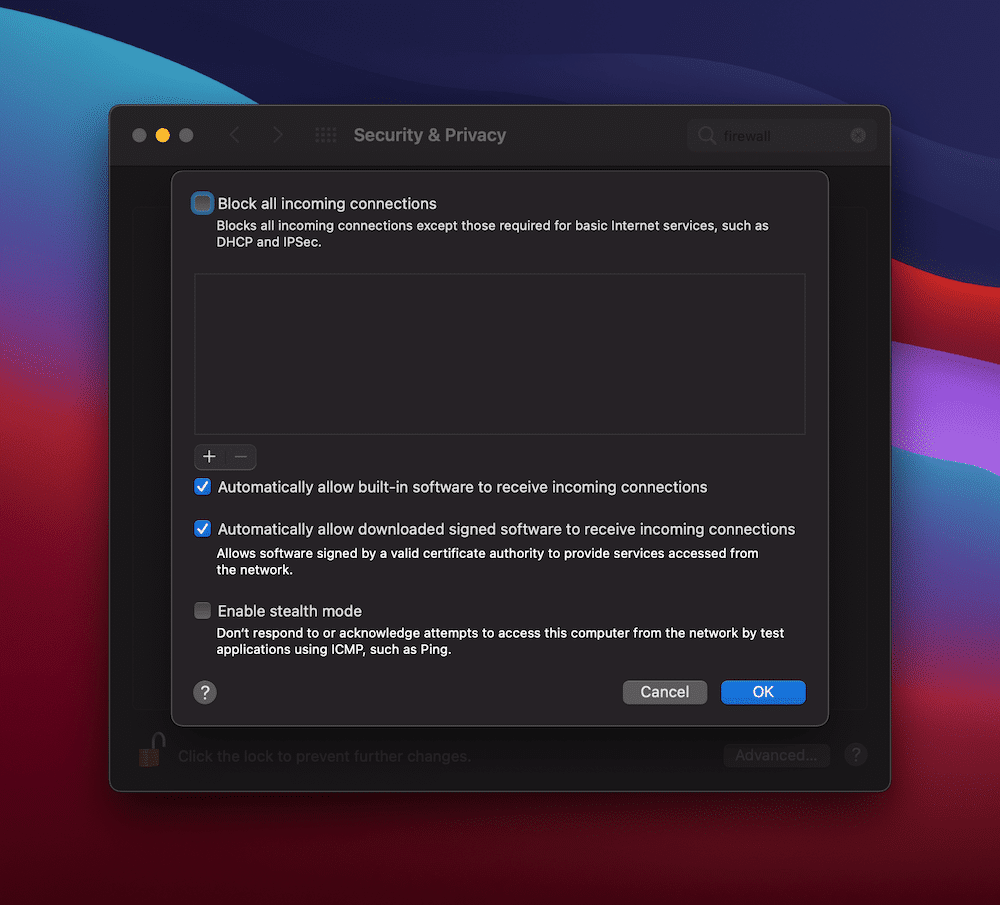
The simplest option is to turn off the firewall using the button. You can also check out the Firewall Options screen to see if anything sticks out:
As before, restart your computer and check the internet again. If you still have no joy, you can turn both your antivirus and firewall back on, and look to other areas.
4. Disable Your Virtual Private Network (VPN) or Proxy
Much like your antivirus and firewall, your VPN and proxy settings can also act up and show the “NET::ERR_CERT_REVOKED” error. It could be that you use neither of these — if so, feel free to skip this method.
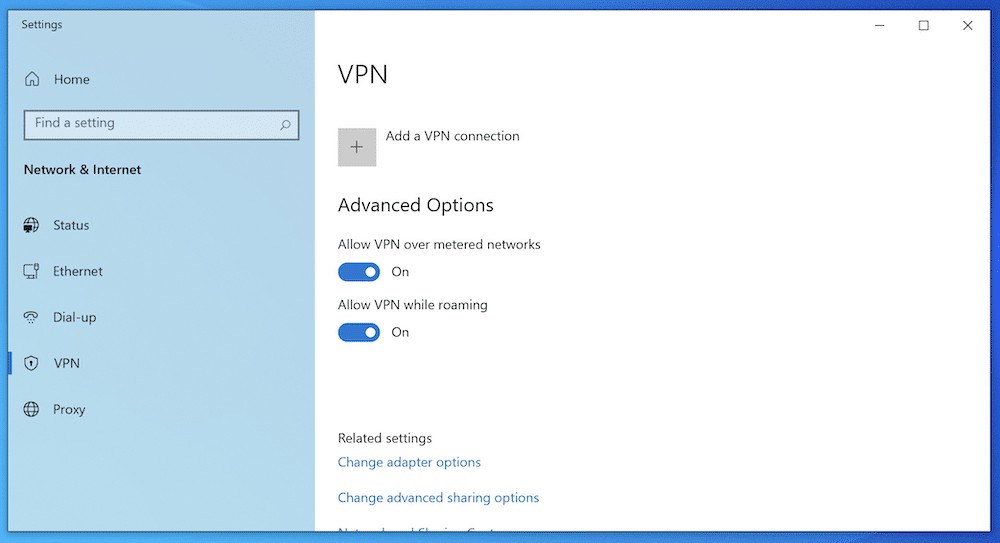
For your VPN, the shut-off is a product-specific setting (similar to your antivirus software). As such, there’s no setting on macOS to help you. On Windows, you might have good fortune in toggling the settings within the Settings > Network & Internet > VPN page:
As for proxies, you can also find this screen on Windows in the Network & Internet settings:
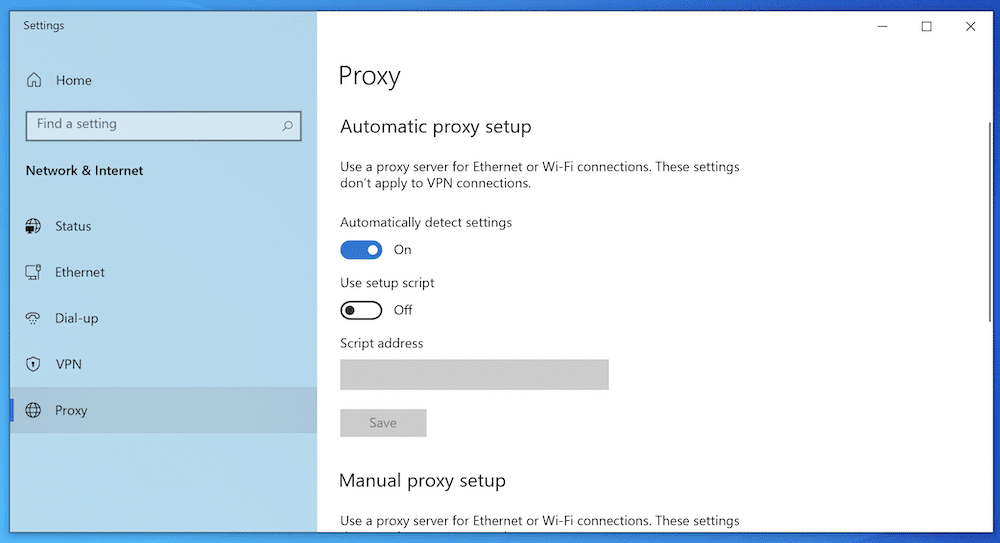
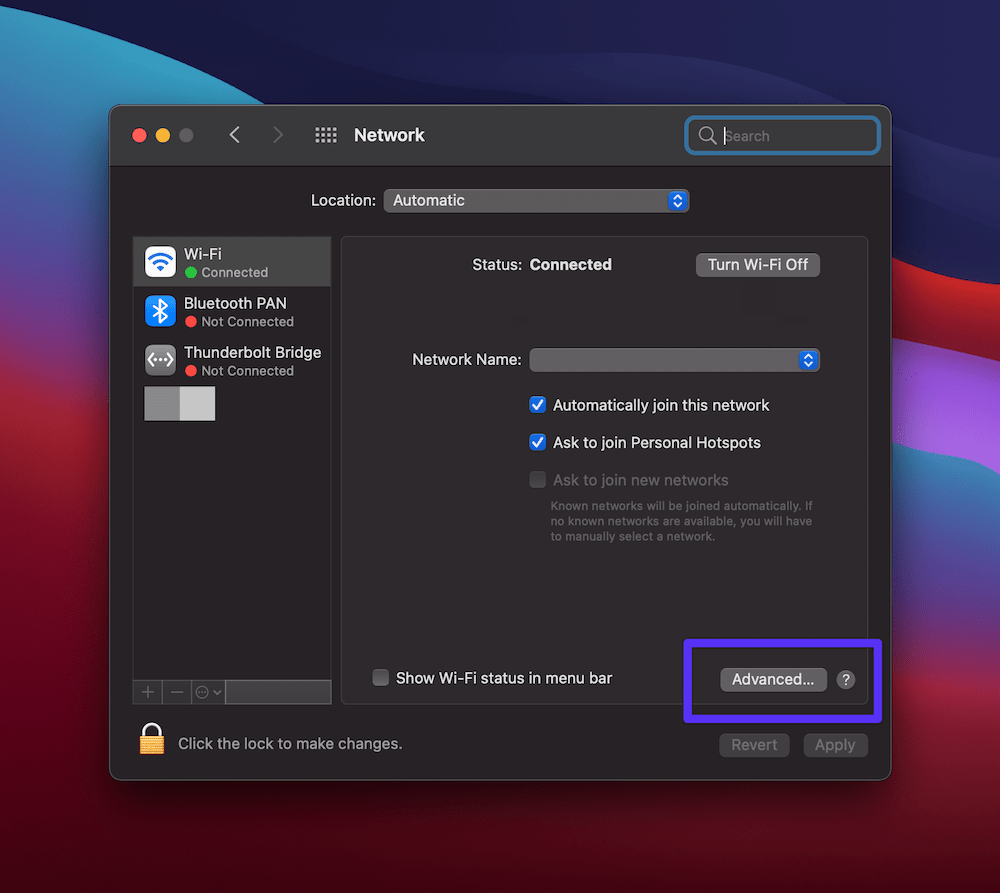
Once you toggle the Automatically detect settings switch, check whether you get the “NET::ERR_CERT_REVOKED” error. For macOS, head to the System Preferences > Network > Advanced screen:
Here, click the Proxies tab, and uncheck any of the proxy settings you see on this screen:
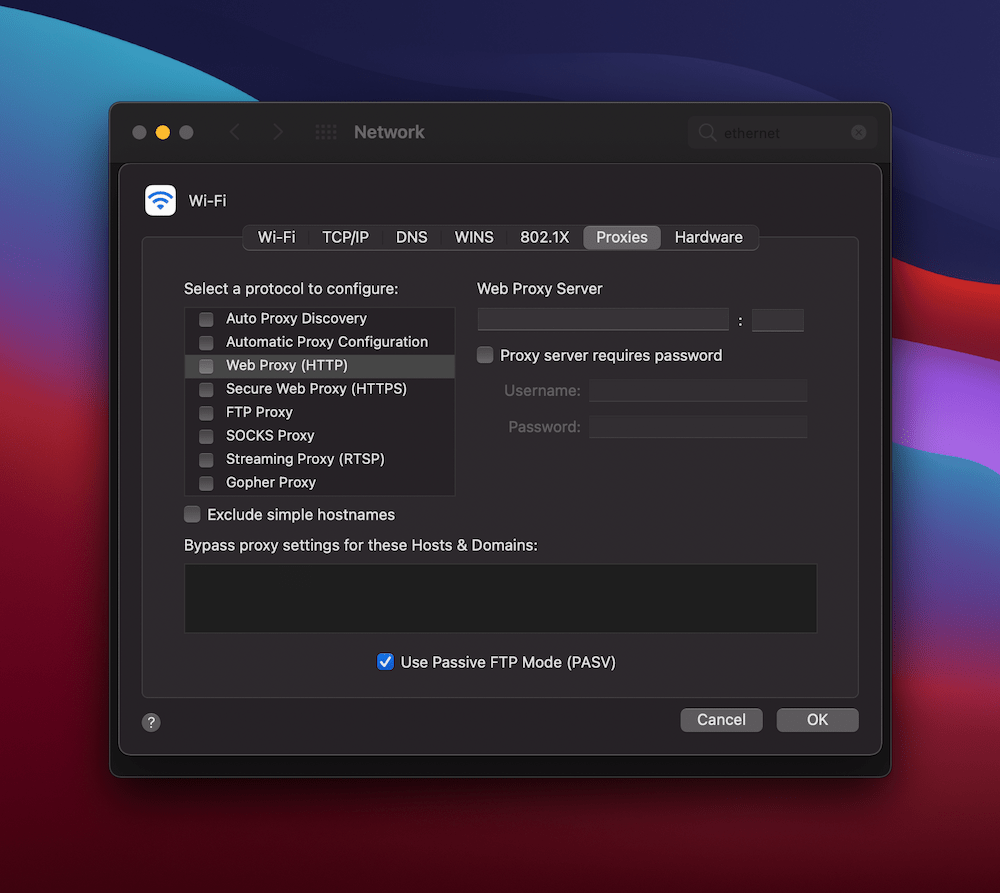
Again, check for the “NET::ERR_CERT_REVOKED” error, and move on if you still get it.
5. Flush Your DNS and Reset the TCP/IP Connection
Much like a good cache flushing can do wonders for your browser, the same can be said for your DNS too. We recognize that flushing the DNS can often fix problems such as the “NET::ERR_CERT_REVOKED” error. As such, we have an article on the subject that covers multiple browsers and platforms.
Our advice is to do this, check for the error, then come back to reset your TCP/IP connection. Of course, this dictates how packets of information get around the web. Resetting this can fix a multitude of errors.
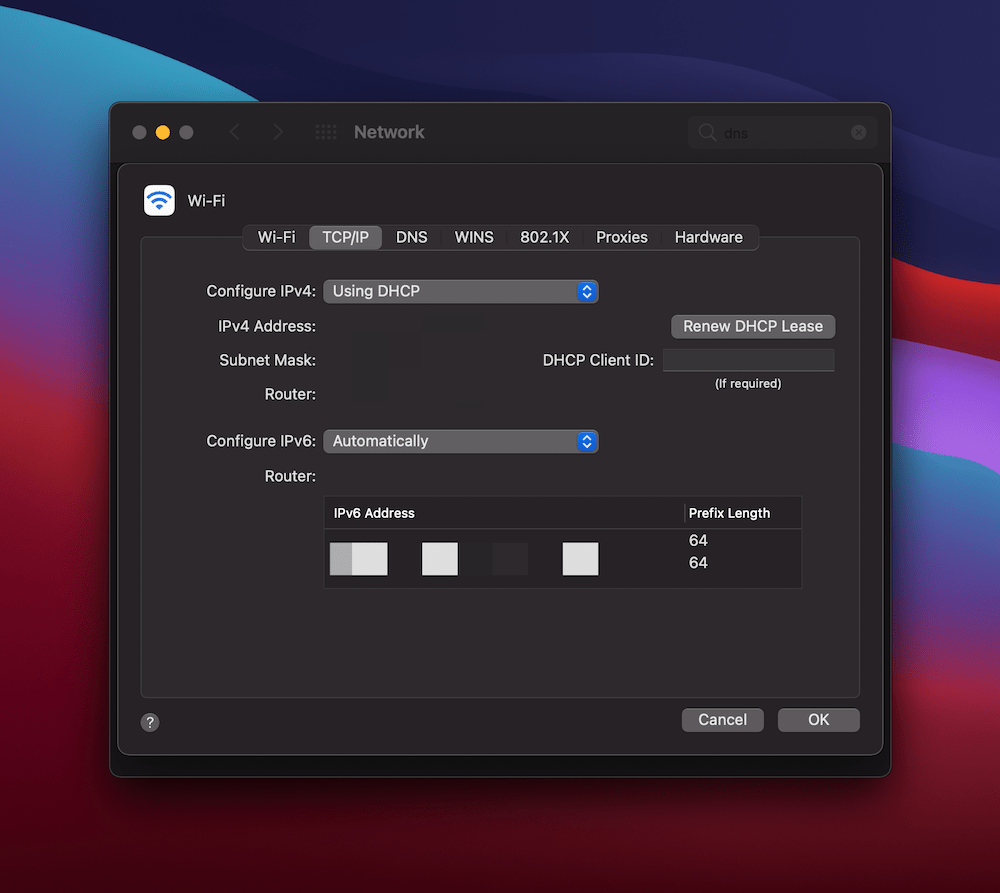
Apple refers to this under the Network tab, under the Advanced screen of your active and connected internet network. Once you’re here, click the TCP/IP tab, and click the Renew DCHP Lease button:
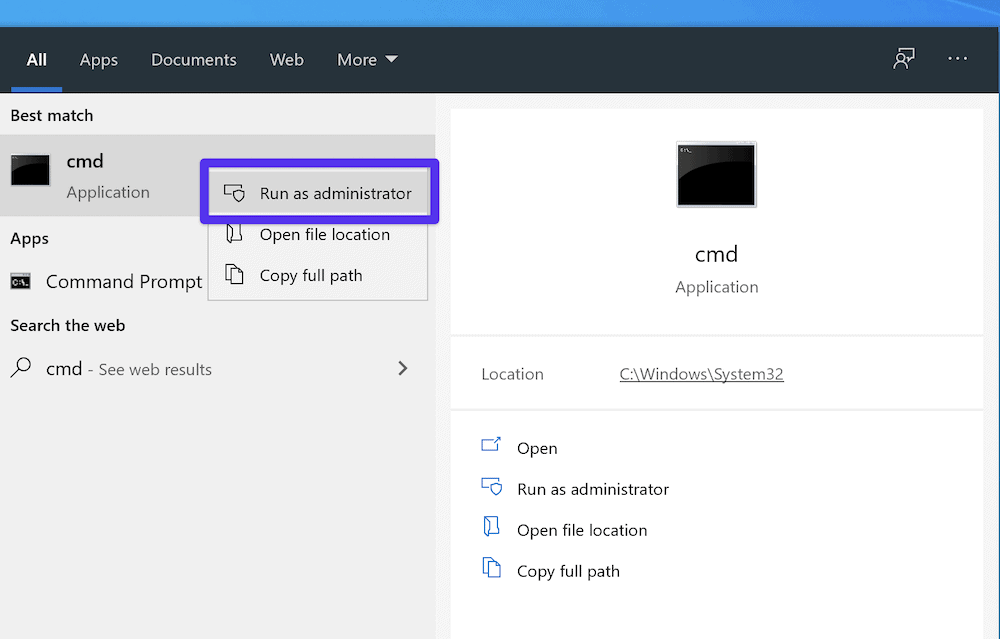
For Windows, you’ll need to open your favorite command prompt app via the Run as administrator option:
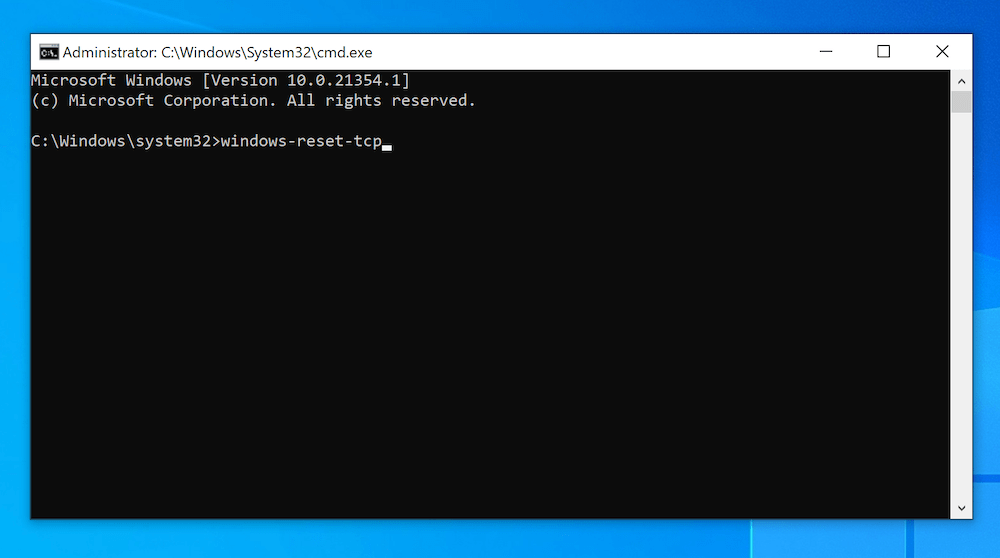
When the command prompt opens, type netsh int ip reset and press Enter:
From here, check again for the error before moving on.
6. Disable Your Browser Extensions
When a WordPress error occurs, one common piece of advice is to disable your plugins and re-enable them one by one. It’s the same for your browser extensions. Most browsers let you install as many extensions as you need, although some don’t always play nicely with other protocols.
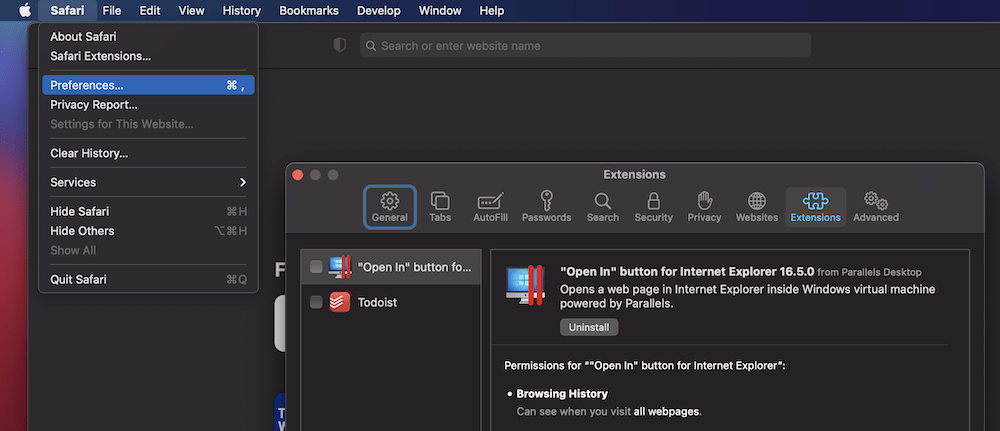
The process for this is different depending on whether you use Safari, Firefox, or a Chromium-based browser such as Brave, Edge, or Chrome. You can find Safari’s Extensions settings through the dedicated Preferences pane:
Click the Uninstall button for every extension, then check for the “NET::ERR_CERT_REVOKED” error.
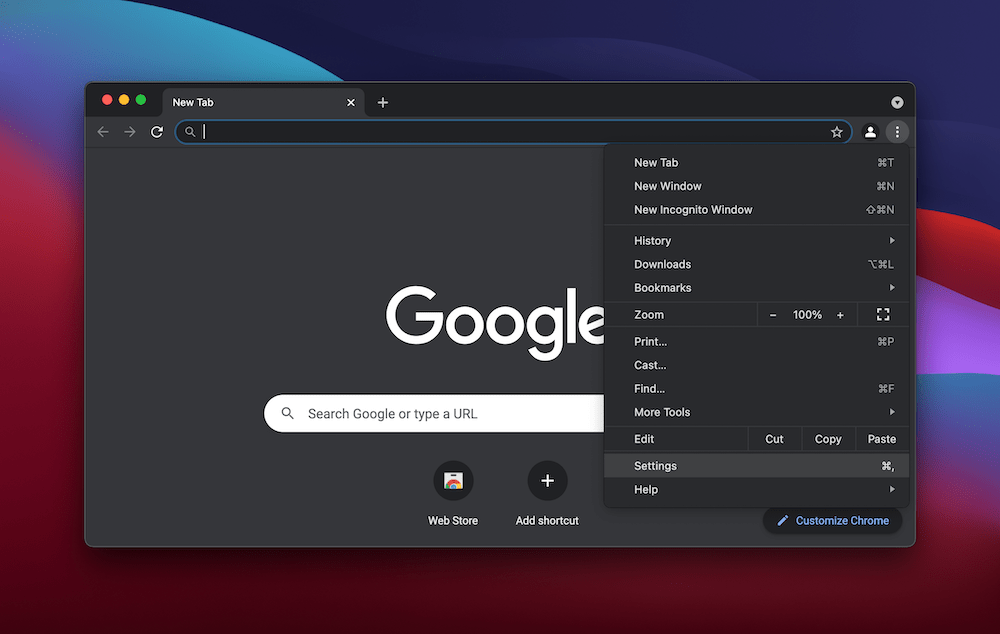
In Google Chrome, you head to the Settings screen:
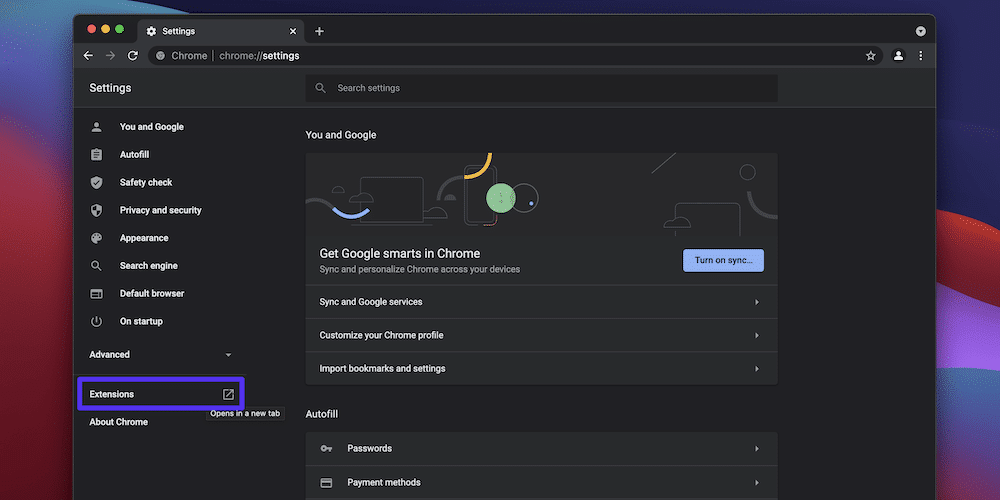
From here, scroll down and look for the Extensions link on the left-hand side:
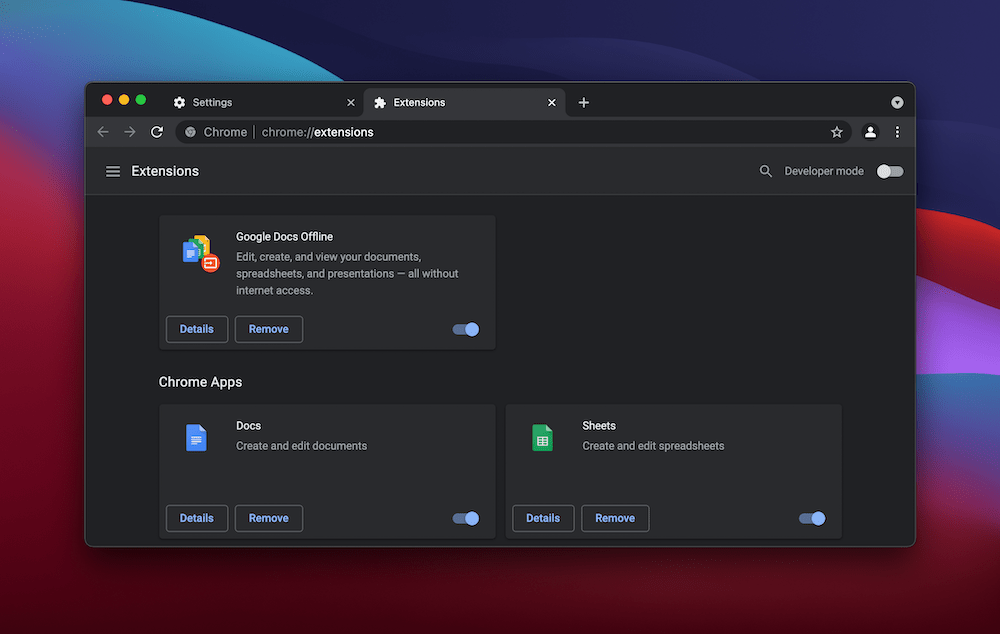
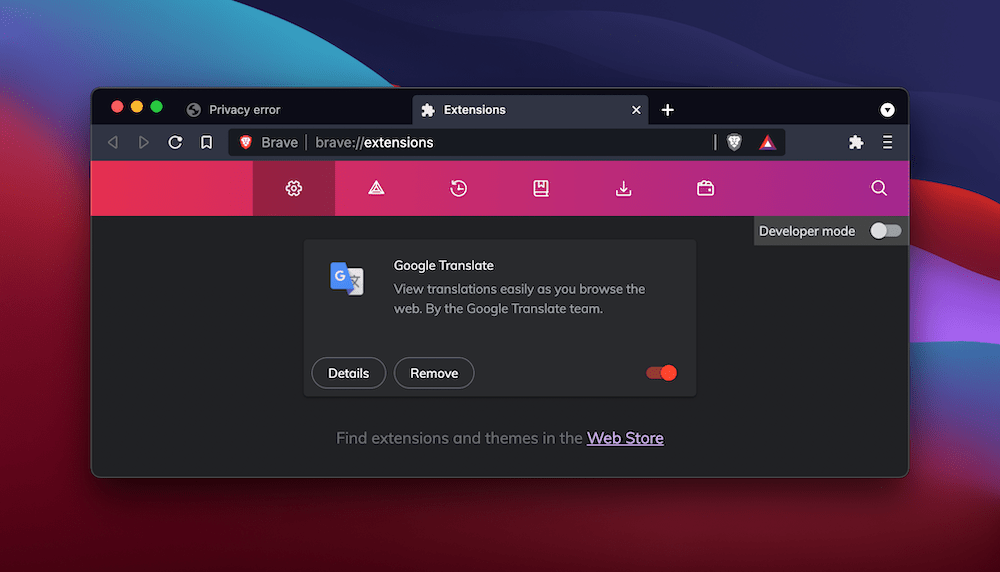
This will bring you to the Extensions screen. Here, click the toggle switches against all extensions, then re-enable them one by one, re-checking for the error each time:
For Brave and Microsoft Edge, there’s a direct link to the Extensions page within the Settings dropdown menu:
The layout of the page, and process to disable extensions is the same as Chrome:
In Firefox, extensions are Add-ons. You access them from the Settings dropdown menu, under Add-ons and Themes:
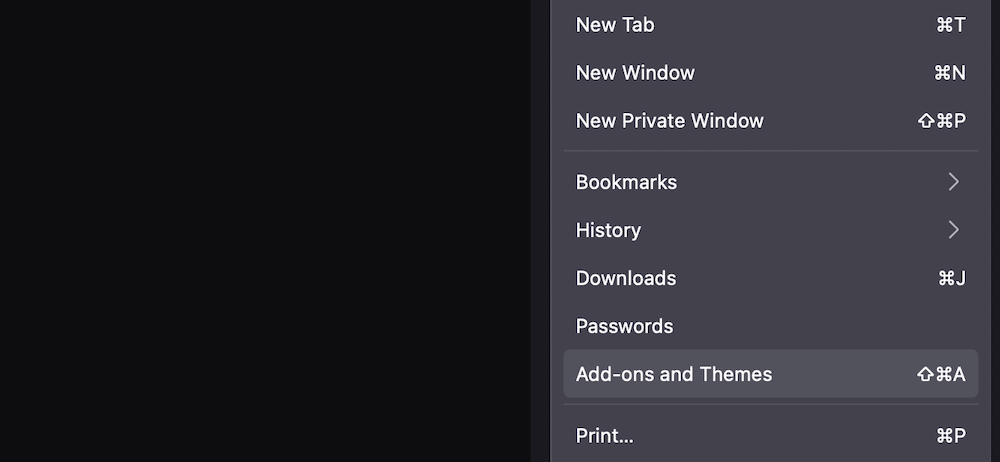
Once you open the screen, Firefox reverts to the “extensions” definition. Regardless, the process (again) is to toggle the add-ons/extensions using the dedicated switch:
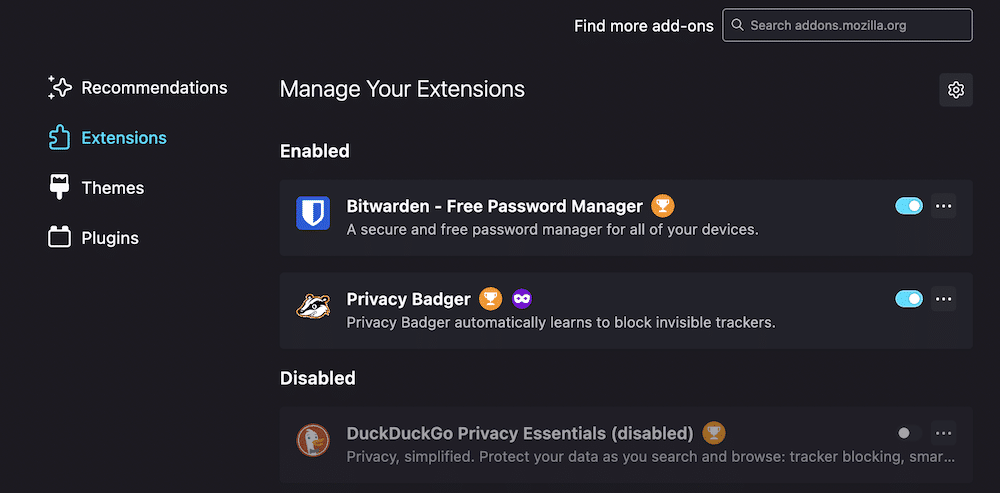
If the “NET::ERR_CERT_REVOKED” error goes away, enable each extension in turn and check your browser. If one extension triggers the error, you’ll know to remove it. Of course, you may want to replace it or contact the developer for a fix if it’s vital to your workflow.
7. Boot Up in Safe Mode or Clean Boot
A more extreme version of disabling extensions is to disable anything on your computer that could interfere with your internet connection. To do this, you’ll want to boot up in your OS’ safe mode or clean boot mode.
We have instructions for doing this for both Windows and macOS in our post on fixing the “DNS Not Responding” error. However, this doesn’t include instructions for Apple Silicon machines.
The main difference for Apple Silicon devices is that you’ll need to power down your Mac and restart it while pressing the power button. This will bring up the Startup Options window, where you’ll follow the same instructions as in the DNS article we just mentioned.
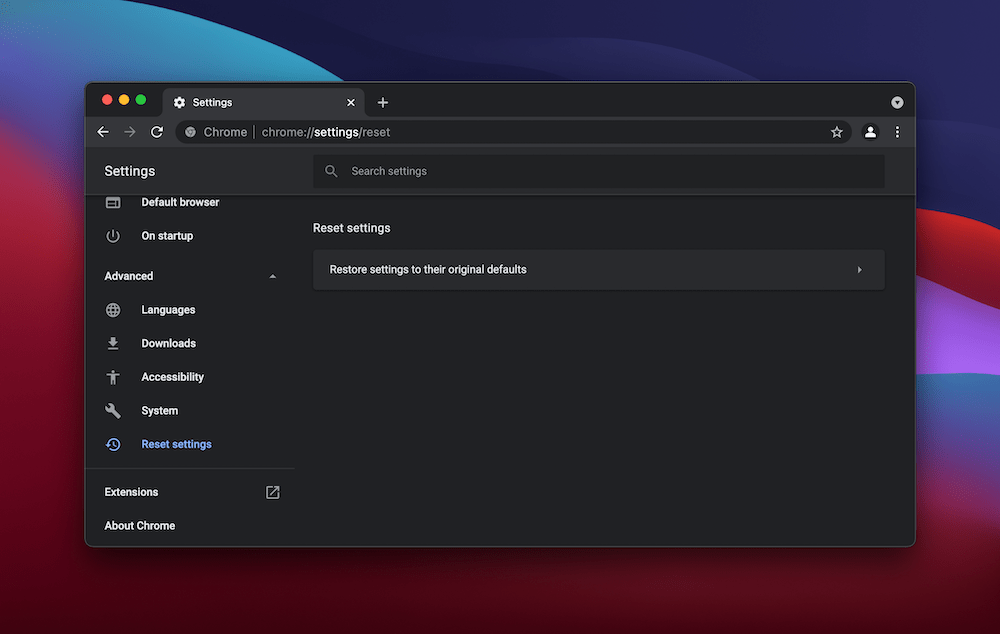
8. Reset Your Browser
Sometimes, the best approach is to start again from the bottom. In other words, you might need to reset your browser. For Chromium-based browsers, this is a piece of cake. While the way to get there is slightly different for each version (i.e. Chrome, Edge, and Brave), it’s similar enough.
You’ll want to open the Settings dropdown menu, then scroll down this page until you find an Advanced settings menu. This is how it’s defined in Chrome:
Brave uses “Additional Settings” instead:
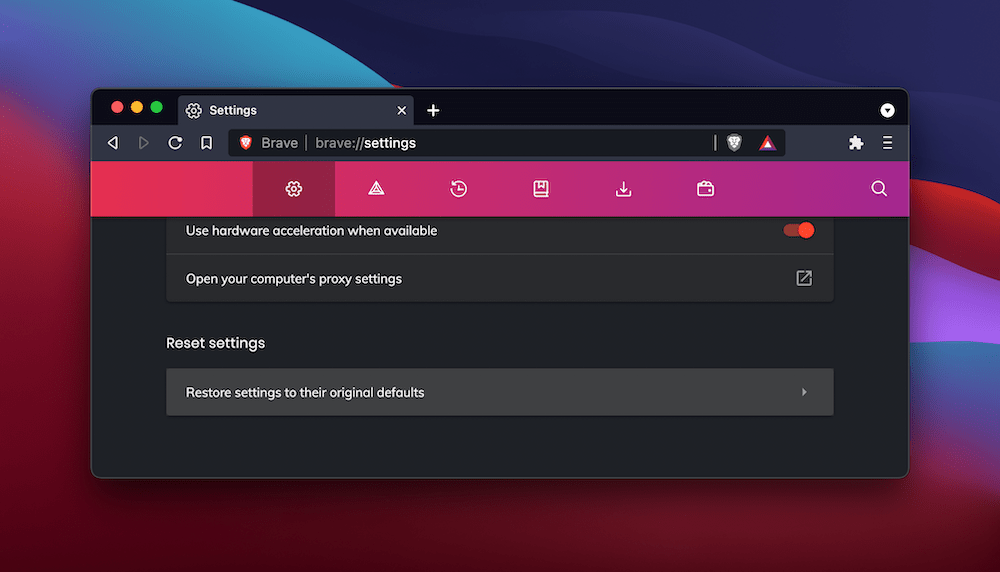
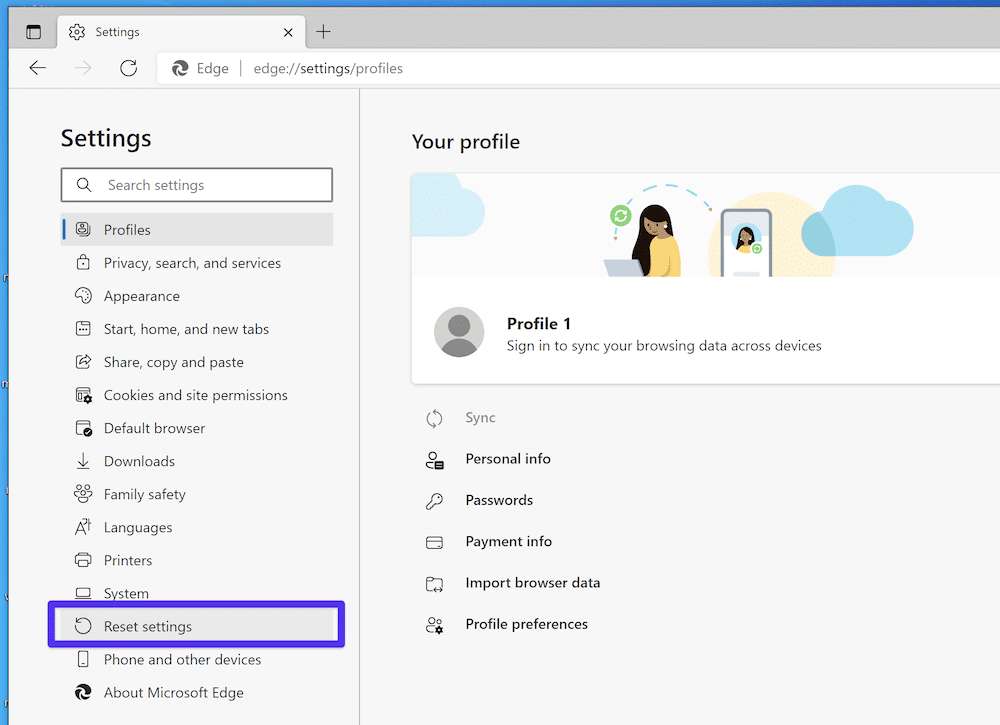
…while Edge has a direct link in the main Settings menu:
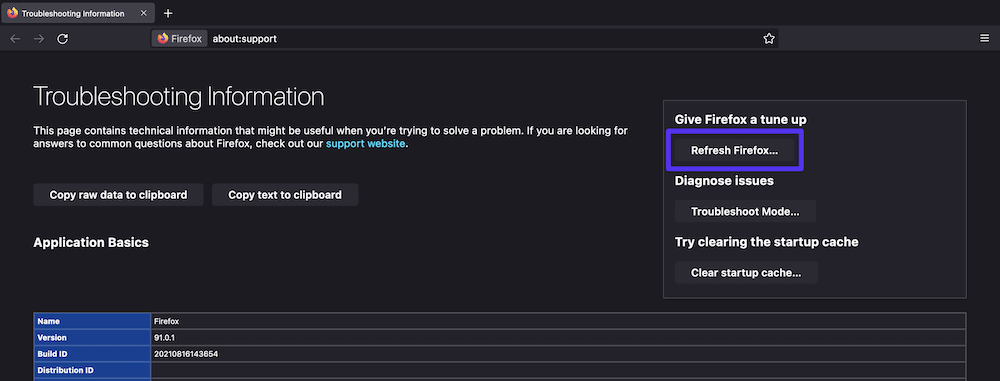
Firefox has a dedicated Troubleshooting page in its settings. To find it, enter about:support in the navigation bar and click the Refresh Firefox button on the right-hand side:
For Safari, there is no dedicated rest button, which is frustrating. Instead, you’ll have to clear the browser’s individual components using the Terminal. If you need a primer, we cover how to use the Terminal within our piece on flushing the DNS cache.
Once you have a terminal window open, you’ll want to run each of the following commands one at a time:
mv ~/Library/Safari ~/Desktop/Safari-`date +%Y%m%d%H%M%S`;

rm -Rf ~/Library/Cache/*;

rm -Rf ~/Library/Caches/Apple\ -\ Safari\ -\ Safari\ Extensions\ Gallery;

rm -Rf ~/Library/Caches/Metadata/Safari;

rm -Rf ~/Library/Caches/com.apple.Safari;

rm -Rf ~/Library/Caches/com.apple.WebKit.PluginProcess;

rm -Rf ~/Library/Cookies/*;

rm -Rf ~/Library/Cookies/Cookies.binarycookies;

rm -Rf ~/Library/Preferences/Apple\ -\ Safari\ -\ Safari\ Extensions\ Gallery;

rm -Rf ~/Library/Preferences/com.apple.Safari.LSSharedFileList.plist;

rm -Rf ~/Library/Preferences/com.apple.Safari.RSS.plist;

rm -Rf ~/Library/Preferences/com.apple.Safari.plist;

rm -Rf ~/Library/Preferences/com.apple.WebFoundation.plist;

rm -Rf ~/Library/Preferences/com.apple.WebKit.PluginHost.plist;

rm -Rf ~/Library/Preferences/com.apple.WebKit.PluginProcess.plist;

rm -Rf ~/Library/PubSub/Database;

rm -Rf ~/Library/Safari/*;

rm -Rf ~/Library/Safari/Bookmarks.plist;

rm -Rf ~/Library/Saved\ Application\ State/com.apple.Safari.savedState;
This will refresh Safari and let you test whether the “NET::ERR_CERT_REVOKED” error is gone. You may have to enter your administrator password or otherwise confirm that the command is good to run.
You might also want to consider an extension such as Simple Refresh for Safari, but this is not at all mandatory.
Summary
SSL and HTTPS are designed to protect information as it shuttles around the web. To do this, an authority issues you a certificate. If it can give you one, it can also revoke one too. The point of the “NET::ERR_CERT_REVOKED” error is that the SSL certificate has been revoked for some reason.
It’s not as scary as it sounds, and it’s often the case that there’s a network or issuing problem that’s causing the error. While it’s primarily a server-side issue, there are client-side fixes in some cases.
In this article, we’ve run through a few for some of the major browsers available. This involves getting into your settings and changing elements such as the date and time, flushing caches, disabling antivirus and VPNs, and more.
Kinsta is known for stellar uptime and rock-solid stability. Even so, our support team is on hand round-the-clock to help you with your site when you need it. If you’re a Kinsta customer, you can contact us through the MyKinsta dashboard and get back to work in no time!


