
Cron is a Unix/Linux utility that is typically used to schedule commands or a script on a web server that runs in the background. A cron job is the task itself, which is used to schedule tasks at periodic fixed times, dates, or intervals. Typically these involve repetitive tasks that are automated to save time. In WordPress, this is handled by WP-Cron, which is used to simulate a system cron.
Some examples of a WordPress cron job might involve scheduling a post to publish or a backup plugin running on a predefined schedule. Today we are going to dive into how to easily create, modify, and run a WordPress cron job.
How To Set up a Cron Job In WordPress
It is important to note that WP-Cron is slightly different than a system cron and they each have their own pros and cons. For example, WP-Cron relies entirely on intervals, whereas a system cron relies on specific times. A WP-Cron also only works when the page is loaded (back-end or front-end), which could be less reliable. The default intervals provided by WordPress are hourly, twice daily, and daily.
To schedule WP-Cron events you have to create custom hooks. We recommend checking out the official WordPress plugin handbook which has an amazing guide on scheduling WP Cron events. If you are looking for an alternative way to set up a system cron with WordPress we recommend checking out Tom Mcfarlin’s article on defining a WordPress cron job. And for those who perhaps aren’t as advanced, we are going to explore how to easily use WP-Cron along with the popular free WP Crontrol plugin. This lets you view and control what is happening in the WP-Cron system.

WP Crontrol has over 200,000 active installs with an impressive 4.5 out of 5 rating. Many people in the WordPress community really love this plugin.
This plugin is super useful. Shows what CRON jobs should run, excellent first step in understanding what’s going on and if it’s working or not. 5 Stars right there. Also, you can create new cron jobs and trigger existing ones to run, 5 bonus stars on top. — Josh, creator of Caldera Forms
You can download it from the WordPress repository or by searching for it within your WordPress dashboard under “Add New” plugins. Features of WP Control include:
- Ability to view all cron events along with their arguments, recurrence, and next run time.
- Edit, delete, and immediately run any cron events.
- Add new cron events.
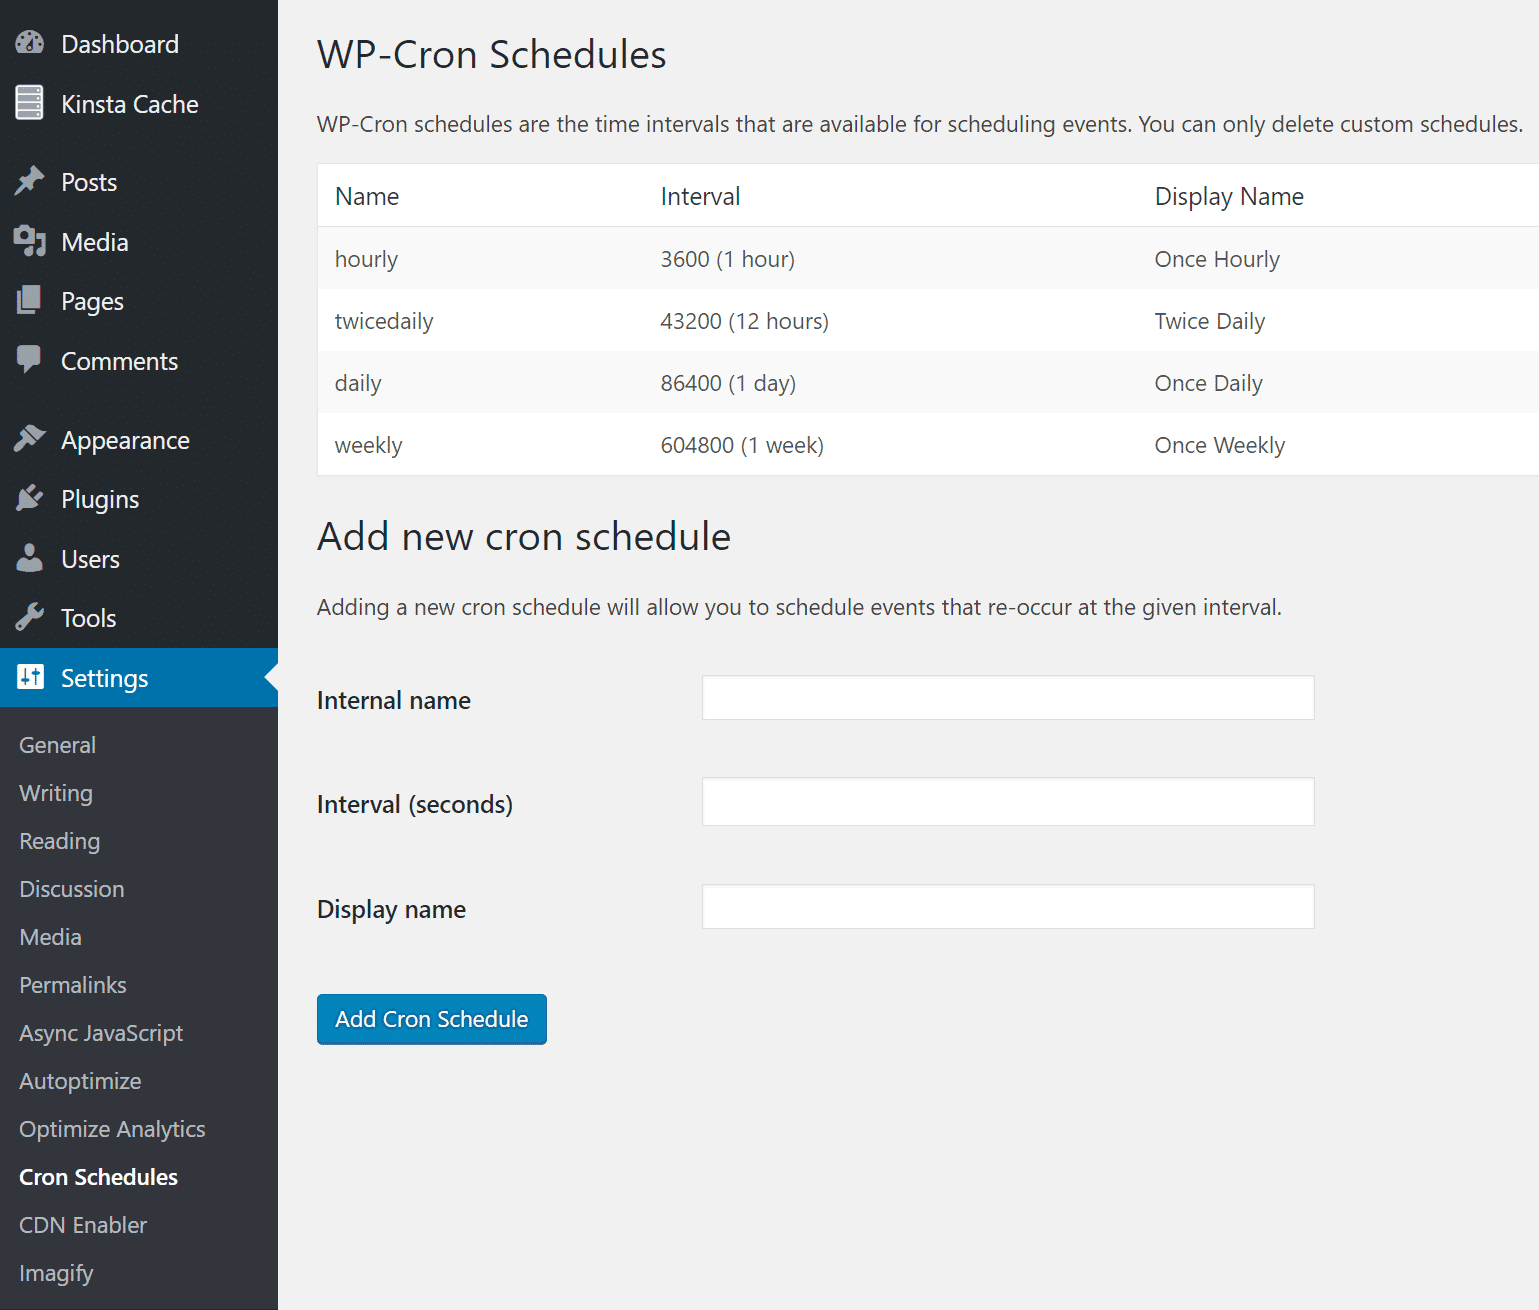
- Add, edit, and remove custom cron schedules.
Server Cron
If you’re a Kinsta client, we also have a server cron job that runs on all sites every 15 minutes. Check out our article on how to manage server crons at Kinsta.
WP-Cron Schedules
Once activated you can change the WordPress Cron job schedules under “Cron Schedules” from within the settings of your WordPress dashboard. Notice that the plugin adds an additional default schedule of weekly. You can also add additional schedules in seconds, such as 21600 seconds for every 6 hours.
These intervals can also be added with code using a filter, such as:
add_filter( 'cron_schedules', 'example_add_cron_interval' );

function example_add_cron_interval( $schedules ) {
 $schedules['five_seconds'] = array(
 'interval' => 5,
 'display' => esc_html__( 'Every Five Seconds' ),
 );

return $schedules;
 }
WP-Cron Events
You can then also use the plugin to see your current WordPress Cron jobs that are already scheduled. Under Tools click into “Cron Events.” Many of the action names are easily recognizable as they should match part of the plugin name, such as “woocoomerce_cleanup_sessions” or “gravityforms_cron.”
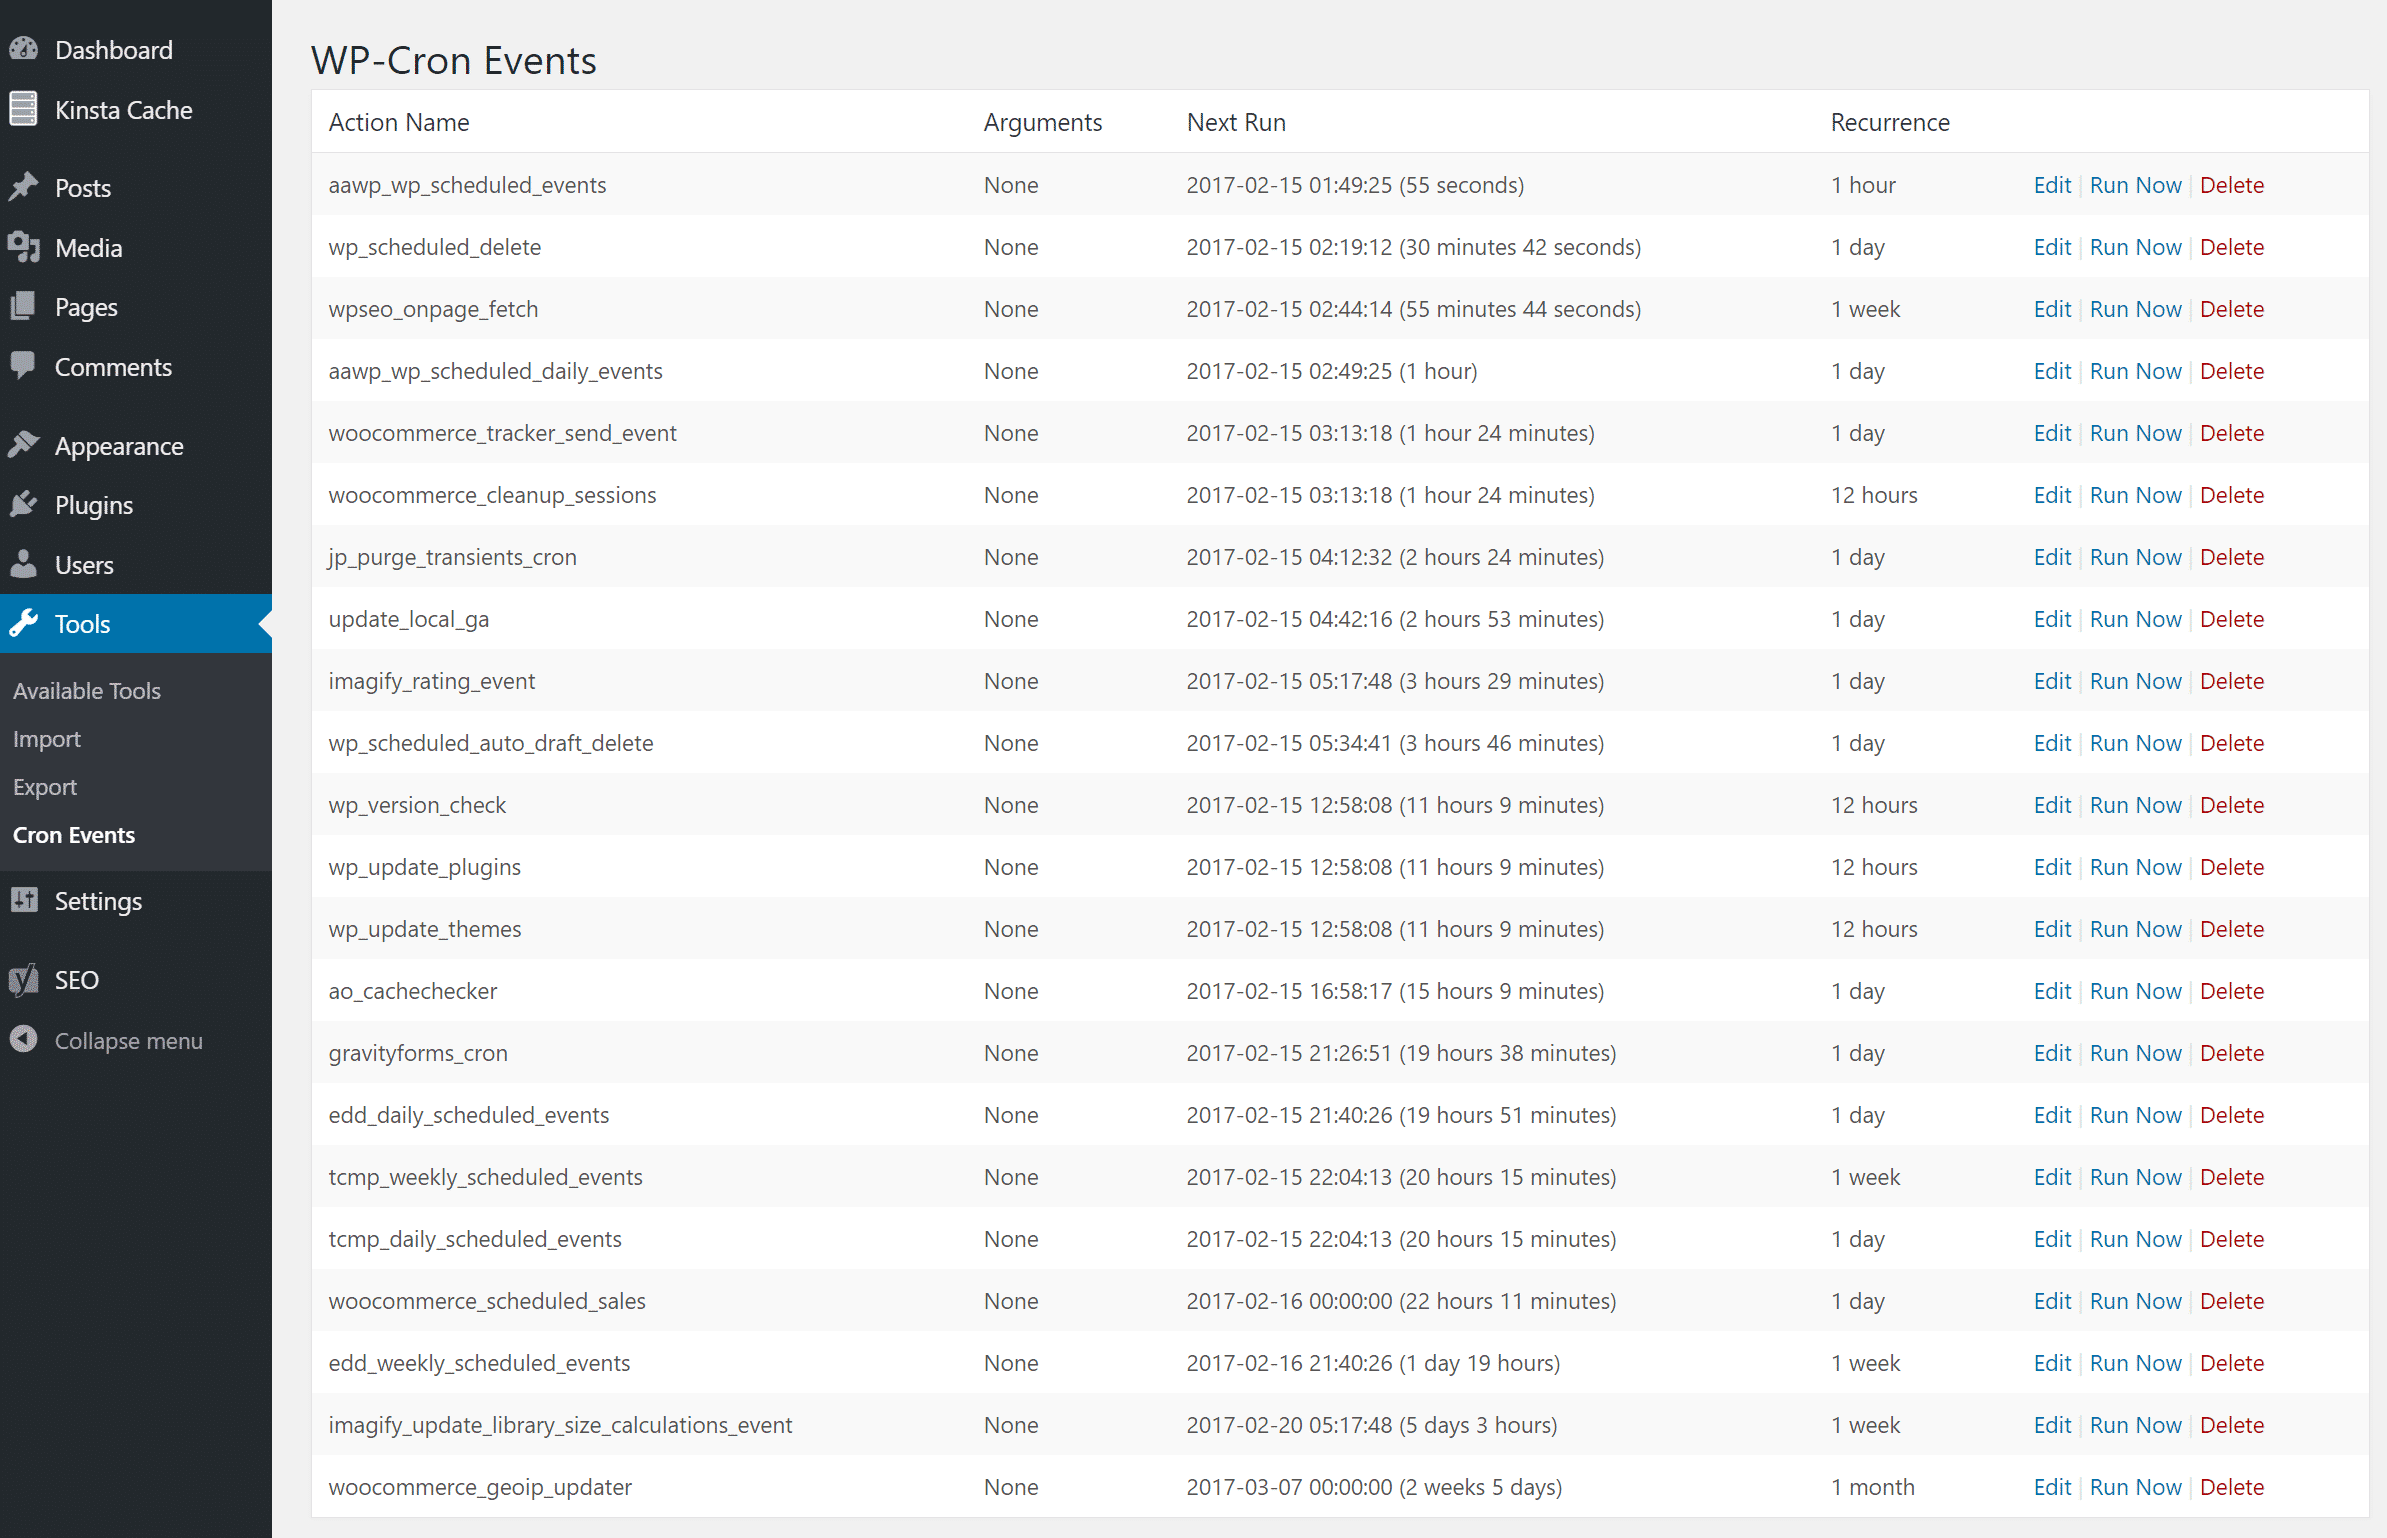
You run a Cron event immediately by simply clicking on “Run Now” next to the action name. This can be helpful when troubleshooting things as you might need to run a Cron event multiple times.

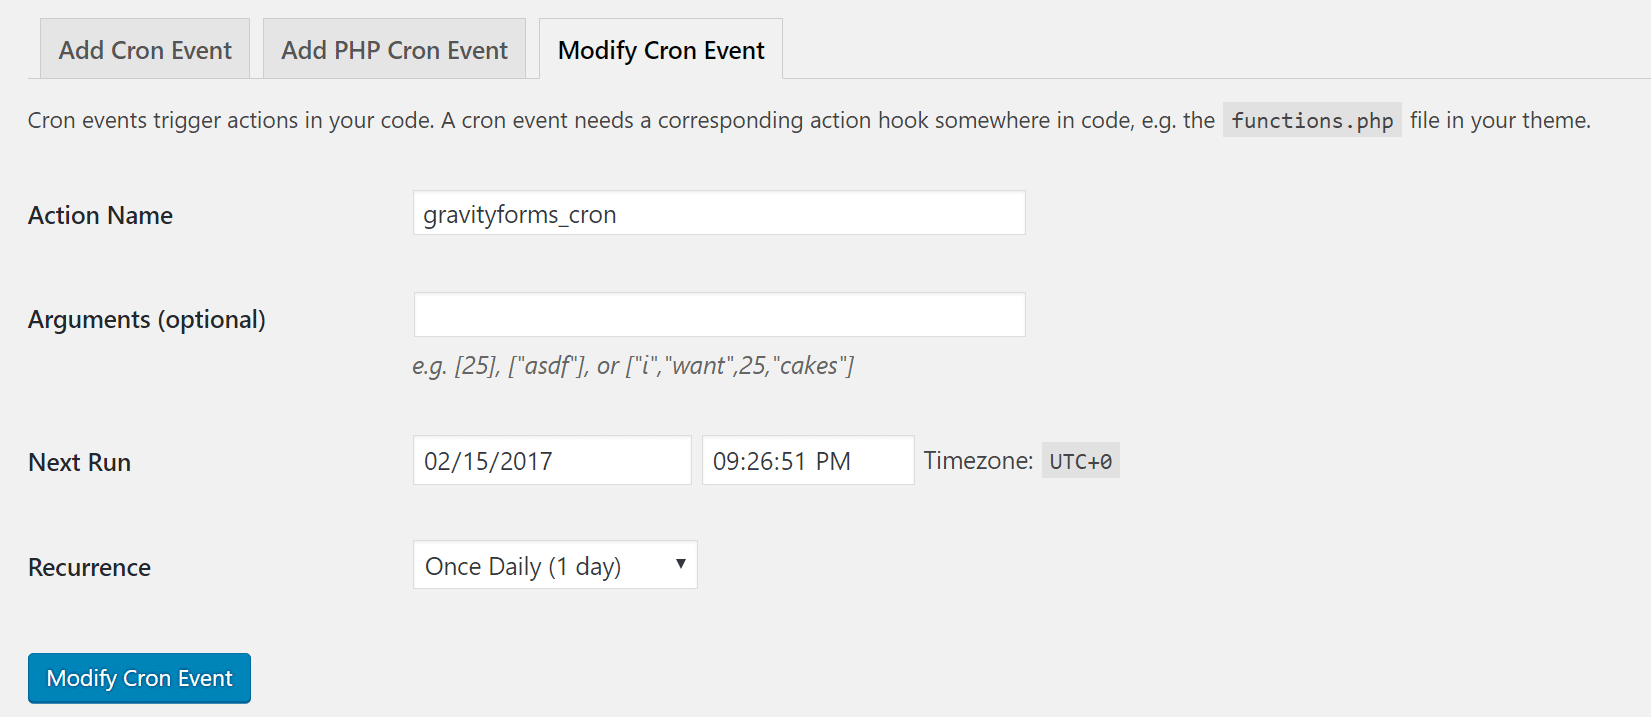
Modify Cron Event
You can also edit existing Cron events by clicking on “Edit” next to the action name. You can then change the action name, arguments, the next run, and scheduled recurrence. Be careful with this though as many plugins rely on their Cron jobs to function properly.
Add Cron Event
You can also Add Cron events. In this example, we are going to add the WordPress Cron job for the Disqus plugin. Many might want to do this to alter the sync frequency or if they are having issues with comments syncing back and forth. Each third party plugin developer’s documentation should have the name of their cron event, or rather the action name. In this case it is “dsq_sync_forum” which is being used by the plugin.
If you are creating one from scratch you will need a corresponding action hook somewhere in your code, such as your functions.php file. This is the example WP-Crontrol gives:
add_action( 'my_hookname', 'my_function' );The next step is to write your function.
function my_function() {
    wp_mail( '[email protected]', 'WP Crontrol', 'WP Crontrol rocks!' );
}
For Disqus, we first add a new cron schedule of 600 seconds (10 minutes). We then click into “Add Cron Event” and input “dsq_sync_forum” as our action name, choose the next run time, and choose the 10-minute recurrence we just created. Then we click on “Add Cron Event.” This will now run every 10 minutes automatically for us to manually sync Disqus comments back to our WordPress database.

And that’s about it! It is really pretty easy to use.
WP-Cron WP-CLI
You can also manage WP-Cron events and or a WordPress Cron job in WP-CLI. For example, the following command will give you your current cron event list.
wp cron event list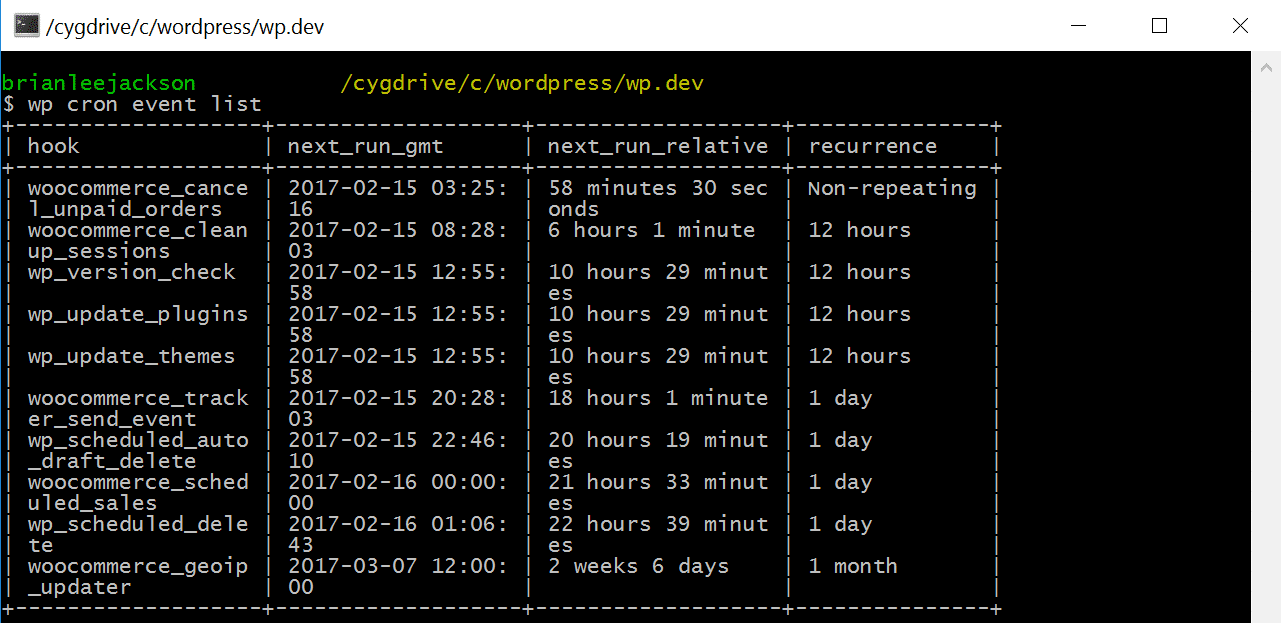
See the official WP-CLI cron documentation for additional commands and parameters.
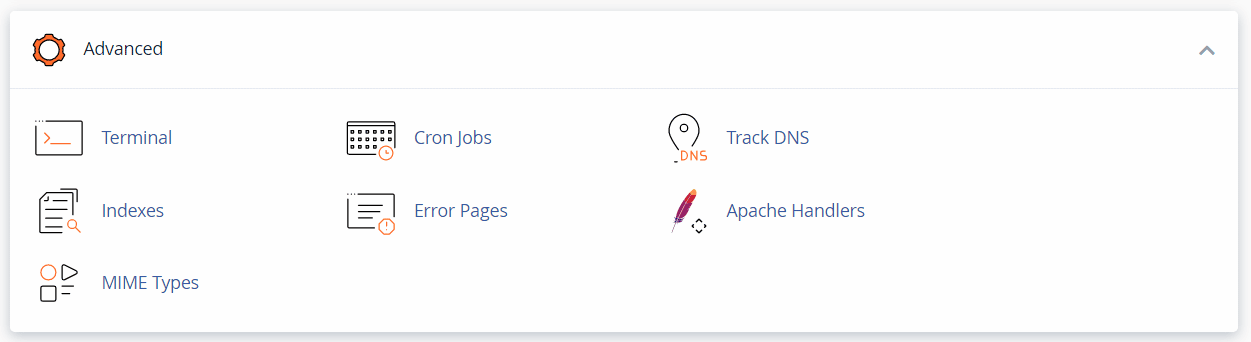
How To Add a Cron Job Using cPanel
If you’re using a web host that gives you access to a cPanel account, you can use the control panel to set up cron jobs. To do this, log into your cPanel account and go to Advanced > Cron Jobs:
The Cron Jobs settings page includes options for setting up cron job notifications and creating new ones. To add a cron job, scroll down to the Add New Cron Job section.
Here, you’ll be able to configure the frequency of the command:
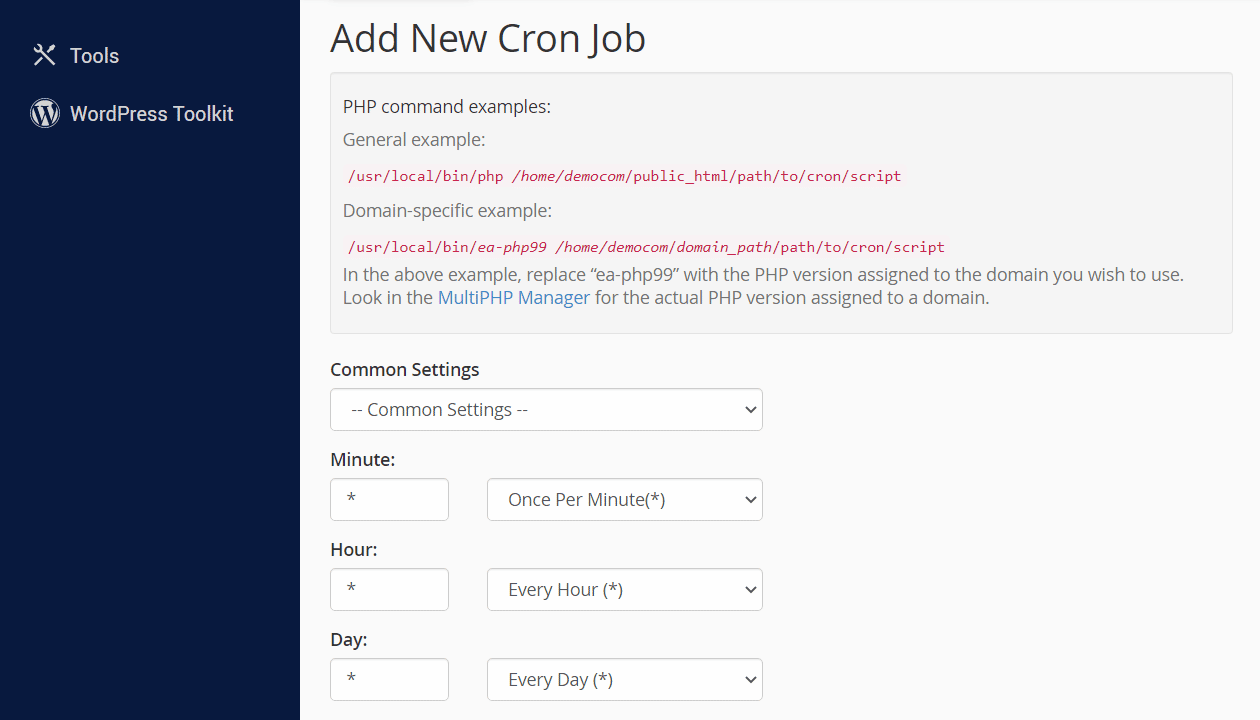
The Common Settings menu includes several preconfigured options, ranging from once per minute to once per year. You can use any of these options or modify the fields below to enter a custom value:
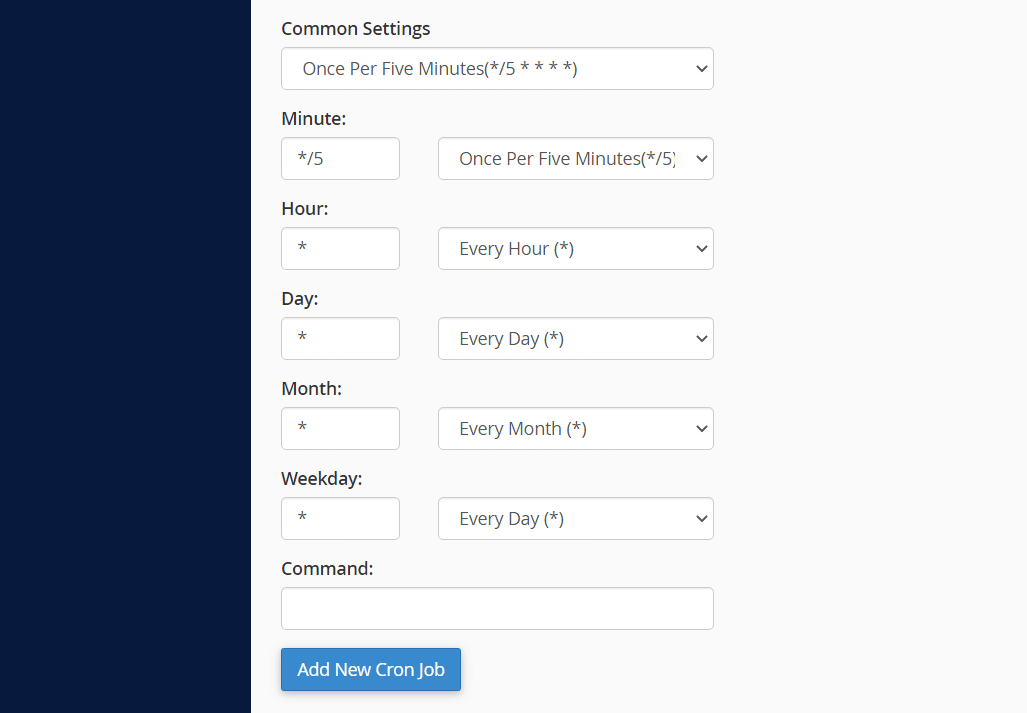
Once you configure the frequency of the cron job, you can add the command it will execute under the Command field. Save the cron job by clicking on Add New Cron Job. Now, it will appear under the list of Current Cron Jobs at the bottom of the page.
How To Add a Cron Job in NGINX
Adding a cron job in NGINX is relatively simple if you’re comfortable using the terminal and writing scripts. To get started, open the terminal and enter the following command:
Sudo crontab -eThis will open the cron configuration file. Every line in the file includes a unique cron job that should look like this:
0 13 * * * /var/www/public_html/cron.php >/dev/nullTo add a new cron job in NGINX, you’ll need to understand what that command does. The first numbers and asterisks specify when the cron job should run.
Each number or symbol represents the following values, in order of appearance from left to right:
- Minute
- Hour
- Day of the month
- Month
- Day of the week
That command tells NGINX to run the cron.php file every day at 13 hours on the dot. We use asterisks for the rest of the values because they’re not necessary for this specific cron job, but your mileage might vary.
On top of specifying what file to run, the command also tells the cron job to discard any output such as errors with the >/dev/null addendum. Alternatively, you can choose to save any such output to a log file.
Once you’re done modifying the cron config file, you can save your changes and close it. Now your NGINX server will run that cron job using the configuration you set for it.
How To Add a Cron Job in Kinsta
There are two ways to add a cron in Kinsta. The first approach involves accessing your website via SSH and running the crontab -e command.
Once you run that command, Kinsta will ask you what editor you’d like to use. Then it’ll open the cron config file using that editor.
You can add cron jobs to the config file by creating new commands on separate lines. A cron job command should look like this:
0 13 * * * /var/www/public_html/cron.php >/dev/nullYou can read more on how to structure cron commands in the previous section, where we looked at how to use the crontab -e command in NGINX. If you’d rather not add the cron job manually, you can ask the Kinsta support staff to do it for you.
Keep in mind that Kinsta cannot edit cron jobs for you and we will simply upload the commands as you provide them. If you require help configuring the cron command, we recommend checking out this crontab documentation.
How To Disable WP-Cron
In some cases, using the WP-Cron function can cause problems with your website. WP-Cron is not a “real” cron job, but a function that mimics how they work. Instead of running continuously, WordPress runs the wp-cron.php script every time a page loads.
This approach can cause issues with high-traffic websites, as you’ll need to devote resources to running wp-cron.php on every page load. If the script doesn’t run due to page loads, your scheduled commands might fail to execute, as wp-cron.php isn’t “checking” the intervals.
If you’re running into problems with WP-cron, you can disable the function by adding the following code to the WordPress wp-config.php file:
define('DISABLE_WP_CRON', true);Save the changes to the file and that’s it. However, if you choose to disable WP-Cron, you’ll need to set up an alternative using any of previous methods in this tutorial.

Brian has a huge passion for WordPress, has been using it for over a decade, and even develops a couple of premium plugins. Brian enjoys blogging, movies, and hiking. Connect with Brian on Twitter.