Need to change your WordPress username? Or maybe the username of another user at your site? There are all kinds of reasons you might want to change your username after you’ve already created your WordPress account.
Unfortunately, though, WordPress doesn’t let you change your username by default. If you tried, you probably saw something like this:

Don’t worry, though! While WordPress isn’t lying to you, there are actually several ways that you can safely change your WordPress username or any other user’s username at your site.
In this article, you’ll learn three different methods. How to…
- Use the free Username Changer plugin
- Change your username by creating a new username and deleting the old one
- Manually change your username using phpMyAdmin
If you’re not comfortable directly editing your WordPress database with phpMyAdmin, we highly recommend that you use the first or second method.
How To Change WordPress Username With Username Changer Plugin
The simplest way to change your WordPress username is with the free Username Changer plugin.
To use it, install and activate the plugin. Then, go to Users → Your Profile. Next to your username, you should see a new option to Change Username:
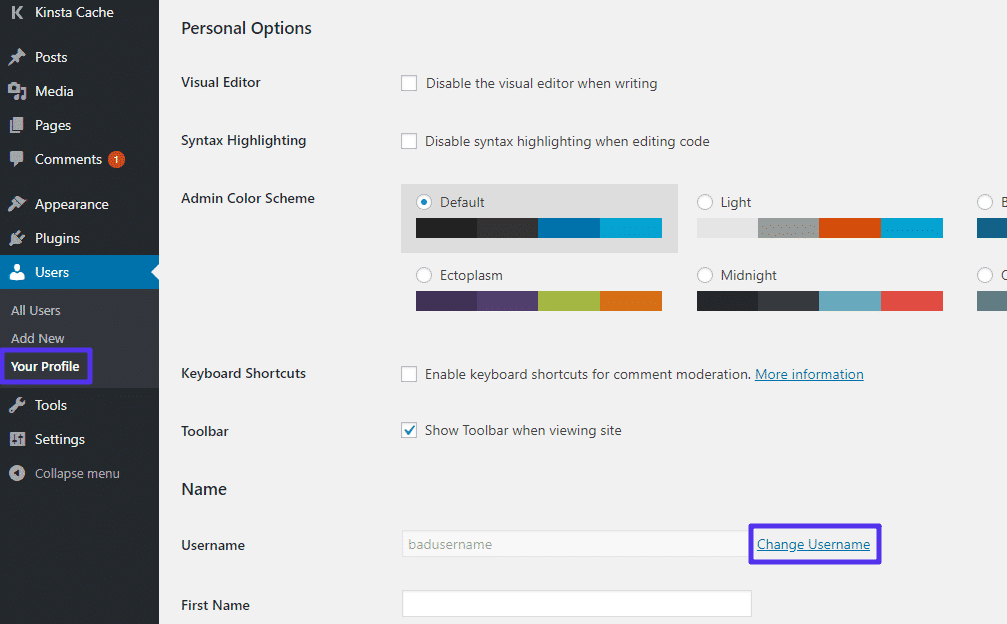
When you click that link, you’ll get an option to enter a username. Then, when you’re happy with the username, just click Save Username to make your changes live:
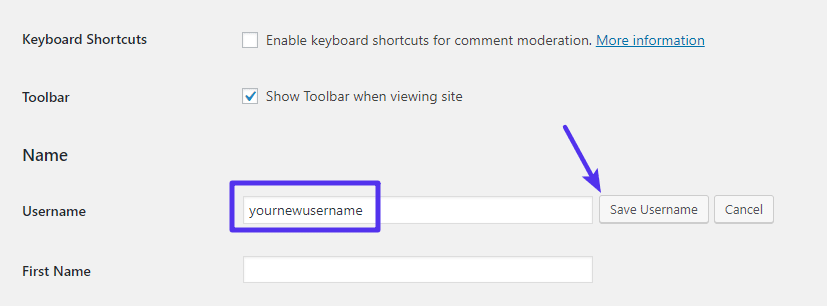
You should see a success message if the change went through. If you changed your own username, you’ll also need to log in again using your new username (your password will still be the same):

And that’s it!
You can also use this plugin to change other users’ usernames. And if you go to Settings → Username Changer, you can also allow certain other users to change their own usernames.
How To Change WordPress Username By Creating/Deleting Accounts
This method isn’t technically changing your username…but the end result is the same. Essentially, you’ll:
- Create a new username
- Transfer authorship from your old username to your new username
- Delete your old username
Step 1: Create A New Admin User
Assuming your account is an administrator account, the first thing that you need to do is go to Users → Add New and create a new user.
Enter your desired username in the Username box and make sure to set the Role to Administrator (if you’re changing another user’s username, make sure to select the appropriate user role for their account):
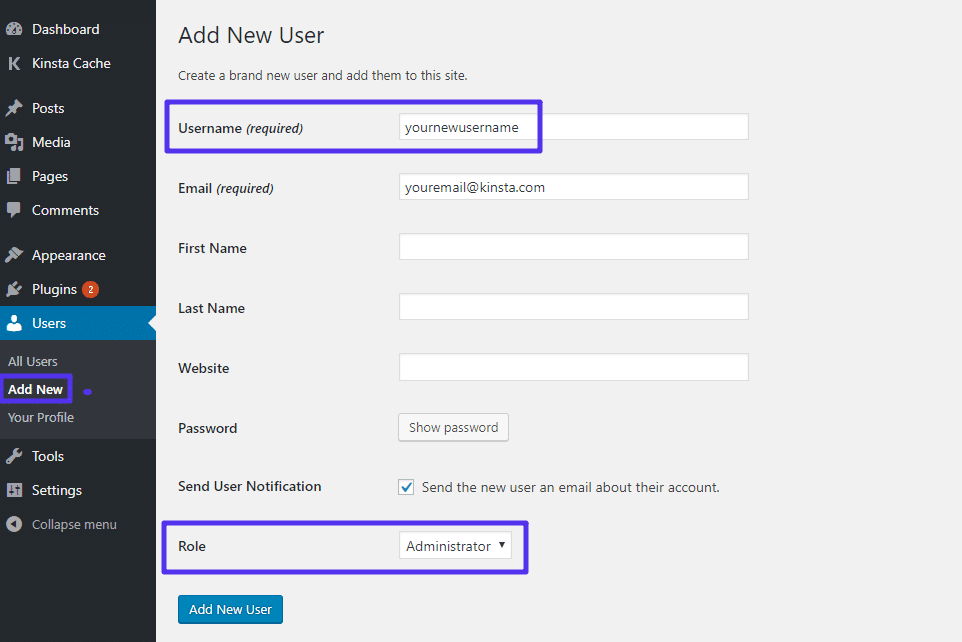
For now, you will not be able to use the same email as your existing account. But you can always update your email after you delete your original account in the next step.
Step 2: Delete Old Username
Now, log out of your WordPress dashboard and then log back in using the new username that you just created.
Once you’ve done that, go to the Users tab in your WordPress dashboard and delete your old username:
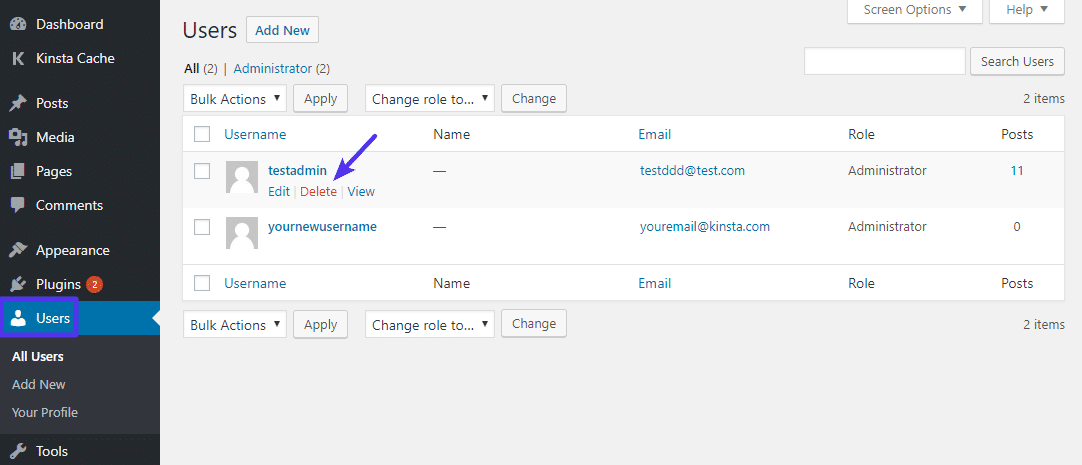
On the next page, use the Attribute all content to drop-down to select your new username. This ensures that all your existing posts and pages will now have your new username as the author:
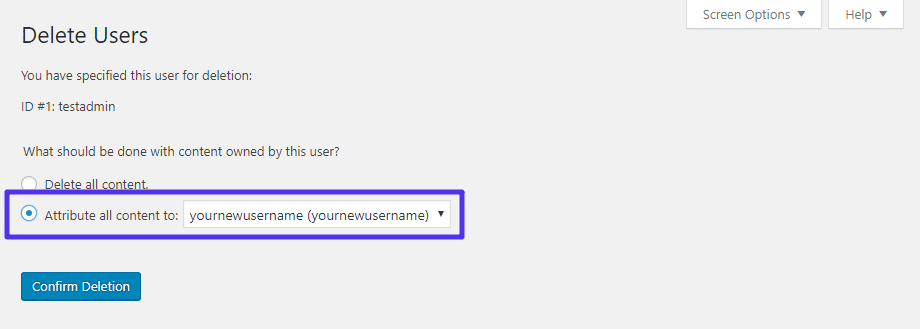
Then, click Confirm Deletion.
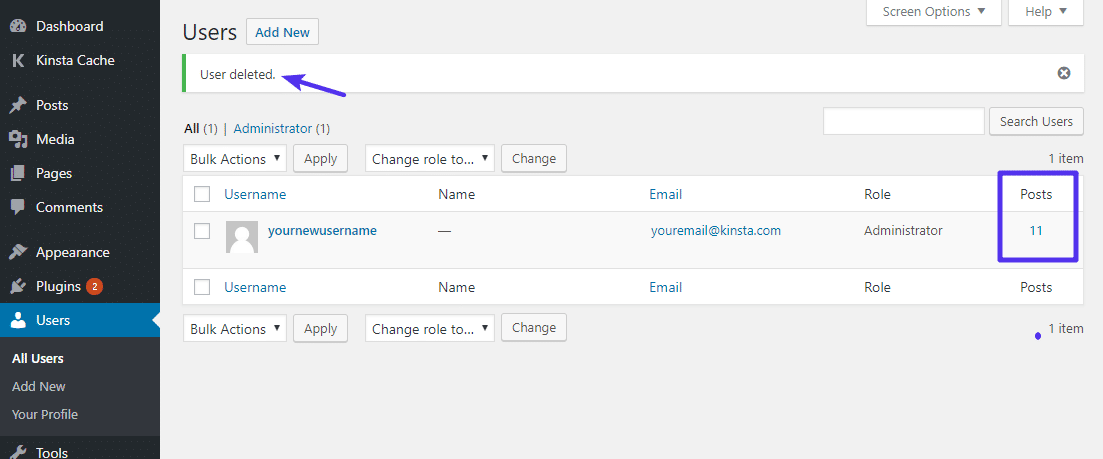
And that’s it! Your new username should now function exactly like your old one did. You can verify this by looking at the Posts column in the Users area:
How To Change WordPress Username Via phpMyAdmin
Important: This method requires directly editing your WordPress site’s database, so we don’t recommend it unless you feel comfortable working with phpMyAdmin.
We always recommend fully backing up your database before making any changes. If you’re hosting with Kinsta, you easily create a manual backup with a single click. We also automatically back up your sites every day.
If you’re hosting elsewhere, you can always back up your database using phpMyAdmin.
With that out of the way, here’s how to change a WordPress username 100% manually.
Step 1: Access phpMyAdmin
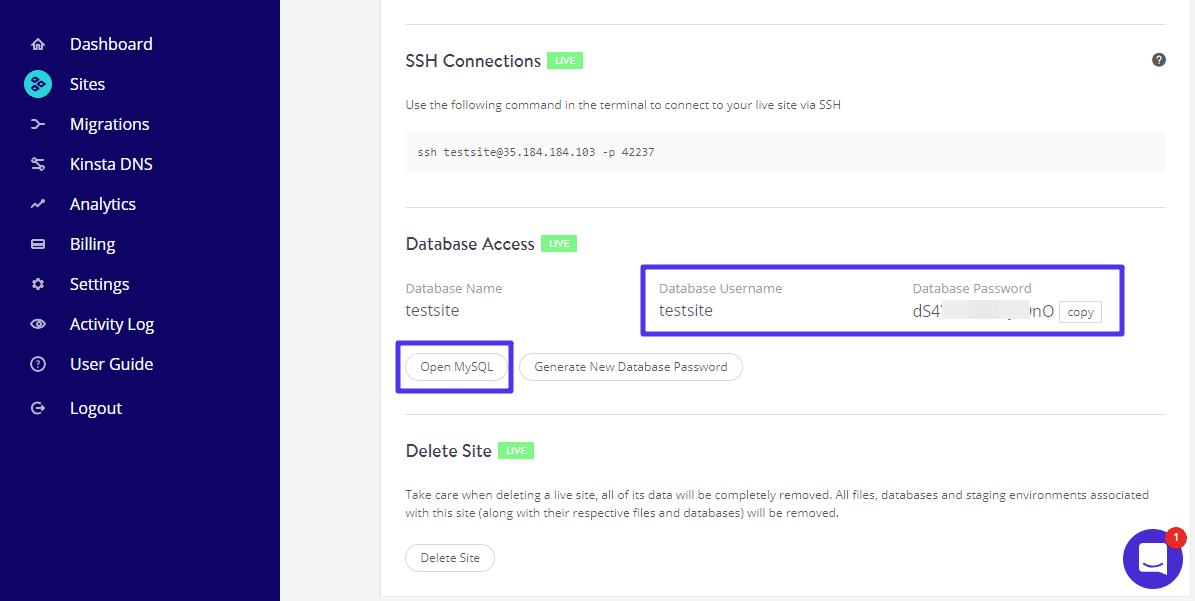
If you’re hosting your site at Kinsta, you can access phpMyAdmin by clicking the Open MySQL button in your site’s dashboard. You can use the Database Username and Database Password to log in to phpMyAdmin on the next page:
If you’re hosting elsewhere, you can usually access phpMyAdmin from your cPanel dashboard.
Step 2: Browse To wp_users Table
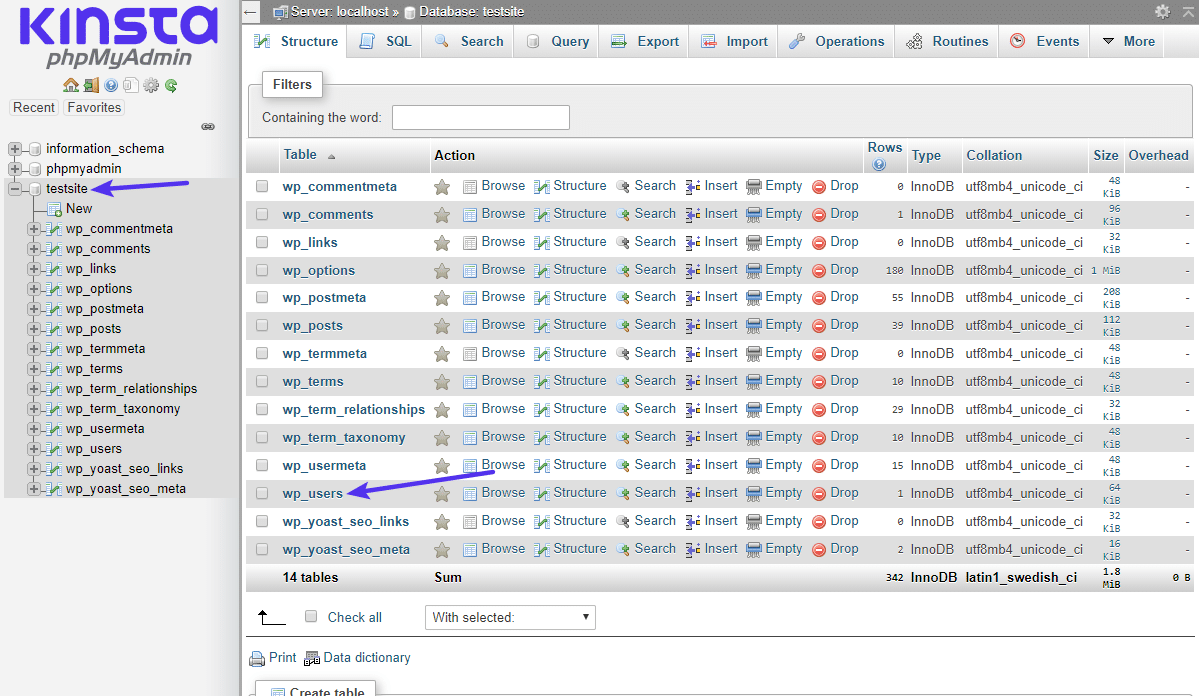
Once you’ve logged in to phpMyAdmin, select your site’s database on the left. Then, click on the wp_users table:
Step 3: Edit Username
Find the user for whom you want to change the username. Then, click Edit:
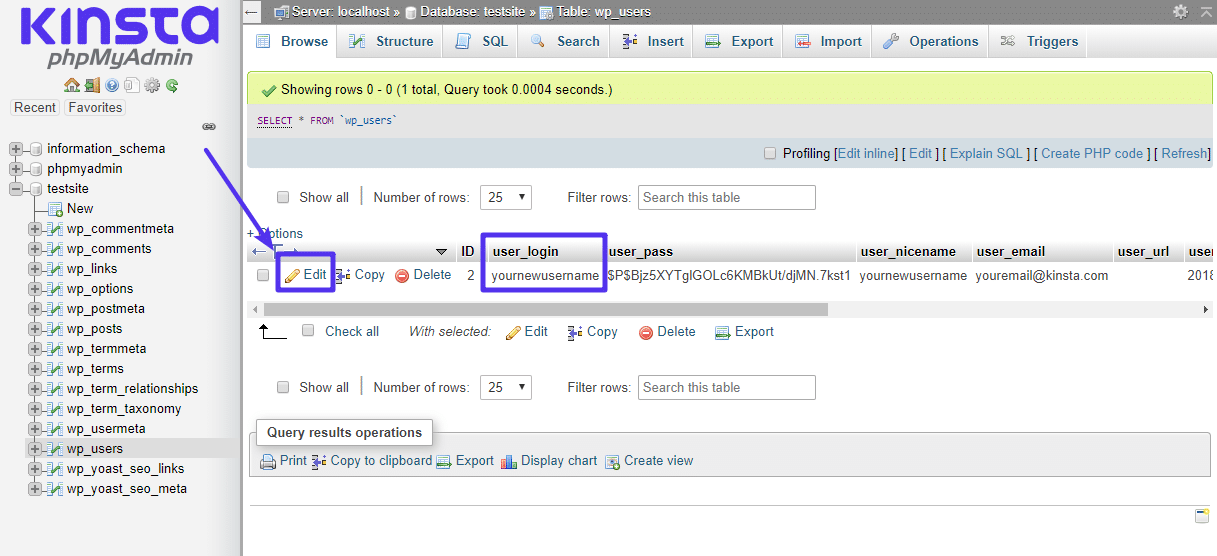
On the next screen, enter your new desired username in the user_login field. Then, click Go at the bottom:
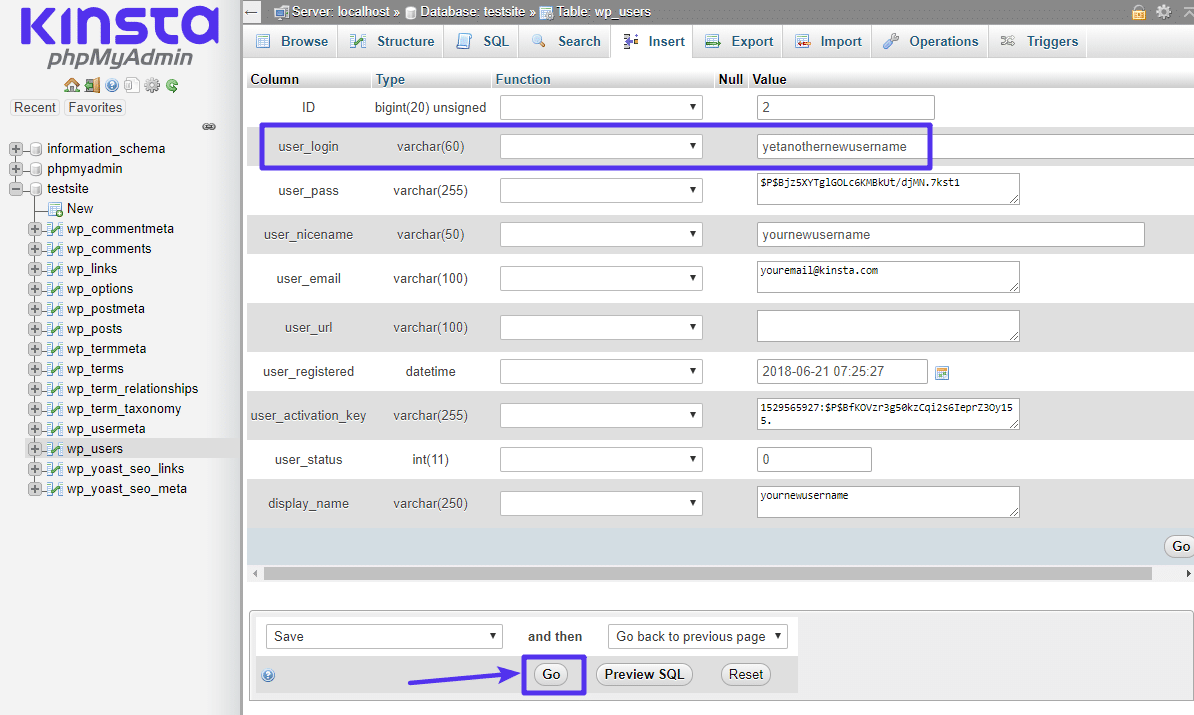
And that’s it! When you try to access your WordPress dashboard, you should be prompted to log in using your new username. Your password and email address will be the same as before.


