Trying to upload something to your WordPress site only to be met with a message saying “the uploaded file exceeds the upload_max_filesize directive in php.ini”?
This error message can appear when you’re uploading large images, videos, plugins, themes, any type of file that you upload to your WordPress site.
In this article, we’re going to help you fix the problem and make it so that you can upload those large files. In total, we’ll cover:
- What causes the uploaded file exceeds the upload_max_filesize directive in php.ini
- How to fix the uploaded file exceeds the upload_max_filesize directive in php.ini
What Causes the uploaded file exceeds the upload_max_filesize directive in php.ini

Let’s start at the beginning. In order to preserve your server’s resources, hosts set a limit on the maximum size of a file that can be uploaded.
This maximum, in megabytes, is defined in the upload_max_filesize directive.
The upload_max_filesize directive itself is located in the php.ini file, which is the default server configuration file for applications that require PHP.
Those two things – upload_max_filesize and php.ini – are what the error message you see is referencing.
It’s important to remember that this upload limit is not a WordPress setting. However, you can see this limit in your WordPress site if you go to Media → Add New:
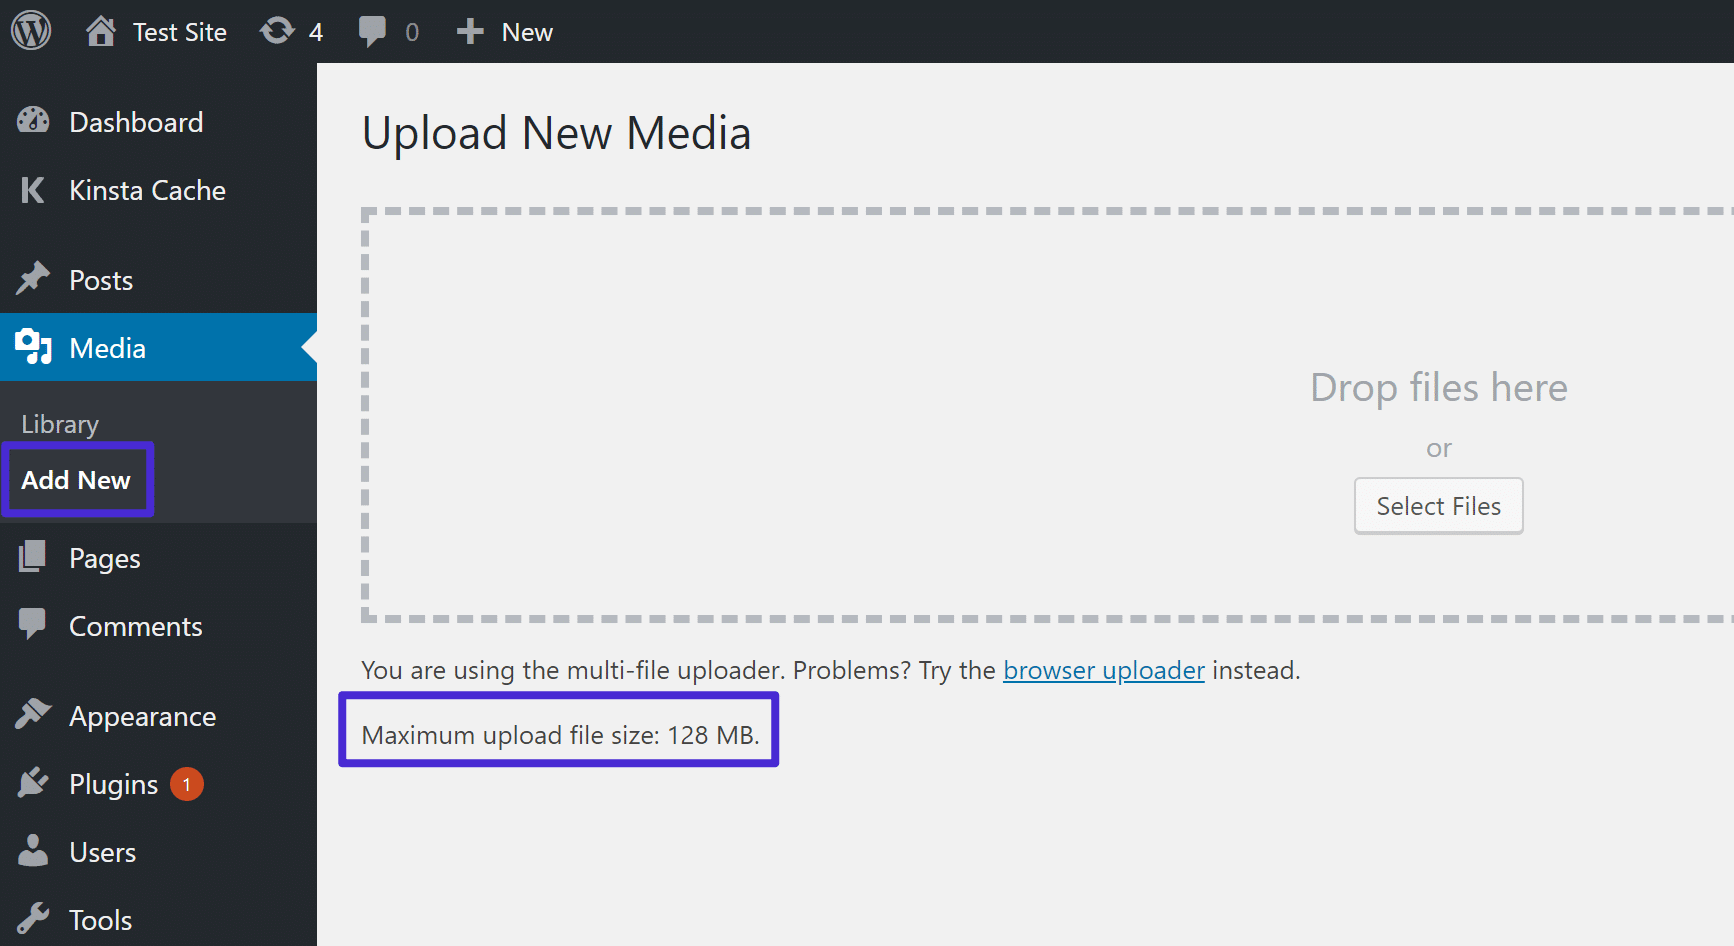
As you can see above, Kinsta sets the default limit at 128 MB, which is quite large and unlikely to ever cause issues. However, a lot of other hosts set the default as small as just 2 MB or 4 MB.
That means if you try to upload a file larger than that limit, you’re going to see the “the uploaded file exceeds the upload_max_filesize directive in php.ini”, or a similar message like “file_name exceeds the maximum upload size for this site.”
How to Fix the uploaded file exceeds the upload_max_filesize directive in php.ini
In order to fix this error, you need to increase the file size upload limit. That is, you need to increase the value of the upload_max_filesize directive in your php.ini file.
There are several different ways you can do this – the exact method that you choose will depend on your preference and your host’s configuration.
1. Talk to your host’s support
While we’ll cover some methods that you can try by yourself, the simplest solution is usually to just reach out to your host’s support and ask them to increase the limit for you.
This is a common request, your host’s support should know exactly what you want, and it should only take a couple of minutes of your time. That’s what your host’s support is there for!
If you host at Kinsta and need to increase your limit beyond the default 128 MB, you can reach out to Support within the MyKinsta dashboard and request that change:

2. Edit php.ini via cPanel
If your host uses cPanel, you should be able to edit your php.ini file and upload_max_filesize directive via the cPanel dashboard.
First, look for the MultiPHP INI Editor:
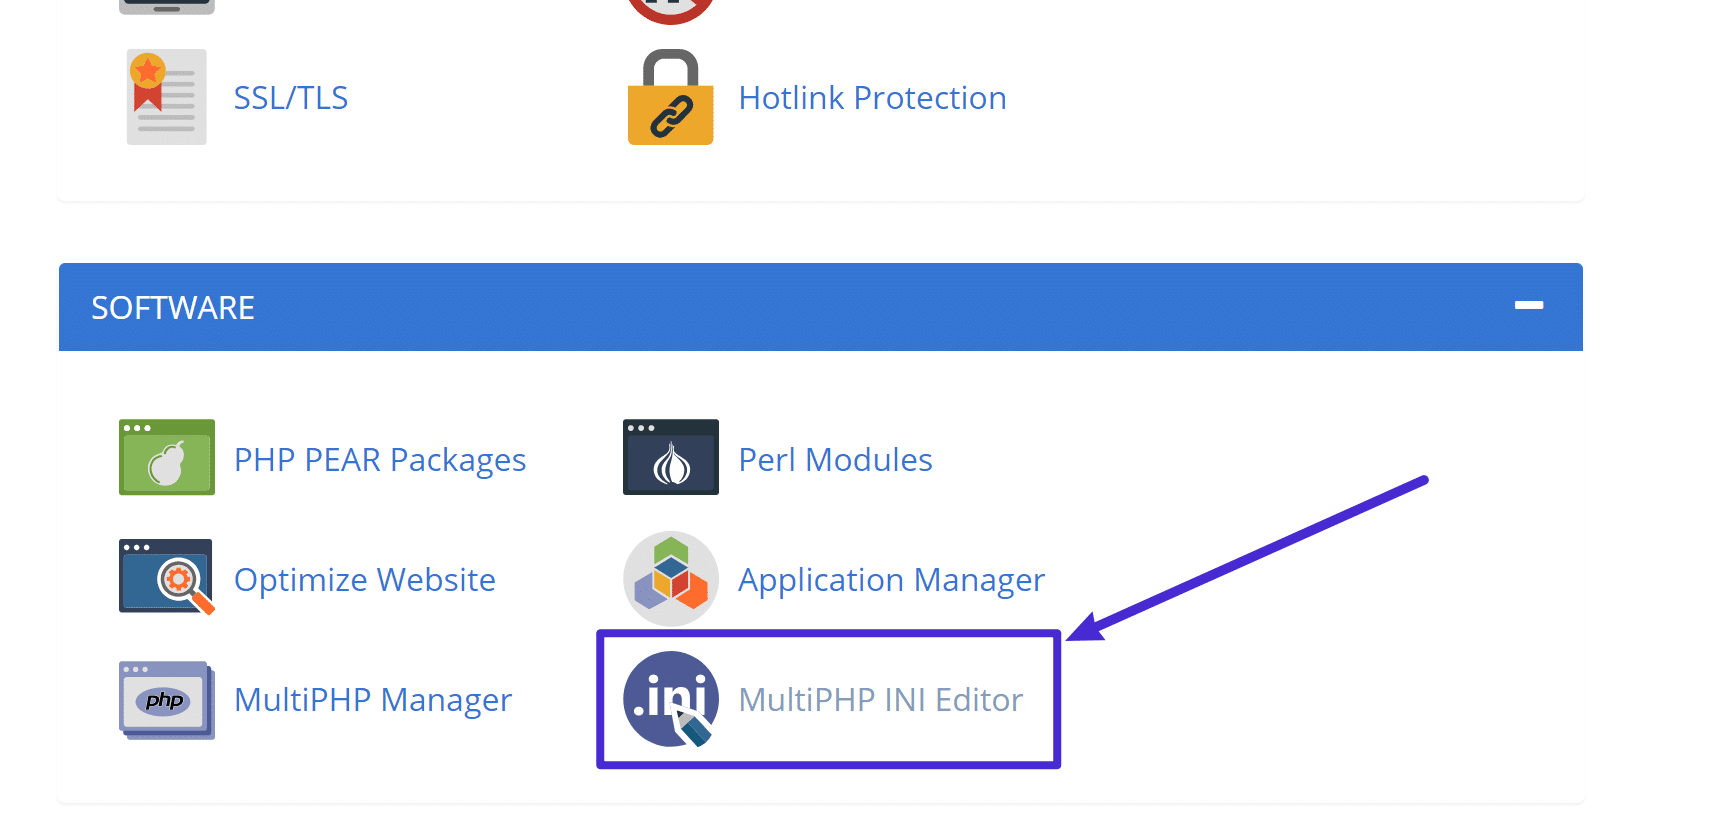
Then choose your WordPress site from the drop-down. After that, you’ll be able to edit the upload_max_filesize directive for that site:
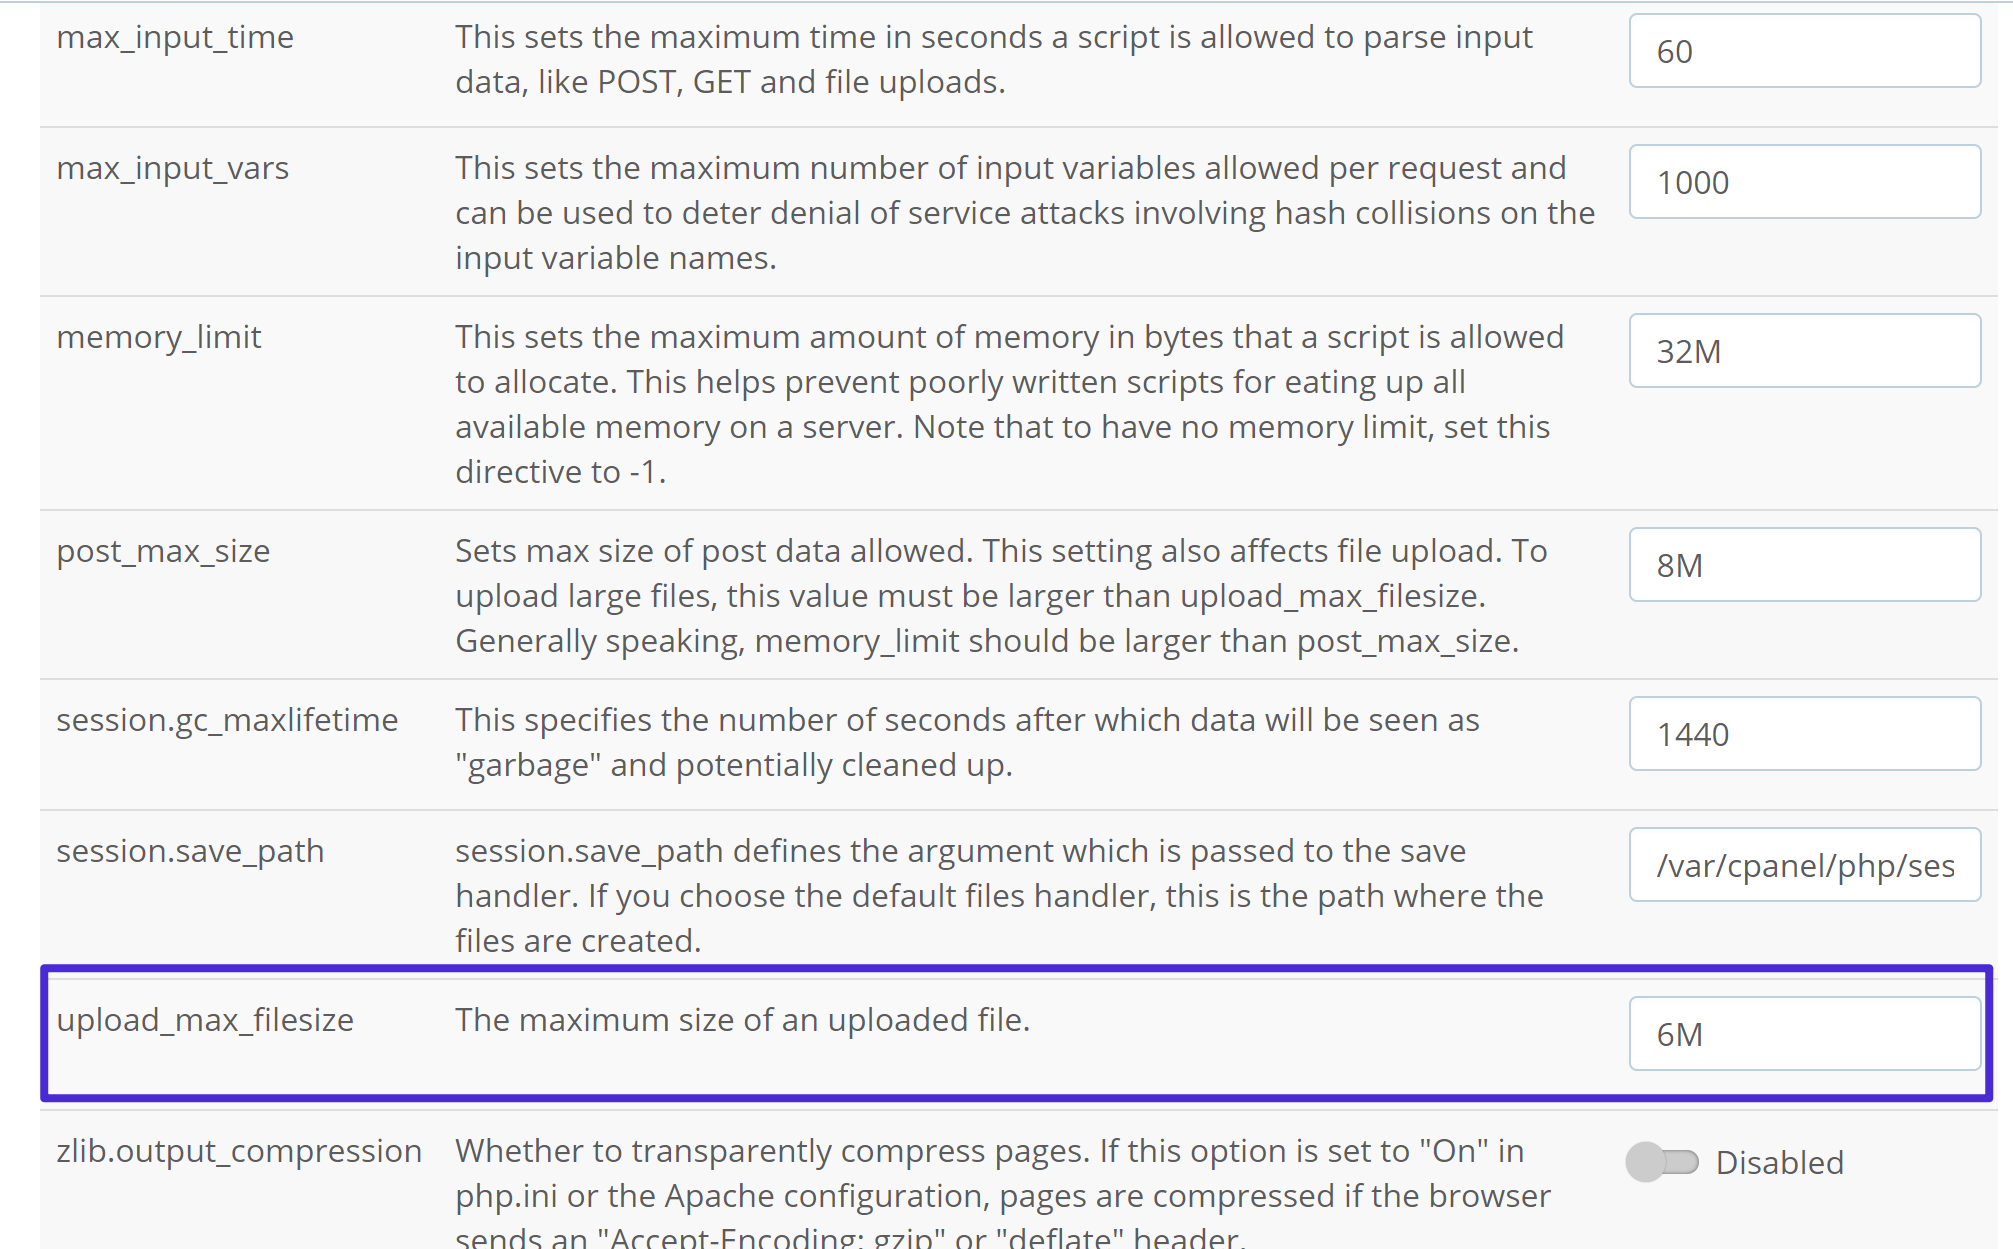
Increase the value based on your needs.
3. Create or edit php.ini via FTP
As you learned above, the php.ini file controls how your server works for PHP applications.
Unfortunately, based on your host’s restrictions, you may or may not be able to use php.ini files. For that reason, a more reliable approach can sometimes be to use .htaccess (which we’ll cover in the next section).
However, you can give this a try first to see if you are allowed to use php.ini at your host.
To get started, connect to your server via FTP and go to your site’s root folder.
If you already see a php.ini file in the root folder, you can edit that file. Otherwise, create a new file and name it php.ini:
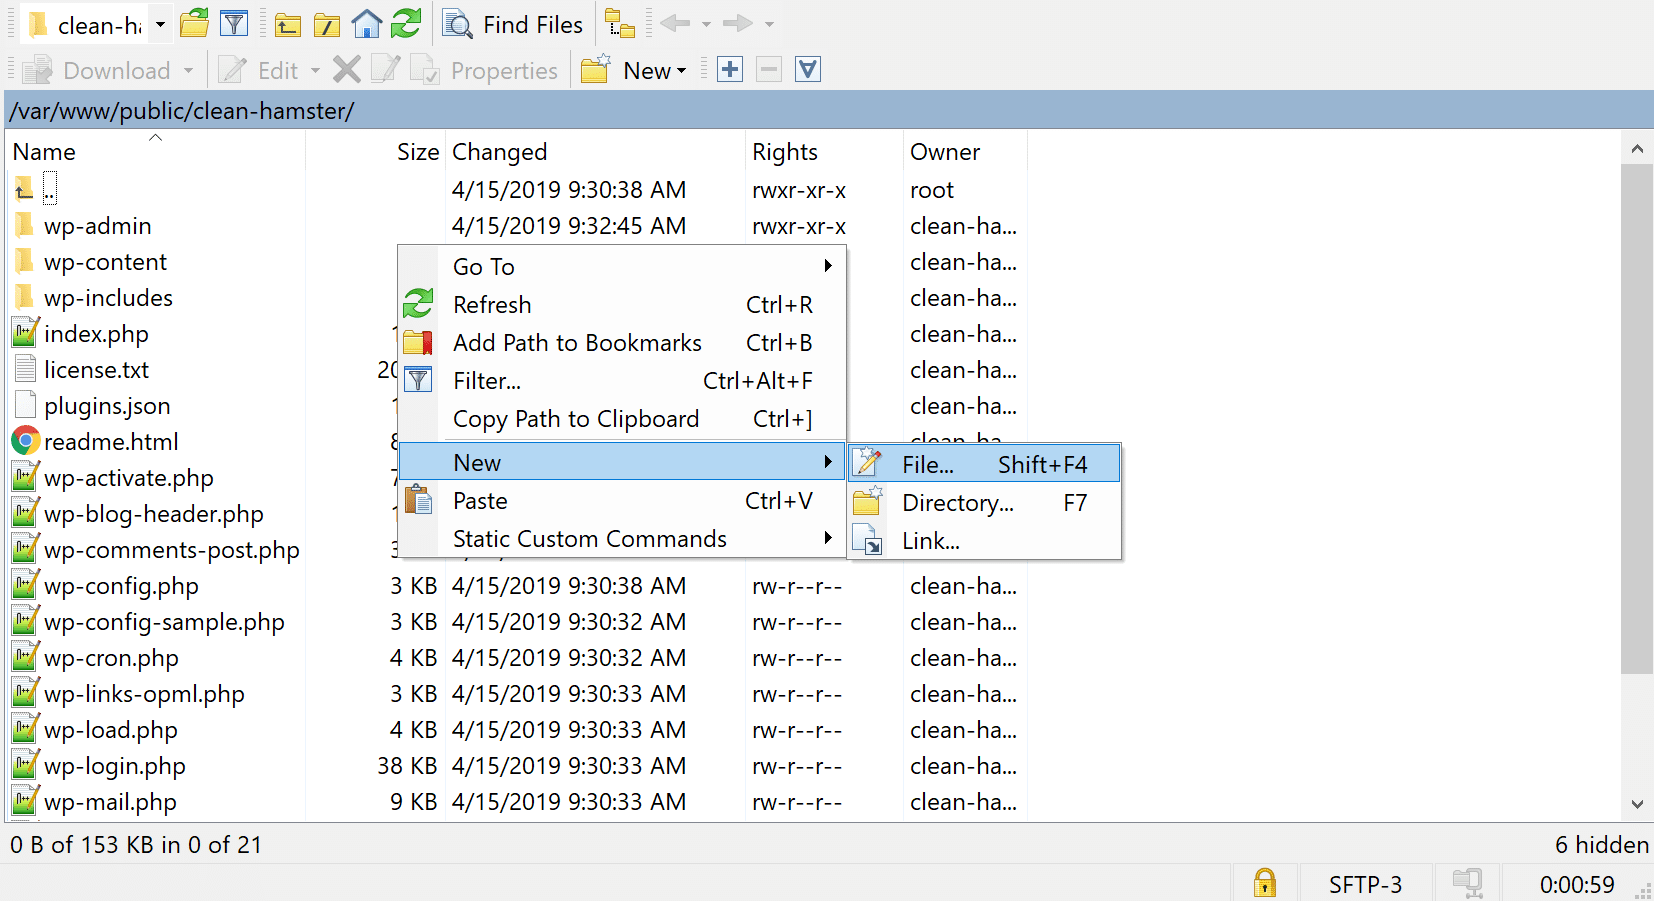
Then add or modify the code snippet below:
- If you created a new file, paste in the code snippet and modify the numbers to suit your needs.
- If you’re editing an existing file, find the same directives in the existing file and modify the numbers to suit your needs.
upload_max_filesize = 12M

post_max_size = 13M

memory_limit = 15M
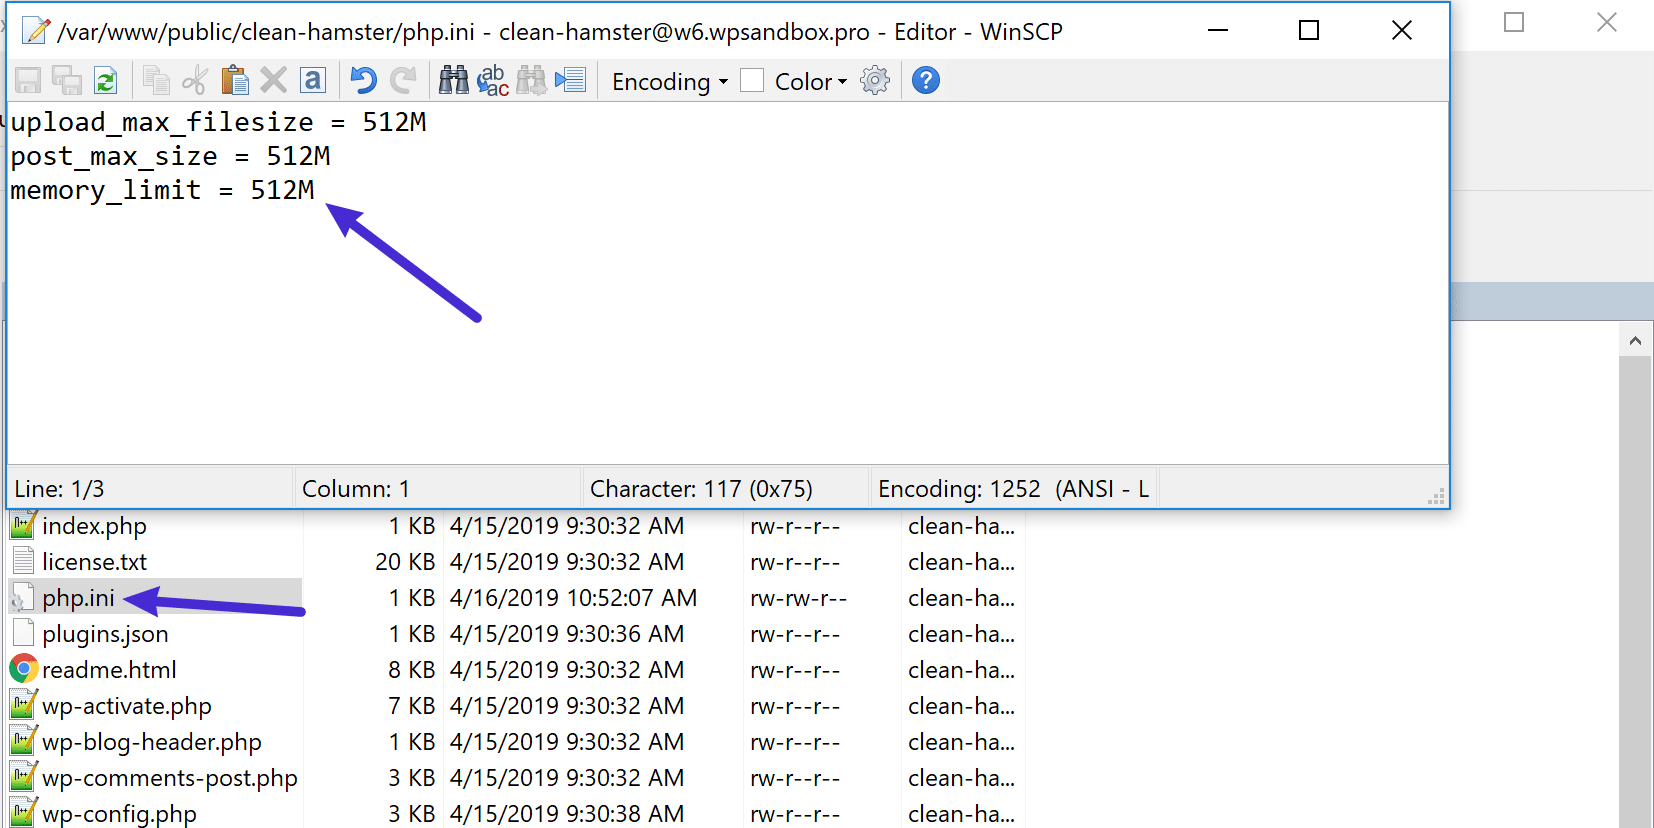
Some hosts might further require you to add the suPHP directive in your site’s .htaccess file in order for the changes above to actually work.
To do this, you can also edit your .htaccess file via PHP and add the following code near the top of the file:
<IfModule mod_suphp.c>

suPHP_ConfigPath /home/yourusername/public_html

</IfModule>
Make sure to replace yourusername with the actual file path of your site.
4. Increase upload_max_filesize value by editing .htaccess
If directly creating or editing the php.ini file via the methods above didn’t work, you can also try to modify the upload_max_filesize directive by editing your site’s .htaccess file.
To get started, connect to your site via FTP and edit the .htaccess file that’s located in your site’s root folder.
Then, add the following code snippet, making sure to adjust the values based on your needs:
php_value upload_max_filesize 12M

php_value post_max_size 13M

php_value memory_limit 15M
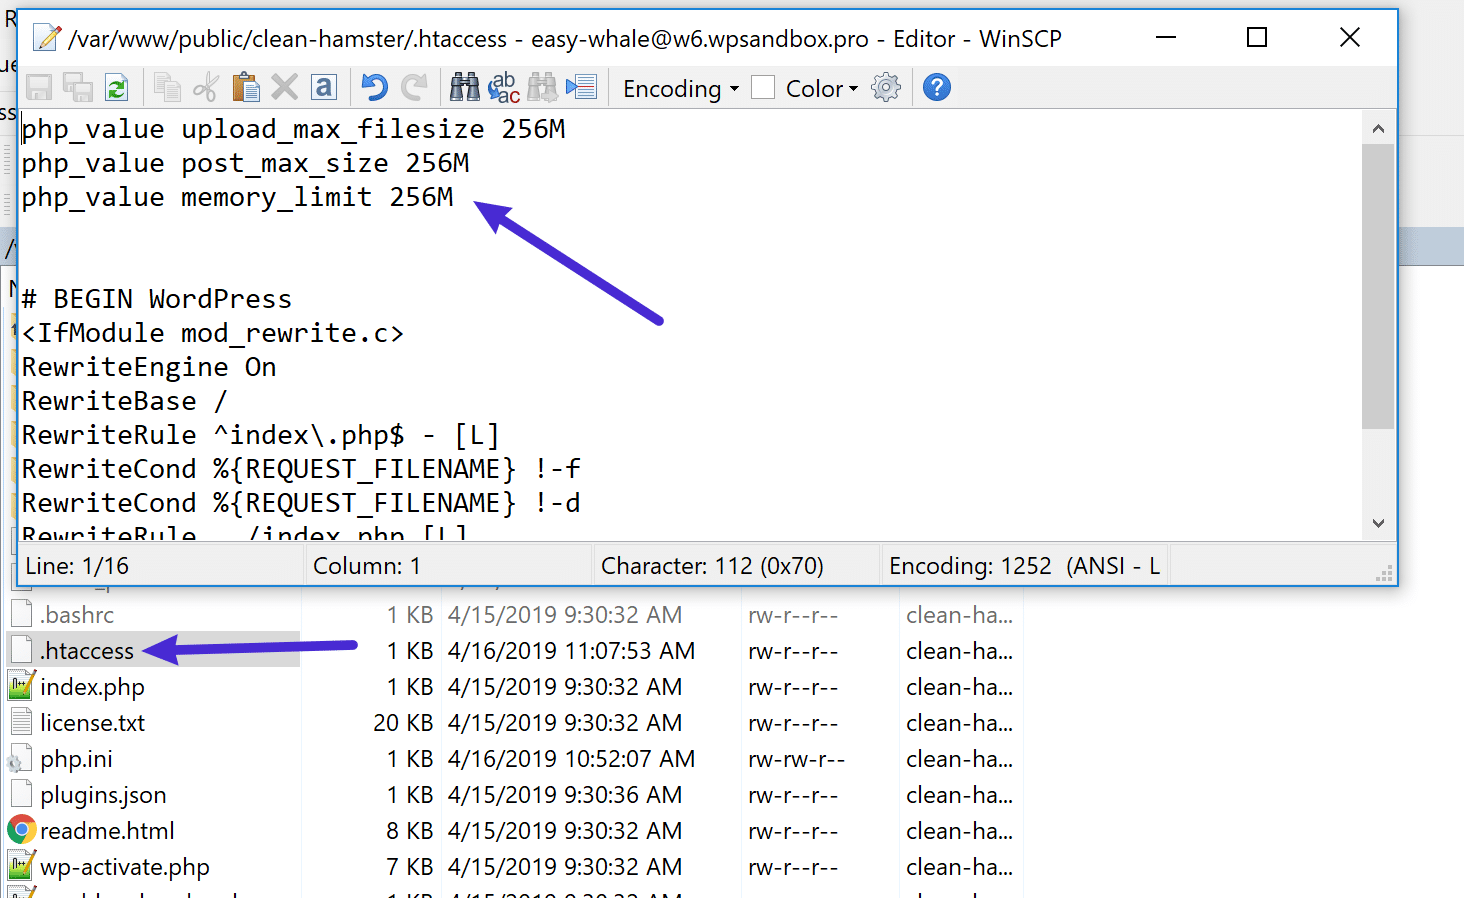
If you get an internal server error message after adding this code snippet, your server is likely running PHP in CGI mode, which means you cannot use these commands in your .htaccess file. Remove the snippets you just added and your site should start functioning again.
Note – if you’re a Kinsta customer, Kinsta uses NGINX, which means your site does not have an .htaccess file. If you need help at Kinsta, we recommend just reaching out to our support team and they’ll be able to quickly get things working for you.
Summary
To check if your changes are working, you can go back to Media → Add New in your WordPress dashboard to see if the new maximum upload limit matches the number you set in your php.ini file. If all goes well, you should see your new value and you’ll be able to upload the file that was giving you problems.
Finally, if nothing you’ve tried is working and your host’s support can’t help for some reason, you can always upload the file via FTP as a workaround. FTP has no limits and will let you upload everything from images to plugins and themes. You can even bulk upload files if needed.


