
Python is one of the most popular development languages. Its simple syntax and low barriers to entry make it a good candidate for novice programmers hoping to make a mark in the software development landscape.
A host of frameworks and libraries make getting a Python application up and running easier. Those include Django, FastAPI, and Flask. The Flask framework attracts Python developers by supporting easy prototyping and customizability.
This hands-on article demonstrates how to develop a simple database-connected Python application using Flask.
Python Apps Made Easier With Flask
Developed in 2010, Flask is well-suited to developing Python web applications thanks to its ease of use and flexibility. Its lean architecture focuses on providing the basics while making it easy to add libraries for the functionality you need. This approach makes Flask ideal for many projects, from simple applications to complex systems.
Flask offers several tools and capabilities to support web app development, including:
- Libraries and tools to manage HTTP requests and responses
- The ability to route requests to designated functions
- Support for rendering templates
- Support for databases
- Authentication and authorization systems
How To Create Your Python Flask App
You can explore the benefits of using Flask for web app development by creating a Python web app using Flask.
Python Flask App Prerequisites
To follow this tutorial, you’ll need:
- Python version 3 or higher
- MySQL Workbench
- Python’s pip and virtualenv packages installed
- A code editor
- An account at Bitbucket, GitHub, or GitLab to host your Git repository
- A MyKinsta Account (free to sign up) to serve the application
Installing Flask for Python
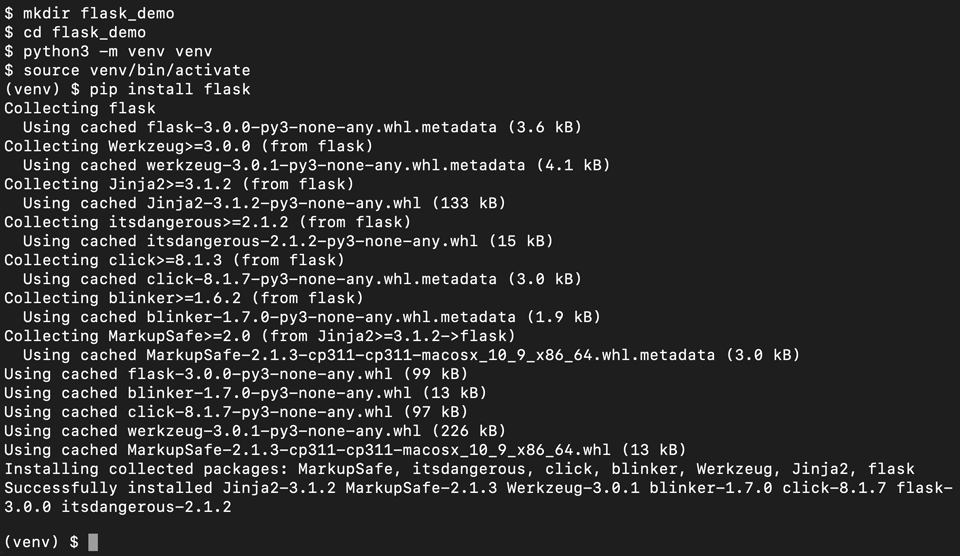
Go to your terminal (Linux or macOS) or Command Prompt (Windows). Start by creating a directory called flask_demo.
Change to the new directory and create a Python virtual environment using the python3 -m venv venv command. In this case, we are also using venv as the name for the directory that will support the virtual environment.
Activate the virtual environment using one of these commands:
venv\Scripts\activatein Windowssource venv/bin/activatein Linux or macOS
Now, install Flask using pip by running pip install flask.
The work in your terminal so far should look something like this:
Building a Base Application
Next, create the base application and review its functionality by rendering content to the browser.
In the flask_demo directory, create a file called demo.py and add the following code:
from flask import Flask

app = Flask(__name__)

# Routes
@app.route('/')
def index():
    return "Happy Coding!"

if __name__ == '__main__':
    app.run(debug=True)
This code imports Flask from the flask module and creates an instance of it called app. The code then creates a route that returns text displaying “Happy Coding!” when users visit the app in a browser. Finally, it executes the development server once the script starts.
Start the application by running flask --app demo run in the terminal. The --app flag specifies the location of the application it’ll execute — here, the demo.py file.
Adding Templates to Your Python Flask App
Adding templates to your app will bolster your content. First, make a directory called templates in your application’s root. Next, move into the templates directory and create a file called index.html containing the following HTML code:
<!DOCTYPE html>
<html lang="en">
<head>
    <meta charset="UTF-8">
    <meta http-equiv="X-UA-Compatible" content="IE=edge">
    <meta name="viewport" content="width=device-width, initial-scale=1.0">
    <title>HomePage</title>
</head>
<body>
    <h3>Flask Demo Application</h3>
    <p>My name is John Doe - learning about Application Deployment!</p>
</body>
</html>
In demo.py, import render_template from the flask module and render the index.html template in the route function like this:
from flask import Flask, render_template
app = Flask(__name__)
# Routes
@app.route('/')
def index():
return render_template('index.html')
if __name__ == '__main__':
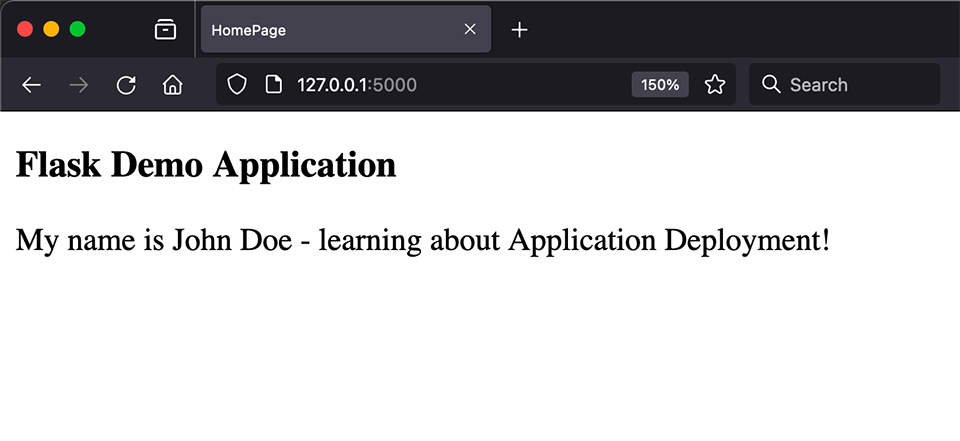
app.run(debug=True)Next, serve your application by running flask --app demo run in your local environment. Use the local address reported in the terminal to launch the app in your browser. You should see something like this:
Connecting Your Flask App to a Local Database
You will create a connection to a local database — MySQL — that stores application content.
To connect your Flask application to MySQL, install the following:
- flask_mysqldb, the MySQL connector for Flask, using
pip install flask_mysqldb - Python-dotenv, for reading environment variables, using
pip install python-dotenv - The Python MySQL connector, using
pip install mysql-connector-python - The MySQL dependency, using
pip install mysqlclient
Head to MySQL Workbench to create a database. Make sure you add a database user with permissions to access the database and create tables.
Create a .env file in your application’s root directory to hold the database connection details. You would add your database user credentials and the database name to this template:
DB_HOST="localhost"
DB_USER="your-db-user"
DB_PASSWORD="your-db-password"
DB_NAME="your-db-name"
In a revised demo.py script, we will now import the MySQL connector and use Python-dotenv to read the environment variable keys in the .env file. This new demo.py script also checks for the existence of a table named persons in the database and will create and populate it if it does not exist.
import os
from flask import Flask, render_template
from flask_mysqldb import MySQL

from dotenv import load_dotenv
load_dotenv()

app = Flask(__name__)

app.config['MYSQL_HOST'] = os.getenv("DB_HOST")
app.config['MYSQL_USER'] = os.getenv("DB_USER")
app.config['MYSQL_PASSWORD'] = os.getenv("DB_PASSWORD")
app.config['MYSQL_DB'] = os.getenv("DB_NAME")

mysql = MySQL(app)

@app.route('/')
def index():
    cursor = mysql.connection.cursor()

    cursor.execute("SHOW TABLES LIKE 'persons'")
    result = cursor.fetchone()

    if not result:
        cursor.execute(''' CREATE TABLE persons (id INTEGER, firstname VARCHAR(20), lastname VARCHAR(20)) ''')
        cursor.execute(''' INSERT INTO persons VALUES(1, 'John', 'Doe') ''')
        cursor.execute(''' INSERT INTO persons VALUES(2, 'Milly', 'Winfrerey') ''')
        mysql.connection.commit()

    cursor.execute('SELECT * FROM persons')
    entry = cursor.fetchall()
    cursor.close()
    return render_template('index.html', entry=entry)
After instantiating Flask, the code above uses environment variables to capture the database attributes from the .env file in your application’s root.
Then, the code instantiates MySQL and associates it with Flask. It creates a cursor object in the index route. Next, the code checks for a table named persons in the database. If it is not found, it creates it with the attributes id, firstname, and lastname and inserts two rows of data.
The next three lines execute an SQL command to select all rows from the persons table and fetch the results. The cursor object is closed, and the results of the query are passed as the context variable entry for rendering with the template.
Here’s a revised index.html template file that can process the results of the database query:
<!DOCTYPE html><html lang="en">
<head>
<meta charset="UTF-8">
<meta http-equiv="X-UA-Compatible" content="IE=edge">
<meta name="viewport" content="width=device-width, initial-scale=1.0">
<title>HomePage</title>
</head>
<body>
<h3>Flask Demo Application</h3>
{% for e in entry %}
<p>My name is {{e[1]}} {{e[2]}} - learning about Application Deployment!</p>
{% endfor %}
</body>
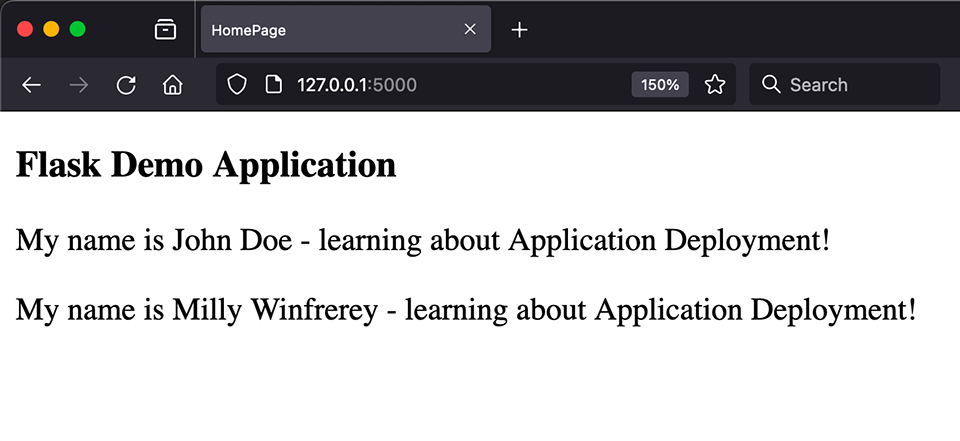
</html>Execute the application, then return to MySQL Workbench to check the data. It should look like the following:

When you query the table, the two entries generated by the app are returned. Your application now renders the following database-derived content in the browser:
Preparing Your Python Project for Deployment
Now that your application is up and running locally, you can make it visible to the world by hosting it on a public-facing web server.
Here, we look at a common approach to pre-deployment using Git to ready the app for delivery to a server where the Python package installer pip will be used for the build.
Start by creating a new directory within your flask_demo project root. Let’s call it myapp. Then move the templates directory and the demo.py file into myapp.
Inside the myapp directory, create a wsgi.py file with the following content:
from myapp.demo import app as application

if __name__ == "__main__":
    application.run(debug=True)
The build process will also use pip to generate your application. You can pass a list of your app’s dependencies to pip on the production side using a requirements.txt file in the project’s root directory.
While still working in the venv virtual environment and within the flask_demo root directory, you can generate a requirements.txt file that is specific to your project with the following command:
pip freeze > requirements.txtThe contents of the resulting text file will look something like this:
blinker==1.7.0
click==8.1.7
Flask==3.0.0
Flask-MySQLdb==2.0.0
itsdangerous==2.1.2
Jinja2==3.1.2
MarkupSafe==2.1.3
mysql-connector-python==8.2.0
mysqlclient==2.2.1
protobuf==4.21.12
python-dotenv==1.0.0
Werkzeug==3.0.1
You won’t be sending the .env file with its database secrets to the production server. Since you won’t need the python-dotenv library to read .env in production, you can remove its reference from requirements.txt and remove (or comment out) these lines in demo.py:
from dotenv import load_dotenv
load_dotenv()
Adding a Python WSGI HTTP Server to the Project
One thing missing from the requirements above is a way to serve the application via HTTP in a production environment. The development server used on your local machine won’t do. For this project, you’ll use the Web Server Gateway Interface (WSGI) package Gunicorn between the app and your host’s web servers.
You can add a Gunicorn requirement to your project by installing it within your virtual environment like this:
pip install gunicornAfter Gunicorn is installed, use pip to generate requirements.txt again.
An alternative to installing Gunicorn locally is to edit requirements.txt and simply add an entry like this:
gunicorn==21.2.0To wrap up the groundwork for the WSGI server, create a file in the project’s root directory named Procfile and add the following line:
web: gunicorn myapp.wsgiThis will be the basis of the start command for your app in production.
Getting Your Project Ready for Git
The revised directory structure is ready for deployment, but you don’t want all of those files going to production. Create a .gitignore file in the project root with content like this:
/venv
.env
This will keep the files within the venv directory and the local database secrets in .env from uploading to your Git host.
You can now initiate your local Git environment and push the code to your Git host using your preferred tools.
Congratulations! You’ve just created a Python Flask application ready for deployment to your favorite hosting platform. We recommend Kinsta’s own PaaS offering, Sevilla.
Summary
Flask’s customizable framework makes creating a Python application dramatically simpler.
Here, we learned how to build a simple database-connected application within a local development environment and then make that ready for deployment to the rest of the world.

Steve Bonisteel is a Technical Editor at Kinsta who began his writing career as a print journalist, chasing ambulances and fire trucks. He has been covering Internet-related technology since the late 1990s.

