
In this guide, we walk you through the process of setting up and configuring an initial Ruby on Rails version 7.1 application to be deployed and hosted on Kinsta. Whether you are a beginner or an experienced Ruby on Rails developer, this step-by-step tutorial will help you get started with your application deployment on Kinsta.
Prerequisites
Before diving into this guide, we assume that you have a basic understanding of Git and Ruby on Rails, including installing Ruby, Rails, and the necessary dependencies on your local development machine.
Step 1: Set up a Kinsta Hosting Account
Visit the Kinsta website and create a new account if you don’t have one already. Configure your domain name or use an assigned Kinsta URL that is provided when deploying.
Step 2: Create a New Ruby on Rails Application
Open your terminal and navigate to the directory where you want to create your new Rails application. Run the following command to create it:
rails new myapp --database=postgresql --javascript=esbuild --css=tailwindThis command creates a new Rails application named myapp with PostgreSQL as the database adapter, esbuild for compiling our Javascript, and Tailwind CSS framework.
Feel free to replace myapp with your desired application name.
For a complete list of available options to configure from the rails new command run:
rails new --helpStep 3: Configure Your Rails Application
Change to the application directory:
cd myappEnsure that when bundling your Rails app that configuration is also adding the Linux platform as this is the OS used for deployment. Enter the following command in the terminal:
bundle lock --add-platform x86_64-linuxWeb Process Script
Add a start.sh file to the bin directory of the app. This ensures that the server starts your application and runs the necessary commands to boot and update the database before running. In your terminal, create the file by entering:
touch bin/start.shInside this file add the following:
#!/bin/bash

bundle exec rails db:prepare
bundle exec rails server
Show Me Home
And to give us a Hello World, create a Home page for the app. In your terminal, enter:
bin/rails generate controller Home indexThis will output:
create  app/controllers/home_controller.rb
route    get 'home/index'
invoke  erb
create  app/views/home
create  app/views/home/index.html.erb
invoke  test_unit
create  test/controllers/home_controller_test.rb
invoke  helper
create  app/helpers/home_helper.rb
invoke  test_unit
Open app/views/home/index.html.erb, and replace its contents with:
<h1>Hello, Kinsta!</h1>Setting the Application Home Page
Open config/routes.rb, and add the following root route to the top of the Rails.application.routes.draw block:
Rails.application.routes.draw do
  root "home#index"

  get "/home", to: "home#index"
end
Now when we run our application locally, we see our new Home page. As we have generated our new application with the addition of esbuild, we have a simplified command to help us boot our application. By running the following command, Rails starts the server and watches for both CSS and Javascript changes with live reload:
bin/devCreate a Database
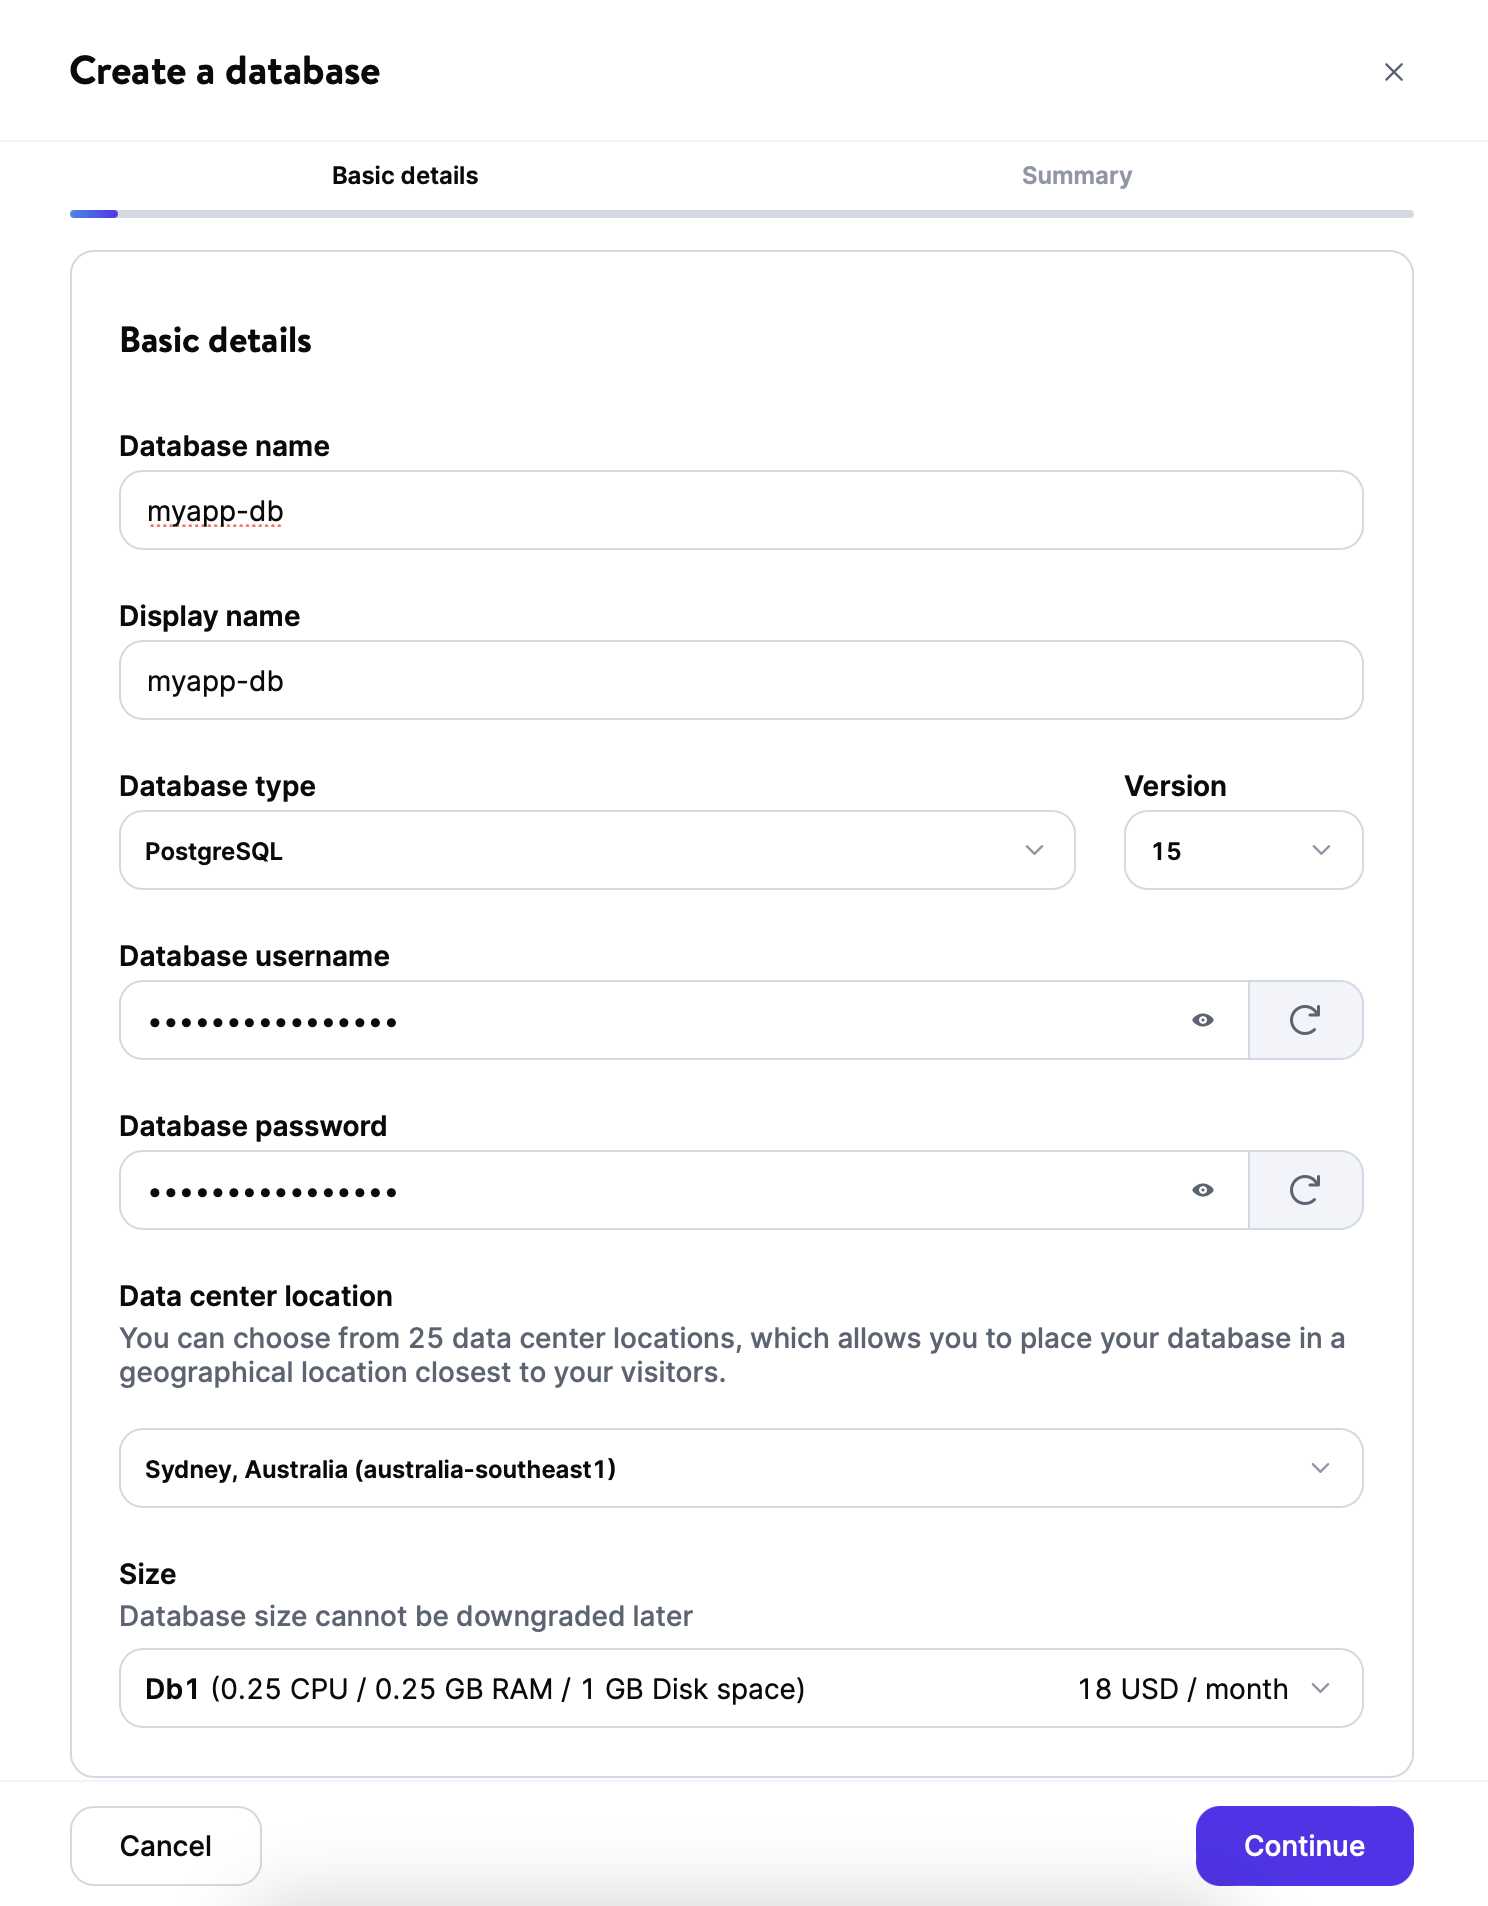
As we have created our Rails application with a PostgreSQL database, we need to set this up through the MyKinsta Dashboard:
- Log in to your Kinsta.com account, and from your Dashboard, click on Add services and select Database.
- Fill in the Basic details and confirm on the Summary page by clicking on Create database.
Step 4: Prepare for Deployment
Start by creating a new repository on GitHub to host your codebase.
Initialize a Git repository locally in your Rails application directory at the root level:
git initCreate a .gitignore file in the root of your application directory and exclude unnecessary files and directories from version control. A sample .gitignore file for a Rails application can be found on the official GitHub page.
To connect your local repository to the repo you created on GitHub, add the remote origin to your local repo, replacing username and repository with your own:
git remote add origin https://github.com/username/repository.gitAdd, commit, and push your code to the Git repository:
git add .
git commit -m "Initial commit"
git push
Note that as we set Kinsta to deploy automatically at every push to the repo, our first build fails. This happens because we haven’t connected the database to the application yet, which we will do in the next step.
Step 5: Deploy to Kinsta
- Log in to your MyKinsta account.
- From your Dashboard, click on Add services and select Application.
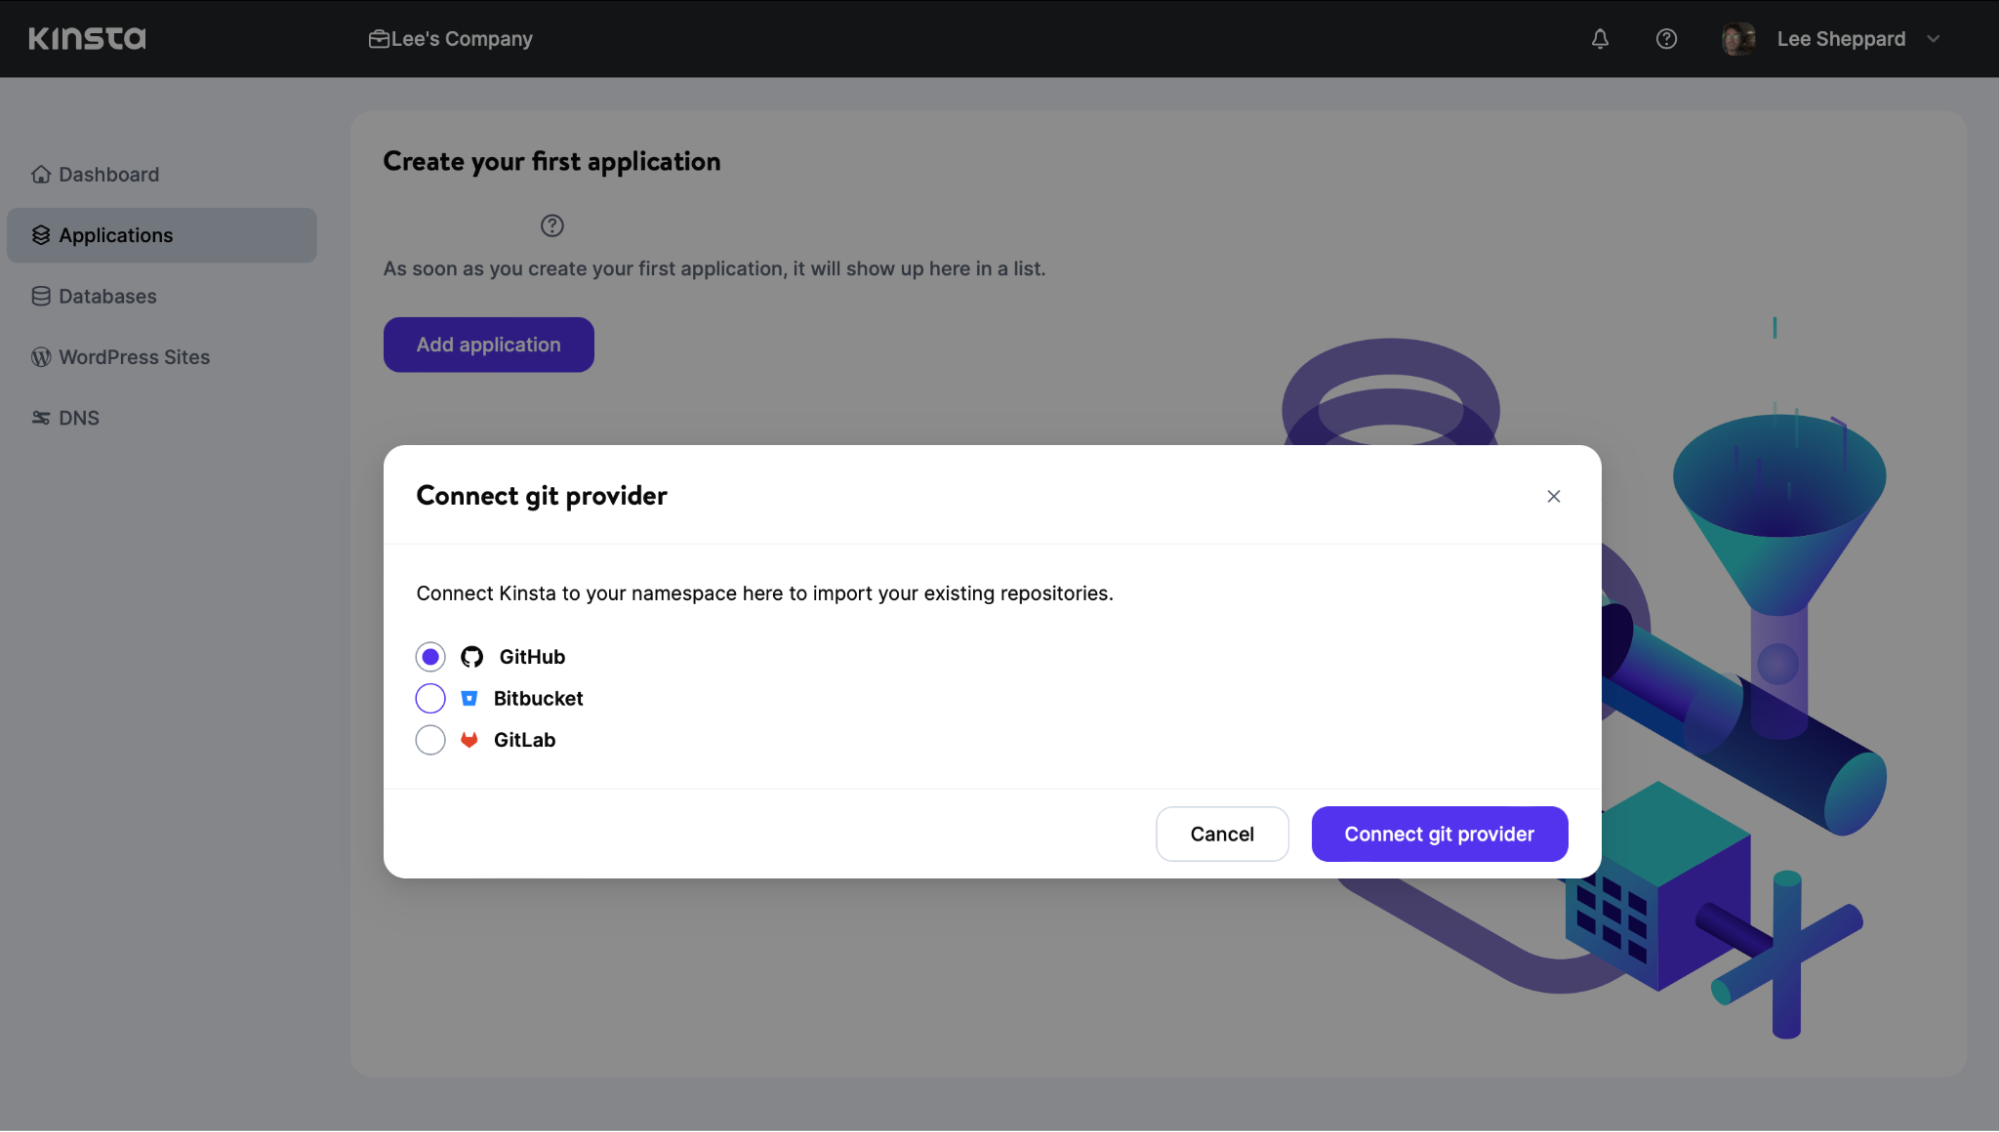
- Connect to a Git provider.
Set Up Your Application Details
- Add the repository and select the default branch.
- (optional) Choose Automatic deployment on commit for this default branch.
- Add the application name. It’s used to identify the app in your Dashboard.
- Choose the data center location. Opt for the location closest to your audience.
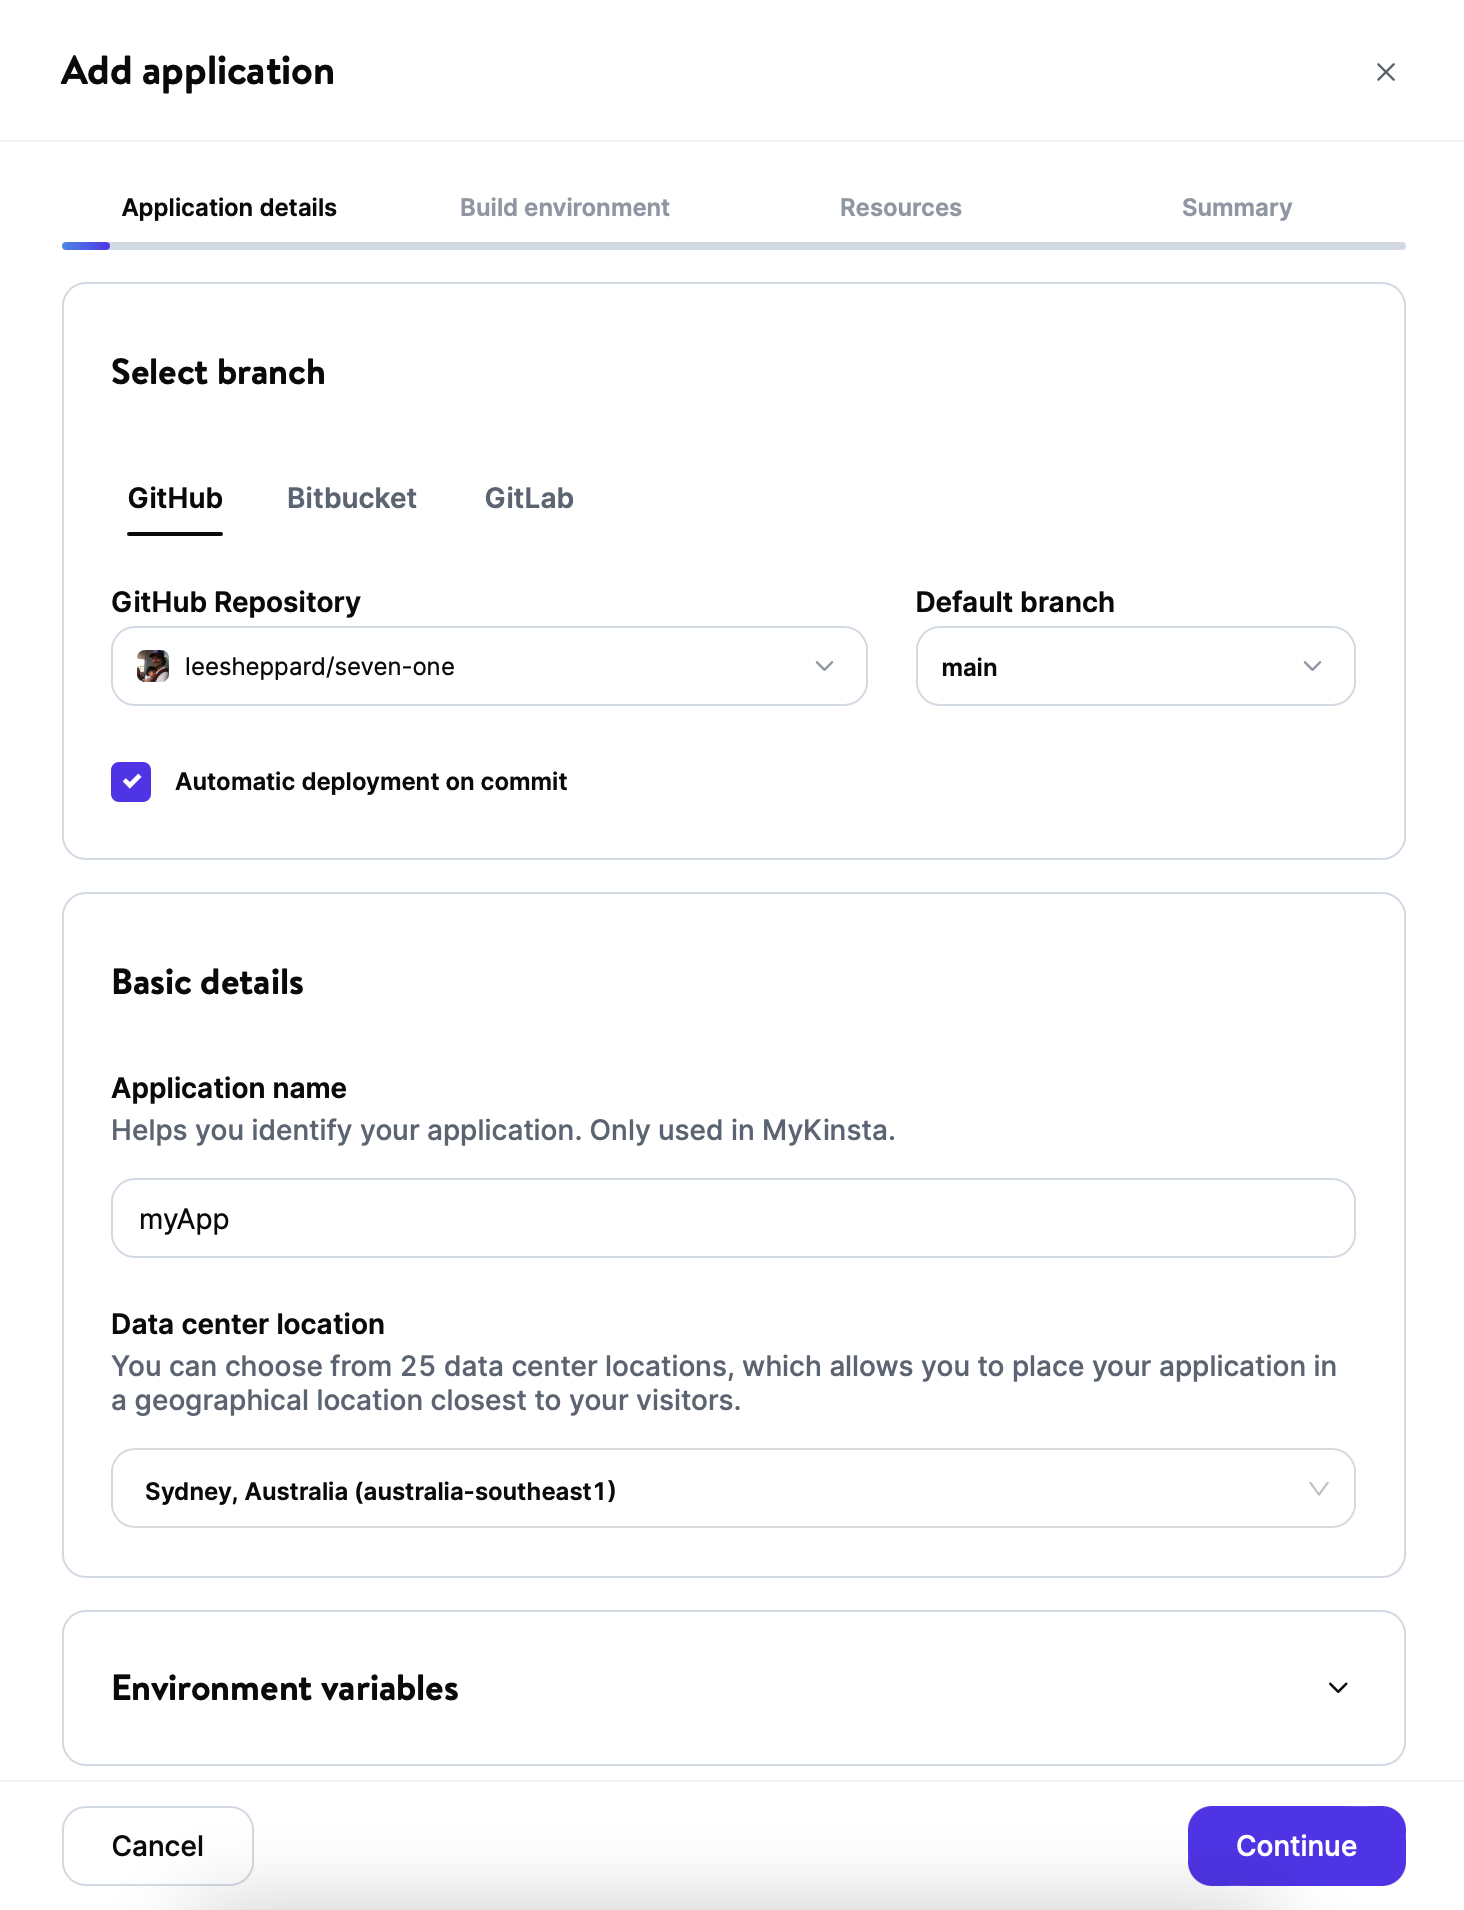
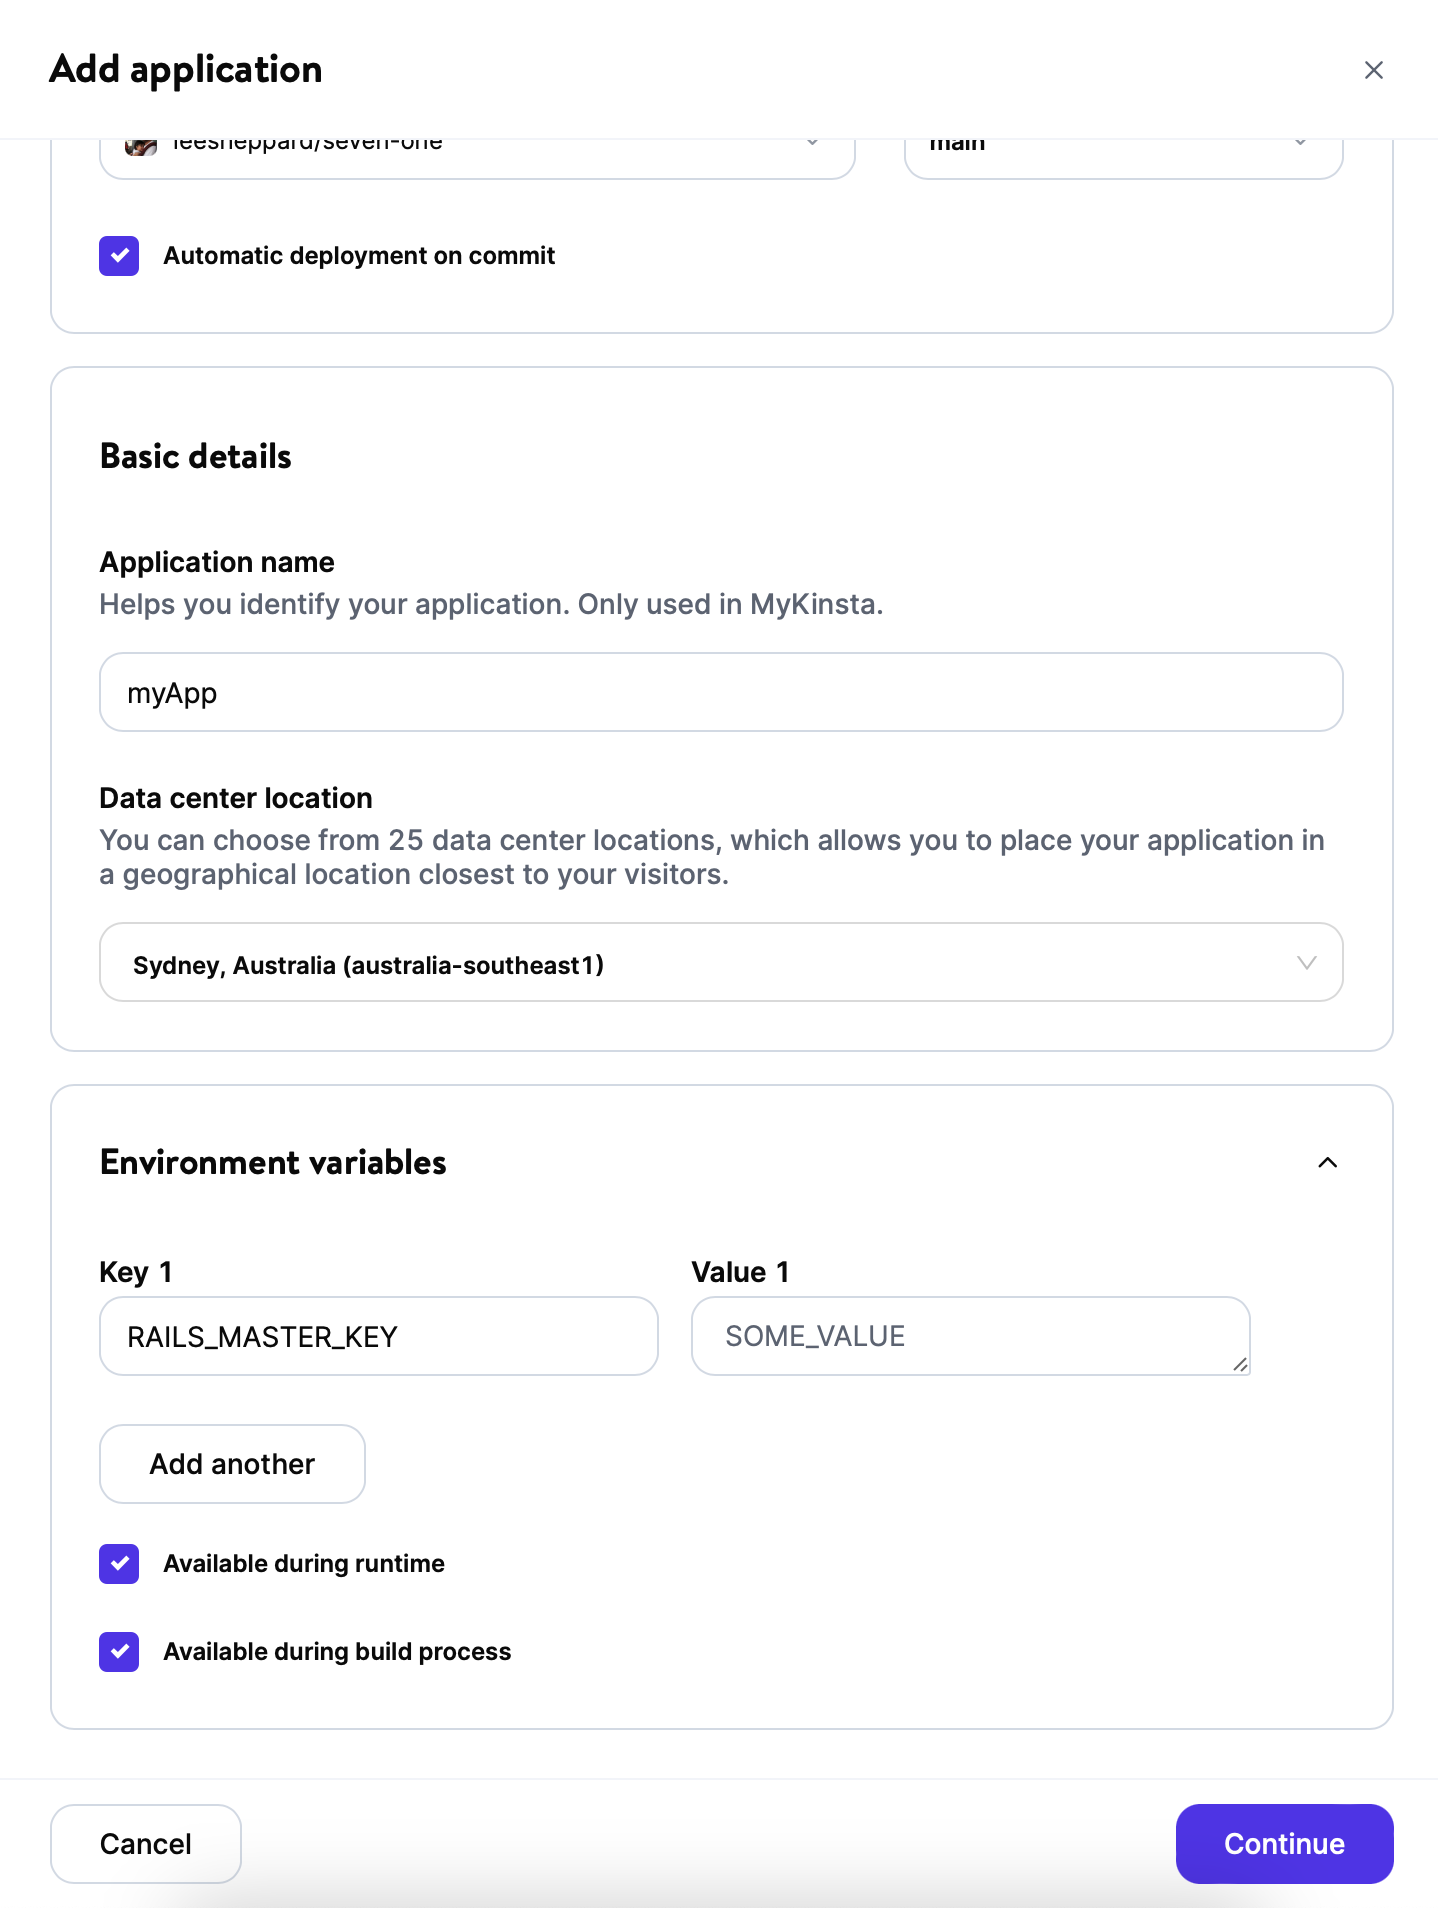
You can add environment variables at this stage (examples). Your newly generated Rails app comes with a master key that decrypts and reads secrets in the credentials file in the config folder. Never keep your master key in version control (it’s in the .gitignore file already).
To allow decryption, you need to set the variables up using a special key. Expand Environment variables, copy your local master key file the value, and paste it into the Value 1 input for the RAILS_MASTER_KEY variable:
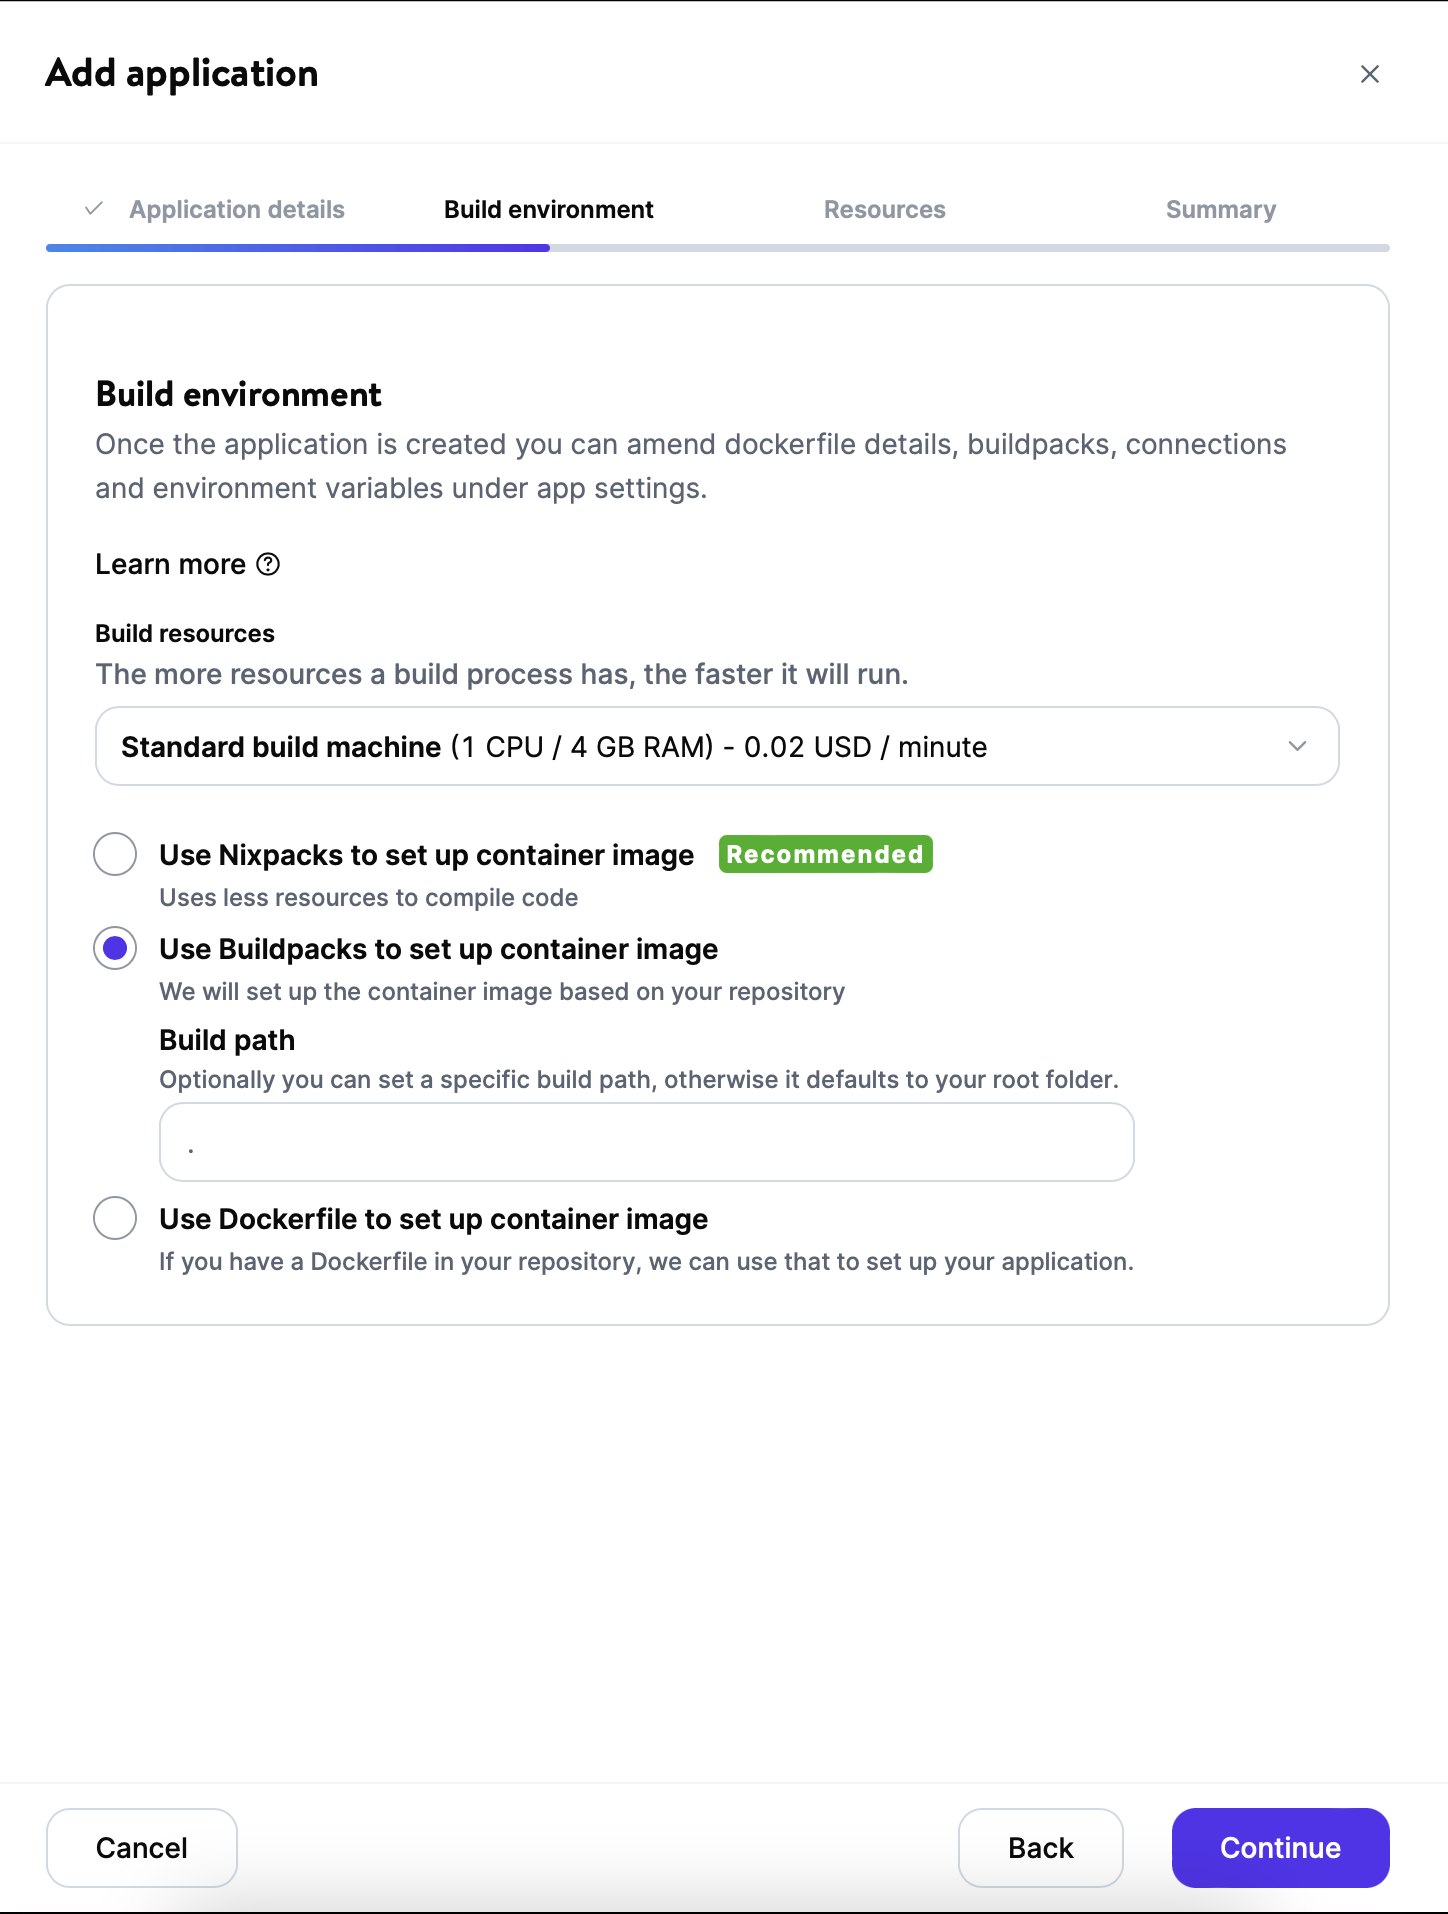
Set Up Your Build Environment
- Choose your Build resources.
- For Rails applications, select Use Buildpacks to set up container image.
- Click Continue.
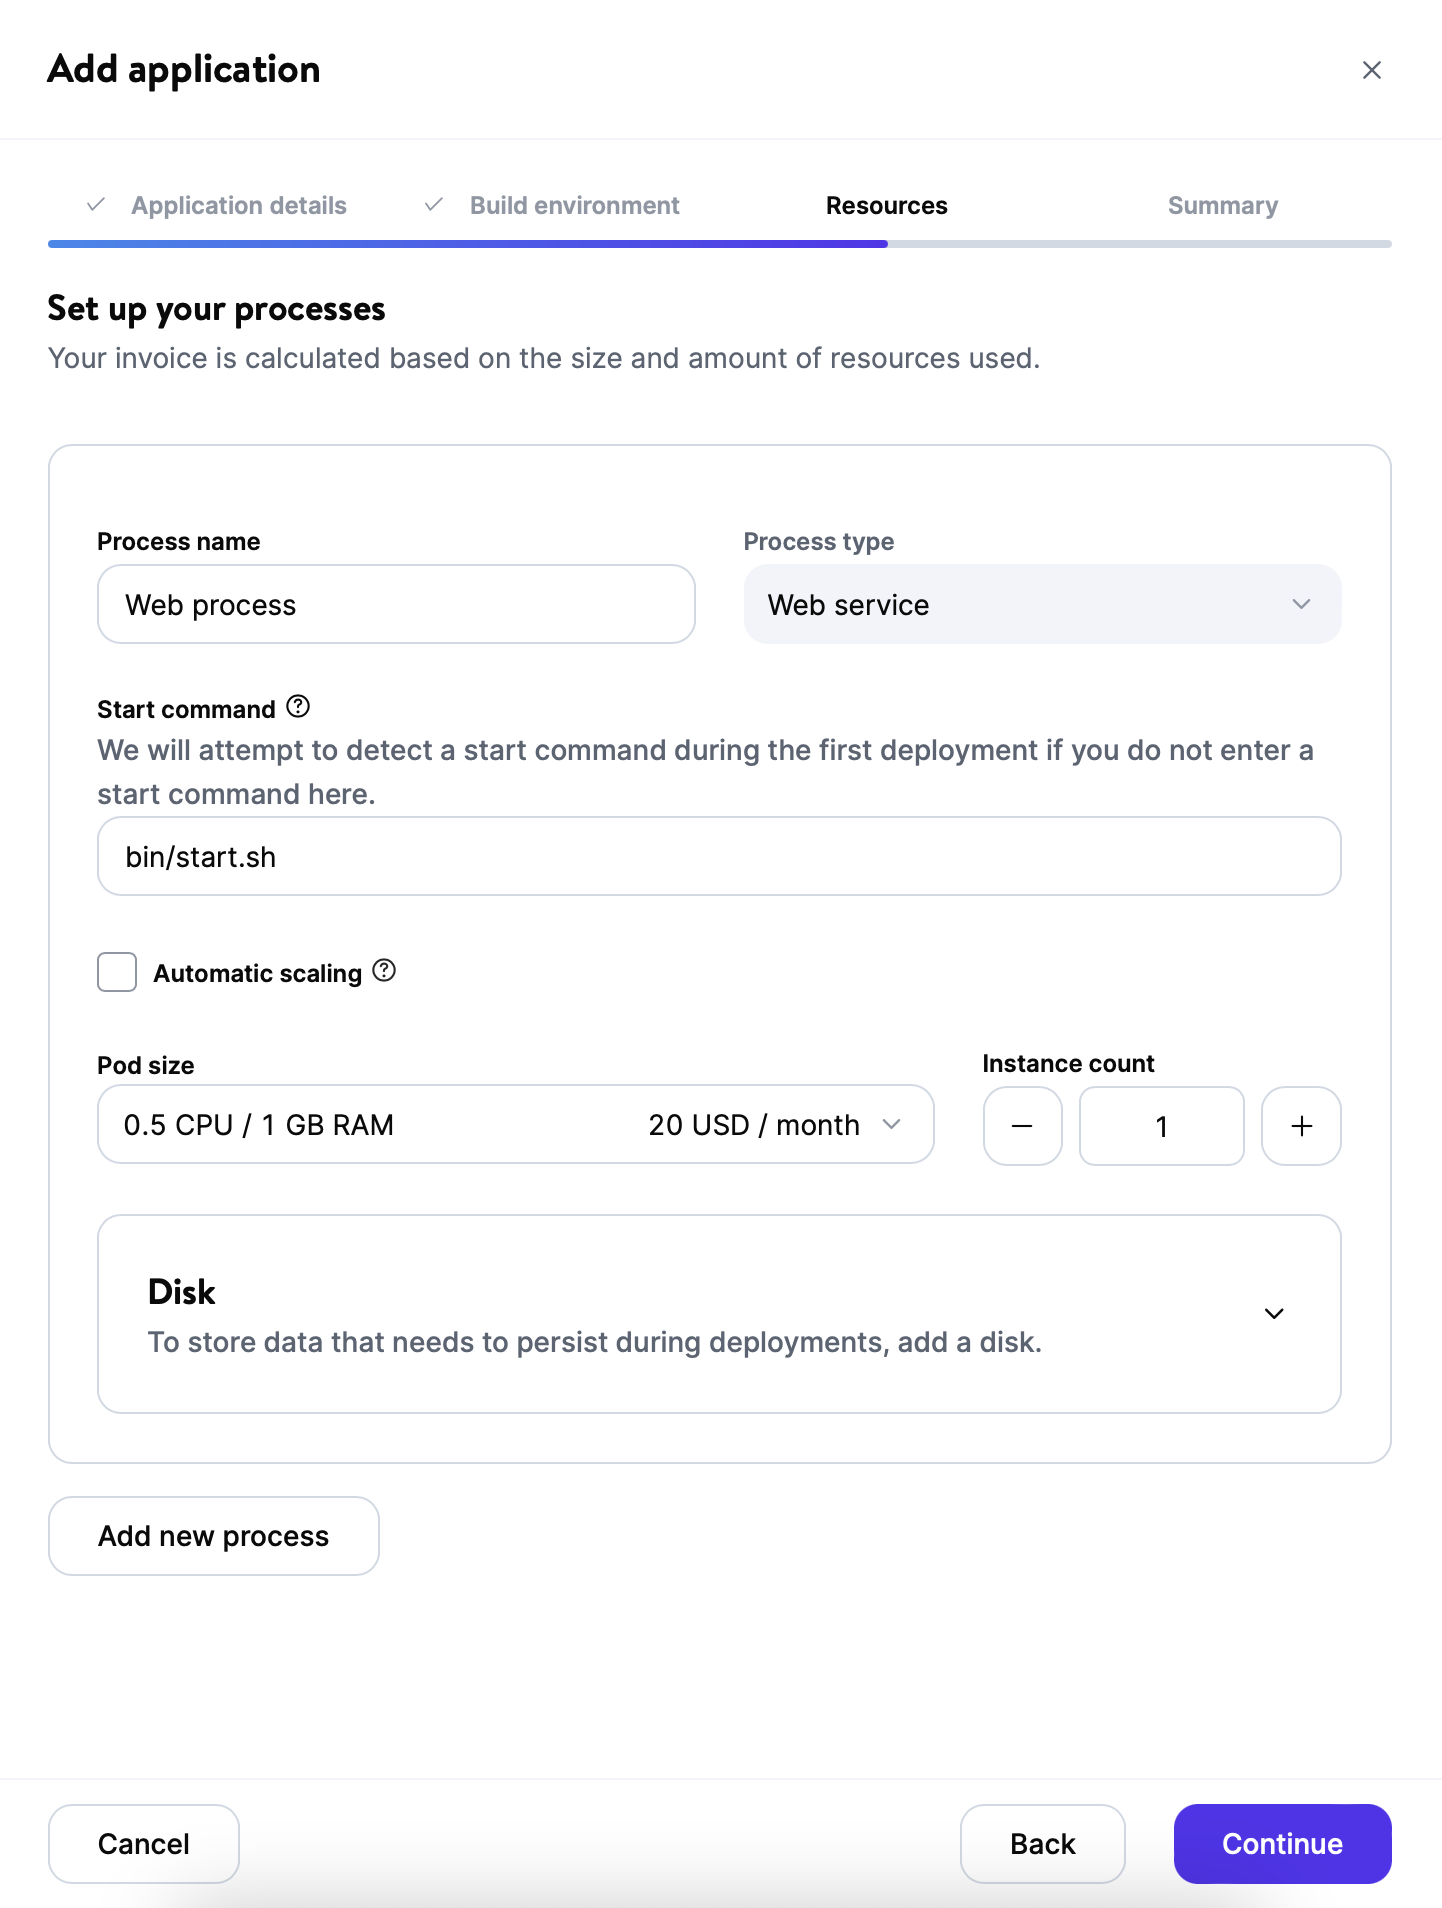
Configure Your Application Resources
- Leave the Start command field empty, as this is defined via the command the file created in our earlier steps bin/start.sh.
- Click Continue.
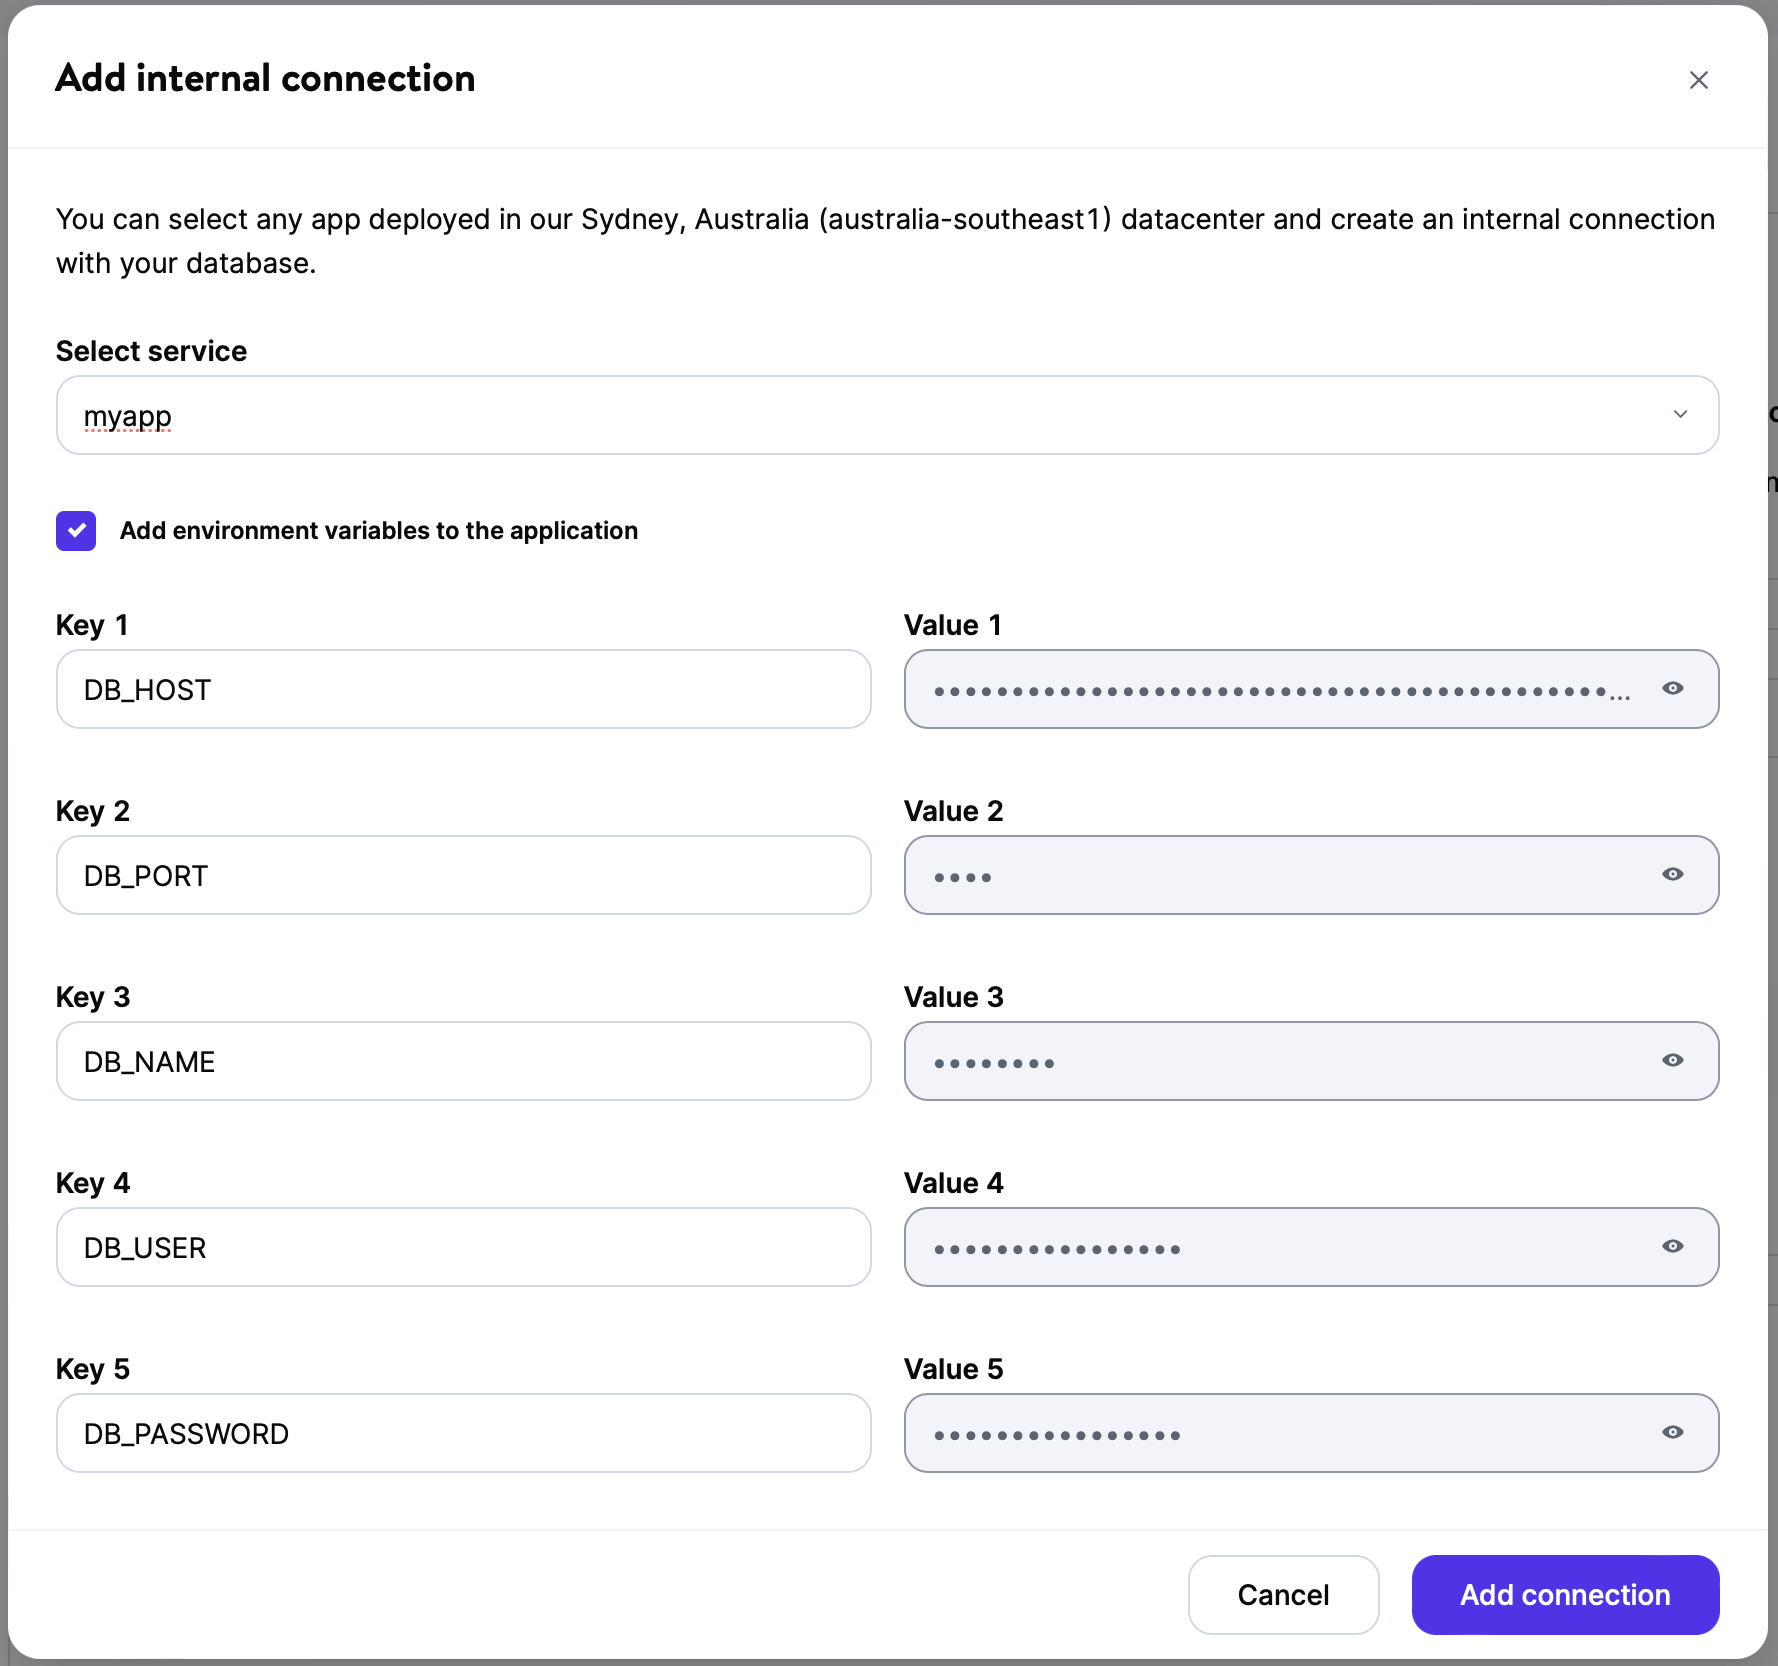
Create Your Apps’ Database
We need to make the final connection configuration for the database.
- From the MyKinsta Dashboard menu on the left, click on Databases and click on the newly created database name.
- Under the Info heading, you’ll see a subheading Internal connections, and click on Add application.
- From the drop-down menu, select your Rails application.
- Check the box Add environment variables to the application.
- Click Add connection.
Configure Your Local Database
Open the config/database.yml file and update the database configuration according to your MyKinsta’s database credentials.
Example:
production:
  adapter: postgresql
  encoding: unicode
  pool: 5
  database: <%= ENV["DB_NAME"] %>
  host: <%= ENV["DB_HOST"] %>
  username: <%= ENV["DB_USER"] %>
  password: <%= ENV["DB_PASSWORD"] %>
Find more information on handling Database connections in our Settings documentation.
Confirm your configuration and enter payment details to finalize the setup of the application and Kinsta deploys it in a few minutes.
Summary
By following this guide, you have successfully set up and configured your Ruby on Rails version 7.1 with a PostgreSQL Database application to be deployed and hosted on Kinsta.
You can now focus on developing your application and utilize the powerful features provided by Kinsta for seamless deployment and hosting. Remember to refer to official documentation or seek further assistance from Kinsta support whenever needed.

Lee is an Agile certified full stack Ruby on Rails developer. With over six years in the tech industry he enjoys teaching, coaching Agile, and mentoring others. Lee also speaks at tech related events and has a background in design and illustration.

