
FileZilla is a popular SFTP client for transferring files between your server and computer.
Occasionally, you may need to transfer “hidden” or “invisible” files or folders, which start with a period (e.g. .htaccess or .maintenance). If you’re having trouble looking for hidden files on your server with FileZilla, you may need to configure the application to show hidden files.
In this article, we’ll show you how to do just that.
Showing Hidden Files in FileZilla
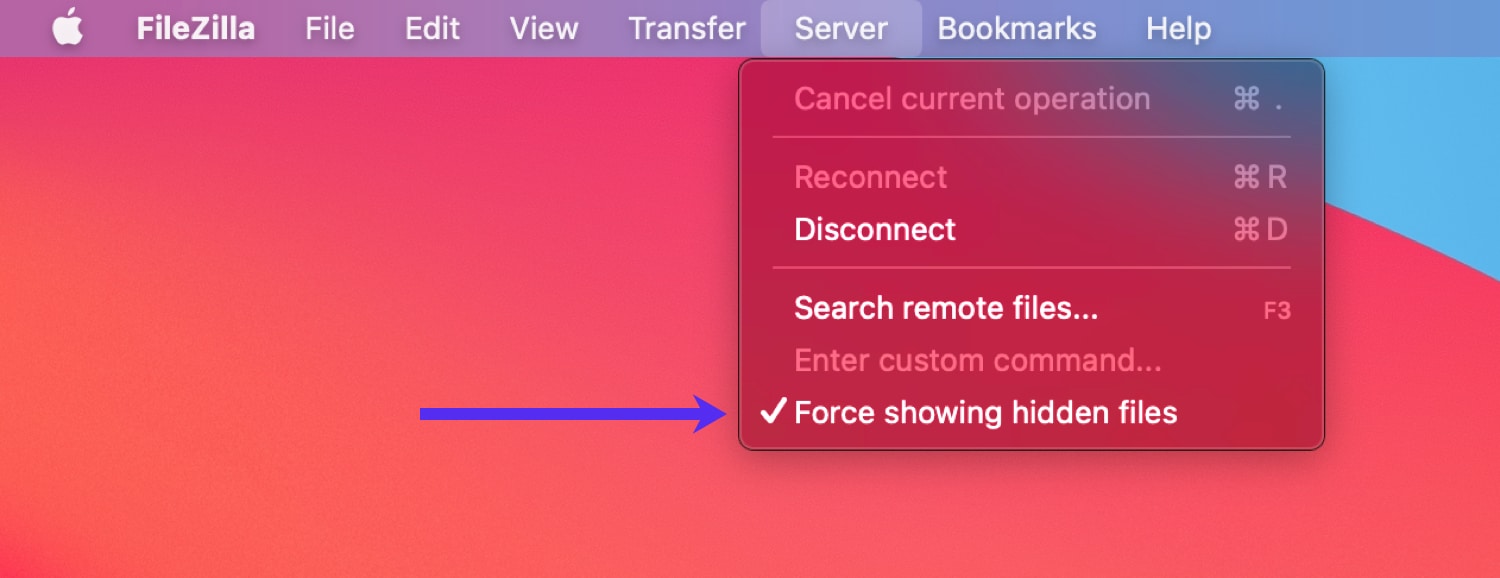
Before connecting to your server, click on the “Server” tab in FileZilla’s menu bar and click Force Showing Hidden Files in the dropdown menu. Checking this option will force FileZilla to show hidden files and directories.
Next, connect to your server via SFTP. If your site is hosted on Kinsta, you can find your SFTP details in the MyKinsta dashboard.
You should now be able to see hidden files on your server. In the screenshot below, there are two hidden files in our ~/public folder – .hiddenfile and .htaccess.

Being able to see hidden files on your server is very important for troubleshooting WordPress. For example, if your site is stuck in maintenance mode, you can check if there is a .maintenance file in your site root that can be removed.
Similarly, for sites that use the Apache web server, knowing how to enable hidden files also allows you to make changes to your .htaccess file without having to reach out to your host’s support team. As you can see, configuring FileZilla to show hidden files is a quick and easy process!

Brian has been a WordPress user for over 10 years, and enjoys sharing his knowledge with the community. In his free time, Brian enjoys playing the piano and exploring Tokyo with his camera. Connect with Brian on his website at brianli.com.