
When managing a website, you’ll regularly need to add new media files like images, videos, and other important elements. However, the default WordPress Media Library doesn’t let you upload these files in bulk.
Fortunately, you can easily upload many media files to a File Transfer Protocol (FTP) client and then make them available in your Media Library. This enables you to add a considerable number of files, or files with large sizes, at the same time.
In this post, we’ll explain when you might want to bulk upload files to the WordPress Media Library. Then, we’ll show you how to do this in three simple steps. Let’s get started!
When Is It Helpful to Bulk Upload Files to Your WordPress Media Library?
If you’re simply uploading a few images to use in a new post, the regular WordPress media library upload functionality is perfectly fine. You can drag and drop multiple images, audio files, or videos directly into the upload area:

However, you’ll likely run into some Media Library errors if you try to upload:
- Large file sizes (some WordPress sites have a max upload size of 2MB by default)
- Large numbers of individual files (think in the hundreds)
There may come a time when you need to complete one of the above actions. In these situations, bulk uploading files to your media library via File Transfer Protocol (FTP) offers a much better solution than trying to use the built-in media library upload tool.
Why Can’t You Just Upload Files via FTP and Stop There?
It’s totally possible to bulk upload files via FTP without completing any additional steps. The problem only arises when you want those files to be available inside your WordPress Media Library.
Once you upload a file via FTP, it’s live on your server. While you can link directly to the file, it won’t appear in your Media Library unless you register the uploaded file with WordPress.
So if you want the files you bulk upload to actually appear in your media library, you’ll need to complete the following process:
- Add the files to your uploads folder via FTP
- Use a WordPress plugin to register the files you uploaded with your WordPress media library
Below, we’ll take you through all of the steps in detail. You don’t need any specialized knowledge to complete the process – just follow along with the screenshots!
How To Bulk Upload Files to the WordPress Media Library
In order to bulk upload your files to the WordPress media library, you’ll need a few tools and pieces of information:
- The FTP account details for your host. We’ll show you how to find these for your Kinsta account. If you’re using a different host, you’ll need to get those details from your own hosting dashboard.
- An FTP program. This software enables you to upload files to your host. FileZilla is a good free option, but you can pick another FTP program if you’d prefer.
- Media Sync. This free plugin lets register your uploaded files to your media library.
Once you have these tools, you’ll be fully prepared to continue with the following steps!
Step 1: Connect to Your Website via FTP
To get started, you’ll need to connect to your site via FTP or SFTP. SFTP is just short for Secure FTP. Kinsta exclusively uses SFTP, but some other hosts operate on FTP.
Remember – you’ll need an FTP program to do this. We’ll use FileZilla in our screenshots, but you can use a different FTP program if you’d like.
To connect to your site, you’ll need your FTP login details (specifically SFTP for Kinsta). If you’re using Kinsta, you can find these credentials by going to WordPress Sites > Your Site > Info in MyKinsta. In the SFTP/SSH section, you’ll need the host, username, password, and port:
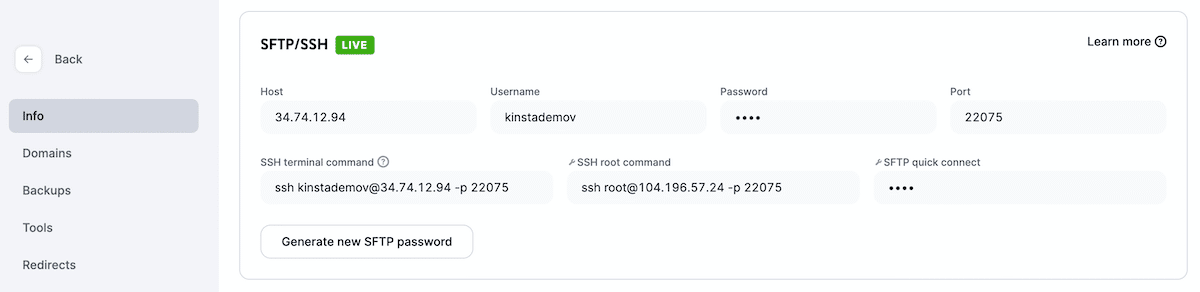
Now, you have all the information you need to connect via FTP. If you’re not using Kinsta, you should be able to get this same information from your host.
Armed with your SFTP details, go back to your FTP program and enter them as follows:
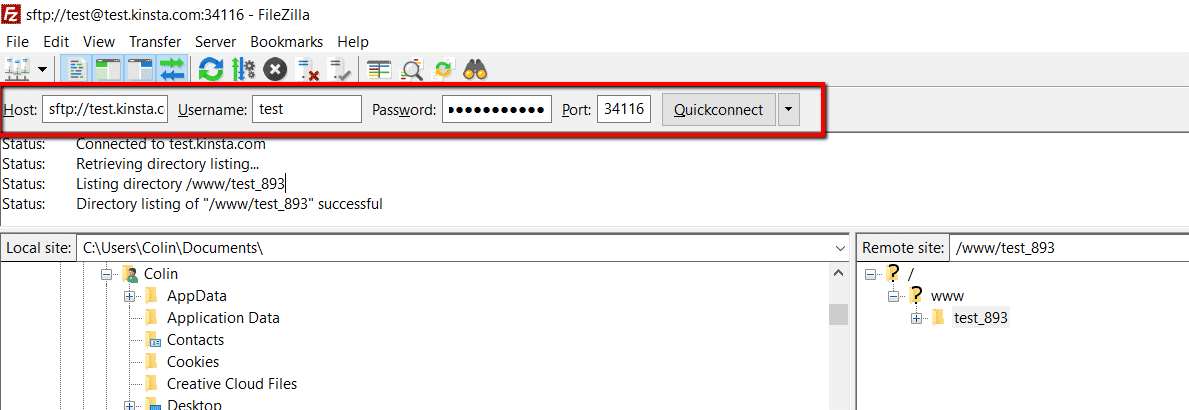
Your host name should be preceded by ‘sftp://’. For example: ‘sftp://35.224.70.159’. Additionally, some FTP programs allow you to specify the SFTP method in a separate dropdown.
Once you’ve entered this information, click on the Quickconnect button and FileZilla (or your FTP program of choice) will handle the rest.
Step 2: Upload As Many Files As You’d Like
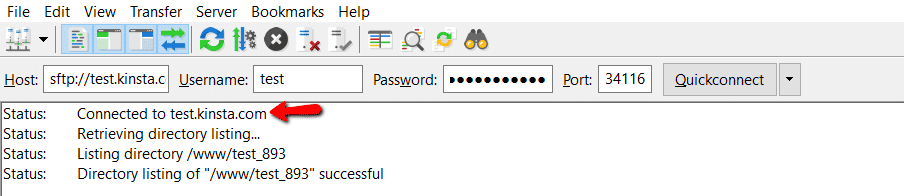
At this point, you should be connected to your site via an FTP client. You can confirm this by looking for a success message:
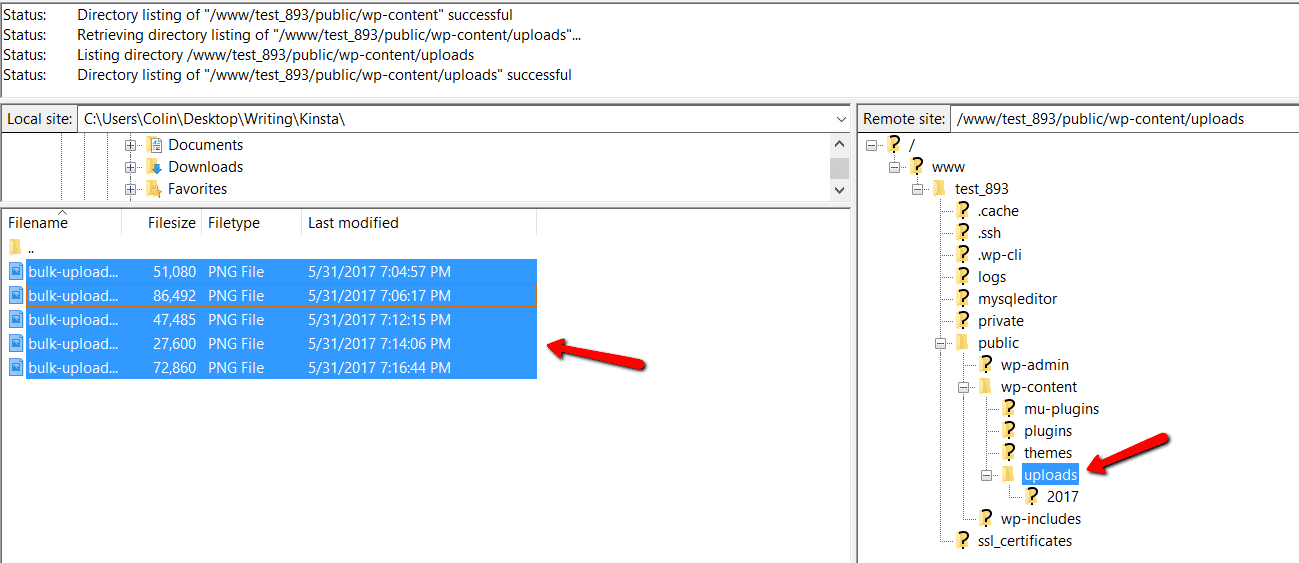
Now, you’ll need to upload your files to the Uploads folder on your WordPress site. To do that, expand the folder structure of your Remote Site tab. You can see the file path to follow in the screenshot below:
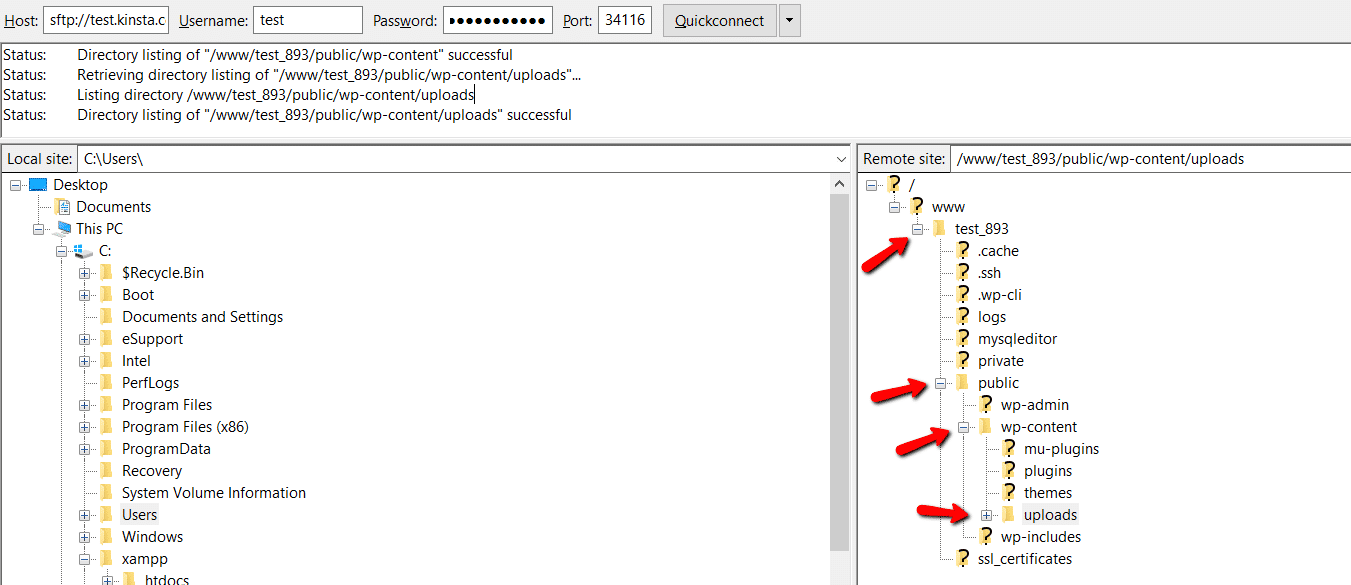
Now, you can navigate to the files you’d like to upload in the Local Site tab. All you need to do is drag those files into the Uploads folder on your Remote Site:
Depending on the size of your files, it might take some time for them to upload. After this is complete, you can continue to the next step.
Step 3: Register Your Newly Uploaded Files to the WordPress Media Library
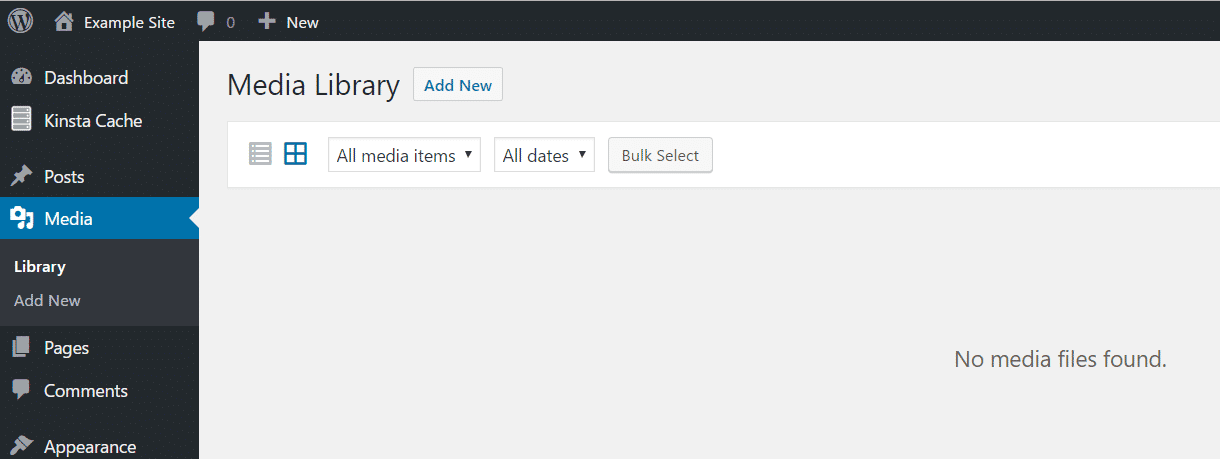
Once the FTP uploads finish, your files are live on your server. However, if you go to your WordPress site’s media library, you’ll notice that the files are nowhere to be seen:
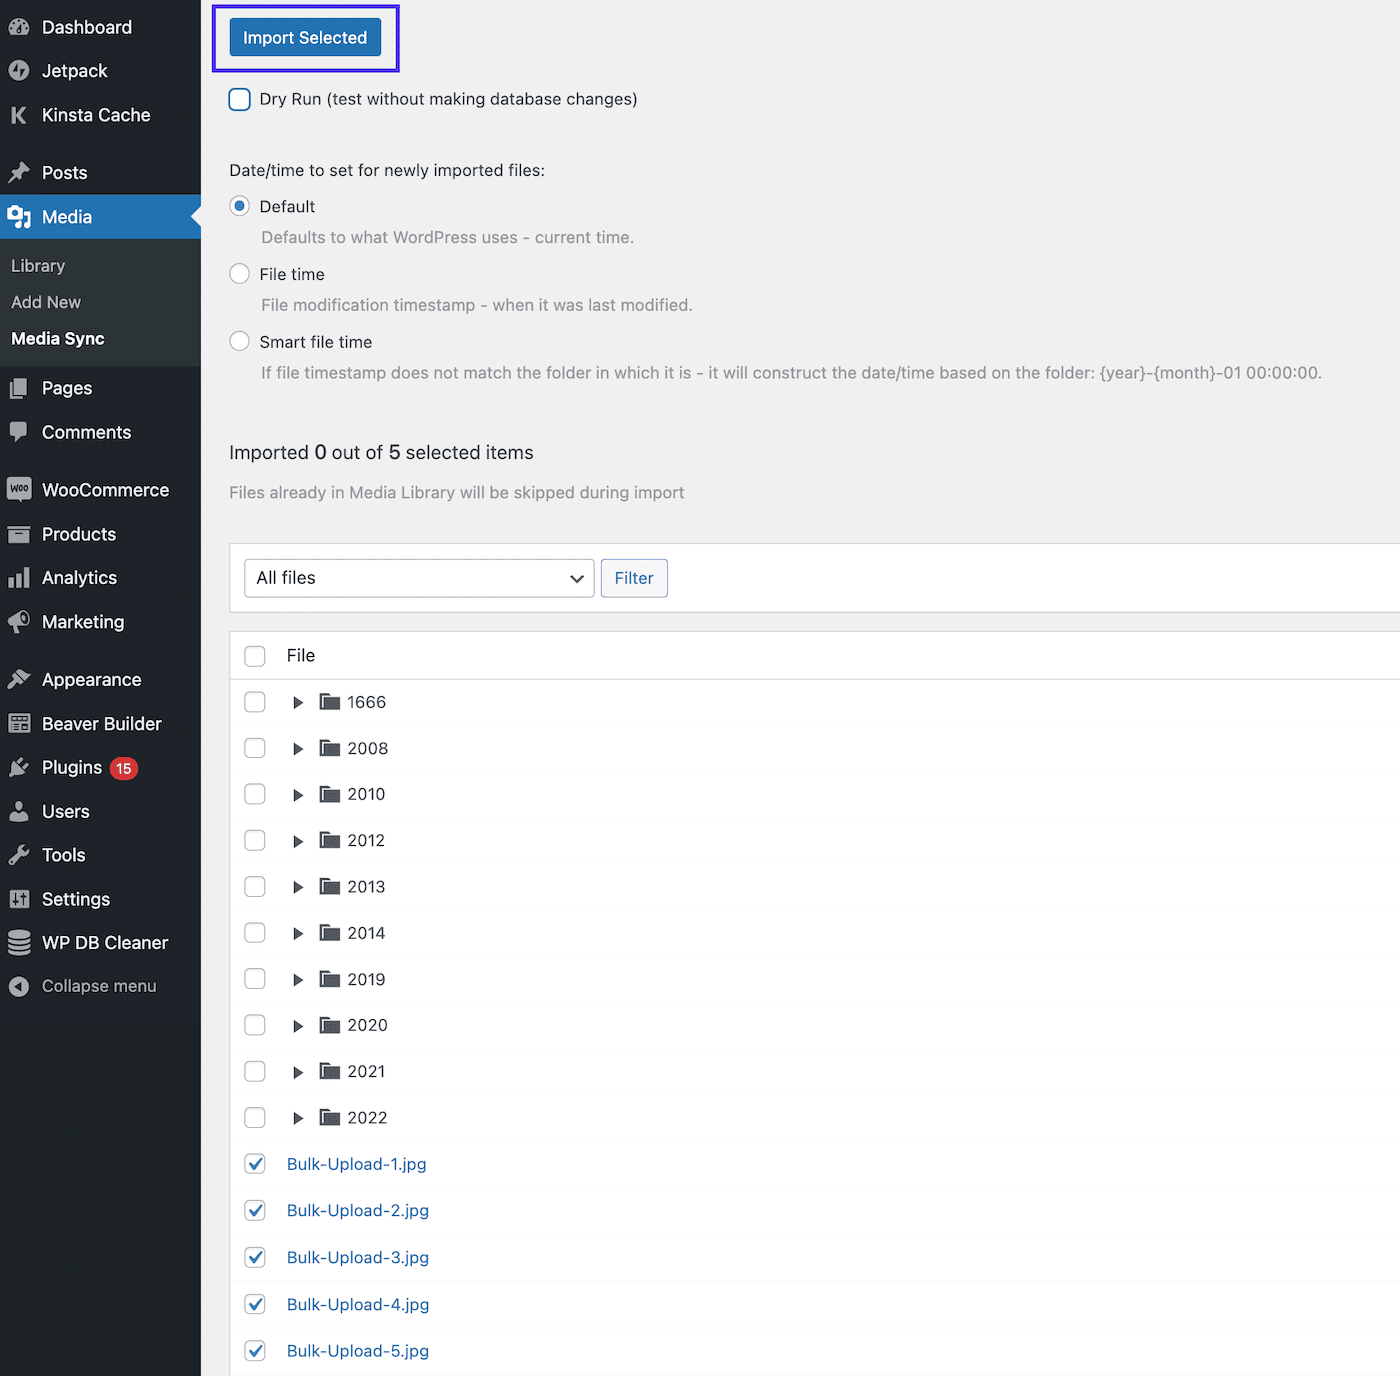
To transfer those files into your library, you’ll need to install and activate the free Media Sync plugin. Once the plugin is activated, you can navigate to Media > Media Sync. Then, click on Scan Files under Sync – uploads directory:

Now, you should see a list of the files you just uploaded via FTP. You can select these files in bulk and then hit Import Selected:
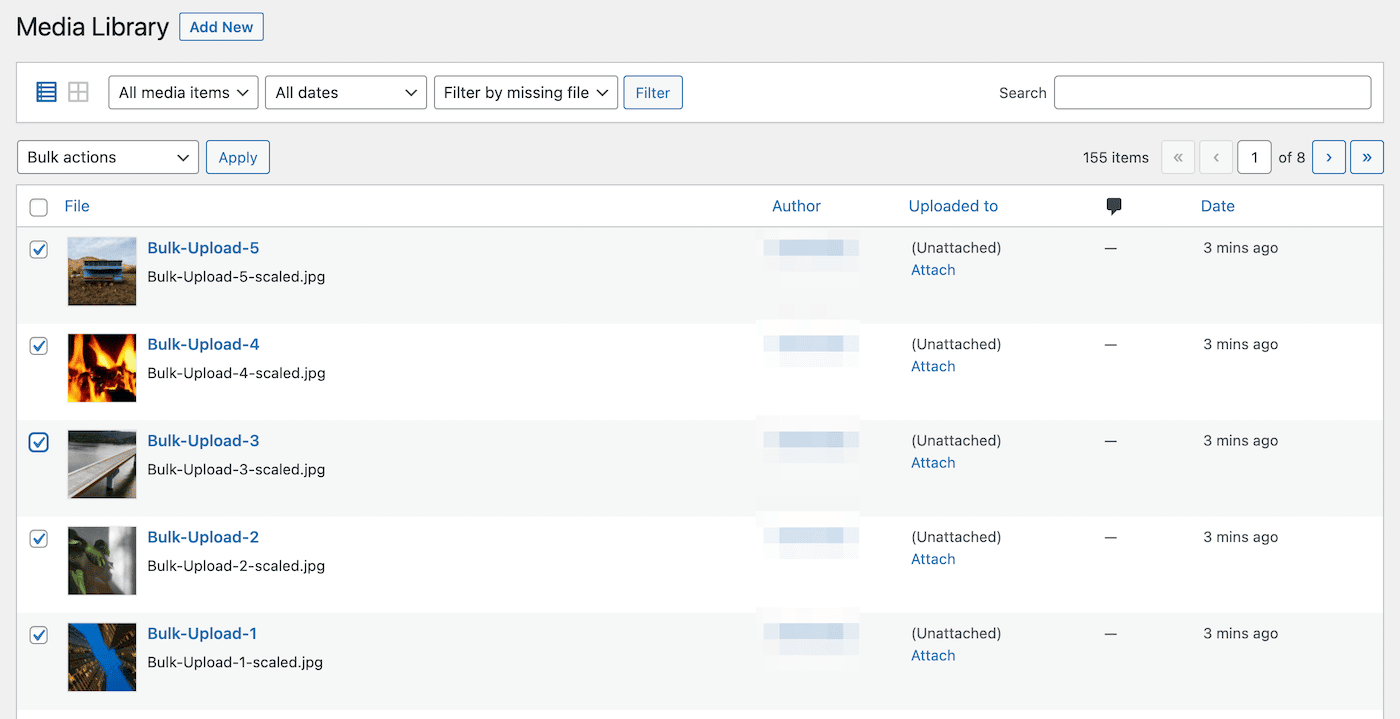
After the import is finished, you can return to the Media Library. Here, you should see all of the files you uploaded via FTP:
That’s all you need to do to bulk upload files to WordPress! To further extend its functionality, you can start using some additional Media Library hacks. These can help you add, edit, and manage new files.
Alternatives
Although the process above is fairly straightforward, you may want to evaluate different methods. Here are a few alternatives you could use to bulk upload and register files within your WordPress media library:
- You can also use the premium WP All Import plugin to import images from your server.
- If you want to do it straight from the command line, you can import images using WP-CLI. The wp media import command lets you create attachments from local files or URLs.
With any of these techniques, you can easily upload files in bulk into the Media Library. This way, you won’t have to upload each one manually.
Summary
If you’re planning on importing a large number of files into WordPress, you may not find the default upload options very useful. Ultimately, the Media Library is not equipped to handle hundreds of new uploads, especially if these are large files.
To upload bulk files into WordPress, you can add them to the Uploads folder in an FTP client. Then, the Media Sync plugin can help you register these files into your Media Library. After this, your new uploads will be available to use in your dashboard.
During this process, you’ll need to quickly access your website’s FTP information. With a Kinsta hosting plan, this will be readily available in your MyKinsta dashboard!


