
If you run a website, chances are you’ve heard the word bandwidth. It is the amount of data your site sends to visitors. This means every time a page loads, an image appears, or a video plays, it consumes bandwidth.
At Kinsta, you’ll see bandwidth mentioned in two ways. There’s server bandwidth, which is the data your origin server delivers directly to visitors, and there’s CDN bandwidth, which comes from Kinsta’s CDN when it serves cached files like images, CSS, or JavaScript from Cloudflare’s network.
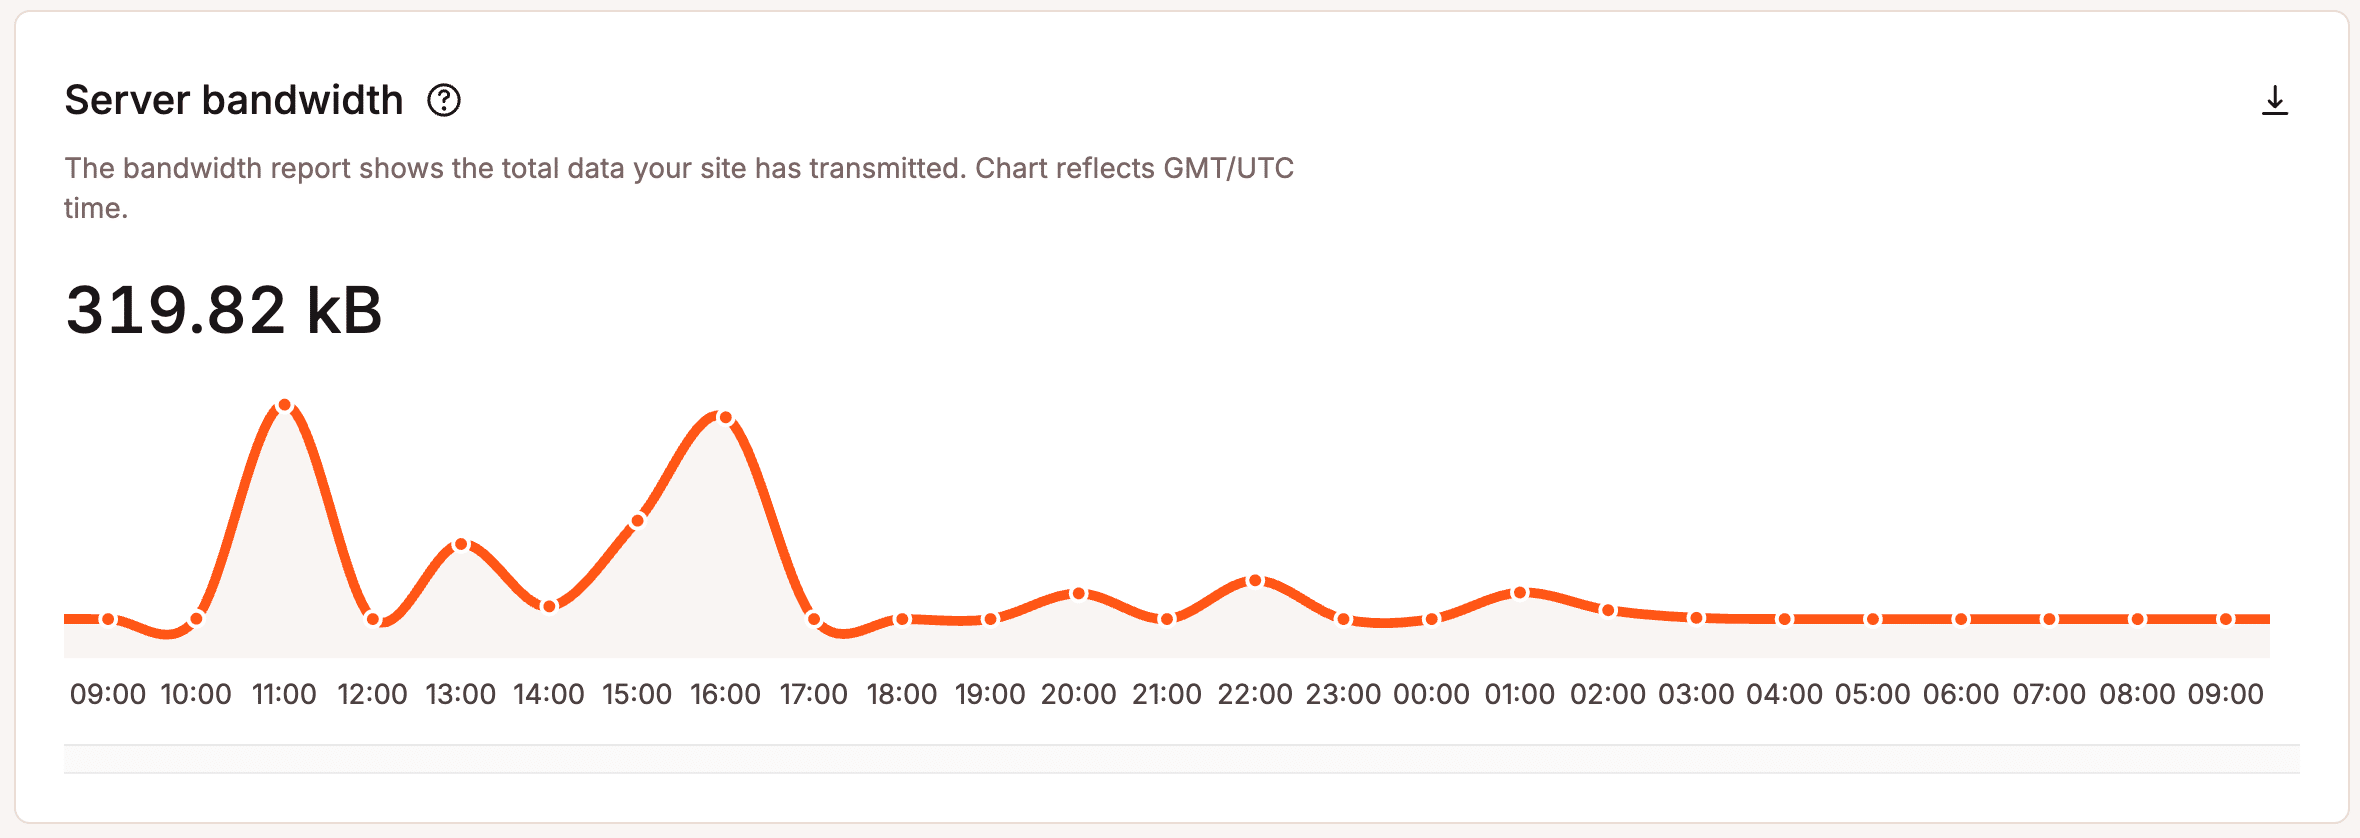
However, what really matters when evaluating performance and plan usage is server bandwidth. This number reflects the actual data your server sends in response to real visitor requests, and that is the focus of this article.
The less work your server has to do, the better. Kinsta provides several tools that help reduce your site’s bandwidth usage and make it load faster at the same time.
What counts toward server bandwidth at Kinsta
When a visitor arrives at your site, their browser doesn’t just grab one file. It may request the main HTML file, several CSS files, some JavaScript, images, fonts, and possibly even a video.
Every one of those requests requires your server to send something back, and together that data transfer is what makes up your server’s bandwidth.
The good news is that not everything gets counted. If your site is already using a content delivery network (CDN) or edge caching, those requests are handled at the edge and don’t eat into your server bandwidth at all. We also don’t include traffic to the WordPress login page, and common bots or crawlers that identify themselves are filtered out automatically.
So, the bandwidth number you see in MyKinsta (username > Company settings > Analytics > Server bandwidth) reflects the actual data your origin server sends in response to real visitor requests.
In other words, the more you can offload traffic to the CDN and edge cache, the lighter the load on your server.
Lighten the load with Kinsta’s CDN
One of the easiest ways to reduce server bandwidth is to stop relying on your server to do all the heavy lifting. That’s where a CDN comes in.
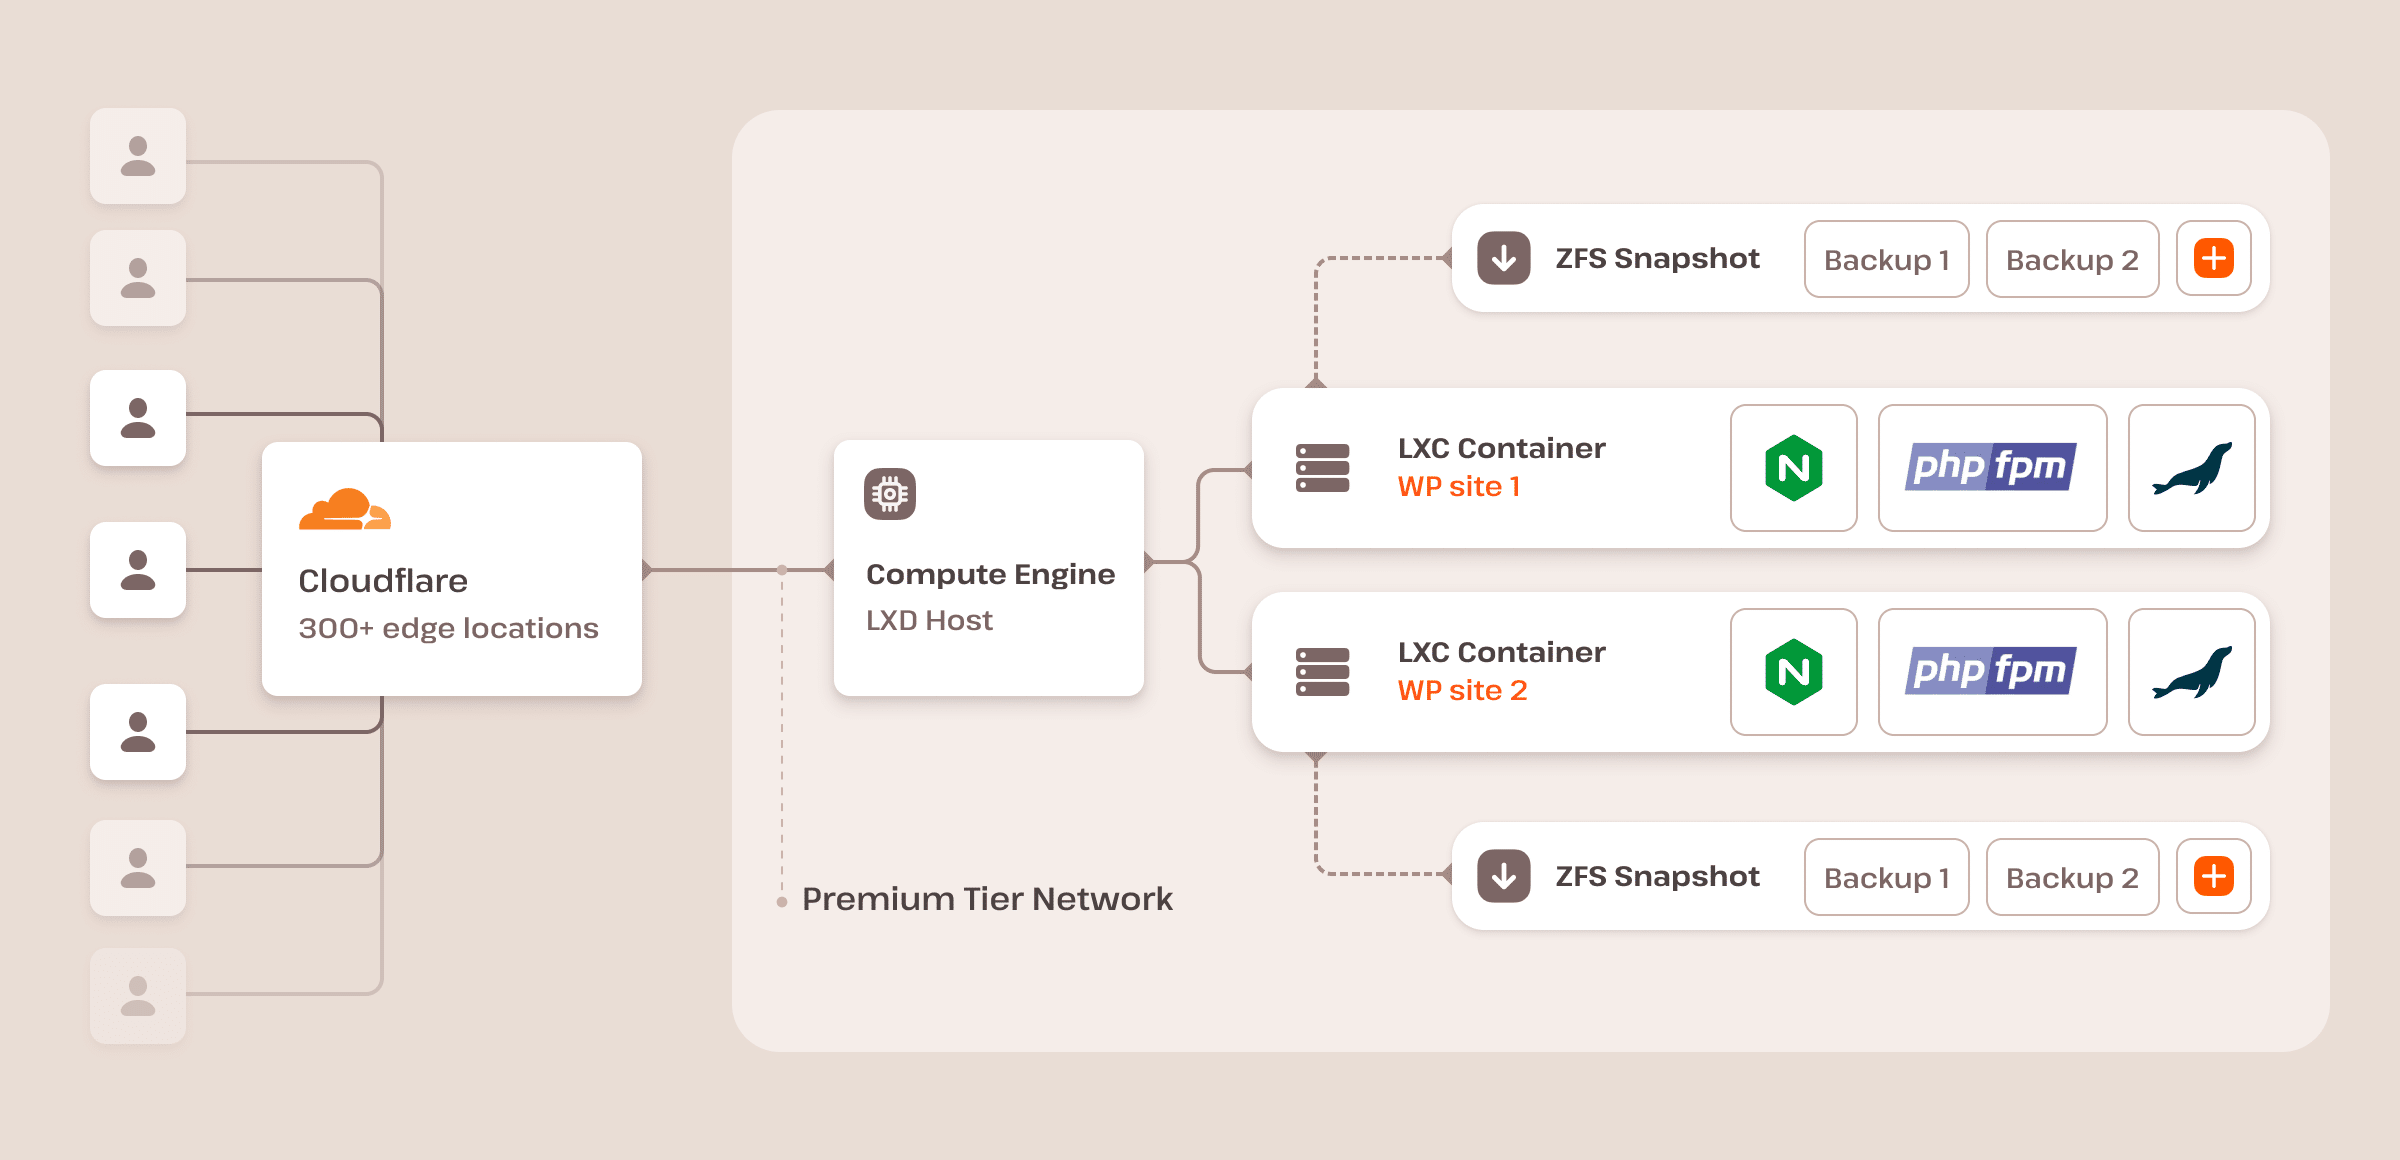
Kinsta’s CDN is built into every plan and powered by Cloudflare’s massive global network. Instead of every visitor pulling files directly from your origin server, your static content (such as images, CSS, JavaScript, fonts, or PDFs) gets cached and delivered from the data center closest to them.
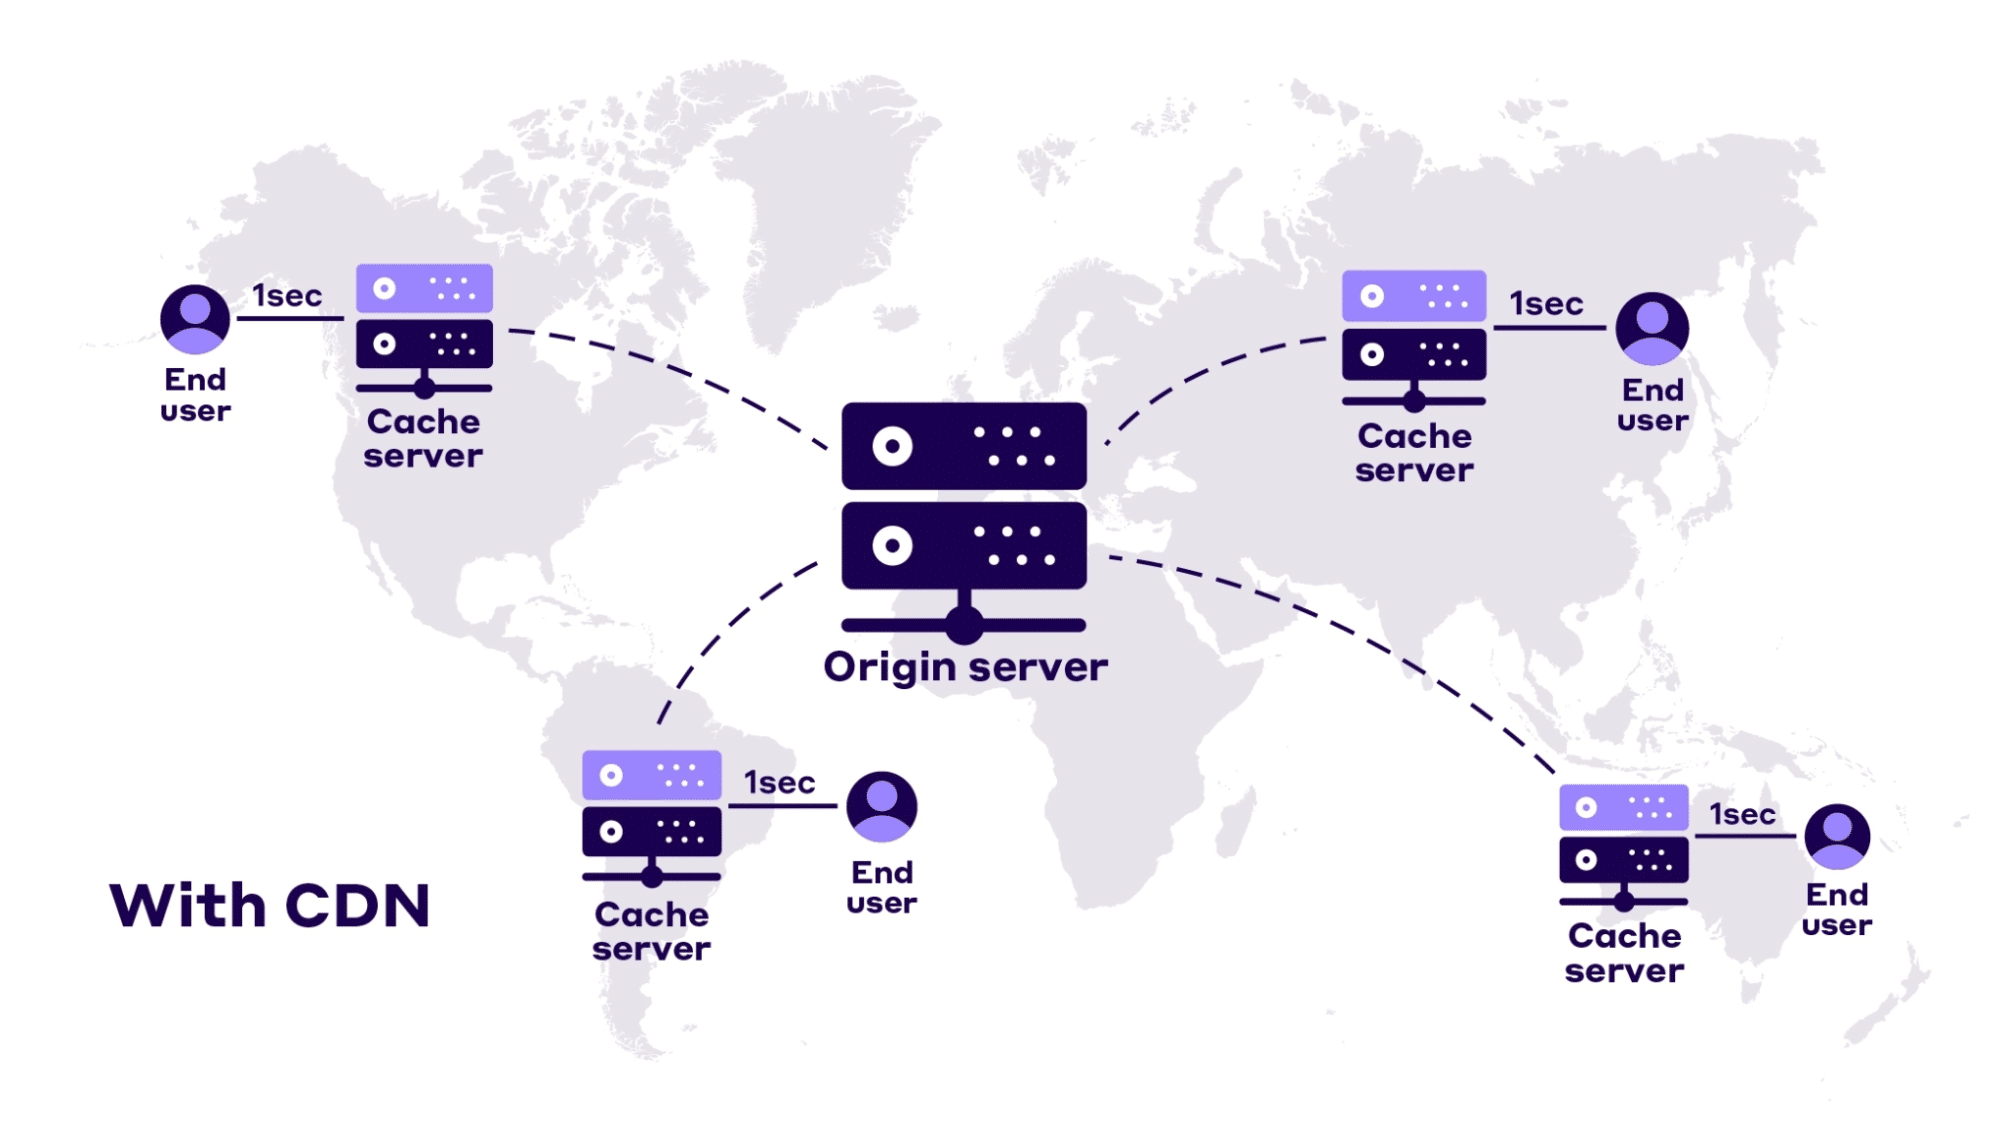
That means your site loads faster around the world, and your origin server saves a huge amount of bandwidth because it doesn’t have to send those files repeatedly.
Enabling it is simple. From your MyKinsta dashboard, go to WordPress Sites > sitename > Caching > CDN > Enable CDN.
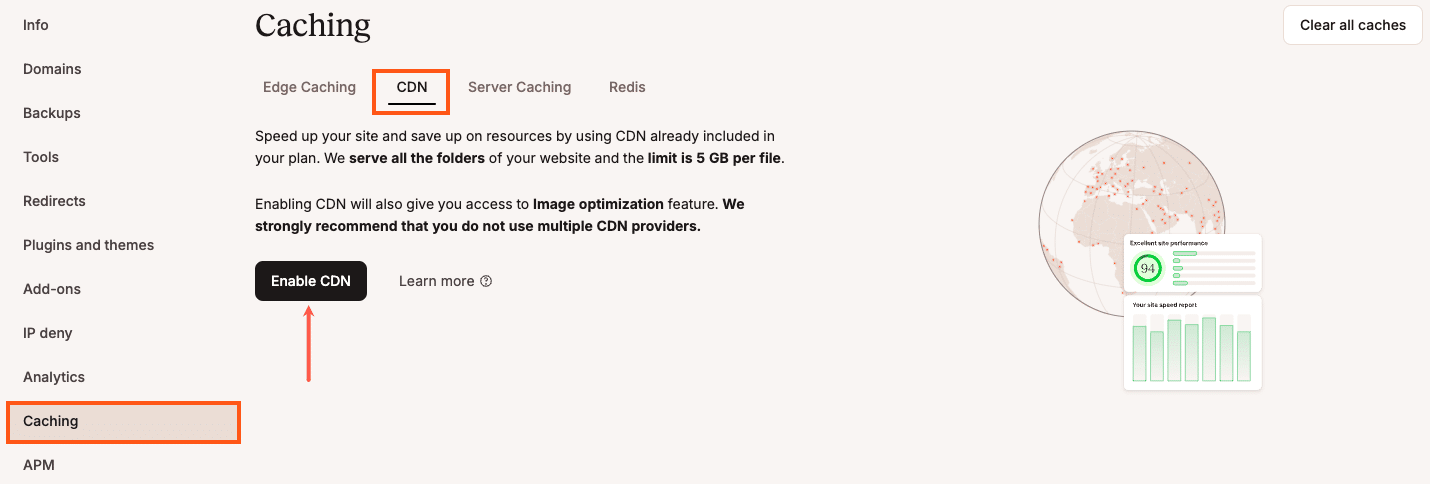
Next, confirm this change by clicking on the Enable CDN button in the pop-up/modal window.

With just a few clicks, static files up to 5 GB in size will be cached at the edge. If you’ve been using a third-party CDN, you’ll want to disable that first to avoid conflicts.
A nice bonus is that Kinsta’s CDN uses your site’s primary domain instead of a secondary CDN URL. That keeps things cleaner and ensures assets continue to work if you ever change providers.
What’s even better is that Kinsta’s CDN comes with automatic image optimization. And this leads to the next tool.
Shrink your images with built-in optimization
Images often make up a huge chunk of your site’s bandwidth usage. By optimizing them, you not only speed up load times but also reduce data transfer, saving bandwidth for what truly matters.
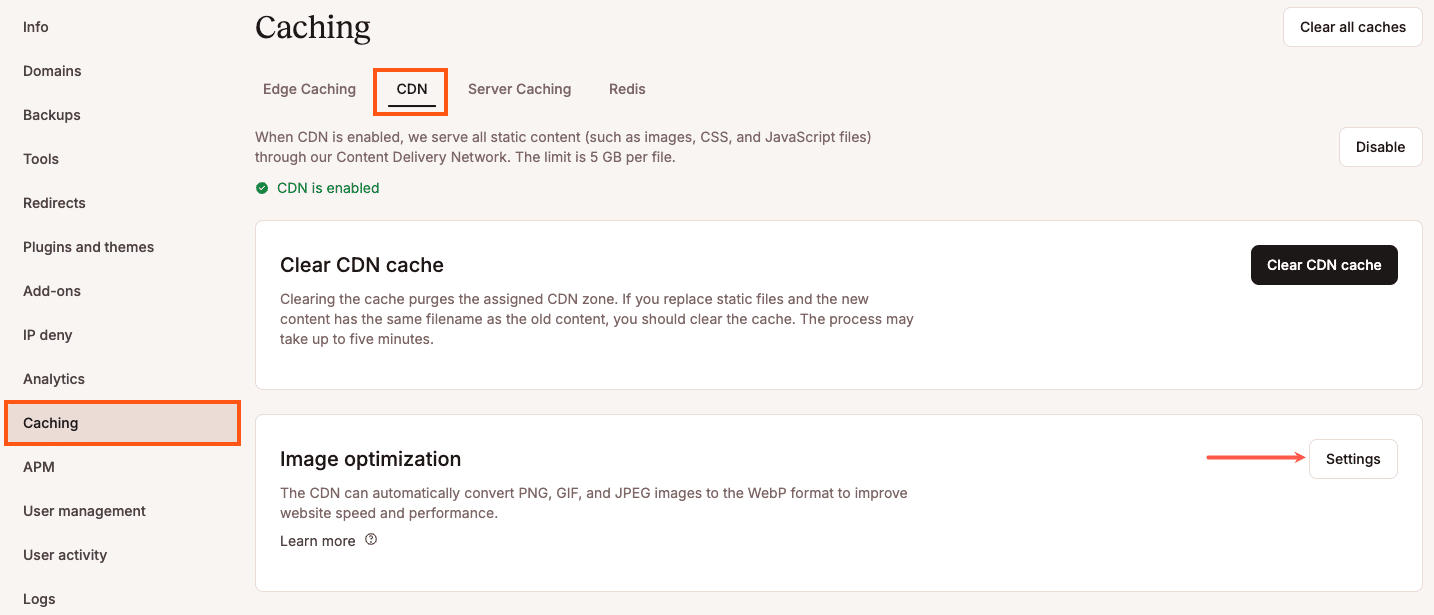
On the CDN page, click Settings to configure and enable image optimization on your WordPress site. Kinsta’s CDN has to be enabled.
When you enable it, your images are converted into smaller, modern formats like WebP on the fly and served only if they’re smaller than the original.
You can choose between lossless optimization, which preserves every pixel’s crispness, or lossy optimization, which further compresses file sizes at the cost of a slight loss in image quality.
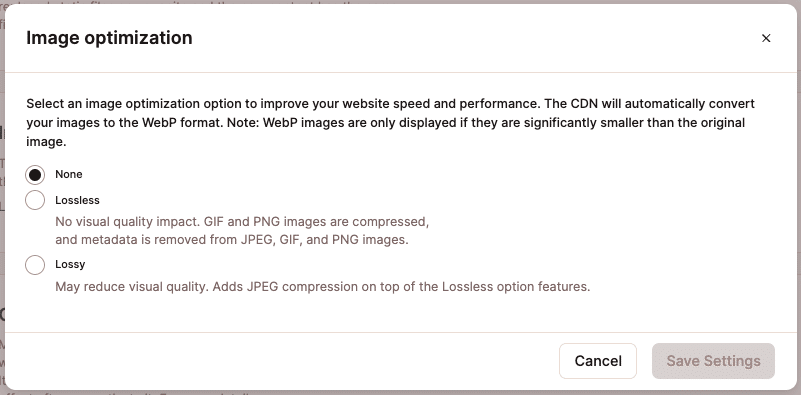
Either way, these optimized versions don’t count against your disk space and are cached at the edge, meaning your visitors always get the lightest, fastest version possible without draining your bandwidth.
In short, turning on Kinsta’s CDN is one of those “set it and forget it” changes that has an immediate impact. You’ll see faster load times, fewer origin requests, and far less bandwidth consumed without touching a single line of code.
Deliver full pages faster with edge caching
While the CDN takes care of your static files, your pages themselves still need to be delivered. Every time someone visits, your server usually has to send back the full HTML of that page. That’s where edge caching comes in.
With edge caching, Kinsta saves your site’s cached HTML and distributes it across Cloudflare’s global network, much like a CDN does for static assets.
The result is that instead of hitting your origin server for every page load, visitors get the page itself delivered from one of Cloudflare’s 300+ edge locations.
This speeds up load times and slashes the amount of bandwidth your origin has to handle.
To enable the CDN in MyKinsta, head to WordPress Sites > sitename > Caching > Edge Caching and click Enable.
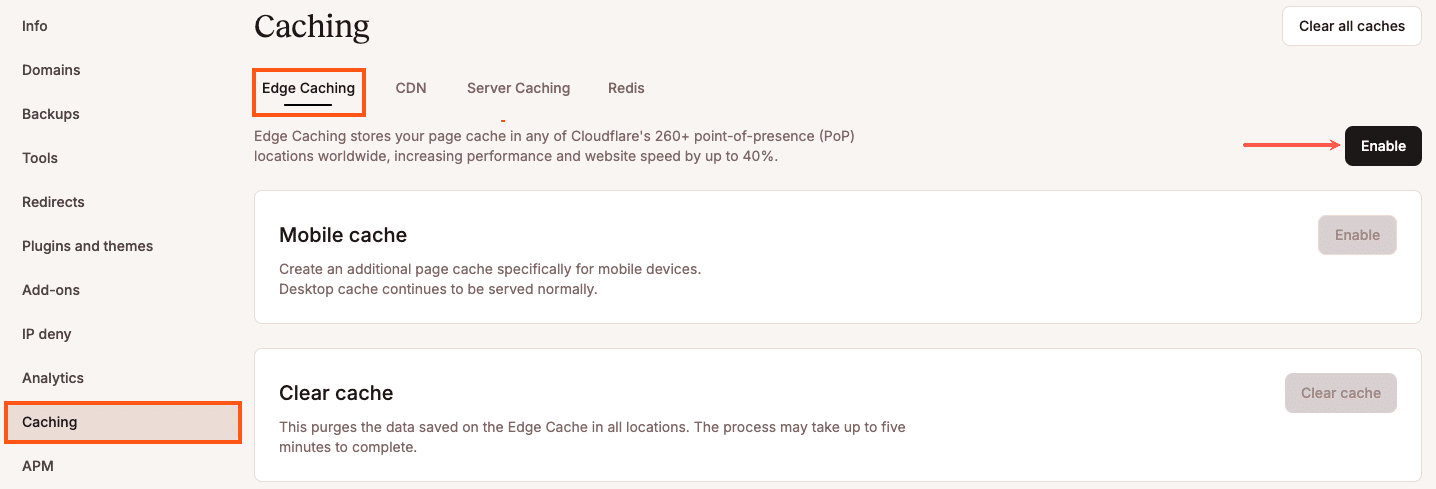
Once enabled, cached pages are automatically served at the edge for 24 hours by default. If your content doesn’t update often, you can change that expiration by going to the Server Caching tab and clicking Change cache expiration.

In the modal that appears, select your desired cache expiration and click Change expiration.

You can also clear the cache at any time right from MyKinsta, your WordPress dashboard, or even WP-CLI.

The impact can be dramatic. During testing, sites using edge caching saw page load times nearly cut in half and time to first byte (TTFB) drop by more than 50%. And because pages are being served from Cloudflare’s network instead of your origin, that’s less bandwidth leaving your server.
Together, the CDN and edge caching cover almost everything a visitor’s browser needs: static files and full HTML pages. Pair them up, and your site becomes faster and your server stays lean.
Protect your assets (hotlink protection + country allow list)
So far, we’ve explored ways to serve your content more efficiently. But what about stopping unnecessary traffic from eating into your bandwidth in the first place? That’s where a couple of handy Kinsta features can also help.
Hotlink protection
Hotlinking occurs when another site embeds your images or files directly from your server, rather than hosting them themselves. At first glance, it may not seem like a significant issue, but it can quickly add up.
A classic example is when The Huffington Post hotlinked a multi-image cartoon from The Oatmeal. Because HuffPost had huge traffic, it ended up generating massive bandwidth bills for The Oatmeal. In true Oatmeal fashion, Matthew Inman swapped the images out with a cheeky replacement.
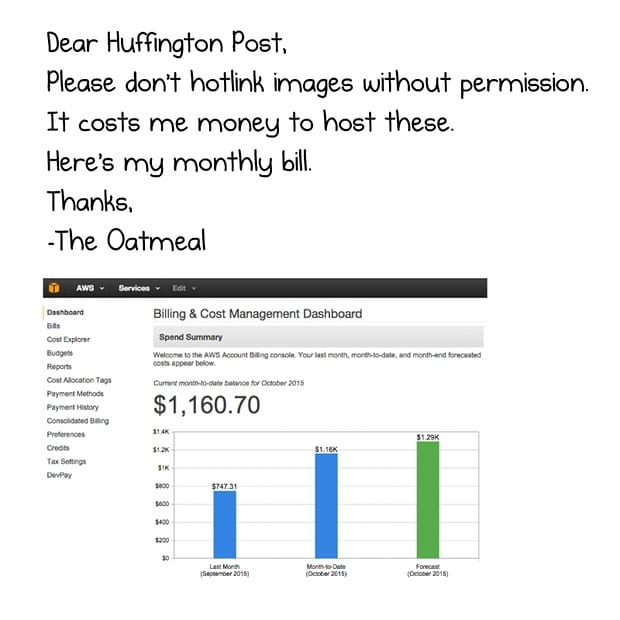
But the point was clear that hotlinking costs the original site real money and resources.
With hotlink protection enabled, those freeloading requests are blocked, saving your bandwidth for your actual visitors. At Kinsta, this can be turned on quickly by contacting our support team.
Country allow list
Sometimes, you want your site to be accessible only to people in specific regions. If your audience is mainly local but your traffic logs show many requests from countries you don’t serve, those requests are just wasted bandwidth.
By asking our support team to enable a country allow list, you can block unnecessary traffic at the edge and keep your bandwidth usage focused where it matters most.
Both of these protections are simple but powerful. They save bandwidth, protect your content, reduce server strain, and ensure your visitors have the best experience without competing with unnecessary traffic.
Summary
With Kinsta, reducing bandwidth is not complicated, as most of the heavy lifting is already built in.
The best part is you don’t have to guess whether it’s working. Inside MyKinsta, you can track your bandwidth usage over time, compare daily trends, and see exactly how much you’ve saved. That way, you’re in control of your resources month after month.
Start small by enabling the CDN or turning on edge caching, and check your analytics after a few days. Chances are you’ll notice faster load times, a lighter server footprint, and a clear drop in bandwidth usage. From there, you can layer in the other tools to fine-tune your setup.
And if you’re wondering which plan might be the right fit for your site or considering switching to bandwidth-based hosting, our team is here to help. Explore our plans or contact sales to discuss the best option for your specific needs.