
Creating a WordPress site doesn’t have to be daunting, even if you’re a beginner. With the right tools and guidance, you can have a sleek, fully functional website up and running quickly.
This guide shows you how to build a WordPress site using Bricks Builder, a powerful theme builder that offers extensive customization capabilities without writing a single line of code.
Overview of Bricks Builder
Bricks Builder is a visual site builder that allows users to create custom, responsive websites directly within the WordPress environment. It is designed to enhance user experience as it integrates seamlessly with WordPress, enabling beginners and experienced developers to construct websites visually through a drag-and-drop interface.
Unlike Elementor and other site builders, Bricks is a theme, not a plugin. It almost incorporates all features, whereas other site builders would use extra plugins.
It features a live front-end editing experience, which means you can see your changes in real time as you adjust design elements and layouts.
It provides a comprehensive toolkit that includes pre-designed templates, a vast array of design elements, and advanced customization options for more detailed web development.
Additionally, Bricks Builder supports dynamic data, allowing users to build data-driven websites easily and integrate content dynamically across their templates.
Benefits of using Bricks for WordPress
Bricks Builder stands out for its performance and flexibility. It is a newer yet robust alternative to other builders, offering:
- Speed — Bricks is incredibly fast and lightweight.
- Ease of use — The interface is intuitive, making it easy for beginners and professionals.
- Customization — Bricks offers extensive customizability through custom CSS and JavaScript and is compatible with a wide range of WordPress plugins.
Getting started with Bricks
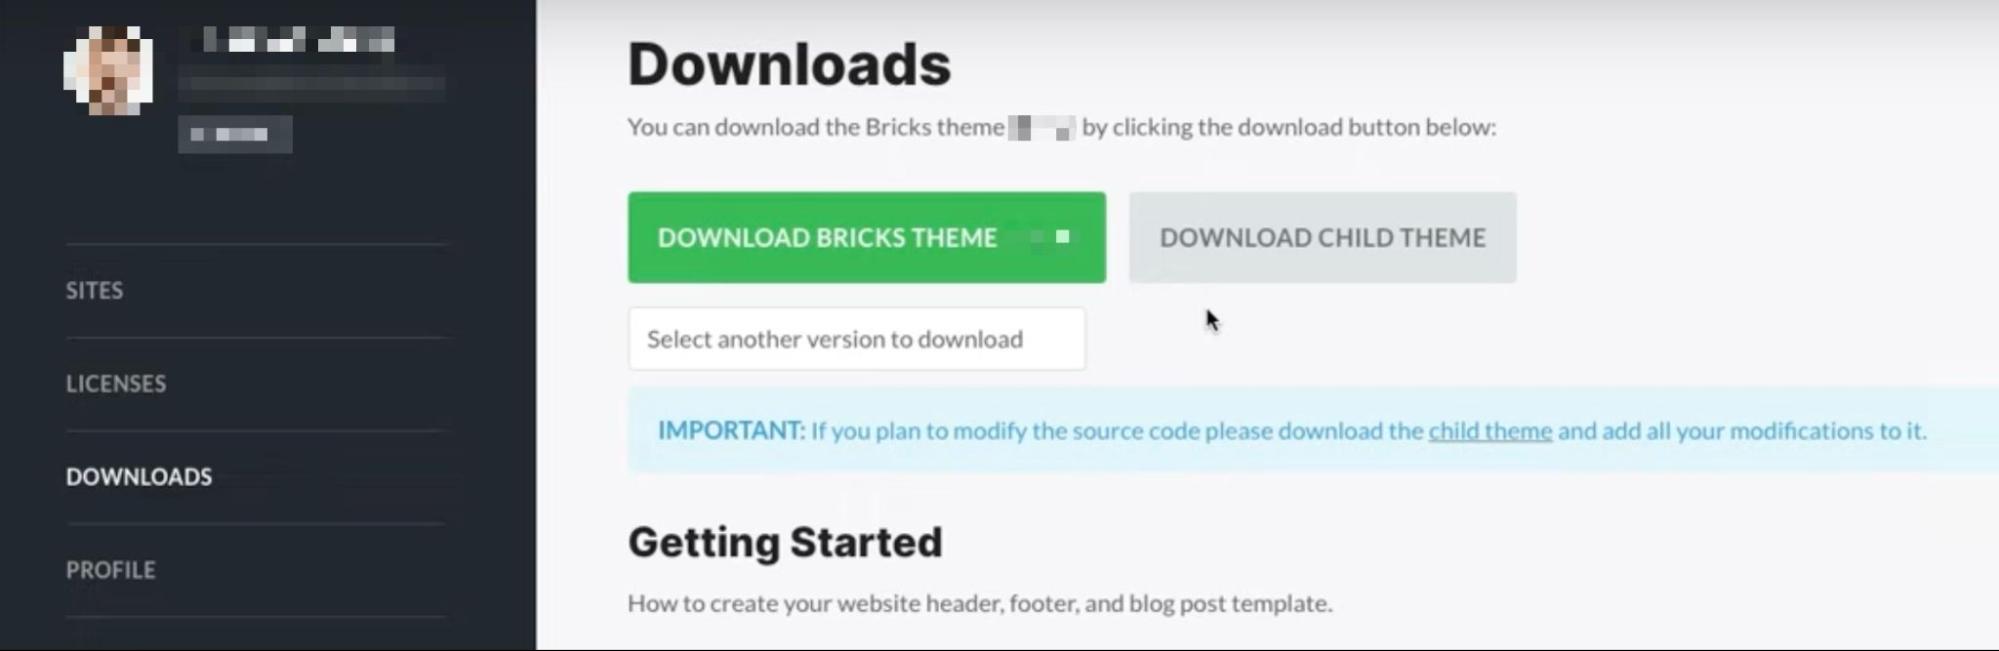
Bricks is a premium theme that requires a paid subscription. To use it, you need to purchase one of their plans. Once you’ve made your payment, you can download a zip file on your dashboard that can be uploaded to your WordPress site, along with a license key that activates Bricks within your WordPress installation.
After installing the Bricks theme, a new Bricks menu item appears in your WordPress dashboard.
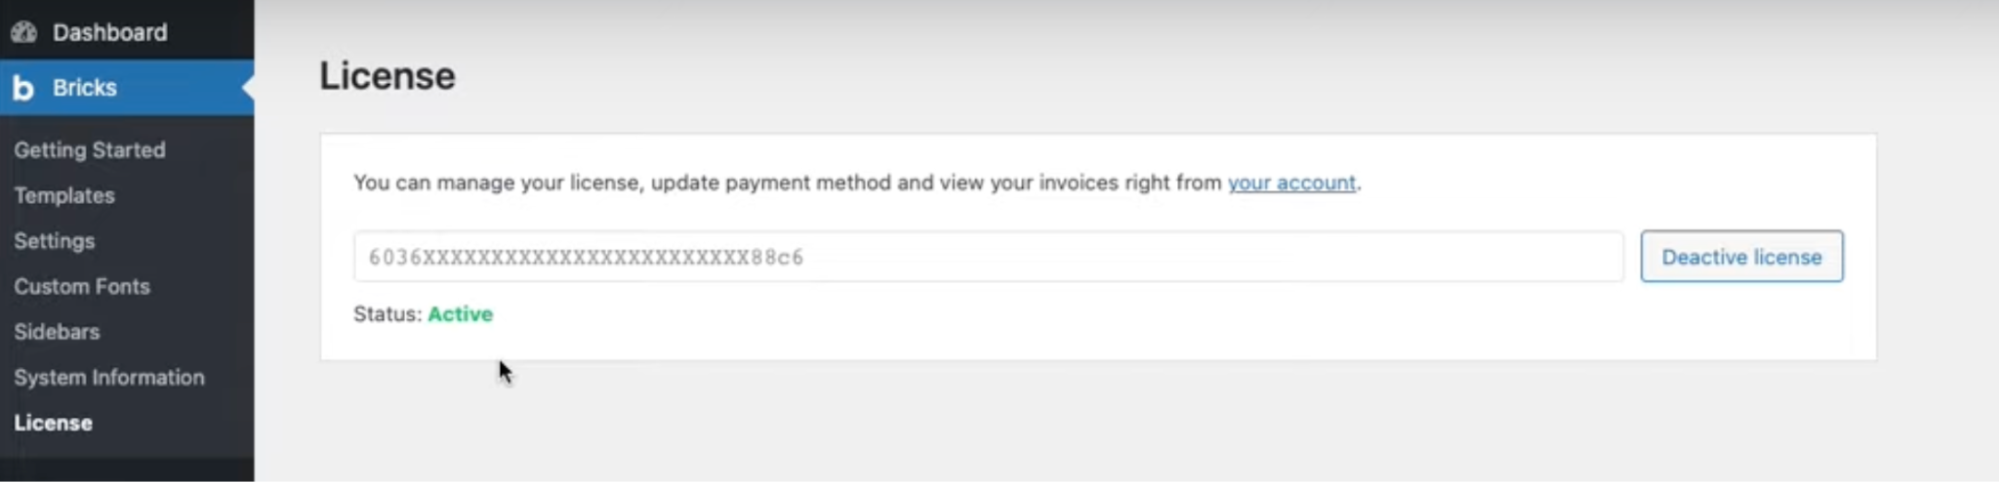
To activate your license, go to the dashboard, click Activate license, enter your license key from your Bricks account, and click Activate. This will enable full functionality of the Bricks theme.
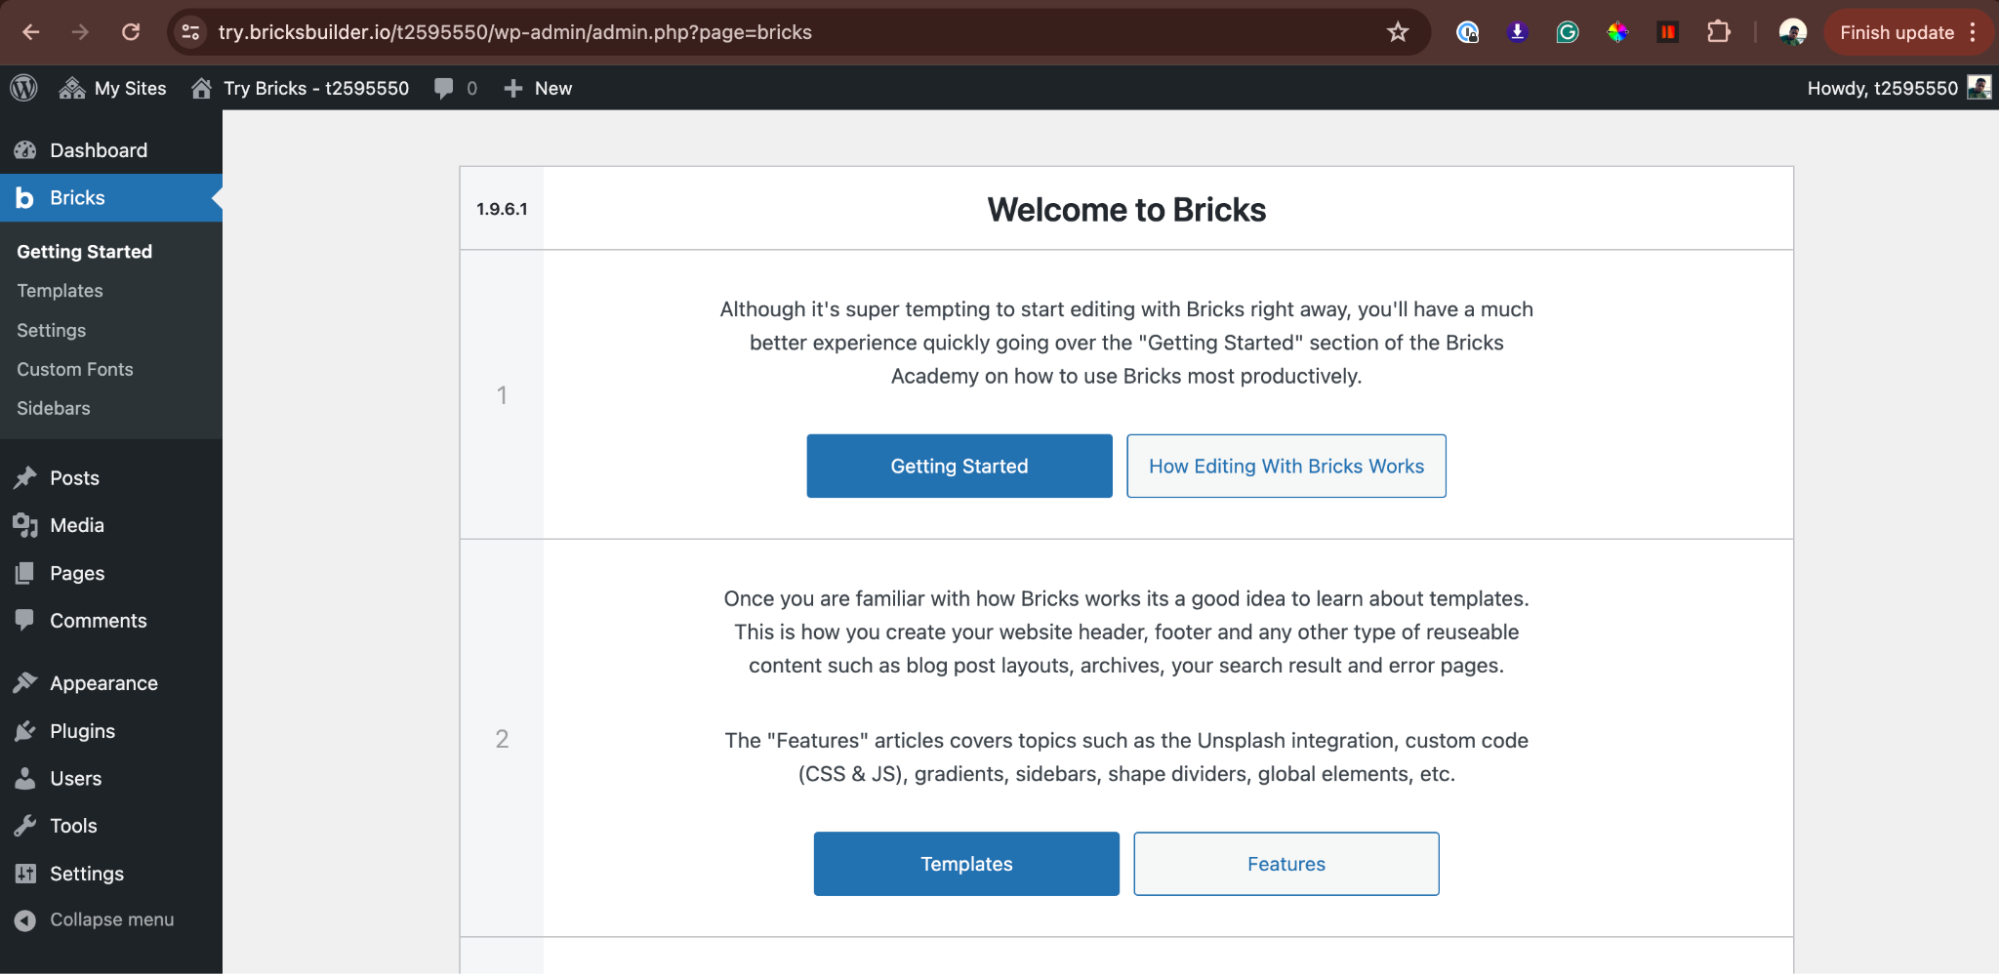
If you like to try Bricks before committing to a purchase, you can set up a trial account at try.bricksbuilder.io. This platform provides access to a pre-configured WordPress site with Bricks installed, allowing you to explore its features and capabilities at no initial cost.
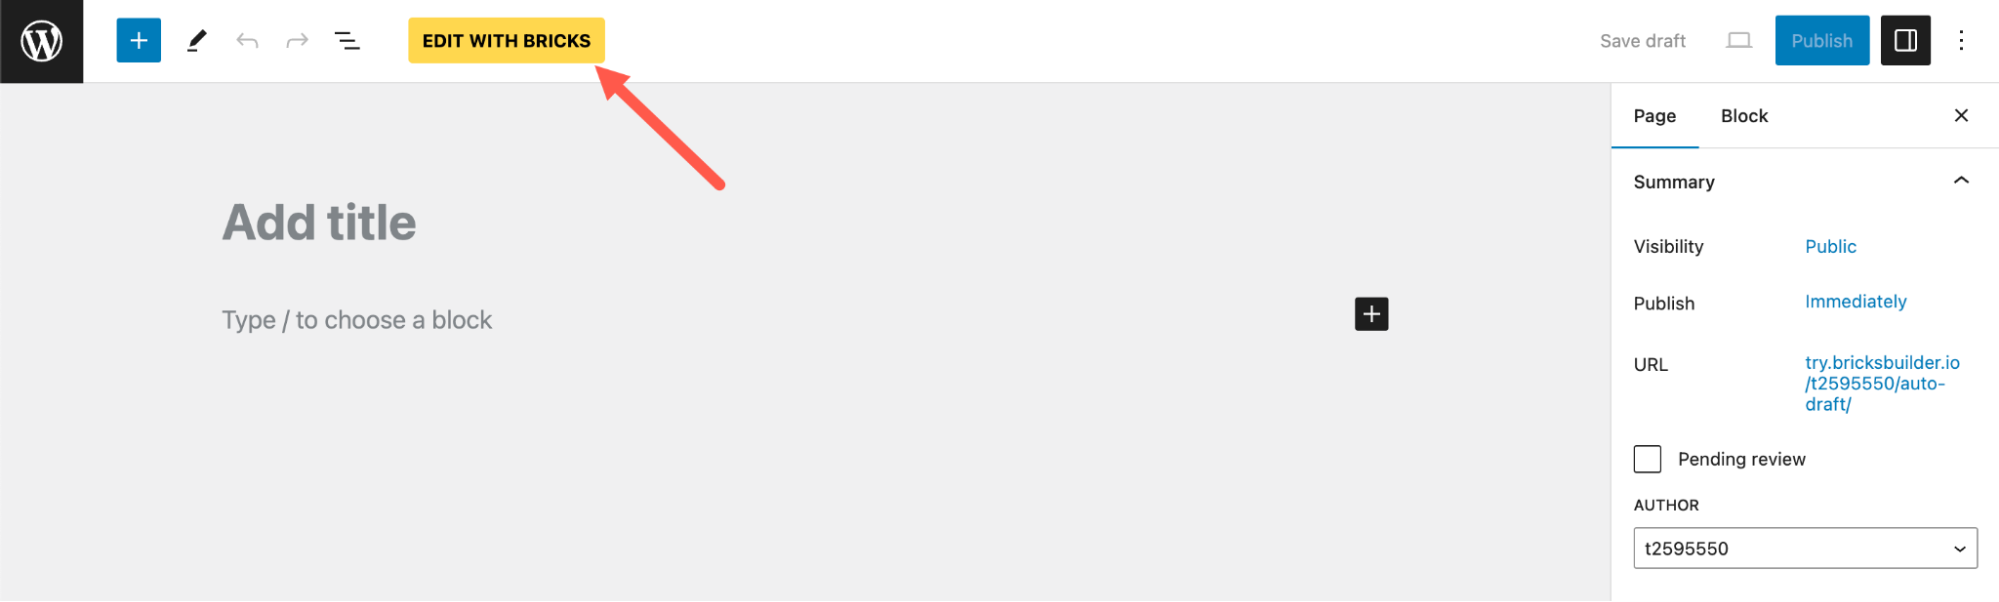
How to launch the Bricks page builder
To design a new page with the Bricks page builder, navigate to Pages > Add New or click an existing page. You can launch the Bricks editor by clicking on Edit with Bricks.
You can now drag elements from the Elements panel to design your page.
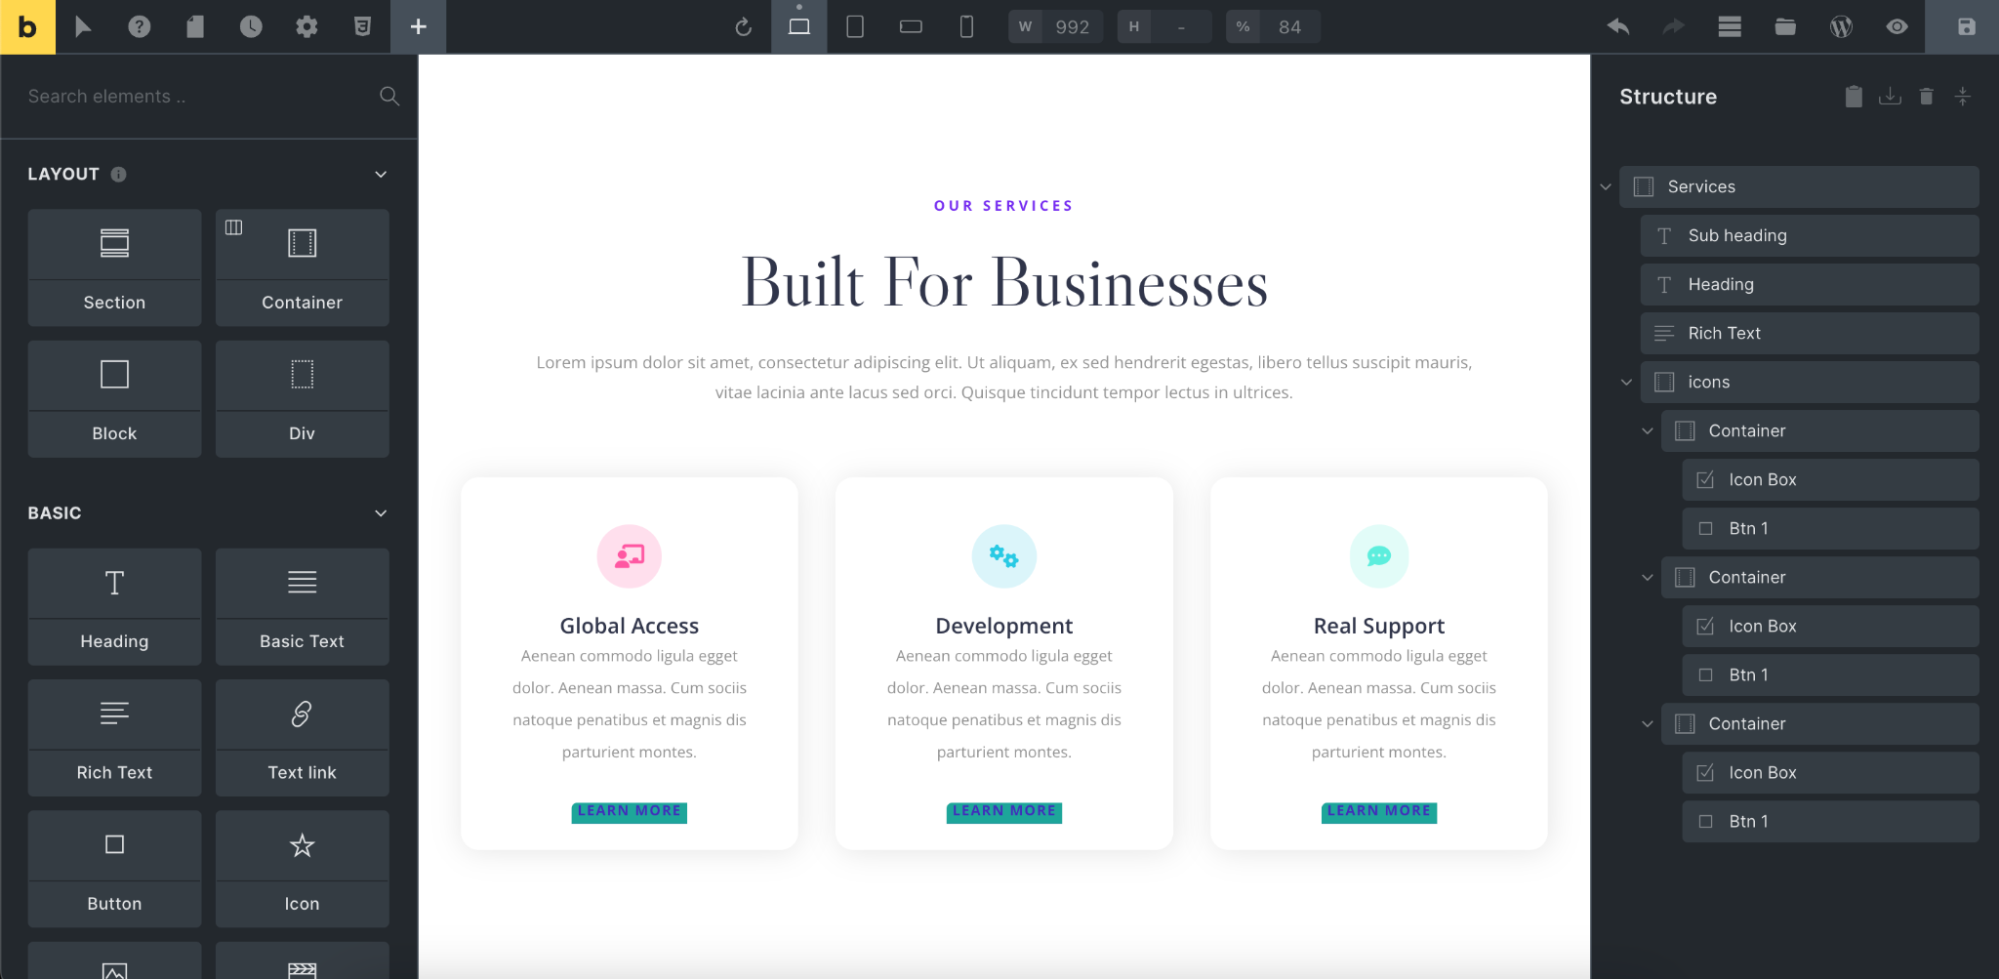
Understanding the Bricks interface
The Bricks interface offers a seamless integration with the WordPress environment.

Here’s a breakdown of its core interface:
- Builder workspace — The main area of Bricks is the builder workspace, which is a visual representation of your website. Here, you can interact directly with your pages, dragging elements into place, resizing, and rearranging components.
- Toolbar — At the top of the workspace, the toolbar provides quick access to essential functionalities such as saving your work, previewing your site, and accessing the settings menu and responsive controls.
- Elements panel — On the left side of the interface, the elements panel is your toolbox. It contains all the building blocks you can use on your site, such as text boxes, images, buttons, and more. You can drag these elements from the panel directly onto your page.
- Structure view — Often located beside or as a toggle within the elements panel, the structure view provides a hierarchical outline of your page. This view is particularly useful for understanding the layout and depth of your page elements, allowing you to select and edit nested items easily.
Using custom fonts in Bricks
Bricks offer the exciting feature of allowing you to upload custom fonts to your WordPress site. To do this, navigate to Bricks > Custom Fonts.

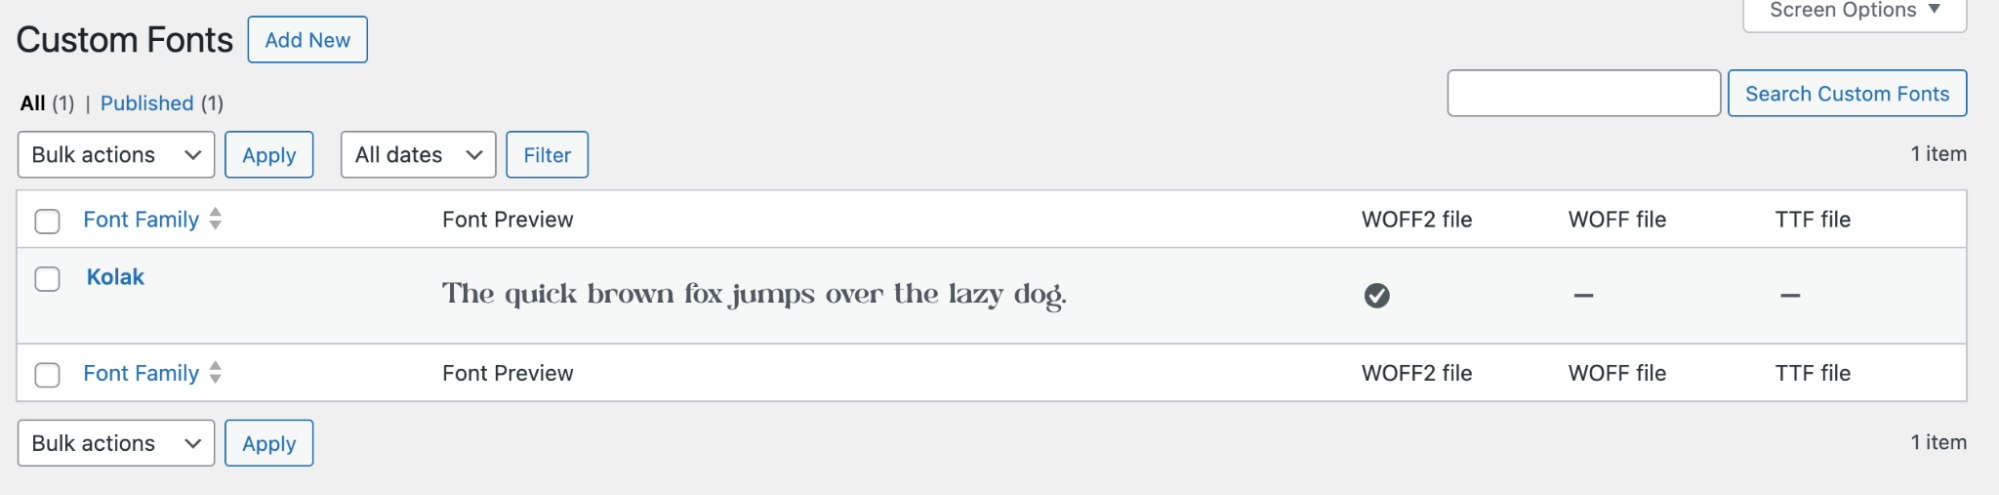
This section lets you upload your font files in various formats, including WOFF2, WOFF, or TTF. You can also upload different font variations, such as thin, semi-bold, normal, and bold.
To add a custom font, click on Add New. Then, enter a name for the font in the Add title field. Next, select the font variant you wish to upload, choose the font style, and click Edit.
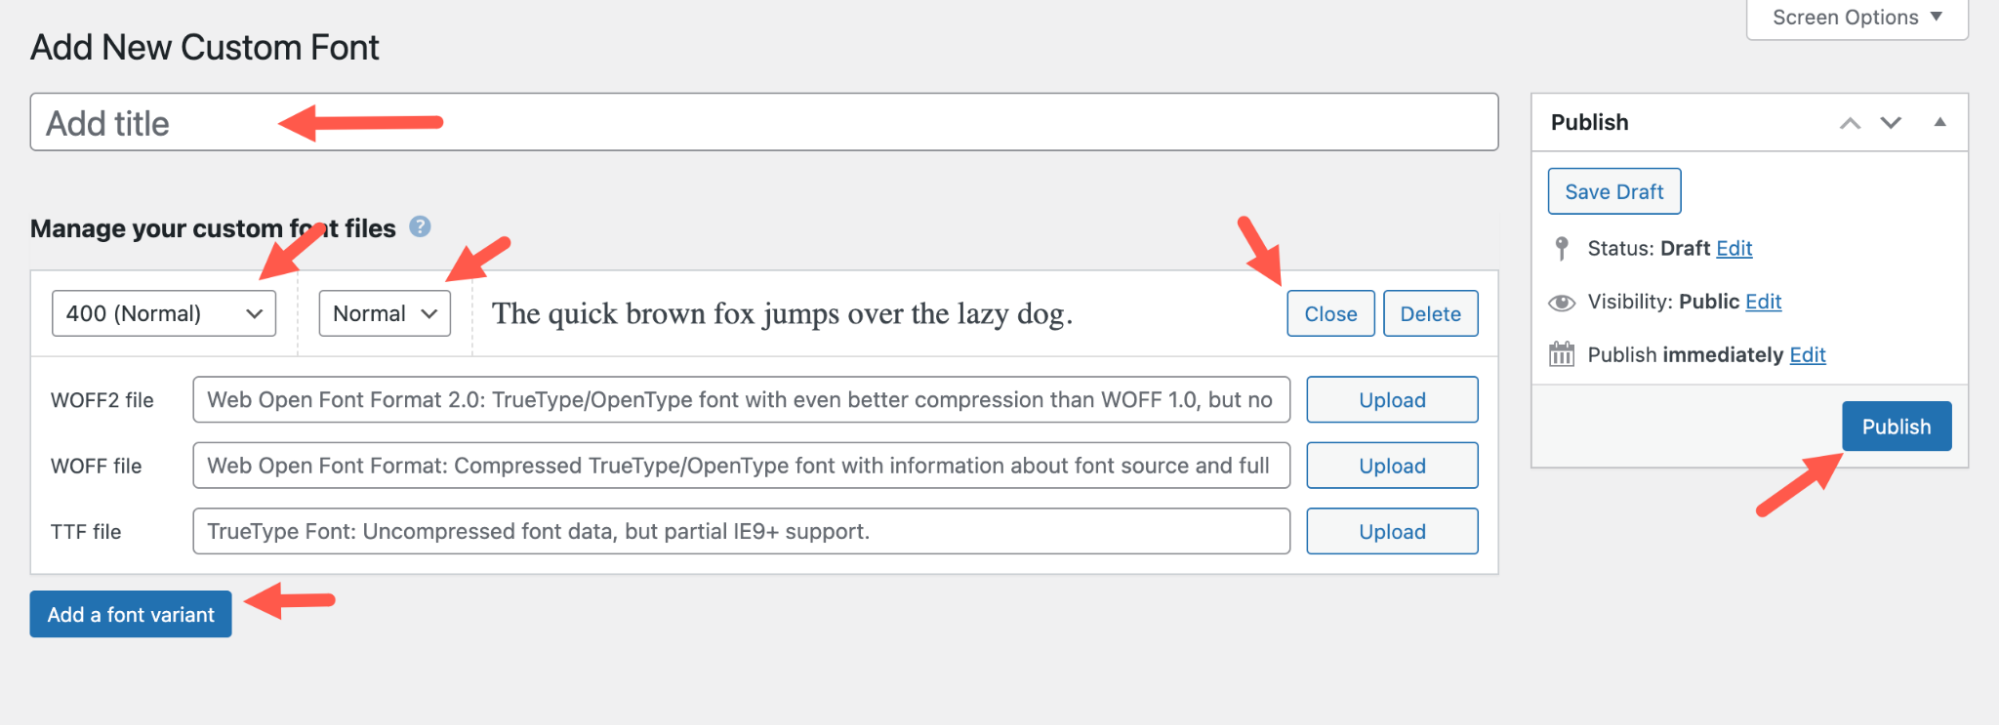
A dropdown will appear, providing fields to upload the font file. Select your font file and upload it. You can repeat this process by clicking Add a font variant for as many variants as possible. Finally, click Publish.
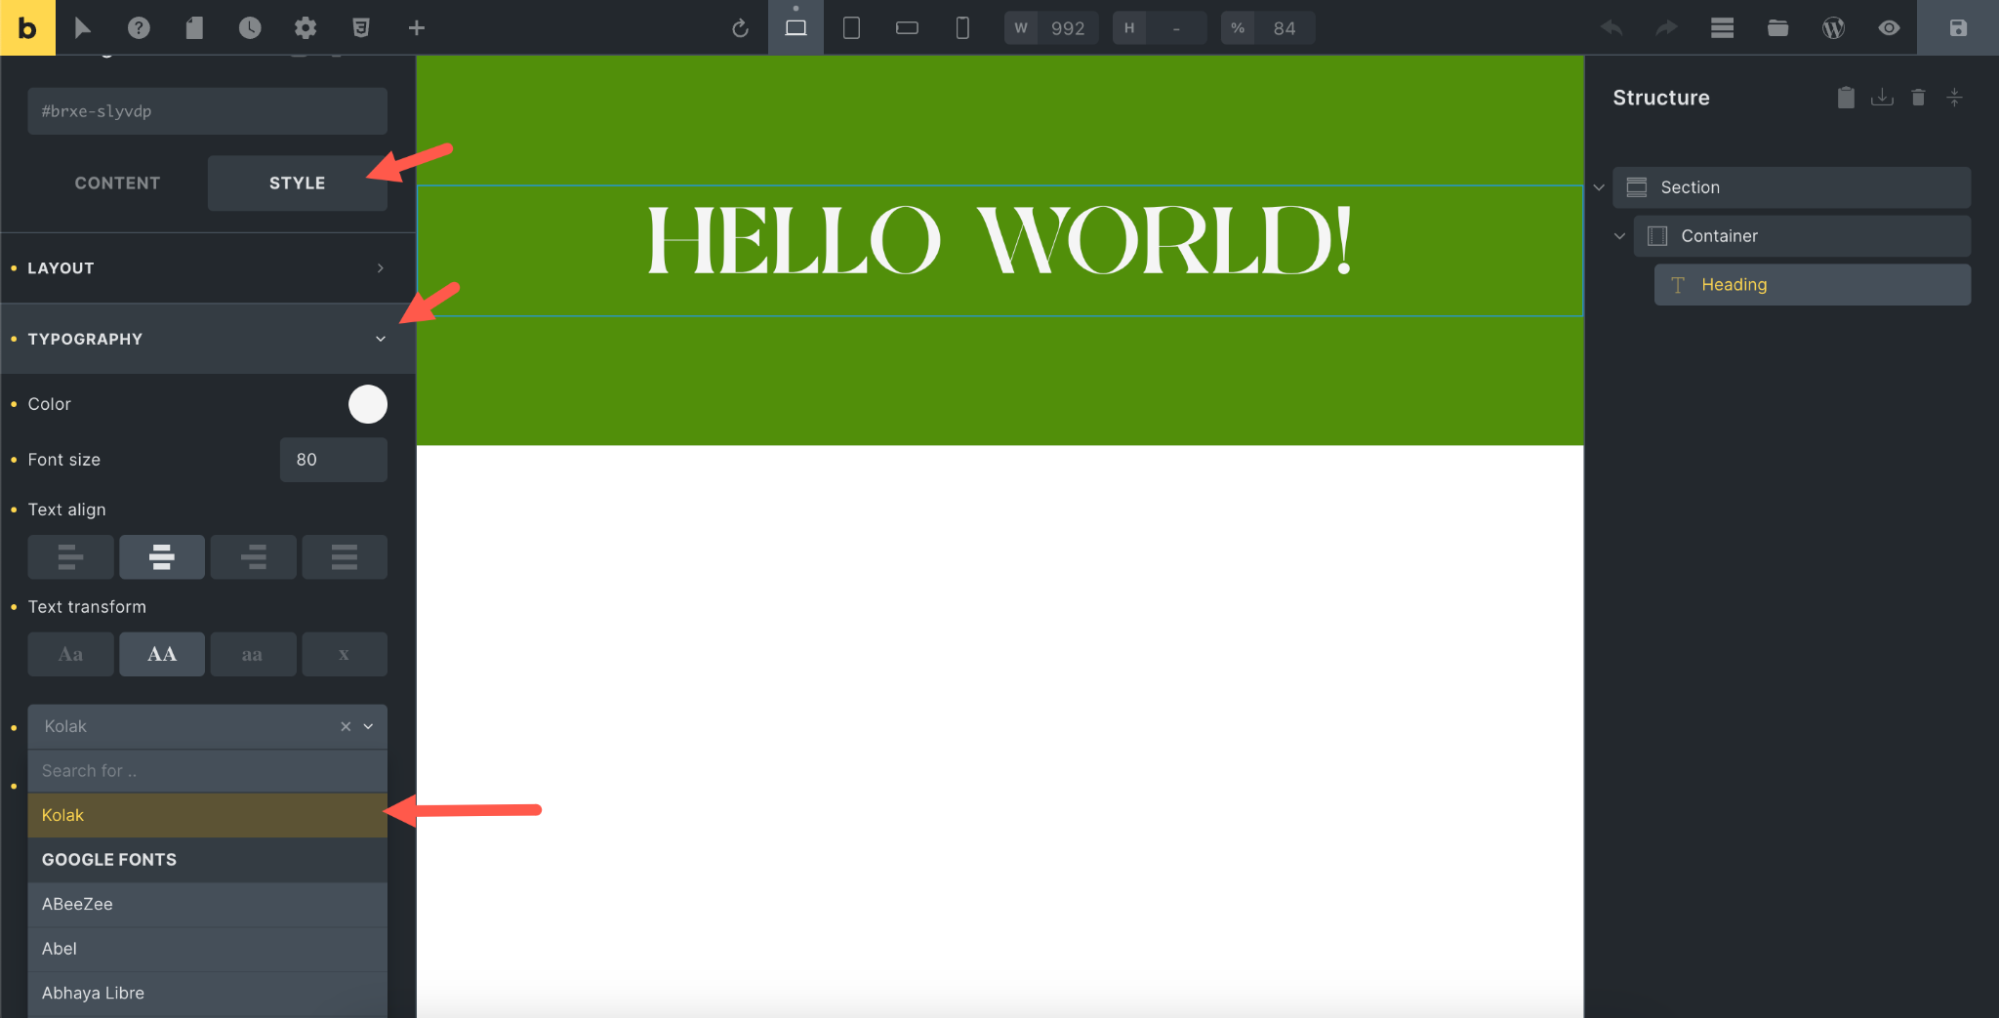
To apply your newly uploaded custom font to text on your WordPress site, follow these steps:
- Go to the page where you want to use the new font and click Edit with Bricks.
- Click on the text you want to change.
- Information about the selected text will be displayed in the left panel. Click on STYLE.
- Expand the TYPOGRAPHY dropdown to view more options.
- In the Font family field, browse the available fonts, including Google fonts and your custom uploads.
- Select your custom font from the list to update your text immediately.
Now, your text will display using your custom font, giving your page a personalized touch.
Using templates in Bricks
Templates are a fundamental feature in Bricks and come in various types, including headers, footers, and blog post layouts. These templates can range from a single section, like a website header or a hero section, to full-page content, such as blog post layouts, archive pages, search results, and error pages.
Creating a template
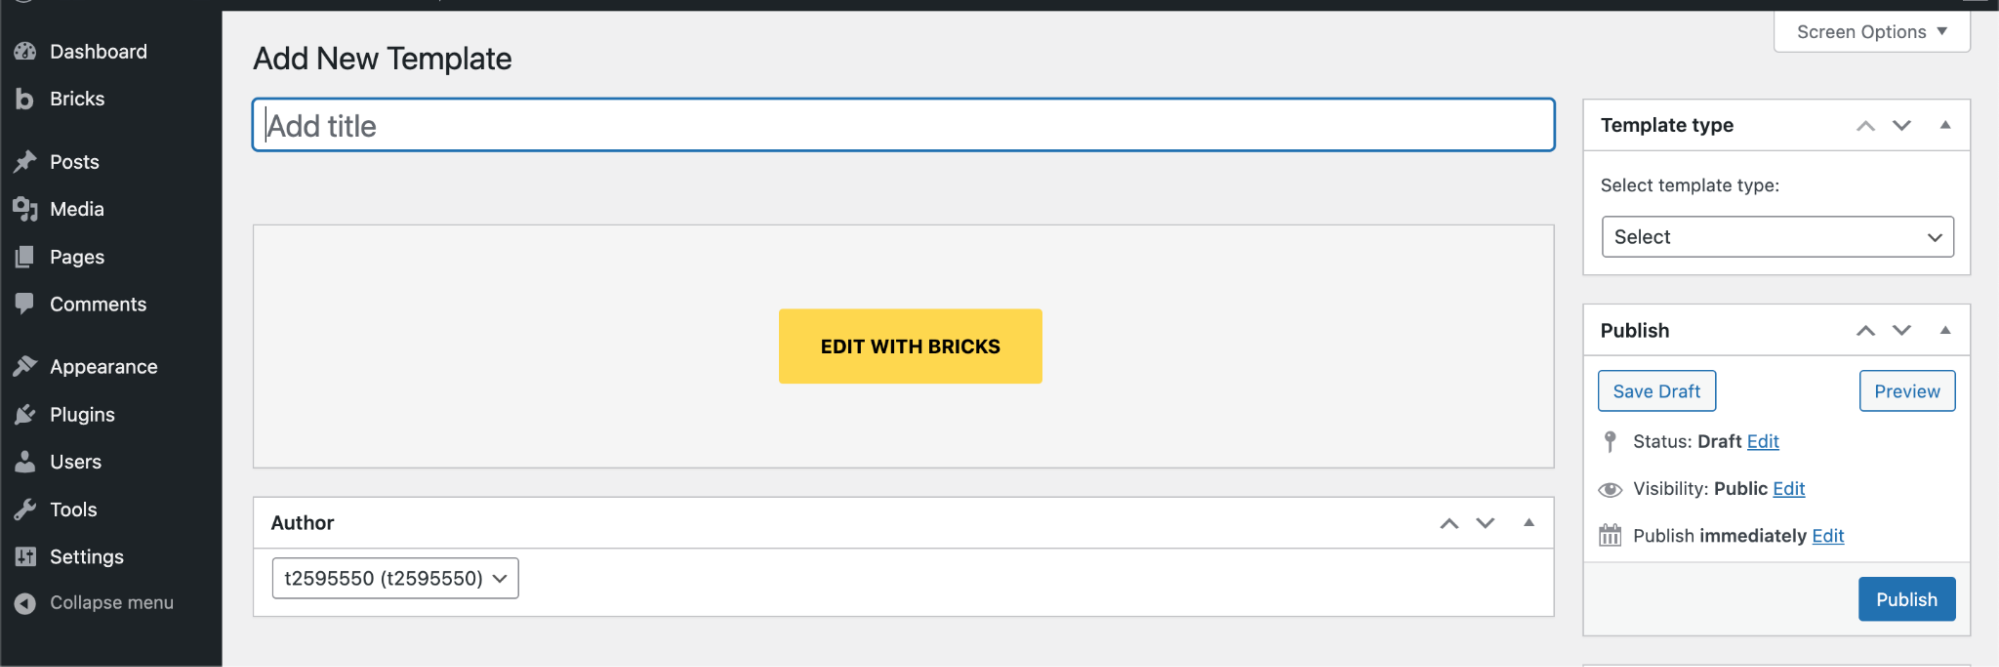
To create a template:
- Navigate to Bricks > Templates in your dashboard.
- Choose to either add a new template or import an existing one.
- Click Add New, select the template type, and then choose Edit with Bricks.
Creating a new template for your Bricks Builder.
Applying templates
To apply a template to a page:
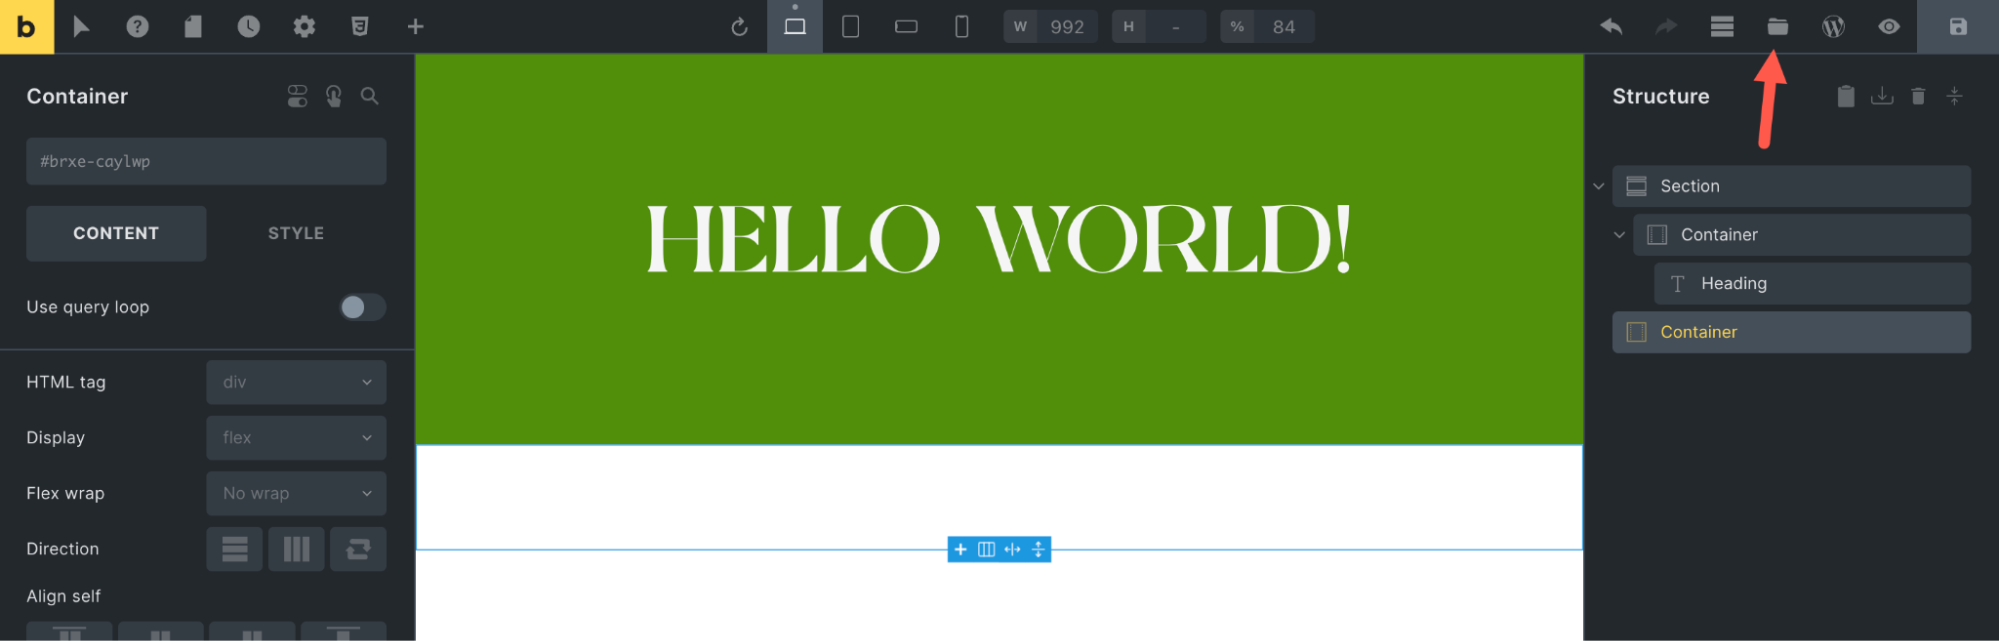
- Navigate to the page where you want to use the template.
- Click the Templates (folder) icon in the builder toolbar to open the templates section.
Applying templates to Bricks pages. - Here, you can access both the templates you created and the community templates.
- Select the desired template and preview it.
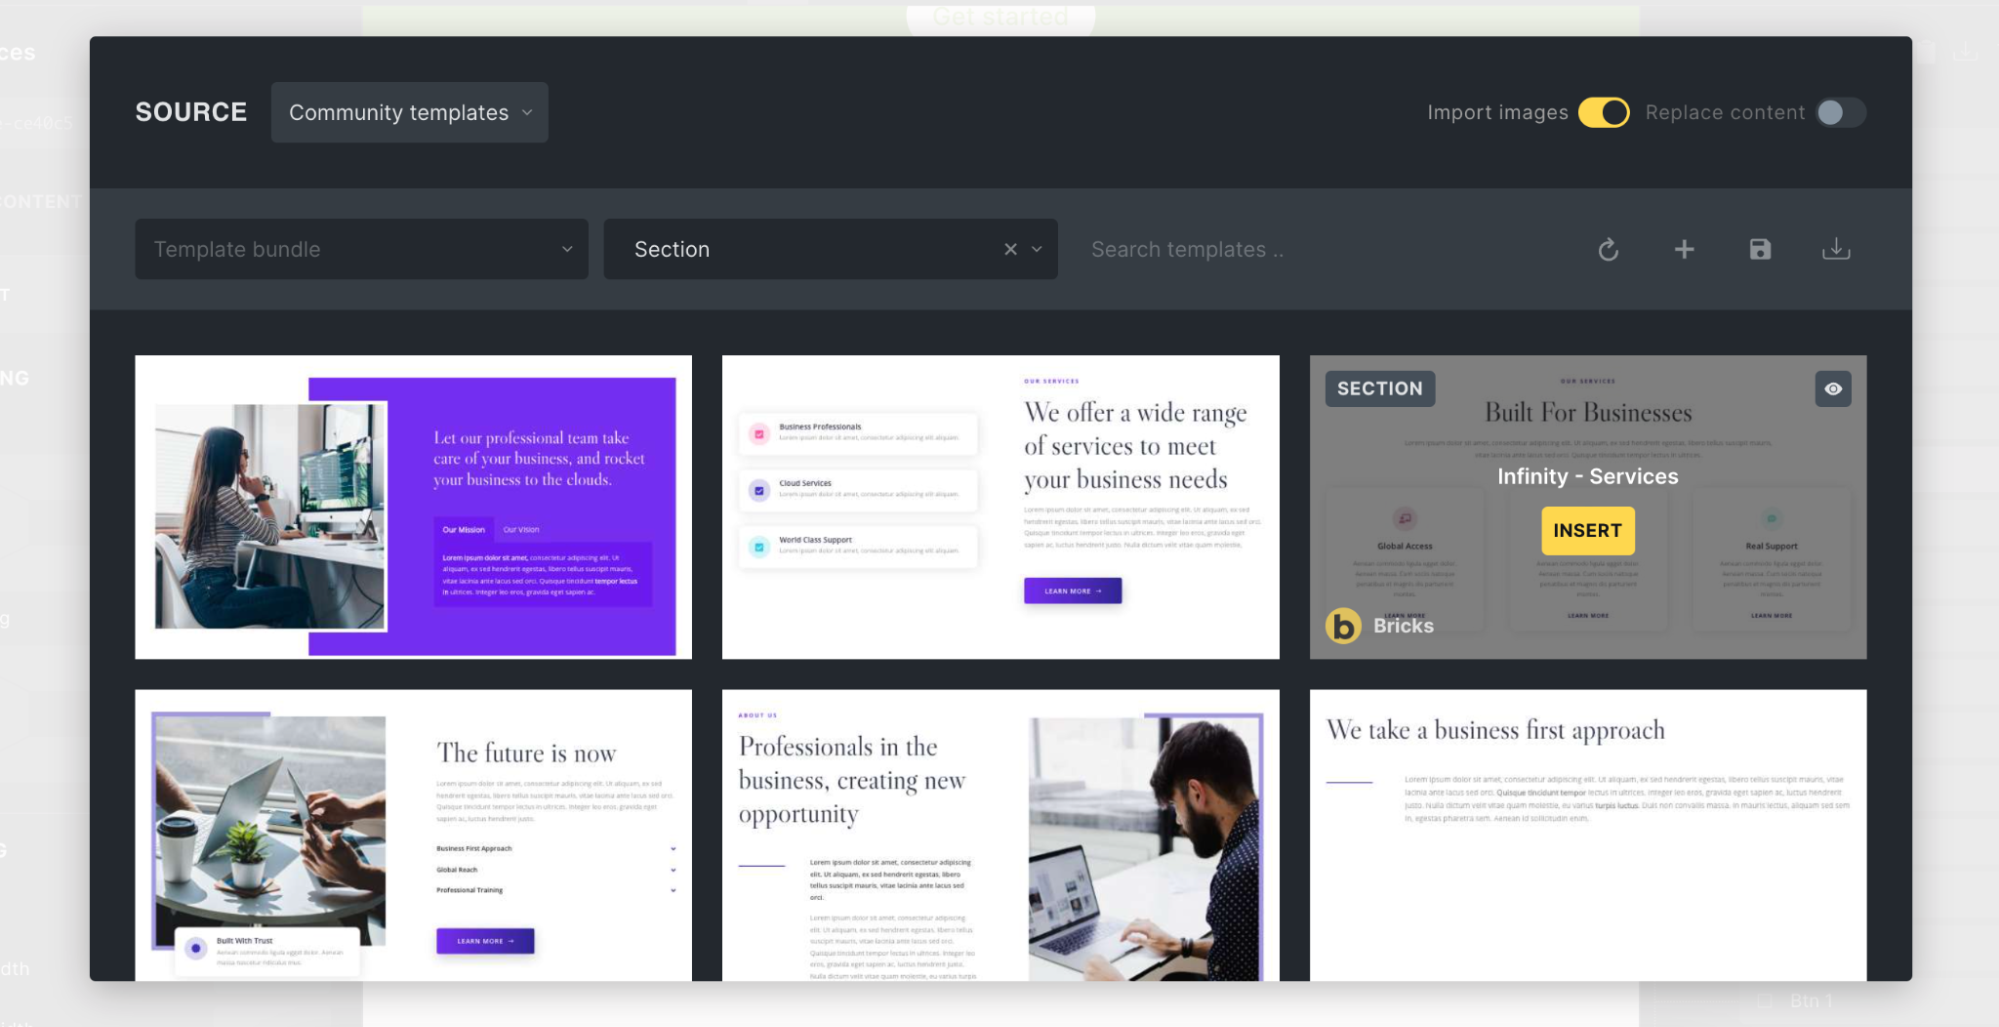
Bricks template store — contains community, local and remote templates. - You can finally click Insert to apply it.
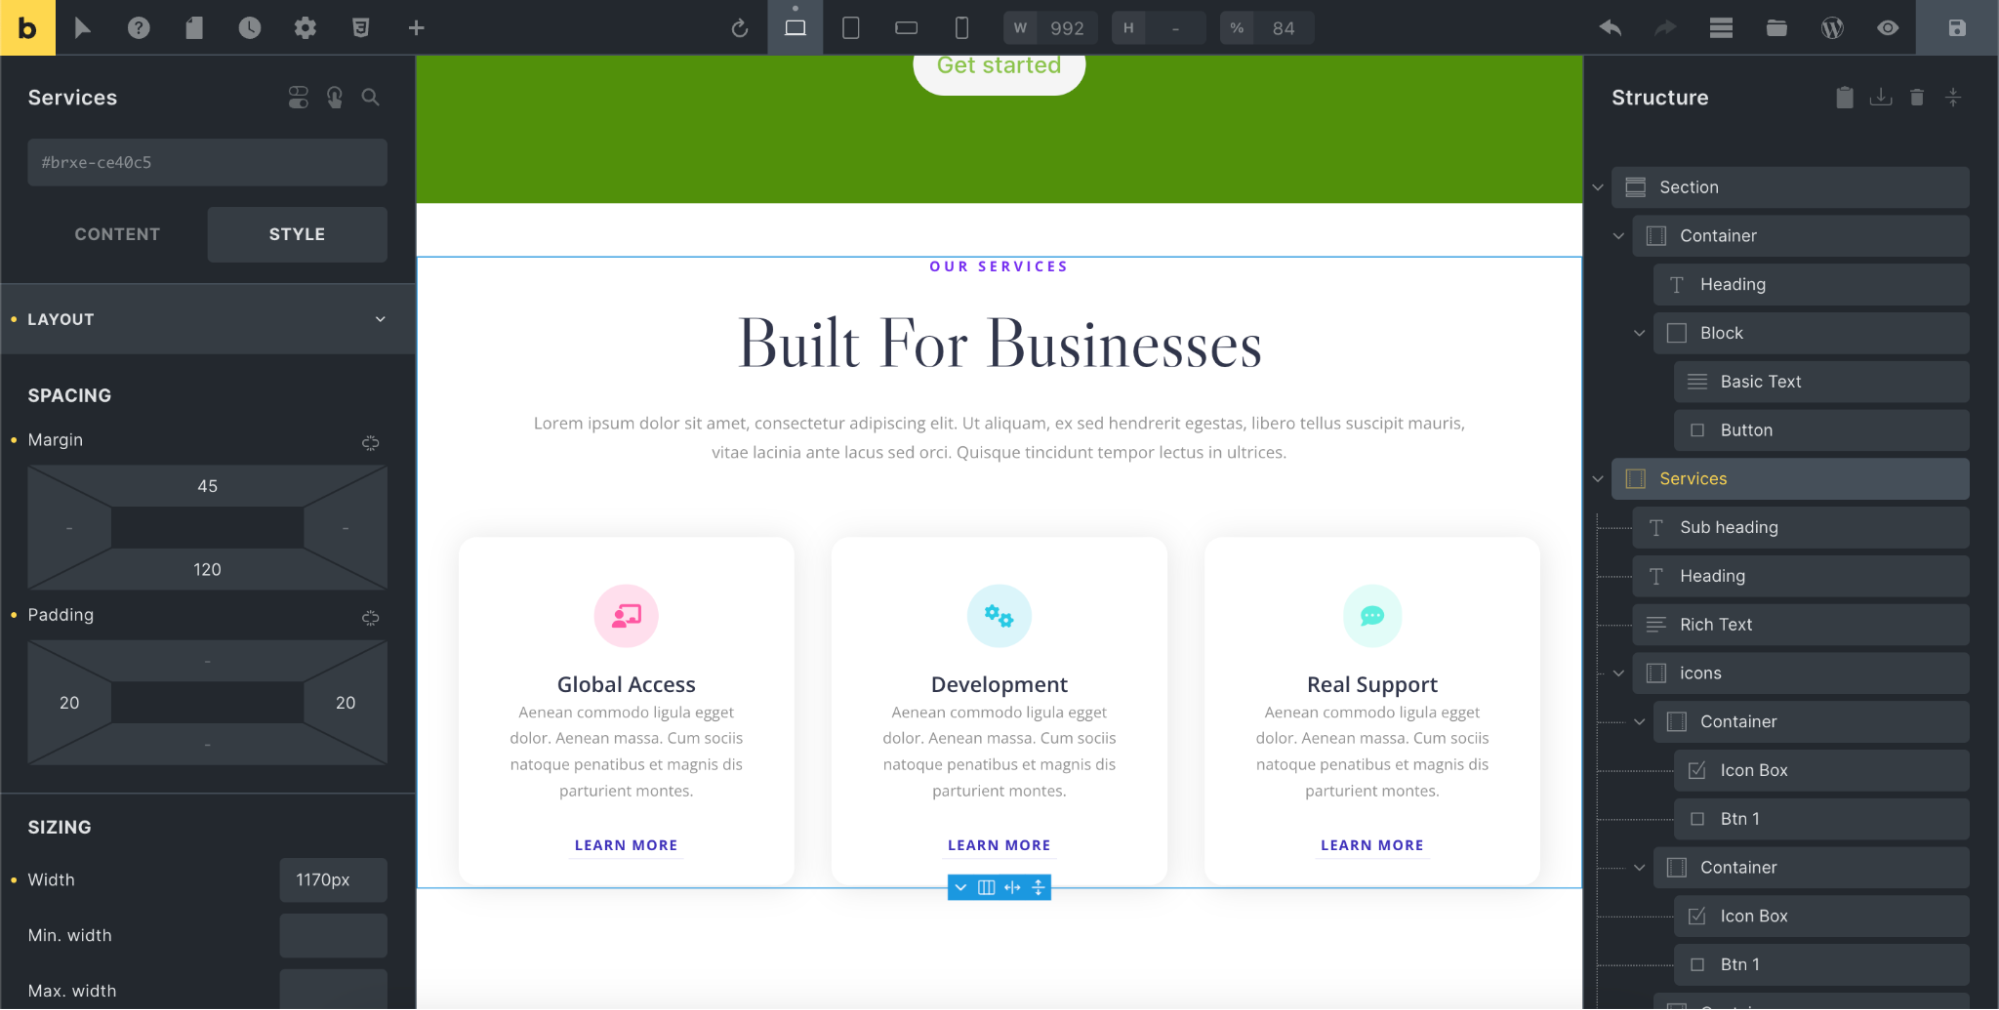
Choose and use a selected community template.
Remote templates
Bricks’ templates offer unique capabilities not found in other site builders. Remote templates mean templates created and used in other sites you want to use in your site.
To allow other sites to use your Bricks templates, go to Bricks > Settings > Templates in your WordPress dashboard and enable the My Templates Access checkbox.
Use Whitelist URLs and Password Protection to restrict template access to people who know the correct password.

To use templates from other sites, go to Bricks > Settings > Templates, scroll to the Remote templates section, and paste the URL of the Bricks site you want to retrieve templates from into the Remote template URL field.
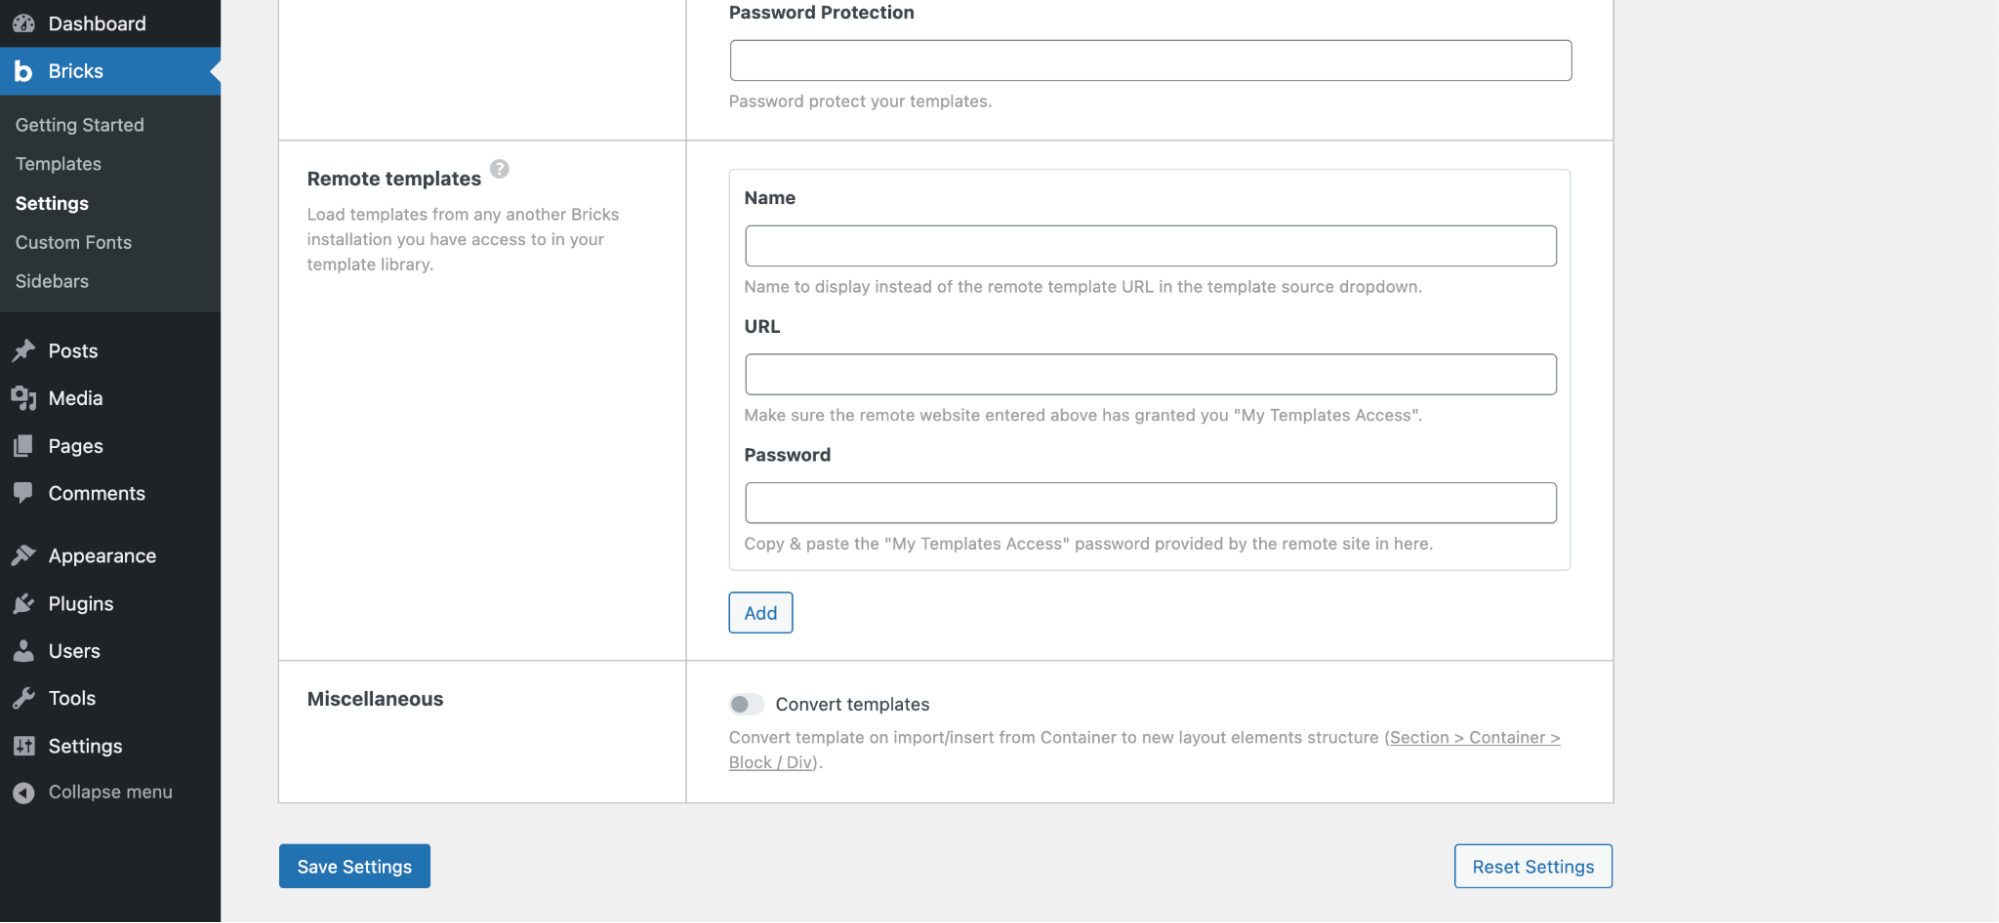
If you set a password, you must make sure that you write it under the Remote template Password. Then click Save Settings.
To use these templates, navigate to the page builder and click Templates like before; a new section of Remote templates will appear with all the templates from the remote site.
Using dynamic data in Bricks
Bricks allows you to incorporate dynamic data into your templates and pages, making it a versatile tool for building dynamic websites.
You can include various dynamic elements such as featured images, post titles, publication dates, author names, categories, tags, site titles, and all your custom fields.
Dynamic data is particularly useful when creating specific templates in Bricks, like your blog post template or templates for custom post types, such as a single property listing.
To add dynamic data, start typing { on the canvas or click the “bolt” icon next to most fields in the settings panel.
Here’s how to create a single post template using dynamic data with Bricks:
- Navigate to Bricks > Template to create a new template. Assign a title to your template, set its type to Single, and then either Publish it or Save as draft.
- Click on Edit with Bricks to start configuring your template to use dynamic data.
- Style the page as desired. Typically, you will want elements like the post title, featured image, publication date, author’s name, and the post content—all set to display dynamically.
- On a blank canvas, add a title and content by inserting
{post_title}in a Heading element and{post_content}in a Basic text element.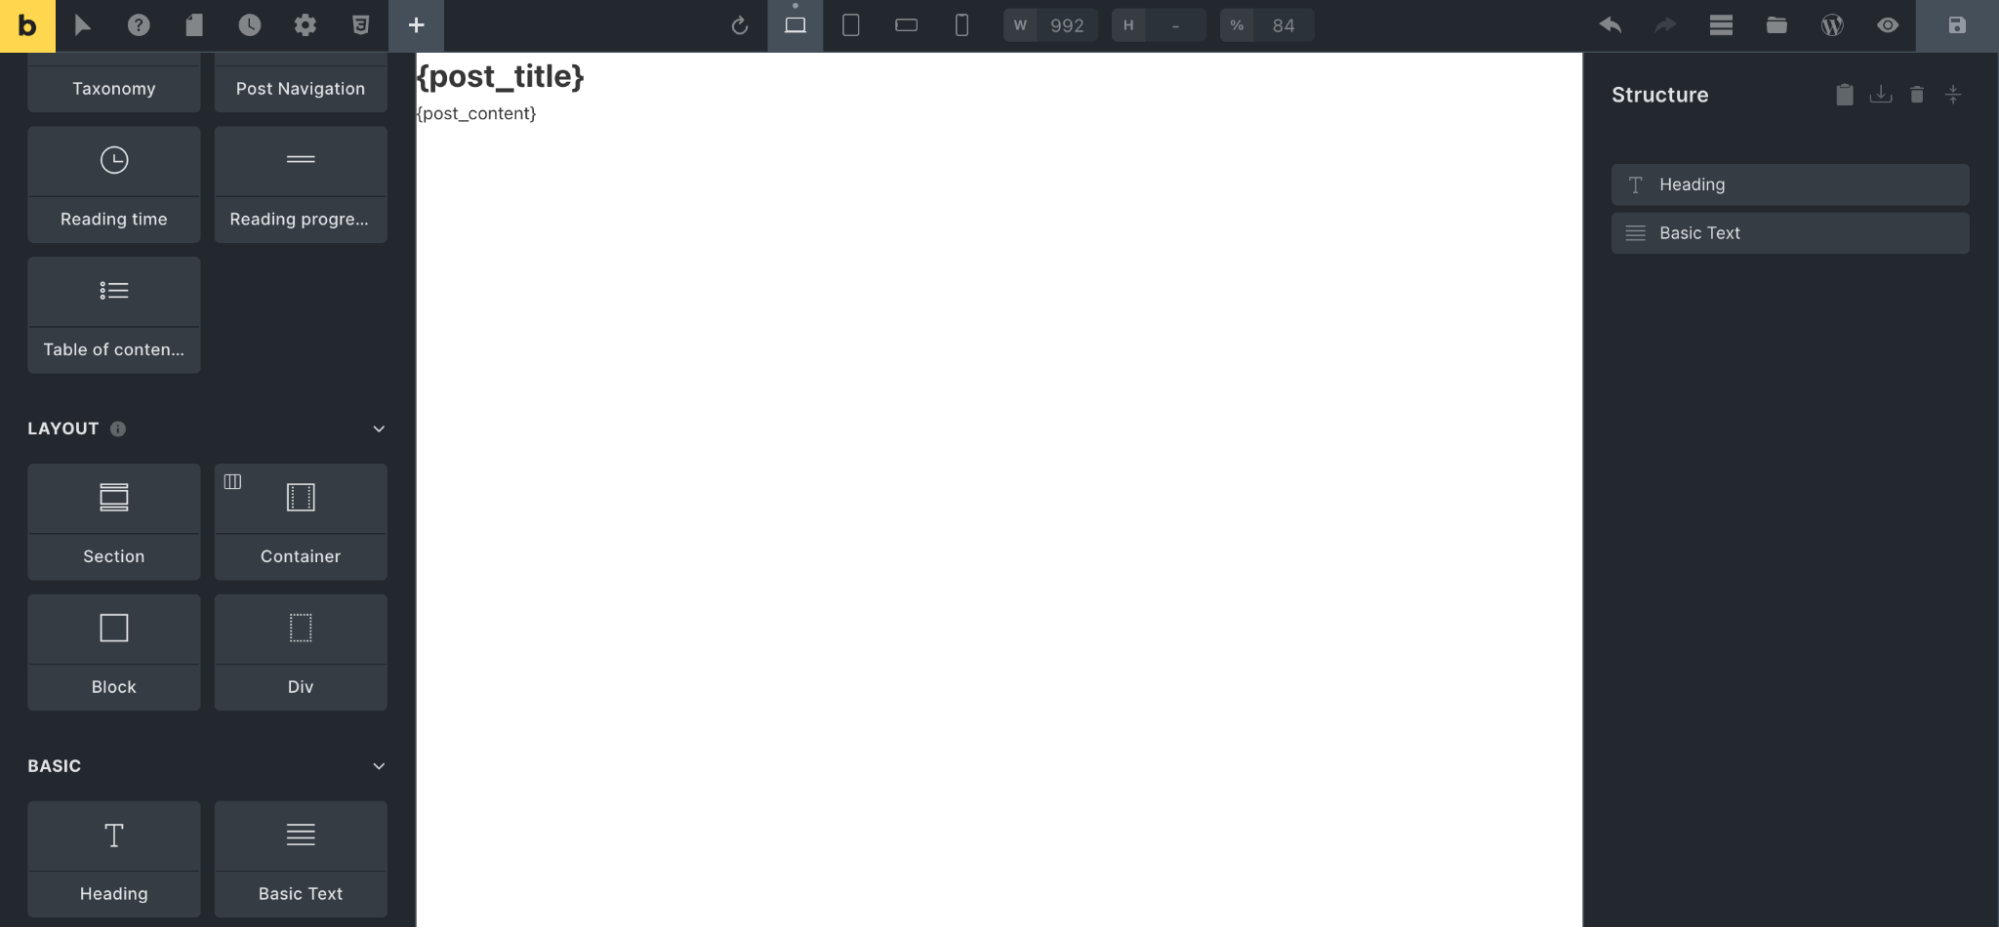
Using dynamic data in Bricks.
To set this template as the default for all posts:
- Click the settings icon in the toolbar, go to Template Settings > Conditions, and then click the + ADD CONDITION button.
- Select Post type and specify Posts.
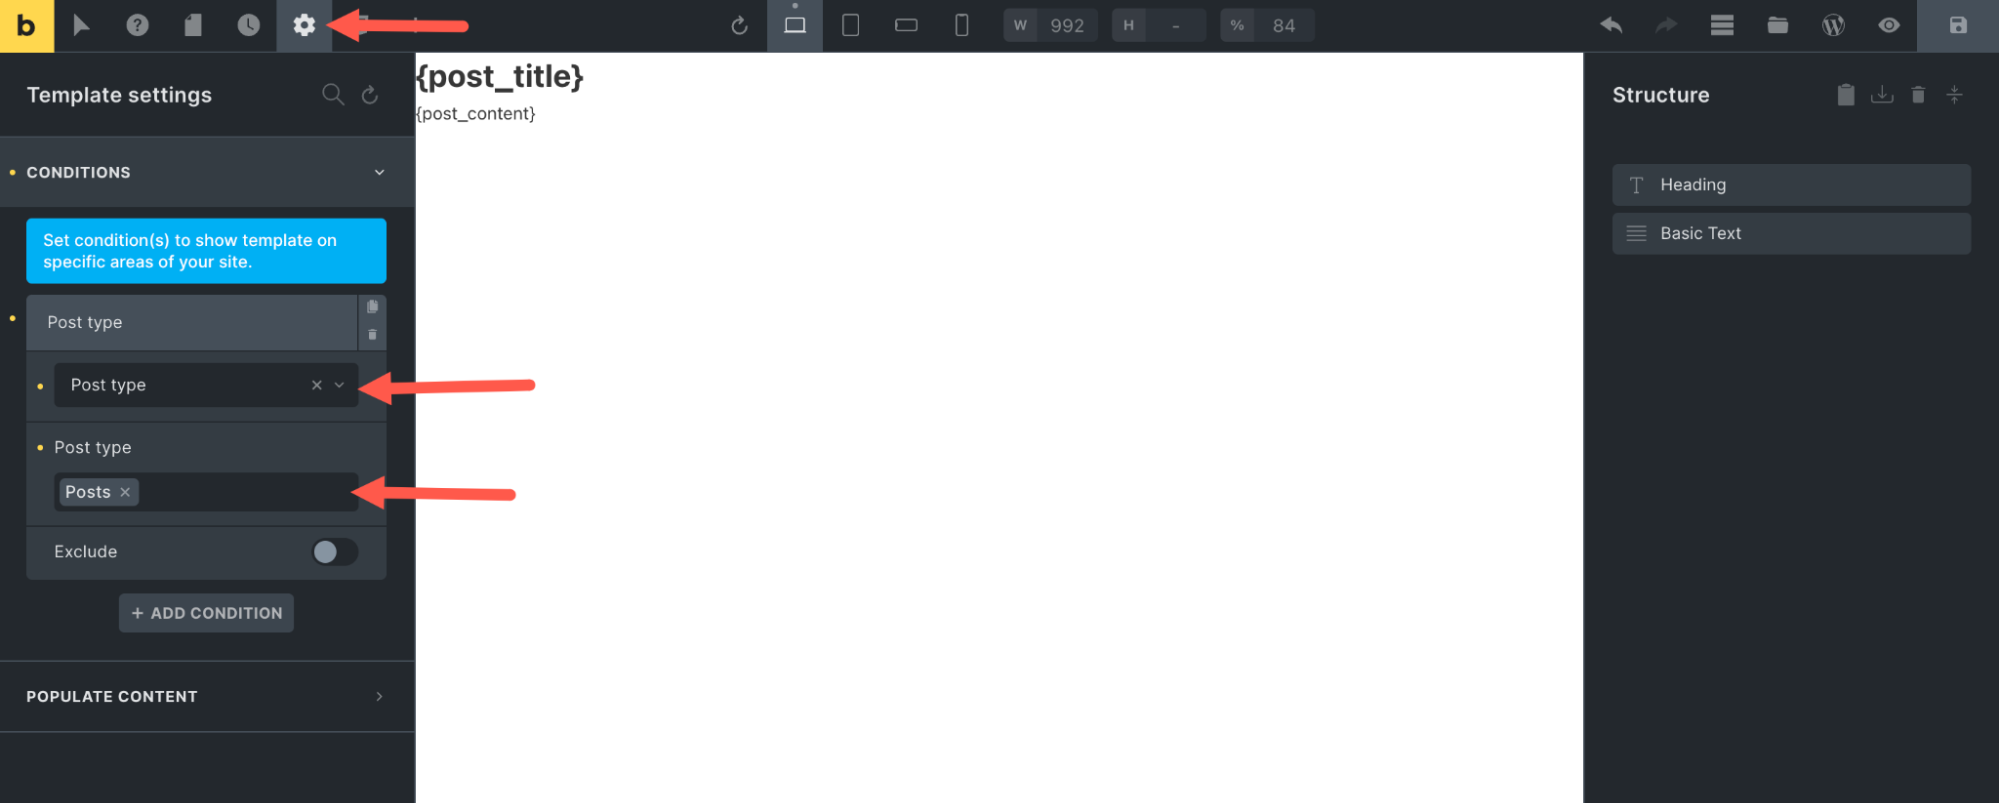
Set template as default for all posts. - Ensure you save and update the template page on WordPress. Then, navigate to the Posts page to see each post formatted with the new template without additional styling.
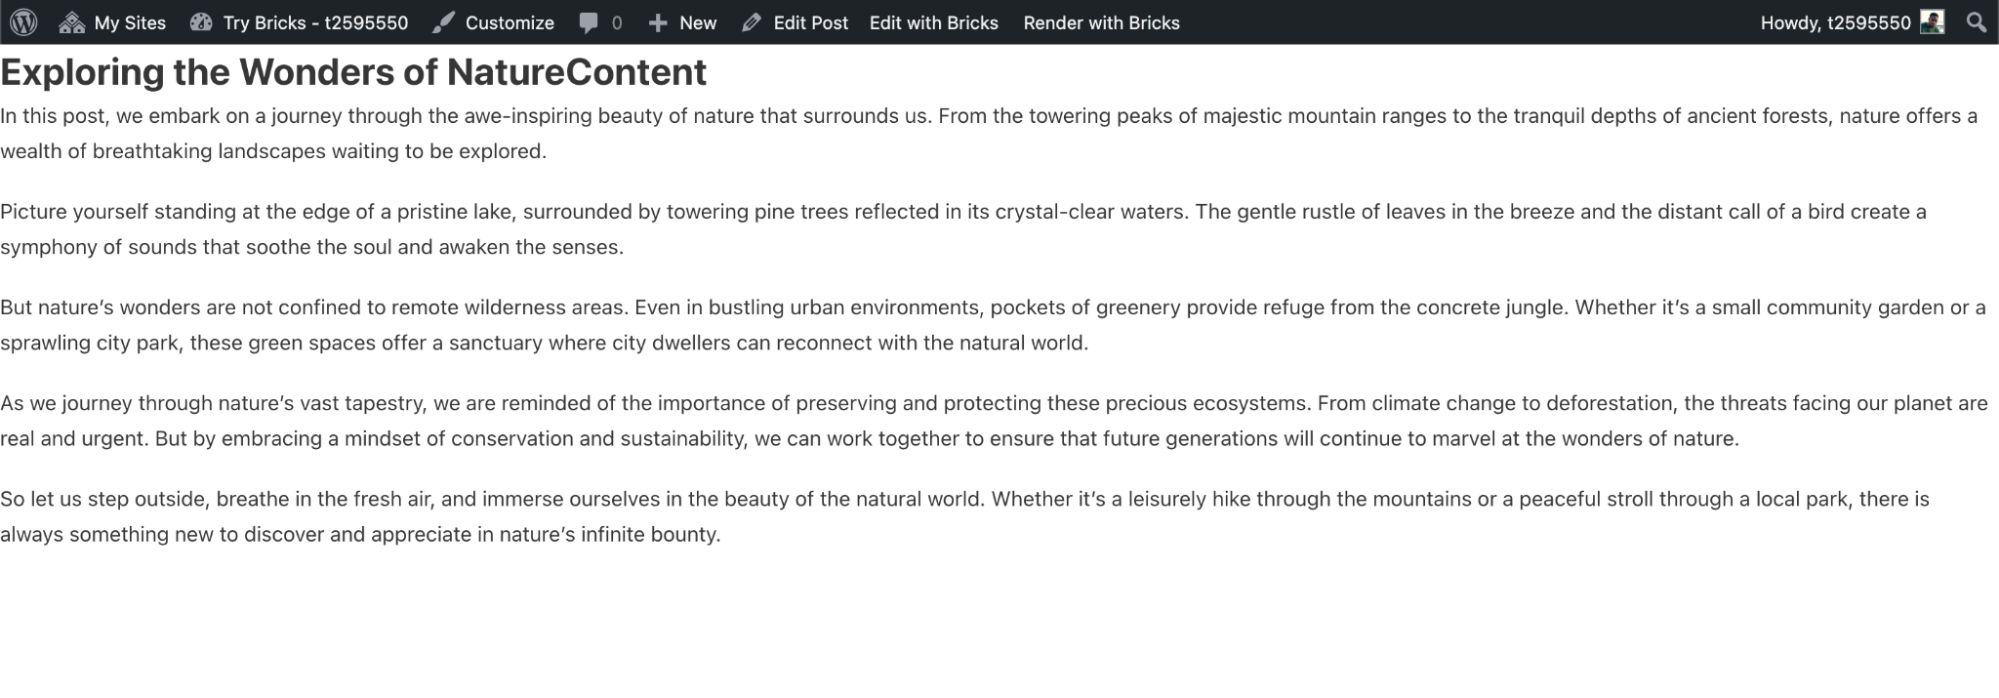
Template is used for all posts.
To simplify the styling of this template, add a default post to use as a reference for the dynamic elements:
- Click the settings icon in the toolbar, and go to Template Settings > POPULATE CONTENT.
- Choose Single post/page as the content type and select a specific post as the template content. If none appear, make sure to search for one, then click APPLY PREVIEW.
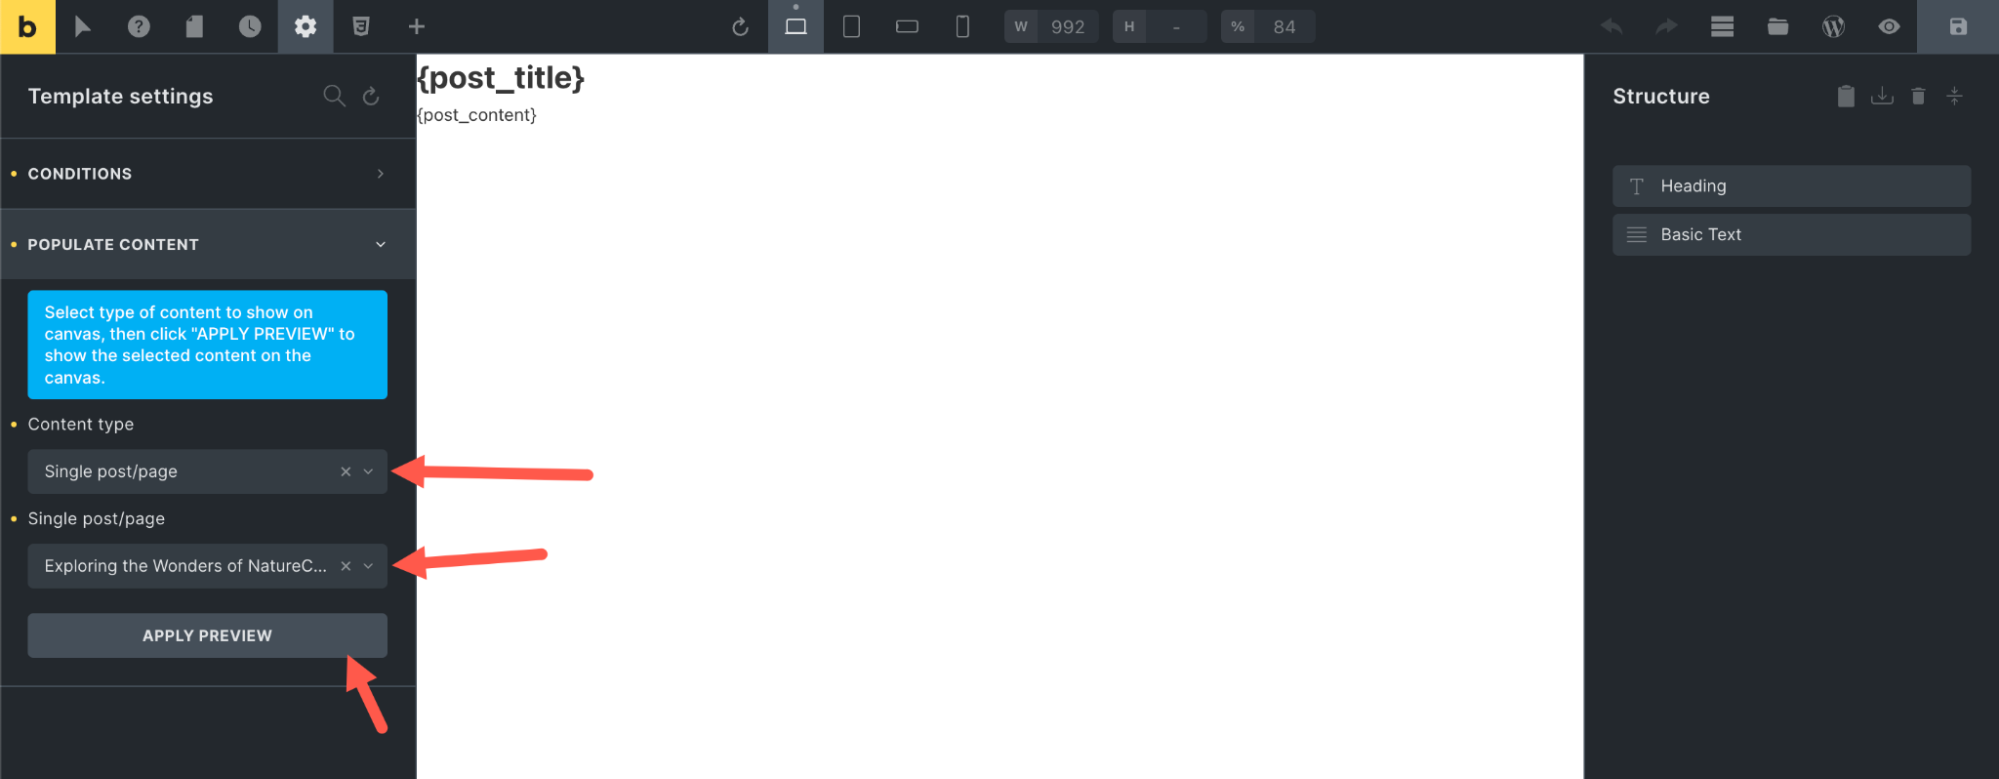
Add default post to use as a reference for the dynamic elements. - You can now easily display elements like the post title and content using the selected template post.
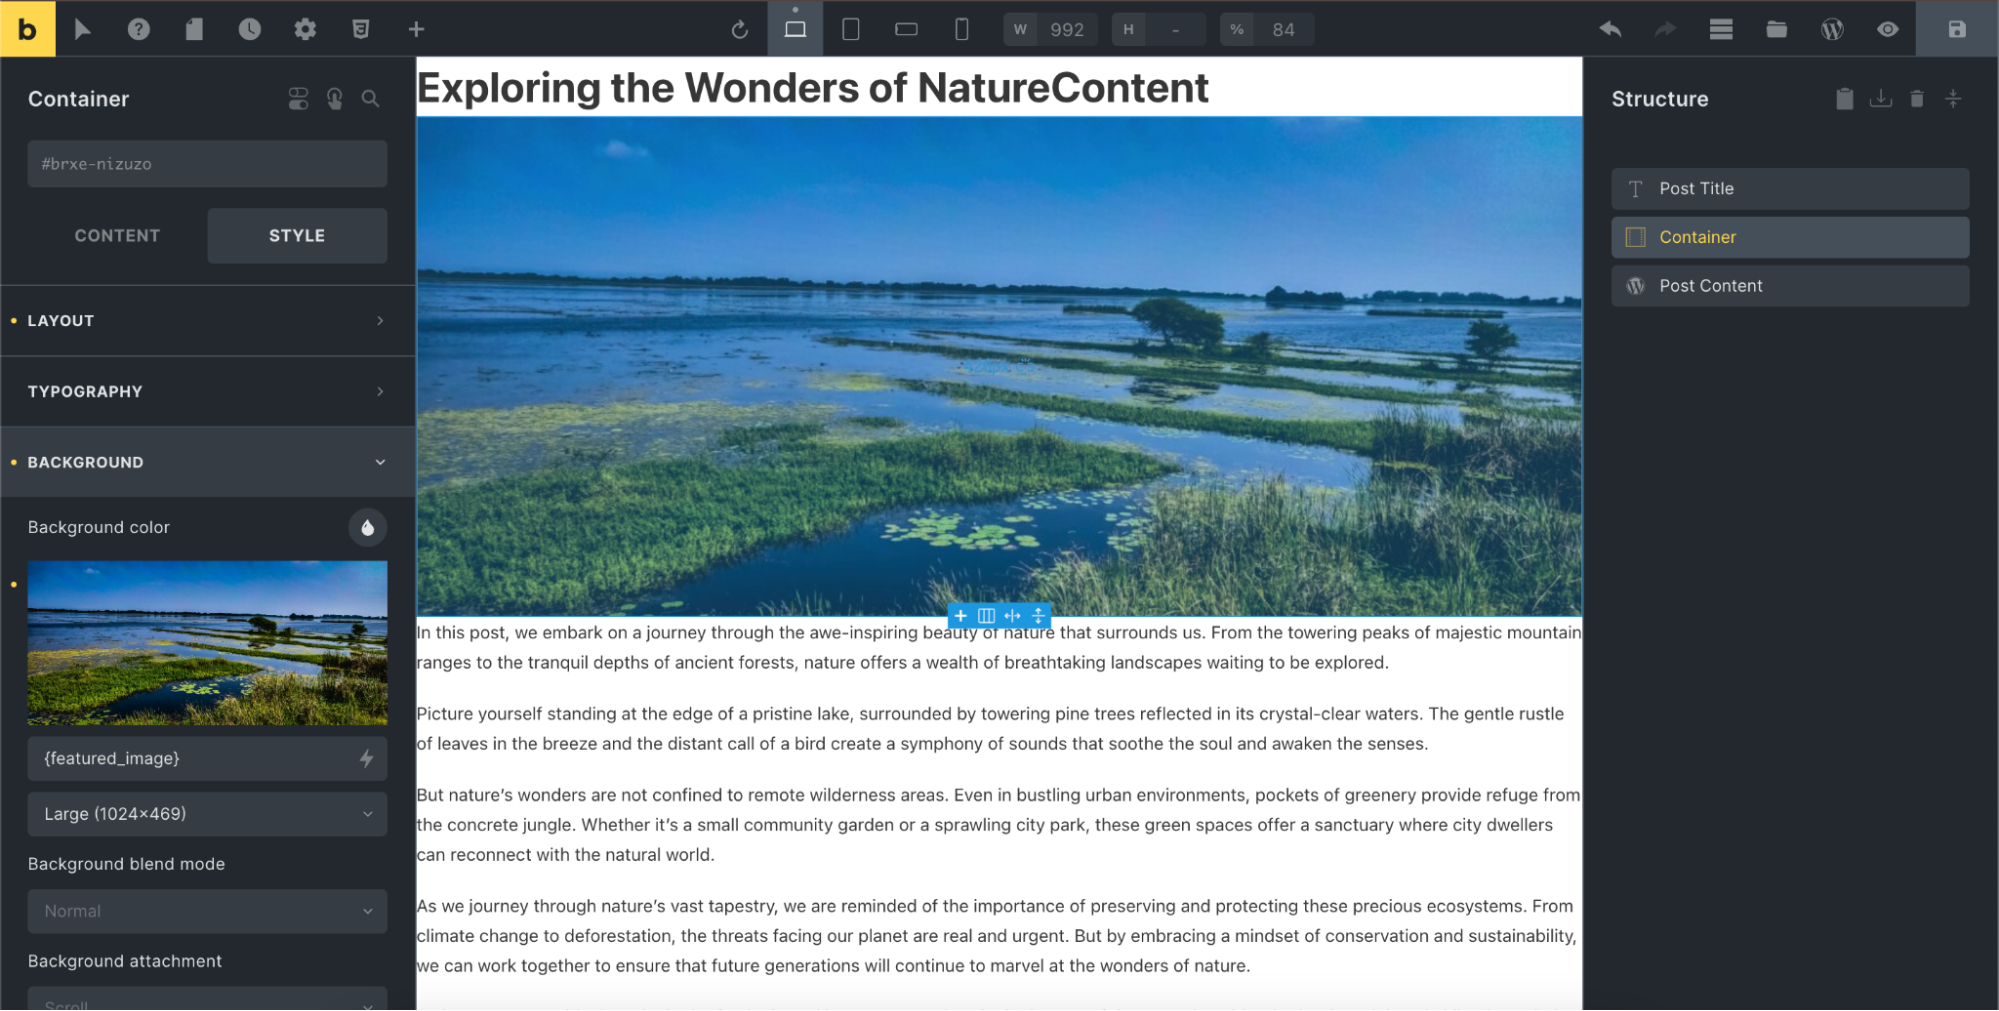
Selected default post shows when customizing page with dynamic data.
Additionally, Bricks supports using content from Advanced Custom Fields (ACF), enhancing your ability to create detailed, custom-tailored pages.
Handling form submissions with Bricks
The form submission feature was introduced in Bricks 1.9.2 to allow you to capture form submissions. This allows you to create a custom table named bricks_form_submissions in your database (plus your WP database prefix).
You can enable the new Save form submissions in database setting under Bricks > Settings > General > Miscellaneous.
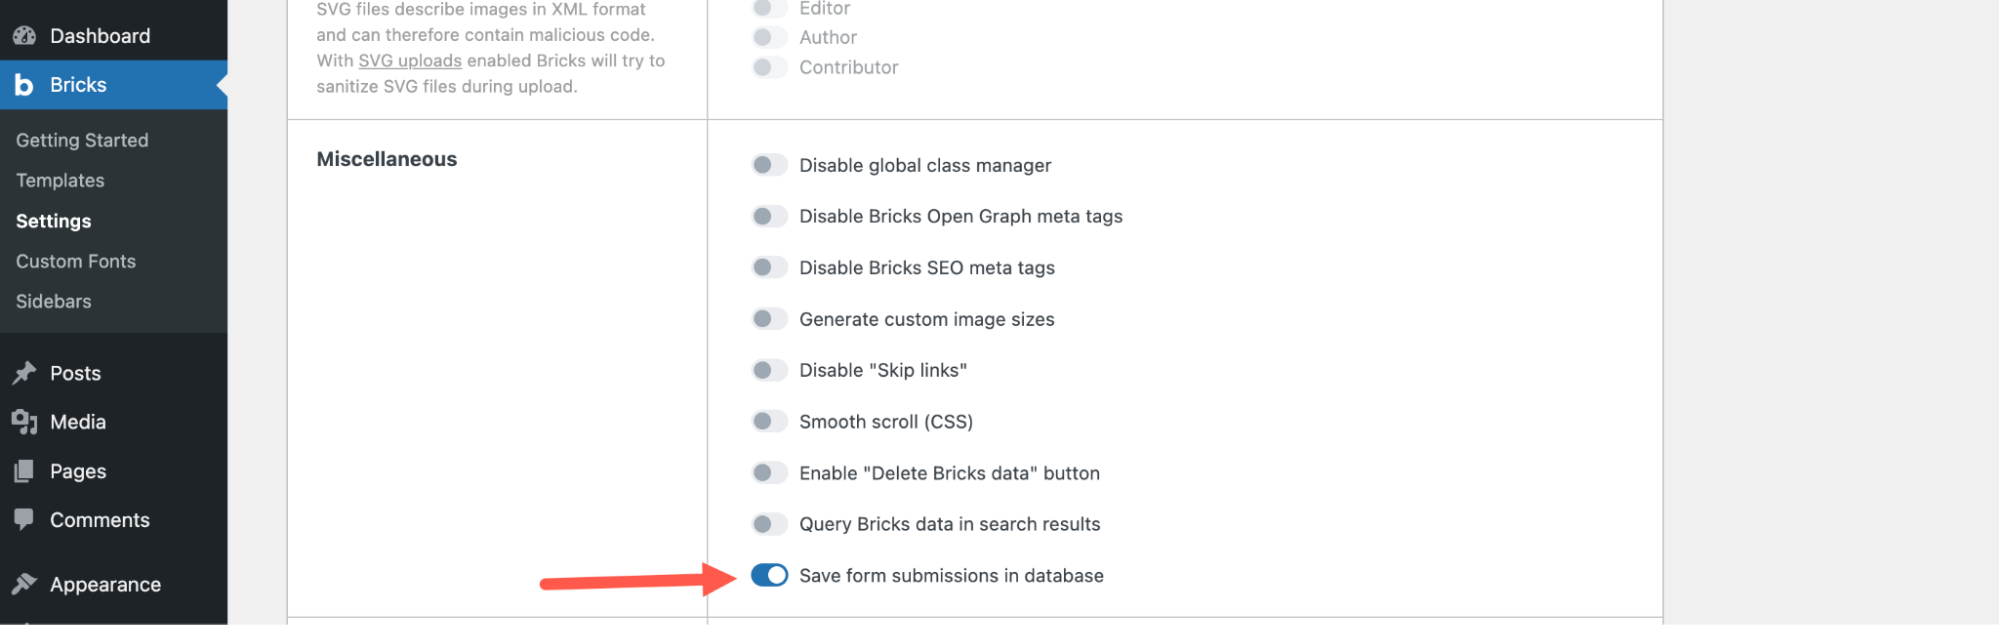
Then click Save Settings. A Form Submissions tab will appear (Bricks > Form Submissions), holding your various form submission tables.
Collecting form submissions
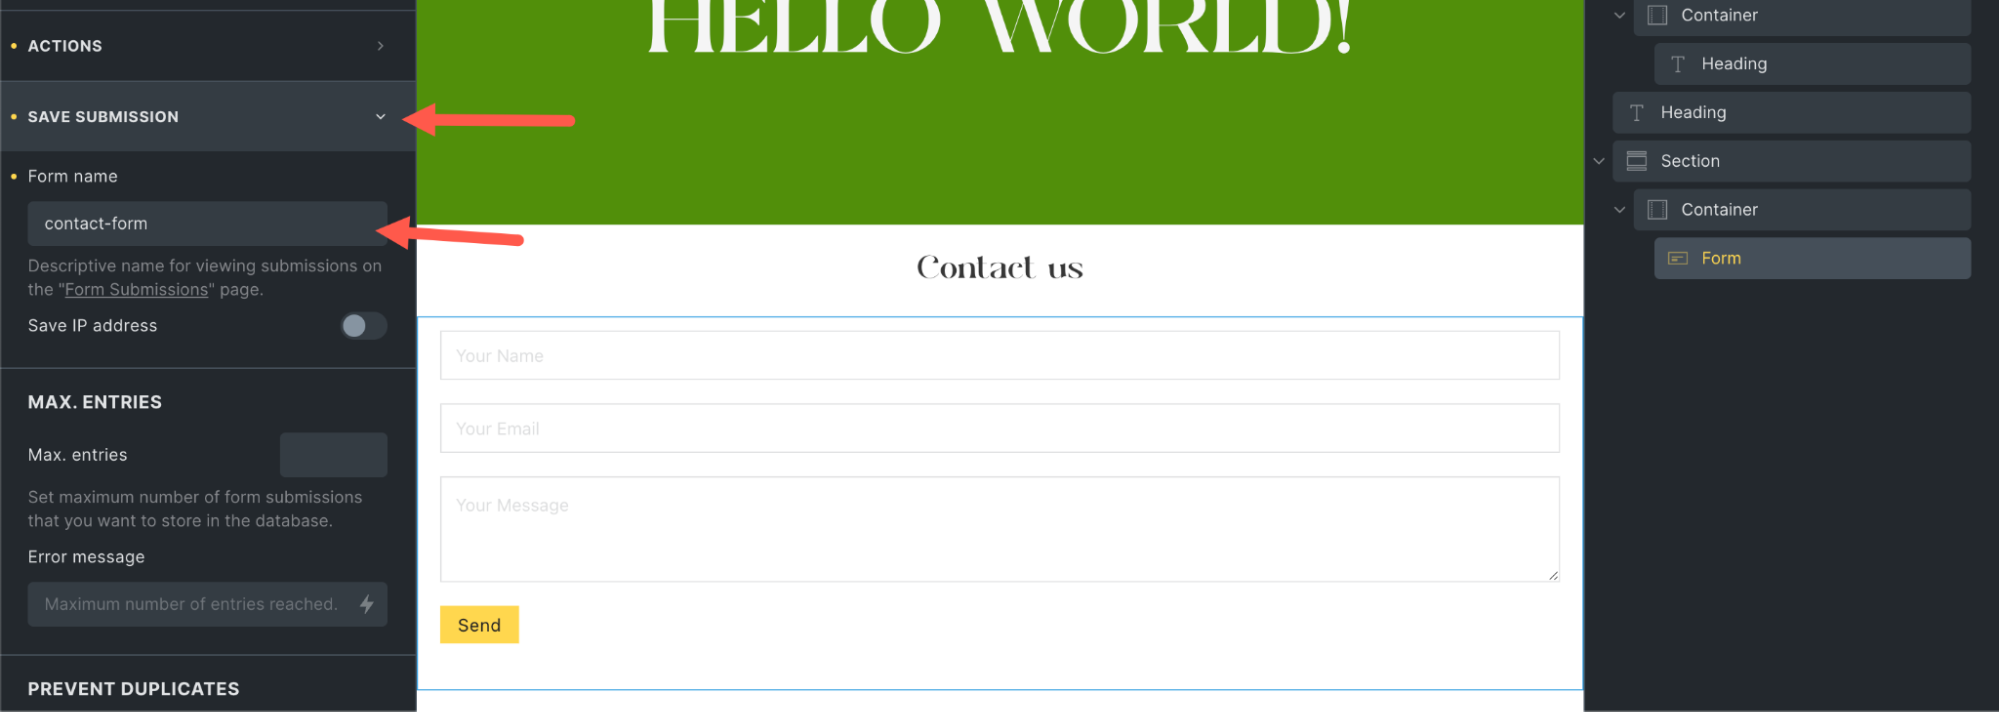
Collecting form submissions in Bricks does not require an extra plugin. You just have to use the Form element to create a form and set the fields correctly.
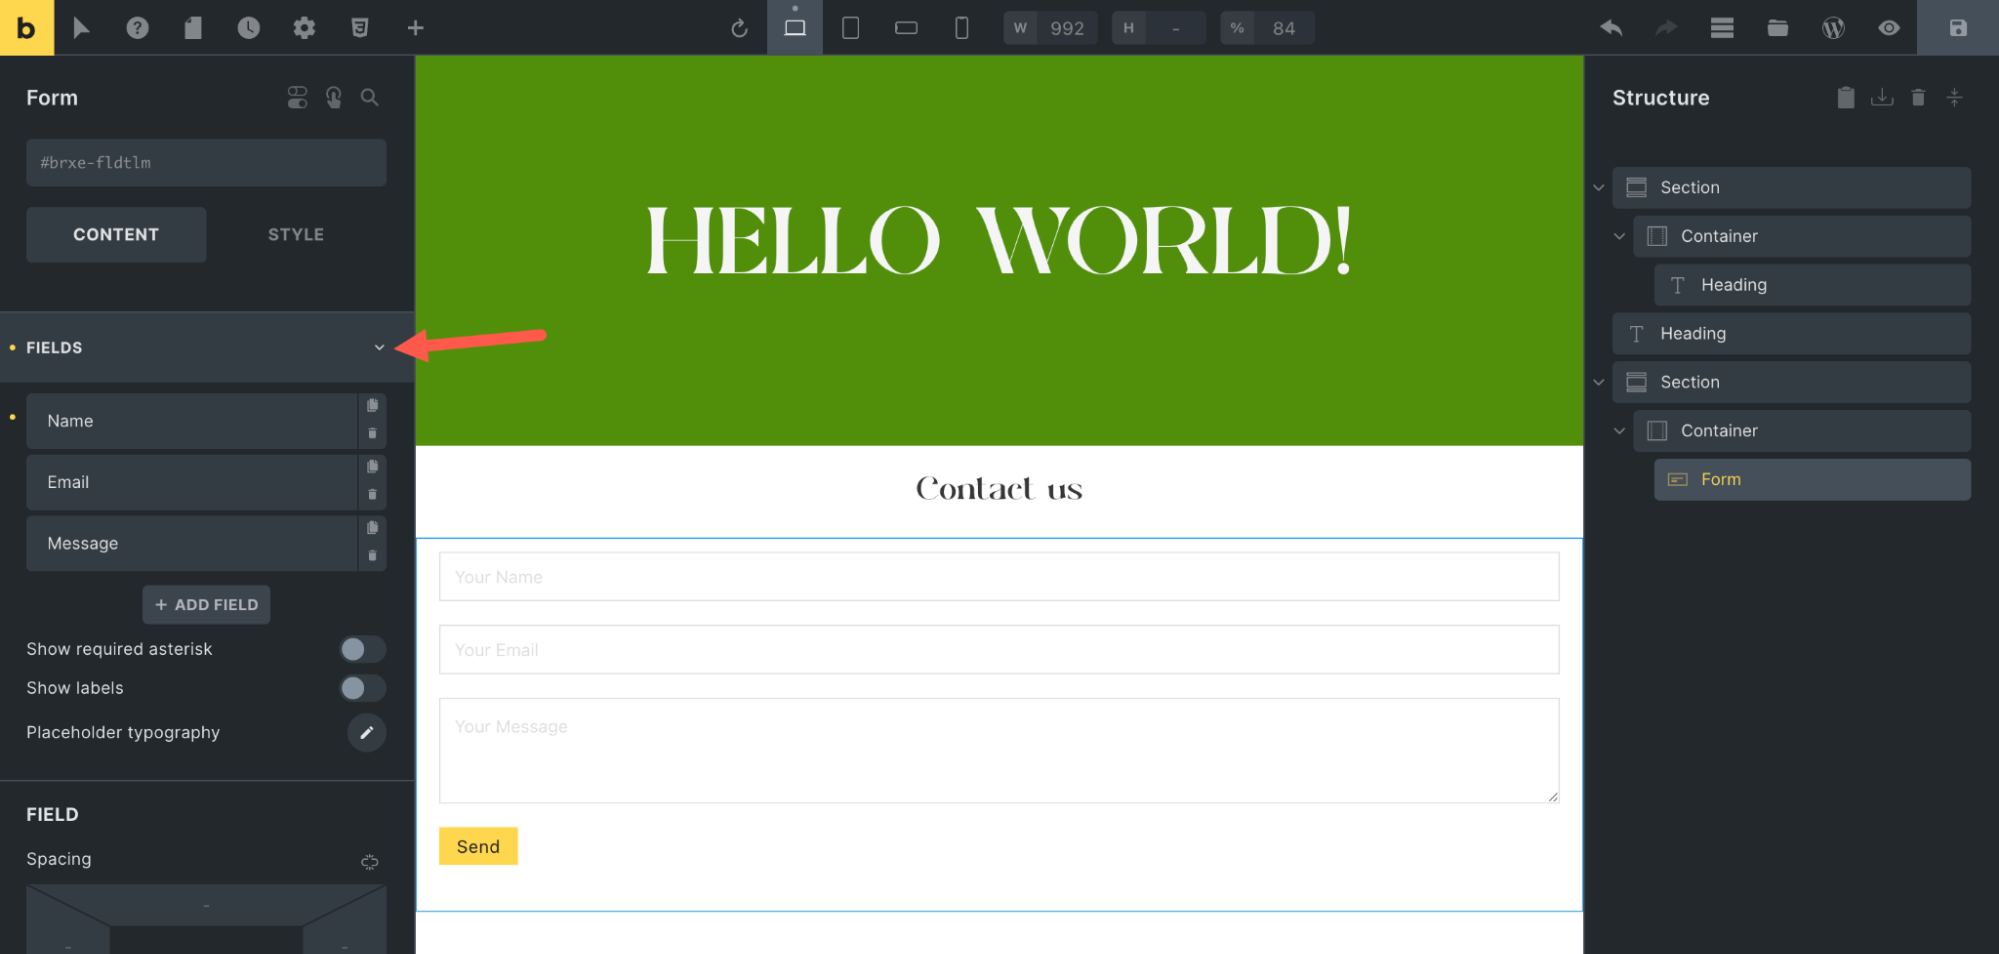
In the settings panel, click Actions, then select the Save Submission action.

Next, click Save Submission settings to give the form a descriptive name. This name will be used to access data from the form.
Now, when you save and open the page. You can complete the form and then navigate back to Bricks > Form submission to see the form data.
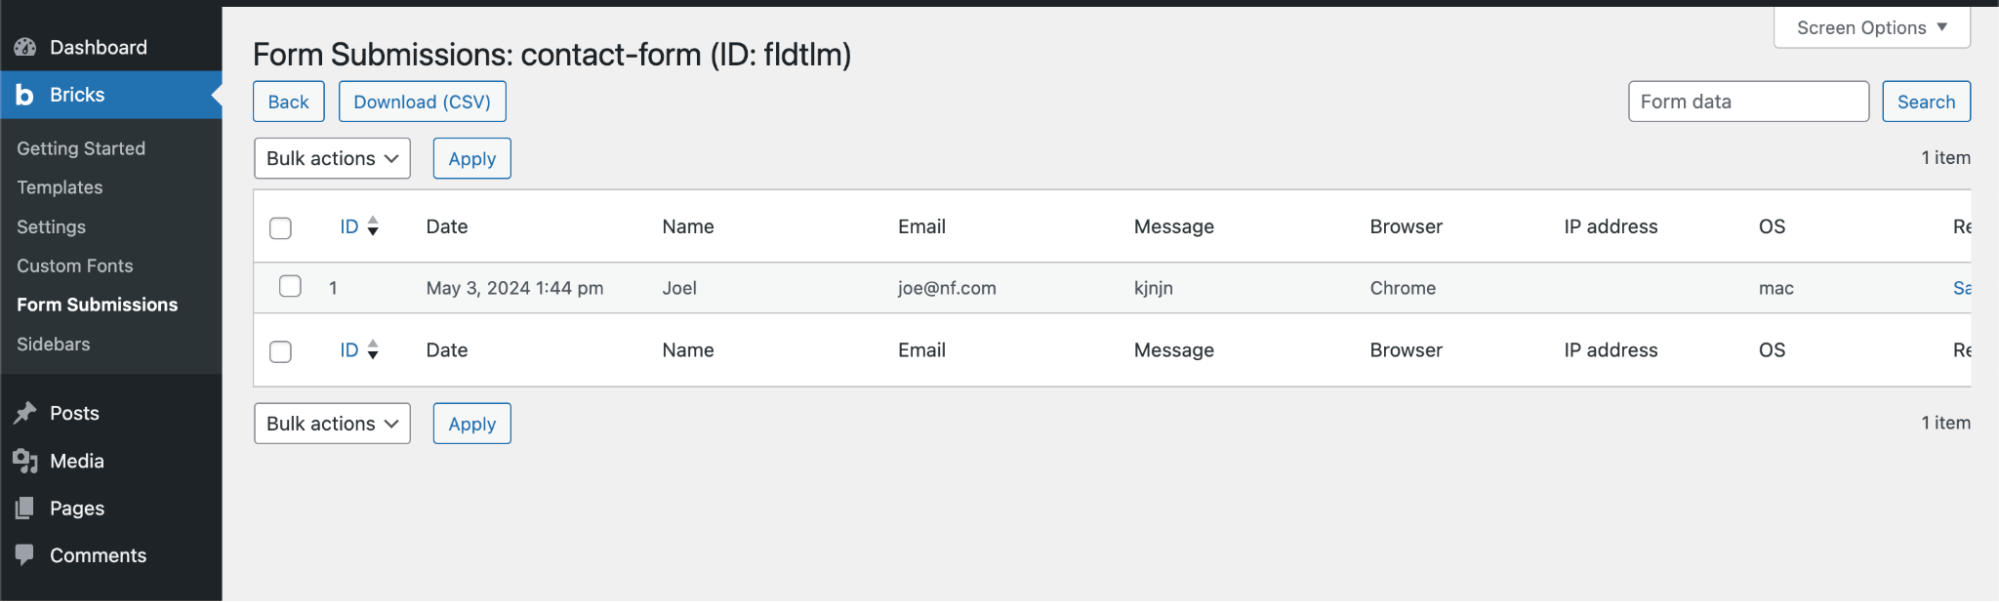
You can also download a CSV file of the various form submissions. In the Bricks > Settings > General > Miscellaneous section where you configured this feature, you can reset or delete the database table.

Using WooCommerce with Bricks
WooCommerce is a free plugin that enhances your WordPress site with e-commerce capabilities. It’s globally recognized as a leading open-source solution for setting up and managing an online store.
Bricks integrate seamlessly with WooCommerce, providing a robust in-theme builder for crafting your entire store, from the main shop page to individual product pages, product archives, carts, checkouts, and account pages.
Bricks offers specialized elements and templates specifically for WooCommerce, allowing you to design your store’s layout.
To start using the WooCommerce Builder in Bricks, install and activate the WooCommerce plugin. Once activated, you can use Bricks to visually design and customize various WooCommerce templates, similar to how you would manage single post layouts.
To create a simple Shop page:
- Navigate to Pages and select the Shop page.
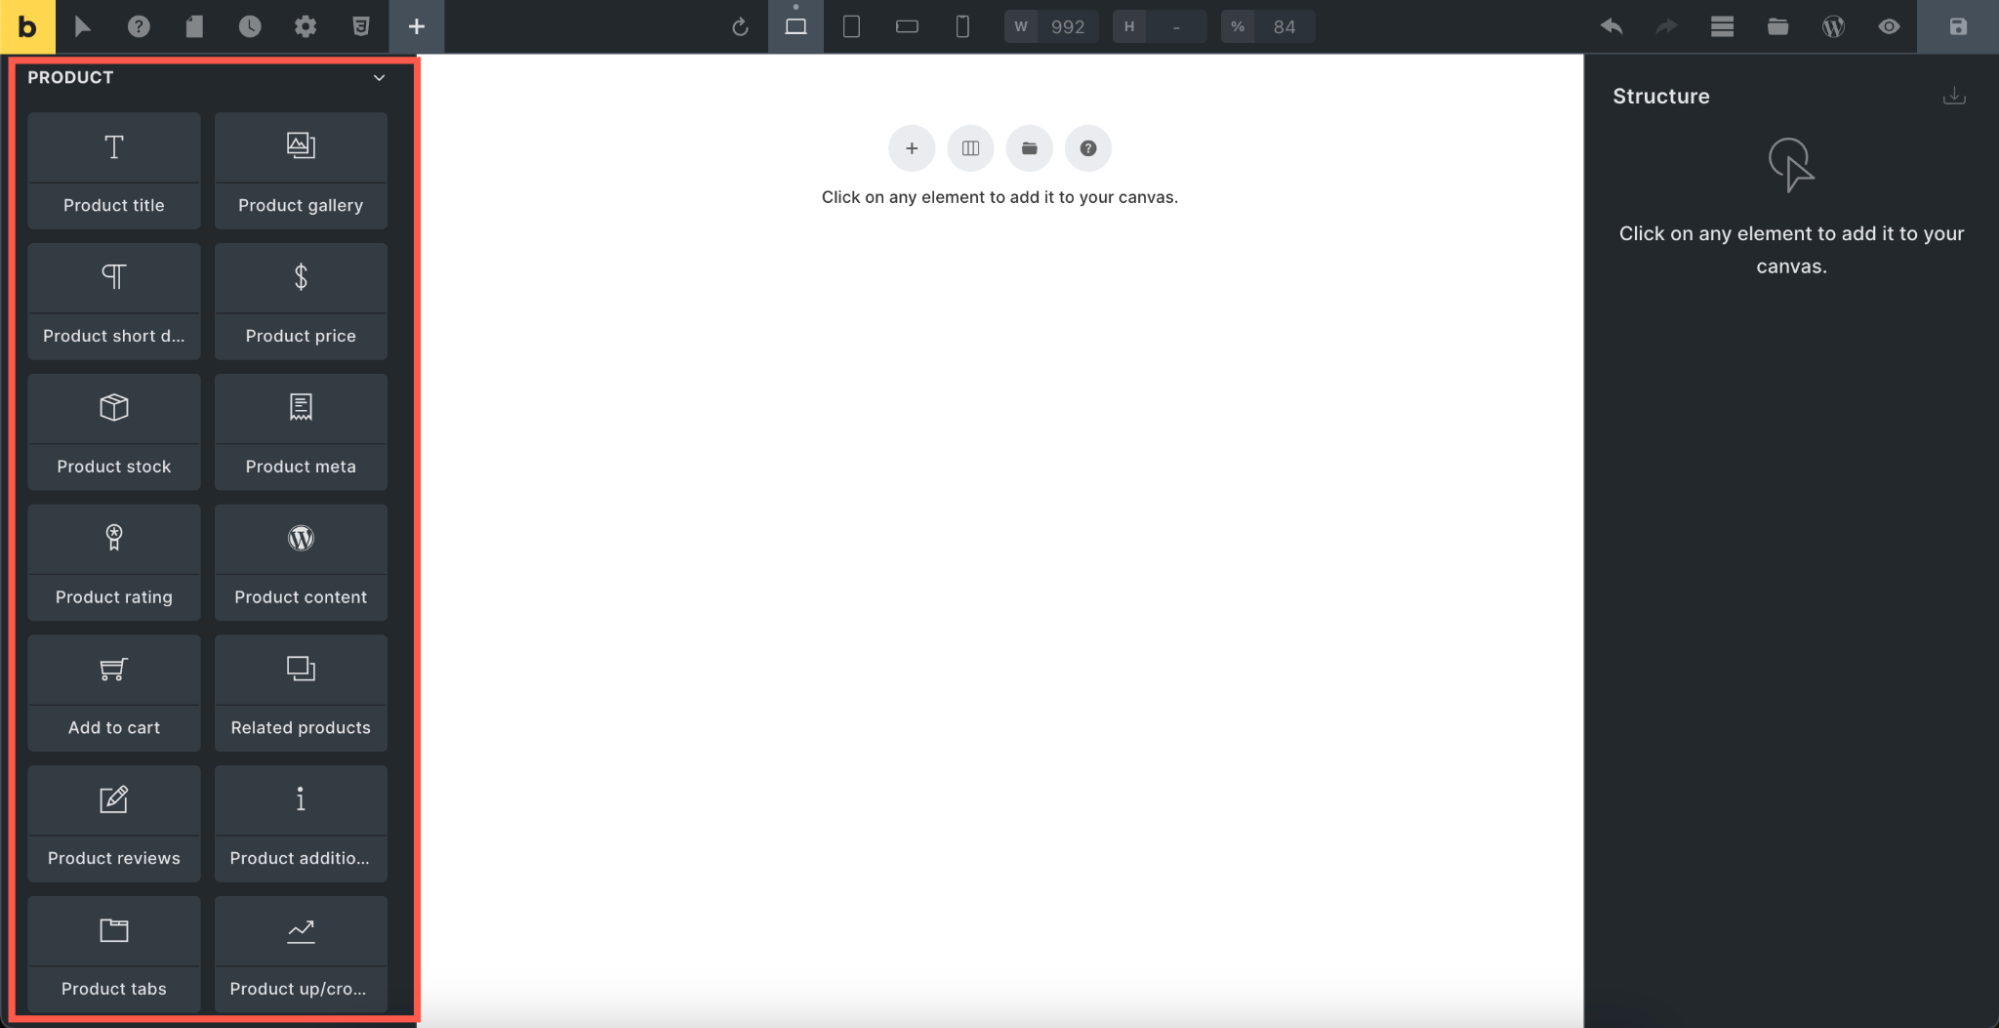
- Click to Edit with Bricks. The Elements panel contains various product elements. These allow you to display products, titles, descriptions, prices, and more, facilitating dynamic template creation.
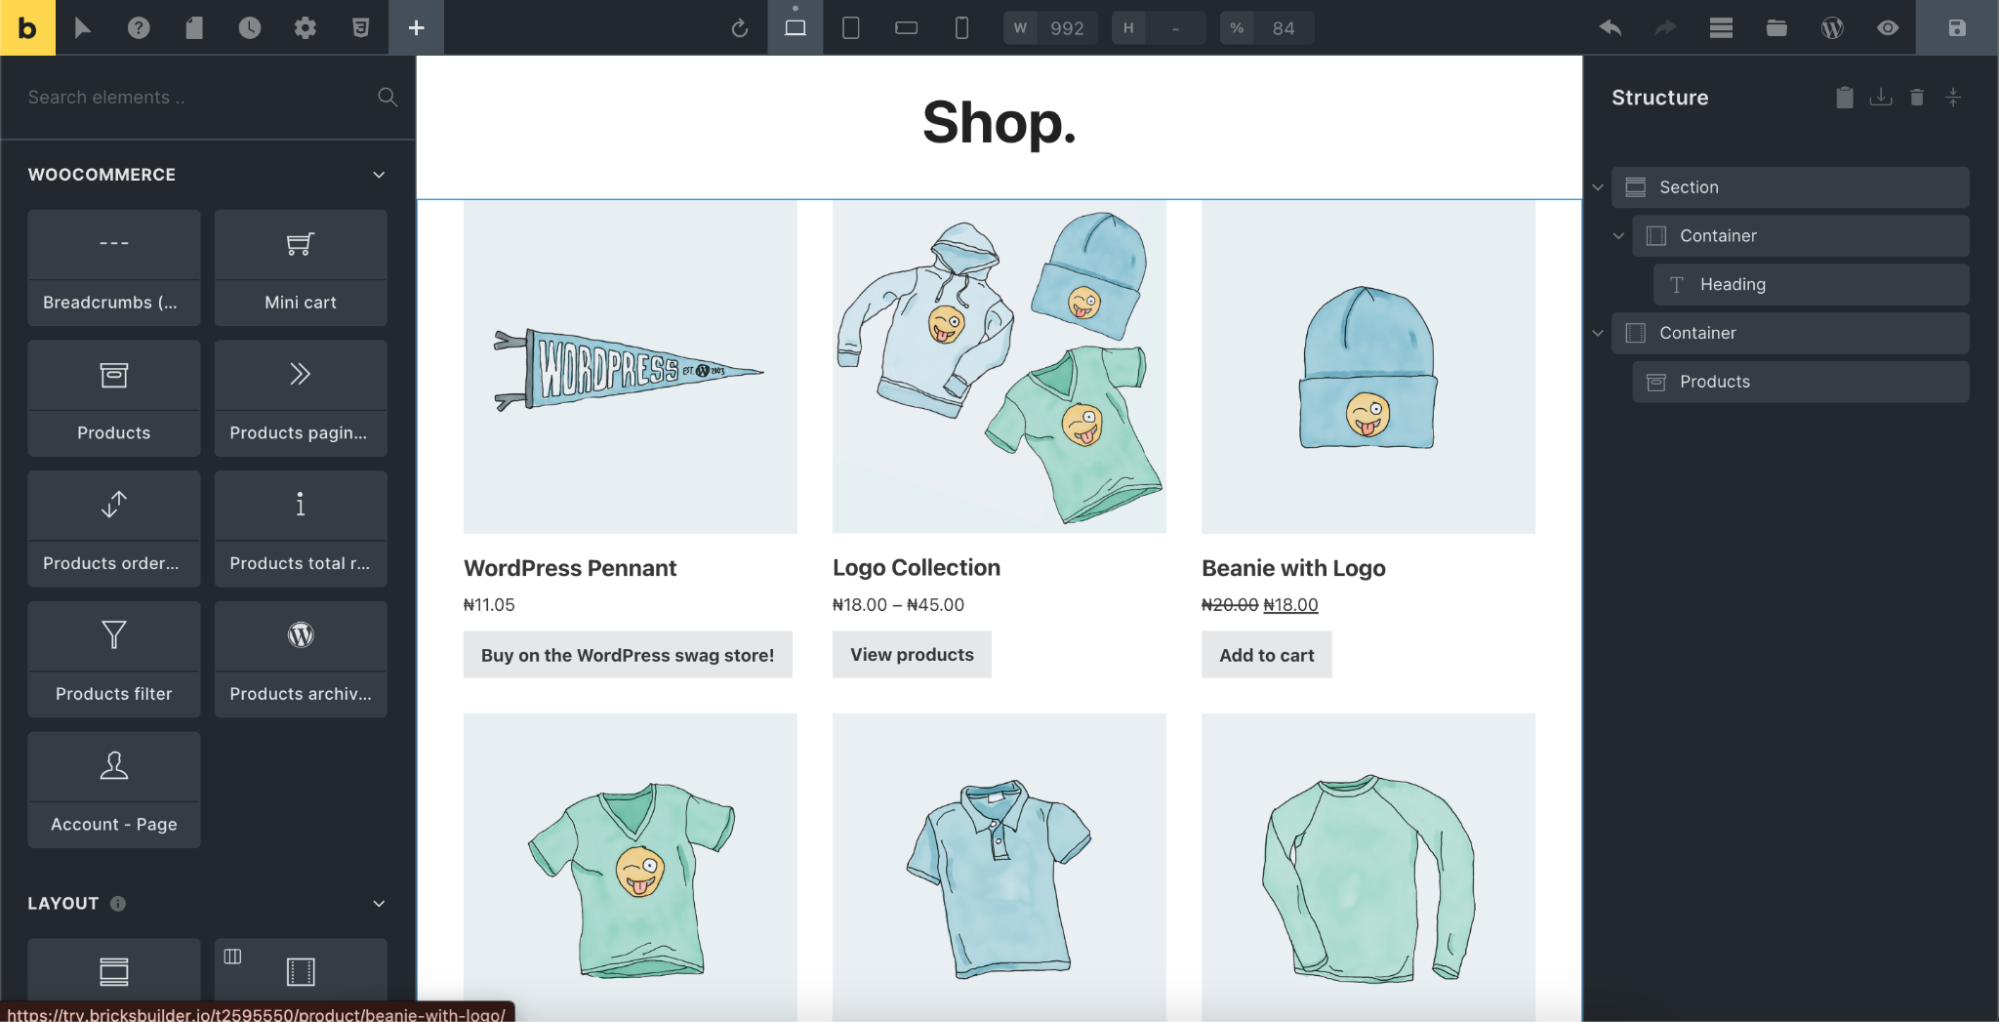
Using WooCommerce with Bricks Builder. Using these elements, you can arrange and style your page as desired.
Like creating a single post template, you can create a single product template and set its conditions to work with all products.
Query loops in Bricks
The Query Loop builder lets you query your database according to your query parameters and renders the query results you want to show inside the loop. It can be used in layout elements like container, Accordion, and Slider.
You can query post types, taxonomy terms, and users. For example, you can query a list of blog authors, community members, and team members.
To use the Query loop, add a Container element to the canvas. Enable the Use Query Loop setting to turn your container into a loop item.
Once you’ve enabled the Use Query Loop setting, you’ll see a Query control (infinity icon). Click the icon to open the query control and set the query parameters for retrieving the content from your database.
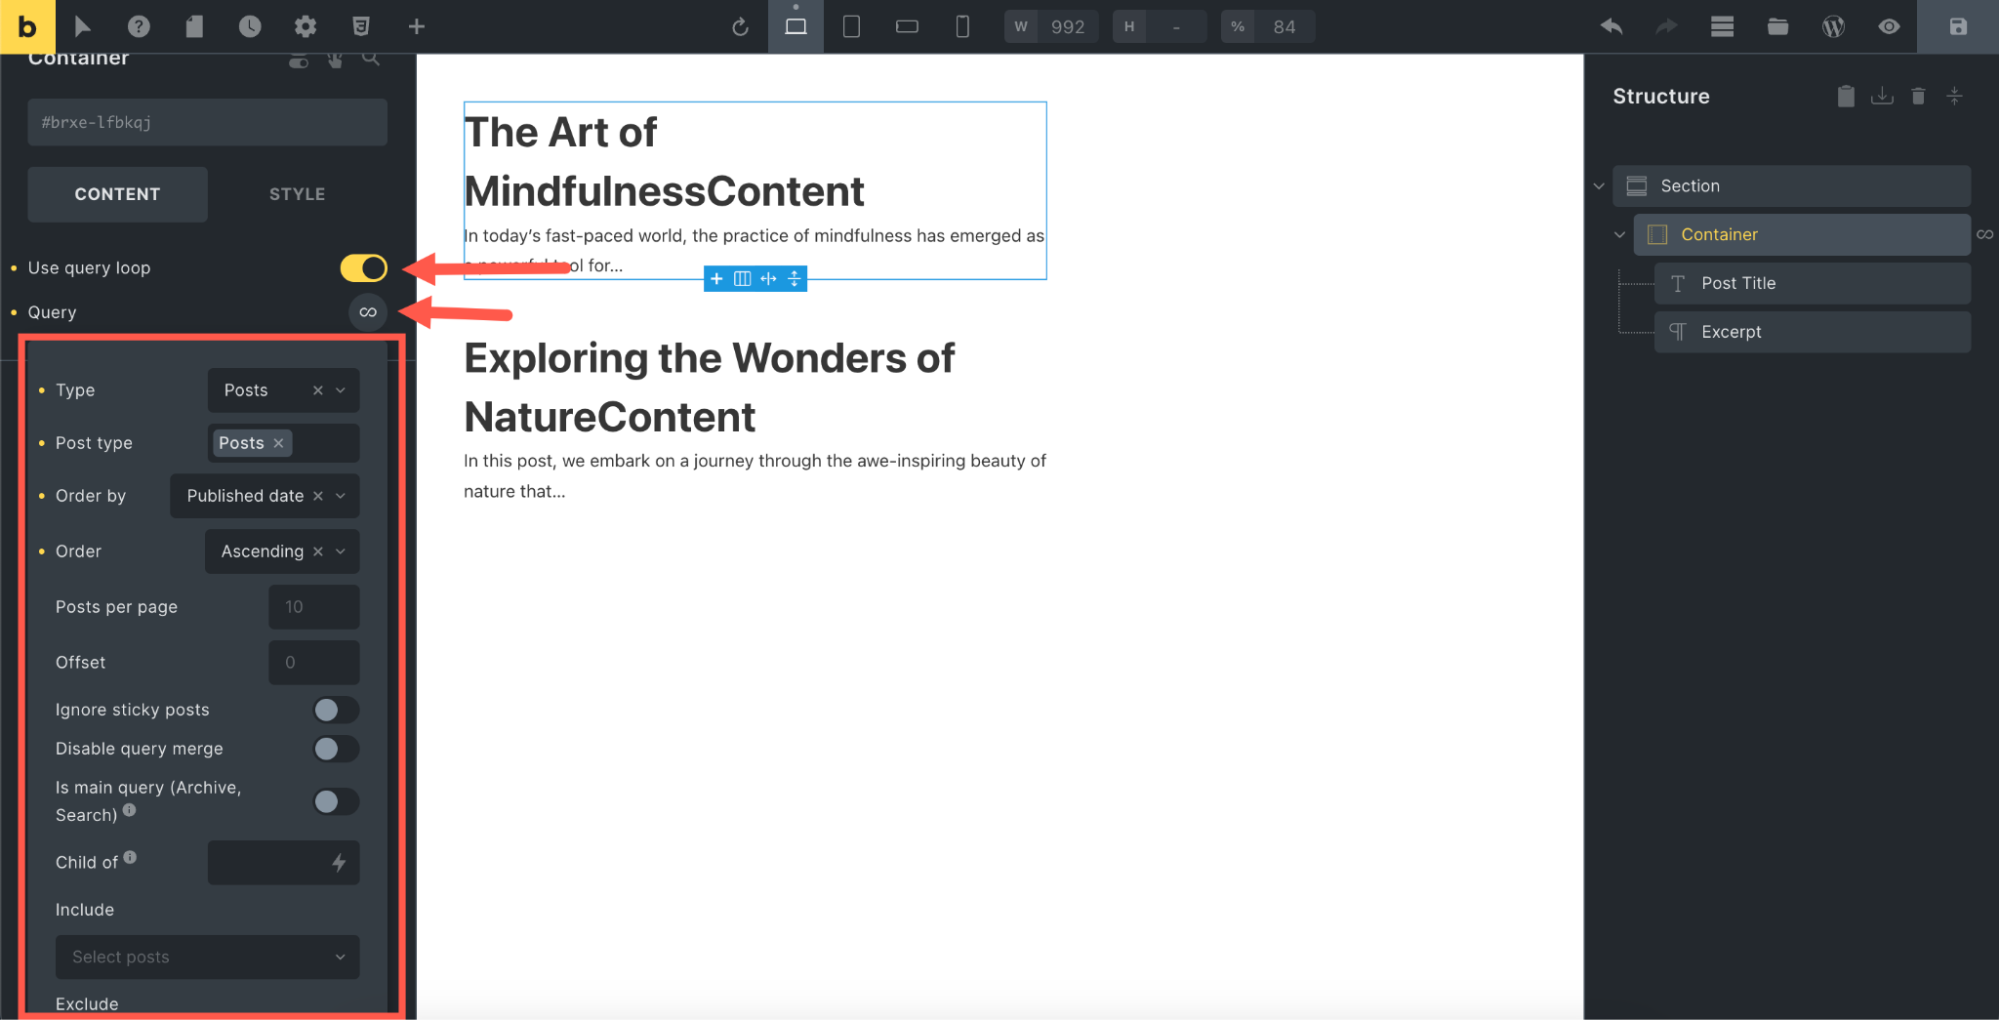
The container now serves as your repeater item. All elements inside this container are repeated as often as there are query results. This academy guide explains how it works.
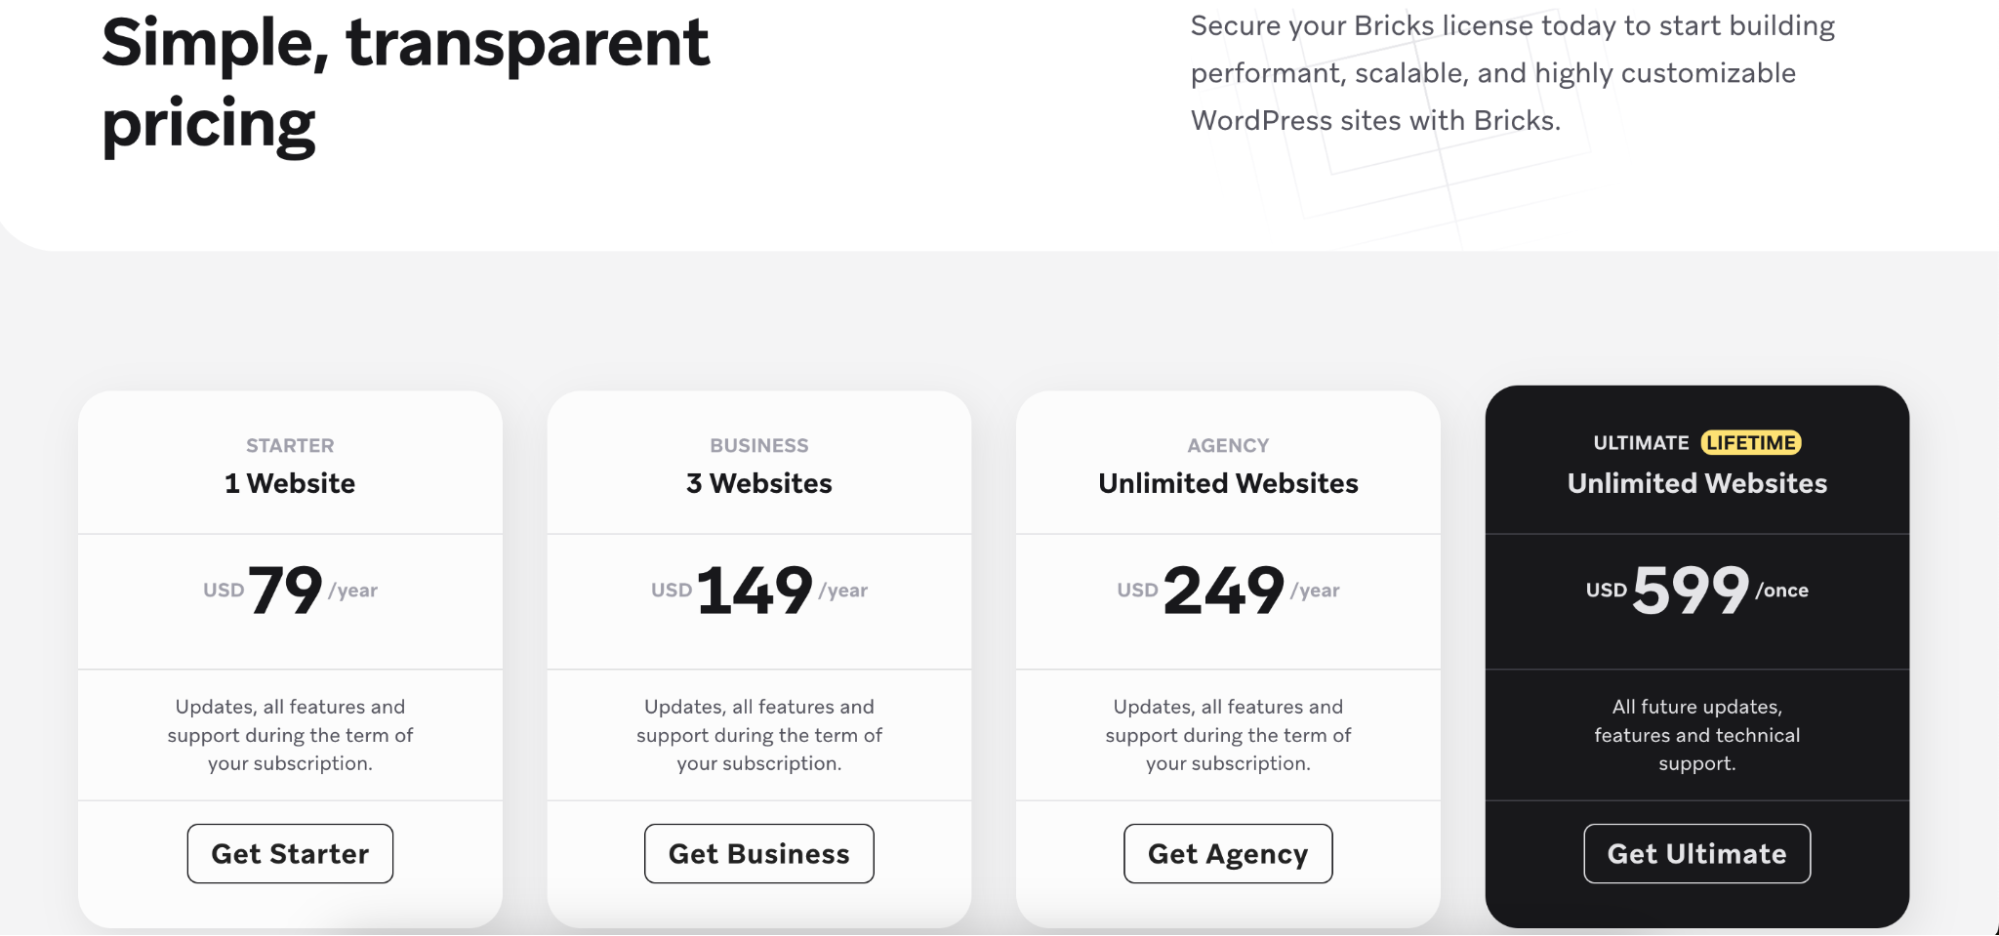
Bricks pricing
Bricks do not have a free plan. They only create an account to let you try their theme, but you can’t use it for your site unless you pay.
Bricks offer basic plans and a lifetime plan. The lifetime plan offers unlimited privileges, but you decide what you want.
They offer the convenience of having almost everything you need within the platform, contributing to a seamless and efficient workflow and making it a worthwhile investment for those seeking a robust and versatile web design solution.
Bricks review: Is it worth a try?
One potential drawback is that Bricks does not offer a free version, unlike Elementor. However, Bricks Builder has been gaining attention in the industry with its blend of simplicity and powerful features.
A 2024 survey of 1,144 WordPress professionals carried out by The Admin Bar says that “Bricks was the only page builder to increase its numbers over last year, racking in 32% of the total” with the following table:
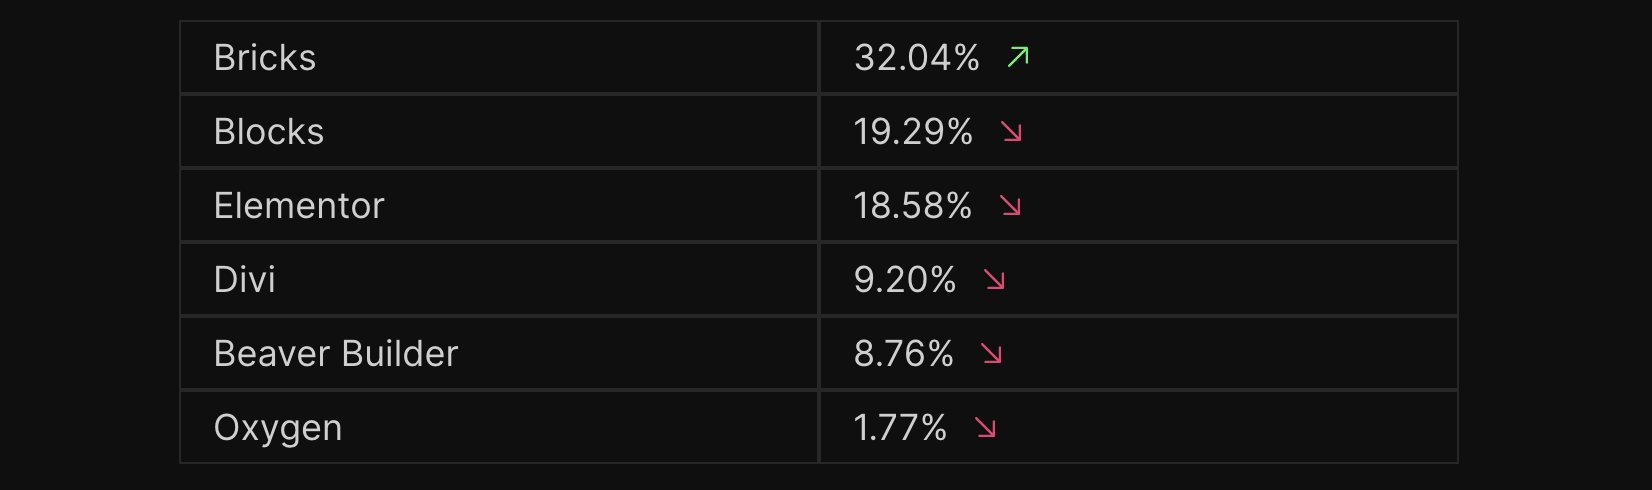
This shows how many WordPress professionals are embracing it even though it is still a relatively new entrant in the market.
Bricks operate as a complete theme. This means you cannot mix and match features from other themes with its page builder. Also, in terms of speed, as a newer page builder designed for high-performing websites, Bricks Builder is reputed to be faster than Elementor Pro.
Using a page builder designed for speed alone can not guarantee the best performance. Regardless of the type of website you are building, your hosting provider plays a crucial role in its performance.
At Kinsta, we are known for providing premium WordPress Hosting with dozens of premium features. We boast in this!
We operate on a fully containerized architecture. This allows us to provide you with a large selection of the fastest data servers, incredible performance, server-level caching, dedicated resources, and enhanced security.
Check out what our customers say, or contact us to learn more about our managed hosting solution and how it excels.
Summary
This article has explored the Bricks Builder, its workings, some of its features, and how to use them. We’ve examined its comprehensive theme-based approach, customization capabilities, and performance benefits.
While Bricks lacks a free version like Elementor, its integrated design and frequent updates may provide superior efficiency for optimizing their website’s performance.
Do you have any questions about how to use the WordPress Bricks theme builder? Let us know in the comments section below!


