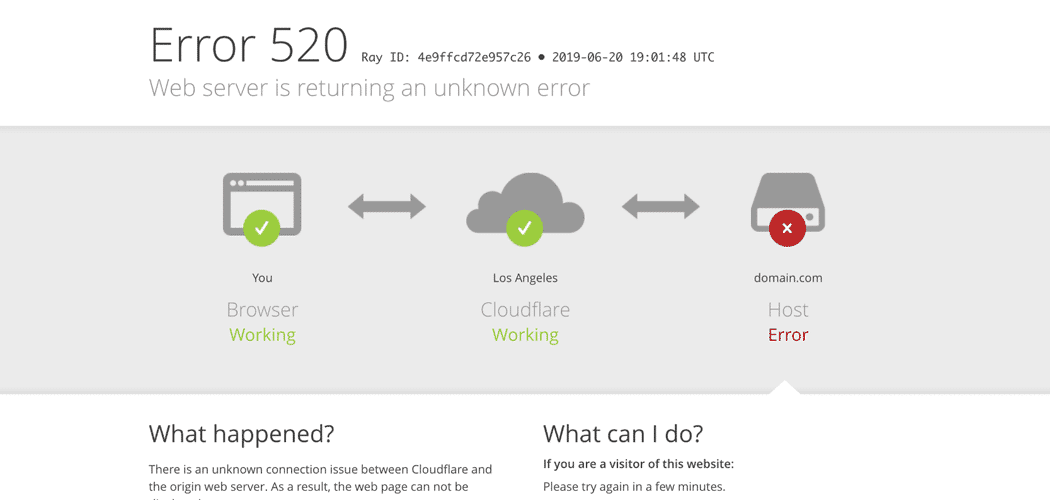
When your site’s visitors see error 520 in their browser, it means Cloudflare is sending the message because your server returned an empty, unknown, or unexpected response.
The 520 error can be approached through troubleshooting first to find the cause and then fixed following these steps.
Let’s jump right in.
Troubleshooting Error 520
Since the 520 error is coming up because of an issue on your server, you can troubleshoot the issue by looking in your error log.
Disable Cloudflare
Before you start troubleshooting, it’s necessary to disable Cloudflare. This helps isolate the problem by ensuring the issue can be replicated without Cloudflare being a factor.
Step 1
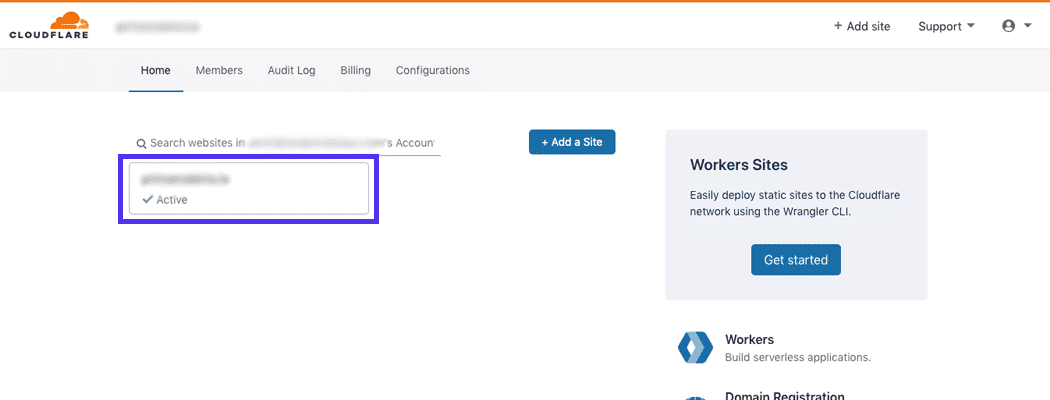
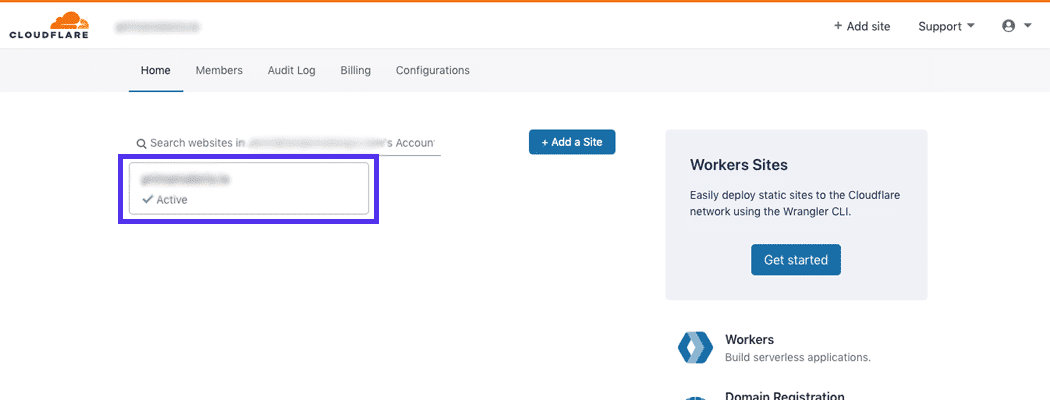
Start by logging into Cloudflare. Then, find your site on the list and click on it.
Step 2
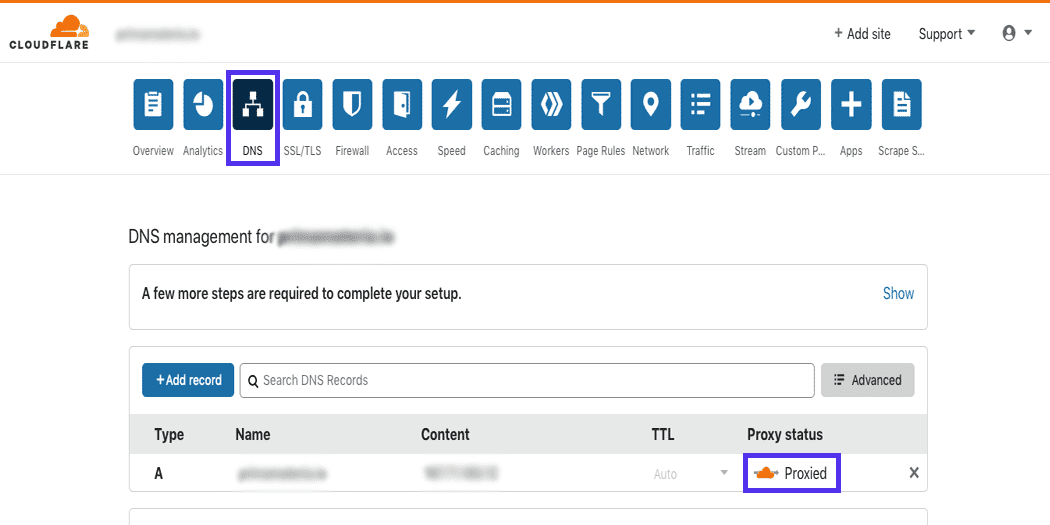
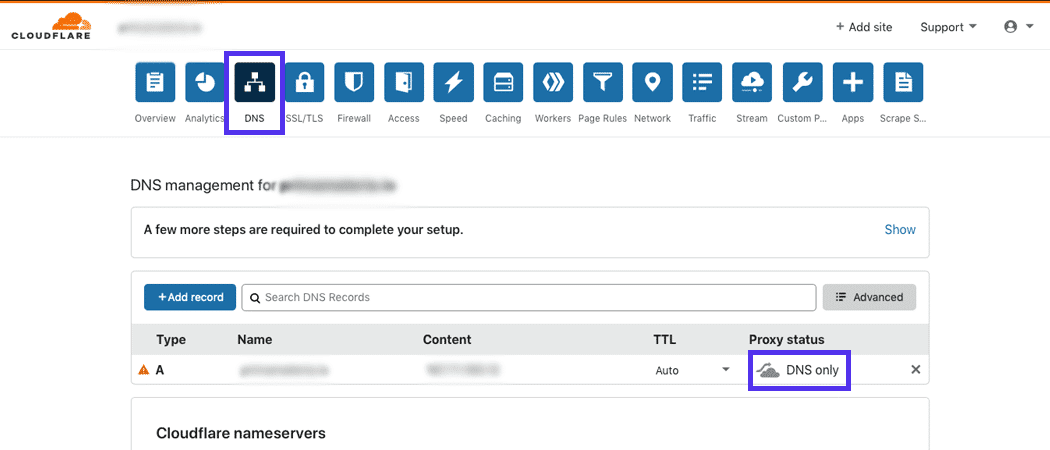
Next, click on the DNS tab, then on the orange cloud under the Proxy status section in the table. You’ll know Cloudflare was disabled because the cloud will have turned gray.
Pause Cloudflare
Alternatively, you can choose to pause Cloudflare after logging in.
Step 1
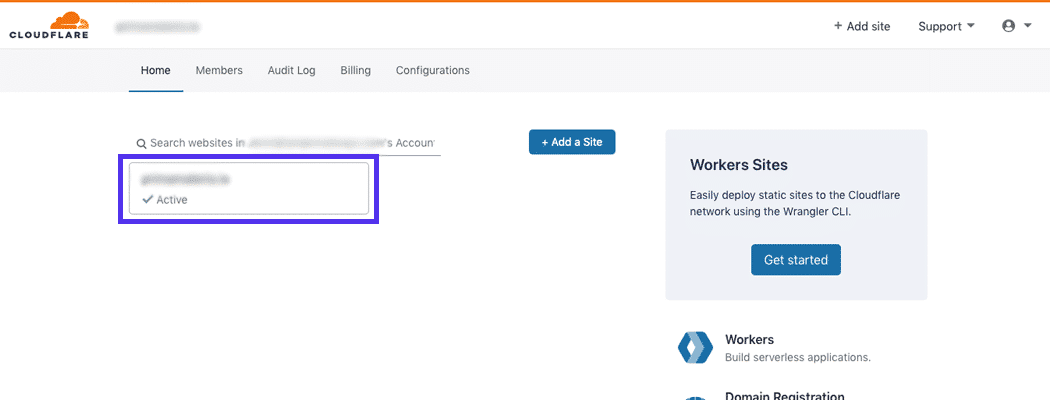
Click on your connected site from the list.
Step 2
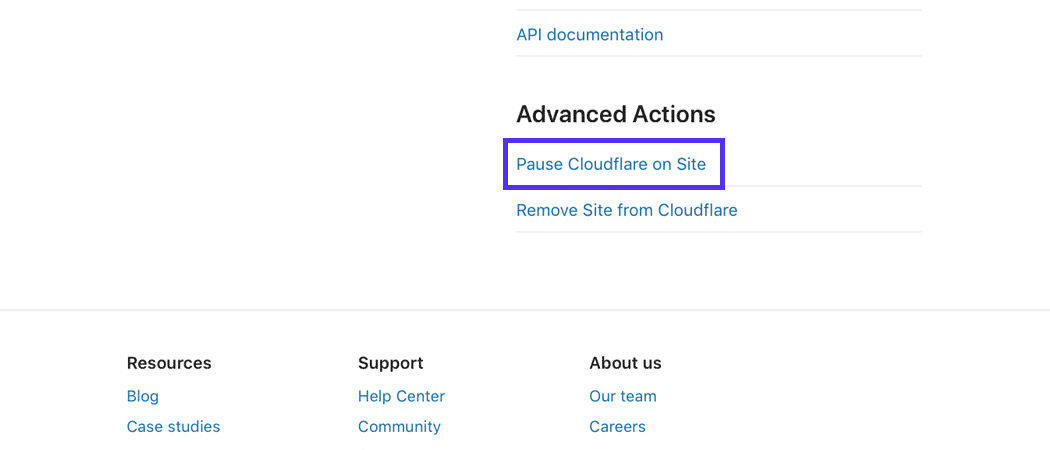
Then, scroll down until you see the Advanced Actions section in the sidebar. Click on the Pause Cloudflare on Site link.
Step 3
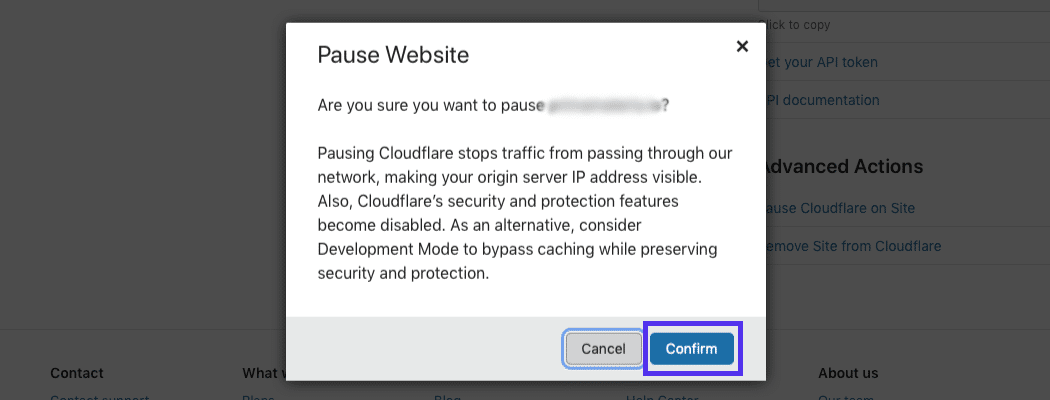
A pop-up will be displayed on the page that asks you to confirm you want to pause Cloudflare. Go ahead and click the Confirm button.
Go into Development Mode
If you don’t want to pause or disable Cloudflare, you can keep it running, but place it in development mode so you can still troubleshoot error 520.
Step 1
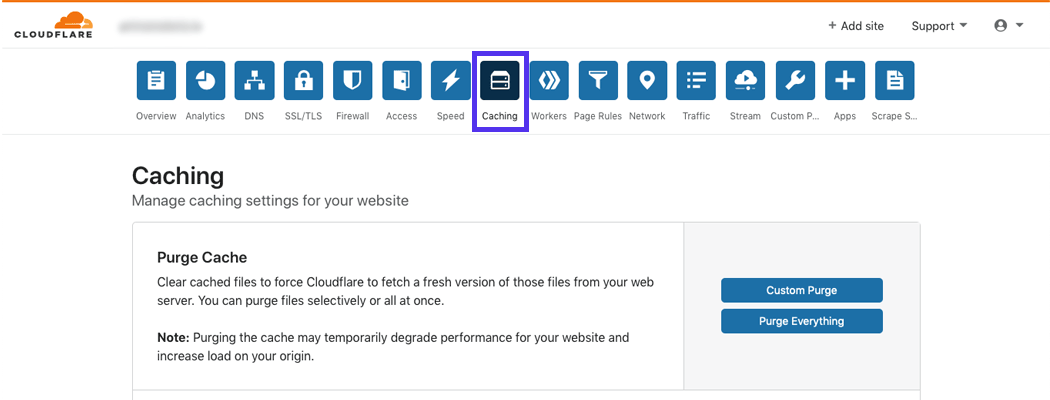
After logging into Cloudflare, click the Caching tab toward the top of the page.
Step2
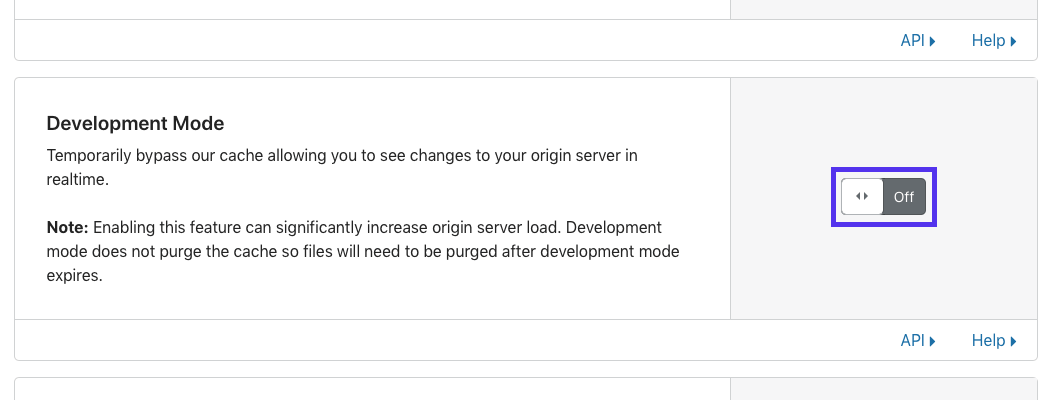
Next, scroll down to the Development Mode section and click the Off toggle button. It should now say “On.”
Checking Your Server’s Error Logs
Now that you have disabled, paused or put Cloudflare into development mode, you can troubleshoot error 520 by checking your server’s error logs.
Finding your error log can vary between hosts so check with yours if you’re unsure of where to find your error logs.
If your hosting provider uses cPanel, you can follow the steps below.
Step 1
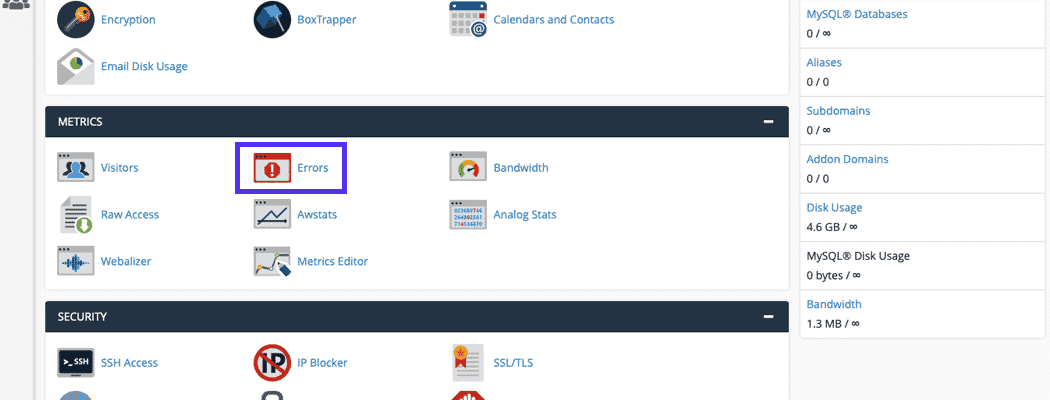
Log into cPanel and in the dashboard, go to the Metrics section. Then, click the Errors button.
Step 2
The error log page displays errors in reverse chronological order as well as up to 300 of the most recent messages. The error log may display more messages if you or your host adjusted the settings.

Checking Your Log for Error 520 Using MyKinsta
If you host your WordPress site with Kinsta, you can follow the steps below to check your error log.
Step 1
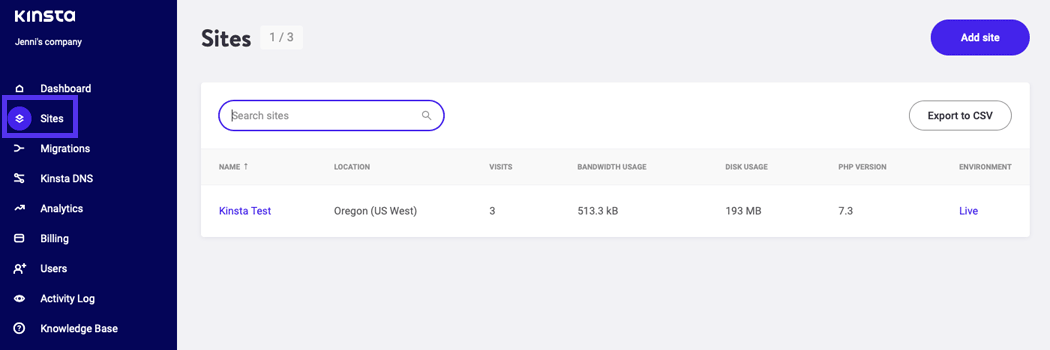
Log into MyKinsta and click on Sites in the menu on the left. Then, select the site you want to troubleshoot from the list on the page.
Step 2
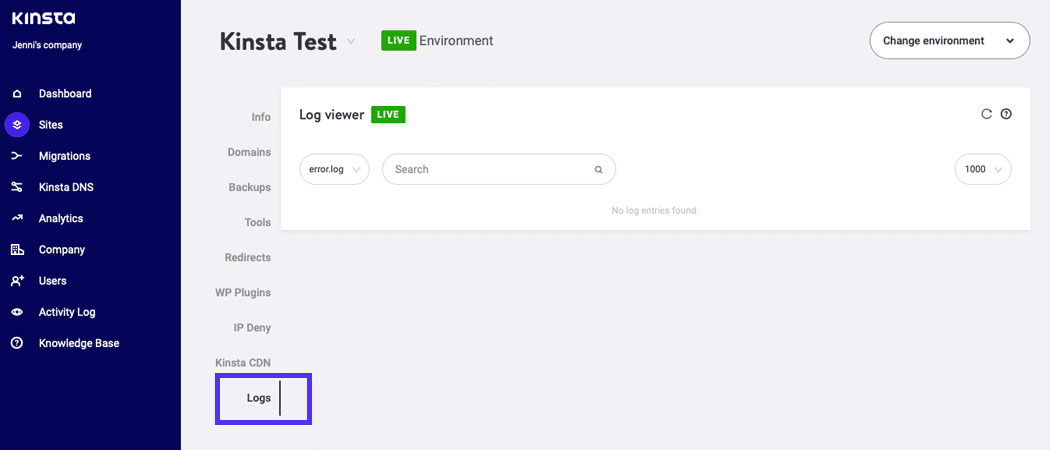
Click on the Logs tab. By default, the error log is displayed. If you don’t see anything listed, it’s due to the fact that no errors on your site have occurred.
How to Interpret the Error Log
Each message in an error log has a structure. If you understand it, you can interpret the error messages that come up.
[Fri Oct 11 17:00:30 2019] [error] [client 123.4.56.7] error description: /path/to/file/with/errorThe date and time of the message are listed first followed by the LogLevel directive which tells you about the severity level of the message.
Next up is the IP address of the client. This is who made the issue appear.
Finally, the actual message is displayed and may contain a path to the affected file.
Here are the LogLevel severity levels which could be listed in your error log’s messages:
- Emerg – This lets you know the issue is an emergency and the server is unavailable.
- Alert – Action should be taken immediately if you see this level.
- Crit – This denotes a critical condition.
- Error – This means an error has occurred.
- Warn – A message with this level is a warning about an issue that requires your attention, but isn’t critical.
- Notice – This means your server is normal, but there are significant details about the condition of your server that is available.
- Info – General information is available with this level.
- Debug – These messages contain details when you have debugging enabled.
Use a cURL Command to Troubleshoot Error 520
You can also use a cURL command to troubleshoot error 520 by testing against the origin server.
curl -vso /dev/null --user-agent "Mozilla 5.0" -H "Host: your-site.com" http://123.45.6.789/wp-login.phpBe sure to change “you-site.com” to your actual domain. You also need to update “123.45.6.789” with your site’s IP address. If you changed your login page, you should also change the “wp-login.php” part.
A successful response header would look similar to the example below:
* Hostname was NOT found in DNS cache
*   Trying 123.45.6.789...
* Connected to 123.45.6.789 (123.45.6.789) port 80 (#0)
> GET /login HTTP/1.1
> User-Agent: Mozilla 5.0
> Accept: */*
> Host: your-site.com
>
< HTTP/1.1 200 OK
< Content-Type: text/html
< Date: Day, DD, Month Year Hour:Minute:Second Timezone
{ [12345 bytes data]
* Connection #0 to host 123.45.6.789 left intact
If you see something like this, it means everything’s okay and the site was reached without an error 520 response.
On the other hand, if you see a response header similar to the example below, it means the 520 error has occurred when Cloudflare was active:
* Hostname was NOT found in DNS cache
*   Trying 123.45.6.789...
* Connected to 123.45.6.789 (123.45.6.789) port 80 (#0)
> GET /login HTTP/1.1
> User-Agent: Mozilla 5.0
> Accept: */*
> Host: your-site.com
>
* Empty reply from server
* Connection #0 to host 123.45.6.789 left intact
How to Generate a HAR File
A HAR is an HTTP archive file. It contains archives for requests that are going to the server of origin and also through Cloudflare.
It can help you with troubleshooting because it compares response headers coming from the origin server and Cloudflare when it’s used as a proxy.
It’s also used to confirm that the headers are too large if that’s why error 520 has appeared.
You can create a HAR file with your browser with the steps below:
Chrome
Step 1
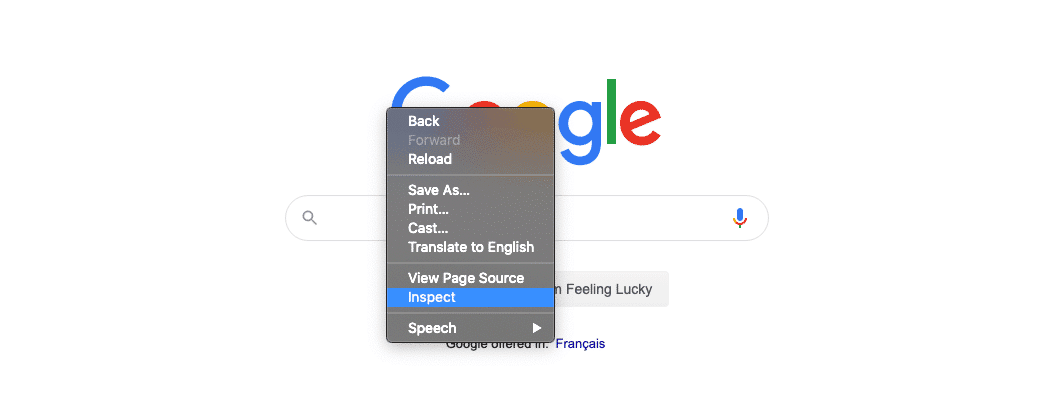
Open your browser and right-click on the page. Then, select Inspect.
Step 2
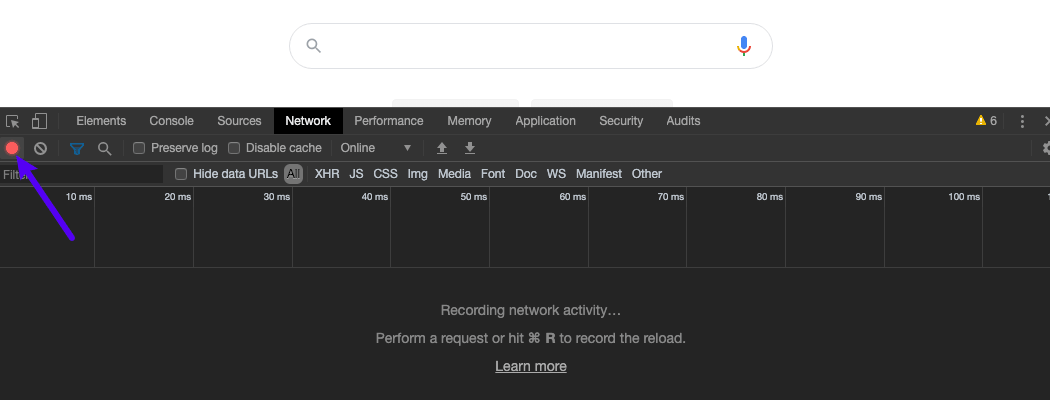
Once the panel has opened, click the Network tab and make sure there’s a red circle button toward the top, left-hand side of the panel. If it’s gray, click it.
Step 3
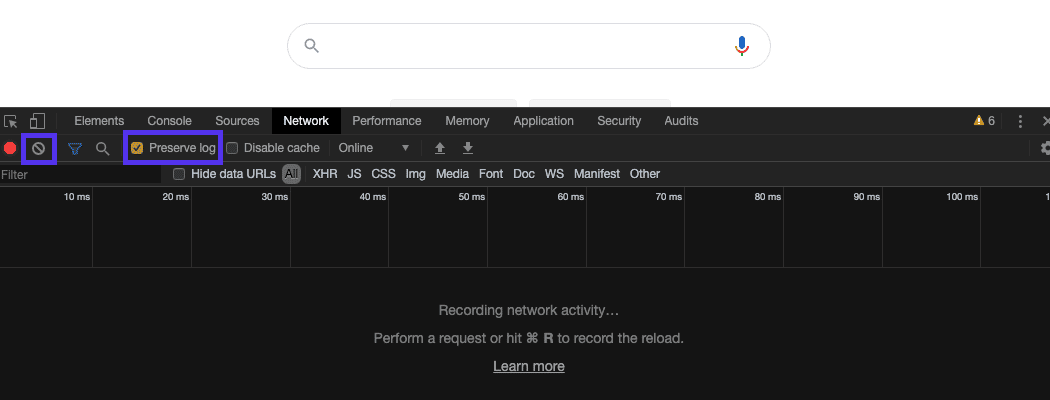
Check the Preserve log option next to the record button and then click the clear button.
Step 4
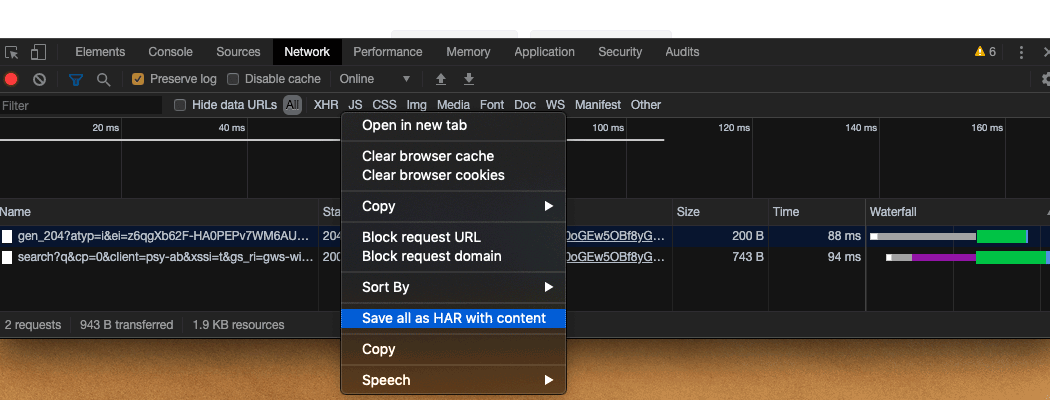
Load the page that’s bringing up error 520. Then, right-click anywhere in the messages area of the Chrome developer tool.
Select the Save as HAR with Content and save the file to your computer.
Firefox
Step 1
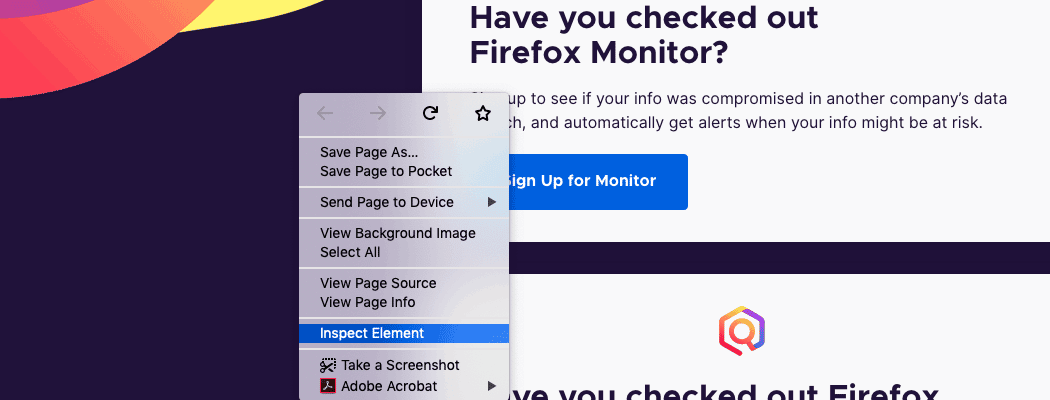
Open Firefox and right-click anywhere on the page. Then, select Inspect Element.
Step 2
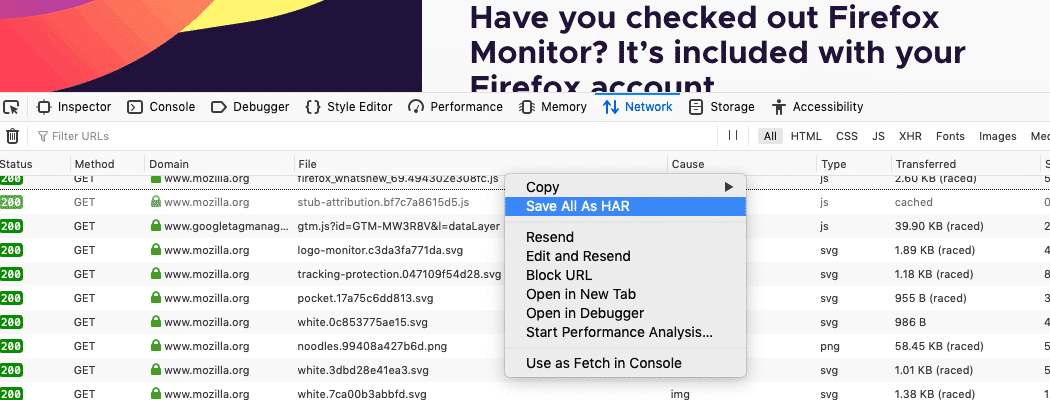
Go to the Network tab and visit the page that has the 520 error coming up. Right-click on messages in the panel and select the Save All as HAR option.
Save the file to your computer.
Edge
Step 1
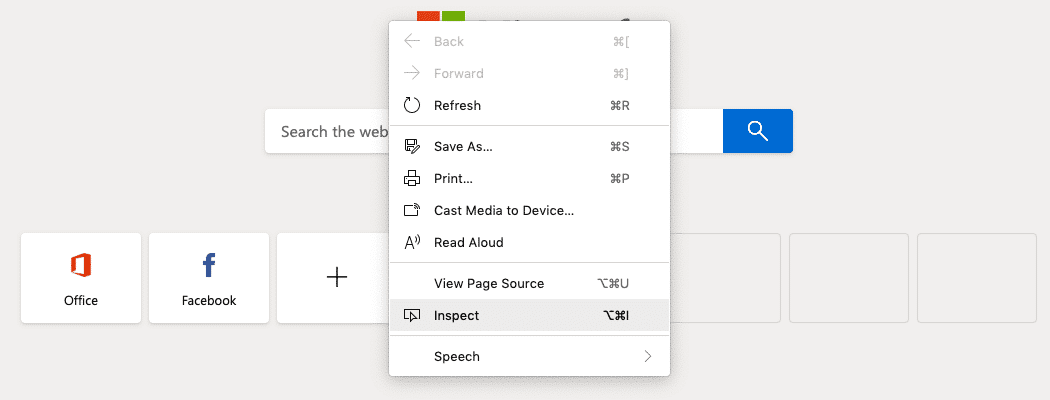
Open the Edge browser and right-click the page. Select Inspect from the list.
Step 2
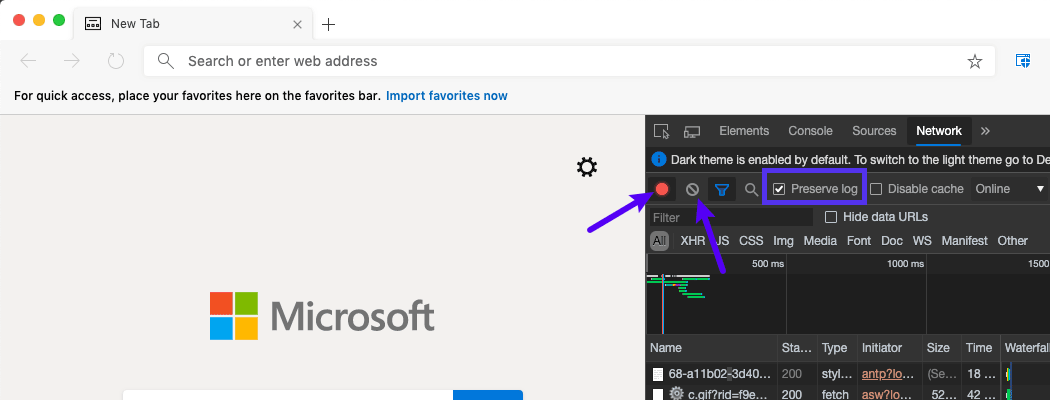
Go to the Network tab and ensure the circular record button is red. If it’s not, click it. Check the Preserve log option, then the icon to clear the current messages.
Step 3
Go to the page where you’re experiencing error 520. Then, right-click on the messages in the developer tool panel and select the Save all as HAR with content option.
Save the file to your computer.
Safari
Step 1
Open Safari and right-click on the page for Windows or press CMD on your keyboard and click for Mac. Select Inspect Element from the list.

Step 2
Go to the Network tab. Check the Preserve Log option, then go to the page with the error 520 issue.

Step 3
Click the Export button and save the HAR file to your computer.

Resolving the Common Reasons for Error 520
Now that you have your error log, search through it and see if you notice any one of the issues below. Then, follow the steps below to resolve the issue.
Origin Server PHP Application Crashed
One common issue that causes error 520 is that one of the PHP applications have crashed on your server. Restarting PHP will fix the error.
Step 1
Using SSH, you can enter the command below for Apache servers:
apache2ctl restartFor Nginx servers, you can restart PHP using the command below:
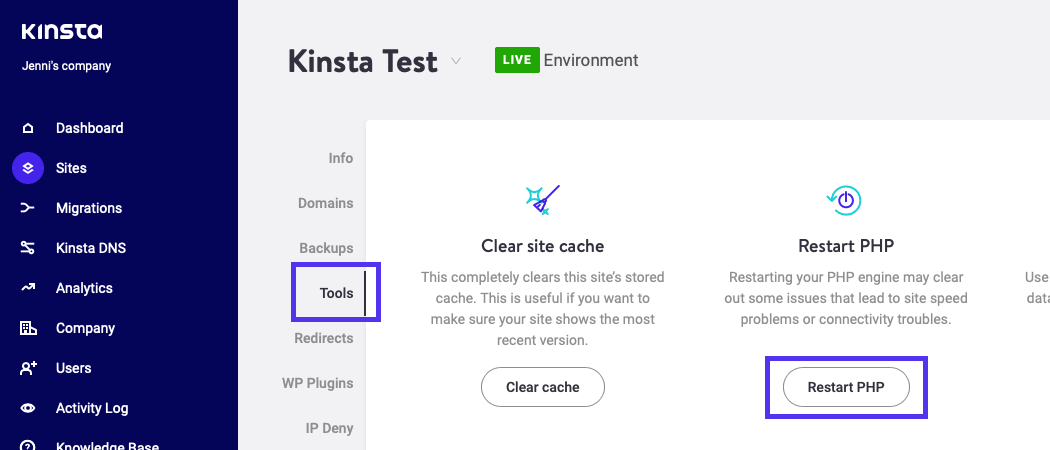
service nginx restartRestart PHP in MyKinsta
If your site is hosted with Kinsta, you can restart PHP in a few clicks.
Step 1
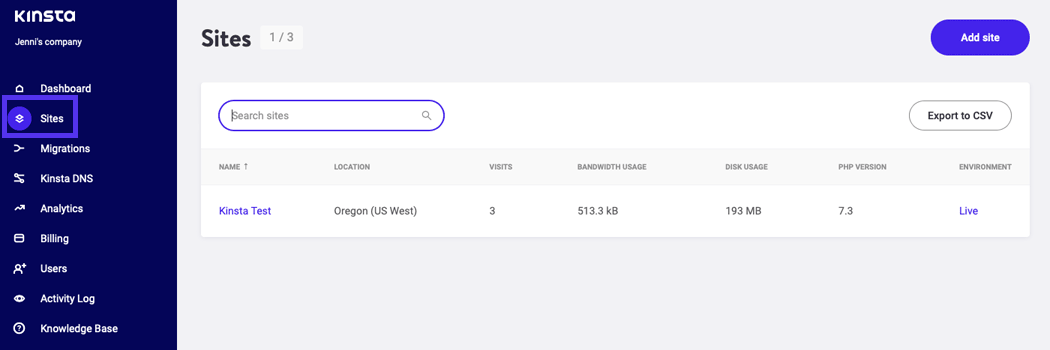
Log into MyKinsta and click on Sites on the left. Then, click on your site from the list.
Step 2
Go to the Tools tab and click the Restart PHP button.
Cloudflare IP Addresses Aren’t Whitelisted
Another reason why the 520 error can occur is if Cloudflare’s IP addresses aren’t whitelisted. You can whitelist them, but the steps vary between hosting providers.
If you’re not sure how to whitelist IPs, contact your host, especially if you don’t find any settings for it.
At Kinsta, Cloudflare’s IP addresses are whitelisted by default so there’s no need to worry about this cause of the error. It also won’t impact the other reasons why the error occurs.
TCP Idle Timeouts Are Shorter Than 300 Seconds
The Transmission Control Protocol (TCP) could also be the cause of error 520.
TCP is a standard protocol that establishes and maintains a network connection. If the TCP is set to timeout in under 300 seconds, it could cause the 520 error to pop up.
You can change the TCP service timeout using a CLI command:
set service Service-HTTP-1 -svrTimeout 500Headers Exceed 8 KB
This issue is typically due to too many cookies or cookies that are too large. The HAR file that you downloaded during the troubleshooting process will show you if this is the problem.
Cloudflare has a limit of 8 KB that can be used for headers.
If you authored a plugin that requires too many cookies or has too much data in its cookies, try to reduce them. Or, if you’re using a lot of plugins that all need cookies, remove some of them (you should always use quality plugins).
Elementor Users
When you try to edit your WordPress site using Elementor and you get the 520 error – “Web server is returning an unknown error” – you can check the following.
First, you can try a different web browser.
If the problem still exists and your site is behind Cloudflare you may have a problem with Cloudflare’s Rocket Loader feature.
The issue was caused by Rocket Loader automatically changing the scripts to load asynchronously, which breaks the site editor and prevents you making changes.
By creating rules in Cloudflare you can solve this issue.
For Elementor pages: Site URL/*elementor*
For Elementor templates: Site URL/?elementor_library=*
Empty Response from Your Server
This problem occurs when your site lacks an HTTP status code or response body. To resolve it, make sure your DNS settings are set correctly for your site’s domain.
The steps involved to check your settings depends on your DNS host. If your hosting plan has DNS bundled with it, then check with your hosting provider.
It may be important to note that if you updated your DNS settings, it may take up to 72 hours for your site to propagate. This means your site may be unavailable for up to three days.
After changing your DNS settings, you need to clear your site’s cache. If you have a caching plugin installed on your WordPress site, you can check its documentation if you’re unsure of how to clear your site’s cache from the plugin’s settings.
You can also clear your site’s cache through your hosting provider. Be sure to check with them if you need to know how to do this for your site.
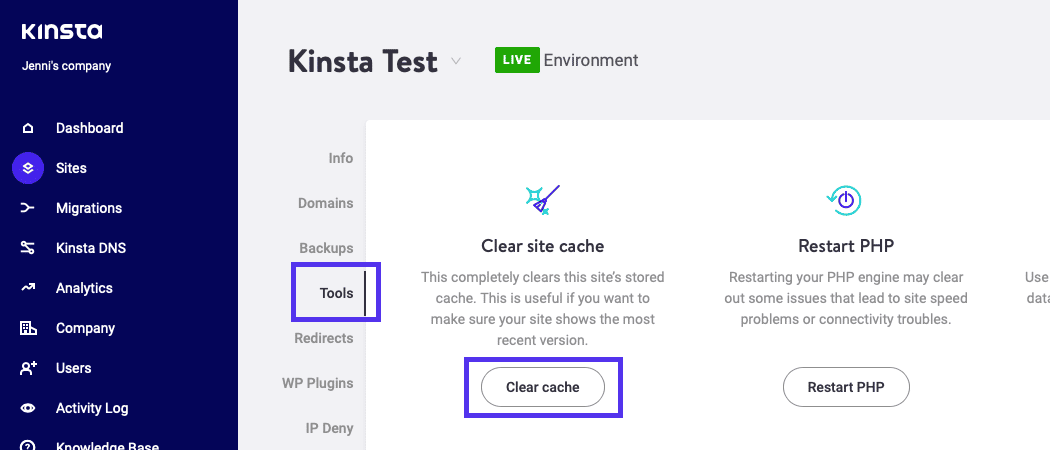
If your site is hosted with Kinsta, you can click Sites in the menu, then on your listed site.
Then, click the Tools tab and click the Clear cache button.
If you have updated your DNS settings, your site is available again, you cleared your site’s cache and you still are experiencing error 520, restart your server.
If you don’t find the option in your settings, contact Kinsta’s support team and we’ll help you with this.
Missing Response Headers
“A response header is an HTTP header that can be used in an HTTP response and that doesn’t relate to the content of the message. Response headers, like Age, Location or Server are used to give a more detailed context of the response.”
Missing response headers can be caused by a multitude of reasons.
Your best bet with this issue is to use a debugging tool like Fiddler to debug the issue and see exactly what the problem is so you can fix it.
Server not Returning Proper HTTP Error Responses
When your server sent an invalid error response, it could have caused the 520 error. This means the message didn’t fit in with the standard list of HTTP response codes.
It’s caused by your server or it could also be something on your server such as PHP applications or possibly plugins used on your WordPress site.
If you can’t find the source for the improper error code to fix it, try contacting support for further help.
Enabling Cloudflare Again
Check to see if you receive the error again. If you do, keep Cloudflare disabled and continue troubleshooting.
If the 520 error has been resolved, enable Cloudflare again.
Step 1
To do this, log into Cloudflare and if you disabled Cloudflare by turning the cloud gray in your account, start by selecting your site from the list.
Step 2
Click the DNS tab, then click the gray cloud to re-enable Cloudflare.
Restoring Cloudflare After Pausing It
Step 1
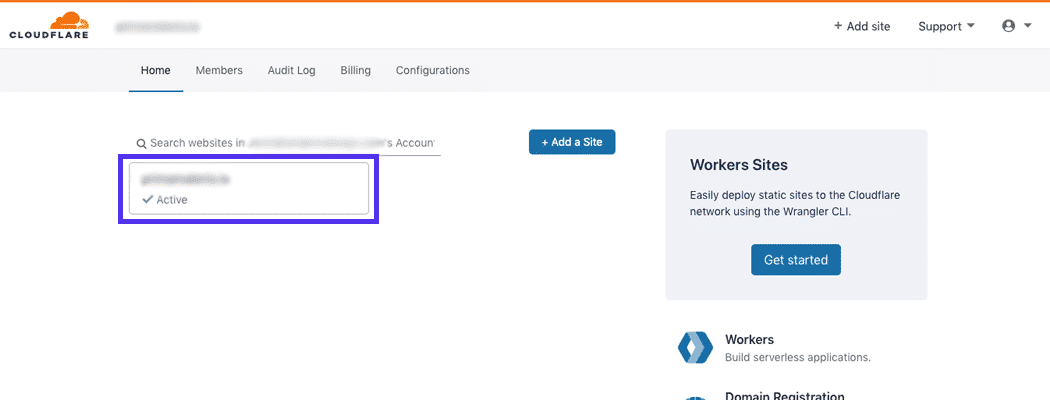
If you paused Cloudflare earlier, restore it by logging into Cloudflare and click on your listed site in the dashboard.
Step 2
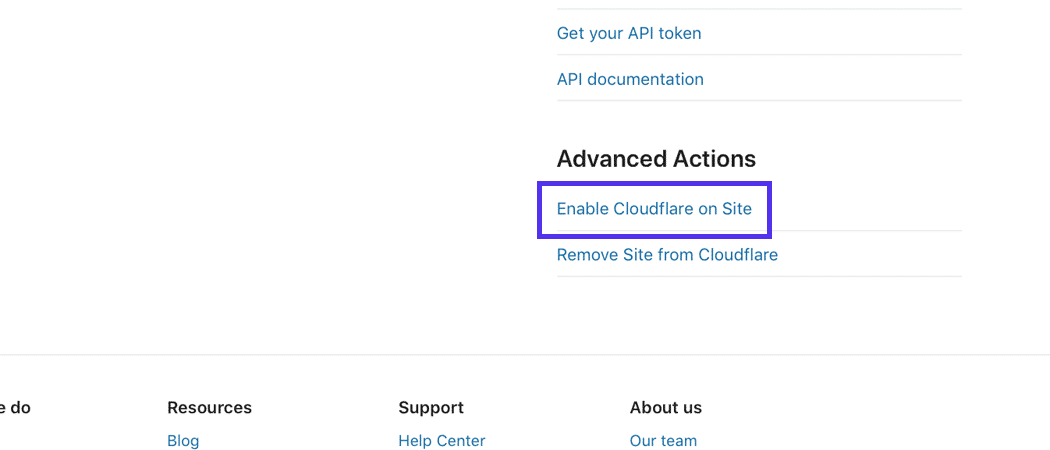
Then, go to the Overview tab and scroll down to the bottom of the page until you see the Advanced Actions sections in the sidebar on the right-hand side of the page.
Click the Enable Cloudflare on Site link.
Turning off Development Mode
Step 1
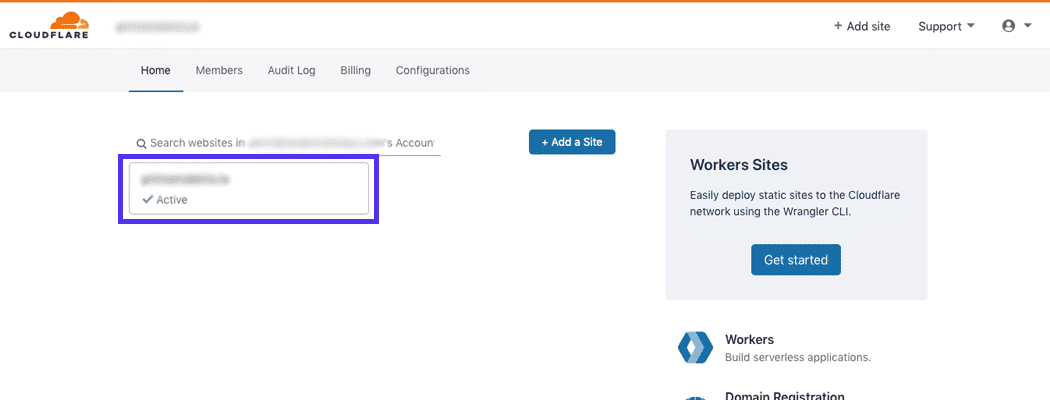
If you have previously turned on Cloudflare’s development mode, you can turn it off by logging in. Then, click your site that’s listed on the page.
Step 2
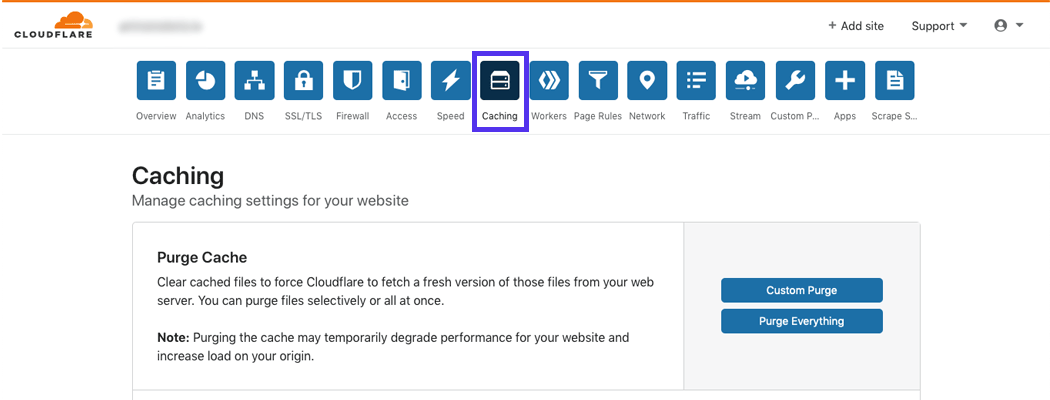
Next, go to the Caching tab.
Step 3
Scroll down to the Development Mode section and click the toggle button that’s currently set to “On.”

What to Do If All Else Fails
If you’re still seeing issues, contact Cloudflare support.
Provide them with the following details:
- Full URL(s) of the requested resource when the error occurred.
- Cloudflare’s Ray ID from the page where you saw the error 520 message.
- The output from http://your-site.com/cdn-cgi/trace, but be sure to replace “your-site.com” with your actual domain name.
- Two HAR files: One from when Cloudflare was enabled for your site and one more from when you had Cloudflare disabled.
Summary
The 520 error can seem confusing, especially since it’s a Cloudflare error. But, it has to do with an error with your server that causes Cloudflare to not connect.
The steps above are the solutions to the most common causes of error 520. If you’re still having issues after trying them, you might want to contact Cloudflare or your hosting support.
Suggested reading: How to Set up Cloudflare APO for WordPress.


