
Git is a fantastic way to implement version control to a coding project — so fantastic, in fact, that it’s almost the obligatory option.
The idea is to create duplicate branches of your main repository, work on the code, then merge the changes back in with the rest. This means you’ll have a lot of old branches within your repo. While the file size of these is often small, you’ll still want to perform a git delete on a local branch to keep things tidy.
The good news is this doesn’t take much effort to carry out. However, you’ll need to consider the best approach depending on whether you merge the changes, as well as what to do if you get an error during the deletion process. You might even need to restore a branch you delete. Each of these scenarios require different skills and commands.
In this tutorial, we’ll show you how to carry out a git delete on a local branch. First, though, we’re going to talk about some of the reasons you might want to delete local branches in Git.
What Is a Git Branch?
Git repositories are a collection of branches — duplicates of the core code within. In fact, you can’t have a working Git repo without a branch.
Often, you’ll have a primary repo (the nominal names are “main” and “trunk”). This will contain working production code that you won’t want to edit. Instead, you’ll create a duplicate branch of the main repo, then carry out the changes you need within your branch. When it’s time to bring those changes back into the core code, you’ll check and merge them.
Branches let everyone on a team collaborate on the same project, independent of one another. There’s also no danger of making a change to working code or stepping on other changes in the meantime.
However, you’ll also need to carry out a git delete on a local branch. This will be a regular action for you, and there are a number of solid reasons to do so.
Why Remove Branches in Git?
Your production code will be in the main branch. This is the only branch that has some permanency.
In contrast, almost every other branch you create will have a temporary shelf life. Once you complete your work, you’ll commit the changes, then look at merging them with the main branch, possibly in an online repo such as GitHub.
This means you’ll often have a lot of branches open at once, depending on the project and team. However, once you finalize the merge, those branches don’t disappear.
As such, there are a few reasons why you’d want to delete a local Git branch:
- General housekeeping: At home, when you finish cooking, you wash the utensils and put them away. The same goes for working with a Git repo: When you finish your work, you’ll merge changes and delete any branches you no longer need. This also makes your project and repo easier to navigate.
- Repository file size: While Git repos are often small enough to be inconsequential to the size of a project, you should still keep an eye on it. One way to reduce the size of a repo is to delete branches you don’t need.
- Potential performance: Even if your core code is performant, a branch might not be, given that you’re working on it. Because of this, you’ll want to keep open branches to a minimum. Otherwise, it could introduce poor performance for your team until you stage and tweak a project.
As you’ll see later, performing a git delete on a local branch is straightforward, for the most part. However, it’s a good idea to understand what happens under the hood when it comes to using this command, as it won’t clear everything relating to the branch from your repo.
What Happens When You Delete a Local Git Branch?
On a technical level, a branch is only a pointer to a specific commit — a section of code you want to include in your main branch. Because of this, when you delete a local Git branch, the commits will still remain.
Later on, we’ll talk about branch recovery, and what’s possible because of those commits remaining in your repo. For now, understand that there are two different types of changes:
- Merged changes: Once you merge a branch with the main one, the code will be as up to date as possible. In technical terms, this is akin to moving the main branch reference to catch up with your secondary branch.
- Unmerged changes: If you don’t merge changes, you’ll have one branch that’s not as up to date as the main branch. As such, the main branch won’t have an up-to-date reference commit.
This is something we’ll talk about in more detail later. Regardless, it brings up another good point about when to delete branches.
When To Perform a “Git Delete” on a Local Branch
Given the perils of deleting a branch with unmerged changes, it’s important to not run a git delete on a local branch until you carry out a code merge. This will ensure that every branch has an up-to-date reference, and by extension, the most current code available.
It’s also a good idea to ensure that you won’t need any of the commits within a temporary branch before you perform a git delete. While you can recover branches to a certain extent, this is work you won’t want to perform when required. We’ll give you an insight into this later.
How To Perform a “Git Delete” on a Local Branch
Across the rest of this tutorial, we’ll show you how to carry out a git delete on a local branch. We’ll talk about what to do with unmerged changes too.
From there, we’ll talk about errors you might see, then how to restore a deleted local branch.
At the end, we’ll take a brief look at remote branches and how to delete them too.
Prerequisites
Git itself offers a simple set of commands and gives you lots of power without the need to crack open a textbook. Even so, there are a few different ways to access a Git repo depending on your chosen app and code editor.
While you could find a “minimal click” setup within a dedicated graphical user interface (GUI) such as GitKraken or Sublime Merge, we’re going to keep things simple and use tools built into the operating system.
To follow along, you’ll need the following:
- Access to the command line: Our examples will use macOS and iTerm. However, you can use Cmder for Windows, the default Terminal on macOS, the same on Linux, and more.
- Access to your specific files: You’ll want to have your project files on your local computer, because without them, there’s nothing you can do!
- Command line knowledge: It will help to have some command line knowledge — specifically, the commands to help you navigate your files, along with some understanding of how the command line works.
In reality, if you have a project with a Git repo and a Terminal window of your choice, this is all you need.
Performing a Basic “Git Delete”
First off, we’ll assume that you want to delete a branch with merged changes. This is the most straightforward and typical practice.
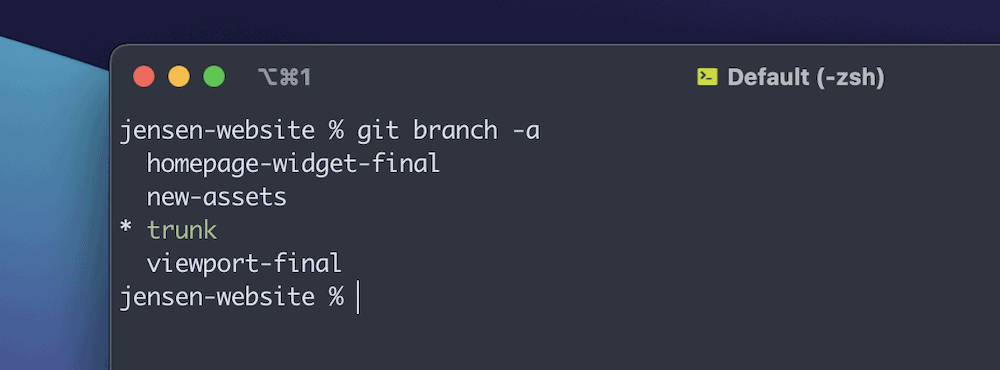
However, you might need to run git branch -a or git branch --list to view all of the branches and find the right one in your repo first:
Here’s the command you’ll need to delete a branch:
git branch -d branch-nameYou’ll want to use the specific branch name rather than our placeholder.
The -d flag here stands for “delete,” and in a lowercase form, you have some protection against deleting a branch with unmerged changes.
If you try deleting an umerged branch, you’ll see an error (really more of a warning):

However, you can capitalize the flag using -D and skip over this protective warning. This lets you delete a branch with unmerged changes.
Note that you won’t get a confirmation to delete the branch if you’re using the capitalized version, so it’s a flag you’ll want to use with care.
What Causes the “Cannot Delete Branch” Error?
Because deleting a branch of your repo is a big decision without an easy resolution, Git throws up errors if you make a wrong move.
For instance, you’ll sometimes go to carry out a git delete on a local branch and see a “Cannot delete branch” error:
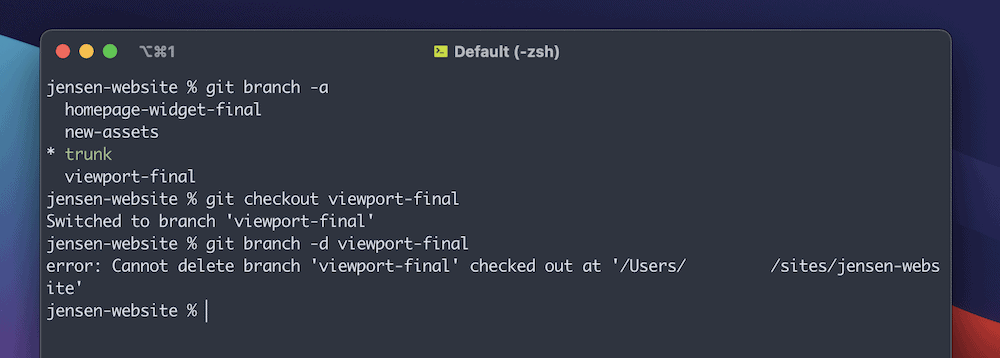
This simple reason lies with your current location within the Git repo. You can’t delete a branch you “check out.”
The solution here is to move to a different branch.
For this reason, we’d always suggest you checkout to the main branch. That way, you’ll get an error if you try to delete main, and can also clear out any other branch in the repo.
How To Restore a Deleted Local Git Branch
Given that a commit will remain after you delete a local branch, there is a small opportunity to recover a branch after you perform a git delete. However, it’s more cumbersome than merging those changes first. In that situation, you’ll know that you won’t need a branch any longer.
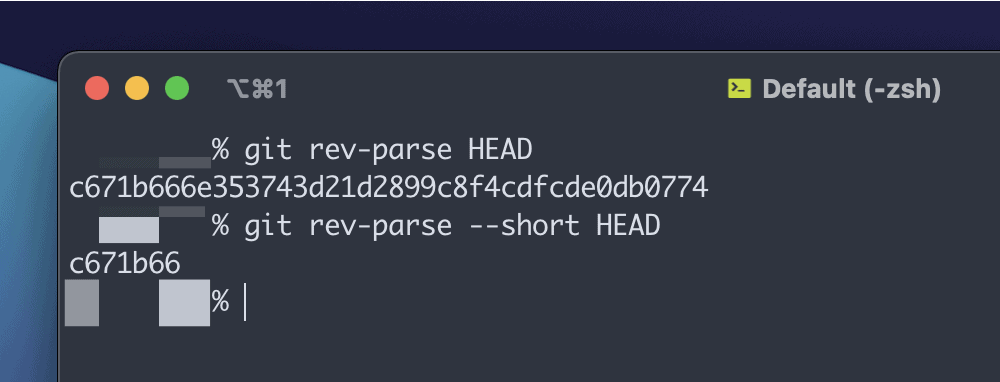
Each commit uses a hash number, which acts as its reference. You can use that hash to checkout and create a new branch:
However, if you don’t know the hash of a deleted branch, you can use the reflog command. These “reference logs” are much like the ones you’ll find in apps such as DevKinsta.
Although using git reflog is a conversation for another article altogether, you can use basic functionality to find the hash of old commits. If you run git reflog, you’ll see a list of commits:
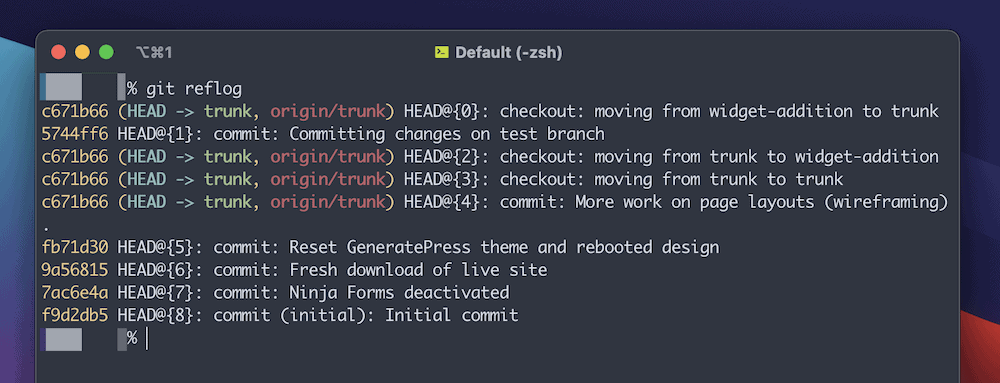
The first column of hashes here lets you then checkout the commit and create a new branch. For example:
git checkout 5744ff6git branch f9d2db5However, this isn’t a foolproof way to recover a deleted branch in Git.
In some cases, there will be no commit in the reflog, and no HEAD reference to the commit itself. This is why it’s better to work with your branches in a safer way by merging changes before you perform a git delete on a local branch.
Working With Remote Git Branches
When you carry out a git delete on a local branch, you’ll often have an associated remote repo. This will be especially true if you pull your site down to Kinsta using Git.
This won’t update alongside your local repo when you make changes, and this is also true when you delete a local branch.
However, both GitHub and GitLab have the same process to delete a remote Git branch. It’s a similar approach to any other push “upstream.”
Here’s the command:
git push remote-name -d remote-branchFor the remote-name, most repos we see use “origin.” The remote-branch reference will be the same as the local branch (unless you rename a local branch, which is beyond the scope of this article.)
As an aside, you can see all branches — both local and remote — using git branch -a. If you want to see remote branches only, you can use git branch -r.
Once you run the command, you’ll see a confirmation message, at which point you should run git branch -a again to check that everything is removed as you’d expect.
Summary
Git is one of the few tools that gives you immense power under the hood using readable and intuitive commands. This also goes for removing branches that you no longer need on your local machine. However, you’ll still need to take care to run a git delete on a local branch.
This is because if you try to delete unmerged changes, you’ll either get an error, or remove something that will impact your future project work. What’s more, you’ll also need to delete the remote branch too. Both your local and remote repos need you to perform good housekeeping in order to keep performance high and file size to a minimum.
While you might be on your own if you delete a Git branch in error, Kinsta has your back with regards to Application Hosting. The Kinsta hosting platform gives you the ability to connect to and deploy with your GitHub repos in just a few minutes. Plus, you’ll get access to a powerful cloud infrastructure, along with our Cloudflare integration, to push your apps to the next level of speed and security.


