
If you develop any type of software or web application, using Git is a near-essential facet of your workflow.
The distributed version control system is almost the only way to coordinate your coding efforts among your team. To that end, Git has a simple set of commands you can pick up fast, but it might not always be intuitive.
This is especially true for situations such as performing a git rename on a branch.
Teamwork requires communication, and your branch names — given that they’re public — should offer plenty of description and clarity. This can butt heads with the common need to work fast. As such, the quick naming convention you give a branch in order to start on the code might need to be tweaked to better fit your project.
In this post, we’ll show you how to perform a git rename on a branch. First, though, let’s talk about what a branch is in Git and some of the situations in which you’ll want to rename one.
What Is a Git Branch (And Why Rename One)?
Git’s version control works with branches. You’ll have a main repository, which will contain all of the various branches for the project, including the primary one (more on this later).
Part of the benefit of using Git is that you can duplicate the primary branch, work on code, then merge those changes later on, once you finalize everything.
Even Kinsta has the ability to use Git to access your site using Secure Shell (SSH).
However, naming the branch is a step many developers rush through. There’s a multitude of reasons you might want to change a branch name in Git:
- Clarity: You’ll want to make sure the branch offers complete clarity on what code changes it encompasses and what they do. This will be important during merges or even deleting branches. There’s no coming back from deleting the wrong branch or forgetting its name.
- Consistency: Your branch might not follow the naming conventions your team has set up. This means you’ll have to revise branch names at a later date.
- Modern standards: If the project is a legacy one, or it’s a long-term concern within your team, branches might not match current cultural sensitivity conventions. As an example, there is a popular movement to change the primary branch from “master” to “main” or “trunk” to avoid references to the institution of slavery.
Because of these reasons (and others), you’ll often have to perform a git rename on a branch.
Next, we’ll walk you through how to do it.
How To Rename a Git Branch
When it comes to running a git rename on a branch, you’ll have to consider both local and remote (e.g. GitHub) repositories. The good news is that the process we’re about to outline will cover all of the permutations you’ll need to succeed.
First, let’s cover how to locate and change the name of a branch. This will include looking at the command flags that will help you. Then, we’ll look at how to make sure your remote repo matches the local one.
1. Use the git checkout and git branch Commands
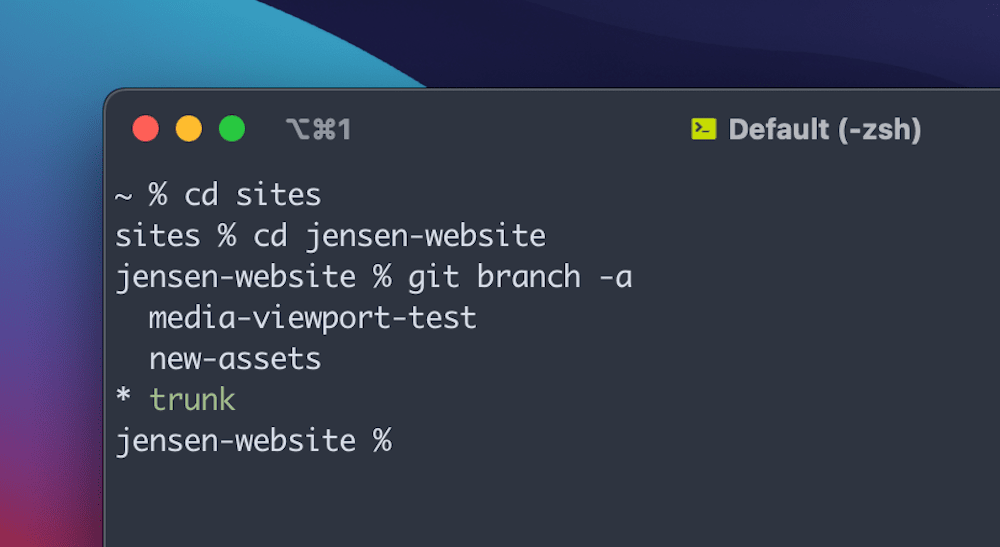
Your first task is to locate the branch you want to rename. You can use the following command:
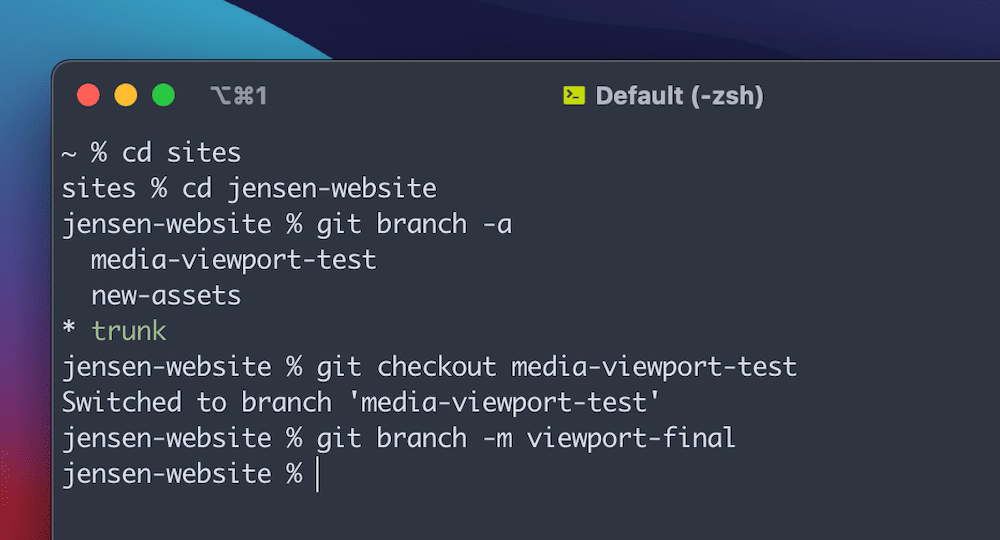
git checkout current-nameWhere we use current-name, you should add the name of your branch. If you don’t know the name, or want to see the complete list of branches (maybe to check for conventions across the project), you can use git branch --list or git branch -a.
Once you’re in the right branch, you can rename it using the following:
git branch -m new-nameAgain, you’ll want to make sure you use a specific branch name here, rather than our placeholder. The -m flag means “move” and is the element of the command that causes the rename to happen.
If the new branch name you select already exists, you can force the change you specify using -M instead. This is also the tactic you’ll use on Windows machines if your branch name contains a mixture of upper- and lower-case lettering.
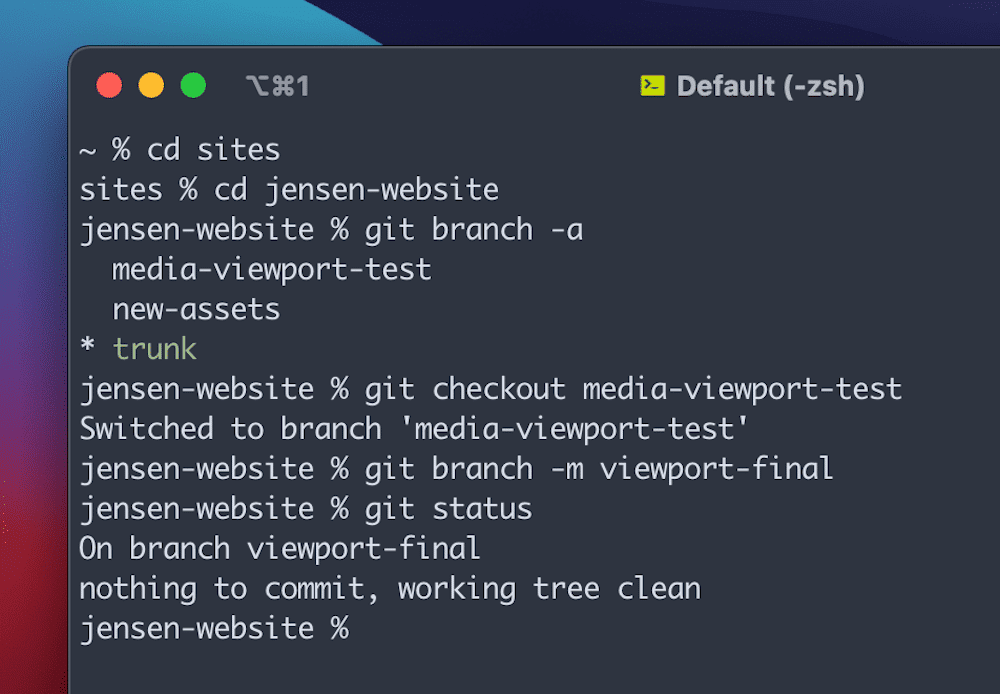
Once you confirm this change, use git status to see whether the new name applies to your branch:
However, you don’t need to use git checkout at all if you don’t want to. Let’s quickly look at this in more detail.
1(a). Renaming a Git Branch Without Using git checkout
This method will only work if you are in the main branch of your repo. If not, you’ll always need to use a git checkout; to get to your main branch.
Regardless, you can see your current location in the repo using git status. The command to change the branch name is similar to the last method, but this time you’ll combine both the current and new branch names:
git branch -m current-name new-nameAfter you run the command, you can check the list of branches as confirmation.
2. Pushing the Renamed Branch to the Remote Repo
While this method works for a local repo, there’s more you need to do when it comes to remote ones. You’ll more often than not have to handle remote repos within your project, and this step is one you shouldn’t forget.
If you skip this part of the process, the new branch will still reference its old “upstream” branch name. The trick is to remove the old branch from the remote repo, then push the new branch upstream.
The first step is to rename the local branch, but from there you can run a couple of commands in turn.
First, delete the old branch:
git push origin --delete old-branch…then push the new one:
git push origin -u new-branchAs an alternative, you can overwrite the upstream branch name using the following:
git push origin: old-branch new-branchgit push origin -u new-branchAgain, run git status to see if the new branch points to its own reference, rather than the older one. If the reference is pointing at the old branch, you can use git branch --unset-upstream to fix it.
Summary
Git is an intuitive and powerful method to apply distributed version control to your project’s code.
One of its more flexible benefits is the ability to use it both for local repositories and remote ones. However, some simple tasks (such as renaming branches) require more thought than others.
In this article, we’ve discussed how to git rename a branch for both local and remote repos. While the command itself is straightforward, you’ll have to apply a few different commands to make sure that the local and remote repos match. Otherwise, any merge you carry out may have errors or incorrect references to old or non-existent repos.
If you need a secure, user-friendly hosting option for your Git-based project, we recommend Sevalla, the PaaS offering created by Kinsta for world-class application, database, and static-site hosting.


