With all the current hot web development tools and frameworks, creating a website is getting increasingly complicated. But sometimes, you don’t need a lot of interactivity on your site. If you’re focused on getting the info to the viewer and don’t need complex functionality, a static site might be the right choice.
In this tutorial, you’ll learn what a static site is, including its perks, its limitations, and how to create and deploy a simple personal website created with HTML and Bootstrap for free using GitHub Pages.
What Are GitHub Pages?
GitHub is a web-based platform for hosting Git repositories and collaborating on software projects. It offers tools for sharing and tracking code changes, managing and reviewing code, and the ability to open and review pull requests.
Do not confuse Git and GitHub! GitHub is a hosting service that allows collaboration between developers, whereas Git is the local version control software you use to save snapshots of the state of your software project.
GitHub Pages is one of the best features of GitHub. It is a service that allows you to host a static website directly from a GitHub repository. This means you can use your repository to store your website’s code and files, and GitHub will automatically publish them as a website you can access online.
In summary, GitHub Pages is a quick and easy way to get your website up and running, and it’s especially useful for showcasing your portfolio, open-source projects, or other static content.
Static vs Dynamic Websites
As we’ve seen, GitHub Pages provides a way to deploy static websites. But what is the difference between a static website and a dynamic website?
Let’s start by discussing the content on said sites.
Static content refers to the elements of the website that remain the same for all users, regardless of who they are or what actions they take on the site. This can include things like the text, images, and layout of the website, as well as the underlying code and files that make up the site. A static site is delivered to the user exactly as it’s stored.
In contrast, dynamic content is content that changes based on the user’s actions — like signing in, interacting with a paywall, or commenting on a post — or other factors, such as the current time or location.
For example, a website that displays a still image of a product will always show the same image to every user (static). On the other hand, a website that displays the current time will show a different time to each user based on their location (dynamic).
Generally, we can say that a website is static if only contains HTML, CSS, and JavaScript on the frontend, with no server technologies like PHP or Python that interact with a database.
While it’s not possible to build dynamic websites using GitHub Pages, you can use easily build your own using a CMS such as WordPress, or static site generators like Gatsby or Hugo.
GitHub Pages Key Features
Let’s see the strengths of GitHub Pages as a hosting service:
- Easy setup and publishing: GitHub Pages makes it easy to get started with just a few simple steps. You can enable GitHub Pages for your repository and specify the source for your website files, and GitHub will automatically publish your website and make it available at a URL based on your username and repository name.
- Custom domains: With GitHub Pages, you can use a custom domain name for your website instead of the default URL provided by GitHub. This allows you to use your own branding and make it easier for users to find and access your website.
- HTTPS support: GitHub Pages offers support for HTTPS, which allows for secure connections to your website. This is crucial for building the trust of your site.
- Jekyll support: GitHub Pages supports Jekyll, a static site generator that allows you to create sophisticated websites using templates and other features. This makes it easy to create professional-looking websites without having to write all of the code from scratch.
Creating and Deploying With GitHub Pages: Step-by-Step Guide
Creating a GitHub Page is a simple and straightforward process to host a static site. Bear in mind that if you need some kind of database connection, you should have an external database provider. (We recommend our own Sevalla SaaS platform.)
In the following guide, you’ll learn how to create a GitHub Page from scratch. That includes creating a remote repository, building a responsive personal website with HTML, and deploying to the web with GitHub.
Let’s get into it!
1. Sign Up on GitHub
To kick things off, you must have an active GitHub account. If you don’t have one, go to their signup page. It shouldn’t take more than a couple of minutes to fill in the form.
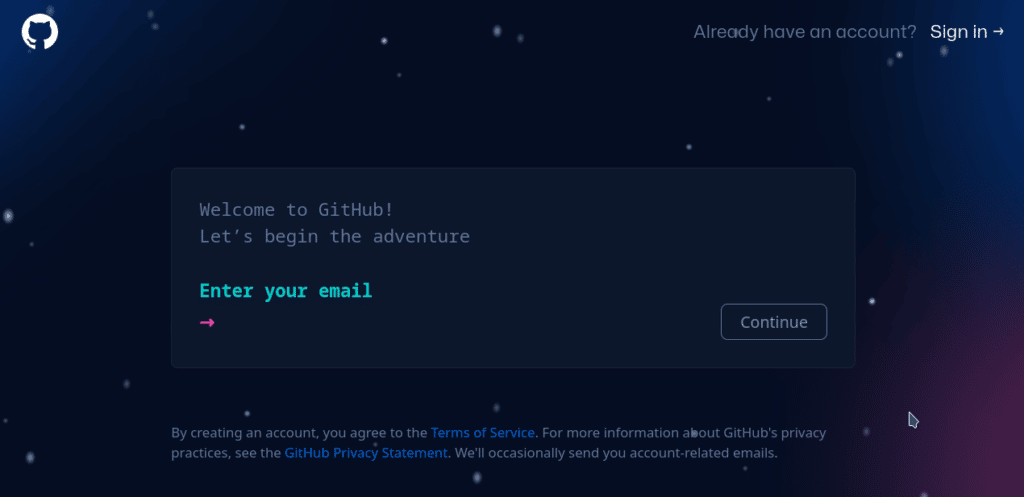
After signing in, you should be able to create a remote repository.
2. Create a Remote Repository
A repository is a directory where you store all the code related to a particular project.
From the GitHub home page, click on the “New” or “Create repository” button located in the left panel of the site. This will redirect you to a form where you’ll fill in your repo’s information.
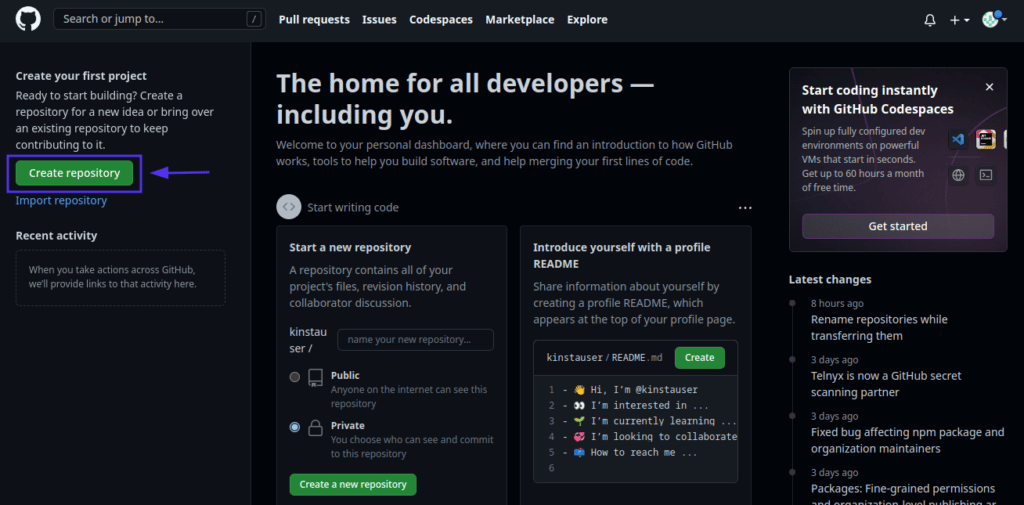
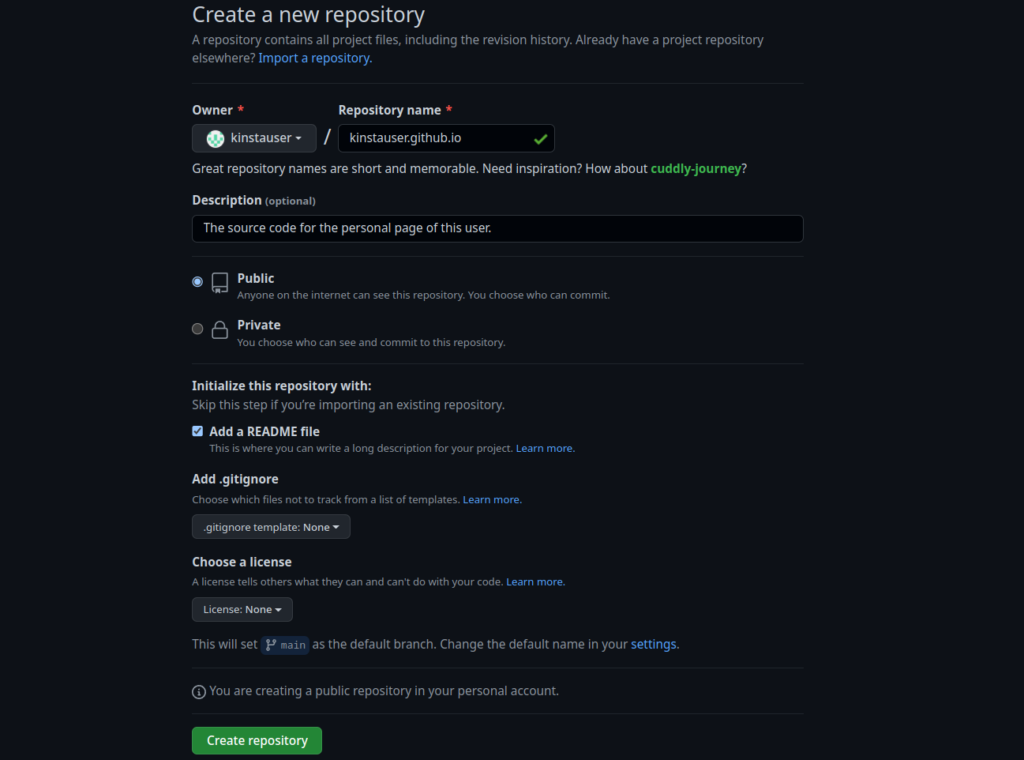
These next steps are crucial:
- Set the name of your repository to
"yourusername".github.io. - Check the public button. You must set the repository to Public to publish your site.
- Add a README.
You can only have a repository for a given personal account or organization. That’s why the repository’s name is your username and the github.io domain. Later, we’ll see how to set up a site from a repository.
Unless you have GitHub Pro, you can only publish a GitHub page if the repository is public. Keep this in mind if you don’t want to share your site’s source code publicly.
After this, you should have something like the following:
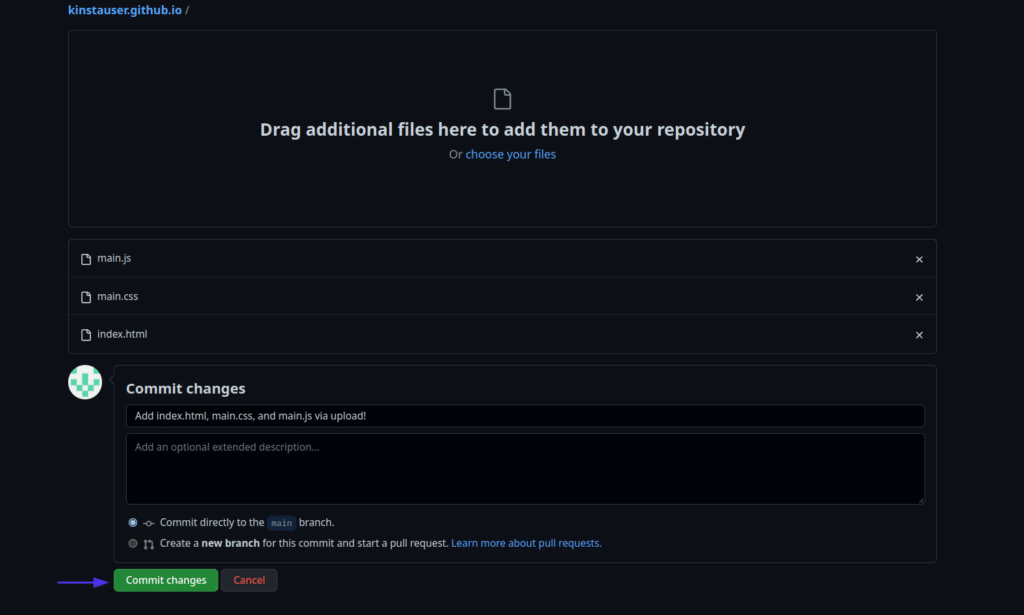
If you already have the working source code of your site, you can skip the common Git workflow and drop the files right into the repo instead.
To do this, click the Add file menu in your repository, and select the option Upload files. Then select the files of your website, with the main HTML file named index.html. Remember to put all your CSS and JavaScript files in the repository as well.
Finally, hit the Commit changes button.
In the following section, we’ll be building a simple personal website with HTML and Bootstrap. Then we’ll upload it to GitHub and set it up as a GitHub public page with a custom domain.
3. Build a Personal Site
We’ll start off by cloning the GitHub repo we just created. To do this, make sure you have the Git client already installed on your computer. (If you don’t, take a look at our tutorial on Git and GitHub.)
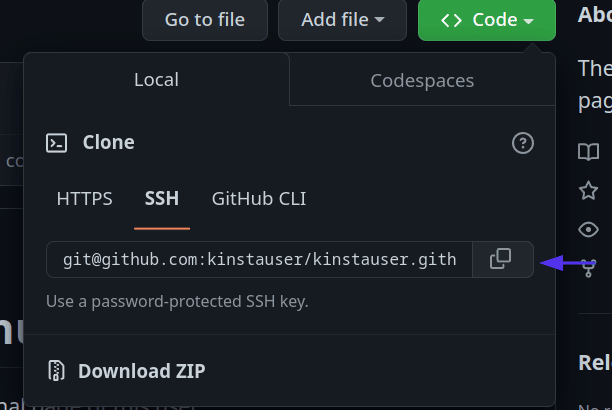
Go to the code tab of your repository and copy the SSH URL in the SHH option.
Then, fire up a terminal or command line. On most Linux distributions and macOS, you can use the shortcut Ctrl + Alt + T, or look through your system’s app menu for Terminal. On Windows, you can use the Git BASH installed by default with Git, the CMD, PowerShell, or a GUI client.
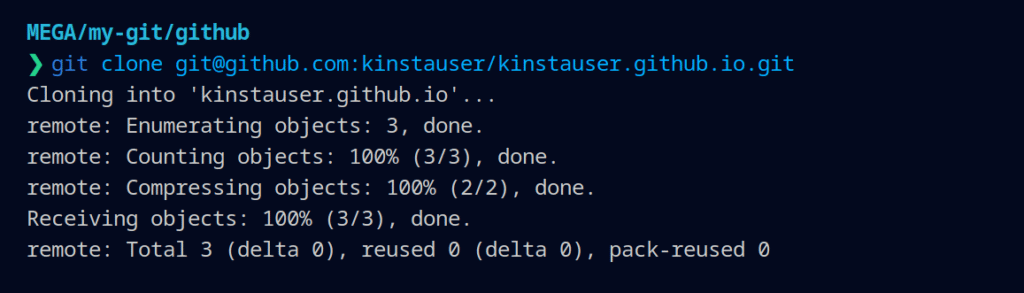
On your terminal, type git clone and the URL you copied. This will download and create a copy of the remote repository on your local machine so you can build your website.
Then enter the new folder named yourusername.github.io with cd and ls. You should see the .git folder, which contains the configuration and metadata of your project, as well as the README.md file if you created one.
Open up your favorite text editor (such as Sublime Text), and let’s start creating your website.
At the root of the repository, create a file named index.html (this name is required by GitHub Pages) and type in the typical HTML code structure:
<!DOCTYPE html>
<html lang="en">
<head>
    <meta charset="UTF-8">
    <meta http-equiv="X-UA-Compatible" content="IE=edge">
    <meta name="viewport" content="width=device-width, initial-scale=1.0">
    <title>Kinsta User</title>
</head>
<body>

</body>
</html>
As we said previously, we’re going to use Bootstrap 5.0, an open-source CSS framework that helps us to build responsive websites more easily. As you’ll see, we won’t have to use custom CSS for this particular site.
To get Bootstrap into our page, we’ll need to include the compiled CSS and JavaScript via a CDN. Paste the following code inside the HTML <head> to be able to use Bootstrap CSS:
<link href="https://cdn.jsdelivr.net/npm/[email protected]/dist/css/bootstrap.min.css" rel="stylesheet" integrity="sha384-rbsA2VBKQhggwzxH7pPCaAqO46MgnOM80zW1RWuH61DGLwZJEdK2Kadq2F9CUG65" crossorigin="anonymous">In this same fashion, we’ll also include the Devicon CDN to be able to use SVG icons of popular programming languages and technologies without much trouble:
<link rel="stylesheet" href="https://cdn.jsdelivr.net/gh/devicons/[email protected]/devicon.min.css">Now, to include the JavaScript, insert the following code right above the end of the </body> tag:
<!-- JavaScript: Above  -->

<script src="https://cdn.jsdelivr.net/npm/[email protected]/dist/js/bootstrap.bundle.min.js" integrity="sha384-kenU1KFdBIe4zVF0s0G1M5b4hcpxyD9F7jL+jjXkk+Q2h455rYXK/7HAuoJl+0I4" crossorigin="anonymous"></script>
We’ll kick things off by creating a header for our website. It’ll be a dark header, with links to our index page and two other pages — “Projects” and “Reading log” — which you can create later:
<nav class="navbar navbar-dark navbar-expand-lg bg-dark ">
    <div class="container-fluid">
        <div class="mx-4">
            <a class="navbar-brand" href="#">Kinsta User</a>
        </div>
        <button class="navbar-toggler" type="button" data-bs-toggle="collapse"
            data-bs-target="#navbarTogglerDemo02" aria-controls="navbarTogglerDemo02" aria-expanded="false"
            aria-label="Toggle navigation">
            <span class="navbar-toggler-icon"></span>
        </button>
        <div class="collapse navbar-collapse" id="navbarTogglerDemo02">
            <ul class="navbar-nav me-auto mb-2 mb-lg-0">
                <li class="nav-item">
                    <a class="nav-link" href="#">Projects</a>
                </li>
                <li class="nav-item">
                    <a class="nav-link" href="#">Reading Log</a>
                </li>
            </ul>
        </div>
    </div>
</nav>
We use the Bootstrap wrapper navbar and navbar-expand-lg to create a responsive container that collapses when the display width is smaller than 992px. This happens because of the grid option lg. If you want to know more about grid options, take a look at Bootstrap’s layout page.
Now, let’s create two responsive columns inside a container: one for a free image from Unsplash and another for a description of ourselves:
<div class="container my-4 ">
    <div class="row justify-content-center">
        <div class="col-lg mb-lg-4">
            <img src="image.jpg" class="img-fluid" alt="" srcset="">
        </div>
        <div class="col-lg mx-2 align-self-center">
            <div class="my-3">
                <h1 class="text-center">I'm a Kinsta User</h1>
                <p>As a passionate software developer, I am deeply enthusiastic about creating and
                    developing software applications. I am constantly learning and experimenting with new
                    technologies and approaches, and I have a strong desire to create innovative and effective
                    solutions to complex problems. I am driven by my curiosity and love for problem-solving, and
                    I
                    am committed to producing high-quality, well-designed software that meets the needs of
                    users.
                </p>
            </div>
        </div>
    </div>
</div>
As you can see, we’re sourcing an image from a local file, so it must be in the repository when we push our changes to the GitHub repo.
Finally, inside our Bootstrap container, we’ll use SVG icons from Devicon, along with a bit of internal CSS to make our skills stand out:
<!-- Inside the container created above -->
<div class="my-4">
    <div class="text-center mb-4">
        <h1>My Skills</h1>
    </div>
    <div class="row ">
        <style>
            I {
                font-size: 4em;
            }
        </style>
        <!-- Skills -->
        <div class="col">
            <div class="text-center">
                <h4>WordPress</h4>
                <i class="devicon-wordpress-plain"></i>
            </div>
        </div>
        <div class="col">
            <div class="text-center">
                <h4>Django</h4>
                <i class="devicon-django-plain"></i>
            </div>
        </div>
        <div class="col">
            <div class="text-center">
                <h4>Python</h4>
                <i class="devicon-python-plain"></i>
            </div>
        </div>
        <div class="col">
            <div class="text-center">
                <h4>GitHub</h4>
                <i class="devicon-github-original" ></i>
            </div>
        </div>
    </div>
</div>
Since we use the <i> HTML tag, we can treat it as a font. Thus we set the size of our logos to 4 em by declaring it in the style tag.
Here is the final result of this simple personal website:

Did you know that over 50% of website traffic comes from mobile devices? Because we used Bootstrap, we saved a lot of CSS coding, and also got a responsive website, as you can appreciate below.
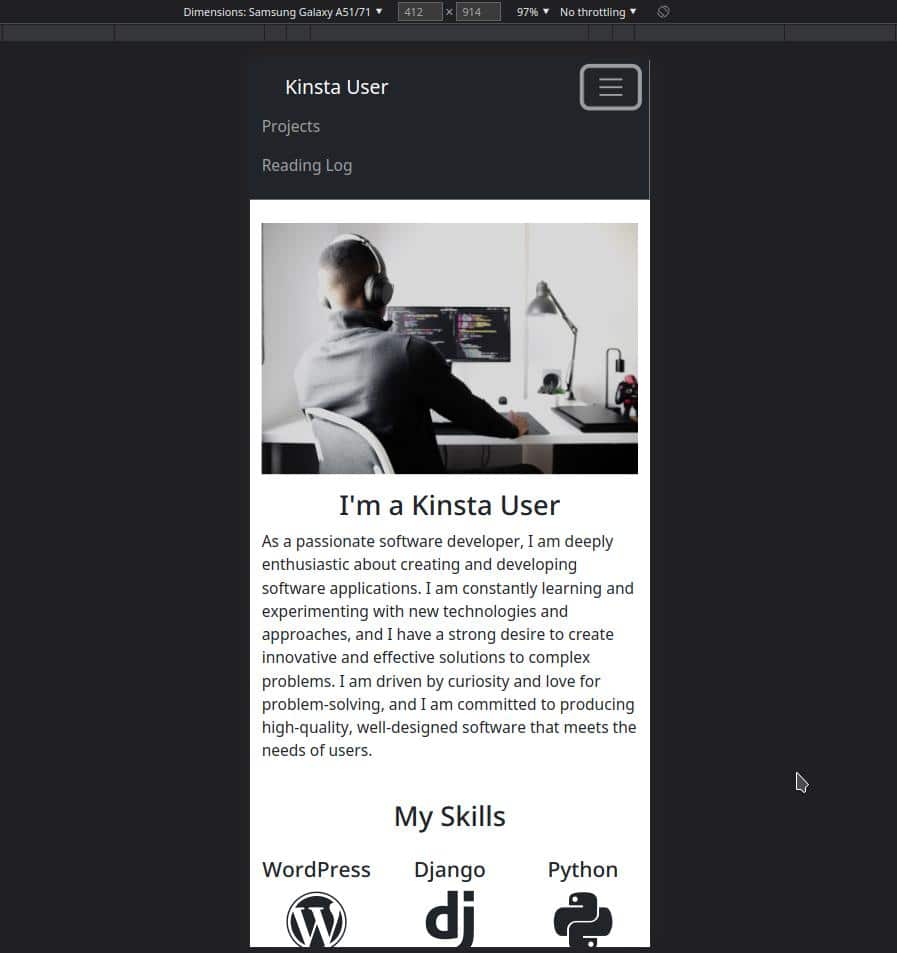
You can customize this site as much as you want. Here’s the full source on GitHub, at your disposal.
4. Publishing a User GitHub Page
It’s time to push your files. To do this, run the following commands on your terminal, at the top level of your project.
git add .
git commit -m "Added website source code and image"
git push
Now, we can use this website to set up our GitHub page.
As soon as you push the index.html to the remote repository named after your username, GitHub will automatically start a workflow process to set up your site online. It may take a couple of minutes, but you’ll get your static site up and running automatically.
The URL of your site will be something like the following: https://kinstauser.github.io/
If after 10 minutes your site is not online, you can try to make a dummy change to your code (e.g., adding a space) and push again to reactivate the GitHub Pages’ building process.
5. Publishing a Repository GitHub Page
Until now, we’ve created a user site, but what if we want to have multiple published GitHub sites? Then we must go with a project site.
As an example, we’ll use the HTML technology site we created in the Git for Web development tutorial.
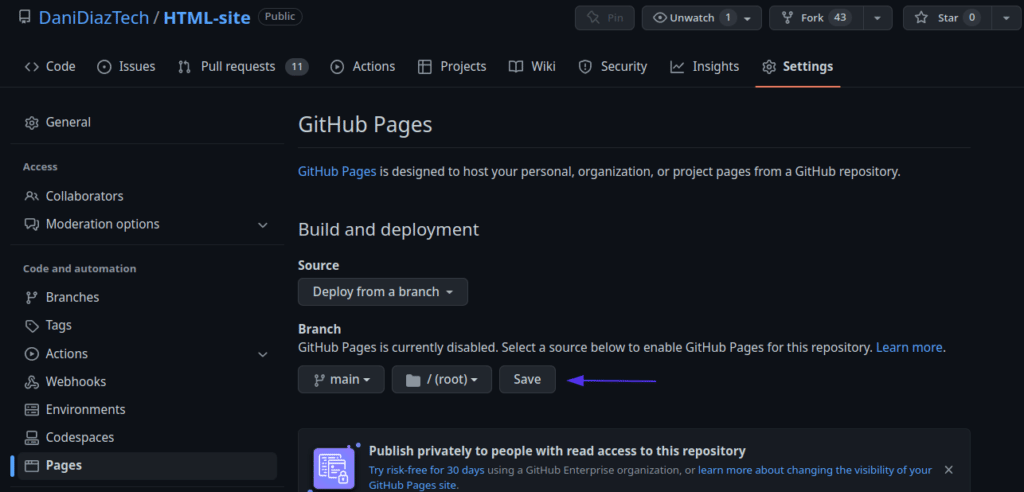
The easiest way is to go to the Settings tab of our repository, then to the Pages option inside the “Code and automation” section.

Select the source Deploy from a branch, and click on the branch you want to deploy the files from. It’s vastly recommended to publish from the main branch, but create features and fix bugs using auxiliary branches, and then merge them. This way you won’t introduce errors to the published site so easily.
Once you’ve selected the branch, select the folder you want to serve the files from — usually the root (/) — and click save.
Again, wait for a few minutes. Your site should be available at "yourusername".github.io/.
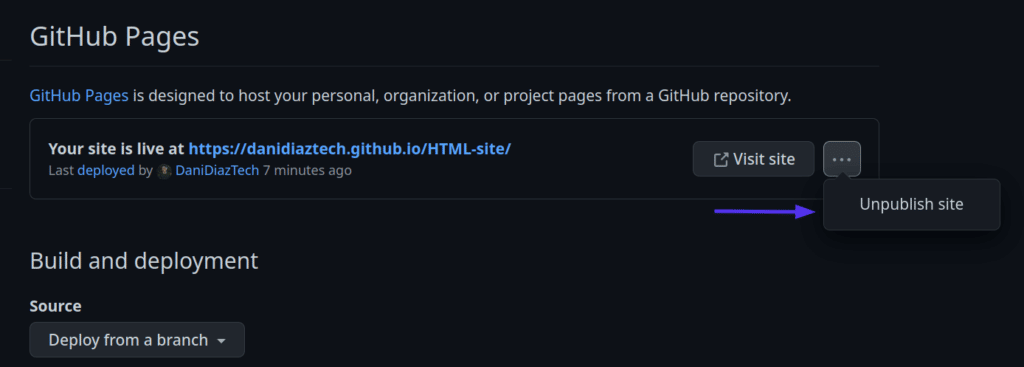
To unpublish a repository site, you can go to Settings, then Pages, and click on the three dots option. You’ll see a box with the message Unpublish site.
Great! You have the site of your open-source project up and running, but the domain name itself is lengthy and certainly not easy to remember. Let’s see how we can improve this.
6. Setting Up a Custom Domain
The easiest way to set up a custom domain for a GitHub page and ensure that it works is to go to your DNS provider and create four A records for the IP addresses of GitHub Pages:
185.199.108.153
185.199.109.153
185.199.110.153
185.199.111.153
You must also set up a CNAME record with yourusername.github.io as the target. Usually, DNS changes are slow, so be patient it, could take up to a whole day.
After doing this, go to the Custom domain section in the settings of your repo, type in your domain, click on the Save button, and wait for GitHub to check your custom domain.
Also, if your DNS supports it, check the Enforce HTTPS box to only serve your site over HTTPS.

Congrats! If you’ve followed along up to this point of the tutorial, you have a static website hosted in GitHub Pages for free.
Best Practices for GitHub Pages
Before we part ways, here are some best practices you should take into account when publishing a GitHub site:
- Never make direct commits to the branch you’re deploying from. Create changes in other branches, then create a pull request.
- Select a good domain for your site if you can afford it. It’s one of the most important decisions for your personal or project brand.
- Don’t use GitHub Pages for commercial purposes, such as spinning up an ecommerce site.
- Evaluate your needs. It’s great to be able to publish a static site for free, but if you’re expecting a lot of traffic or want complex features, paying for a great hosting service is the way to go.
Summary
Web development is getting more and more complicated every day. Static sites have been here since the advent of the internet, and they’re a great way to start creating projects.
In this tutorial, you learned what static sites are, and how to set them up online using GitHub Pages. You created a simple personal site using Bootstrap and published it as your GitHub user site. You also learned how to get a project’s site up and running and how to unpublish it if necessary.
Overall, GitHub Pages is a convenient and powerful way to host your static website for free. Whether you’re looking to showcase your portfolio, share your open-source projects, or start creating an online presence, GitHub Pages is an excellent choice.

Daniel is a self-taught Python Developer, Technical Writer, and long-life learner. He enjoys creating software from scratch and explaining this process through stunning articles. Follow him on Twitter: @DaniDiazTech