Google Chrome is one of the most popular browsers in the world, and many quality extensions that can add to your online experience are available.
From grammar-checking extensions to ecommerce tools that can help you find coupon codes, extensions are helpful assistants intended to make browsing seamless. Sometimes, however, the extensions we download and install don’t live up to our expectations, or we simply stop using them.
When that happens, you need to know how to remove Chrome extensions, lest they interrupt or slow down your browser. In this article, we’re going to discuss several ways you can disable or remove extensions from Google Chrome and other popular browsers.
Check Out Our Video Guide on How To Remove Chrome Extensions
Why Would You Remove a Browser Extension?
When you download a browser extension for Google Chrome, it’s for a specific purpose. There’s a need that you have in your experience on the world’s most popular browser, and a good extension can help alleviate your pain point and make the downloading process seamless and enjoyable.
However, downloading even the best Chrome extension on your browser isn’t like getting a tattoo. It’s not a decision that you have to live with for the rest of your life. Sometimes, extensions don’t pan out the way we expect. And bad or unsupported extensions can take away from the browsing experience.
Before we get into how to remove Chrome extensions, here are some common reasons why you might want to remove one (or more) of your browser extensions.
They Interfere With the Browsing Experience
We install extensions to Google Chrome because we believe they’re something that will improve the overall browsing experience, like an email productivity extension. But sometimes, the extensions we choose can do the exact opposite and interfere with that experience.
How can this happen?
For starters, no one wants to deal with annoying pop-ups. They can disrupt the browsing experience and make casually scrolling a website an irritating ordeal.
Another way bad extensions can disrupt your browsing experience is if they collect too much user data. Companies rely on data to market to us, and many internet users are taking steps to keep their information private. If you discover that a browser extension is pulling more data than you’re comfortable with, it’s time to get rid of it.
Some browser extensions have been known to mask malicious programs like malware, which can infect your computer, cause crashes, and even steal vital information, like banking passwords. These dangerous extensions should be removed and reported.
Some extensions go overboard with Chrome notifications. If you’re trying to browse peacefully but keep getting notification after notification, you should go into the extension’s settings and disable notifications. If this doesn’t work, or you’re unhappy with the extension for other reasons, it might be time to uninstall it.
They Impact Browser Performance
Some extensions can negatively impact your browser’s performance. If this is happening to you, this is a huge issue that needs to be addressed immediately.
One way that an extension can impact browser performance is by eating up too much computer memory. Your computer only has so much memory, and when it’s all used up, you’ll see a lot of lag, freezing, and even forced restarts for critical platforms like WordPress. That’s why it’s always a good idea to look at the amount of space the extension will take up on your device. Then you can decide whether you have the room to spare before you slow down your Mac or PC.
Some browser extensions that aren’t well built can cause the entire browsing session to crash unexpectedly. This is a huge problem that should be dealt with right away.
How To Temporarily Disable Chrome Extensions
Sometimes you don’t need to uninstall your Chrome extensions permanently; you may need to just disable them temporarily. It could be that you find the extension useful but need a break from it, or perhaps it’s getting in the way of a specific task you need to accomplish.
Thankfully, there are three major ways to disable your Chrome extensions temporarily. The first is to work through your Google Chrome browser directly.
Chrome includes an Extensions hub, where you can easily access all of the extensions currently installed. You can get there through the three-dot menu on the upper right of your browser window or by typing chrome://extensions into the search bar at the top.
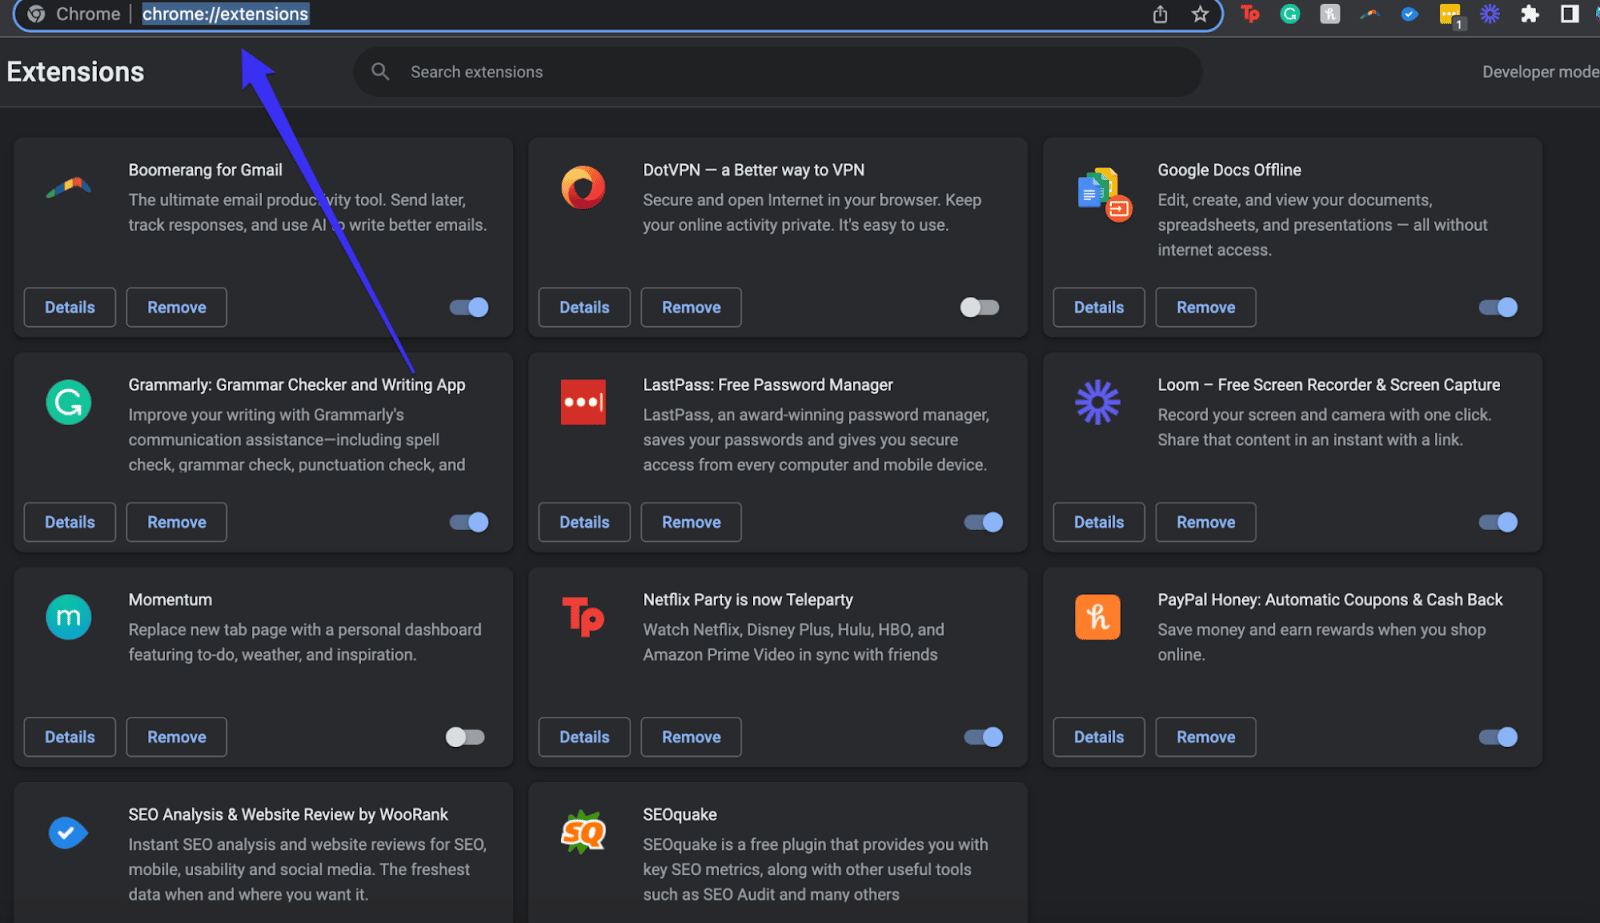
You’ll notice that under each extension, there are a few options. You’ll see a button marked “Details,” another marked “Remove,” and a slider on the right-hand side with a dot on it. This slider is what we’re focusing on in this step.
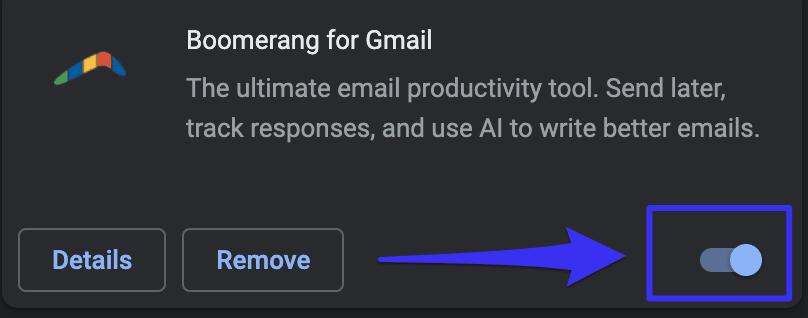
If the slider is on the right and blue, the extension in question is active. If it’s on the left and white, the extension is not active.
Simply click on any active slider to temporarily disable the extension. There is no timer on this feature, so you’ll have to physically reactivate it once again when you decide it’s needed.
The next way to temporarily disable extensions is by using another extension.
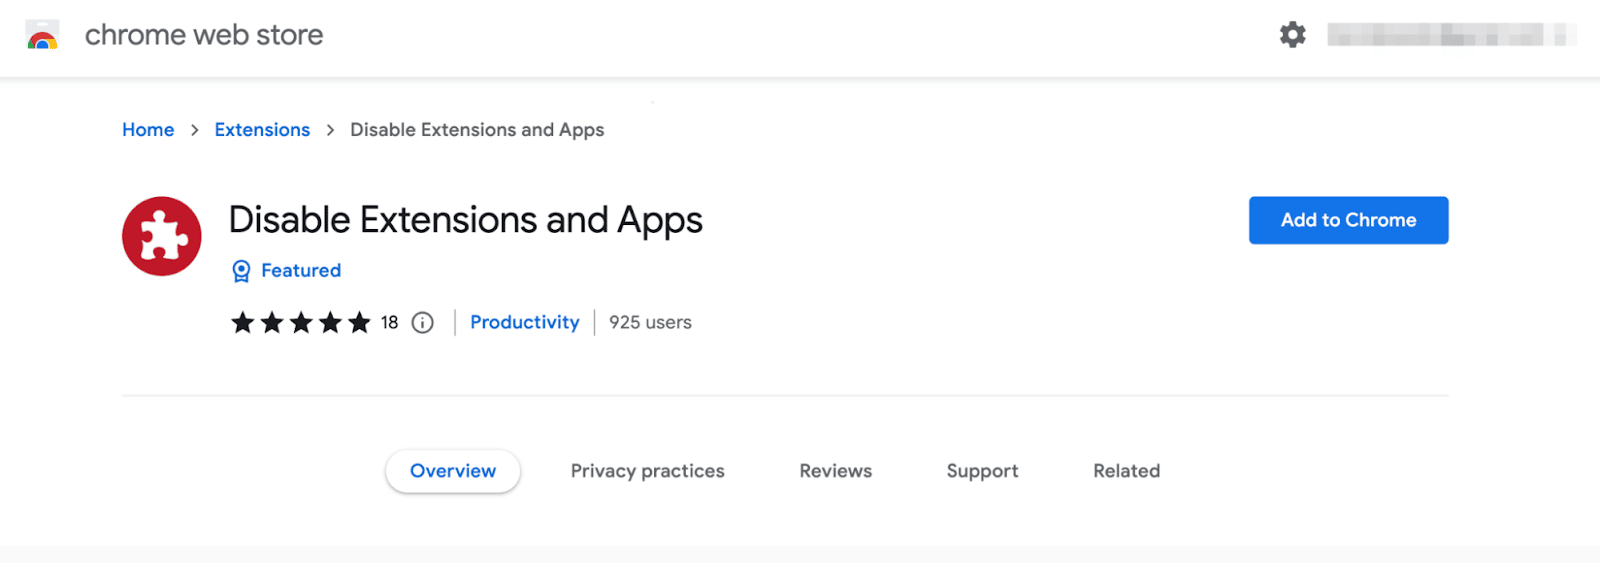
In the Chrome Web Store, you’ll find an extension called “Disable Extensions and Apps.” With this extension, you can disable and re-enable your extensions and apps using the keyboard command Ctrl + Shift + E.
Doing this disables all apps and extensions, with the exception of those you’ve labeled as “Whitelist.”

You can also accomplish this by using a simple Windows command.
Simply copy the following command:
“C:Program Files (x86)GoogleChromeApplicationchrome.exe” –disable-extensions.
Once it is copied, open a Windows search box and paste it in. After that, hit Enter, and you’re good to go.
How To Remove a Chrome Extension
If you decide that a temporary deactivation just isn’t good enough, then you need to learn how to remove Chrome extensions. Chrome makes this process quick and easy, as long as you follow a few simple steps. It’s way faster and easier than trying to delete a Google review.
First, click on the three dots in the upper right-hand corner of your Chrome browser.

Clicking this will open a dropdown menu. Scroll down to More Tools and hover your mouse over it. This will open up another sub-menu on the left-hand side.
Navigate to that new menu and click on the tab marked Extensions. Doing this opens the Google Chrome Extensions Manager.

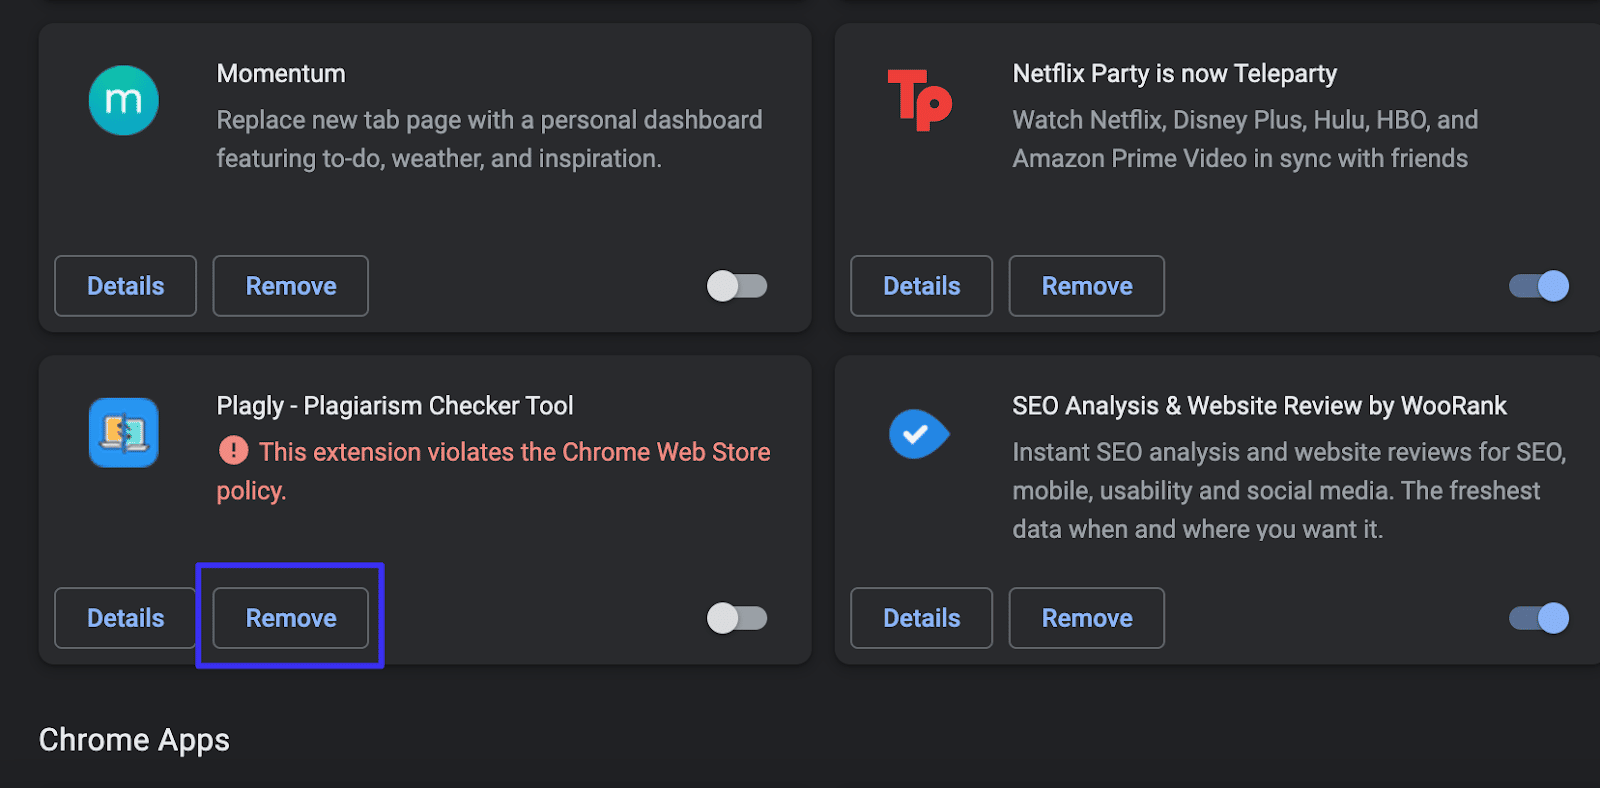
As you can see in the image above, the extensions manager displays all of your installed extensions. In this example, one of the extensions is marked as having violated the Google Chrome Web Store’s policies, so that’s the one we’re going to remove.
Under each extension, there are two options: “Details” or “Remove.” Click Remove under the extension that you don’t want.
This opens up a confirmation tab where you can confirm that you want to remove the extension. You can even report abuse here if needed.

Once that’s done, the extension is no more.
You can also delete Chrome extensions right from the browser toolbar. Just find the icon of the extension you want to delete and right-click on it if you’re using a PC, or hold down Control and click on it if you’re using a Mac.
This will bring up a sub-menu. Once there, click on the tab that says Remove from Chrome.
You will then be asked for confirmation that you want to delete the extension. Confirm that this is your intention, and click Remove when prompted by the system.
The toolbar method we just described can’t be used to disable an extension, but you can use it to open the extension manager and disable it from there.
How To Remove All Your Chrome Extensions
Maybe you don’t want to just remove a single extension. Perhaps you’re done with Chrome extensions altogether and want to wipe the slate completely clean. Either way, it’s important that you know how to remove Chrome extensions when needed.
There are two different methods for going about this. The first (and easiest) is to go directly through the Chrome browser itself.
This process will run a lot like the last step in the extension removal process outlined earlier, only with repeated steps for each Chrome extension on your list.
First, go to the Chrome extensions hub. You can do this by typing chrome://extensions into your search bar or clicking on the three-dot menu on the upper right, then More Tools, and finally, Extensions.
Once you’re in the Extensions hub, you can start disabling all of your extensions, one at a time. Under each extension, you’ll see the “Details” and “Remove” buttons, along with the slider that disables extensions without uninstalling them.

There is no option to turn all extensions off simultaneously, so you will have to click Remove on each service. However, this isn’t as time-consuming as it sounds. Just click on Remove for each extension and confirm that you want to remove it from your Chrome browser.
If you’re a Windows user, you can use a much more complicated process to uninstall your Chrome extensions manually.
First, find the default folder location for your operating system. Type the following into a Windows search:
C:UsersusernameAppDataLocalGoogleChromeUser DataDefault.
Just make sure to substitute your actual username where it says “Username.”
Once you make it inside the default folder, there will be a folder marked “Extensions.” When you open that, there will be folders for each extension you have installed; however, these folders’ names might look like a long, jumbled mess.
Opening one of these folders reveals a subfolder with the version number of your extension. When you open that subfolder, it will tell you the name of the extension you’re looking at. You can then back out of this folder, returning to those with the long, messy names. Simply delete those folders and restart Chrome. The extension will be gone.
How To Find and Remove Hidden Chrome Extensions
Removing a Chrome extension doesn’t always get the job done. There could be hidden extensions and files still sitting on your device, taking up space. However, there is a way you can remove those extensions from your hard drive completely. This process will look a little different depending on your operating system.
Removing Hidden Chrome Extensions in Windows
When it’s time to remove hidden extensions from your Windows system, you’ll have to first go to the Chrome installation location. Typically, this is marked as:
C:UsersusernameAppDataLocalGoogleChromeUserDataDefault.
Open the folder marked Extensions to find a list of your extensions. Then, as described in the previous section, just delete the folder of the extensions you don’t want, and restart your browser. This will make the change take effect.
Removing Hidden Chrome Extensions on a Mac
If you’re using a Mac, you’ll be able to find your extension installation location by going to:
~/Library/ApplicationSupport/Google/Chrome/Default/Extensions.
If you’re signed into different Google accounts within Chrome, there will be different folders for each username. The folders inside will all have long, 32-character names.
Re-open Chrome and go back to your Extensions hub by either typing in chrome://extensions/ or clicking on the three dots on the upper right, selecting More Tools, and clicking on Extensions.
When you’re in the hub, click on the tab marked Developer Mode.
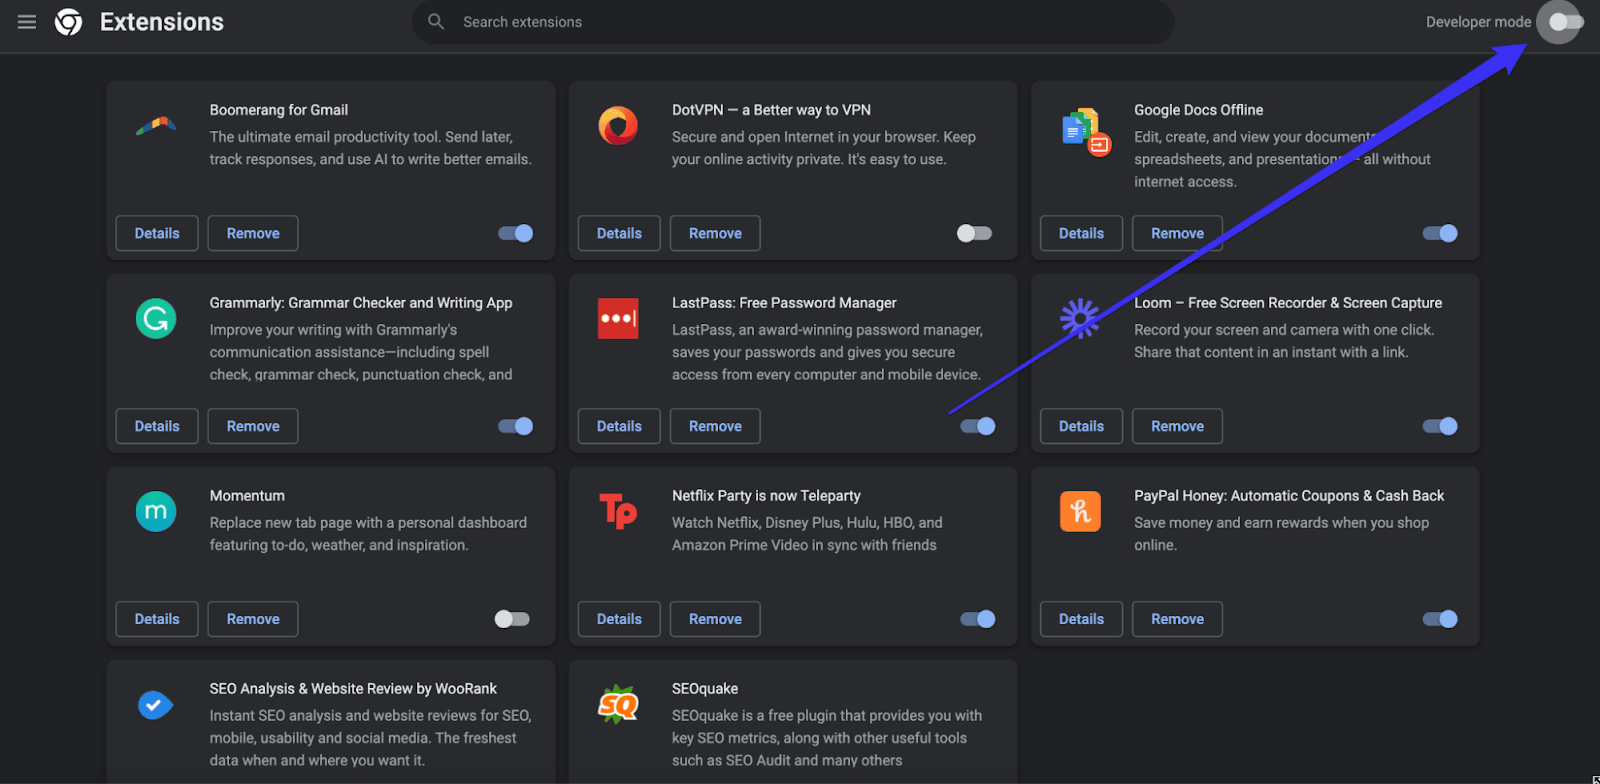
Once the developer mode is turned on, it will look something like this:

Developer mode shows you the 32-character identifiers for each extension. Go back to your hard drive folder, find the proper extension using this information, and delete it from your system.
How To Remove Extensions in Other Browsers
Extensions are not exclusive to Google Chrome. Other leading browsers, including Microsoft Edge, Firefox, Safari, and Opera, have extensions that can easily be managed and removed. We’ll cover these Google Chrome alternatives in this section, explaining how you can get rid of their unwanted extensions.
Microsoft Edge
Microsoft Edge is the default browser that comes installed on all Windows PCs. It’s the bigger and more evolved brother of Internet Explorer (which was once mostly used for downloading Google Chrome).
When removing extensions from Microsoft Edge, you’ll want to start by selecting and holding the icon of the extension you’re removing. These icons will be located to the right of the address bar at the top of your browser — similar to where they’re located on Google Chrome.
Once you do this, select Remove from Microsoft Edge to start the removal process. The system will ask you for confirmation. Confirm that you want to do this, and select the option that says Remove.
You can also select extensions on the right of the browser address bar and choose the More Actions field marked by three dots next to the extension.
Select the Remove from Microsoft Edge option provided, and confirm your choice by selecting Remove.
Firefox
Firefox is a secure browser with extensions that can be deleted as easily as clearing a browser cache. This process takes only a few steps.
To get rid of unwanted Firefox extensions, you first have to click on the “hamburger” menu button — the one with the three horizontal lines that resemble a hamburger.
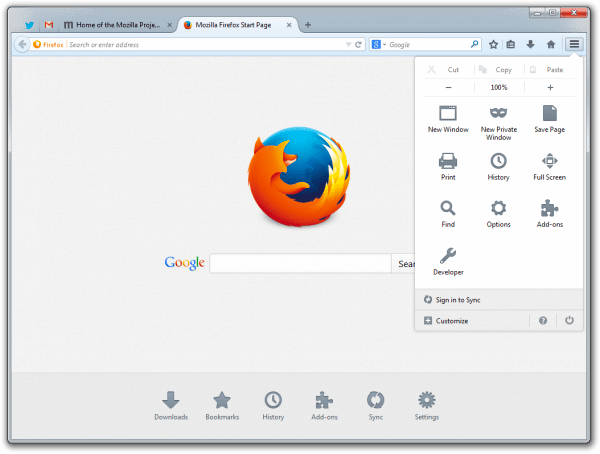
From the dropdown menu, select Add-ons. You’ll then be presented with more options. Click on the choice marked Extensions.
This will open your Firefox extensions list. If you want to remove these extensions, click on the three-dot menu next to them. This will open up yet another sub-menu where you’ll be prompted to select the option marked Remove.
Safari
Safari is the web browser that comes preinstalled with all Mac computers and Apple products.
You can get rid of Safari extensions by going into the tab marked Safari at the top of the page.
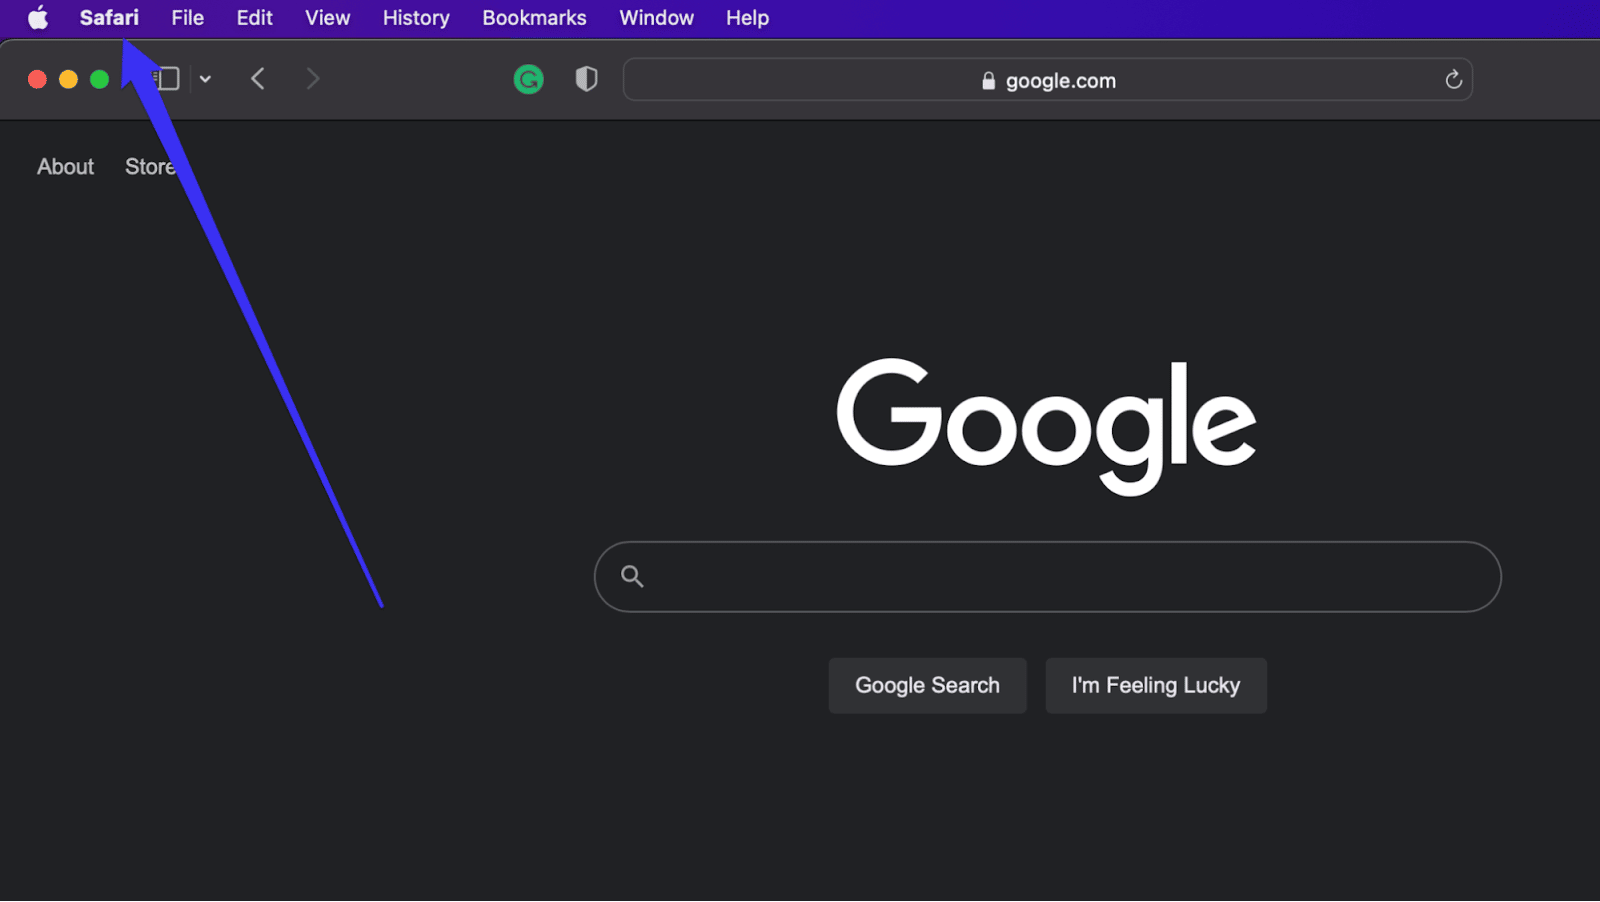
Once there, select the dropdown menu item titled Preferences. After that, click on the option labeled Extensions. This will open up a list of your Safari extensions.
Select the extension you want to get rid of, then click Uninstall.
Opera
When you’re using the Opera browser, you can set up a number of extensions that will come in handy throughout the browsing experience. However, if you want to get rid of extensions you’re no longer using, it’s a rather quick and simple process.
First, click on the option marked View in the Opera menu bar. Once you’ve done that, select Show Extensions.
This will open up a list of your Opera extensions, much like Google’s Extensions hub. Note that each extension on this list will have an X in the right-hand corner of its box. You can get rid of the extension by simply clicking on that X.
Opera will then ask you to confirm that you want to remove the extension. Confirm your decision, and the extension will vanish from your browser.
If you don’t want to get rid of your Opera extensions, you can choose to disable them. This leaves the extension installed on your device, but it lies dormant and not operational.
Summary
Extensions can be a helpful part of the browsing experience, but when they outlive their usefulness, you need to remove them to make room for other, more beneficial ones.
In this guide, we’ve taught you everything you need to know about why you’d remove extensions, how to disable extensions and remove them from Chrome, how to remove hidden extensions, and how to remove extensions from other popular web browsers.
Knowing how to remove Chrome extensions will help you focus more on critical functions, like managing your WordPress website. If you need managed hosting services for your WordPress site, the team at Kinsta is ready to help you make the best of your clean and clear computer so that you can focus on running the best possible website for your business. Schedule a demo with us today.

Head of Content at Kinsta and Content Marketing Consultant for WordPress plugin developers. Connect with Matteo on Twitter.