Have you ever sat down at your Mac to complete an urgent task, only to sit there waiting for your computer to load? Slow computers aren’t just annoying — they are a productivity drain that can increase your workload and decrease your output. That’s why it is important to find ways to speed up a Mac.
In fact, if a single full-time employee loses seven minutes of work time each hour to a slow computer, that amounts to just over 52 minutes a week (or 3.5 hours a month).
Anyone with a slow Mac will understand this problem well. But how do you speed up a Mac?
That’s what this article is all about. We’ll cover common reasons for slow Macs and 15 tips you can try to increase your Mac’s speed.
Let’s go.
Why Is My Mac Slow?
Without your computer handy, we can’t tell you exactly why your computer specifically is slow. But we can help you diagnose the problem yourself.
You’ll know if your Mac is running slow if you notice any of these things:
- Your computer takes longer to boot up than normal
- Your Mac gets very hot
- Your browsers or programs crash frequently
- You see the “beach ball” often
- You are spending more time than usual waiting for things to load
Many things cause slowness or lag in Macs and other computers.
Your computer may run slowly if you have numerous programs running, are downloading a large file, or are running fancy graphics. These issues are caused by your Mac working harder than usual.
Alternatively, age can slow your computer down. The longer you use your Mac, the more disk space you’re likely to use, and the more your computer wears out.
We’ll cover fixing many of these issues in the “How To Speed Up Your Mac: Our Top Tips” section, but first, we need to establish that it’s your Mac that is slow, and not something else.
Things to Rule Out
Computer slowness can be tricky since it often masquerades as other things. Before you start troubleshooting, check that these common factors aren’t slowing down your computer experience:
Slow Internet
Today, most of your computer activities use the internet, so a lousy internet connection can make your computer seem sluggish. You can test your internet speed using SpeedTest like this:
- Go to speedtest.net.
- Check that your internet provider and location are correct.
- Press “go.”
- Wait for the tool to measure your upload and download speeds.
- Read your results. They’ll look like this:
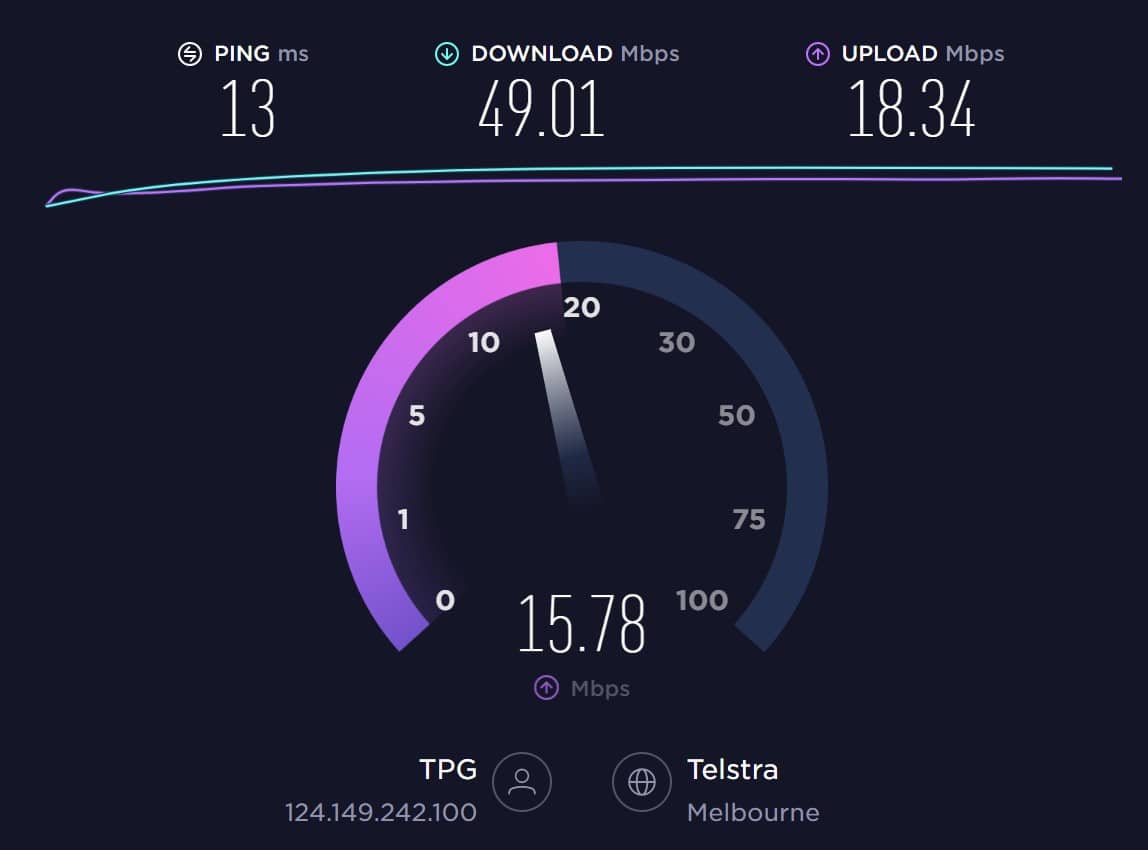
We measure internet speed with megabits of data per second (Mbps). Your upload time is how many Mbps your computer can send to another device or server. Your download speed is how many Mbps your computer can receive.
As of early 2022, the average global download speed on fixed broadband connections was 59.75 Mbps, and the average upload speed was 25.06 Mbps. SpeedTest also gives averages on a per-country basis if you want to see results for your country.
If your internet speed is the culprit, you’ll need to speak to your telecommunications company to fix your slow internet.
Alternatively, if your internet is fine, but a particular website is slow, you can check the website’s speed with Google Pagespeed. Or, if you own or manage a slow website, there are tons of ways to speed up a website that you can use.
Slow Browser
Suppose your internet speeds are normal, but your computer only runs slowly when you use the internet. In that case, your web browser could be the problem. Like computers, web browsers slow down when they need to complete an overwhelming number of tasks at once.
Speed up your website browser by closing unnecessary tabs and removing extensions you don’t need. Then, clear your browser history, cookies, and cache.
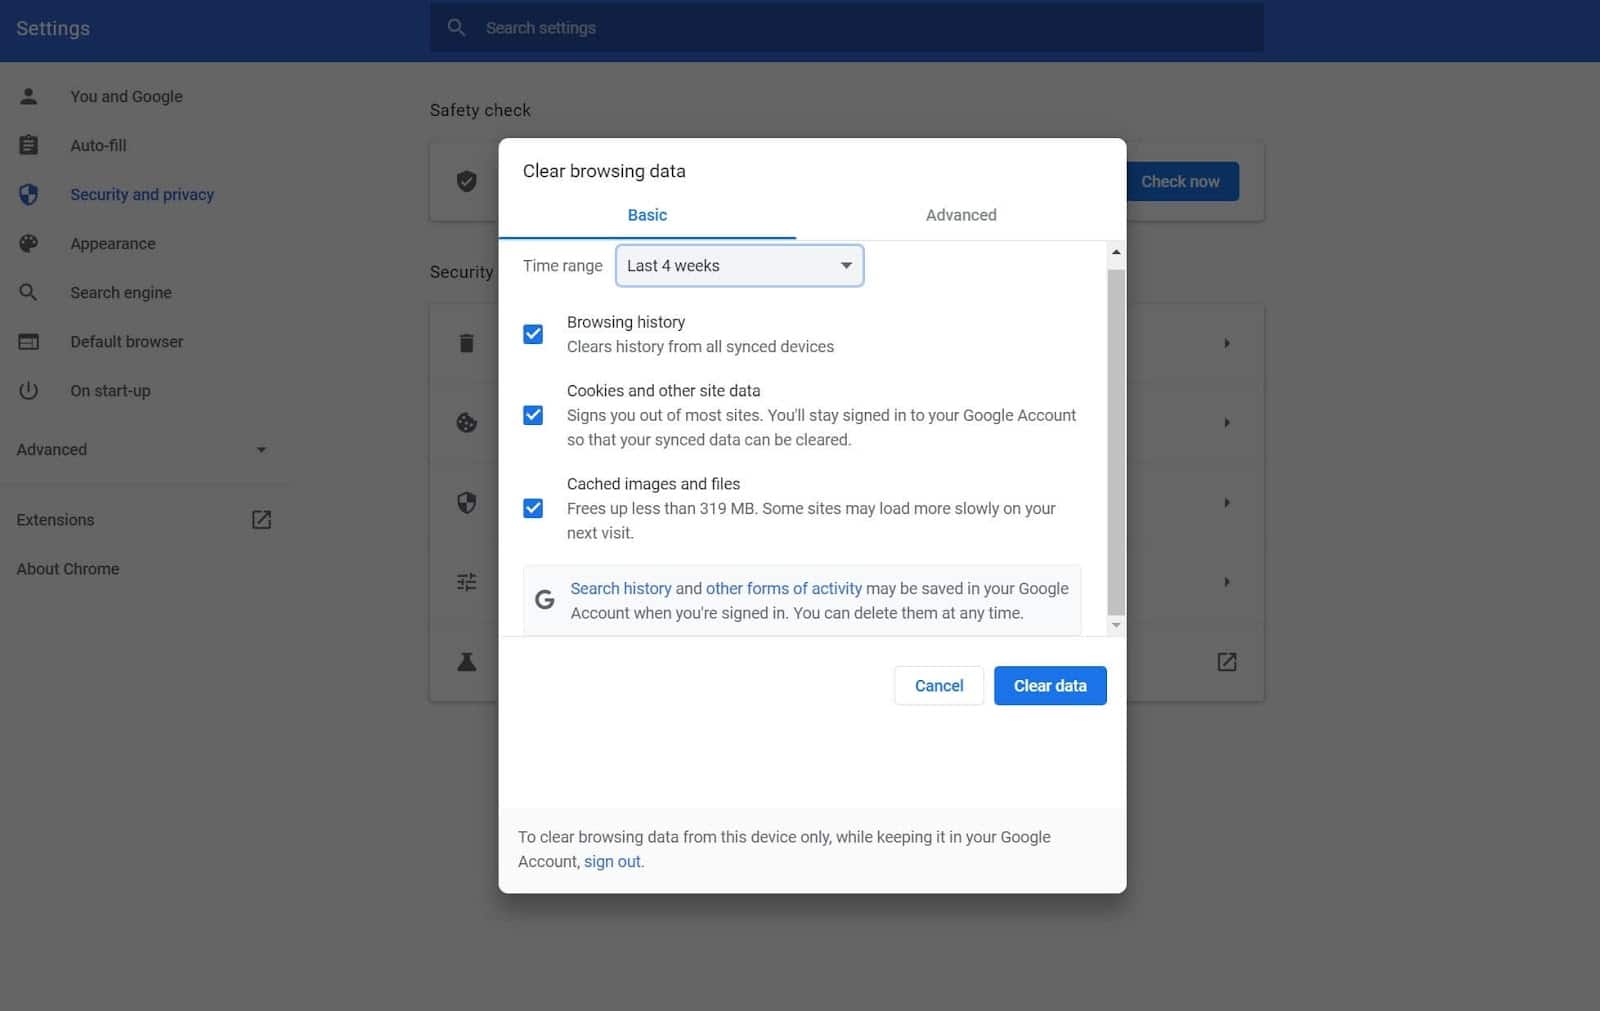
As of December 2021, 66.6% of global desktop users use Chrome. If you are one of those people, here’s how to clear browsing data:
- Open your browser and select settings.
- Press security and privacy, then select clear browsing data.
- Select browsing history, cookies and other site data, and then cached images and files. Clearing your cookies will sign you out of many websites.
- Choose your desired time range.
- Press clear data.
The steps to clearing data on other browsers are very similar.
Your Mac Needs to Be Restarted
Finally, your Mac may be running perfectly fine, but simply needs restarting. Restarting your computer regularly:
- Flushes the Random Access Memory (RAM) that handles data and tasks.
- Resets your internet connection.
- Reduces glitches and bugs.
- Reduces memory leaks. Memory leaks can occur when programs don’t close fully and keep using RAM.
How to Speed Up a Mac: Our Top Tips
Now that you know your issues go deeper than shoddy internet and a cluttered computer, it’s time to start troubleshooting.
We’ve started with the most straightforward tips first, so we recommend you try these one-by-one, restarting your computer in between to check if each tip made a difference.
Let’s dive in.
1. Check for a System Update
You’d be surprised how many issues you can solve by updating your computer. With each new macOS update, Apple alters how your computer functions to optimize it and make it more user-friendly.
You can check for a new macOS update by clicking the Apple menu in the top left corner (marked with the Apple logo). Then, select system preferences and software update. This screen will search for updates and display downloadable updates like this:
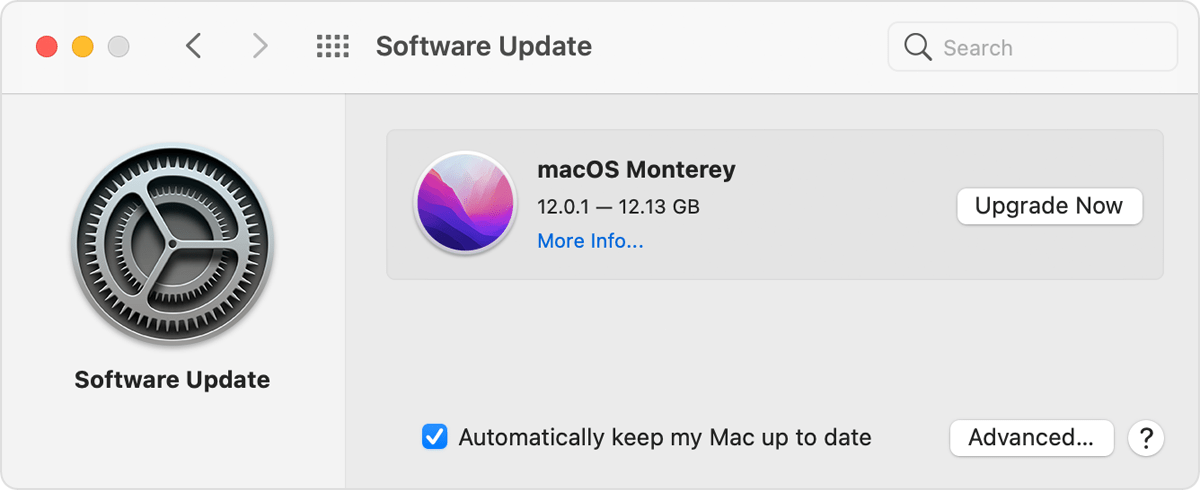
Select “upgrade now” and wait. Some updates take a few minutes, while others take longer.
2. Turn Visual Effects Off
Apple’s visual effects are quite pretty and can make your computer look funky, but they also use a lot of resources. Naturally, turning visual effects off may make your Mac run faster (especially if you use a lot of RAM otherwise).
To reduce animation-related visual effects, select the Apple menu in the top corner of your screen and press system preferences. Then, click accessibility and display. Click the checkbox that says reduce motion.
If you have a MacBook or an iMac, you can also turn off more visual effects by following these instructions:
- Click system preferences and dock and menu bar.
- Make sure you untick “automatically hide and show the dock” and “animate opening applications.”
- Press minimize windows using and select scale effect instead of genie effect.
Once you’ve altered your settings, restart your computer.
3. Reduce File Clutter
Have you ever tried to clean out a cupboard and realized it contained twice the amount of stuff you thought was in there? The same is true for computers. Your computer saves a lot of data locally, which requires processing energy.
There are many ways to reduce desktop clutter. Start by removing files and icons from your desktop.
Next, target your downloads file and remove anything you don’t need. To optimize this process, sort the downloads folder by the largest file size and delete those files first.
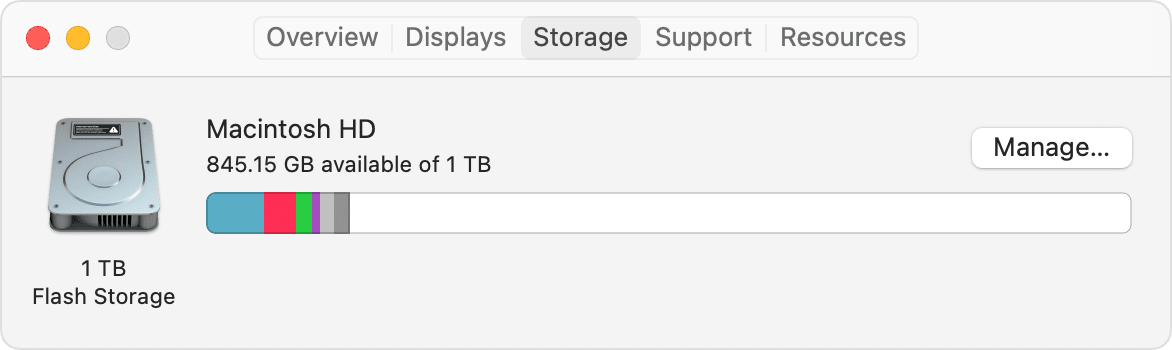
Finally, sort through your files and delete anything unnecessary. This step is especially important if you don’t have much disk space left. You can check for disk space by selecting the Apple menu, about this Mac, and storage. It’ll look like this:
Of course, reducing your files is only a temporary solution if you save a lot of files locally.
Consider using a cloud-based storage solution to store your files in the cloud if that’s you. Popular examples include Dropbox, Google Cloud, and Apple iCloud. Or, you could also use a plugin like VaultPress to backup your website.
4. Turn Off iCloud Syncing
Want to speed up a Mac by checking the “syncing” function?
iCloud automatically backs up your app data, settings, desktop organization, photos, videos, files, and messages. This is a lot of data for your computer to process, so it can sometimes slow down your Mac.
iCloud syncing is a background process, so you may not even know you are using it. To turn it off, go to system preferences and click iCloud. That will bring you to this screen:
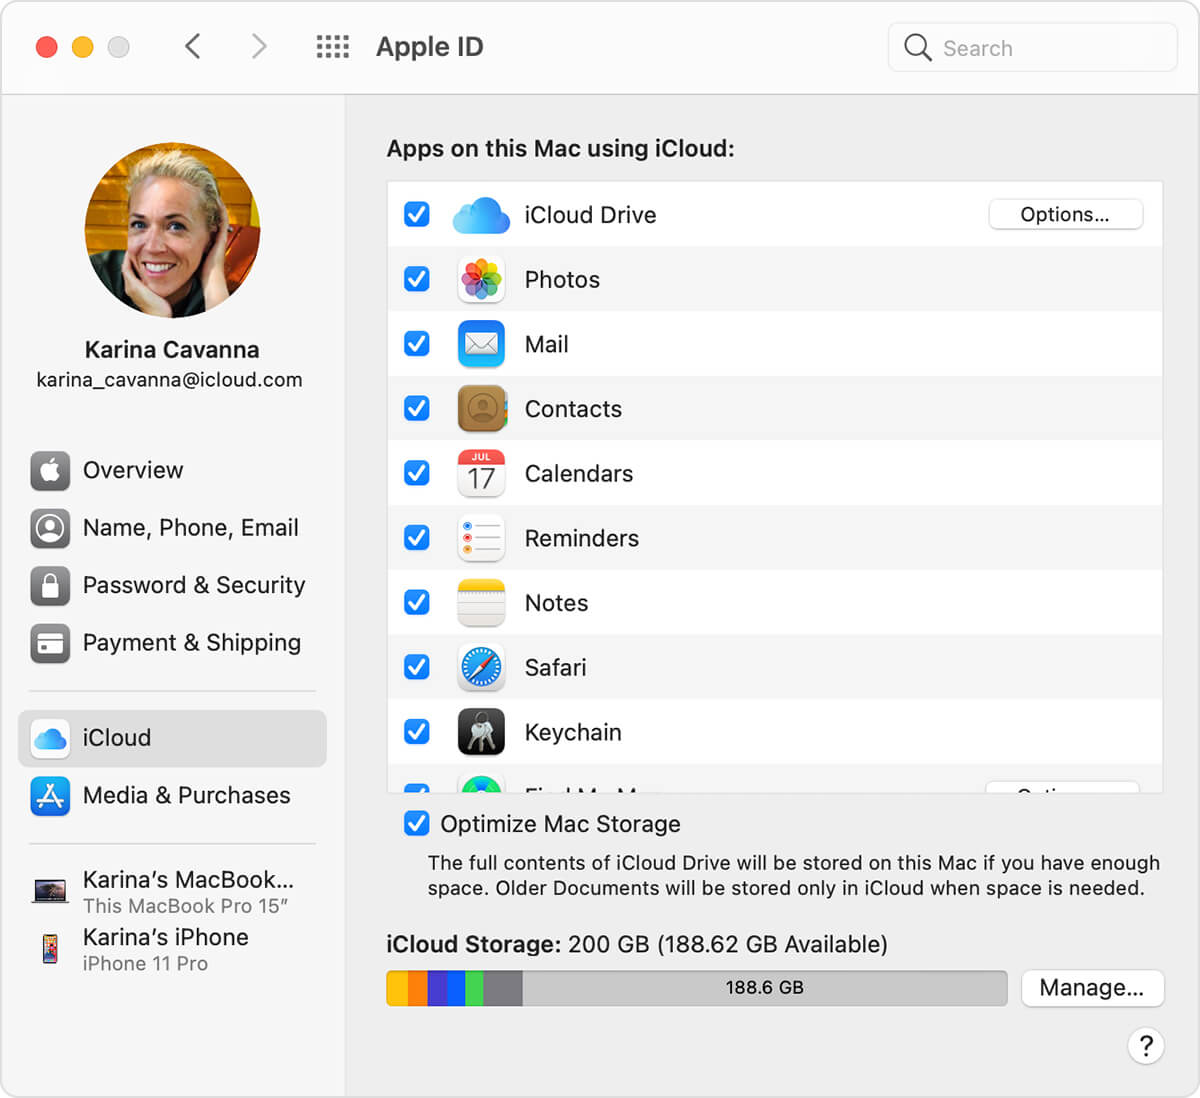
From here, you can choose which apps use iCloud to backup data. Uncheck the boxes for all apps you don’t want to backup data for. Then, select optimize Mac storage.
5. Close Unnecessary Processes in Utilities
You may have noticed that when you use multiple apps simultaneously, your computer slows down and starts glitching. The same is true of background processes.
You can see which processes your computer is running by checking your activity monitor. To find it, select go on the macOS bar, select utilities, and click activity monitor.
Take a look at the column labeled “CPU” (CPU stands for “Central Processing Unit”). The higher the “% CPU” figure, the more processing power a function uses. The “user” section is also important here, as you want to focus on processes you initiated (so ignore macOS-related tasks from “root,” “_hidd,” and “locationd” if you see them).
Work your way down the list and close any unnecessary processes that use more than 5% of your CPU time.
6. Clear Your Cache And Empty Your Trash
Your computer creates cache files to load apps and programs quickly for you. However, if you don’t clear your cache occasionally, those piles can stack up and slow your computer down.
There are three types of caches:
- Browser caches (which we covered in “Slow Browser”)
- System caches
- User caches
As you can’t clear all system caches without preventing some apps from working, we recommend only clearing your user cache. Here’s how:
- Select go from your Apple menu.
- Press go to folder.
- Type in “~/Library/Caches.”
- Click the folders one by one and delete their contents (don’t delete the folders).
Once you’ve cleared your cache, remove the files from your computer by taking out the trash. You can do this by clicking the bin icon in your taskbar and selecting empty trash (or press command, shift, and delete). This process should work fairly well in order to speed up a Mac.
7. Stop FileVault 2 From Encrypting Files
FileVault 2 is a cybersecurity feature that encrypts your computer data so that any bad actors that access your computer can’t read it. FileVault is extremely handy, but it also uses a lot of processing time and may slow your computer down.
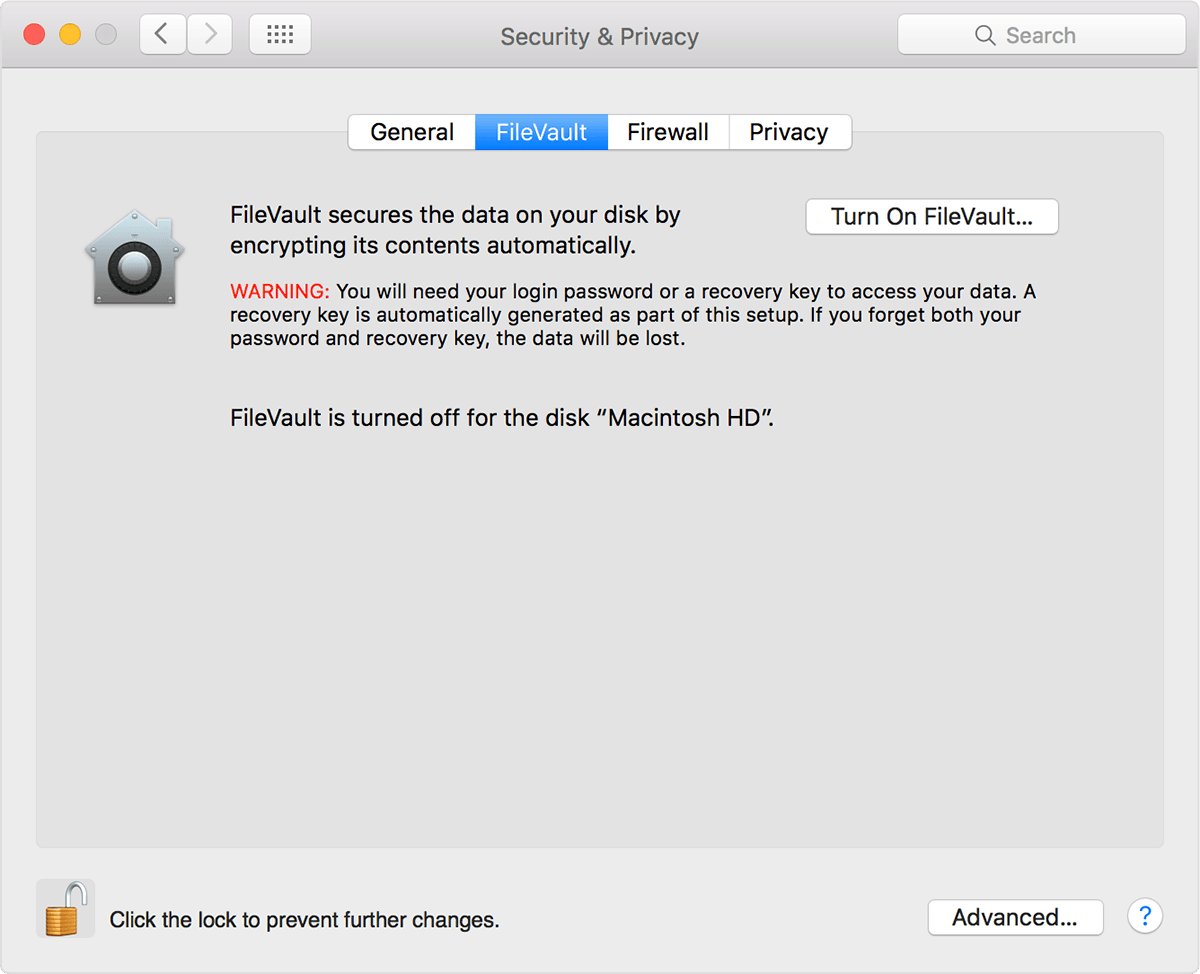
Here’s how to turn it off:
- Go to system preferences.
- Click security and privacy.
- Select FileVault.
- Click the lock icon and type your administrator information.
- Press turn off FileVault. Here’s what FileVault will look like once you have successfully turned it off:
If turning off FileVault makes you nervous, you can improve your knowledge of cloud cybersecurity.
8. Change Your Start-Up Preferences
Are you one of those people that rarely restarts their computer because you don’t want to go through the process of closing all the apps that pop up on start-up? This tip is for you.
You can change your start-up preferences so only your favorite apps open when you start your Mac. As you might imagine, this will reduce your background processes, so your Mac runs faster.
To change your start-up preferences, select system preferences and click users and groups. Then, click your user profile and select login items. This will show you a shortlist of apps that boot up when you start your computer.
Simply remove apps from this list by clicking the minus symbol.
This strategy is usually very effective, but some apps are sneaky. Try these steps if you have an app that still boots upon start-up:
- Click go and press the option key.
- Click library.
- Scroll down until you find “LaunchAgents” and “LaunchDaemons.”
- Open both folders and delete the files associated with the problem apps.
9. Uninstall Zombie Apps
As the name suggests, zombie apps are programs that are dead to you (meaning you don’t use them or have forgotten about them).
There are two ways to get rid of zombie apps: Launchpad and Finder.
Let’s start with Launchpad. Open Launchpad in your dock and scroll until you spot a zombie app. Press the option key until the apps dance, then delete the app. Rinse and repeat until your Mac is zombie-free.
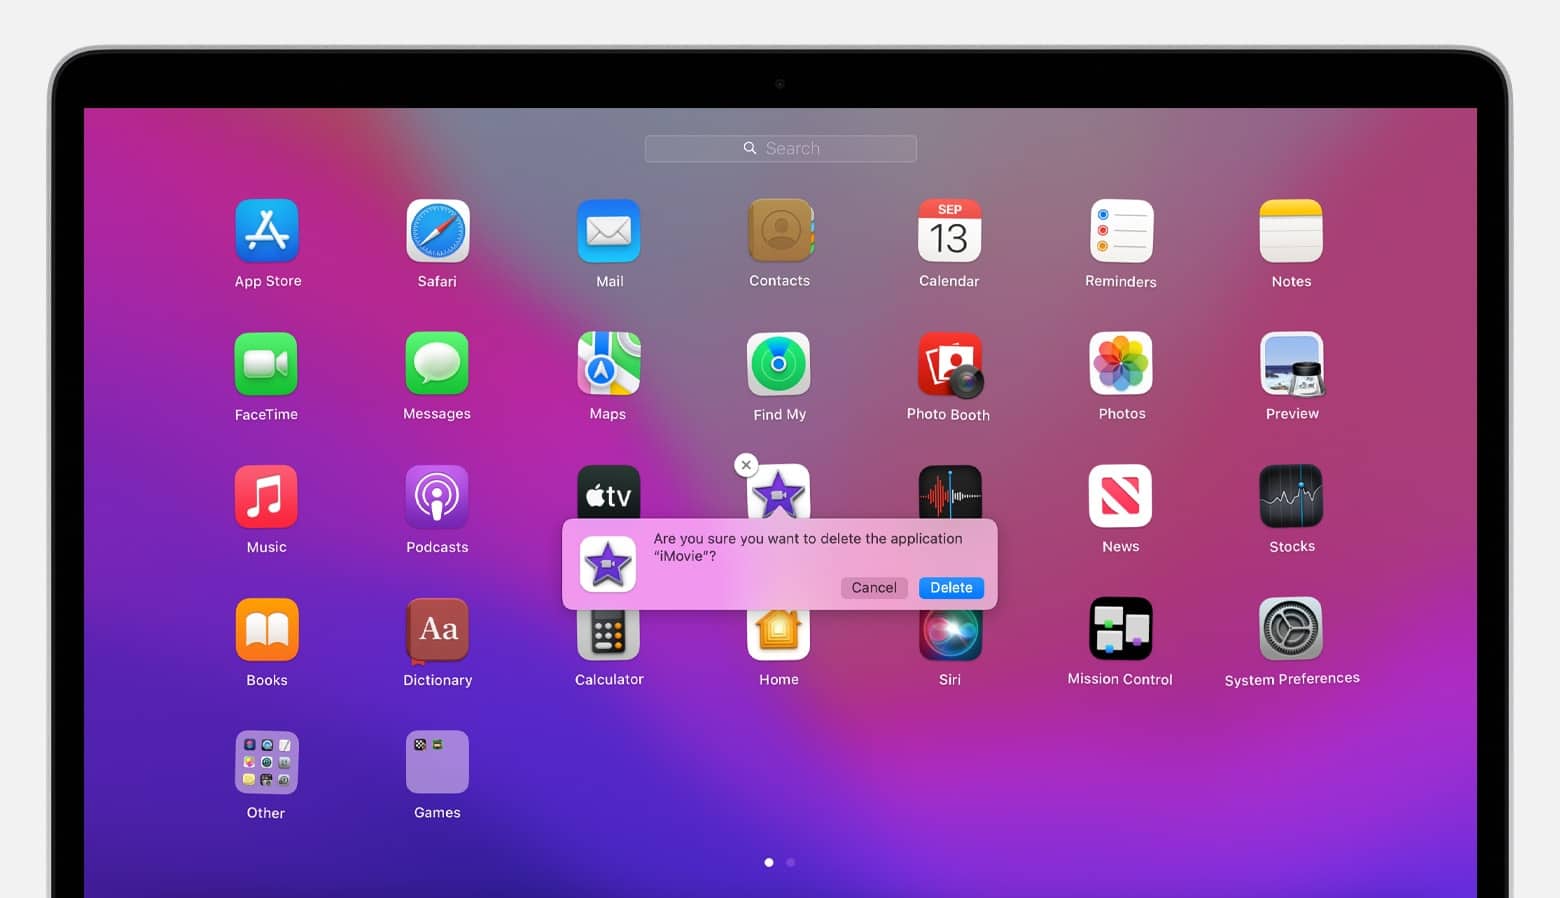
Alternatively, you can select Finder and hunt for apps in the applications folder. Once you locate a zombie app, move it into the trash. As you might imagine, you’ll need to take the trash out to delete the app entirely.
10. Move Files Onto an External Hard Drive
We’ve already touched on cleaning out old files in this article, so we’ll keep this tip brief. You can clear out storage space and increase computer speed by moving large files onto an external hard drive. An external hard drive is handy because you can keep these files without storing them on your Mac (or pay per month to host them in the cloud).
The best files to move onto a hard drive are the large ones, like:
- Podcasts
- Music
- Videos
- Photos
- Old mail files
If you have a lot of files on your WordPress site, you can also increase your disk space with an add-on and store them there.
11. Reindex Spotlight
Did your computer slow down immediately after you installed a new update? Try reindexing Spotlight.
Spotlight is a search tool that helps you navigate your Mac easily. Spotlight indexes when you update your Mac. Unfortunately, this process can sometimes get stuck and slow your computer down for several hours at a time.
You can reindex Spotlight by going to system preferences and clicking spotlight. Then, select privacy. You should see a screen like this with your data:
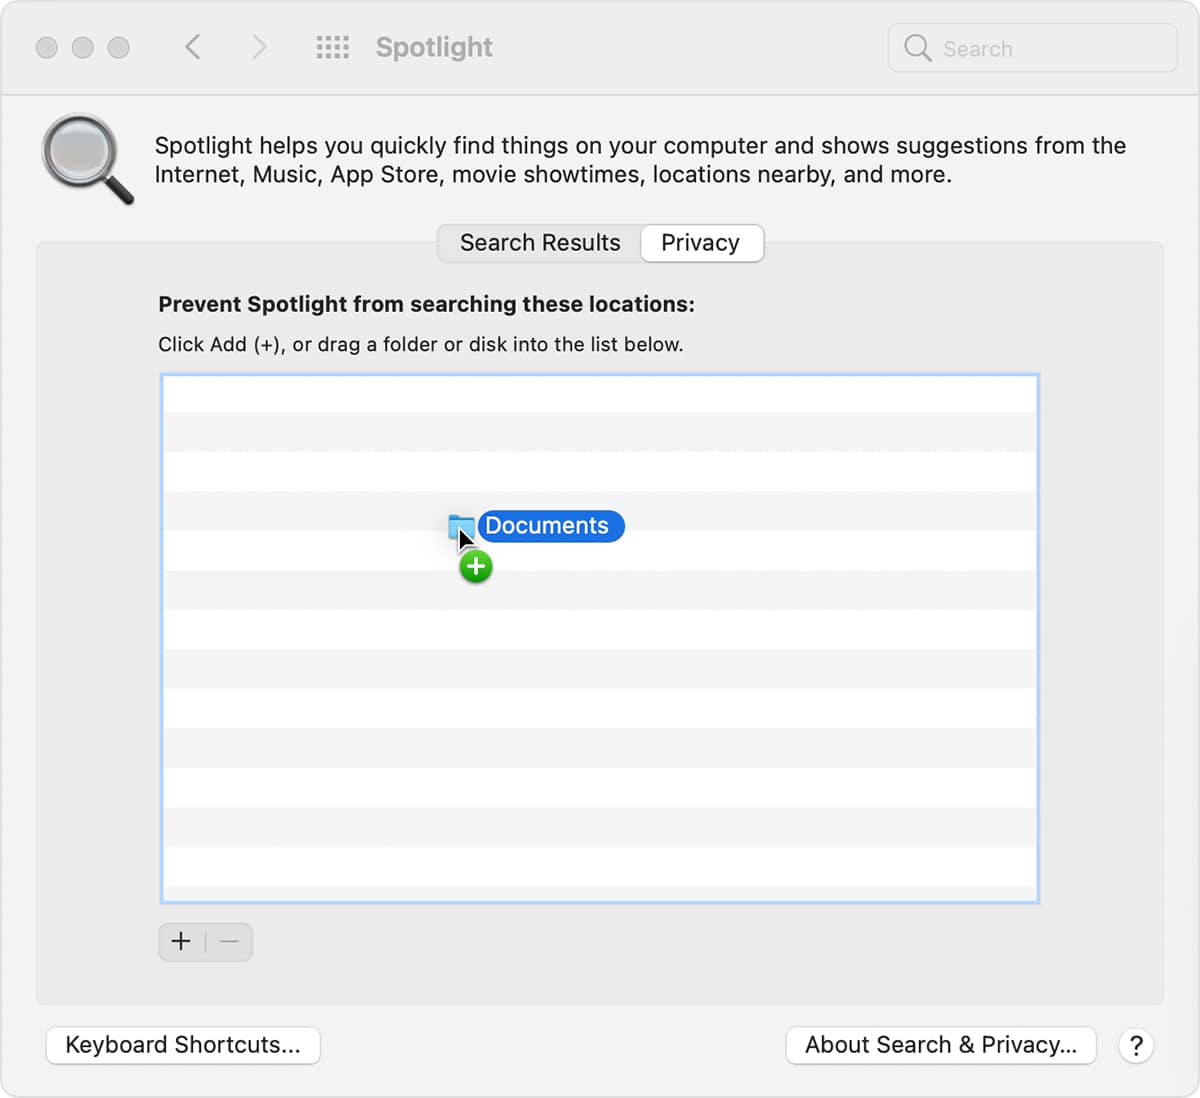
Select your hard drive and click the minus button. Then, use the plus button to add your files back in. Spotlight will start reindexing (though this could take a while, depending on how much you store on your drive).
12. Reset PRAM and SMC
If your Mac is slow and you’ve noticed other glitches, resetting Parameter Random Access Memory (PRAM) might help. PRAM stores data about your settings and system (like your keyboard lighting and volume settings).
The first step in resetting your PRAM is to shut down your computer. Then, push the power button and immediately press the command, option, and p keys. Hold these down until your computer begins restarting. This part could take a few seconds, so be patient.
Reset your System Management Controller (SMC) on your Mac’s motherboard if this doesn’t work. SMC is in charge of features like Wi-Fi and USB connections.
The method for resetting SMC changes with the type of Mac you have. Start by removing the power cord and shutting down your Mac, then:
- Remove the battery, hold the power button down, and replace the battery (for MacBooks with a removable battery).
- Hold down the shift, control, and option keys for at least ten seconds (for MacBooks with a non-removable battery).
- Wait at least 20 seconds(for iMacs, MacBook Pros, and Mac Minis).
13. Reinstall macOS
If your computer has been sluggish for a while and nothing else has worked, it’s time to try reinstalling macOS.
First, you’ll need to backup all your files with cloud-based storage or an external hard drive. Then, select utilities and click macOS utilities. From this menu, select reinstall macOS and follow the prompts.
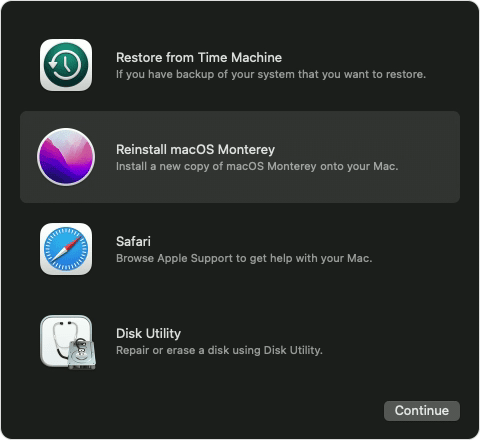
Keep in mind that it could take several hours to complete the process.
14. Upgrade RAM
This tip is best for people whose computers are slow because they consistently use most of their RAM running their everyday programs. Upgrading your RAM can also help if you have less than 4 GB of RAM.
This step is near the bottom because you’ll need to purchase additional RAM from a local technology store. Then, you can ask a professional to replace the RAM for you, or you can follow the introductions for MacBook Pro’s here or iMac’s here.
15. Get an SSD
Finally, you could try switching your Mac’s Hard Disk Drive (HDD) for a Solid State Drive (SSD) to improve your storage and make your computer process information faster.
Without diving into too much detail, an SSD is slightly different from an HDD because it is smaller, more powerful, more energy-efficient, and more heat-resistant. SSDs store your data on NAND flash-memory chips (which, interestingly, work with and without power).
Here’s what an SSD looks like:
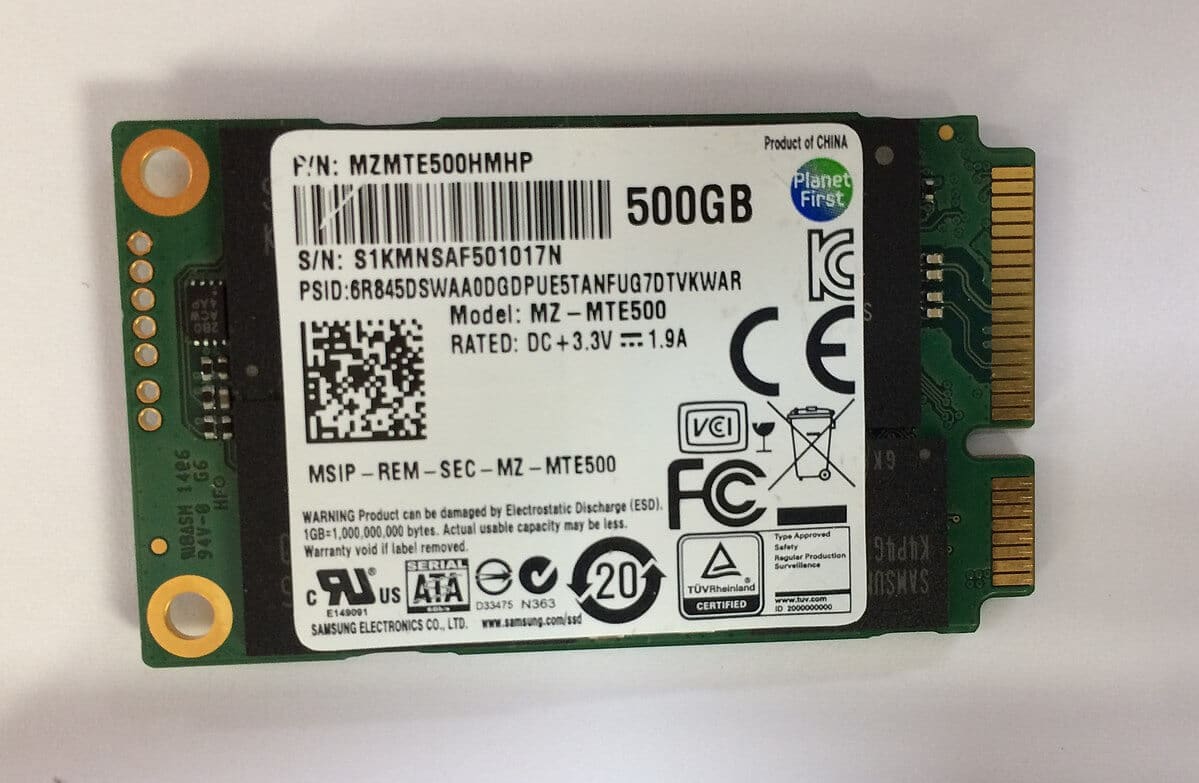
Again, you’ll need to purchase an SSD drive from a local technology retailer and install it within your computer. SSD drives can be pretty expensive, so make sure you research suitable options for your Mac carefully before investing.
Recent MacBooks (from 2013) all ship with an SSD, so this tip will only work for a model that is almost 10 years old (in which case, upgrading to a new version may be a better choice).
Summary
A slow Mac is more than just an inconvenience. A slow computer can hinder your workflow and increase frustration, ultimately zapping your creativity and concentration.
However, there are some solutions. Try these tips to increase Mac speed:
- Update your macOS
- Turn off visual effects, iCloud syncing, and file vault encryption
- Delete unused apps and old files
- Change your start-up preferences
Or, if these don’t work, try more complex solutions like reindexing Spotlight, resetting PRAM and SMC, reinstalling macOS, upgrading your RAM, or switching to an SSD.
If you have any expert tips that will help speed up a Mac (or a story about a slow computer and how you fixed it), we’d love to hear from you. Please share your thoughts in the comments below.