
Errors are one of the most frustrating aspects of running a WordPress site. Some problems like HTTP Error 407 can make your content inaccessible, leading to a drop in sales or conversions.
Luckily, there are some easy steps you can take to resolve this issue, plus tools to help you debug your site. By identifying the root cause of the problem, you can implement the right fix and hopefully prevent it from happening again in the future.
In this article, we’ll take a closer look at the HTTP 407 error and its causes. Then, we’ll show you how to fix it on the client side and server side. Let’s get started!
Check Out Our Video Guide To Fixing HTTP Error 407 “Proxy Authentication Required”
What Does “407 Proxy Authentication Required” Mean?
The “407 Proxy Authentication Required” error occurs when the server is unable to complete a request. This happens due to a lack of authentication credentials when a proxy server is used between the client and server. Essentially, the proxy is unable to authenticate the client.
Since there are multiple parties involved, it can be tricky to identify the exact cause of the problem. It may even be caused by the proxy itself, meaning there is no fix on your end.
However, there are some things that you can do to try to resolve the communication with the proxy.
Note that this problem may also be related to the generic 400 Bad Request error.
What Causes the HTTP Error 407?
HTTP errors happen when a client requests to connect to a server and fails. Anytime a web browser attempts to access an online server through the HTTP protocol, there is a conversation between the client and server. HTTP codes are used to handle that conversation, sending success and failure messages back and forth.
HTTP error 407 is similar to error 401, which occurs due to unauthorized access. The only difference is that error 407 fails authentication with a proxy rather than a direct server connection.
Client authentication is part of the process of establishing a secure connection. One component of this communication is the exchange of a digital certificate. This certificate may be tied to the digital ID of a person, company, program, or individual machine. Servers can approve or deny requests based on the data within a digital certificate and grant or withhold access to connect.
In many cases, a simple connection delay, typo, or code contradiction can lead to a digital ID being misunderstood and rejected. Alternatively, you might not have access to the server.
How To Fix the “407 Proxy Authentication Required” Error
Since there are three different parties involved, you may need to try a few different solutions to resolve HTTP error 407. You may have access to the client and server, but the proxy is likely out of your control.
Hopefully, you’re using an Application Performance Monitoring (APM) software that caught the error before it became a larger problem. There are several powerful APM tools that can help you identify and resolve errors on your site, including our Kinsta APM tool. You can access this from the MyKinsta dashboard.
Now, let’s look at how to identify the cause of HTTP error 407 and resolve the issue. As always, it’s a good idea to perform a backup before making changes to your site.
Fixing a Client-Side Issue
Checking for client-side issues is probably the quickest and easiest place to start. To rule out any oddities, you can try to connect from a different browser or device. For instance, if you get a 407 error on your computer but not your phone, there may be an issue with the device’s digital ID or security program.
If you’ve made changes to your site recently, you may want to undo them and test the connection again. Otherwise, if you have reason to believe it could be a client-side issue, you can try the following steps.
Step 1: Check the URL
First, you’ll want to make sure that you’re entering the correct URL. This may sound silly, but a minor typo can lead to the HTTP 407 error. Therefore, you’ll want to double-check the URL, clear your cache, and try revisiting the website.
Better yet, try using a search engine to pull up the page you’re looking for, rather than typing in the URL directly. If you’re still receiving an authentication error, there is likely an issue on the back end.
Step 2: Deactivate Your Plugins
If you’ve recently made any changes that seem to coincide with the error, that is a good lead to pursue. If the error is happening on your own website, you might want to take a look at any recent plugins, themes, or extensions you have added or updated.
If you’re still able to access your dashboard, go to the Plugins page and deactivate all of your plugins:
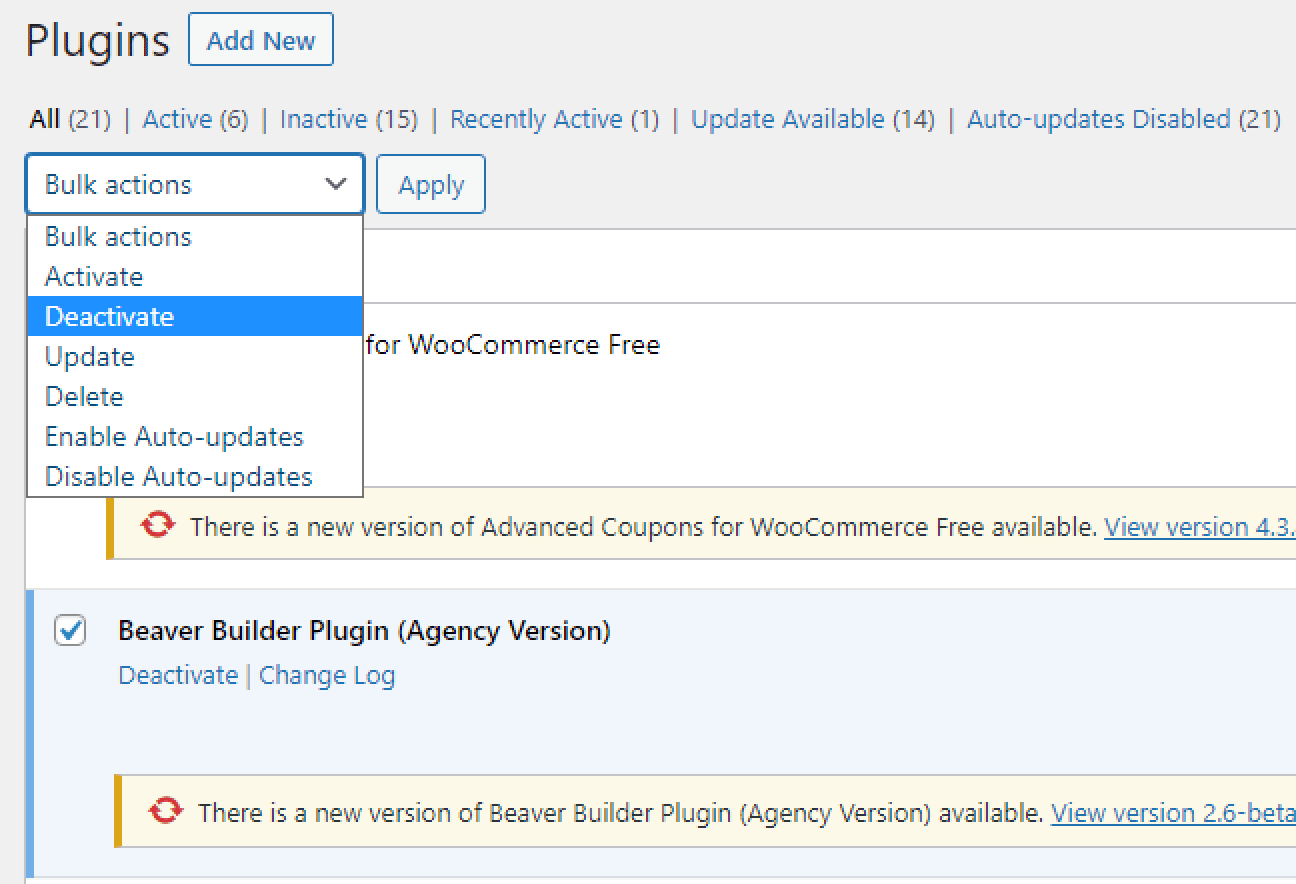
Then, try to connect to the site again to see if the error persists. If not, you may have found the source of the problem.
Now, reactive your plugins one at a time and keep refreshing the page. If HTTP error 407 only occurs when a certain plugin is active, there may be some issue with the coding that is preventing you from accessing the proxy server.
If you’re unable to access the WordPress dashboard, you’ll need to connect to your site via a File Transfer Protocol (FTP) client like FileZilla. Once you enter your credentials and connect to your site, navigate to public_html > wp-content and locate the plugins folder.
Then, right-click on the folder and select Rename:
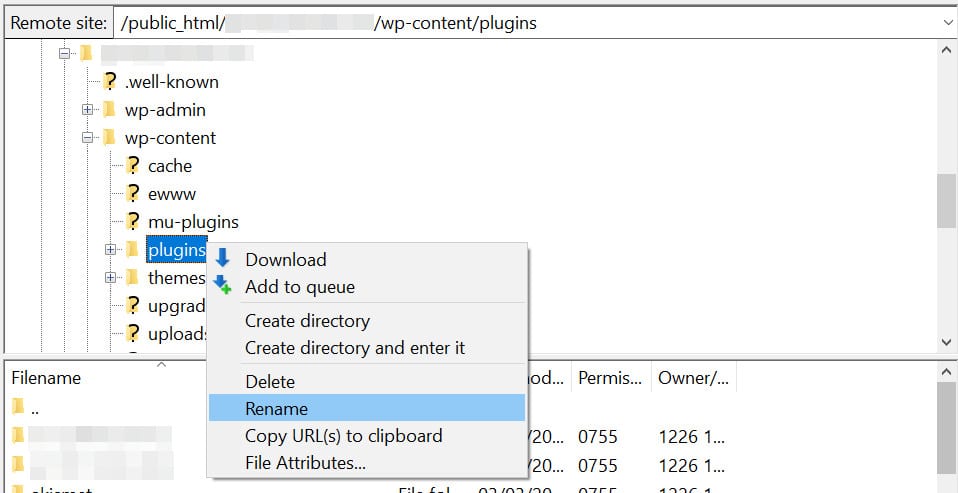
By renaming this folder, you’ll automatically deactivate all plugins on your site. Now, check to see if the error has disappeared. If it has, you can rename the folder back to plugins and log into your WordPress dashboard to reactive your plugins one by one until you find the culprit.
You might want to check to see if there is an update available for the glitchy plugin, as this may resolve the issue. If not, consider reaching out to the developer to see if they’re aware of the problem and if they’re working on a solution.
Step 3: Review and Roll Back Recent Changes
If you can’t find any issues on the client-side that could be causing the problem, the last thing you can do before moving on is to run a restoration. If you can revert the site to a previous instance before the error cropped up, this will determine if the problem was caused by a recent change or an external source.
If possible, run a backup before rolling back so you can return to the current version if the error persists. Otherwise, you may revert back and still encounter the problem, then have to redo your work to return your site to its previous state.
If the error no longer occurs after restoring a backup, this may indicate that a recent modification to your site is causing the issue. If you can think of any likely culprits, you can try testing them first. Otherwise, you’ll need to redo any updates incrementally and check to see if the error returns as a result of a specific change.
Fixing a Server-Side Issue
If none of the above steps resolved HTTP error 407, you may be dealing with a server-side issue. If you have other sites on your server, you can check to see if they are experiencing the same error. This will help confirm if the error is present on a particular site only or if it’s originating on the server.
Let’s look at a few troubleshooting steps to help you resolve error 407 on the server side.
Step 1: Review Error Logs
Error logs record activity on your website and server, including any errors that occur. These logs can show you which connection requests are successful and which are failing.
To access your error logs, open your site’s root folder from your FTP. Then, select the logs folder. Here, you’ll see two options: nginx and php. These folders contain error logs that you can view:
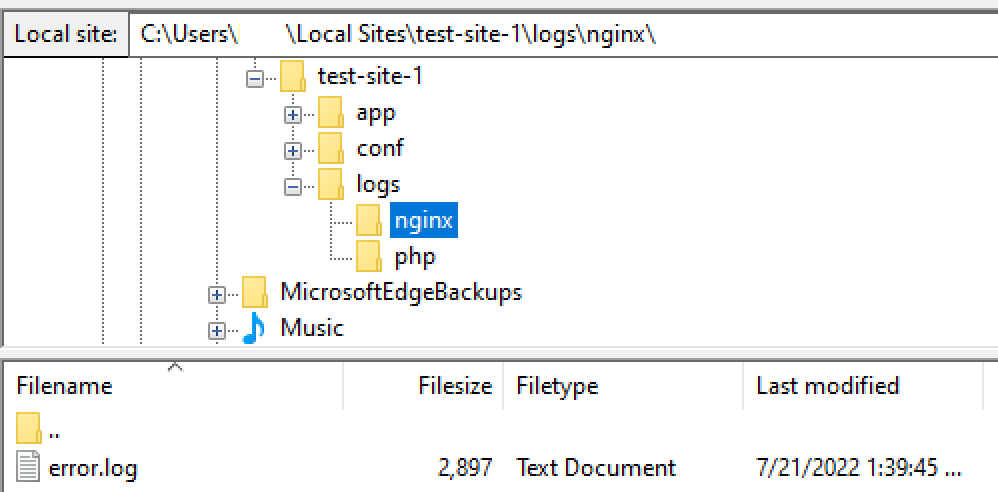
Nginx handles serving, proxying, and caching. Note that if your host uses a different server, the name of this file will be different. Meanwhile, PHP is the scripting language that WordPress runs on. If you search either log for error 407, it may shed some light on why it’s happening and when it started.
Step 2: Check Server Config Files
A common cause for a proxy authentication error is an unexpected redirect. This may look suspicious to a proxy server, causing it to deny access. Therefore, you’ll want to check your web server’s configuration files to see if there are any unintentional redirect instructions.
You can do this by checking the .htaccess file. Using an FTP client, go to your website’s root folder and click on the app folder. Then, select public and you should see the .htaccess file:
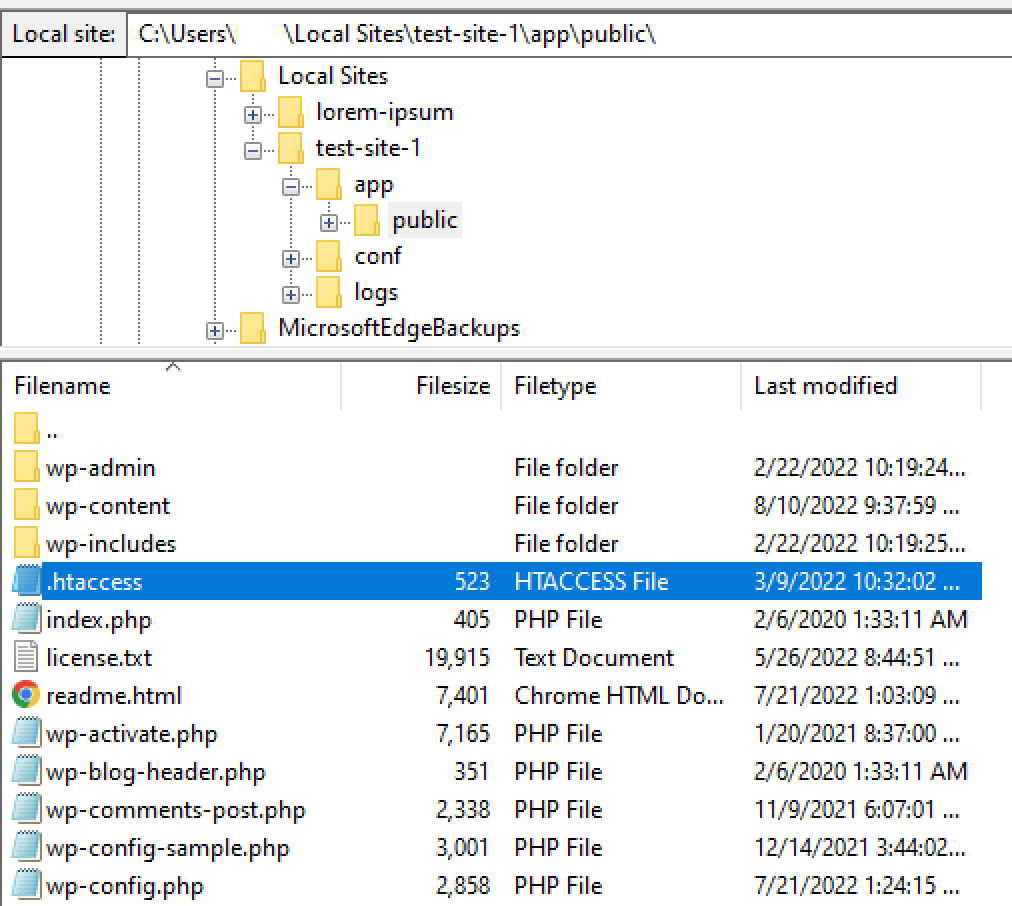
Open this file and look for any lines of code that include the term “redirect” or are rewriting URLs. If any of these look suspicious or unnecessary, consider removing them (you may want to make a copy of the file first). Then, check to see if error 407 is still present when you try visiting your site.
Since this code is probably in your .htaccess file for a reason, removing it may cause aspects of your site to stop functioning. However, if this code is the cause of HTTP error 407, you will need to address it. We recommend contacting your hosting provider for assistance.
Step 3: Debug App or Scripts
One last thing you can try is debugging your site. If you’ve recently added custom code or new plugins, there’s a chance that a simple bug could be causing authentication issues. The free Query Monitor can help you comb through the code to look for anything suspicious.
Before you get started, we recommend that you clone your site to a staging environment. This can be easily done using DevKinsta. Then, you can safely try to isolate the events that are triggering error 407.
If you need a little help, you can enable WordPress debugging to get a better look at what is going on. You can also turn on the WordPress debug log to track bugs for you to review later.
Summary
HTTP Error 407 usually happens when the server is unable to complete a request as the client lacks proper authentication credentials for a proxy server. Since this error can prevent users from accessing your site, you’ll want to fix it straight away.
If the problem occurs on the client side, you can try deactivating your plugins and rolling back recent changes to resolve the issue. If it happens on the server side, you’ll need to check your server configuration files, review your application logs, and debug your apps or scripts.
Either way, the simple fixes above should clear the HTTP error 407, and you will be able to move forward.


