
Managing database schema changes across WordPress environments is often an error-prone and time-consuming task. A single misplaced SQL query or forgotten database modification is a site-breaking action during deployment. Furthermore, actions such as manual SQL scripts and direct edits lack version control, audit trails, and coordination across environments.
Using Roots’ Radicle (specifically Acorn) is one solution, as it brings Laravel migrations into WordPress. You get version-controlled database changes that deploy alongside your code, automatic tracking of which changes have run, and the ability to roll back schema modifications when needed.
When you combine this with Kinsta’s infrastructure and tools, you get a way to automate migration execution during deployments.
Why WordPress database changes need version control
Manual database modifications treat schema changes as one-off operations rather than versioned code. For example, you run an SQL query to add a custom table, execute an ALTER TABLE statement to add columns, or rely on plugin activation hooks to handle updates. These solutions initially work, but they break down when you manage multiple environments or work with a team.
Staging environments often start to diverge from local ones once you forget to document smaller changes (such as adding a column to the local database), which also causes production deployments to fail. This also means there is a lack of an audit trail.
Laravel migrations are a good way to eliminate these coordination failures as they treat database changes as versioned code that lives in your Git repository. This deploys with your application and executes in the same order across every environment.
How Laravel migrations work in WordPress with Acorn
Laravel migrations are PHP files that define database schema changes through two methods: up() applies the changes and down() reverses them. Each migration file gets a timestamp prefix that determines the execution order. Roots’ Acorn brings this migration system (and more) to WordPress without requiring a full Laravel installation.
The migration system tracks which changes have run using a migrations table in your WordPress database. When you execute wp acorn migrate, Acorn carries out a few tasks:
- Checks the table to identify pending migrations.
- Runs tables in chronological order based on the timestamps.
- Records each successful migration.
This tracking prevents migrations from running multiple times and shows you exactly which schema changes have applied to any environment.
Acorn integrates Laravel’s schema builder, which provides a fluent PHP syntax for creating and modifying database tables. Instead of writing raw SQL, you use methods such as $table->string('key')->unique() or $table->json('value')->nullable(). This approach offers database-agnostic syntax, type safety, and more readable code than SQL statements with concatenated strings.
Creating and running your first migration
You create migrations through WP-CLI:
wp acorn make:migration create_app_settings_tableThis generates a new migration file in the database/migrations/ directory with the current timestamp and your specified name:
<?php
use Illuminate\Database\Migrations\Migration;
use Illuminate\Database\Schema\Blueprint;
use Illuminate\Support\Facades\Schema;

return new class extends Migration
{
    public function up(): void
    {
        Schema::create('app_settings', function (Blueprint $table) {
            $table->id();
            $table->string('key')->unique();
            $table->json('value')->nullable();
            $table->string('group')->default('general');
            $table->boolean('is_public')->default(false);
            $table->text('description')->nullable();
            $table->timestamps();
            $table->index('group');
            $table->index('is_public');
        });
    }

    public function down(): void
    {
        Schema::dropIfExists('app_settings');
    }
};
The up() method creates the table with columns for storing key-value pairs, grouping settings, and tracking when entries were created or modified. The indexes on group and is_public improve query performance. The down() method removes the table completely, which lets you reverse the migration.
You execute pending migrations with the wp acorn migrate command. This runs all migrations that haven’t executed yet, creates tables, and modifies your database schema. You check which migrations have run with the wp acorn migrate:status command. The status output shows each migration file with indicators for whether it has run.
When you need to reverse the last batch of migrations you use the wp acorn migrate:rollback command. This executes the down() method for each migration in the last batch to undo the changes.
Verifying migrations with Database Studio
After running migrations, Kinsta’s Database Studio (or any other database tool) lets you verify that the expected tables and columns exist with the correct structure. You access Database Studio through the MyKinsta dashboard by navigating to any site and clicking the Database tab:
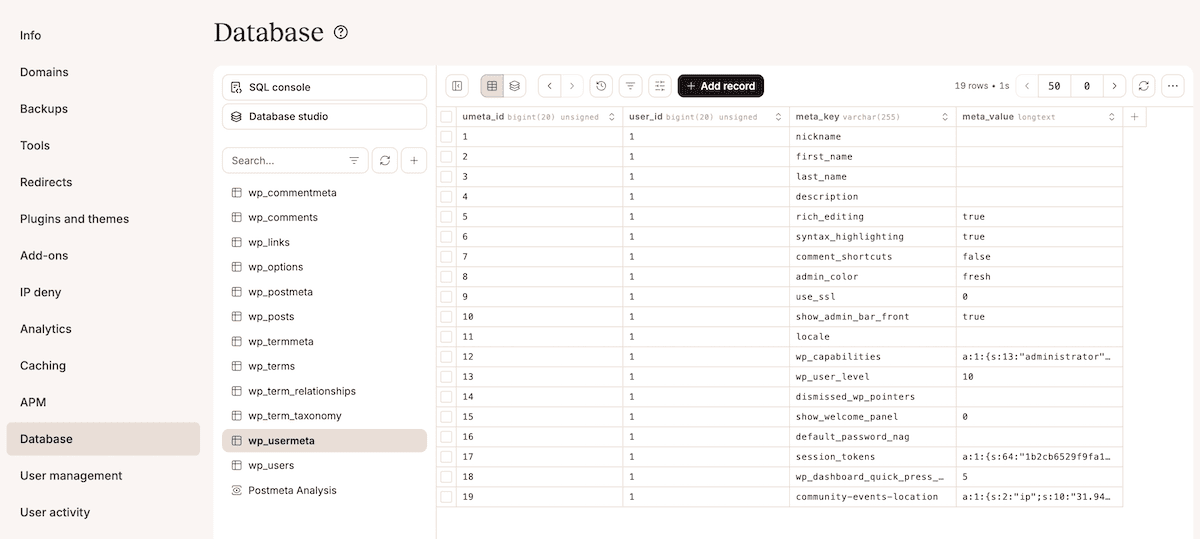
The included SQL Console lets you run verification queries to confirm your migrations have created the expected structure.
After creating the app_settings table, the DESCRIBE app_settings; query lets you verify the columns. This returns the table structure showing column names, types, and indexes. Another query: SELECT * FROM app_settings;, lets you test that the table accepts insertions.
Filtering allows you to examine specific records or columns without writing SQL queries. Here, you click column headers to sort, apply filters to narrow results, and export your data:
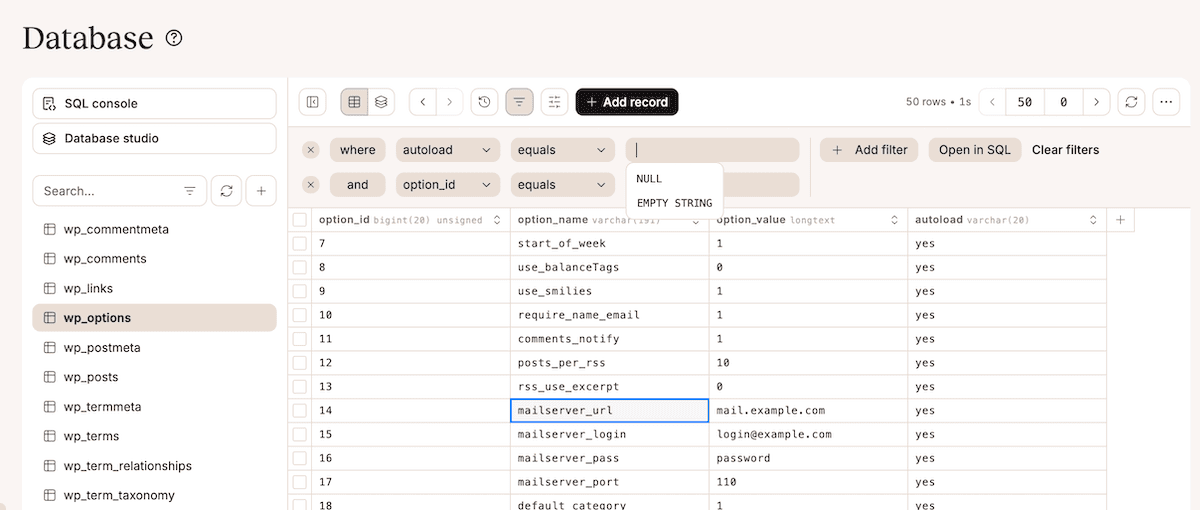
These export options are useful before testing rollback procedures.
Running migrations with SSH and WP-CLI on Kinsta
Kinsta includes SSH access and WP-CLI across all plans. This means you run migration commands directly on your staging and production environments without any additional setup.
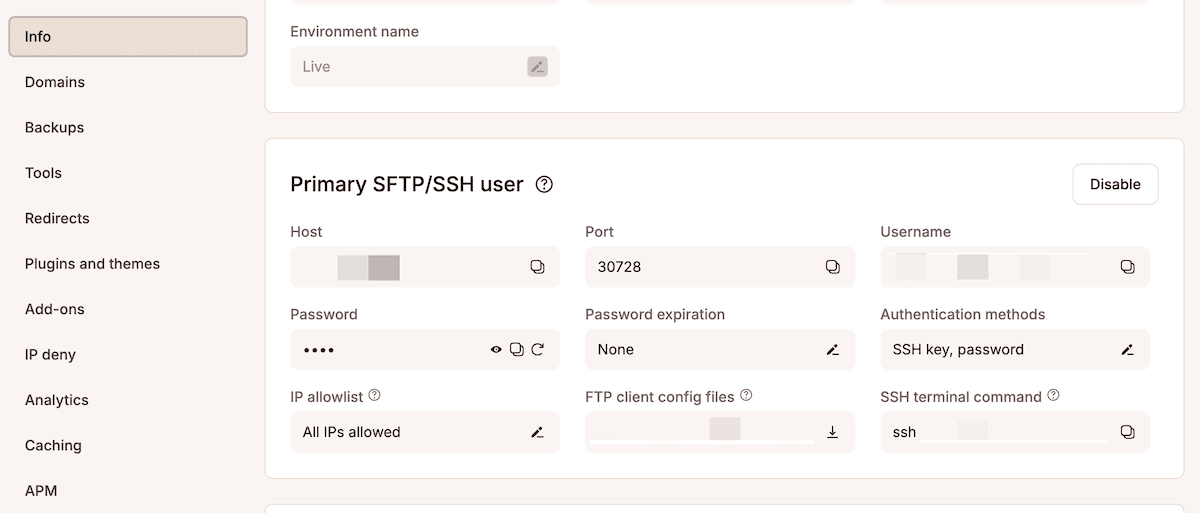
To run migrations on a Kinsta environment, first connect to it using SSH. The credentials are on the Info screen for any site within MyKinsta:
After you connect and authenticate, navigate to your site’s document root. For Radicle sites, this is the public directory. Next, you execute wp acorn migrate.
The migration process displays output showing which migrations are running and the completion status of each. This also works on staging and production environments because Acorn tracks migrations independently in each environment’s database.
Testing migrations in Kinsta staging environments
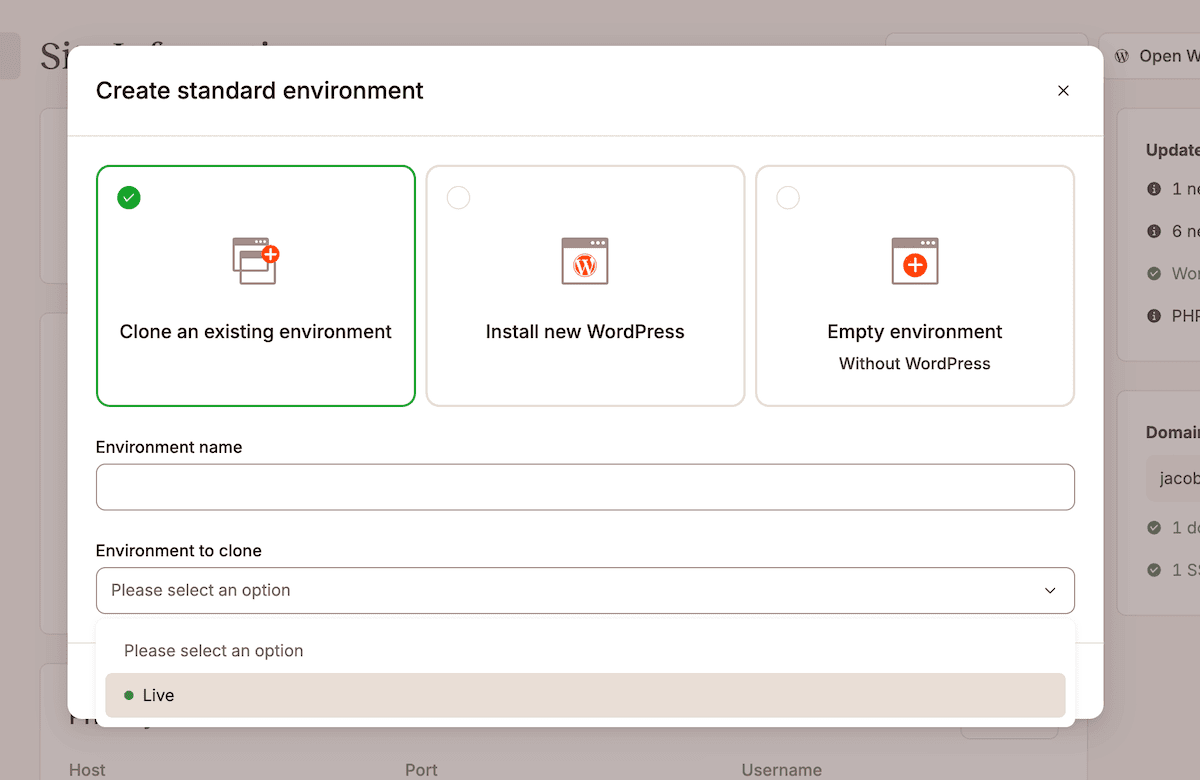
Kinsta’s staging environments are a safe space to test migrations before deploying to production, but you need a dependable workflow in order to test them. Once you’ve verified the migration changes within Database Studio, look to test rollback to ensure the down() method works correctly.
To do this, switch to your staging environment in MyKinsta, navigate to the Database tab, and inspect the tables that your migrations created or modified.
If you discover issues during staging tests, the wp acorn migrate:rollback command lets you revert the last batch of migrations and make corrections without affecting production. You can then modify your migration files, commit the changes, deploy to staging again, and retest.
Kinsta’s selective push lets you deploy only the changes you’ve tested, so you can choose to push just your files to production, or push both the files and database:
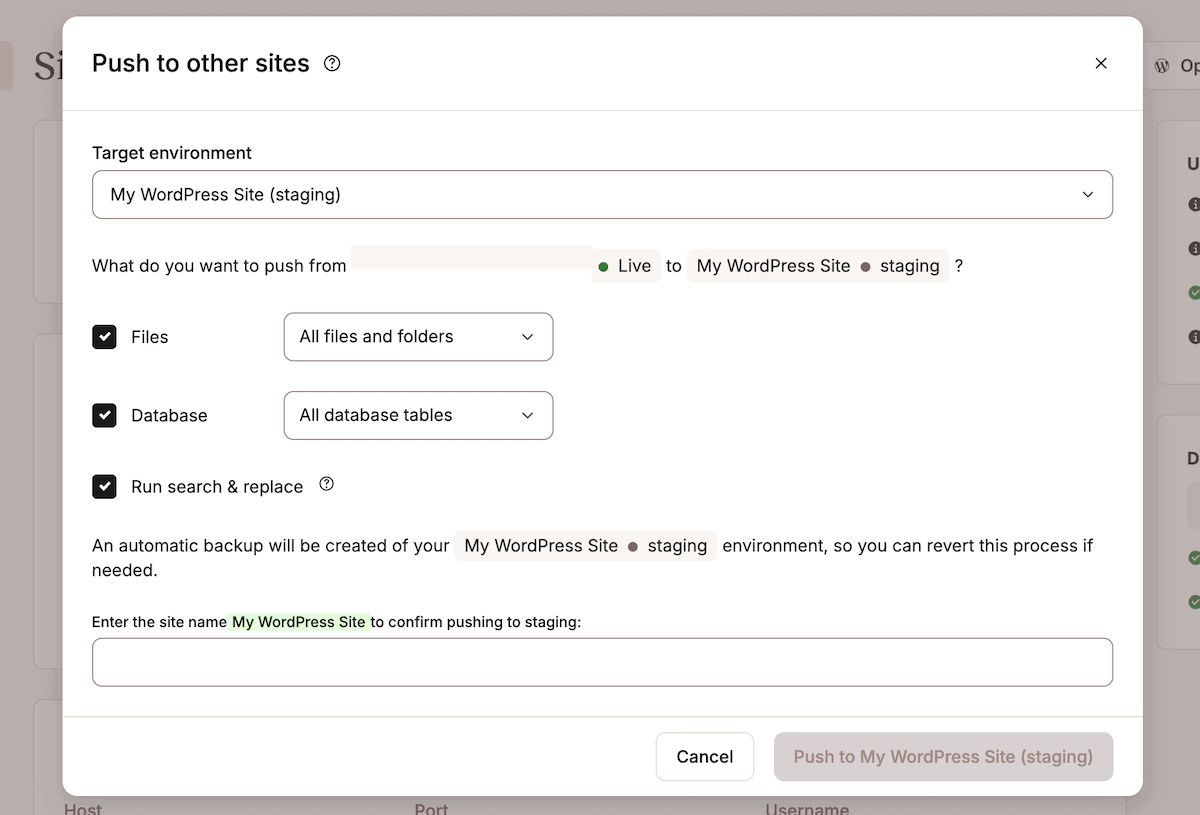
For migration workflows, you typically push only files because migrations run on the existing production database rather than overwriting it with staging data.
Deployment workflow with automated migrations
Automated migration workflows run database schema changes when code deploys, which eliminates manual steps and reduces deployment errors. You achieve this by adding migration commands to your deployment process, whether that’s manual SSH scripts, GitHub Actions automation, or tools such as Roots’ Trellis.
For manual deployments using SSH, connect to your production environment and navigate to the document root. Next, run these commands in sequence:
git pull origin main
composer install --no-dev
npm install && npm run build
wp acorn optimize
wp acorn migrate --force
The --force flag tells Acorn to run migrations without confirmation prompts, which is essential for automated deployments where you can’t interact with the terminal. Running this command after wp acorn optimize ensures the application cache is fresh before migrations run.
If you use GitHub Actions for continuous deployment, you automate migrations in your workflow file. Radicle includes a .github/workflows/deploy.yml configuration that you modify to include a migration step after the build process:
- name: Run migrations
  run: |
    ssh user@host -p port 'cd /path/to/site && wp acorn migrate --force'
The deployment workflow connects via SSH, navigates to your site directory, and runs the migration command.
For deployments using Trellis, migrations integrate into the deployment hooks. You include the following through modifying deploy-hooks/finalize-after.yml:
- name: Run Acorn migrations
  command: wp acorn migrate --force
  args:
    chdir: "{{ deploy_helper.new_release_path }}"
This runs migrations after Trellis completes other deployment tasks. The migrations execute in the new release directory, and Trellis handles rollback if the deployment fails.
Version controlling migration files with Git
Migration files live in the database/migrations/ directory within your Radicle project structure. This directory is part of your Git repo, which means migrations travel with your code through version control. The workflow mirrors standard development: create migrations locally, commit them to a feature branch, and merge to main after testing.
The commit workflow for migrations follows a consistent pattern:
git add database/migrations/2025_01_03_140000_create_app_settings_table.php
git commit -m "Add app_settings table migration"
git push origin feature-branch
Once you review the migration you then merge the feature branch to main. This makes the migration available for staging and production deployments.
The wp acorn migrate:status command verifies that all environments have the same migrations applied. You run this across all environments to confirm they’re in sync. If an environment shows pending migrations, this indicates it needs a deployment or manual migration run to catch up.
Rollback strategies and database backups
However, not all migrations are fully reversible. While you can simply drop a table to undo its creation, a migration that deletes data is a permanent action. Sometimes, down() can tell you why a rollback isn’t possible:
public function down(): void
{
    // This migration cannot be reversed as we're deleting data
    \Log::warning("Migration cannot be reversed - data permanently deleted");
}
It’s good to document these limitations. Kinsta’s automated backups provide a safety net, so it’s also important to create a manual backup before running a migration that might cause problems:
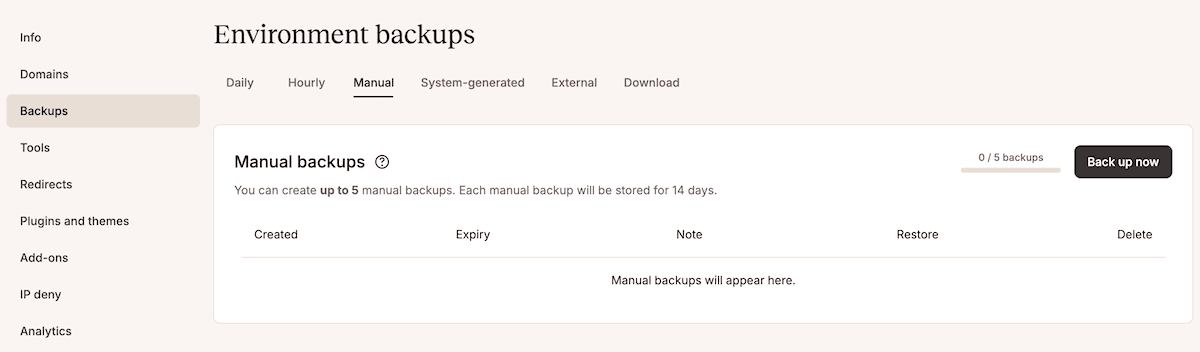
Navigate to your site, click Backups, and generate a backup with a descriptive name. If a migration causes unexpected issues in production, you restore from this backup through MyKinsta.
For migration rollbacks, you restore only the database to the production environment. The restoration completes within minutes and returns your database to the exact state captured in the backup.
Building reliable database workflows for WordPress
Laravel migrations through Radicle’s implementation of Acorn turns what is often a source of anxiety into a predictable, version-controlled process. The combination of migrations-as-code, Kinsta’s staging environments, and Database Studio for verification creates a workflow where you catch schema issues before they reach production.
As such, modern WordPress development that includes tools such as Radicle and Acorn means you don’t have to choose between WordPress’ ecosystem and professional tooling frameworks. The same pattern applies to Laravel queues, Blade templating, and custom WP-CLI commands through Acorn.
If you’re ready to adopt this workflow, the next step is to establish migration conventions, such as defining naming patterns for migration files, process documentation, and establishing testing requirements before key merges. Kinsta’s managed hosting for WordPress offers built-in developer tools to help (such as SSH access, staging environments, and Database Studio) that supports modern workflows, including Radicle and Acorn migrations.