If you picture a Venn diagram, Kinsta’s staging environments would converge with both developing for WordPress and your chosen DevOps Lifecycle. They can be a part of your workflow from the initial planning, right up to your operations phase. This includes working locally with WordPress, utilizing version control, and almost every other task you have during a cycle.
For this article, we’re going to look at developing sites alongside Kinsta’s staging environments. Throughout, we’ll link this to a typical DevOps Lifecycle. There’s a lot to get through, so let’s begin with why we think you should use the staging environments Kinsta offers.
The benefits of using Kinsta’s staging environments
Kinsta’s staging gives you versatility and flexibility when it comes to developing websites and testing them. These environments let you build in a setting that mirrors your live environment. Given that your live server will be on Kinsta, too, it’s a reliable and accurate testing ground to work from.
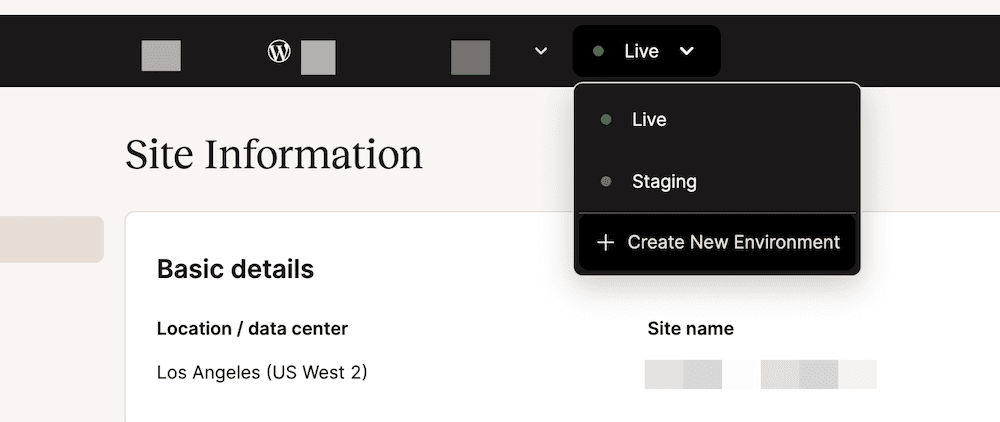
Of course, you can create, manage, clone, and delete staging environments through the MyKinsta dashboard:
If you need more flexibility, the premium staging environment add-on gives you an extra five environments. In addition, you’ll benefit from our robust infrastructure, which includes Cloudflare integration.
As you’d expect, this also comes with more power under the hood. Depending on your plan, you get up to 12 CPUs and 8GB of memory, a matched PHP thread count relative to your live site, and the option to enable Kinsta CDN for enhanced performance. It’s a setup that suits a range of tasks, such as A/B testing, plugin compatibility checks, resource-intensive tests, and much more.
For local development, DevKinsta complements the whole experience. Once you get out of your initial phases, you can push your site straight to Kinsta’s staging environments.
On the whole, you can create, build, design, test, and debug all within Kinsta’s ecosystem. What’s more, it’s suited to your DevOps Lifecycle too. We’ll discuss this in more detail soon. However, let’s first offer some extra information about Kinsta’s staging environments.
Some incidentals about Kinsta’s staging
Kinsta’s staging environments are excellent when it comes to testing a site on a live – albeit non-production – server. However, there are some differences between staging and live on Kinsta that you’ll want to be aware of:
- First, we disable both full page caching and OPcache by default. You can enable this if you wish, but without it, you’ll likely see higher page loading times.
- In the same way, site indexing is also disabled within WordPress. While you can re-enable this if you need to, one aspect you can’t turn off is our temporary URL indexing restrictive headers.
- Cron jobs also won’t run while in staging, although they are still ‘in place.’ This means you can make changes to them, which will replace the cron jobs on your live site once you push live. While in staging, though, they won’t fire.
- Also, note that your WordPress login credentials will be the same for your staging site as they are for your live one.
There’s one more aspect we want to focus on quickly before we move on to workflow: how plugins interact with staging.
Using plugins in Kinsta’s staging environments
Kinsta already bans some plugins from installation in WordPress for security and performance reasons. However, when it comes to staging, you will also want to disable some of your site’s plugins.
There are three situations you’ll want to consider this:
- If your plugin license is linked to your domain name, it may not work in your staging environment.
- Plugins such as Jetpack will switch to a staging mode on an automatic basis. You may not see any difference, although none of the data you process will go to WordPress.com. Also, you won’t be able to disable Jetpack on staging.
- Some plugins connect and post to social media, such as CoSchedule. In these instances, we recommend you turn them off until you push to live. This is because they can schedule and post URLs from your staging environment.
We have further information on this (and a lot more) in our documentation. It’s essential reading if you want to use Kinsta’s staging environments yet minimize any effects relating to your plugins and themes.
A typical development workflow using Kinsta’s staging environments
You likely already have a typical workflow for development. Using Kinsta’s staging environments, you can integrate your DevOps Lifecycle for Continuous Integration/Continuous Deployment (CI/CD) in a seamless way.
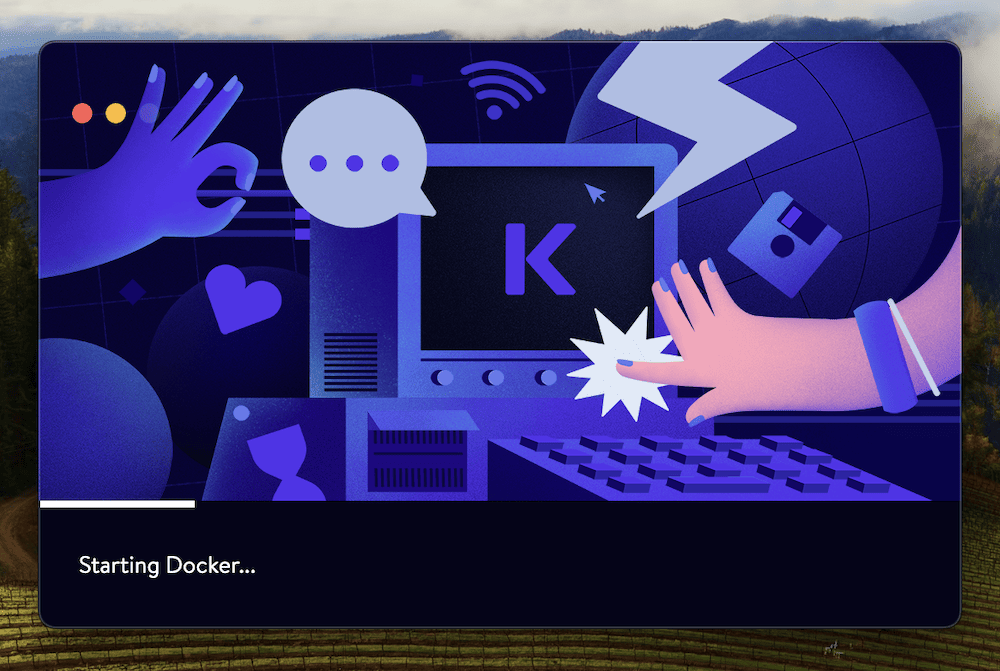
In fact, the process begins with a local environment for development. The setup process takes no time and also handles building a MariaDB database.
DevKinsta is also ideal for headless WordPress projects. While here WordPress is akin to a content Application Programming Interface (API), you can still build the front end using a JavaScript framework such as React or Vue.js.
Here’s how the rest of a typical workflow might look:
- Pushing to the staging environment. Once you complete your local development and preliminary testing, you’ll want to push to staging. This production replica ensures your testing yields similar results to your live site. It’s a crucial step in your CI/CD pipeline, as you can implement automated testing and quality assurance before you deploy.
- Testing and debugging. You’ll want to carry out more testing within staging, such as performance testing, security scanning, and User Acceptance Testing (UAT). Because Kinsta isolates the staging and live environments, these tests won’t impact the live site. Using Kinsta’s logging and Application Performance Monitoring (APM) tools, you can also debug any issues here.
- Continuous integration and deployment. After the testing phase and final approvals, you’ll need to integrate any staging changes into the live environment. You can automate aspects of this process as per your CD/CI workflow. As such, your central version control can stay up to date, and you can deploy code to production with minimal input.
- Monitoring and feedback. Post-deployment, it’s crucial to identify and rectify any issues using a continuous feedback and monitoring loop. Kinsta’s APM can help you address any post-deployment challenges. From here, you can carry out continuous improvement with the insights and data you glean.
On the whole, Kinsta’s staging environments (and DevKinsta) provide a robust infrastructure to help streamline your development workflow. It even supports headless WordPress applications. In the next section, we’ll look at how you can use your existing DevOps skills alongside our staging.
Applying DevOps techniques when using Kinsta’s staging environments
Applying DevOps techniques within Kinsta’s staging environments can significantly enhance collaboration and streamline the development lifecycle. This is especially true for cross-functional teams, as staging replicates production as closely as possible.
This lets developers, Quality Assurance (QA) teams, and others work together in sync through the building, testing, and deployment phases. Because this happens in a controlled and isolated setting, it helps to minimize any conflicts. It also ensures you can identify and address any issues early in the development process.
At its core, DevOps looks to remove the barriers between typical and traditional ‘siloed’ teams, development, and operations. The practices you implement encourage a collaborative, automated, and integrative culture.
What’s more, the right DevOps practices aim to improve the speed, efficiency, and security of your development and deployment.

You can see this in action throughout the various DevOps Lifecycle stages. There are around five to seven, depending on your project and team:
- Development. This stage involves planning and coding, along with choosing your staging environment. You’ll write code, test it, and version-control it (likely using Git) here before you move to the next stage.
- Integration. Here, you’ll merge code changes into a central repository and ensure these new additions don’t break your site.
- Testing. You’ll next automate tests to run within the staging environment. This gives you a second layer to ensure bug-free and quality code.
- Deployment. After you validate your staging code, you can automate deployment to production. This ensures your site will always run to the latest version.
- Monitoring. Post-deployment, you’ll want to monitor site performance. This is where a robust alert system and process will offer value. The data you collect here will also help you deliver in the future.
- Feedback. This is a post-deployment phase where you collect insights and data from users – in this case, site visitors. You’ll use the feedback from this stage to identify areas for improvement in the next development cycle.
- Operations. You’ll likely have some crossover with a new cycle during this phase. This is where you minimize outages, work on improving uptime, and optimize server configurations.
Depending on the number of steps you have in your own Lifecycle, some of these will be in a different order. For instance, your integration phase may become part of your development or testing stages. What’s more, you may not have some of these stages, such as a dedicated feedback or operations phase.
Kinsta’s staging environments are integral to the development phase, as they provide a secure, isolated area for coding, testing, and QA pre-deployment. Integrating these environments into the DevOps lifecycle can help your collaboration, boost delivery times, and enhance your deliverable quality.
Next, we’ll show you how to create them through the MyKinsta dashboard.
How to set up a staging environment on Kinsta
Not all hosts will offer the functionality, but Kinsta’s staging environments feature for every plan we offer. The whole process takes a couple of minutes and minimal clicks.
What’s more, we don’t need to cover every step here, as it’s something you can find in our knowledge base. However, in brief, you can begin the setup through your MyKinsta dashboard:
Your first decision will be to choose either a standard or a premium staging environment. Our advice is to understand how vital staging will be to your live site. For instance, a standard environment will likely suit you if you only need to test elements away from production.
In contrast, a premium environment will be necessary if you need the same level and scope of resources as your live site. There are other benefits, too, such as the ability to set up multiple staging environments. However, for resource-intensive sites (such as ecommerce stores), you’ll need to match your live site’s resources.
For most cases, you’ll likely want to clone your existing site, which is one of the options you have after choosing your type of staging environment.
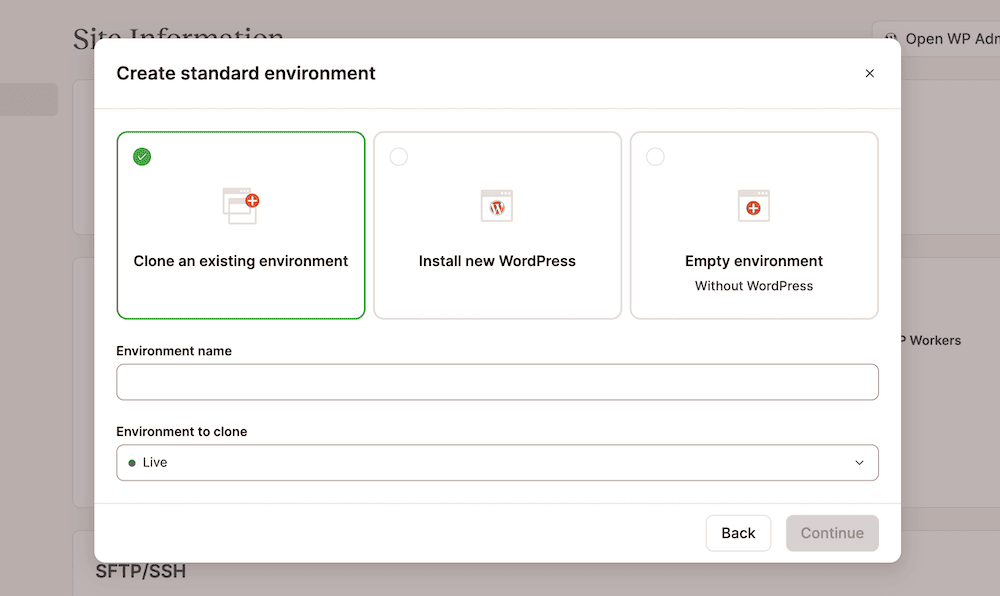
Coming from DevKinsta, you can set up a blank environment here. There’s a button within your site’s settings in DevKinsta to push to staging. Regardless, you’ll want to wait a few minutes for your environment to complete its setup. From there, you can begin using your Kinsta staging environments to build and test your site.
Giving your Kinsta staging environment a proper subdomain address
Under typical circumstances, your Kinsta staging environment will live in a subfolder on your server. It will have a URL that’s a subdomain of kinsta.cloud, but this can cause a couple of problems:
- Some plugins won’t work, such as those that need to verify a license through a specific domain name.
- Certain configurations of WordPress Multisite experience issues with subdirectories on Kinsta or require a custom subdomain to run in an optimal way.
As such, it’s a good idea to set up a proper subdomain address for your Kinsta staging environments. For premium users, Kinsta provides dedicated subdomain addresses, but even this may not resolve your issues.
The answer is to set up a custom domain for your site, then run staging off of a subdomain using the Domain Name System (DNS). A custom staging URL using a proper domain and subdomain has two benefits: first, you can mitigate any of the issues we talk about. Second, you have a ‘nicer’ subdomain to share with collaborators or clients.
Pushing a live site to staging
One aspect of your staging environment that may not be clear at first is how to push your live site to it after setup. Once you understand that a staging environment is simply a copy of your live site, it’s easier to visualize.
However, here’s a quick overview of the workflow for the avoidance of all doubt:
- When you create a staging environment, this essentially copies your live site to a subdomain. This includes all of your databases and files. It’s a complete one-to-one replica of your live site.
- You make changes to the staging environment as per your DevOps Lifecycle. This will be subjective and relate to your own project, workflow, and goals.
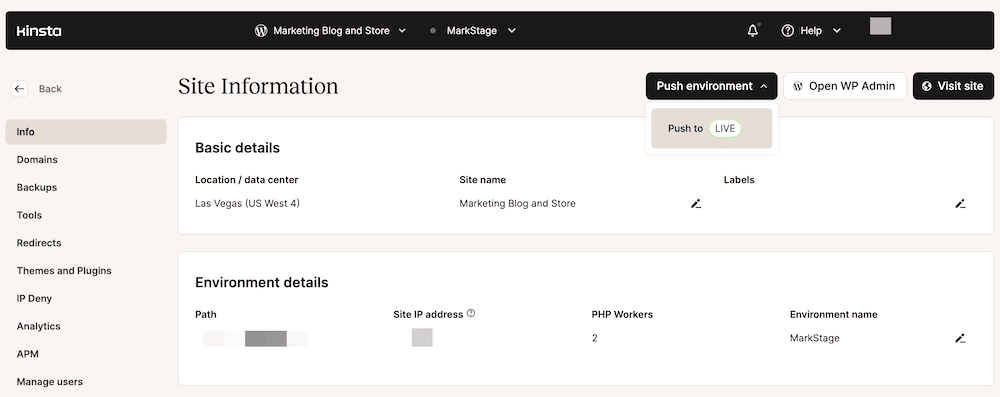
- When it comes to pushing those changes live, you have a few options. You could use the built-in Push to Live functionality within Kinsta or make manual changes. This is something we will discuss in greater detail later.
- From here, you’ll again have a one-to-one replica of your site for both staging and live environments.
As such, there is no way to refresh your staging environment based on your live site’s status. Our recommendation is to delete your staging environment and rebuild it when you need it next, as this will copy your current site over. This is another good reason for using a custom subdomain address for your Kinsta staging environments.
Kinsta makes backups for both your live site and the staging environment. This means you can also restore a live site backup directly to staging. With this, you get a way to transition between your Lifecycle phases with greater ease and can use previous permutations of your site during development.
Note that you’ll need to set up your staging environment first, but you can restore to either standard or premium environments. Regardless, you can do so through the MyKinsta dashboard:
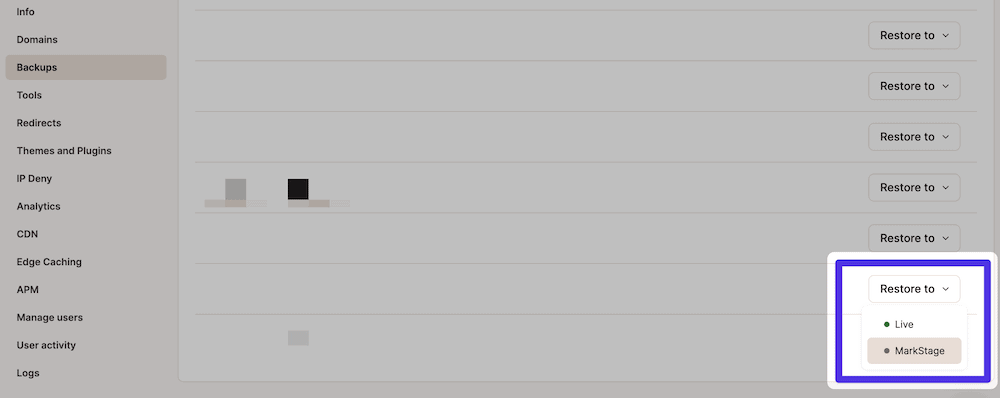
This takes a couple of clicks and will also retain both existing backups for your live and staging sites, along with any custom domains you set up.
Incorporating version control into your staging setup
Many developers will use version control, such as Git, which we recommend. Both live and staging environments on Kinsta will offer integration with Git, which means you can version control your staging site to keep on top of your development schedule.
Pulling and cloning a repo onto Kinsta’s server should be a piece of cake. The process has a few basic steps:
- Connect to your site using Secure Shell (SSH).
- Pull your current repo from GitHub, GitLab, or other similar service.
- Alternatively, clone your repo from your remote location.
How you pull your remote repo will be different depending on whether it’s public, private, or has Two-Factor Authentication (2FA). When it comes to pushing your code to the remote repo, though, you’ll need to find a suitable workflow.
This is because Kinsta’s staging environments and Git integration doesn’t yet support a command such as git push kinsta mysite. Even so, there are workarounds. For instance, you could use a tool such as WP Pusher:
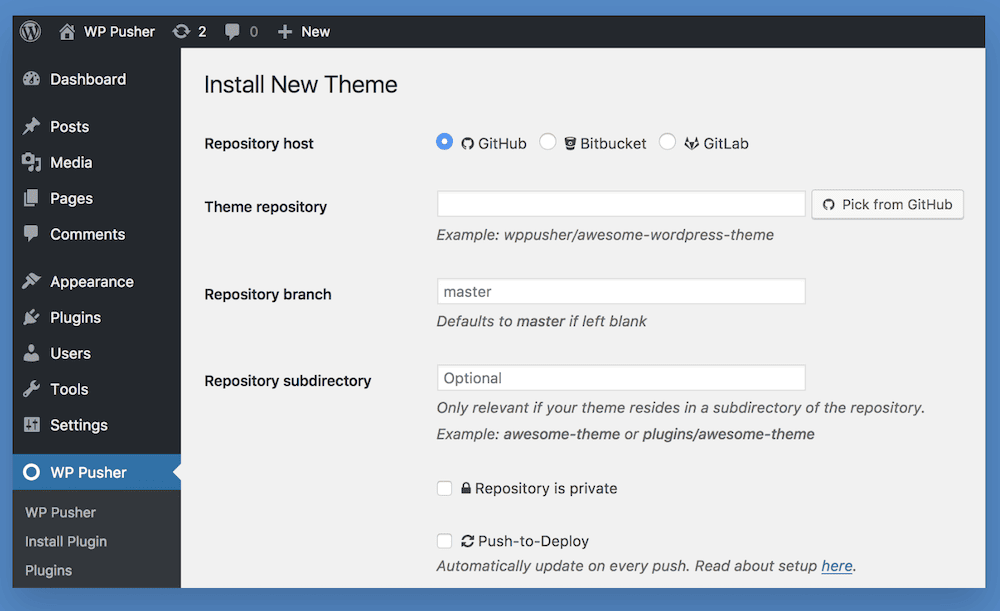
Clever developers are finding unique ways to push to GitHub from Kinsta, too, even if that is running a simple command from a Git client or automating the process with scripts. We’ll have more on the general concept of pushing your code back to the live site later on.
Conducting performance testing on Kinsta’s staging environments
Part of your testing and monitoring Lifecycle phases includes looking at (and comparing) the performance of your staging site with benchmarks. The good news is that you have access to all of Kinsta’s tools for your staging site, as well as the live one.
In short, you’ll grab benchmarks for your live site, create targets you’d like to reach and optimize your code within staging. From there, you’ll assess whether those changes make any positive difference. If so, you can take things forward. If not, you cycle around the coding and testing steps.
For Kinsta’s staging environments, the Kinsta APM tool is likely going to be a central reference:
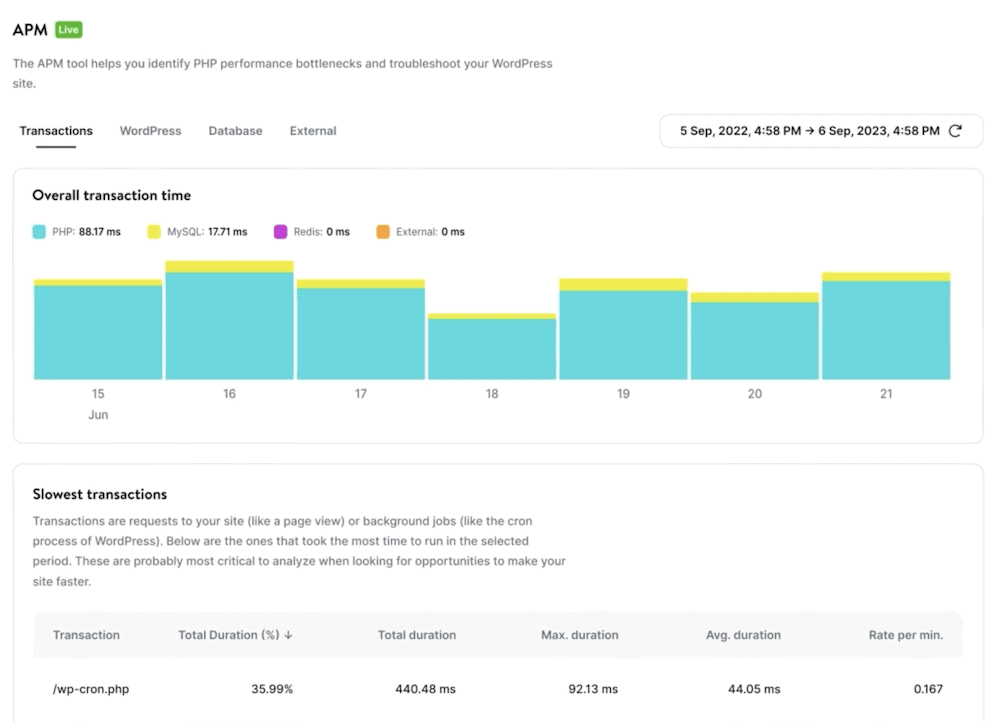
This is a custom tool that focuses on WordPress issues and timestamps all of the activity it collects. You’re able to monitor PHP processes, your HTTP calls, database queries, and much more. For instance, we find that the majority of performance degradation issues call back to a nonoptimal plugin or theme. Kinsta APM can show you this in explicit detail on the WordPress tab.
You’ll see that it’s possible to look deeply into individual transactions, which means you can see precisely where your bottlenecks are. For staging sites, you won’t often monitor the Redis transaction time. Instead, your PHP and MySQL times will be of greater interest.
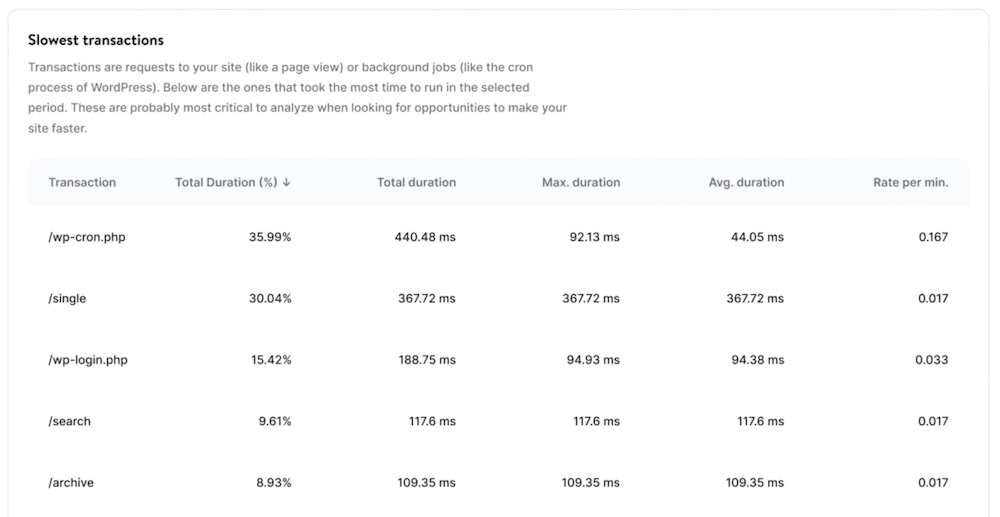
Using an absolute timeframe when you troubleshoot will help to pinpoint areas of concern. The Kinsta documentation walks you through the general workflow, but in a nutshell, slow-loading pages should be your first concern.
From there, you can dig into the processes that make up those transactions and root out either suboptimal code or poor third-party tools. You’ll likely use a mixture of tools to hunt and combat troublesome code. For WordPress development, WP_DEBUG and Query Monitor are typical.
Continuous deployment: syncing changes between staging and production
The deployment phase of your Lifecycle means you’ll have a decision to make: which code to push. Your first thought might be to push it all at once, but it’s not always the best idea.
This is because, regardless of how similar your staging and live environments are, they will still have differences. A measured approach may be more sensible as you can push a suite of code for a specific improvement, monitor the changes, and then schedule the next push.
This concept is central to continuous deployment, as safe deployment should be a key concern. In the past, Kinsta’s one-click push-to-live functionality would send your entire site back to your live server, regardless of your changes. However, you now also have selective push options: either pushing your files, database, or both back to live:
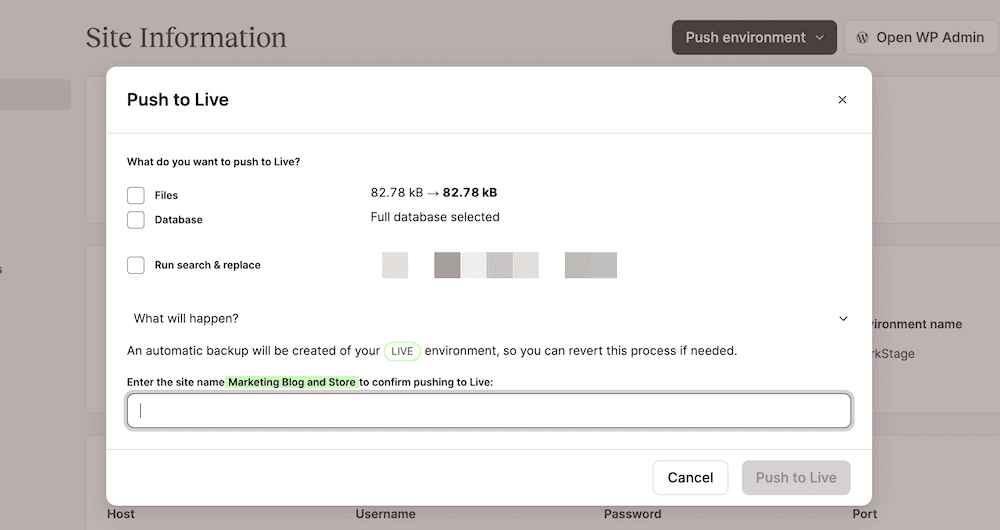
Even so, this includes your environment settings, too, such as your Nginx, PHP, and redirect configurations. This still may be overkill, especially when you only make small or minor changes to one specific part of your site.
Of course, you also have the option to forgo Kinsta’s push-to-live options and carry out the work yourself. The safest approach is to replicate your changes on the live site rather than automate them. Sure, it will take longer to implement, but you have the potential to monitor each change as it goes live.
However, regardless of your approach to continuous deployment, your backups will be a vital component. Kinsta makes backups every day for every site within your account. This includes backups that the system generates and your manual backups, too.
What’s more, each backup is a complete snapshot of a specific environment. This means you can get back to a known working configuration within minutes if you need to fix a broken site.
Summary
Kinsta’s staging environments can help you create, test, and deploy your site to production regardless of how many phases you run or the nature of each step in your workflow. They’re flexible beasts, as you can use the standard free staging environment on every site you run with Kinsta.
However, with a premium staging environment, you can set up multiple instances, run resources that match your live site, and more. And you can take your site from local to live and enjoy access to all of Kinsta’s typical tools right from the MyKinsta dashboard.


