
When a new client signs up for your services, the time between contract and a provisioned WordPress site matters. MyKinsta makes creating and managing WordPress sites straightforward, but agencies handling many client projects often look for ways to automate repetitive setup tasks.
The Kinsta API lets you automate parts of that process. In this tutorial, you connect a HubSpot client signup form to the Kinsta API through a Node.js middleware app. When a contact submits your form, the middleware receives the data, calls the Kinsta API, and automatically provisions a WordPress site.
Why agencies should automate site provisioning
A manual site setup introduces delays at the point in a client relationship where momentum matters most. New signups require someone to create a hosting environment, configure WordPress, generate credentials, and communicate them back to the client.
MyKinsta makes these tasks straightforward, but when the process depends on a team member being available to complete each step, delays can still occur.
Straight out Digital (Sod), a digital agency that manages hundreds of client sites on Kinsta, uses the Kinsta API to build custom internal tools that turn provisioning and maintenance into automated workflows. Instead of repeating the same setup steps for every new site, Sod triggers the process programmatically. The result, as the team describes it, is that “what could be a time-intensive operation has been made straightforward.”
Connecting HubSpot to the Kinsta API achieves a similar outcome. When a client submits your signup form, HubSpot sends a webhook, your middleware receives the contact data, and the Kinsta API starts the site creation process.
This way, the handoff from lead to a provisioned WordPress environment happens automatically, reducing the manual work involved in onboarding new clients.
Getting started
To follow this tutorial, you need:
- At least one existing site in your Kinsta account. This ensures API access is available.
- A HubSpot account with a form set up to capture client signups. Note that webhook workflows are available only on certain premium HubSpot plans.
- Node.js 18 or later installed locally.
You can generate a Kinsta API key within the MyKinsta dashboard. Navigate to Company settings > API Keys and click Create API Key.
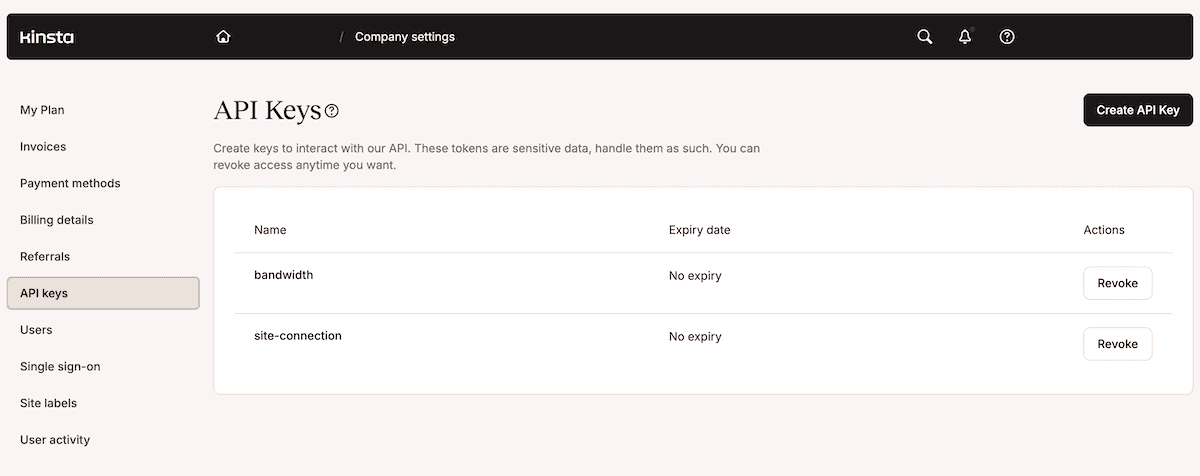
Set an expiry, give the key a name, and click Generate. Because MyKinsta only displays the new API key once, store it somewhere secure.
You also need your Company ID. You can retrieve this from the MyKinsta URL while logged in or by making a request to the /sites endpoint once your API key is active.
Store both values in a .env file at the root of your project:
KINSTA_API_KEY=your_api_key_here
KINSTA_COMPANY_ID=your_company_id_hereHow to integrate HubSpot with Kinsta using the Kinsta API
Much like using the Kinsta API and Slack, you can set up an integration in which a HubSpot form submission triggers a webhook, a Node.js app receives the contact data, calls the Kinsta API to create a WordPress site, and polls the API until the site is live.
You build this across five steps: HubSpot configuration, middleware setup, API authentication, site creation, and operation monitoring.
1. Set up your HubSpot form and workflow
Within your HubSpot dashboard, create or select the form that captures new client signups under Marketing > Forms.
At a minimum, the form needs fields for a first name, email address, and company name. These values map to the parameters you pass to the Kinsta API later.

With your form ready, navigate to Automation > Workflows in HubSpot’s navigation menu and click Create workflow in the top-right corner.
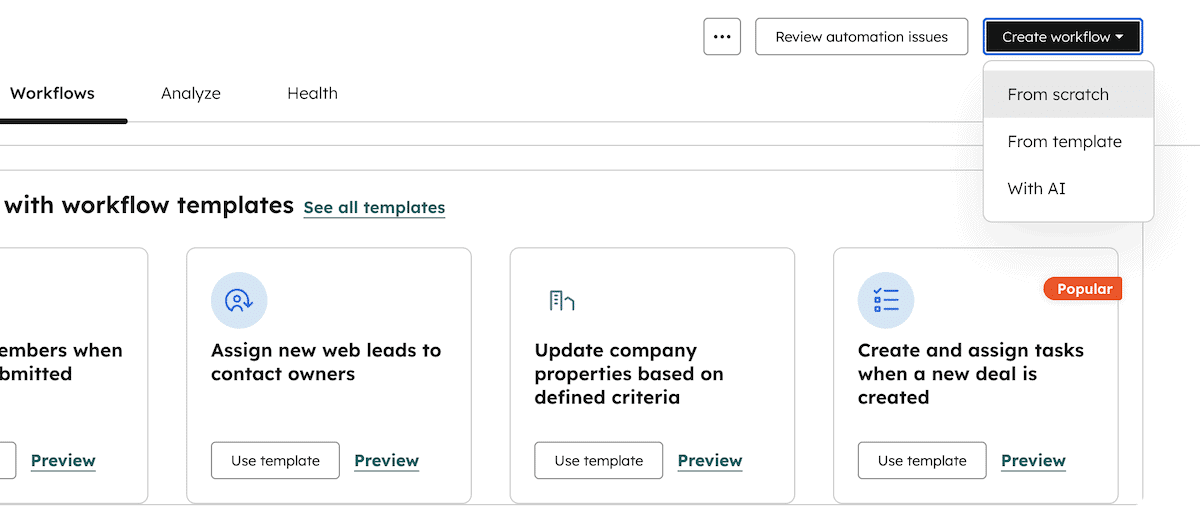
Next, select Start from scratch. This opens the workflow editor. Click the trigger and choose Form submission as the enrollment trigger.
Then select your form from the Form submission dropdown menu and complete the setup. HubSpot now enrolls a contact in the workflow whenever someone submits the form.

With the trigger in place, the workflow canvas displays a new action. Click Data Ops > Send a webhook, set the method to POST, and enter a placeholder URL for now. Once you deploy your Node.js app, update the URL to your live endpoint.
HubSpot sends a JSON payload to the webhook URL when the workflow runs. The payload includes the contact’s properties, with form field values appearing under their internal HubSpot property names. You can confirm the internal name for any field in HubSpot under Settings > Properties by reviewing the property details panel.
2. Build the middleware endpoint
HubSpot can send a webhook to a URL when a contact submits your form, but it has no way to speak directly to the Kinsta API. Instead, a middleware layer receives the HubSpot payload, extracts the contact data you need, reformats it, and passes it to the Kinsta API.
Express.js is a minimal Node.js web framework that makes building an HTTP server like this quick to set up. It handles incoming requests, lets you define routes, and gives you access to the request body with minimal configuration. You install it after initializing a new Node.js project:
npm init -y
npm install express dotenv
express provides the server and routing layer, while dotenv loads your .env file into process.env so your API key and Company ID are available to the application at runtime.
Your server lives in an app.js file. It starts Express, tells it to parse incoming request bodies as JSON, defines a route that listens for POST requests from HubSpot, and starts the server on a local port.
This example assumes Node.js 18 or later, which includes native fetch support.
// app.js
const express = require('express');
require('dotenv').config();

const app = express();
app.use(express.json());

const KinstaAPIUrl = 'https://api.kinsta.com/v2';
const headers = {
    'Content-Type': 'application/json',
    Authorization: `Bearer ${process.env.KINSTA_API_KEY}`
};

app.post('/new-site', async (req, res) => {

    const event = Array.isArray(req.body) ? req.body[0] : req.body;

    const displayName = event?.properties?.company;
    const adminEmail = event?.properties?.email;

    if (!displayName || !adminEmail) {
        return res.status(400).json({ message: 'Missing required fields' });
    }

    // Kinsta API call goes here
    res.status(200).json({ message: 'Received' });
});

app.listen(3000, () => console.log('Server running on port 3000'));
The app.use(express.json()) line tells Express to parse incoming request bodies as JSON. Without it, req.body returns undefined.
The route reads the contact data from the webhook payload, extracts the company name and admin email, and validates that both values are present before continuing.
The ?. optional chaining operator handles cases where the payload structure differs from what you expect. Instead of throwing an error that could crash the server, it safely returns undefined if a property is missing.
3. Authenticate with the Kinsta API
The Kinsta API uses Bearer token authentication. Every request you send includes your API key in the Authorization header. The API uses this key to identify your account and check your access level.
The require('dotenv').config() call at the top of app.js loads your .env file when the application starts. This allows process.env.KINSTA_API_KEY to resolve to your actual API key at runtime.
Define your base URL and headers as constants near the top of app.js after the dotenv configuration:
const KinstaAPIUrl = 'https://api.kinsta.com/v2';
const headers = {
    'Content-Type': 'application/json',
    Authorization: `Bearer ${process.env.KINSTA_API_KEY}`
};
Defining the headers as a constant keeps the code consistent across every API call in the application and makes key rotation straightforward. Updating the value in your .env file and restarting the server means you don’t have to hunt down every place the key appears in your code.
Your Company ID does not go in the Authorization header. Instead, you include it in the request body when creating a site.
4. Create the WordPress site via the Kinsta API
With authentication in place, you can make the site creation request. The Kinsta API’s /sites endpoint accepts a POST request with the details of the site you want to create and queues it for provisioning. Rather than waiting for the site to be ready before responding, the API returns immediately with a reference you use to track the operation.
Inside the /new-site route, replace the placeholder comment with the following:
const response = await fetch(`${KinstaAPIUrl}/sites`, {
    method: 'POST',
    headers,
    body: JSON.stringify({
        company: process.env.KINSTA_COMPANY_ID,
        display_name: displayName,
        region: 'us-central1',
        install_mode: 'new',
        admin_email: adminEmail,
        admin_password: process.env.WP_ADMIN_PASSWORD,
        admin_user: 'admin',
        site_title: displayName
    })
});

const data = await response.json();
The required parameters are company, display_name, region, install_mode, admin_email, admin_password, admin_user, and site_title. Setting install_mode to 'new' tells the API to create a fresh installation. The region value corresponds to a Kinsta data center’s region identifier.
If you provision sites with WooCommerce or Yoast SEO pre-installed, the API supports optional parameters for both. Once you add woocommerce: true or wordpressseo: true to the request body, the API installs those plugins as part of the site creation process. The provisioned site arrives with your standard plugin stack already in place.
A successful request returns a 202 status code, not 200. The 202 tells you the API accepted the request and queued the operation, but it does not mean the site is ready. Kinsta site creation runs asynchronously, so the response body contains an operation_id that you use to check the provisioning progress rather than returning the finished site details.
5. Monitor the operation status
Because site creation runs asynchronously, you need to poll the /operations/{operation_id} endpoint to check when the site is ready. The API returns the current status of the operation each time you call it. When that status changes to completed, the response includes details about the new site.
Take the operation_id from the site creation response and pass it to a polling function:
const pollOperation = (operationId) => {
    const interval = setInterval(async () => {
        const resp = await fetch(
            `${KinstaAPIUrl}/operations/${operationId}`,
            { method: 'GET', headers }
        );
        const result = await resp.json();

        if (result.status === 'completed') {
            clearInterval(interval);
            console.log('Site ready:', result);
        }
    }, 30000);
};
The function polls every 30 seconds. Kinsta’s API allows up to 120 requests per minute, with a lower limit of 5 requests per minute for resource-creation endpoints such as site creation. Polling the operations endpoint every 30 seconds stays well within those limits while still checking progress at a reasonable interval.
You also need to extract the operation_id value and pass it to pollOperation(). Add the following at the end of the app.post route:
const operationId = data.operation_id;
pollOperation(operationId);
Once the operation completes, the response contains the new site’s details. You can test this locally by running node app.js in your terminal. After you deploy the app, replace the placeholder webhook URL in your HubSpot workflow with your live endpoint.
Automating your agency’s client onboarding with HubSpot and Kinsta
With the integration running, a new WordPress environment begins provisioning as soon as a client submits your HubSpot signup form. The middleware receives the contact data, passes it to the Kinsta API, and polls the operation until the site is ready. This approach helps automate the initial site setup step while your team continues managing sites through MyKinsta.
To make the middleware accessible to HubSpot, deploy the application so it has a public endpoint. Platforms such as Sevalla (a Kinsta product) can host Node.js applications like this. Once the app is live, update the webhook URL in your HubSpot workflow to point to the deployed endpoint.
For Kinsta’s managed WordPress hosting, API access is available on all accounts once you generate an API key in MyKinsta.