
Managing MySQL databases is one of the fundamental requirements of being a professional WordPress developer. Adminer simplifies that task immensely.
Every WordPress site requires a database to function—it’s where WordPress stores all of your sites’ critical data. While phpMyAdmin has been a staple MySQL/MariaDB database management tool for many years, Adminer is a great alternative. It comes loaded with tons of useful features and a prettier UI, all within a single, lightweight PHP file that you can deploy quickly on your server.
In this post, you’re going to learn about Adminer, the many benefits it offers over phpMyAdmin, and how you can use it for managing your databases. We’ll also explore how DevKinsta uses Adminer to simplify WordPress database management in local development environments.
Let’s get to work!
What Is Adminer?
Adminer (formerly phpMinAdmin) is a PHP-based, free, open source database management tool. It’s super simple to deploy on your server. To use it, all you have to do is upload its single PHP file, point your browser towards it, and log in.

Unlike phpMyAdmin, which only supports the management of MySQL and MariaDB databases, Adminer also supports managing other databases such as PostgreSQL, SQLite, MS SQL, Oracle, SimpleDB, Elasticsearch, MongoDB, and Firebird. It is also available in 43 languages.
Adminer provides an easy-to-use interface, better support for many MySQL features, more remarkable performance, and increased security.
Let’s explore how to install Adminer now.
How to Use Adminer
But before you get started with installing it, here are some basic requirements to get Adminer working on your server:
- Install PHP 5, 7, or 8
- A database driver (e.g. MySQL, PostgreSQL, etc.)
That’s pretty much it!
Download the latest version of Adminer from their official website. You can also find the MySQL-only and English-only flavors of Adminer on there. If you’re managing a MySQL or MariaDB database (e.g. for a WordPress site), you can get these lighter variants.
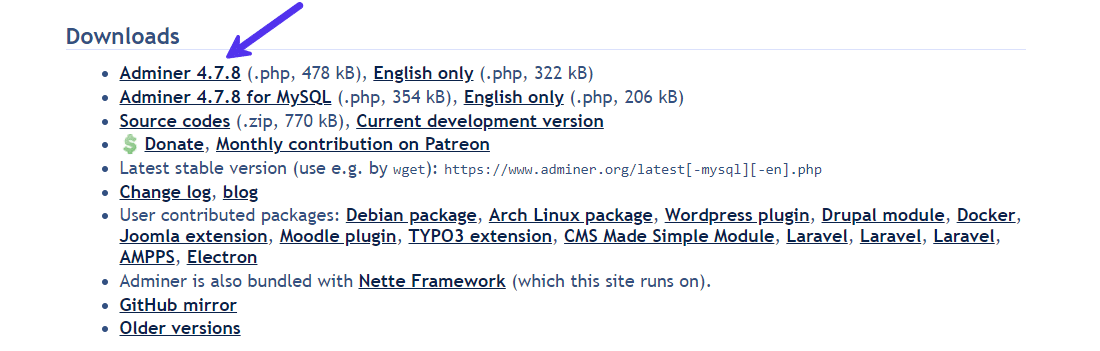
Alternatively, if you’re using the terminal, you can download it directly to your directory with the curl command.
curl -o https://github.com/vrana/adminer/releases/download/v4.7.8/adminer-4.7.8.phpAdminer 4.7.8 is the latest stable version. It adds support for the just-launched PHP 8.0. You can change Adminer’s version number in the above code’s download URL if there’s a new version available.
Once downloaded, you can place this .php file anywhere on your server, like its root folder. However, it’s good practice to put all your third-party tools in a separate directory (e.g. vendor, assets, etc.).
You’ve now installed Adminer on your server. Its plug-and-play design means that Adminer will work on almost any server.
How to Access Adminer
To access it, all you need to do is visit its link through your browser.
For example, if you’ve placed it in your website’s root directory, then you can access it by visiting https://your-website.com/adminer-4.7.8.php. If you don’t have a domain name setup, you can also access it through your server’s IP address or localhost environment.
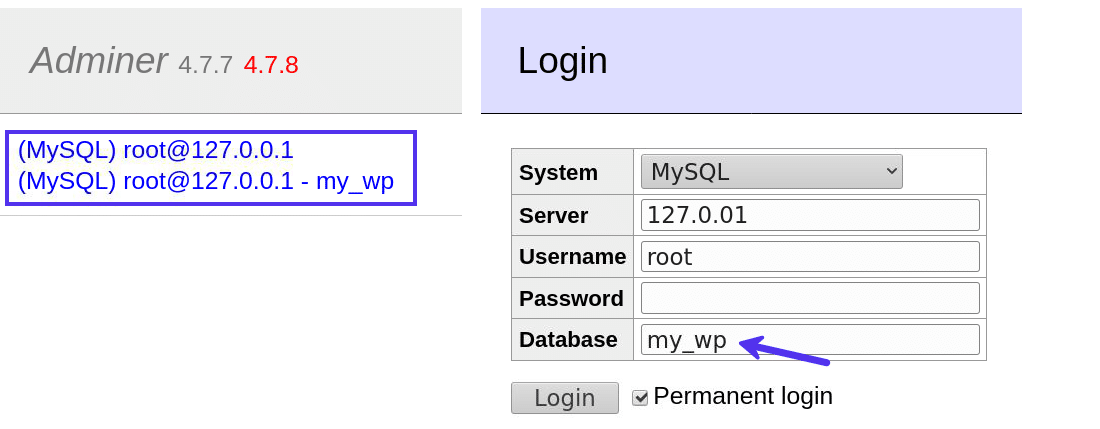
From here, you can log in to any database installed on your server. You can also leave the database field blank. Adminer will show you a list of all the databases on its next screen.
Ticking the Permanent login option will save your login details so you can revisit this session easily later through the links on the side.
Adminer Features
Adminer includes many features to make database management more effortless. It’s time to take a deep dive into them.
Connect to a Database Server
As explained before, you can connect to any database server Adminer supports. For a MySQL database server, the default username is root, and the default password is an empty string. You can also select an existing database to manage through here.
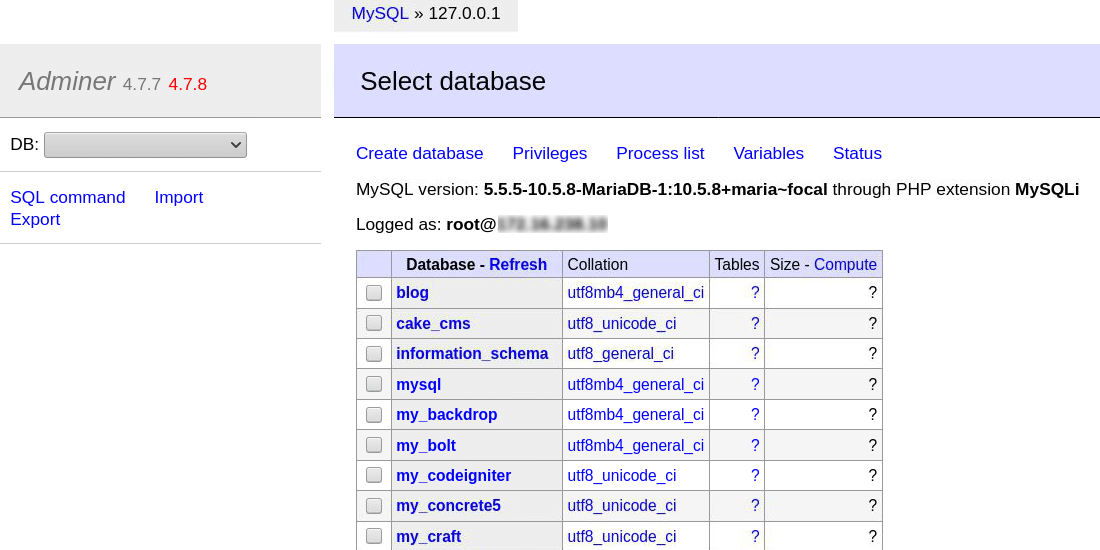
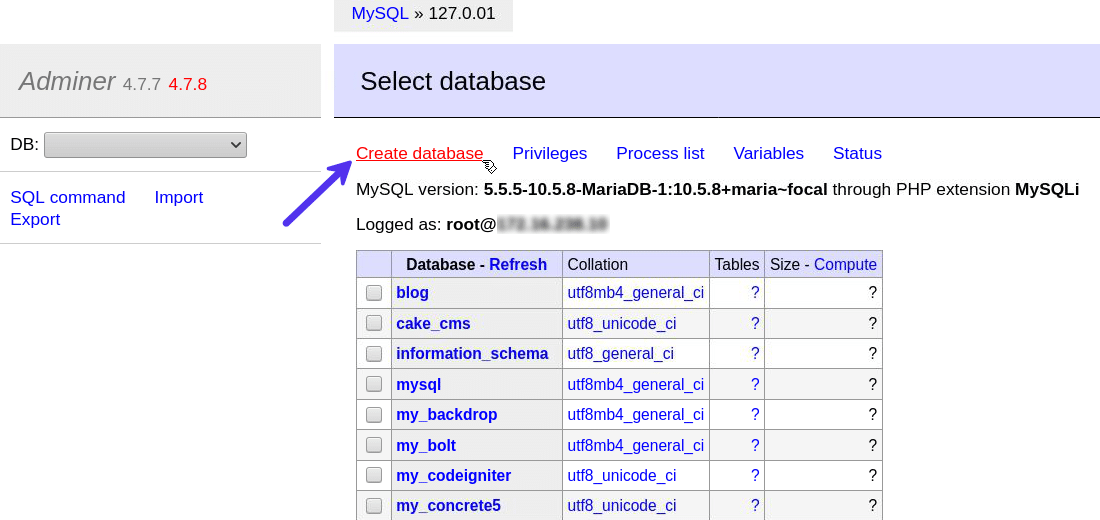
Create a New Database
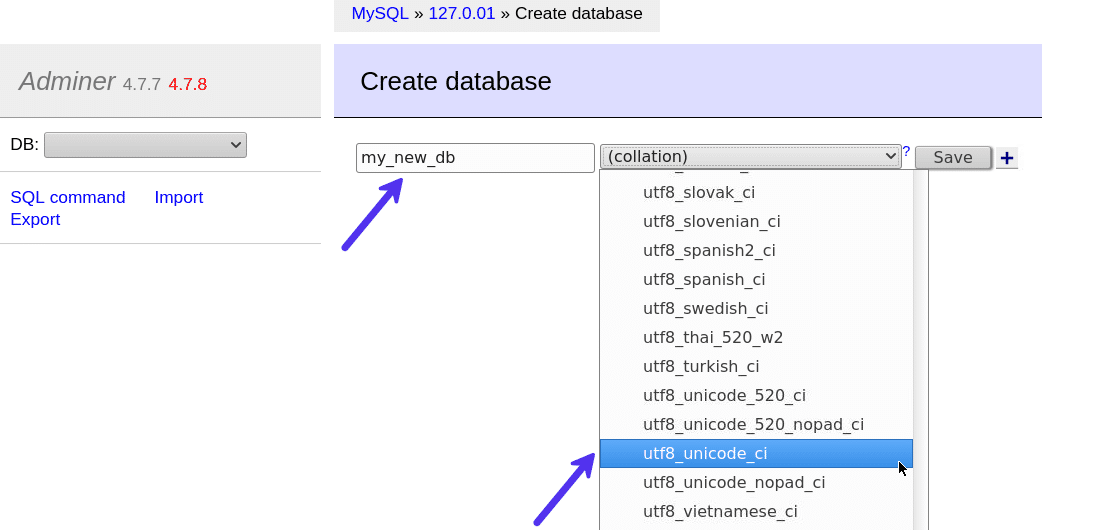
You can click the Create database link to create a new MySQL database. Enter the database name and select its collation type. For WordPress databases, the recommended collation type is utf8mb4_unicode_ci.
After creating a database, you can change various aspects of it, like the database’s name, schema, users, and tables.
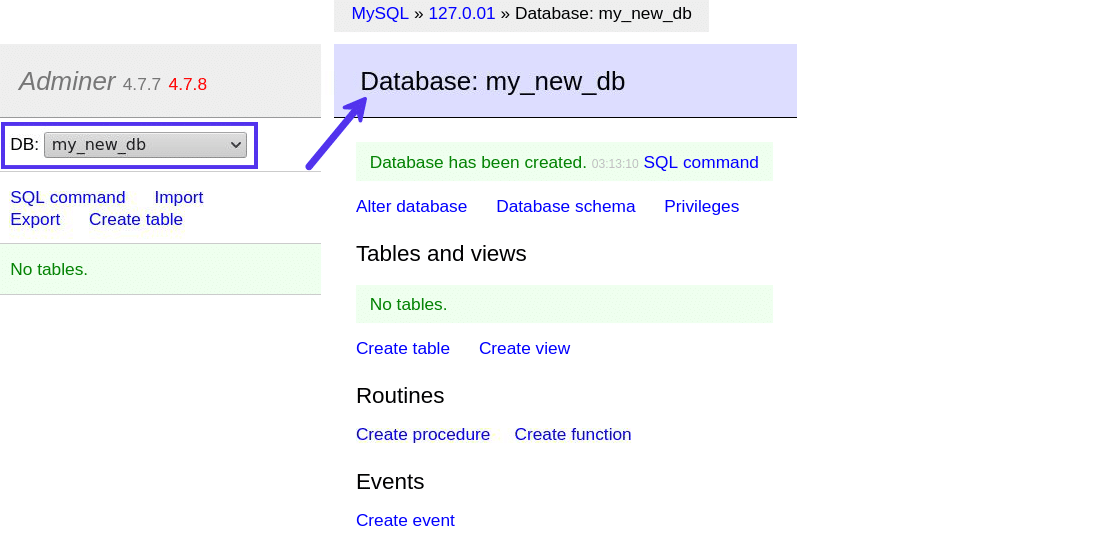
You’ve now created a new MySQL database. The next page will show you more options for populating it with tables, columns, and more.
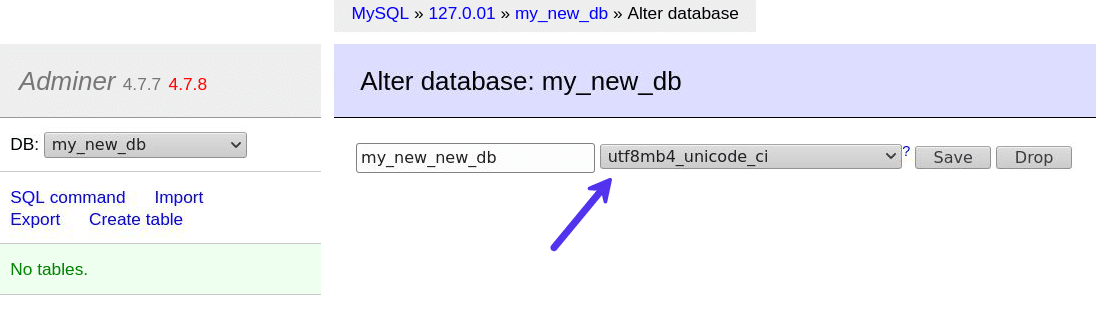
Alter Database Name and Collation Type
Clicking the Alter database link will let you change its name and collation type. If you’ve just created a database and made a typo, this will come in super handy.
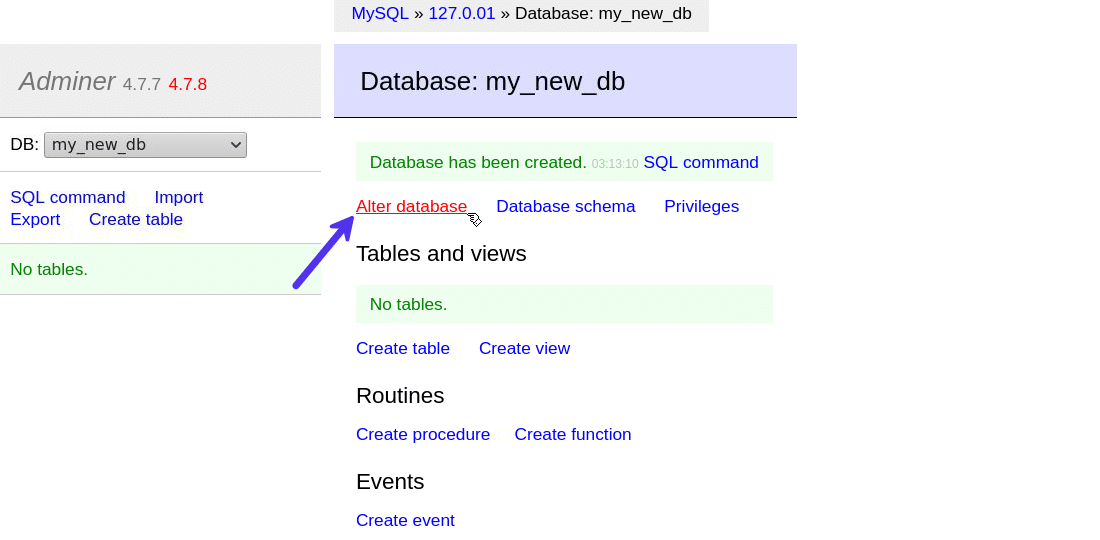
For instance, I changed the database’s collation type from utf8_unicode_ci to utf8mb4_unicode_ci.
Note: If your database is already in use by any application, ensure that the changes you make here reflect in your application’s code too.
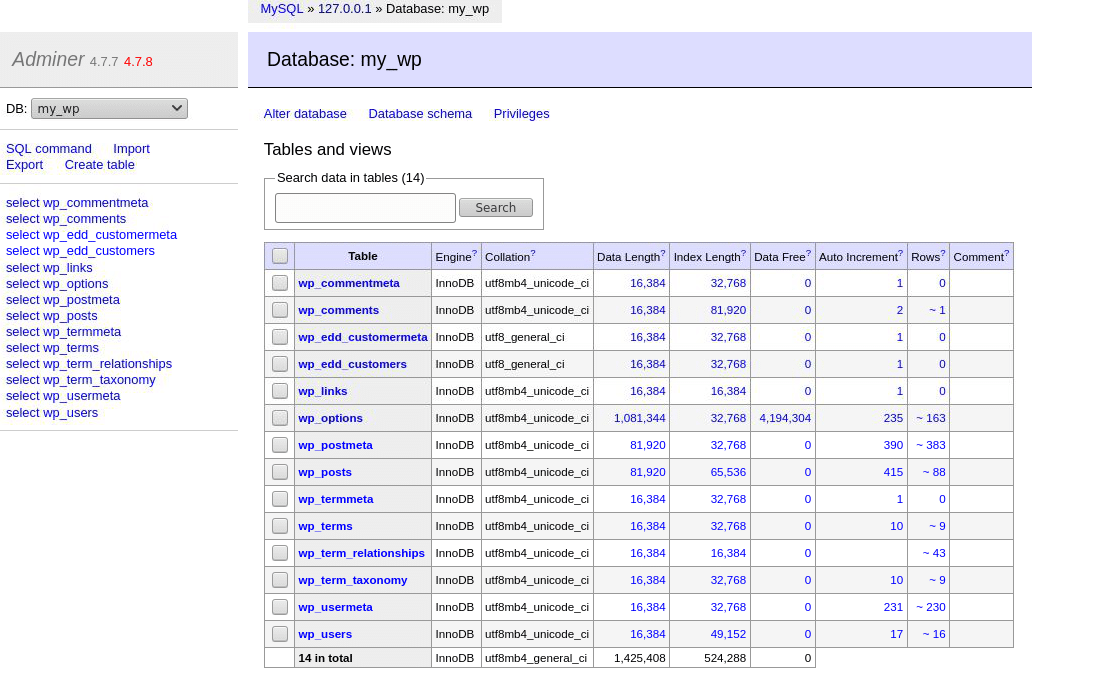
Explore the Database Schema
A database schema refers to the logical configuration that defines how all the database elements are related. In MySQL, a schema is synonymous with a database. So, they refer to the same thing.
However, in other databases such as PostgreSQL and Oracle, a schema refers to a collection of tables. It is only a part of the database.
WordPress uses MySQL for its database. Hence, its schema is essentially its tables with their columns. Adminer even lets you move around the schema boxes and play with them as you wish.
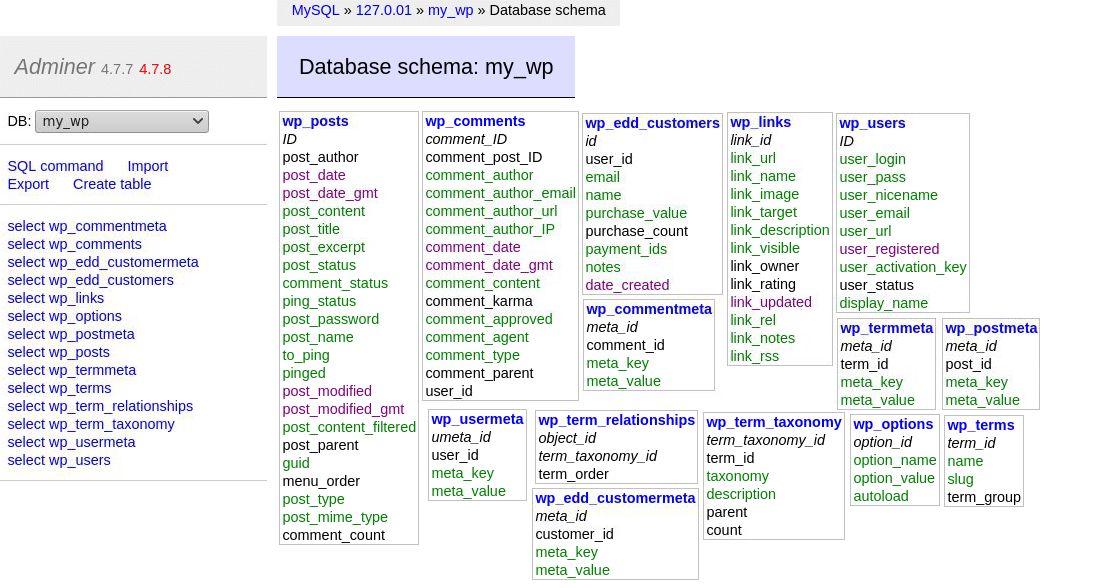
That’s a great way to learn the ins and outs of a typical WordPress database structure.
Inspect Tables Data and Structure
Clicking on any table will show you more details about it. By default, Adminer will direct you to the Table’s Show structure tab. Here, you’ll find information on the table’s columns, such as their names, types, and indexes.

If your database table has any foreign keys or triggers associated with it, they’ll also be listed here in the bottommost sections.
The above example shows details about the wp_options table. It’s where WordPress stores all its crucial settings. Next, you can go to the Select data tab to see all the values stored inside this table.
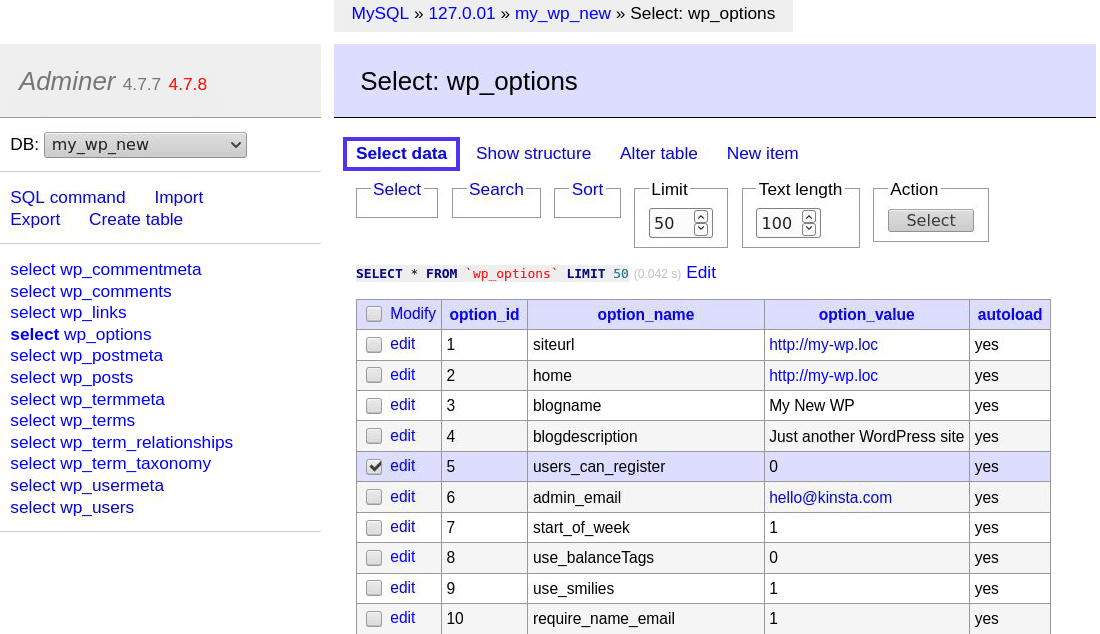
As you can see, the user interface here is much easier on the eyes than the one found in phpMyAdmin.
Alter Table and Column Settings
Click the Alter table link on the top to change the table and column settings.
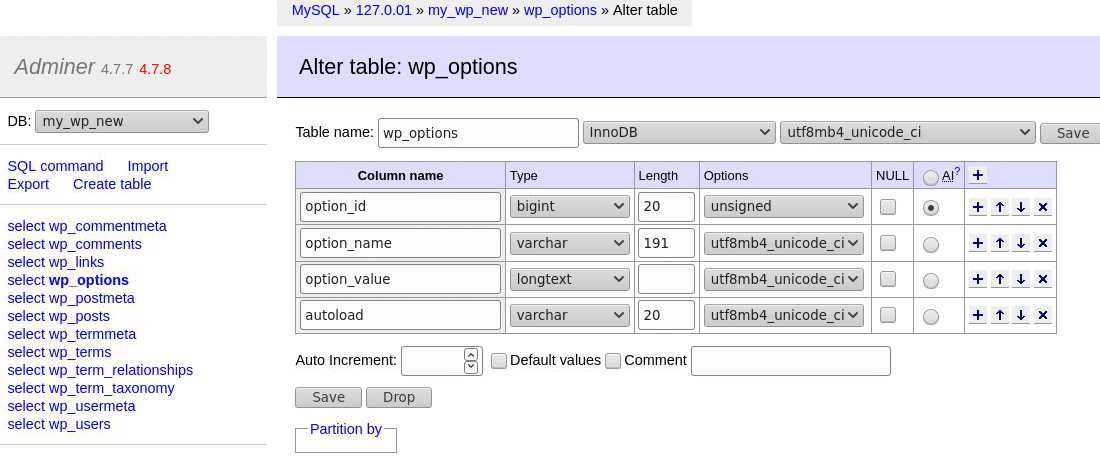
For the table, you can change its name, engine, and collation type. At the bottom, you can also find options for setting the table’s default value for starting auto-increments, and whether you can set its columns with a default value and comments.
As for the columns, you can change their names, type, length, and collation type.
You can also add or remove columns by clicking the + and x buttons. The Drop button will remove the database table altogether, so use it with caution.
Once you’ve made the changes, don’t forget to hit the Save button.
Insert New Records and Update Existing Ones
Hit the New item link to go to the Insert: <table_name> tab.
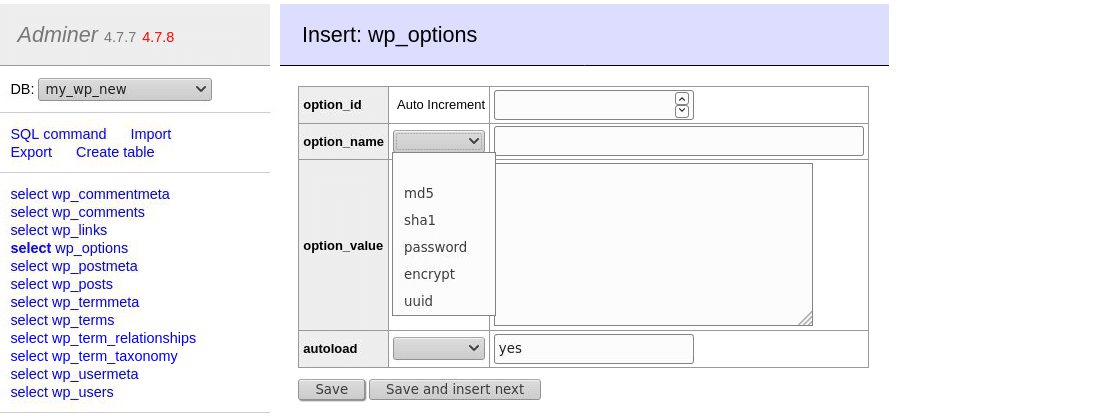
Here, you can add a new row to your table. Adminer lists the column names and their types so you can enter them quickly. You can also run a hash function for the value you enter to encrypt them automatically. It’s super helpful if the data is sensitive, like a password. For instance, WordPress stores its passwords in the database using the MD5 algorithm.
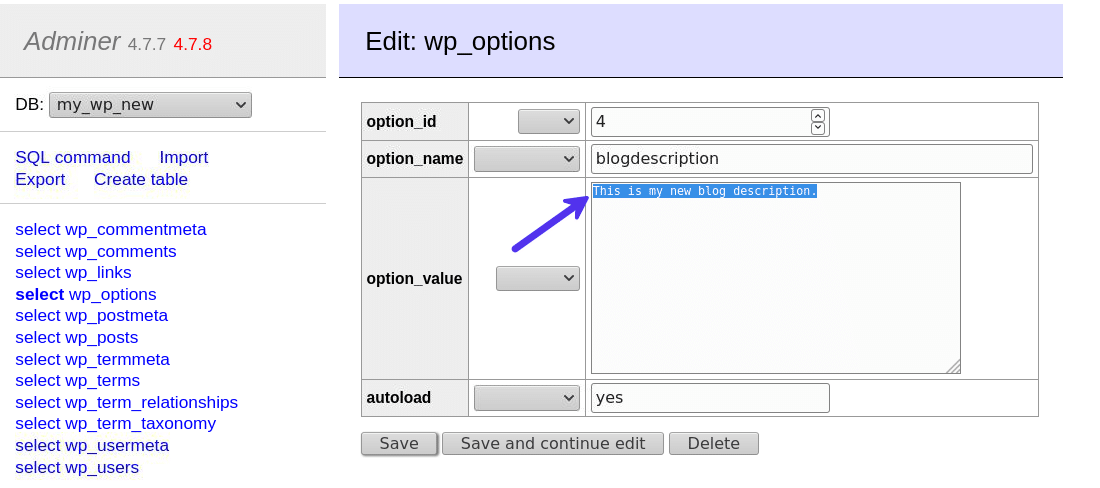
Editing an existing record is as simple. For instance, if you want to change your site’s description, you can edit the blogdescription option’s value in your wp_options table.

Next, enter your new blog description in the option_value field and click the Save button for your changes to take effect.
Search Data in All The Tables
Adminer allows you to search for any data in all the tables of a database at once. It’ll show you the tables most likely to hold this value.
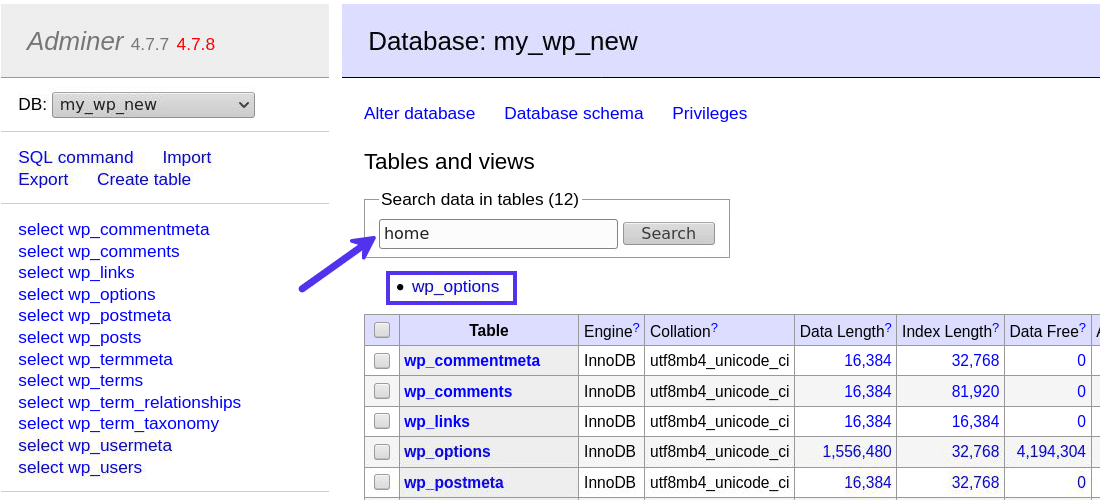
When I searched for the term home, Adminer pulled up the wp_options table as the most likely candidate. Clicking on it showed me the exact column and rows where Adminer found it in the database.
Clicking on a table listed under the search result will show you more details about it. From here, you can perform a more granular search within this table.
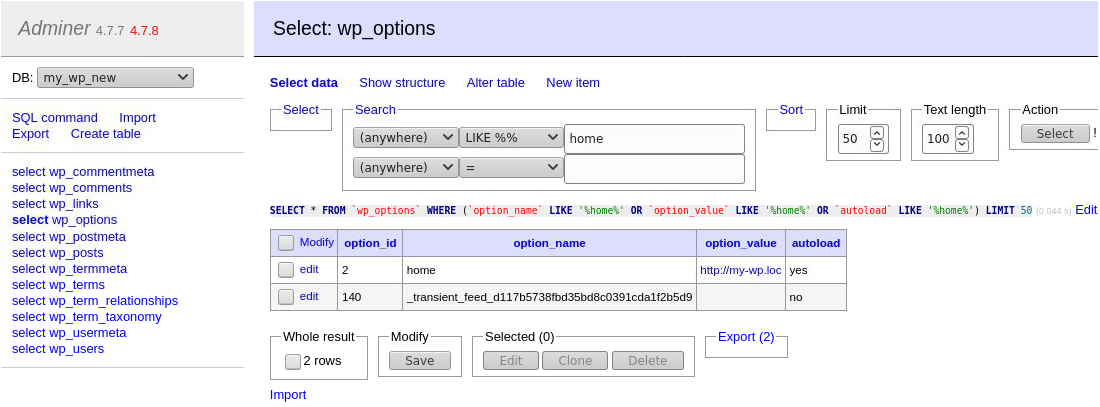
As an example, I can edit the home option name’s value and change my site’s homepage URL.
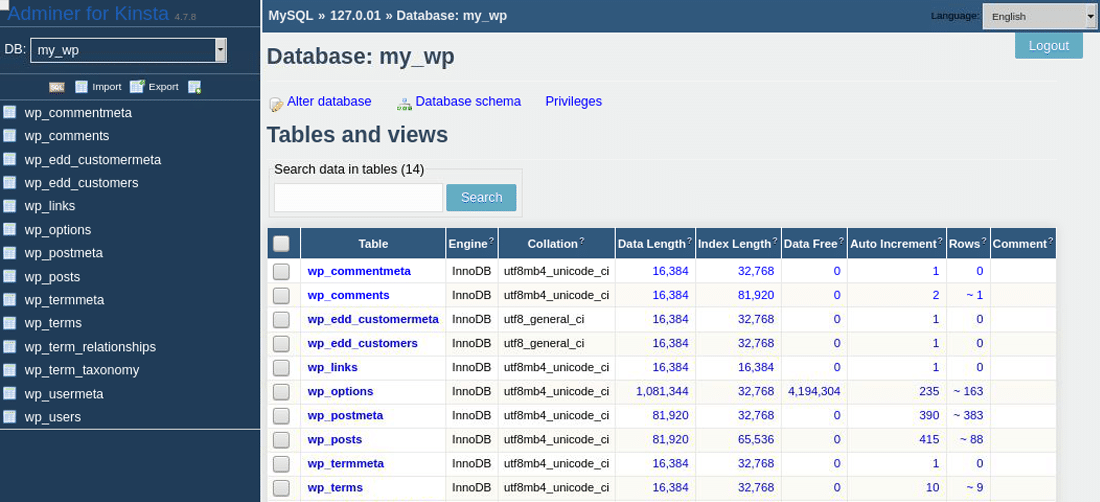
Truncate, Drop, Move, and Copy Tables
Adminer allows you to perform many operations on tables directly from the database’s dashboard.
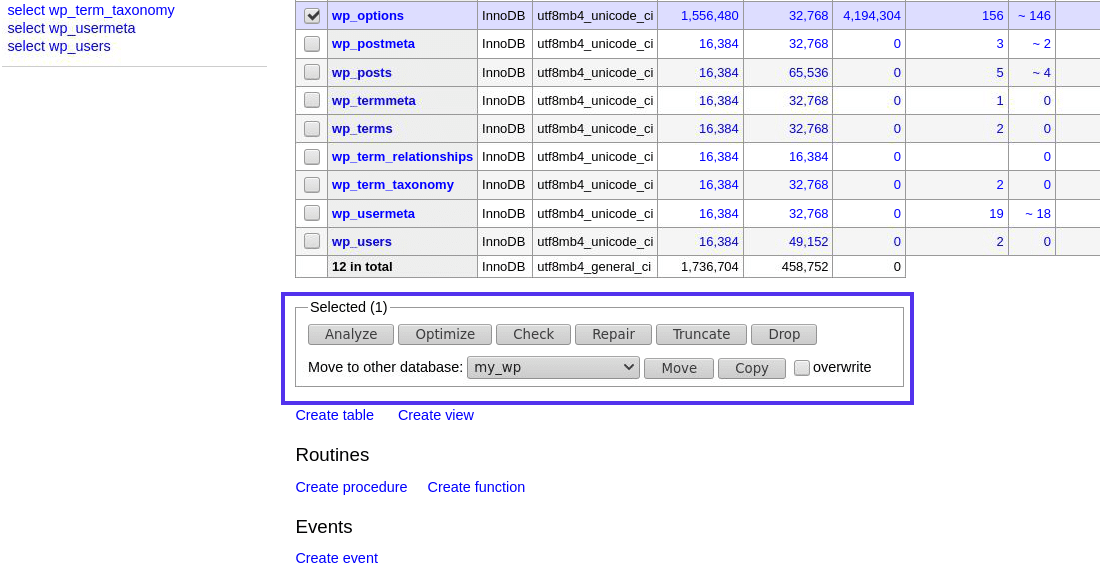
You can perform many SQL queries on tables by selecting them and clicking the buttons below.
For example, if you want to delete all the comments on your site, you can select the wp_comments table and hit the Truncate button. It’ll empty all the rows in the table, but it’ll still preserve the existing column structure. Hitting the Drop button will delete the table altogether.
From here, you can also Move or Copy the table to another database. With the Overwrite option, it’s a quick and dirty way to transfer site data such as posts and comments from one site to another.
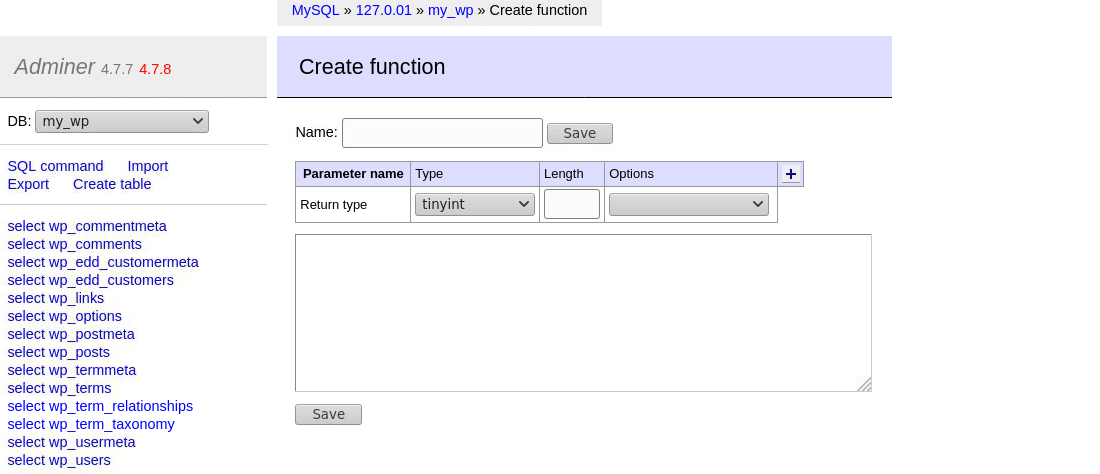
Create Tables, Views, Routines, and Events
You can use Adminer to create new tables, views, routines, and events.
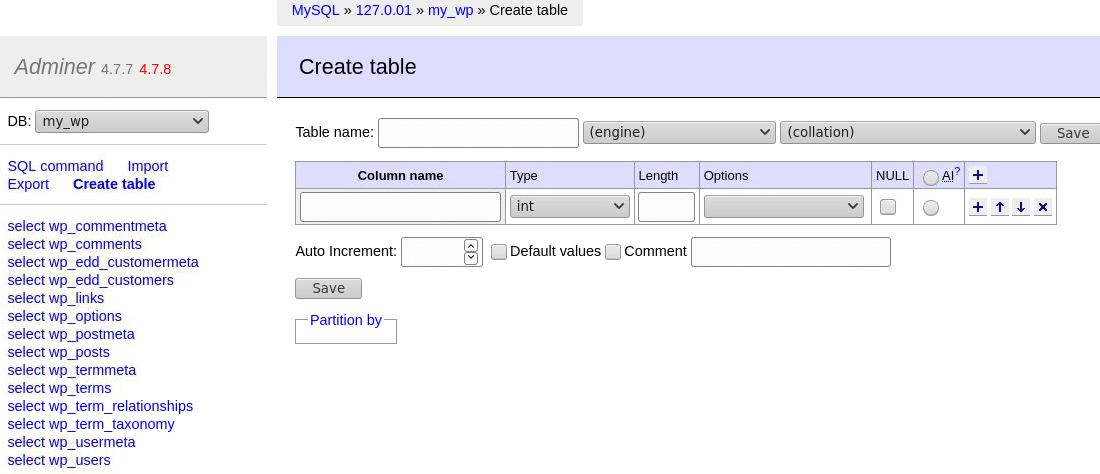
The Create table feature lets you define the table’s complete schema, including its columns and nested values.
Power users can use Adminer’s other advanced features to define MySQL views, procedures, functions, and events.
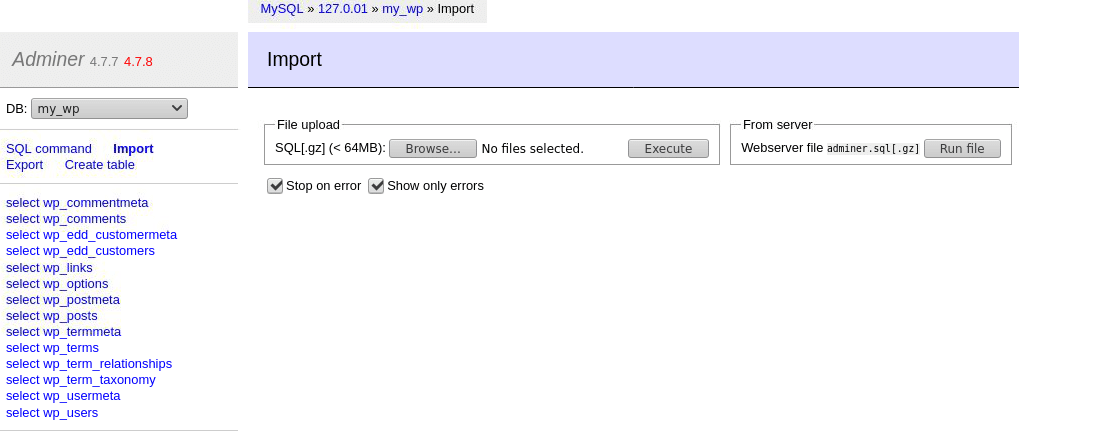
Import or Export a Database
Adminer lets you import a MySQL database easily. All you need to do is upload the backed up .sql or .sql.gz (recommended) file and execute it. This method is an easy way to restore a MySQL database.
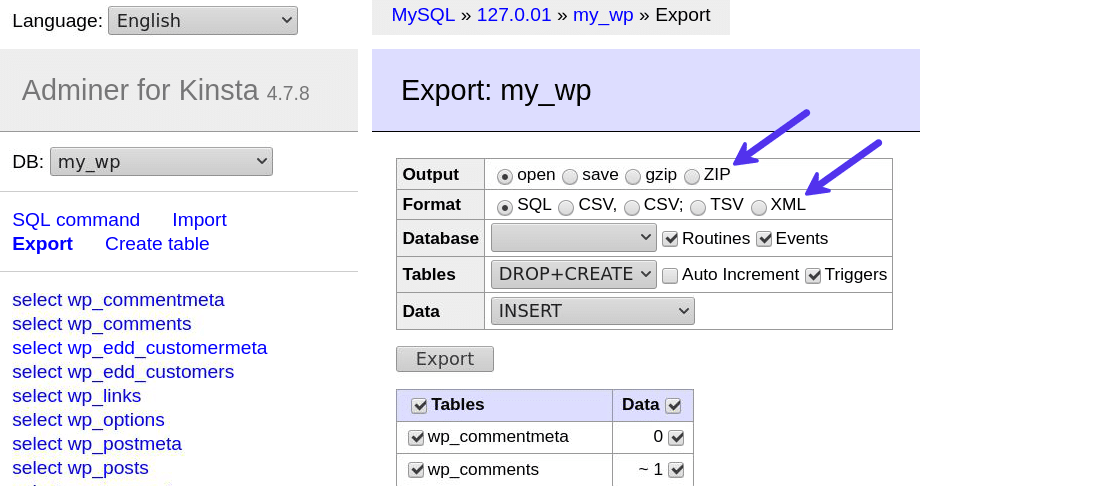
Likewise, backing up an existing database is also super simple with Adminer. Click the Export link, and then choose the export options such as the output type, format, and other database settings. You can also select the tables you want to export.
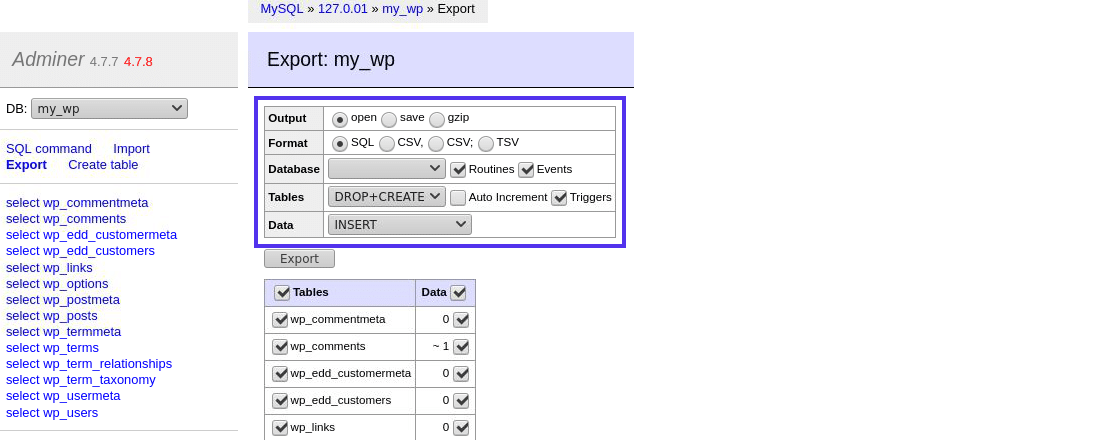
By default, Adminer supports exporting the database with Open, Save, or GZIP outputs, with SQL, CSV, CSV;, or TSV formats. However, you can extend this functionality effortlessly with Adminer plugins. I’ll cover them later in this article.
Execute SQL Queries
You don’t have to deal with a clunky user interface with Adminer to run an SQL query. Just visit the SQL command screen and execute any query you want.
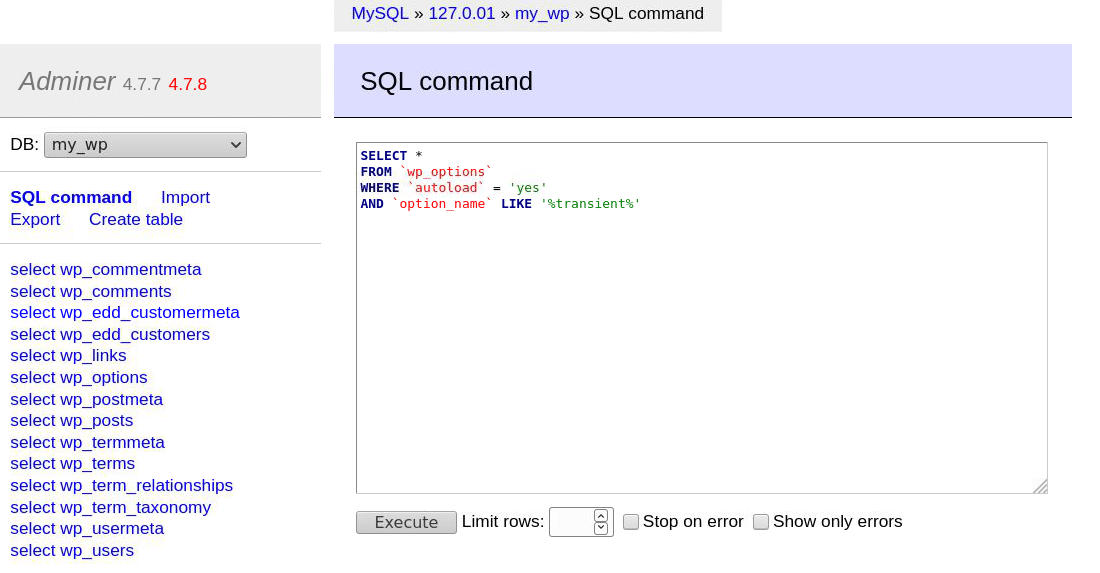
Note the syntax highlighting. Adminer even links the highlighted SQL keywords to their official documentation.
Before executing the query, you can limit its rows, set it to stop running when it hits an error, and only show output for errors.
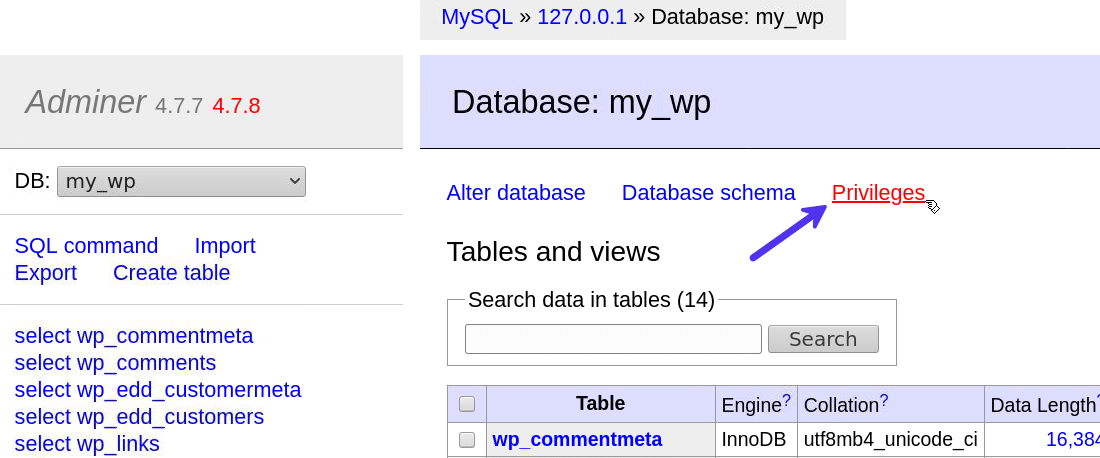
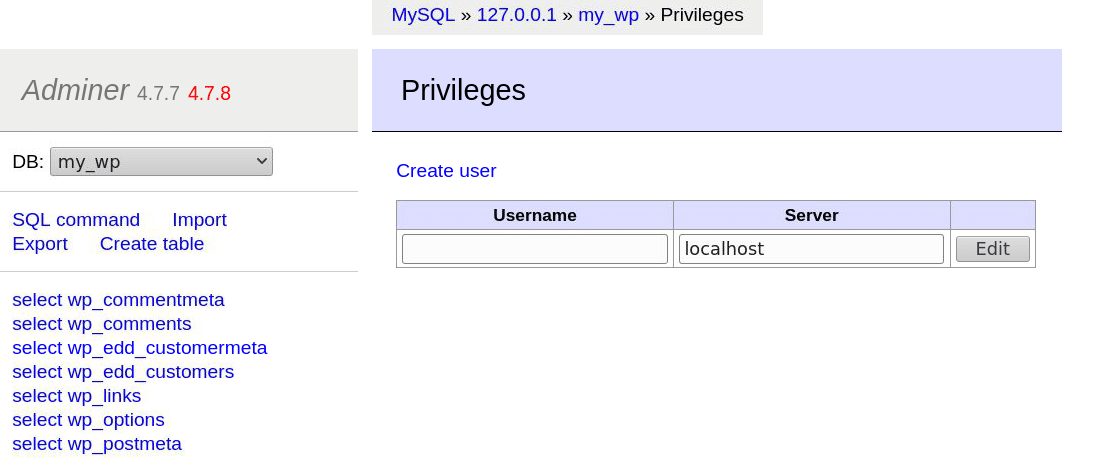
Display and Create Privileges (Users)
You can use Adminer to create new users with custom privileges for your database. It’s unnecessary in most cases, but if you want to create a new user, you have the option to do it quickly.
Extensive Customization Options
You can extend or overwrite Adminer’s default features with your custom code using its default Adminer class. To achieve that, you need to define an adminer_object function that returns custom values for the Adminer class.
For example, if you want to customize the name displayed in the page title and heading, you can do it with this code:
<?php
function adminer_object() {
    class AdminerExtender extends Adminer {function name() {
        // your custom name for title & heading
        return 'Adminer for Kinsta';
        }
    }
    return new AdminerExtender;
}
include './adminer-4.7.8.php';
You can now see the custom name we set (“Adminer for Kinsta”) in the header section.

There are a lot more cool things you can do with Adminer’s extensions. You can learn more about Adminer’s extensions on their API reference page.
Adminer Plugins
Adminer plugins are ready-to-use extensions that you can use to extend Adminer’s default functionality easily.
For instance, if you want to export your database in XML format, you can install the Adminer dump-xml plugin. Likewise, if you want to export your database as a ZIP compressed file, you can plug in the dump-zip extension.
The official website lists some of the most popular Adminer plugins. You’ll also find information on how to set up and use Adminer plugins there.
Adminer Themes
One of Adminer’s coolest features is its theming functionality. The official website lists some ready-made designs that you can use right away.
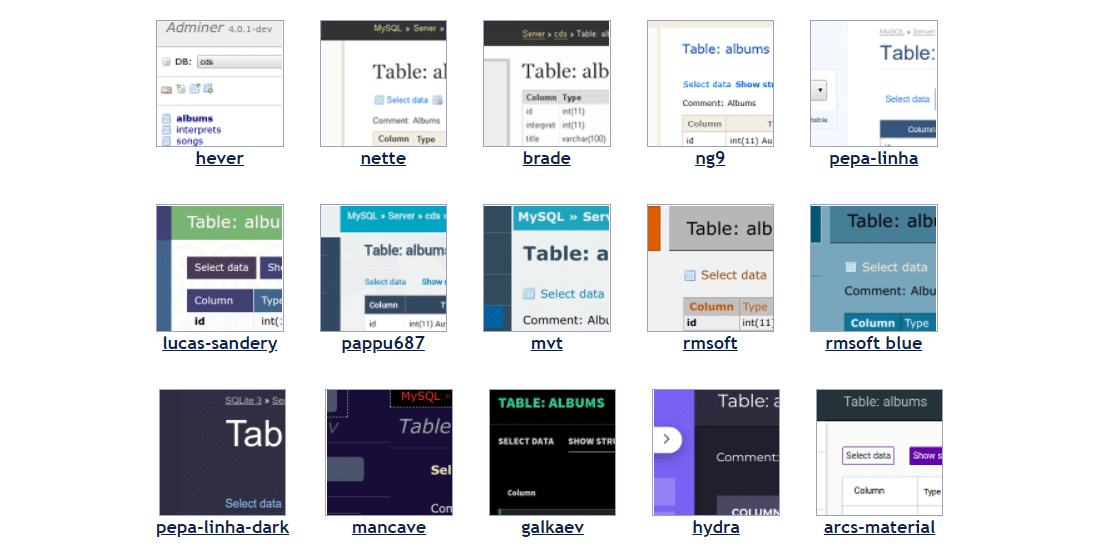
To use an Adminer theme, you need to put the theme’s adminer.css file in the same directory where adminer.php resides.
It’s that easy.
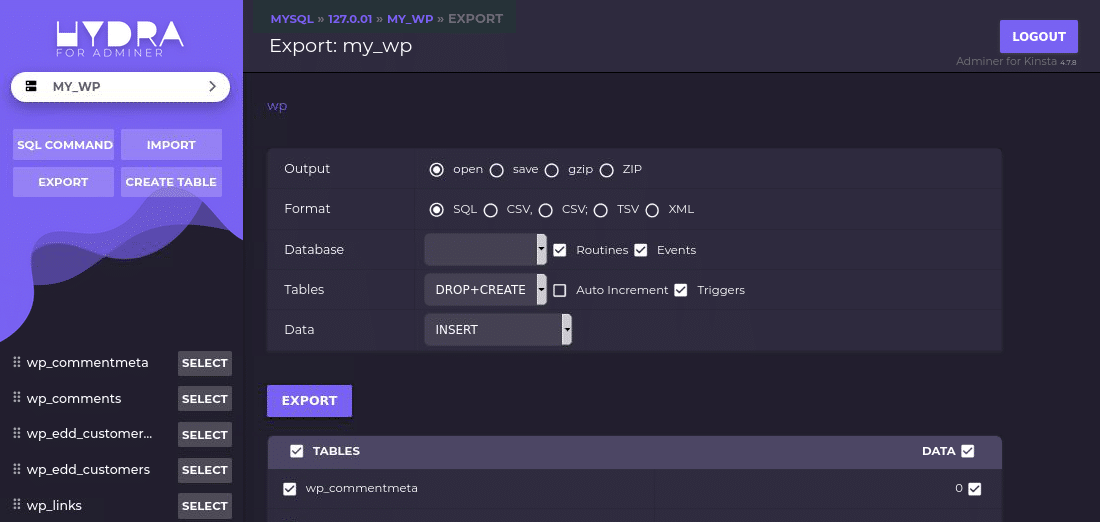
The above example is the Hydra theme listed on Adminer’s website. It’s a Material Design-based dark theme for Adminer.
Some other good Adminer theme examples are Adminer Bootstrap-Like Design and Adminer Theme by pematon. Using any of the above themes as a template, you can customize them to your liking by modifying the CSS file.
Adminer vs phpMyAdmin
Now that we’ve explored many of Adminer’s features, it’s time to look at how Adminer compares to phpMyAdmin, the industry leader. Here’s a brief review of how they stack up on various fronts:
Adminer vs phpMyAdmin: Features Comparison
phpMyAdmin only supports MySQL databases, while Adminer supports many other databases. Adminer is also available in a MySQL-only flavor.
Editing and creating tables in phpMyAdmin is a chore compared to Adminer. Selecting data in bulk and editing them all at once is comfortable with Adminer. You’ll find phpMyAdmin lacking in this area.
You can also look at Adminer Editor, a variant of Adminer focused on editing a database. It works with only one database at a time, and you need to connect it to another database to make it work.
There are some areas where phpMyAdmin excels. For instance, it supports many more languages and export formats than Adminer. Its large userbase ensures that there’s a thriving community that’s willing to help you if you stumble across any problem.
Adminer vs phpMyAdmin: Security
According to Adminer’s team, “Security is #1 priority in development of Adminer.” For instance, Adminer blocks access to databases without setting a password in the backend. It also rate-limits connection attempts to protect against brute-force or SQL injection attacks.
Adminer’s plug-and-play design also means that you can delete it from your server quickly when it’s not needed anymore. If you want to use it again in the future, you can upload it back quickly. You cannot do the same with phpMyAdmin.
By using Adminer’s login-ssl plugin, you can connect to your MySQL database server using SSL. Adminer’s dashboard also hints you if there’s a new version available, so you can be sure that you’re always using the latest version.
Adminer vs phpMyAdmin: Performance
According to an independent test by Juraj Hajdúch, Adminer is on average 28% faster than phpMyAdmin. While they published these results way back in 2009, when Adminer was still in its infancy, it’s the only independent performance test available (yet).
As Adminer comprises just one lightweight file, you can deploy it on even the most resource-limited server.
Adminer vs phpMyAdmin: User Experience
Using Adminer is a breeze from the get-go, unlike with phpMyAdmin. You don’t have to dabble with any configuration or settings. It just works.
Adminer also provides a better, friendlier user interface. Customizing tables, columns, and their values is amazingly simple with Adminer. So is importing a database or taking backups.
Furthermore, Adminer plugins and themes let you customize its features and interface to suit your requirements. That makes Adminer a clear winner from a user experience perspective.
Adminer vs phpMyAdmin: File Size
Adminer is a compact database management tool. It’s at least 28x times smaller than phpMyAdmin, even though it supports more database types than phpMyAdmin.
The latest full-featured version of Adminer (v4.7.8) comes in at a measly 478 KB, while phpMyAdmin’s latest version (v5.0.4) is 13.7 MB (plus, it’s a compressed file to boot). The file size difference is even starker when you consider Adminer’s MySQL-only version (354 KB).
How to Use Adminer with WordPress
There’s no particular way to use Adminer with WordPress. It works the same with all MySQL databases. Download its PHP file, place it anywhere on your server, and access it from your browser. After logging in to Adminer, you can explore your WordPress site’s database with it.
I recommend you to remove the Adminer file from your server once you’ve finished using it. Leaving it unattended on your server for an extended period may expose your database to vulnerabilities.
There was a WordPress plugin named “ari-adminer” that allowed you access Adminer directly from your WordPress dashboard. However, it has been closed since April 2019 and is no longer available for downloads because of a critical security issue.
The next best way to use Adminer with WordPress is with DevKinsta.
DevKinsta and Adminer: Easy WordPress Database Management
DevKinsta, Kinsta’s free suite of local development tools, uses Adminer in the background to power its database manager.
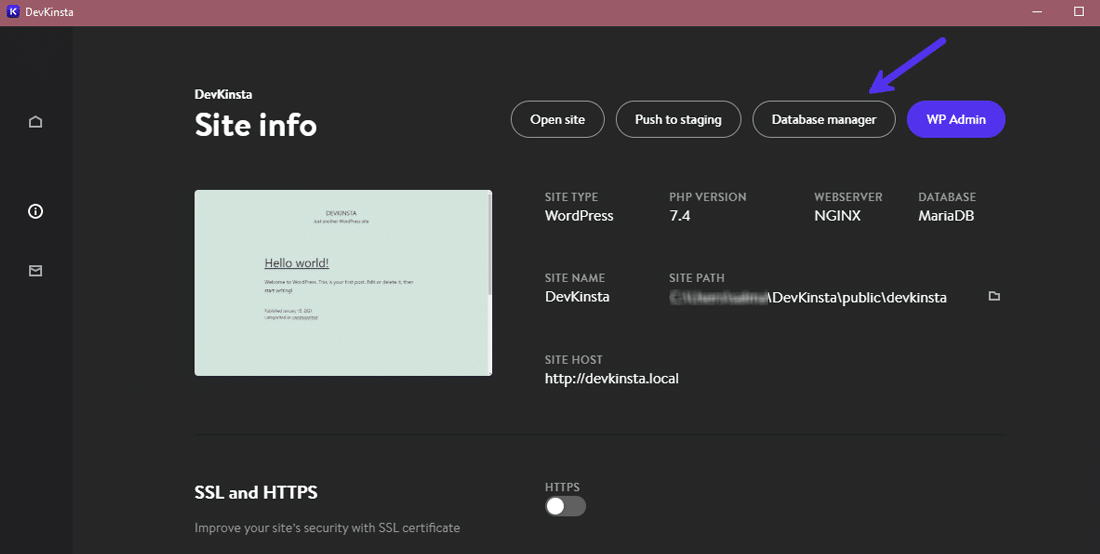
Click the Database manager button in your DevKinsta dashboard to access Adminer.
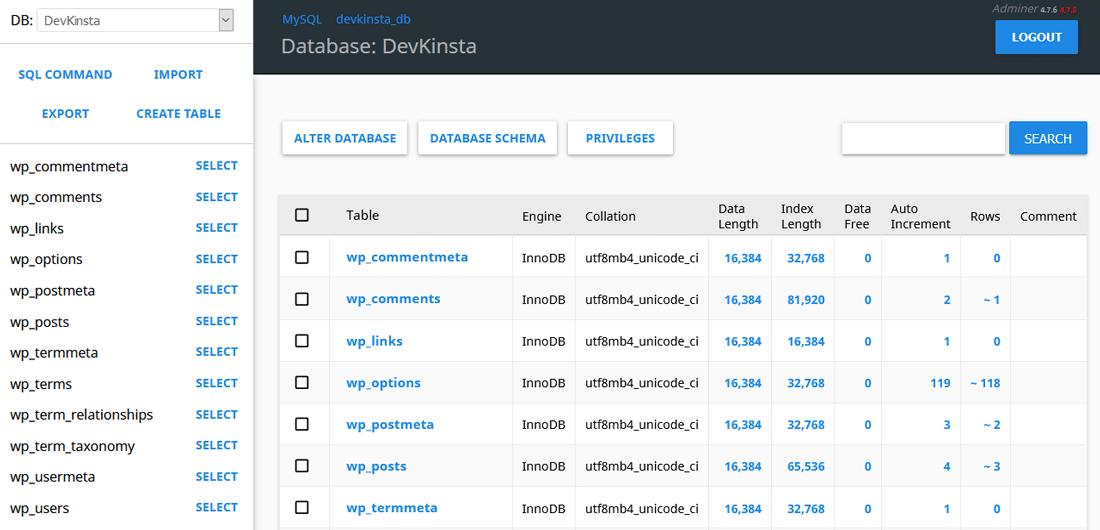
DevKinsta’s database manager supports all the Adminer features discussed earlier in this post. You can use it to switch between different databases, view and edit tables, manipulate database values, import and export databases, run SQL queries, and much more.
If you’re setting up multiple sites locally with DevKinsta, then you can switch between their databases from Adminer’s dashboard. Just select the database you want to use from the dropdown menu in the top-left corner.
You can visit DevKinsta documentation for more information on its Database Manager.
Summary
Adminer is one of the best alternatives to phpMyAdmin. Not only does it have a lighter footprint, but it’s also much snappier to work it. It’s under slow yet constant development. Adminer’s latest version added support for PHP 8 environments, making it future proof.
If you’d like to experiment with Adminer, you can create a local WordPress site with DevKinsta almost instantly and start exploring its database with Adminer.
Now it’s your turn: what’s your experience with Adminer? Do you have any questions about managing databases with Adminer or DevKinsta? If so, share them in the comments section.


