
Using SSH with WordPress can be one of the most secure and convenient methods of accessing your website.
It’s a protocol for accessing the files on your site which means ‘Secure Shell’. As long as you have the login credentials, you can use it to access your site from wherever you are, knowing that you are doing so securely.
In this post, you’ll learn about some of the most useful SSH commands to use with WordPress.
Let’s dive in!
What is SSH and How Do I Use it with WordPress?
SSH is a secure protocol for accessing files on your WordPress site. This post focuses on the commands you can use, so I’m not going to go into detail on how to use SSH to access your site, but just give you a recap.
What Is SSH?
SSH, or ‘Secure Shell’, is a protocol you can use to access files and directories on a remote server. The SSH specs define it as:
“A protocol for secure remote login and other secure network services over an insecure network.”
Instead of using your web browser, you use either the Terminal (on macOS or Linux) or a client such as PuTTY (on Windows) to access your site over SSH.
How Do I Use SSH with WordPress?
For a WordPress site, SSH will give you access to the WordPress files themselves plus any files you’ve added to the wp-content directory, either via the admin screens or directly.
It’s likely you’ll be using it in the wp-content directory mostly, and occasionally in the root directory to access files like wp-config.php.
To work in your site using SSH, open either the Terminal or a client such as PuTTY, and start by accessing the server. To do this you’ll need four pieces of information:
- Server address.
- Username.
- Password.
- Port.
To connect via SSH with Kinsta, you’ll need to find this information in MyKinsta. Select your site and finding the SFTP/SSH section of the Info screen.
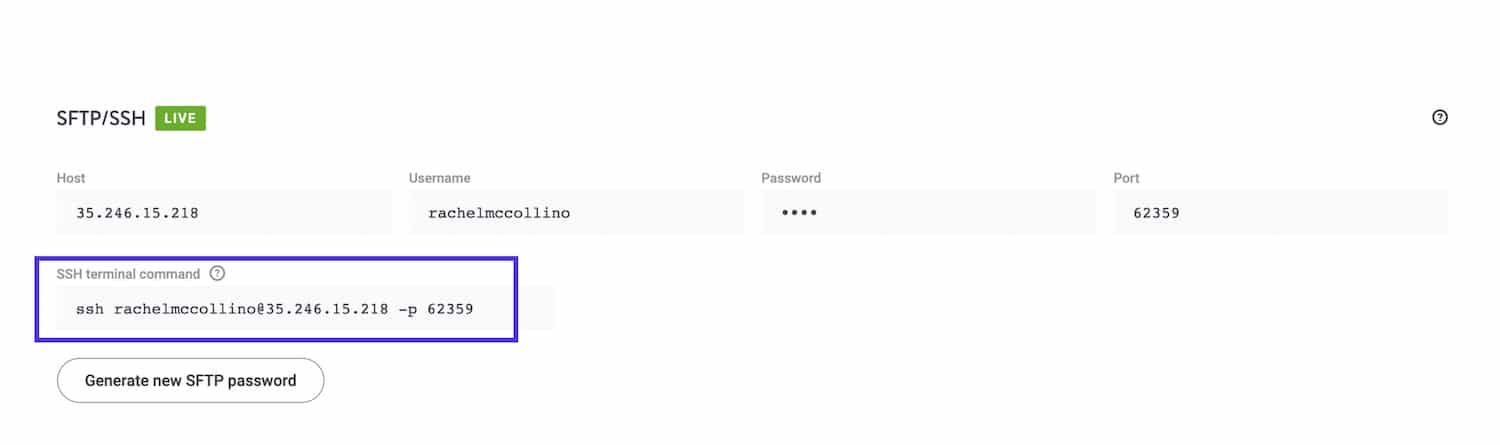
Copy this into the command line.
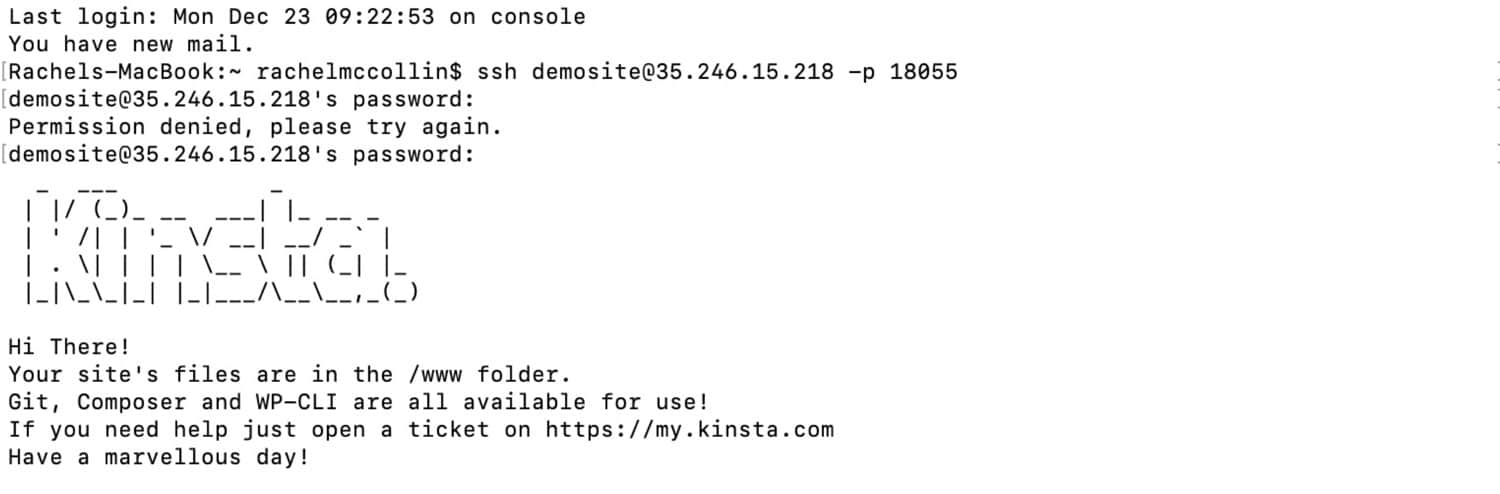
Once you’ve done that, you can start using SSH commands with your WordPress site.
If your connection is refused, it could be for one of a number of reasons. Follow our guide to troubleshooting a refused SSH connection to get connected again.
What Is PuTTY and How Do I Use It?
If you’re running macOS or Linux, you have the interface you need to access your WordPress site via SSH already. You can simply use the built-in Terminal to use SSH.
But if you’re on Windows, you’ll need to install a client to be able to use SSH.
The most popular SSH client is PuTTY. You’ll need to download and install that before you can access your site from Windows. You then use the same SSH commands in PuTTY as you would in the Terminal.
How Can I Automate SSH Commands with WordPress?
One of the benefits of using SSH to access your WordPress site is that you can automate commands you use frequently.
You do this by using WP-CLI, the WordPress command-line interface. This is an interface that gives you access to a library of WordPress-specific commands that you can use over and above those provided by SSH.
Using WP-CLI means you can automate WordPress management tasks such as updating your WordPress installation, installing plugins, and configuring remote servers. Using the command line speeds up the process and can make you a much more efficient developer.
Benefits of Using SSH with WordPress
Using SSH with WordPress gives you a number of benefits:
- It’s secure. It means you can access your server remotely from wherever you are, knowing that you are doing so over a secure interface.
- It’s convenient. It gives you access from anywhere you happen to be. You don’t need to access the WordPress admin screens or even have a web browser running.
- It’s fast. Using SSH commands can be much quicker than using the WordPress admin screen or accessing files via SFTP in many cases.
Now that you know what SSH is and how it works with WordPress, let’s take a look at the most popular SSH commands you can use with WordPress.
27 SSH Commands to Use with WordPress
The SSH protocol has a wide range of commands. Below I’ve listed out the most commonly used ones and grouped them into categories for convenience.
Directory Commands
There is a range of SSH commands that you can use to work with or manipulate the directories (or folders) in your WordPress site.
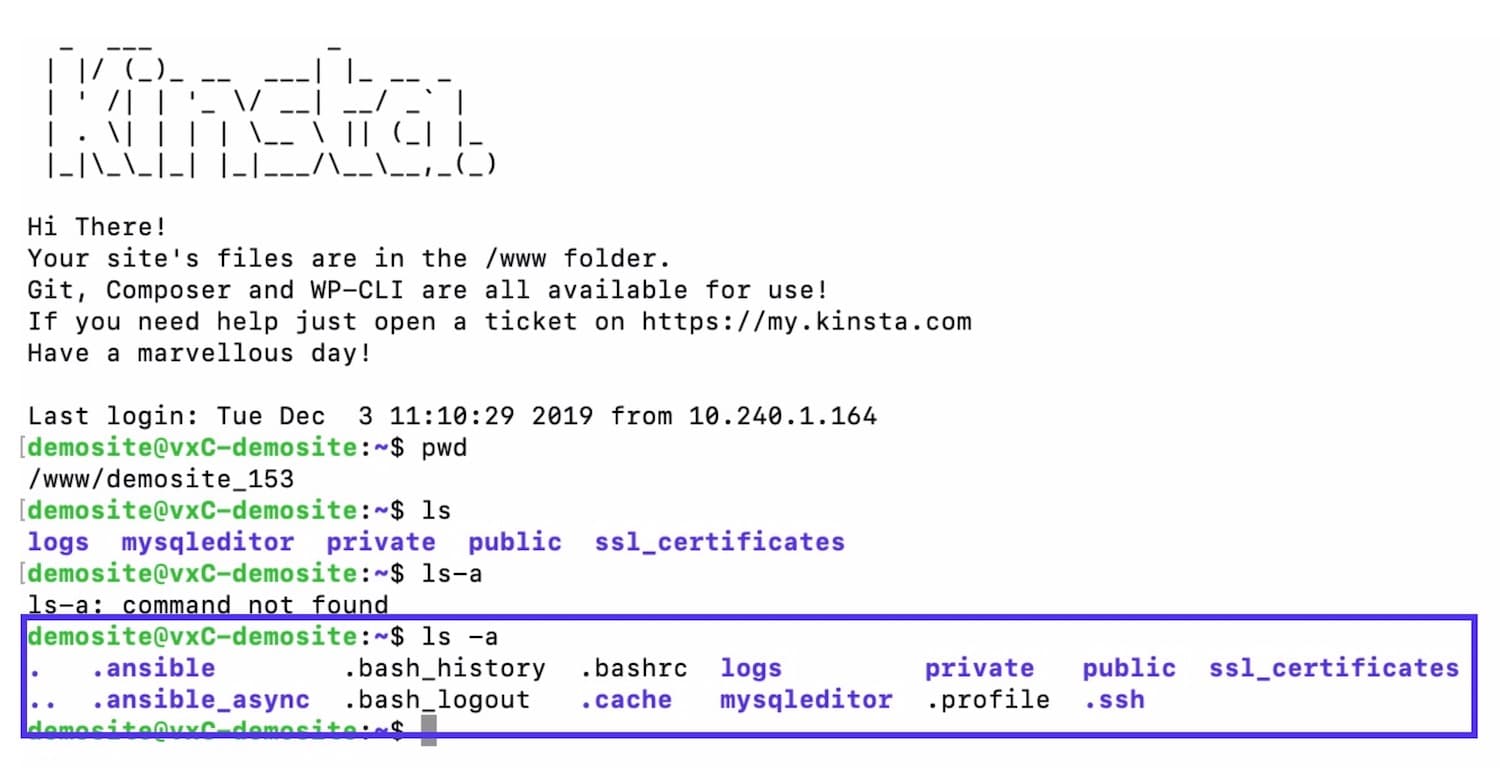
pwd – Show Current Directory (Full Path to Where You Are Right Now)
The pwd command will display the full path to where you are in your server right now. If you type this in when you first access your site, it’ll tell you which server you are on.
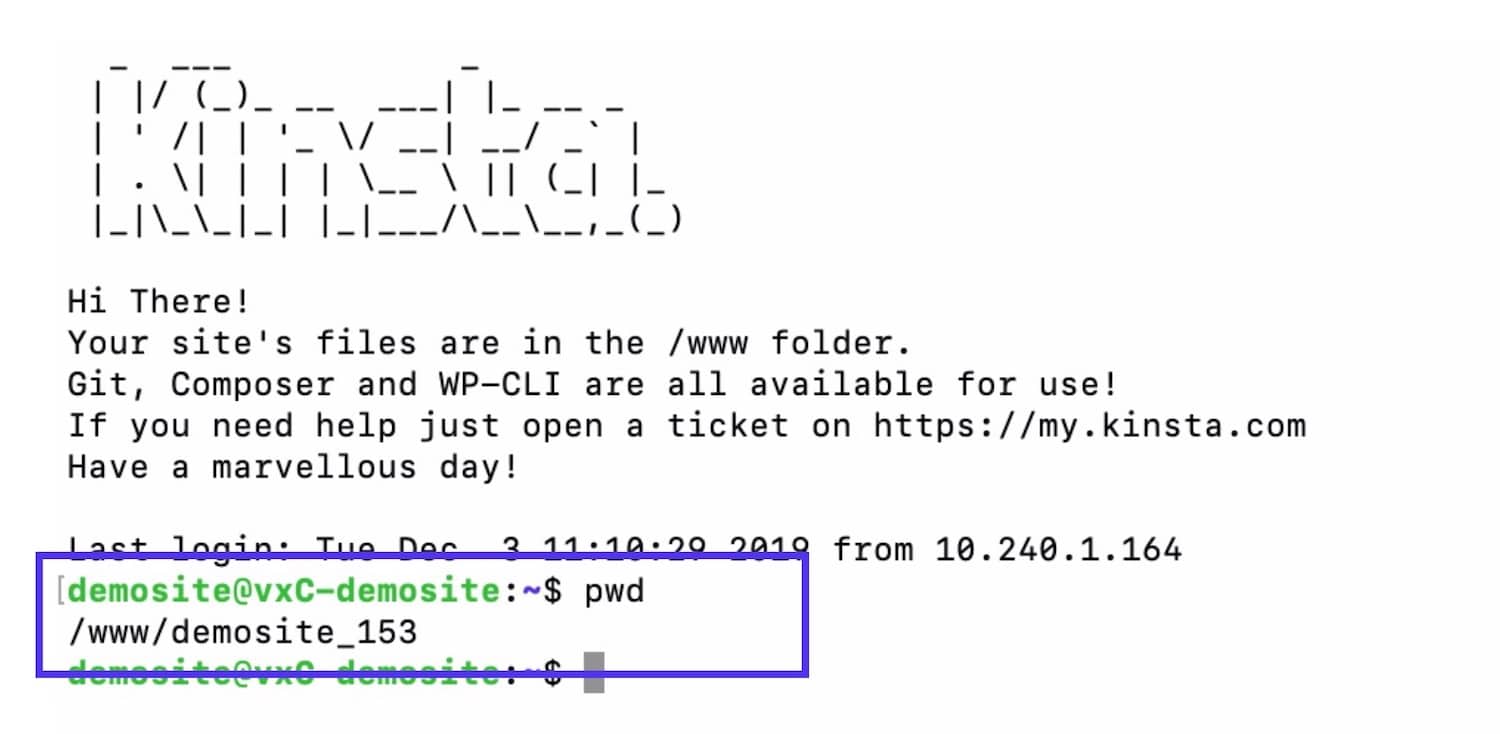
Use this command after moving further into your folders, and you’ll see more information about exactly where you are. This can be useful to check your location, as you don’t have the visual representation that you’d get when using a code editor or FTP client.
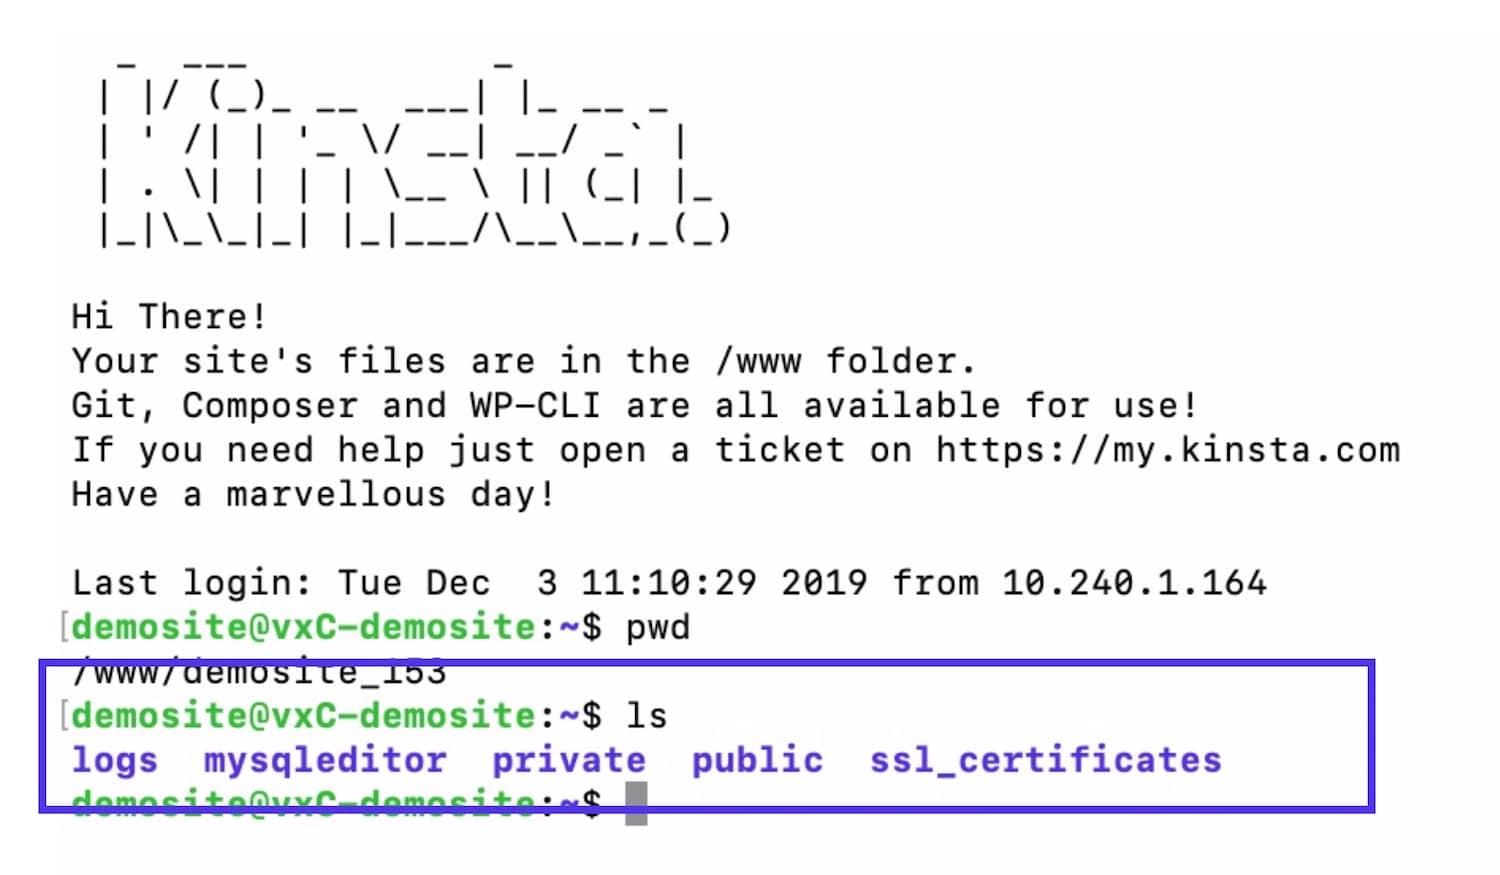
ls – Show Directory Contents (List the Names of Files)
The ls command will display the contents of the current directory.
You can also use additional parameters to customize or add to the information the ls command returns:
ls -adisplays hidden files.ls -lshows file details for directory contents, for example, permissions, ownership, date, etc.ls -slists the size of files, in blocks.ls -s -hshows the size in a humanly-readable form.
Make sure to type a space between the command and any parameters.
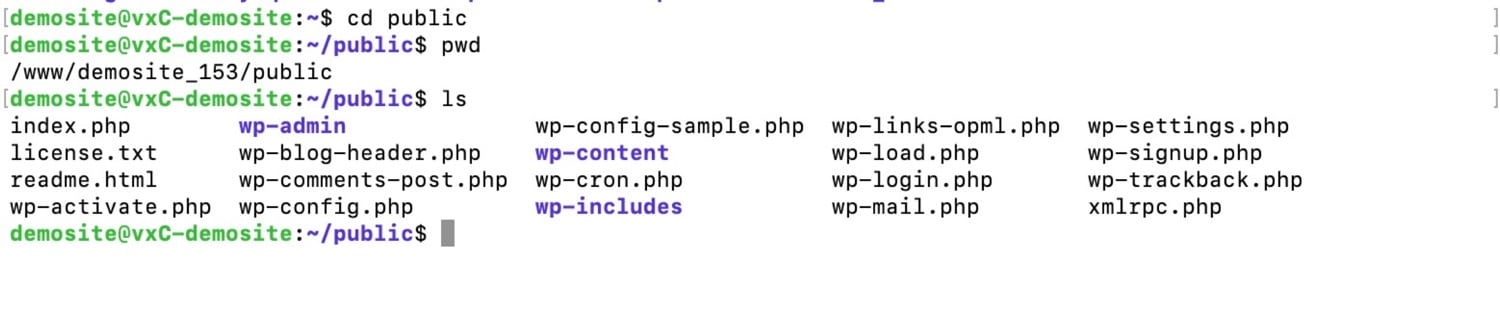
cd – Change Directory
The cd command will let you move to another directory. You can move into subdirectories of the current directory or you can move up or across with the correct parameters.
The command below takes me from the root directory of my server to the public directory:
cd publicTo move up the directory tree or to go back where you came from, use one of these parameters:
cd ..goes to the directory immediately above your current location.cd ../foldernamemoves you sideways into another folder inside the folder right above you.cd– goes to the previous directory.cd /takes you to the root directory.
In the screenshot below, I’ve moved into the public directory and listed out its contents. If you have experience with the contents of a WordPress installation, this will look familiar to you:
mkdir – Create a New Directory
With the mkdir command, you can create a new directory in the current directory.
So, if you’re inside the folder of a plugin and you want to add a directory for stylesheet, you might use this command:
mkdir stylesThis will add a new empty directory to the folder you are currently in. If you want to add a directory to a folder lower down in the structure, you type in the structure. So from the wp-content folder, you might type:
mkdir /plugins/myplugin/stylesrmdir – Remove Directory
The rmdir command will delete a directory on your server. Be careful using this as you can’t undo it!
As with mkdir, you can use rmdir to remove a directory in your current location:
rmdir stylesOr you can use rmdir to remove a folder further down in the structure:
rmdir /plugins/myplugin/stylesYou can also use rm to remove directories, if you add additional parameters.
rm * foldername– delete all the files or content in a directory.rm -r foldername– delete the folder as well as the folders inside it.
File or Directory Commands
The following commands can be used with either files or folders/directories.
cp – Copy File or Folder
You can use the cp command with both files and folders to copy them to another location. You’ll need to specify where you want the file or folder to be copied to.
cp filename.extension /dir/This specifies the name of the file to be copied (including its extension) and the location it will be copied to.
If you want to rename the file (i.e. the new version has a different name from the original), then you can also specify the new file name.
cp filename.extension /dir/filename.extensionThis command has a number of parameters you can use:
cp -rcopies all the contents of a folder.cp -fdeletes the destination file if there is already another file with the same name, and overrides it with the new one.cp -igives you a warning message before copying.cp -uoverwrites the file in the destination folder only if the files have different content.cp -nchecks if the file already exists first and if so, it won’t copy. It doesn’t overwrite the file.cp -aarchives the original file.
mv – Move File or Folder
As well as copying files and folders, you can also move them. To do this, use the mv command.
As with cp, you can either move a file or folder and keep the same name or move it and rename it.
mv filename.extension /dir/moves a file and keeps the same name.mv filename.extension /dir/filename1.extensionmoves and renames the file.mv filename/ ..moves a file one folder up.
zip – Compress File or Folder
Another command you can use with folders or files is zip which you can implement to compress a folder and its contents. You need to include the name of the file/folder that will be compressed as a zip file. You can use it with parameters that will specify whether you want to delete the original folder or not.
zip -r filename.zip foldernamecompresses a folder but doesn’t delete it.zip -m filename.zip foldernamecompresses a folder and deletes it, leaving you with just the zipped version of the folder.zip -d filename.zip foldernamedeletes a file from the existing zip archive you specify.zip -u filename.zip foldernameupdates a file within an existing zip archive: useful if you’ve updated the original file and don’t want to delete the zip file and create a new one.
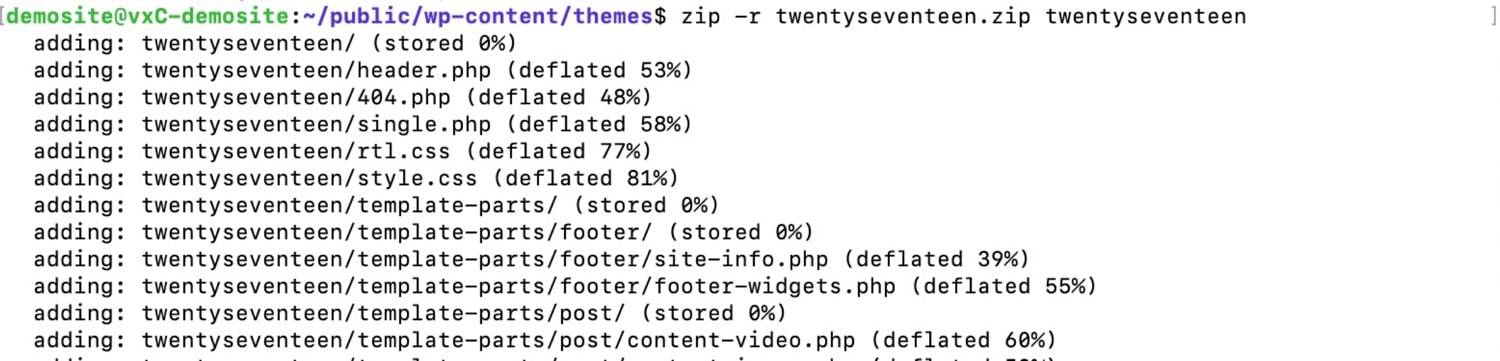
When you then list out the contents of the folder, you will see the zip file and the original folder if you used zip -r, but just the new zip file if you used zip -m.

unzip – Decompress a Folder
The unzip command will decompress a zip file in your directory and extract its contents to create the folder or files it was originally compressed from:
unzip twentyseventeen.zipDon’t use this if you didn’t delete the original folder when zipping it. It won’t overwrite the original folder. Instead, use zip -m to delete the original folder when zipping it, or use rm to delete it before unzipping the zip file.
You can also add parameters to unzip to customize its use:
unzip filename.zip -x excludedfile.zipwill exclude a file and prevent it from being unzipped with the rest.unzip filename1.zip filename2.zip filename3.zipwill unzip multiple files. You can use this with as many zip files as you want, and it’s a lot quicker than doing this in an FTP client.
tar – Create and Unpack Compressed Archives
The tar command will let you create and unpack .tar.gz archives, which is an alternative to using .zip archives. You use the same command to compress and decompress files or folders.
To compress a file or folder, use tar cvzf. The syntax for compressing a folder would be:
tar cvzf archivename.tar.gz directorynameAbove, archivename is the name of the archive file to be created and directoryname is the name of the folder to be compressed.
And to decompress the folder, use tar xvzf:
tar xvzf archivename.tar.gzThe four letters represent specific instructions:
ctells tar to compress files.xtells tar to extract files.vstands for verbose and tells tar to display the names of files affected by the command.ztells tar to uncompress the archive.ftells tar you are supplying the name of the archive.
File Commands
Below is a list of the most common SSH commands specifically for use with files.
touch – Create a New File
To create a new empty file on your server, use the touch command:
touch style.cssYou can only create a file in the current directory, so you’ll have to navigate to it before using the touch command.
cat – Show File Contents
To display the contents of a file, use cat.
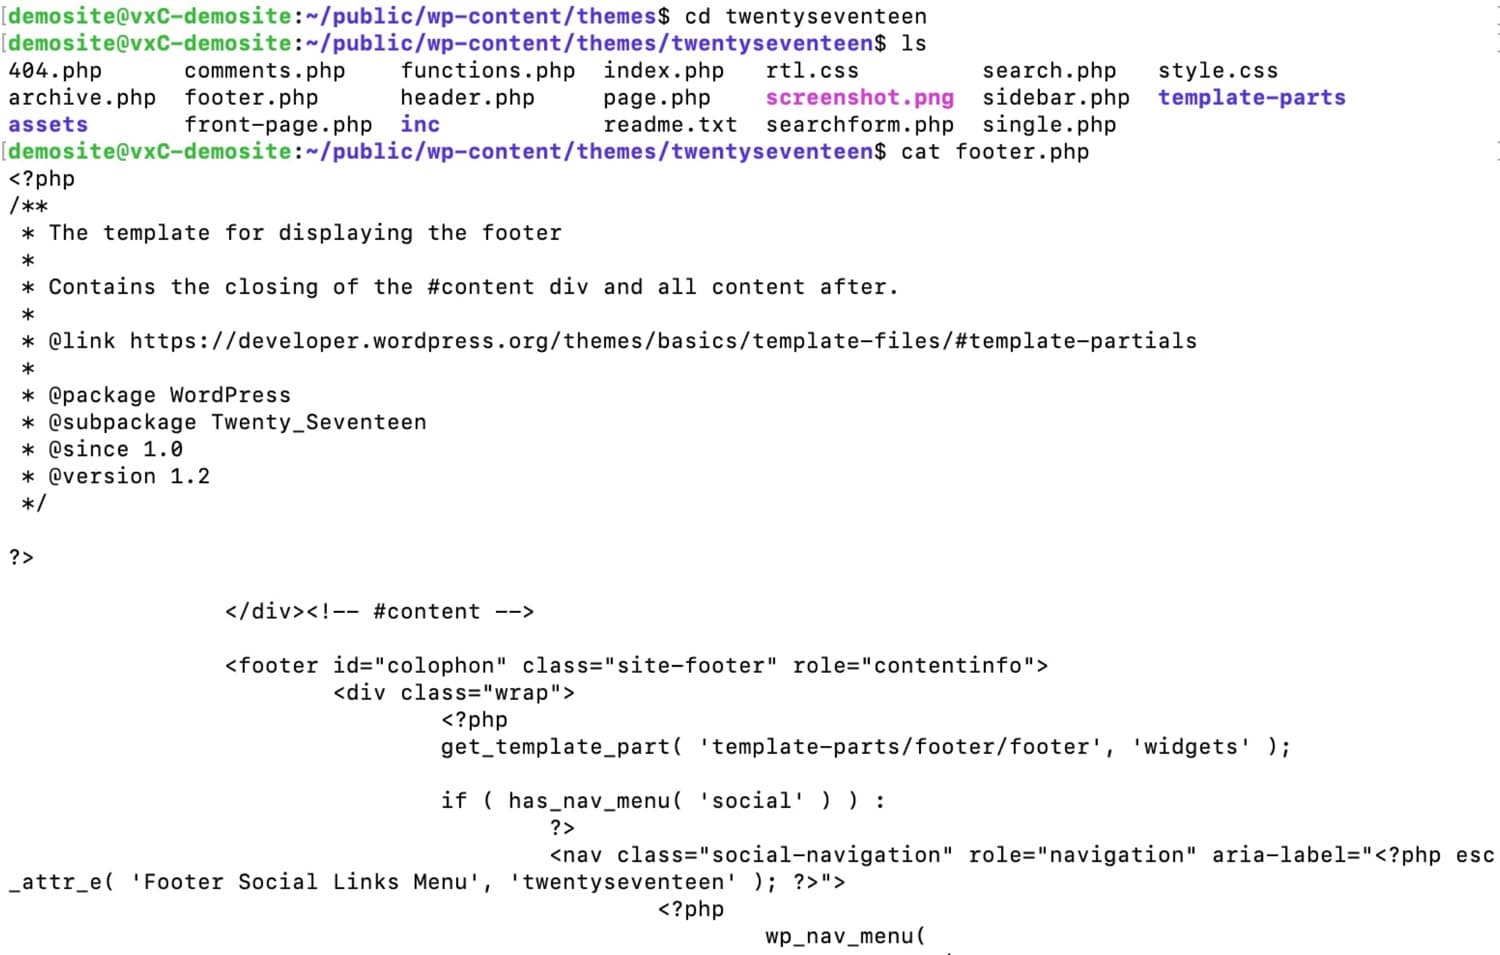
This will display the full contents of any file within the Terminal or PuTTY.
grep – Search for a Specific Phrase
If you know the file you need to examine is long and you also know what contents you’re looking for, you can use the grep command to search for specific content.
Below I’ve done a search for the word ‘sidebar’ in the sidebar.php file in a theme.

This will display any lines containing the search term.
If I wanted to search for a string of more than one word, I’d need to enclose it in speech marks:
grep "nav class" footer.phpThe grep command also has a number of parameters you can use to customize your search:
grep -i “string” filenamesearches for a string case-insensitively in the file.grep -c “string” filenamecounts the number of instances of a string in the file.grep -l “string” *lists the files that contain the string.grep -n “string” filenamedisplays the line number(s) along with the result
head – Read the First 10 Lines of a File
If you just want to read the opening lines of a file, then use the head command:
head filename.extension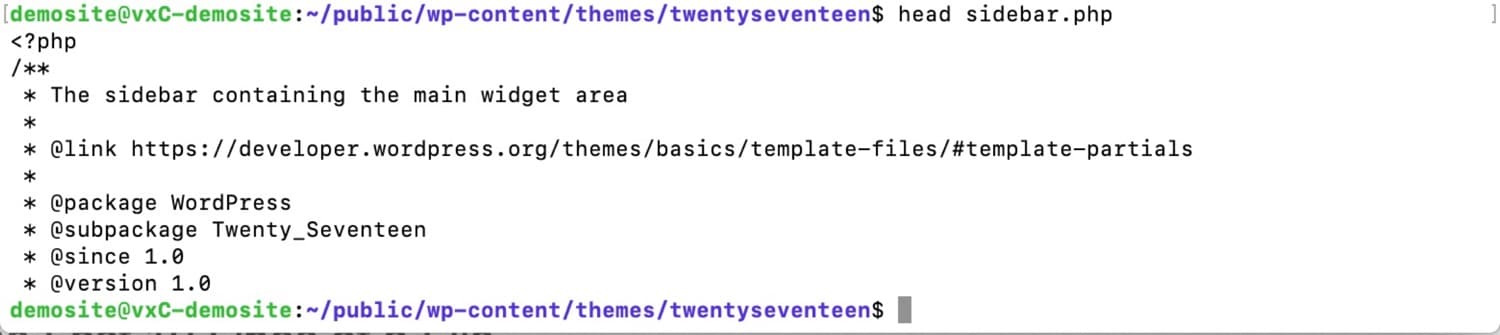
tail – Read the Last 10 Lines of a File
The tail command works in the same way as the head command, but instead reads the last ten lines of a file:
tail filename.extensionfind – Search Files and Directories
The find command lets you search through files and directories and return those that meet criteria that you specify. The command below will search the current directory for all files whose name includes ‘index’:
find . -name “index”The syntax is:
find operator criterion stringThe operators you can use are:
/(slash) searches the whole system..(dot) searches the working directory.~(tilde) searches the home directory.
So, if you changed the command above to this, str would search the whole system, not just the current directory:
find / -name “index”The criteria you can use include:
-name– file name.-user– files belonging to a given user.-size– files of a given size.-type -d– the directory type. i.e. only search directories.-type -f– the file type, i.e only search files.
The search term can be any string you like. Make sure you enclose it in speech marks.
du – Get File Size
If you want to find out the size of one or more files in your WordPress installation, use the du (Disk Usage) command:
du -h wp-config.phpThe insertion of -h means the disk usage will be displayed in human-readable format, rather than as blocks.
There are extra parameters you can use:
df -hwill display the result in a human-readable format.df -mwill display the result in MB.df -kwill display the result in KB.df -Twill show the file system type in an extra column.df -ht /directorynamelets you view information about a specific directory.df helplists other options that you can use, with their descriptions.
chmod – Change a File’s Permissions
The chmod command lets you change a file’s permissions:
chmod 464 filename.extensionTo determine which permissions to use, use the Unix Permissions Calculator and copy the number it gives you into the command.
nano – Edit a File with the Nano Text Editor
If you’ve used the touch command to create a new file, or maybe the cat command to show the contents of an existing file, you might want to then edit the file.
You can do this using the nano text editor with the nano command:
nano filename.extension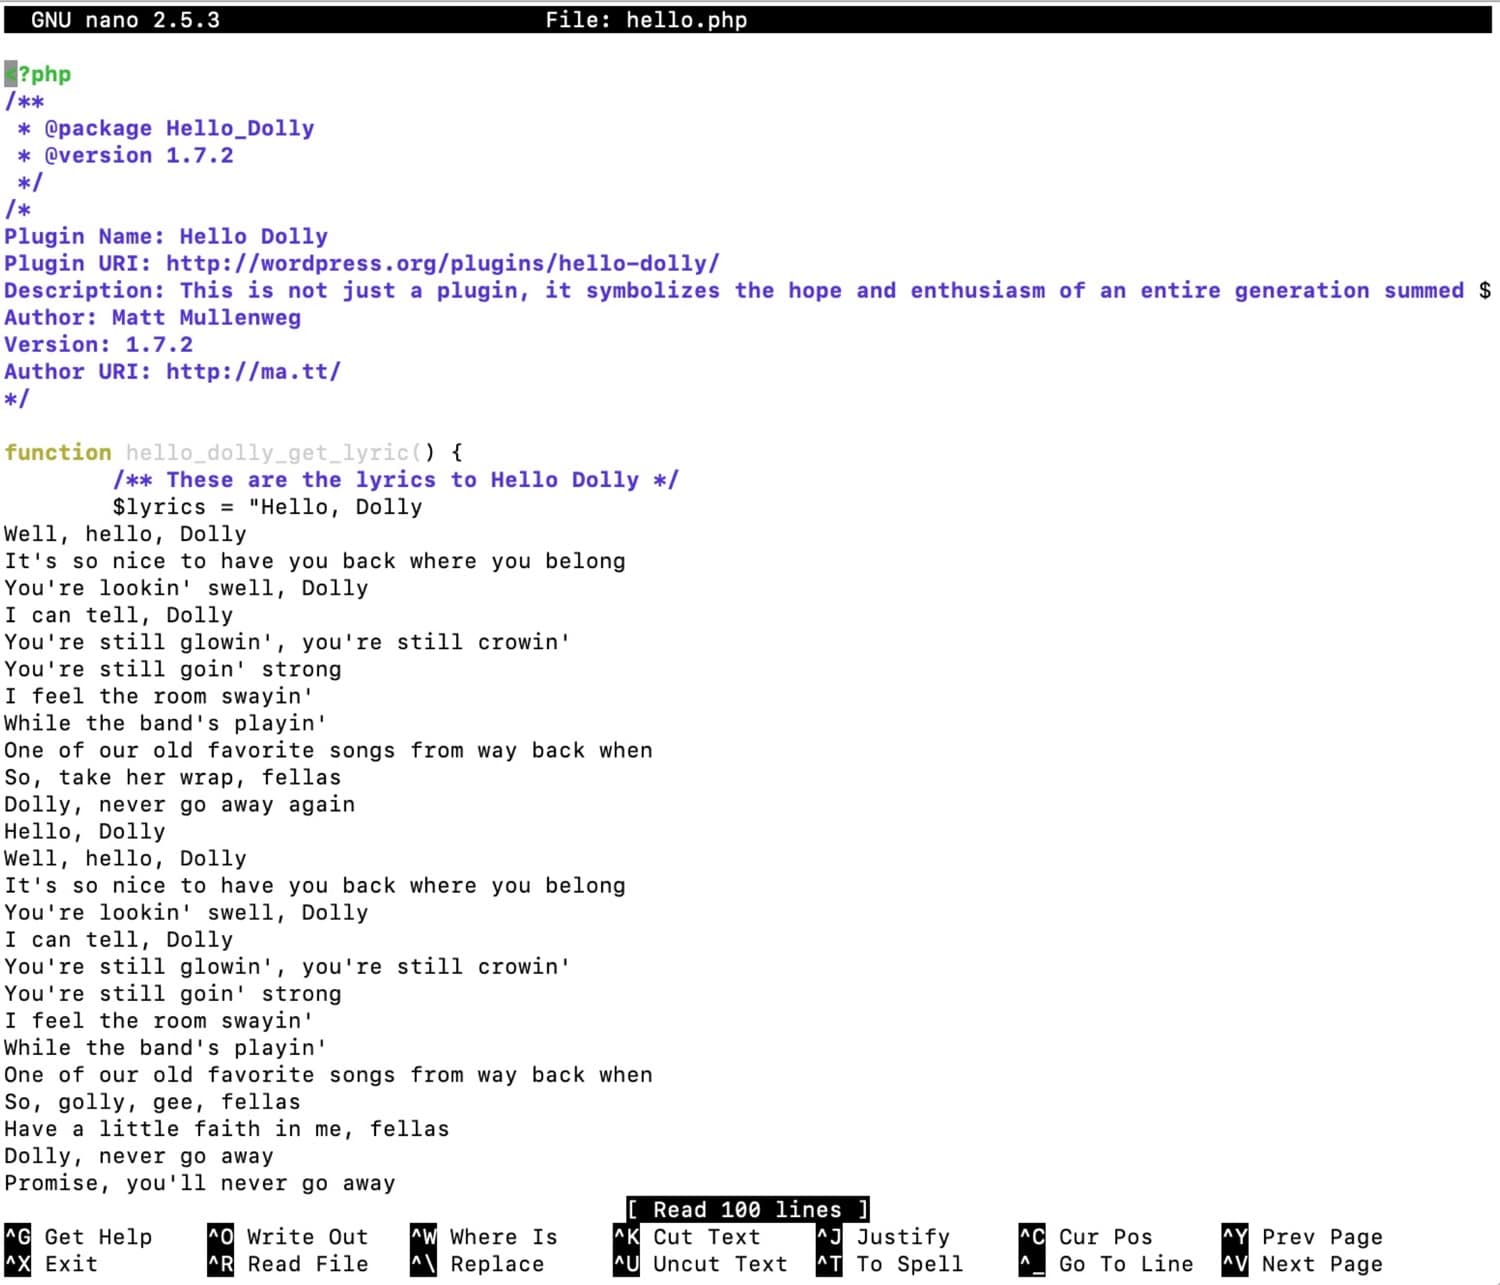
This lets you edit your files right from the command line.
Beware: undoing your work is a lot harder than if you’d used a code editor or a version control system. Only make minor changes if you are confident in doing so.
To navigate the file, use the cursor keys along with the keyboard shortcuts listed at the bottom of the screen. To exit the file, use Ctrl-X to return to the Terminal.
vim – Edit a File with the Vim Text Editor
The vim text editor works in much the same way as the nano editor and you access it using the vim command. Which you choose to use will depend on personal preference:
vim filename.extensionwget – Download Files
With the wget command, you can download files from the internet. They will be downloaded to the directory you are currently in. You’ll need to include the full path to the file you want to download:
wget https://site.com/filename.extThis will download the filename.ext file from site.com and store it in your current directory.
Terminal Commands
Now let’s take a look at some of the most commonly used commands to help you work with the Terminal (or PuTTY) interface.
clear – Clear Screen
If your screen is feeling cluttered, simply type in clear to clear it and find yourself at the top of a blank screen again. This is useful if you want a clean working environment or you want to hide your work if you’re in a public place:
reset – Remove Output from Terminal
The reset command will remove all of your commands and output from he terminal screen and clear the screen.
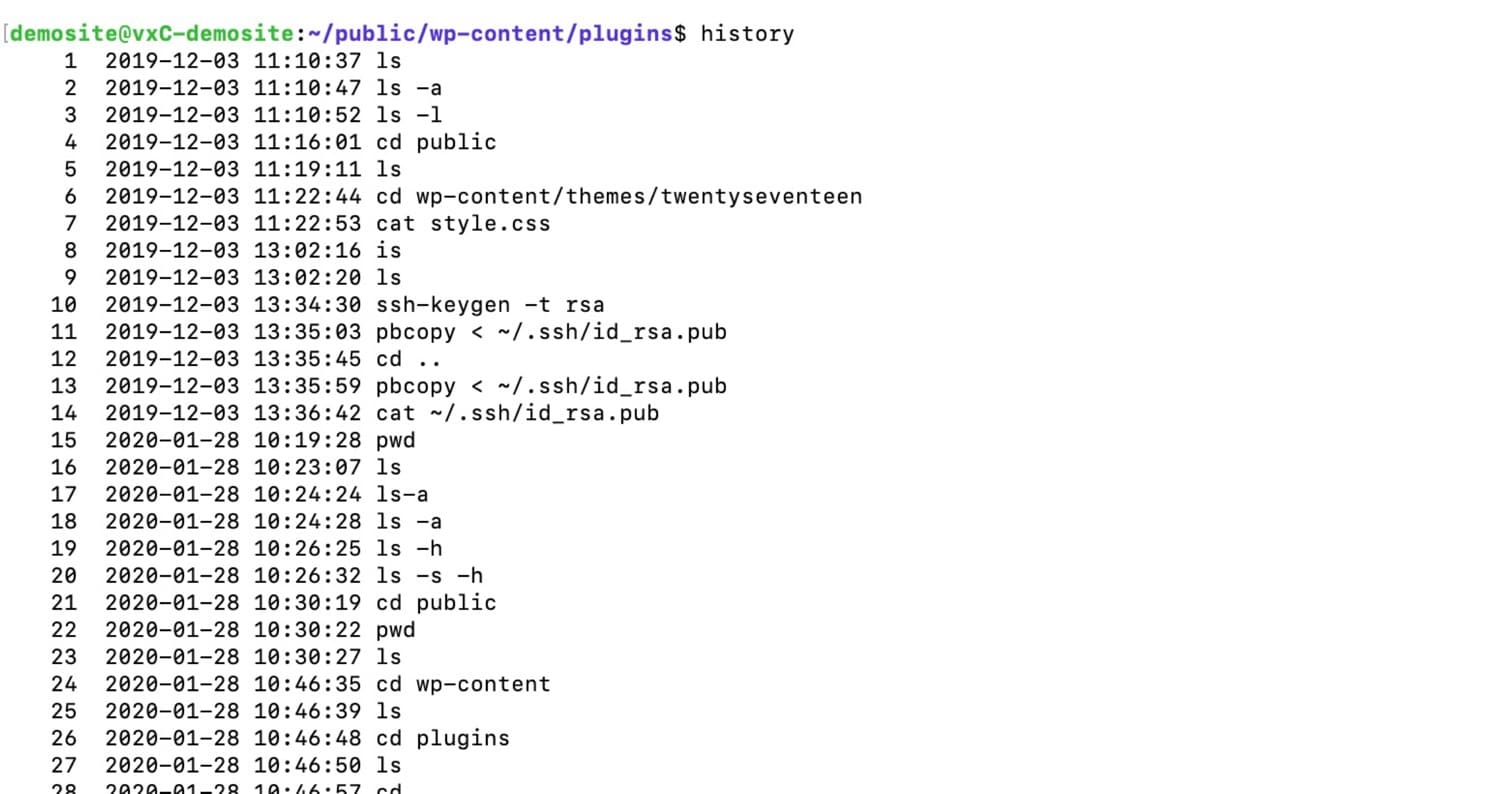
history – Show last 50 used commands
If you’re not quite sure what you’ve done most recently and want to repeat or undo something, use the history command to output a list of the most 50 recent commands you’ve used.
screen – Resume SSH Sessions
Screen is a terminal multiplexer, or a tool that lets you extend a single terminal session with multiple virtual sessions. With Screen, you can switch between different “windows” running different tasks without having to open two SSH connections to your server.
For example, you can use nano in one window, and switch to another window to download a large file using wget. Furthermore, working in a Screen session allows you to resume your task after reconnecting due to a SSH connection or network error. For WordPress users, Screen is useful for safely running long tasks like database imports and regex search and replace processes with wp-cli.
Let’s take a closer look at how to use Linux Screen.
How to Install Linux Screen
First, you’ll want to make sure Screen is installed on your server with the command below.
screen --versionIf Screen is installed, you’ll see something like this.
kinstalife@mYJ-kinstalife:~$ screen --version

Screen version 4.03.01 (GNU) 28-Jun-15
Otherwise, use the commands below to install Screen.
Ubuntu and Debian
sudo apt update

sudo apt install screen
CentOS and Fedora
sudo yum install screen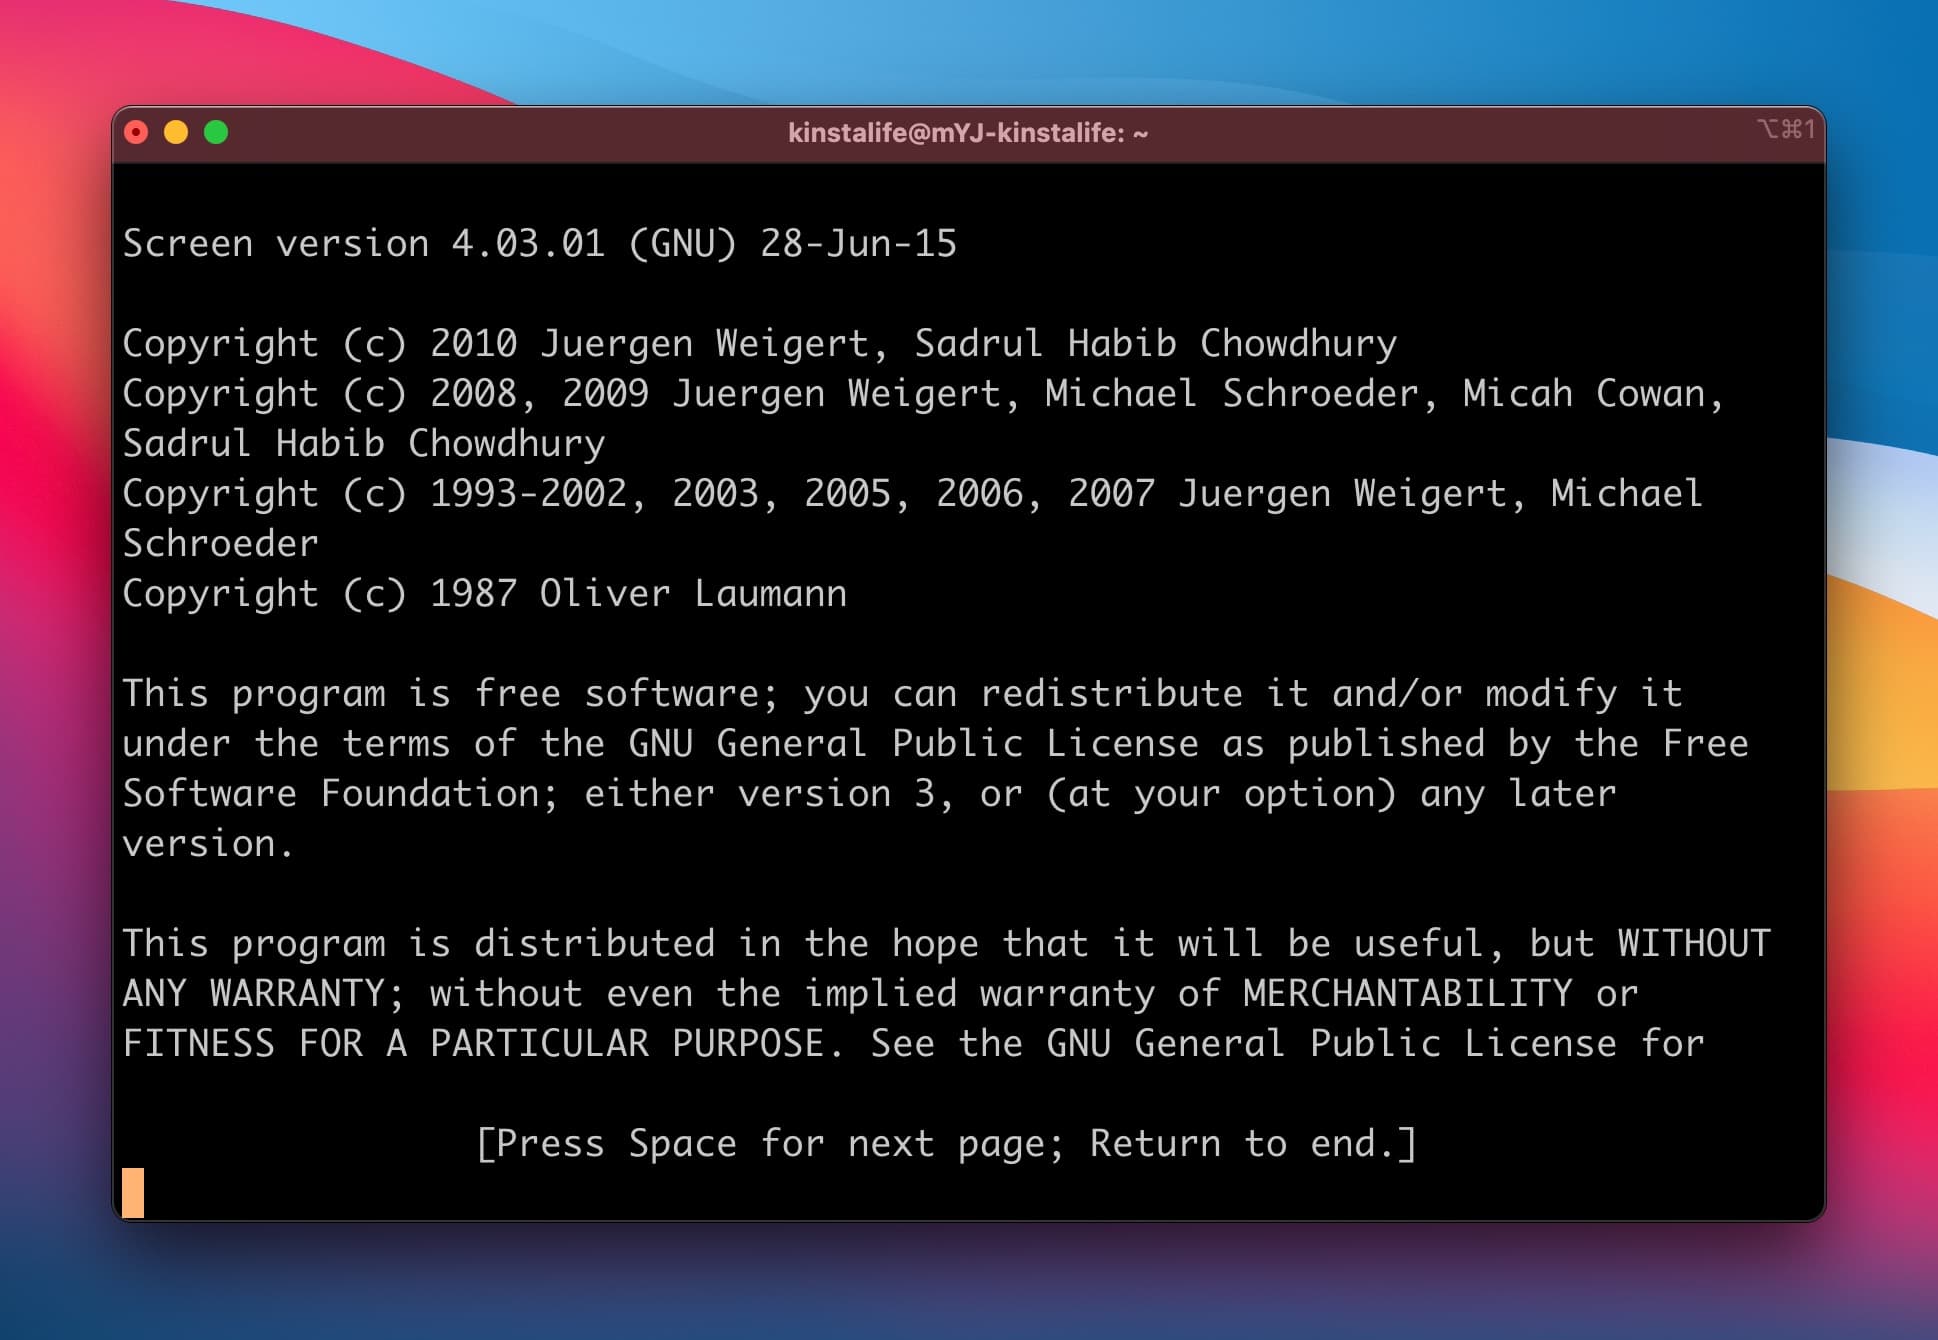
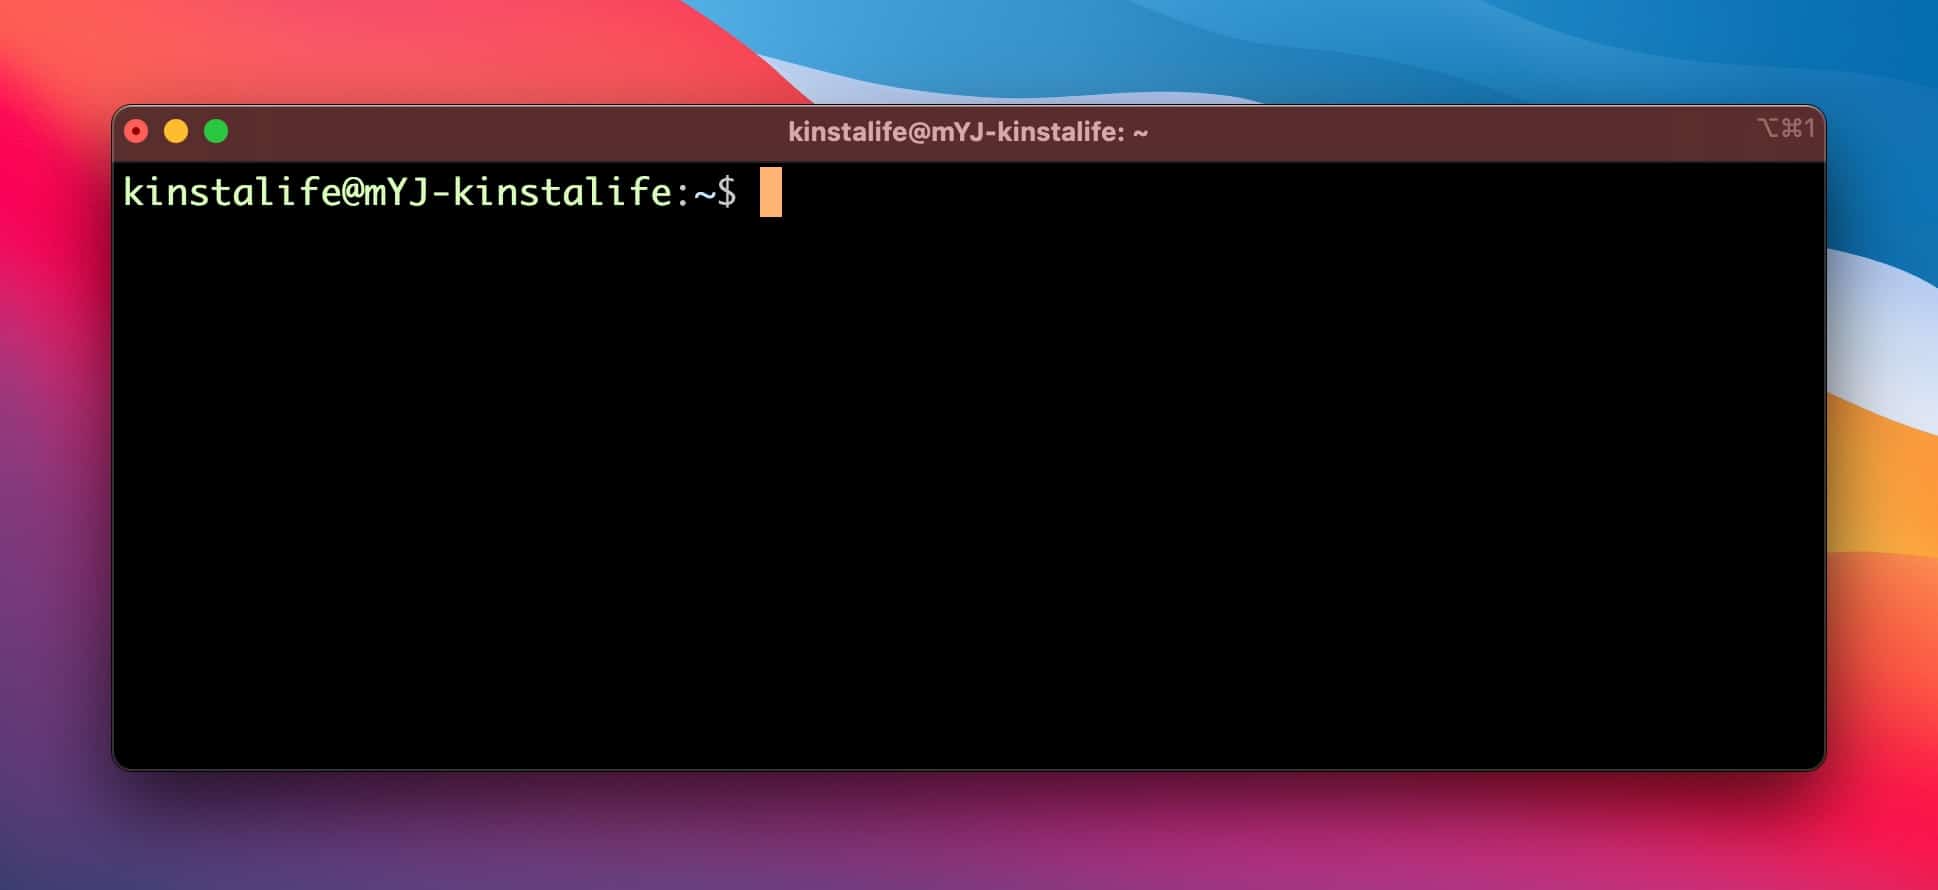
While your Terminal doesn’t look any different than before, you’re now in a Screen session! Let’s try to create a new window in the Screen session now.
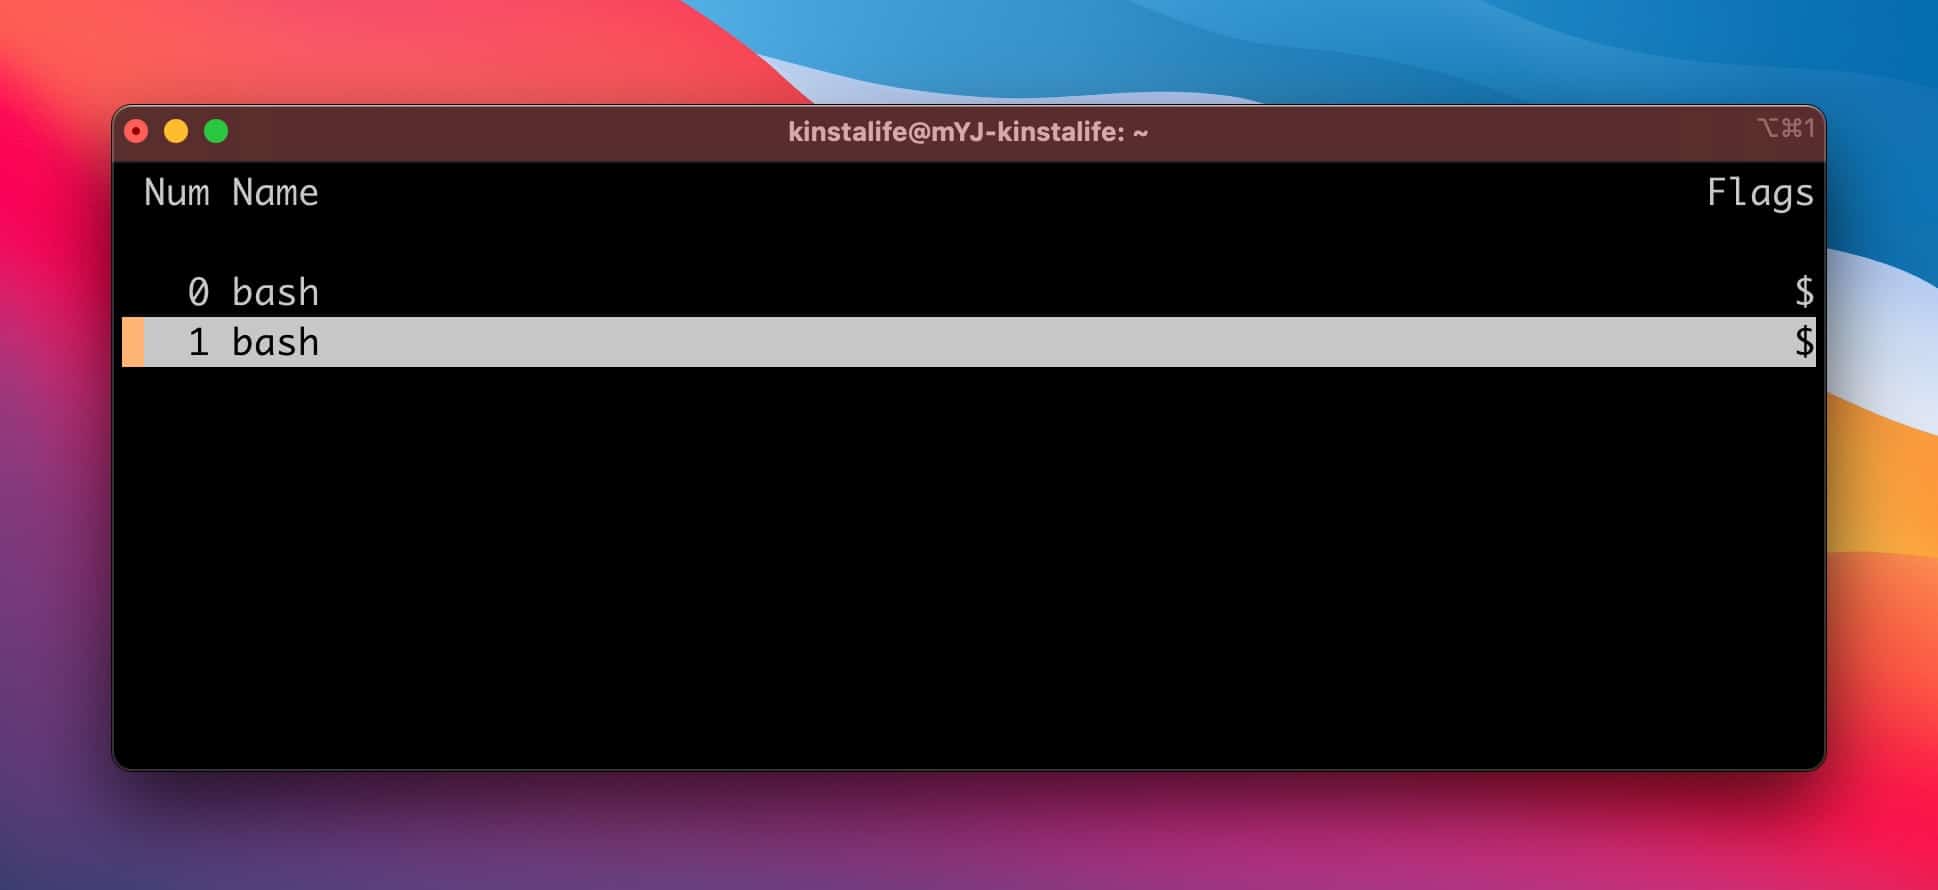
In Linux Screen, all shortcuts start with Ctrl+A. To create a new window, press Ctrl+A, let go, then press c. To view the two windows, press Ctrl+A followed by ”.
How to Switch Between Screen Windows
The screenshot below shows two windows – 0 and 1. From this window, you can use your arrow keys to move up and down between different windows. Press “Enter” or “Return” on a highlighted window to select it. If you know the number of a specific window, you can also use Ctrl+A and number to select it.
Lastly, you can also use the commands below to navigate to the next or previous window.
- Next Window –
Ctrl+An - Previous Window –
Ctrl+Ap
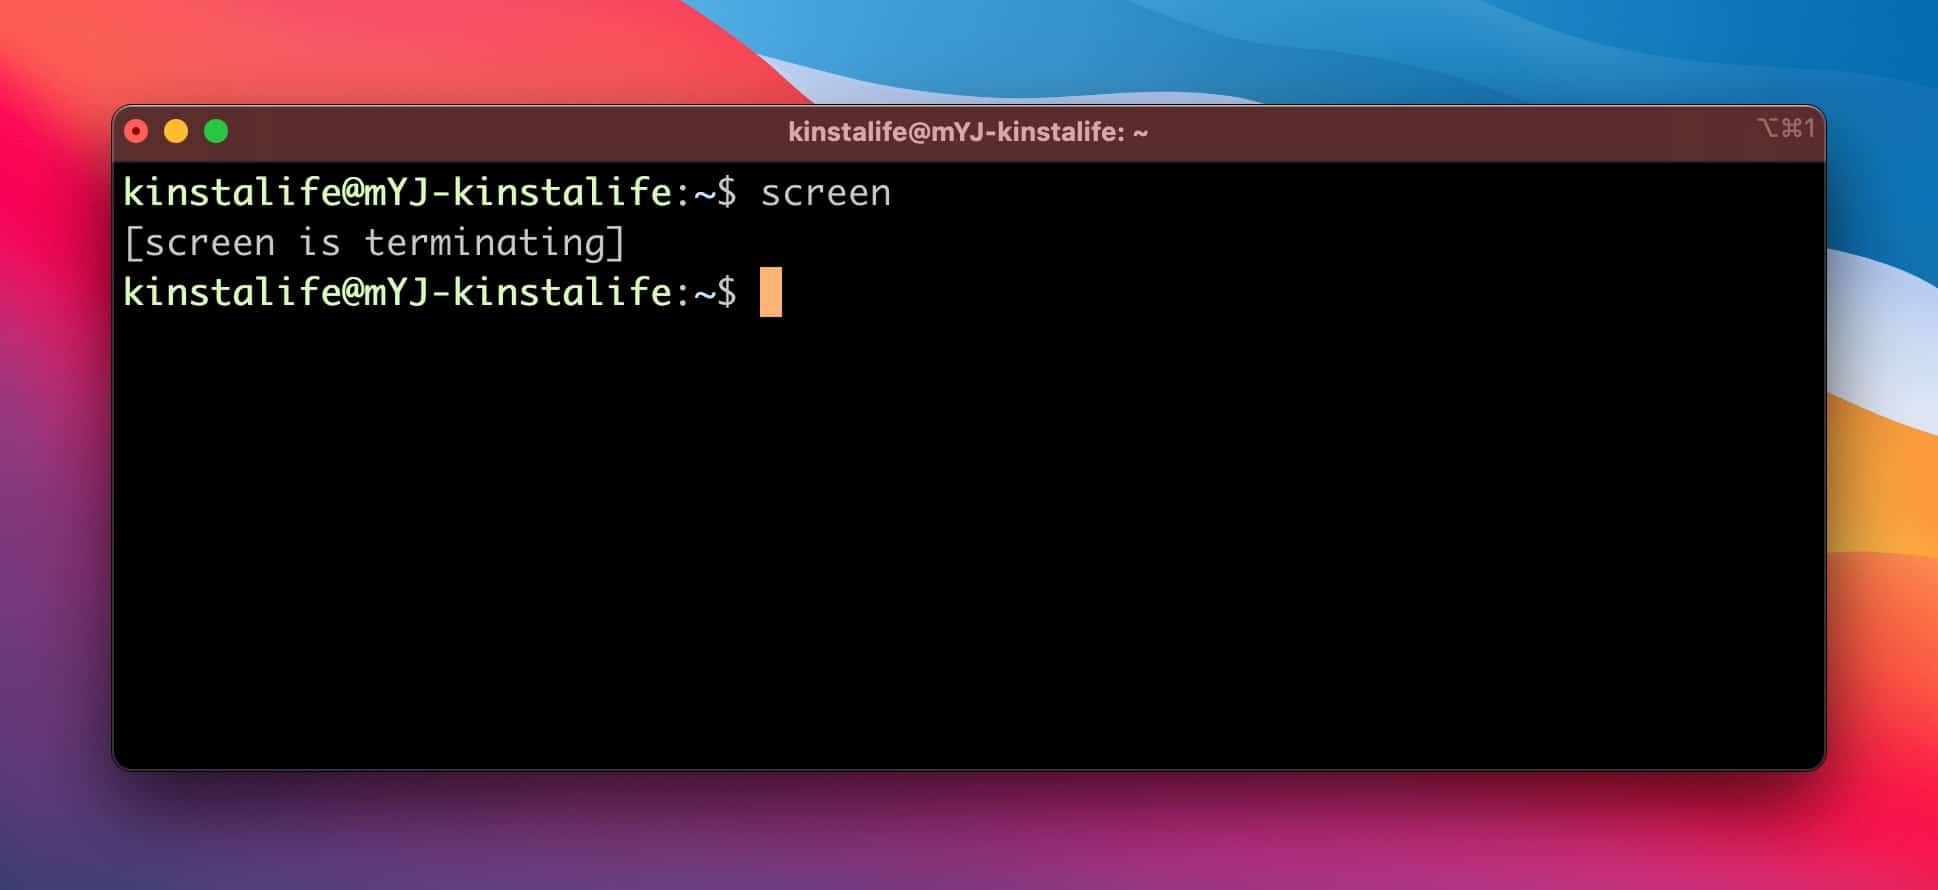
How to Exit a Screen Session
To exit a Screen session, press Ctrl+D. The Terminal will read “[screen is terminating]” – this indicates the Screen session is no longer active.
How to Manage Multiple Linux Screen Sessions
One of Screen’s most powerful features is the ability to use multiple Screen sessions. For example, you can have one Screen for running search and replace tasks on the database, one for navigating around the WordPress filesystem, and another one for updating plugins in wp-cli. Best of all, you can detach and resume Screen sessions as needed. This means you can resume a long database import process even if you lose connection to your server.
Before we move on, use Ctrl+D to exit your existing Screen session if applicable. After you’ve terminated the Screen session, use the command below to create a new session. Notice how this command lets you set a unique name for the session. Feel free to replace “session1” with whatever you’d like.
screen -S session1After creating the new session, use the screen -ls command to list all the active Screen sessions. In the screenshot below, you can see session1, the session created by the command above.
How to Use Linux Screen
After installing Screen, use the screen command to start a new Screen session. You should see some introductory text like the screenshot below. Press “Enter” or “Return” on your keyboard to finish initializing Screen.
How to Detach a Linux Screen
When you use Ctrl+D to exit a Screen session, it terminates the session completely. What if you wanted to keep the session running in the background while you work on something else? That’s where detaching comes in. When you detach a Screen session, it keeps running in the background. Detaching is useful for keeping long running processes like database imports and Elasticsearch indexing active in the background.
To detach a Screen session, just press Ctrl+A followed by d. If you run screen -ls after detaching, you’ll see a “(Detached)” parameter for the Screen session.
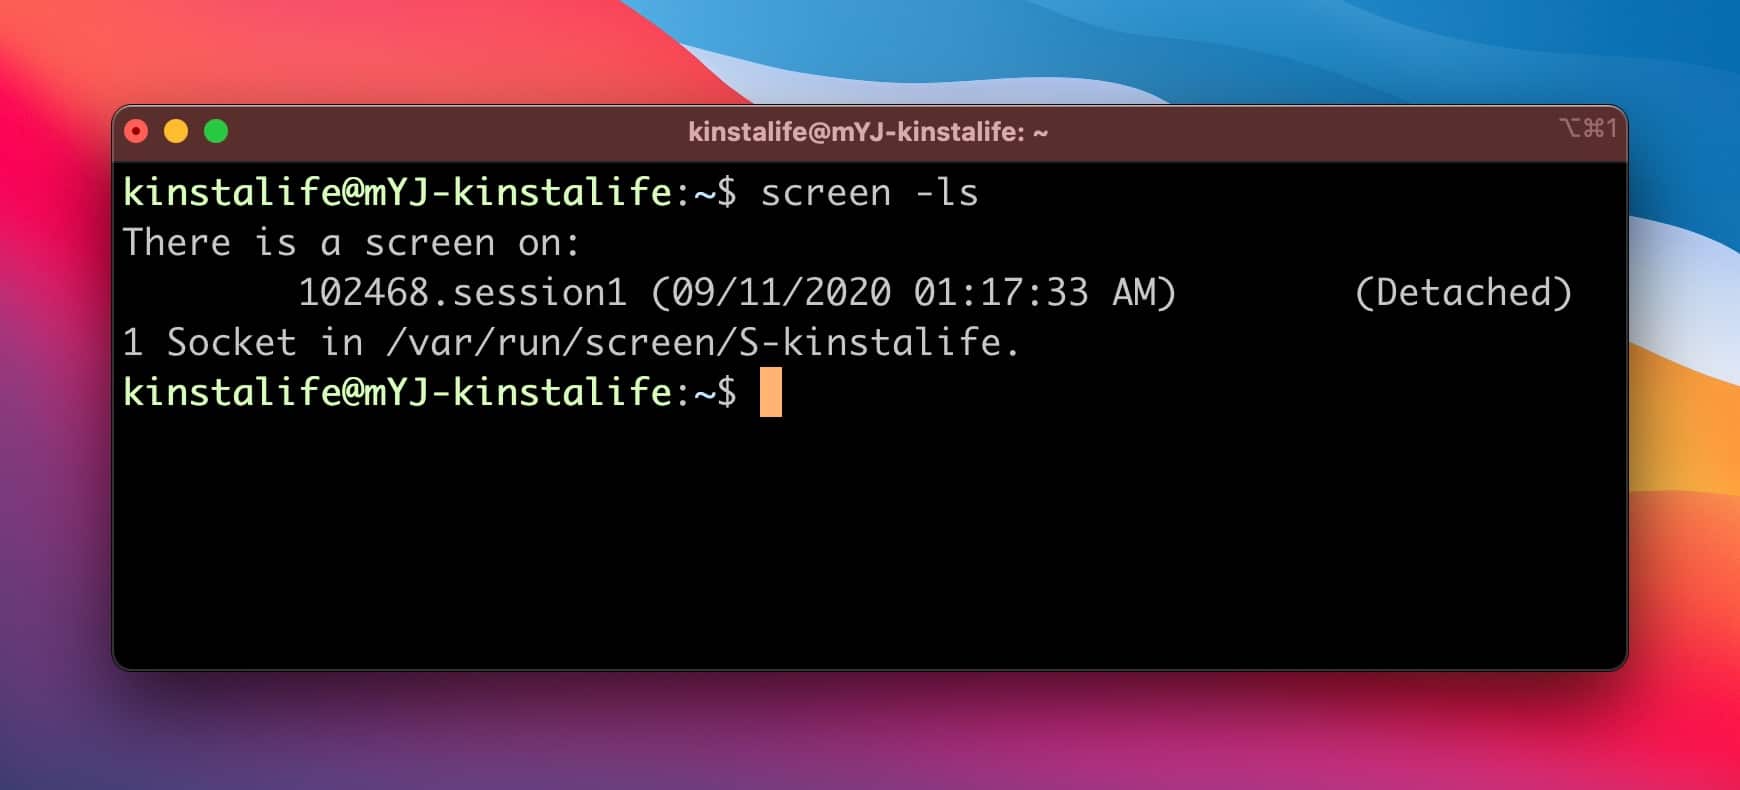
After detaching a Screen session, you can create another screen.
screen -S session2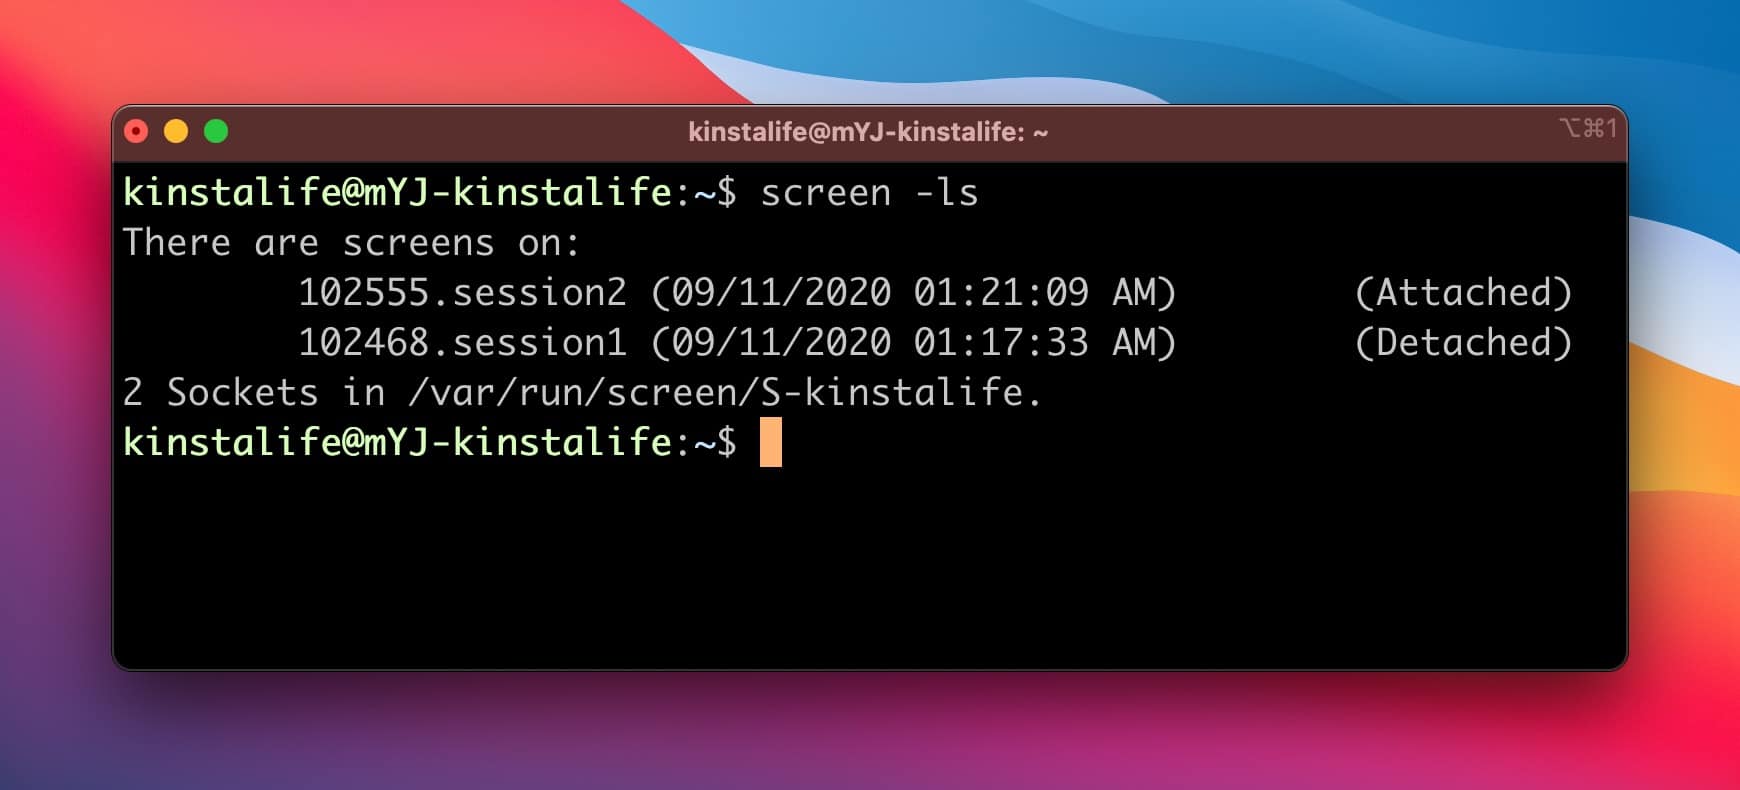
How to Resume a Linux Screen
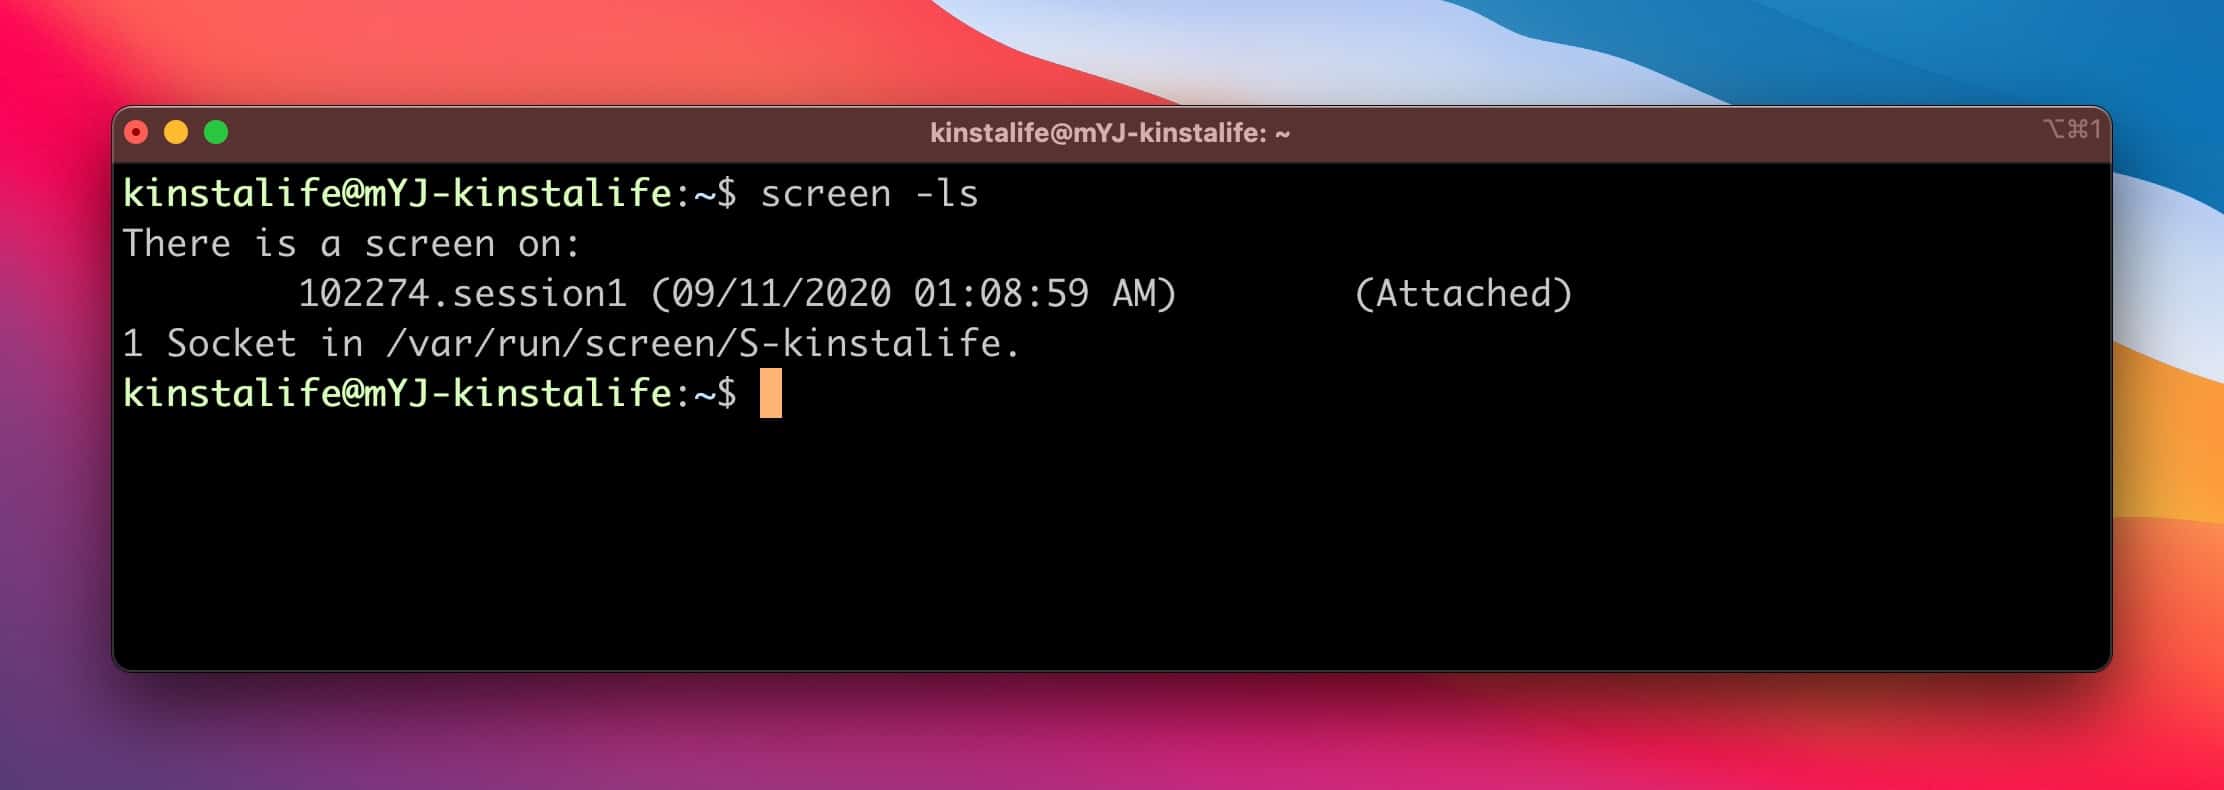
To resume a detached Linux screen, use the command below. Be sure to replace “session1” with the name of the session you want to resume.
screen -x session1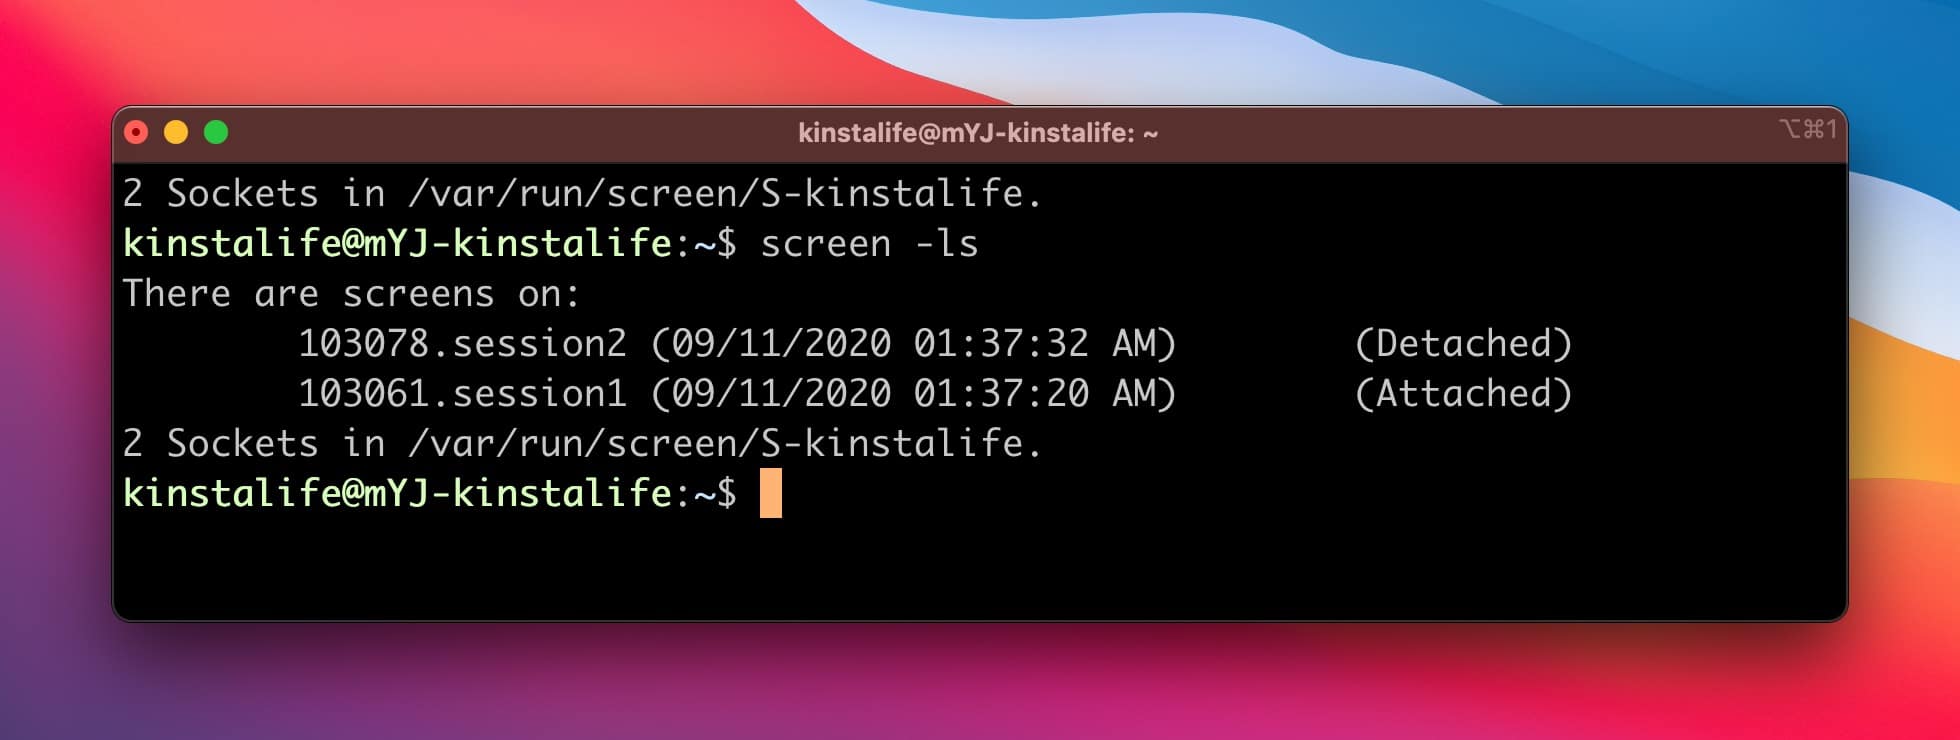
In the screenshot below, you can see “session1” is now attached, and “session2” is detached.
Screen is a powerful tool for multitasking in the terminal. It allows you to run multiple distinct environments for different tasks without having to make multiple SSH connections. We recommend using Screen if you’re running a time-intensive process on your WordPress site.
Other Useful Commands When Working via SSH
The following commands don’t come under the headings above but you might find them useful for working with your WordPress site via SSH.
netstat – Display Network Connections
Type in the netstat command and you will see details of your network connection and status:

exit – Exit the Remote Server
When you’re done working with your remote WordPress site, type in the exit command to exit the server and return to your local machine.
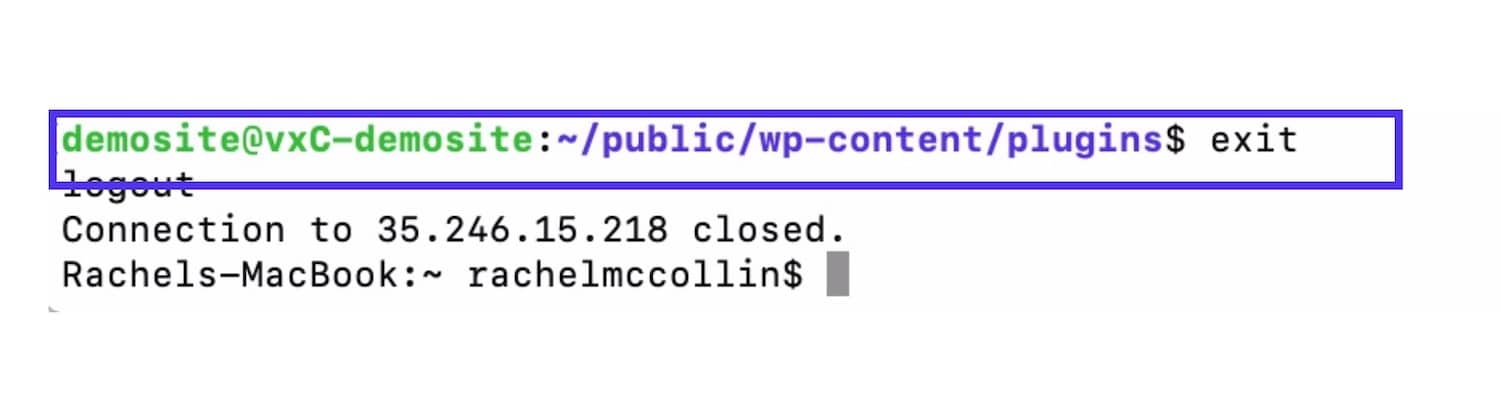
You should always do this when you finish working, so no one else can access your server via SSH.
Summary
Being able to access your WordPress site via SSH gives you a secure and convenient way to work with the files on your site without having to open a FTP client or a web browser.
Thanks to the commands listed here, you should be able to carry out most of the tasks you’ll need to do in WordPress over SSH and get more work done faster.

Rachel McCollin has been helping people build websites with WordPress since 2010. She's a huge fan of self-hosted WordPress and wants to help as many people as possible create an awesome website with it.

