When a deal closes in Salesforce, the site it represents still depends on a separate set of manual steps to go live. A developer has to find the right client site in MyKinsta, create a backup, and push staging to production, all at the right moment.
Using the Kinsta API, you can connect these two parts of the workflow so that deal approval automatically triggers the launch. Instead of relying on someone to carry out each step, the process runs as soon as the opportunity reaches the target stage.
It’s a straightforward setup: fire a batch of MyKinsta tasks when a Salesforce Opportunity updates, and remove the need for manual intervention after deployment. Meanwhile, your client gets a faster path from approval to a live site, without waiting on handoffs between teams.
What you need before you start
To follow this tutorial, you need a Kinsta account with a WordPress site that has both a staging environment and a live environment, a Salesforce account with access to Flow Builder, and Node.js installed locally for the middleware.
To authenticate with the Kinsta API, navigate to Your name > Company settings > API Keys in MyKinsta and click Create API Key.
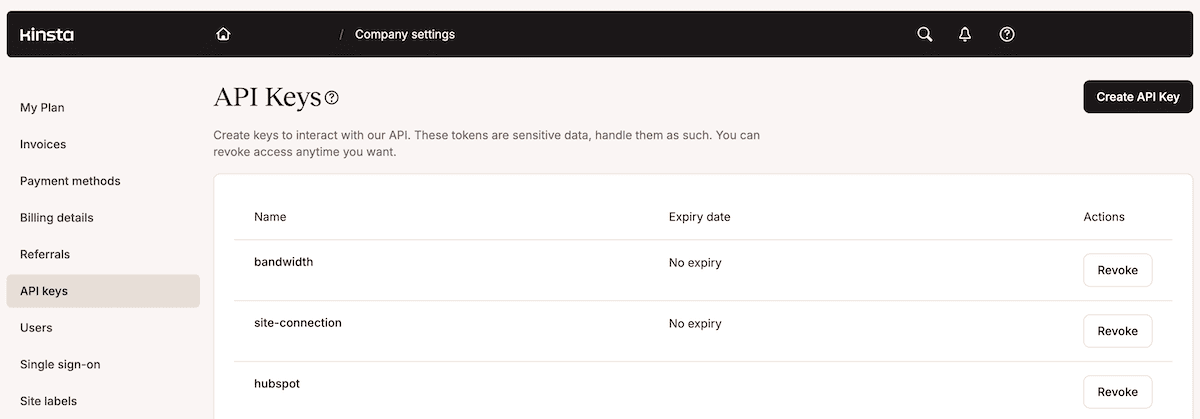
Give the key a name, set an expiry, and click Generate. The key only displays once, so copy it before you close the modal. Store it in a .env file at the project root alongside your Company ID, which you find under Company settings > Billing Details:
KINSTA_API_KEY=your_api_key_here
KINSTA_COMPANY_ID=your_company_id_here
You also need a custom text field on the Salesforce Opportunity object to store the Kinsta site ID for each client project. Head to Setup > Object Manager, then to Opportunity > Fields and Relationships.
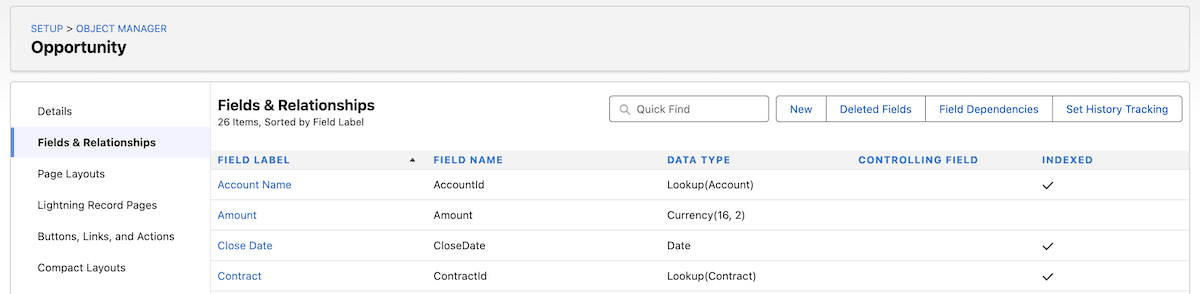
Here, add a Field Label, and Salesforce generates a Field Name that you need to note down. Set the Length to 255 and save your changes.
The site ID is a UUID that Kinsta assigns at creation. It appears in the MyKinsta URL when you open a site, or you can retrieve it once by calling GET /sites with your API key in place:
https://my.kinsta.com/sites/details/hyut4927-d324-4044-b794-67ap0rbf20bj/…
You use the site ID in a custom field on each Opportunity to trigger the entire workflow.
How to automate WordPress go-live from Salesforce using the Kinsta API
On the Salesforce side, a Record-Triggered Flow monitors the Opportunity stage and fires an HTTP callout the moment the stage transitions.
The Node.js middleware receives the site ID, calls the Kinsta API to back up the staging environment, waits for that operation to complete, then pushes staging to production. Most of the work takes place in Salesforce to ensure the right permissions and access are set.
1. Set up a Named Credential
Salesforce has an efficient way to store API keys. It involves an External Credential, which holds the actual secret, and a Named Credential, which defines the endpoint URL and connects to it.
Within Salesforce, open the Setup screen from the home menu:
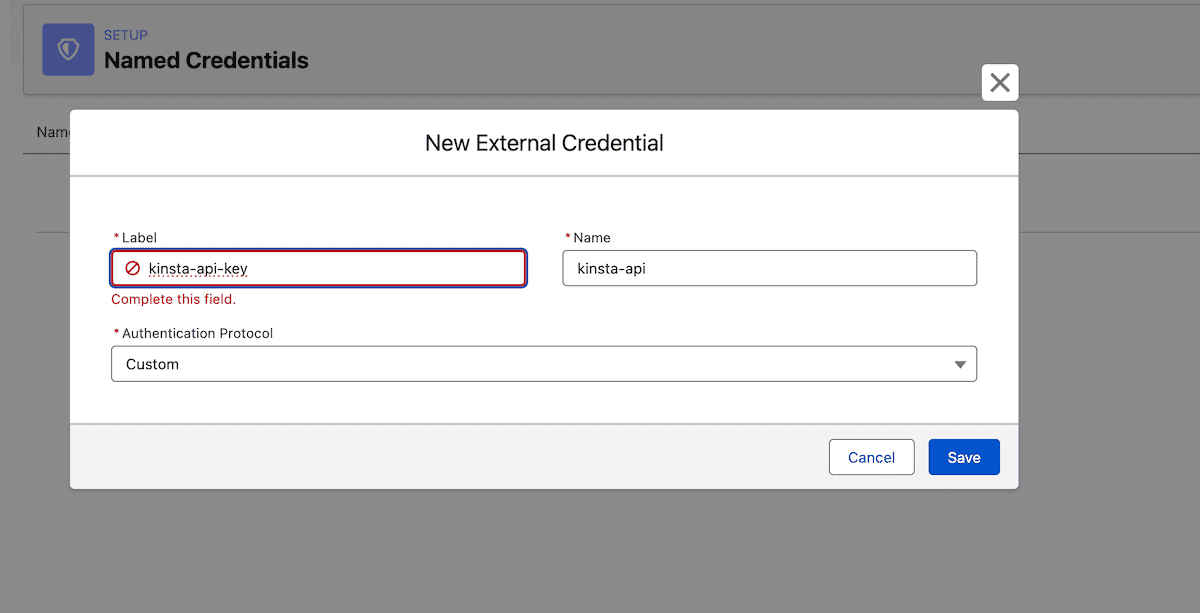
Here, search for Named Credentials, open the External Credentials tab, and click New. Give it a name and a label, then set the authentication protocol to Custom. This lets you define a Bearer token header rather than using a managed OAuth flow.
After you save it, scroll to Principals and click New. Give the principal a name, such as KinstaKey, and enter the Kinsta API key as its value.
Now, add a Custom Header with the name Authorization and a value referencing the principal, so that every outbound callout includes the API key as a Bearer token.
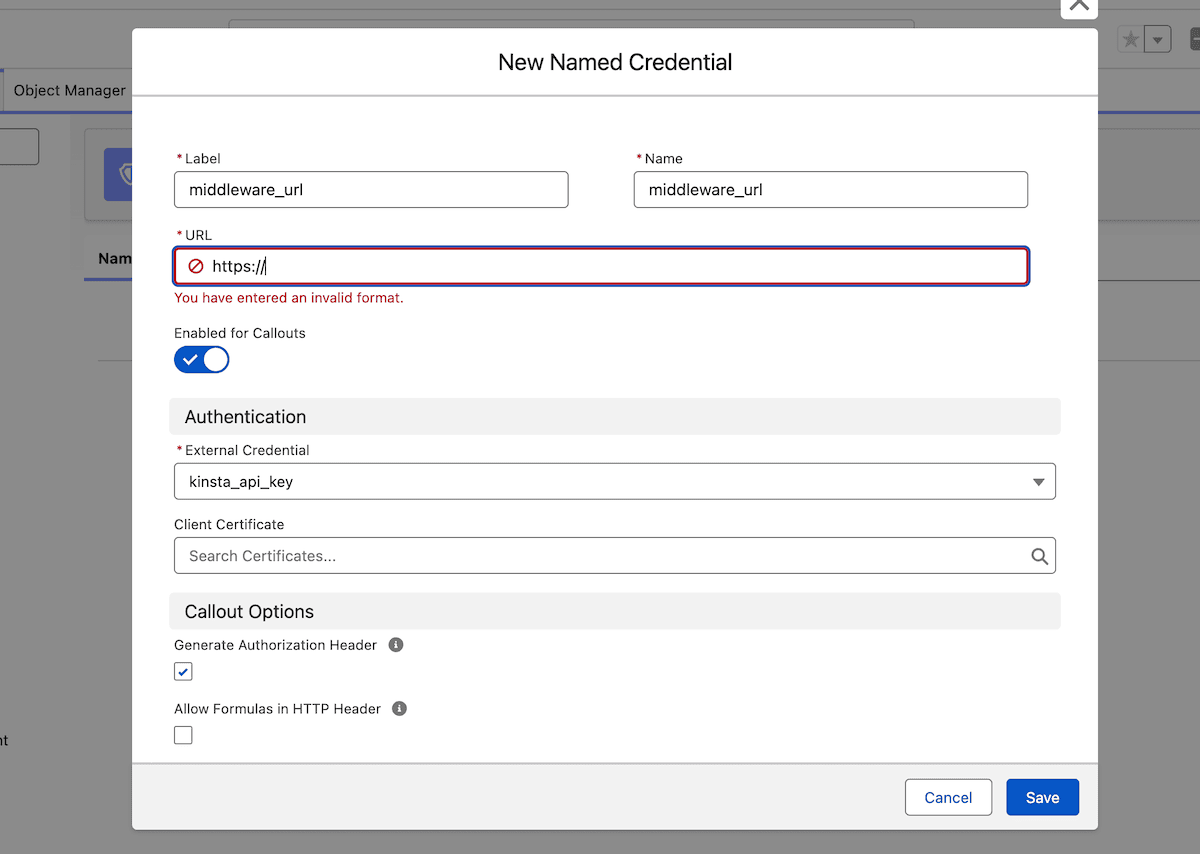
With the External Credential saved, go to the Named Credentials tab, click New, set the URL to your middleware endpoint, fill in the required fields, and select the External Credential under the Authentication section.
Setting user permissions
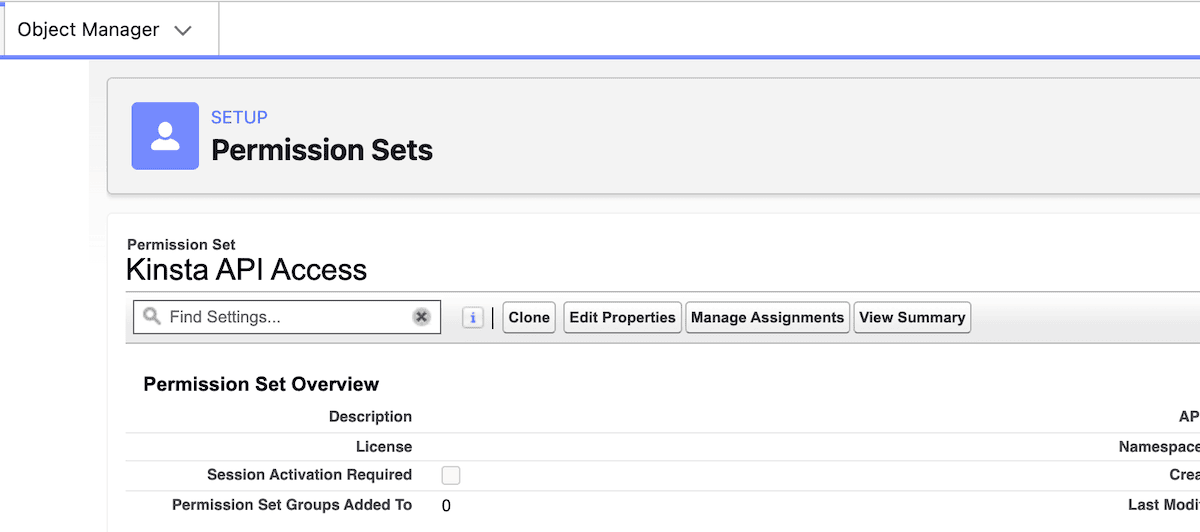
You also need to enable a Permission Set for the External Credential’s Principal, which grants your user profile the necessary credentials to call the Kinsta API. To do this, head to Setup > Permission Sets and click New.
Here, give it a name and save it, then reopen the Permission Set and click to edit the External Credential Principal Access screen. You should move the External Credential principal to the enabled list:
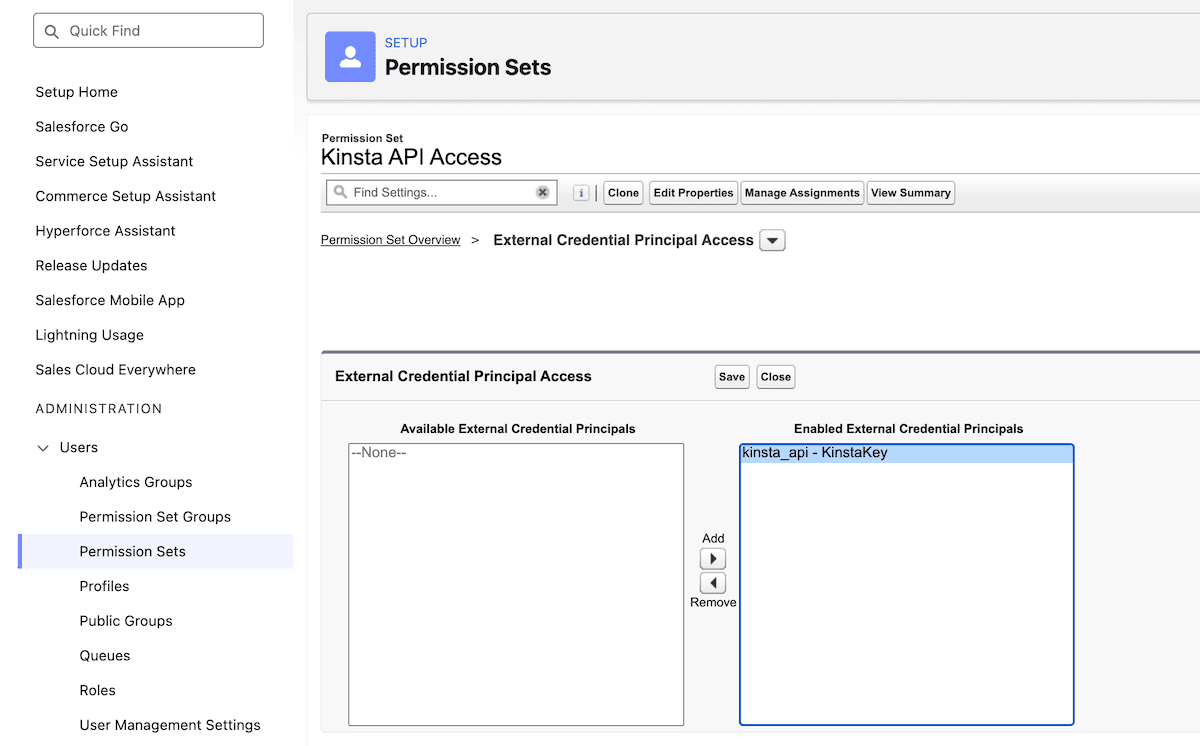
Finally, save your changes, head back to the Permission Set, and click Manage Assignments within the top toolbar:
On this screen, use Add Assignment to connect to your user profile and enable access to the Kinsta API.
2. Create a Record-Triggered Flow on the Opportunity object
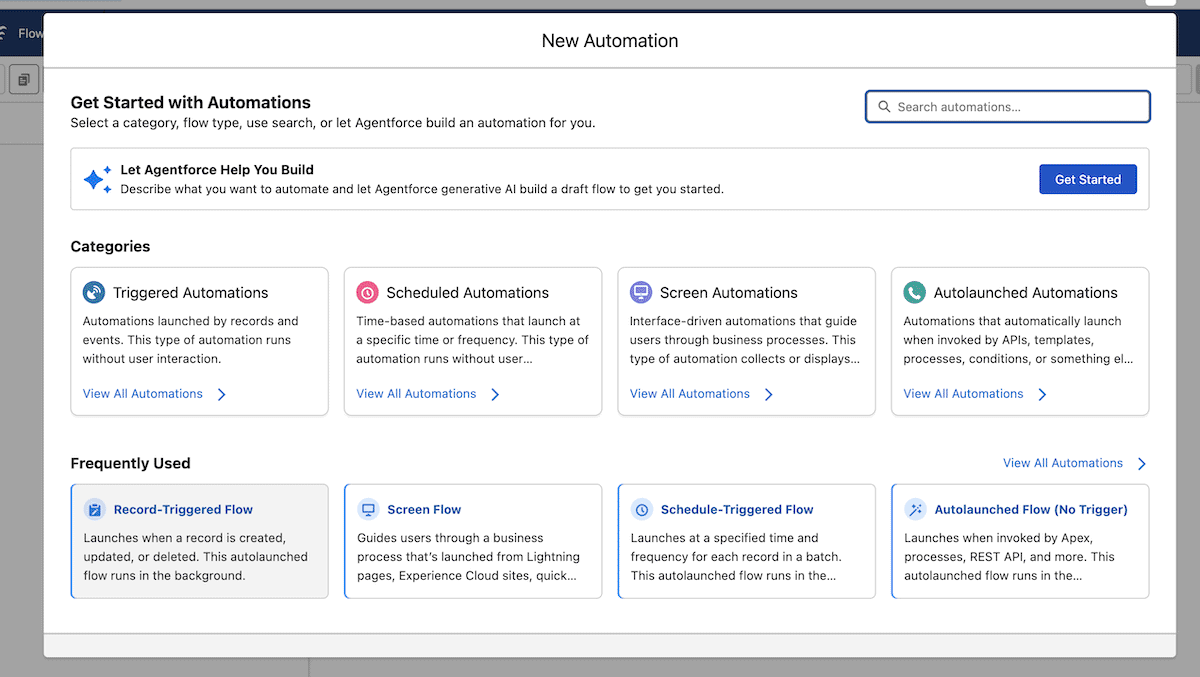
Next, open the Salesforce App Launcher, then search for Flows on the screen you come to, click New, and select Record-Triggered Flow.
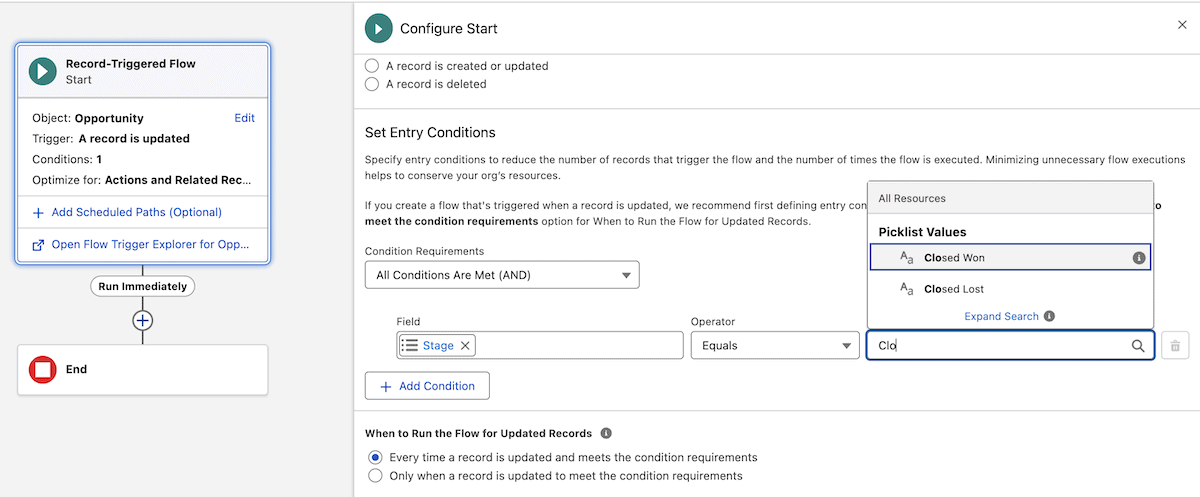
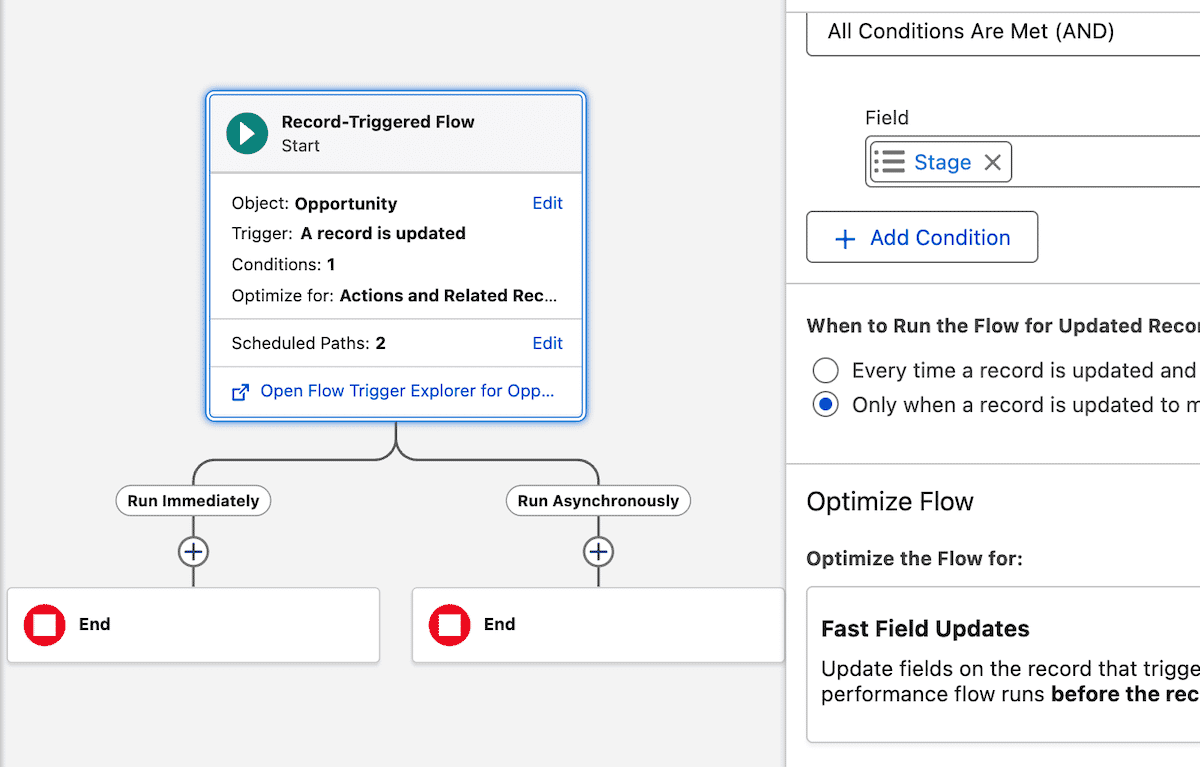
Once the Flow Builder opens, set the following options:
- Choose Opportunity as the object.
- Set the trigger to fire when a record is updated.
- Pick All Conditions Are Met (AND) from the Condition Requirements menu.
- Within the new fields that display, choose Stage for the Field, the Equals operator, and Closed Won for the Value.
- Under When to Run the Flow for Updated Records, select Only when a record is updated to meet the condition requirements.
Running the flow based on record updates prevents the deployment from firing more than once. Without it, the flow runs on every subsequent save after the stage has changed.
Finally, under Optimize the Flow For, select Actions and Related Records then toggle the Add Asynchronous Path switch that makes the callout possible and displays the two new ‘paths’.
3. Configure the async path, and add an HTTP Callout action
Salesforce does not permit HTTP callouts within an open trigger transaction. Any callout must go on the Run Asynchronously path. Actions placed on this path run after the triggering transaction commits.
On the Run Asynchronously path, add an Action element, and select Create HTTP Callout at the bottom of the right-hand panel.
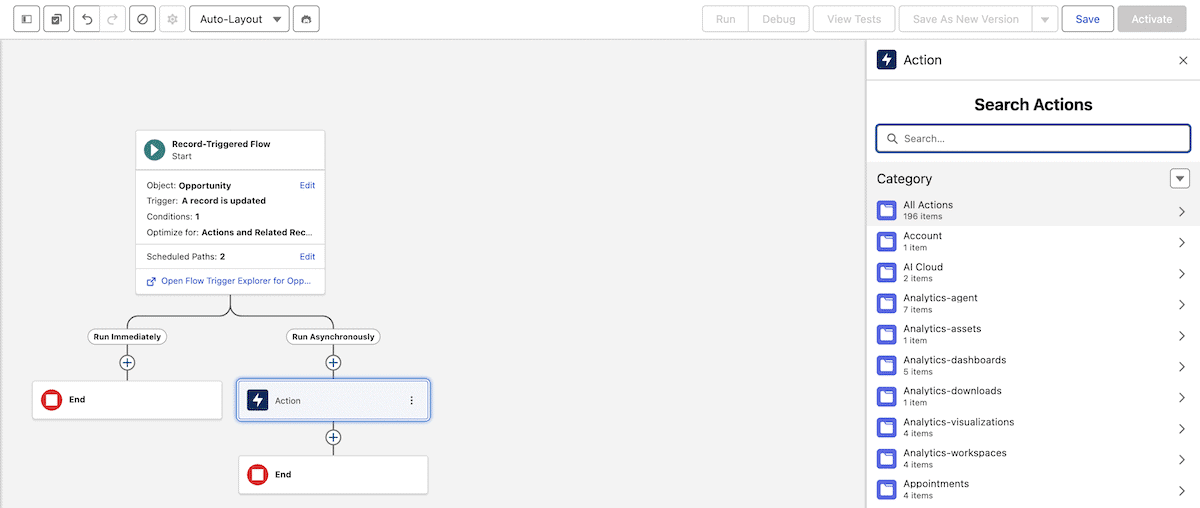
For the callout, give it a name and point the URL at your middleware endpoint, using /go-live as the slug. You can use a URL placeholder until the middleware is deployed. For local development, ngrok exposes your local port with a public URL. Also, select the Named Credential here.
Once you click Next, assign a POST method and give the callout a label. Clicking through, you need to offer an example JSON request and response. For the request, use the following:
{
  "site_id": "fbab4927-e354-4044-b226-29ac0fbd20ca"
}
If you select Connect with Sample Response on the next panel, you can use the Connect button to test the connection so far. However, this displays a 502 error until you write the middleware. For now, click Use Example Response and add the following:
{
  "message": "Received"
}
Later, come back and connect if you wish to test the connection further.
4. Setting a request body within Flow Builder
You have to do some manual work in order to set up the request body for the Action. The first step is to choose New Resource from the Set Request Body drop-down menu:

Here, enter a name (such as requestBody), save it, then select it as the Value for the request body. Next, add an Assignment element in the Flow Builder, give it a label and a name, then add the following within the Set Variable Values drop-down menus:
- Variable:
site_id - Operator: Equals
- Value: Scroll through the Triggering Opportunity submenu until you reach the Kinsta Site ID.
Completing this means the Salesforce setup is done. Next is to begin to build the Node app.
5. Build the Node.js middleware
With the flow configured, the middleware is where the Kinsta API calls live. Start a new Node.js project and install the dependencies:
npm init -y
npm install express dotenv
Express.js handles the routing and request parsing. dotenv loads the .env file so your API key is available at runtime without appearing in your source code. Next, create app.js at the project root:
// app.js
const express = require('express');
require('dotenv').config();
const app = express();
app.use(express.json());


const KINSTA_API_URL = 'https://api.kinsta.com/v2';


const headers = {
  'Content-Type': 'application/json',
  Authorization: `Bearer ${process.env.KINSTA_API_KEY}`
};

app.post('/go-live', async (req, res) => {
  const { site_id } = req.body;
  if (!site_id) {
    return res.status(400).json({ message: 'site_id is required' });
  }
  // Kinsta API calls added in the steps below
  res.status(200).json({ message: 'Received' });
});

app.listen(3000, () => console.log('Middleware running on port 3000'));
The headers constant handles Bearer token authentication for every Kinsta API request in the application. Note that the Company ID, when needed for endpoints such as GET /sites, passes as a query parameter (not in the Authorization header). The require('dotenv').config() call at the top ensures the key loads from .env before anything else runs.
Before creating a backup, the middleware needs the environment IDs for both staging and live. Add a getEnvironments function below the headers constant:
const getEnvironments = async (siteId) => {
  const resp = await fetch(
    `${KINSTA_API_URL}/sites/${siteId}/environments`,
    { method: 'GET', headers }
  );

  const data = await resp.json();
  return data.site.environments;
};
This calls GET /sites/{siteId}/environments and returns the full environments array.
6. Create a manual backup of the staging environment
Pushing an environment to production overwrites the live site. Creating a backup first means there is a restore point if the push surfaces a conflict that testing in staging did not catch.
Here, add a createBackup function below getEnvironments:
const createBackup = async (envId) => {
  const resp = await fetch(
    `${KINSTA_API_URL}/sites/environments/${envId}/manual-backups`,
    {
      method: 'POST',
      headers,
      body: JSON.stringify({ tag: 'pre-launch-backup' })
    }
  );

  const data = await resp.json();
  return data;
};
Kinsta processes the backup asynchronously and returns 202 Accepted with an operation_id rather than a completed result:
{
  "operation_id": "backups:add-manual-54fb80af-576c-4fdc-ba4f-b596c83f15a1",
  "message": "Adding a manual backup to environment in progress",
  "status": 202
}
To pause execution until the backup is complete before the push runs, add a pollOperation function underneath createBackup:
const pollOperation = async (operationId, intervalMs = 5000, maxAttempts = 12) => {
  for (let attempt = 0; attempt < maxAttempts; attempt++) {
    await new Promise(resolve => setTimeout(resolve, intervalMs));
    const resp = await fetch(
      `${KINSTA_API_URL}/operations/${operationId}`,
      { method: 'GET', headers }
    );
    const data = await resp.json();
    if (data.status === 200) return data;
    if (data.status >= 400) throw new Error(`Operation failed: ${data.message}`);
  }
  throw new Error('Operation timed out');
};
The loop checks every five seconds, covering up to a minute of processing time. A 200 status from the operations endpoint means the backup is complete and the push can proceed.
7. Push staging to production and monitor the completion
With the backup confirmed, add a pushToProduction function below pollOperation:
const pushToProduction = async (siteId, stagingEnvId, liveEnvId) => {
  const resp = await fetch(
    `${KINSTA_API_URL}/sites/${siteId}/environments`,
    {
      method: 'PUT',
      headers,
      body: JSON.stringify({
        source_env_id: stagingEnvId,
        target_env_id: liveEnvId,
        push_db: true,
        push_files: true,
        run_search_and_replace: true
      })
    }
  );
  const data = await resp.json();
  return data;
};
The source_env_id and target_env_id parameters identify where each environment pushes to. The run_search_and_replace flag updates hardcoded domain references in the database after the push. Without it, any staging domain references in the database persist on the live site after the push completes.
The push also returns 202 Accepted with an operation_id. Passing that to pollOperation confirms completion. Finally, update the route handler to call all functions in sequence:
app.post('/go-live', async (req, res) => {
  const { site_id } = req.body;
  if (!site_id) {
    return res.status(400).json({ message: 'site_id is required' });
  }
  try {
    const environments = await getEnvironments(site_id);
    const stagingEnv = environments.find(env => env.name === 'staging');
    const liveEnv = environments.find(env => env.name === 'live');
    const backup = await createBackup(stagingEnv.id);
    await pollOperation(backup.operation_id);
    const push = await pushToProduction(site_id, stagingEnv.id, liveEnv.id);
    await pollOperation(push.operation_id);
    console.log(`Go-live complete for site ${site_id}`);
    res.status(200).json({ message: 'Go-live complete' });
  } catch (err) {
    console.error(err);
    res.status(500).json({ message: 'Go-live failed', error: err.message });
  }
});
Once you save your changes, update the Named Credential with the actual middleware URL if necessary, then Activate the flow. Next, run it with node app.js and move an Opportunity to the target stage in Salesforce.
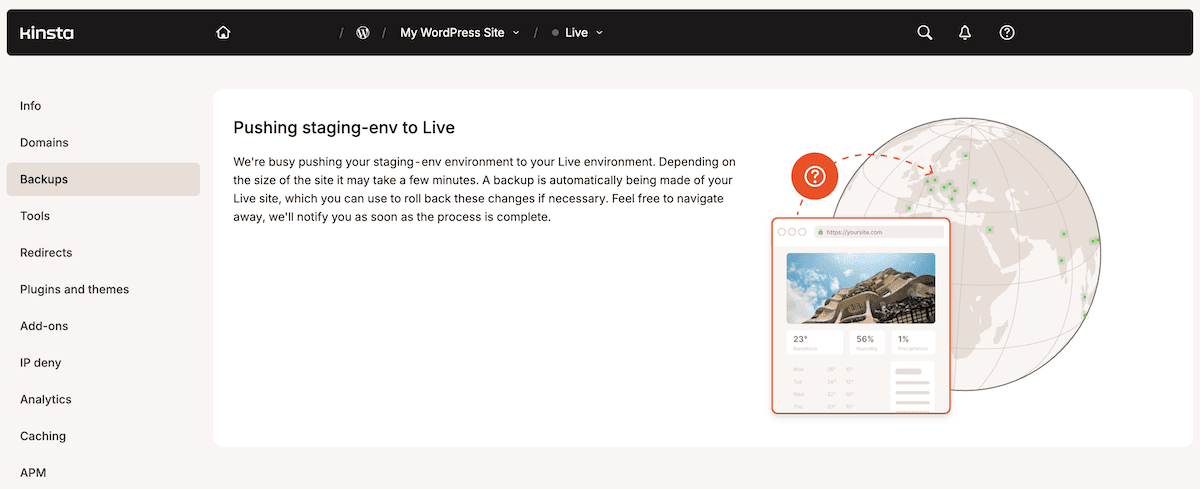
The site would go live without requiring a login to MyKinsta. You might also consider that with Salesforce’s Headless 360, you could run much of this outside the GUI, via the CLI, or as an MCP.
Automating your agency’s deployment workflow with Salesforce and Kinsta
You can close the loop between the Kinsta API and Salesforce through a middleware Node app. Once you change the stage of an Opportunity in Salesforce, MyKinsta automatically takes a backup, pushes it to production, and confirms it without any manual steps.
When the middleware is ready for production, Sevalla is a deployment target built for exactly this kind of Node.js service. You push the project to a Git provider, connect the repository, add the environment variables, and update the Salesforce HTTP Callout URL to the live middleware address.
For agencies building automation across a client portfolio, Kinsta’s Agency Partner Program provides the infrastructure partnership and dedicated support that make this kind of work sustainable at scale.