
WordPress is a highly popular content management system (CMS) for creating blogs, e-commerce stores, and other websites. It stands out due to its flexibility, supporting thousands of free and paid themes across several platforms, which helps accelerate the website creation process.
However, the true power of WordPress lies in its customization options, as you can tweak your site’s appearance with various page builders and block themes to suit your taste. But what if these options still don’t meet your specific needs? The good news is that you can develop your theme from scratch.
This guide describes the creation of a classic WordPress theme. You learn how to build a theme step-by-step, giving you the foundation for building more advanced themes in the future.
Prerequisites
Developing your theme from scratch is a technical process that involves writing code. You should be familiar with the following:
- PHP — Essential for adding functionality and dynamic content to your theme. It is the backbone of WordPress.
- HTML — Used for creating the structure of your theme’s templates.
- CSS — Used to style your theme and ensure it looks good across different devices and browsers.
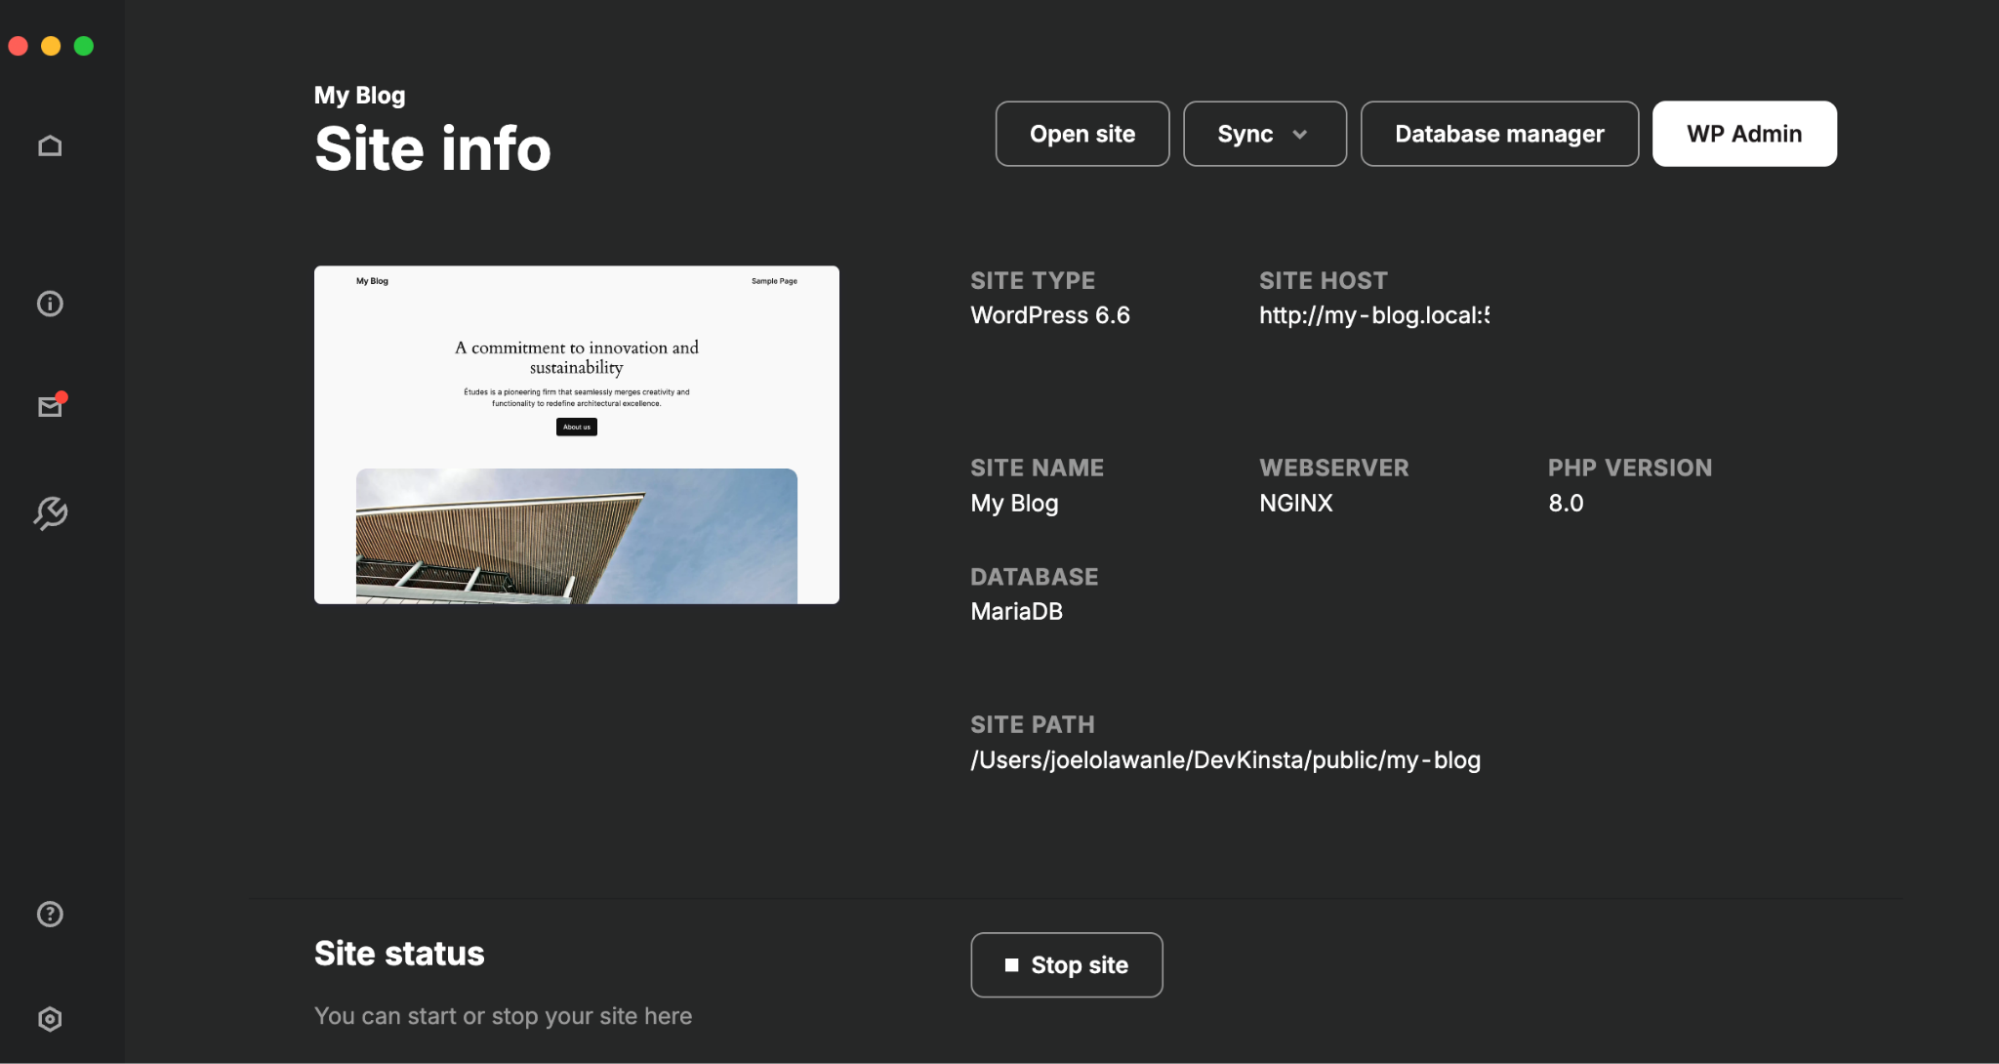
Additionally, setting up a development environment is crucial. You can create one with DevKinsta, a local development suite for WordPress sites, by following these steps:
- Visit the DevKinsta website to download the application for your operating system.
- Follow the installation instructions for your OS.
- Open DevKinsta and click New WordPress site.
- Next, select the New WordPress site option and fill in the Site name, WordPress admin username, and WordPress admin password fields.
- Finally, click Create site and wait 30-60 seconds for the site to be created.
Once your site is created, you can preview it, access your WP dashboard, and even see the file path to the local WP installation on your computer, giving you access to all the code.
Understanding the WordPress theme structure
Before diving into the step-by-step process of creating your classic theme, it’s essential to understand the structure of a classic WordPress theme and the key files involved. This knowledge will provide a solid foundation for your theme development.
The WordPress themes directory
All WordPress themes are stored in your WordPress installation’s wp-content/themes directory. Each theme resides in its folder within this directory.
Key files in a WordPress theme
There are two primary files every classic WordPress theme must have:
index.php— This is the main template file that serves as the fallback for all other template files. It is the core file that WordPress uses to display content.style.css— This file contains the theme’s metadata and custom CSS styles. It’s crucial for defining the theme’s appearance and providing essential information, such as its name, author, and version.
To structure your theme well and add functionality, you can use additional template files, such as the following, which are common to classic themes and used in the example theme created in this guide:
header.php: This file can contain the header section of your theme, including the site’s logo and navigation menu.footer.php: This file should contain the footer section of your theme.functions.php: This file can be used to add custom functions, features, and theme support options.single.php: This template file is used to display individual blog posts.page.php: The template file used to display static pages.
Now that you understand the essential files and their roles let’s move on to the step-by-step process of creating your classic WordPress theme.
How to create a classic WordPress theme
There’s a popular saying that the best way to learn is by doing. Let’s apply that principle by creating a classic blog theme that displays your WordPress posts on the homepage with custom CSS styling and additional features.

Step 1: Create a new theme folder
Create a folder within the themes directory, such as myblogtheme.
Step 2: Add theme metadata information
Next, let’s set up the theme details in the style.css file. Here is an example of some metadata information you can include in style.css:
/*
Theme Name: Kinsta Blog Theme
Author: Joel Olawanle
Author URI: https://kinsta.com/blog/author/joelolawanle/
Description: A thoughtfully designed WordPress theme crafted specifically to illustrate the theme creation process. This theme provides a clean, responsive layout suitable for showcasing articles and tutorials, making it an ideal choice for blog posts and educational content related to web development and design.
Version: 1.0
License: GNU General Public License v3 or later
License URI: http://www.gnu.org/licenses/gpl-3.0.html
*/
In the code above:
- Theme Name: The name of your theme displayed in the WordPress admin area under Appearance > Themes.
- Author: Shows the name of the theme creator.
- Author URI: Links to the author’s website or profile.
- Description: Provides an overview of the theme’s purpose and features.
- Version: Indicates the theme’s current version for updates.
- License: Specifies the distribution terms.
- License URI: Links to the full text of the license.
You can learn more about these fields in the WordPress Theme Handbook.
After adding this information to your style.css file, navigate to Appearance > Themes in your WordPress admin area. You will see the newly created theme listed. When you click to see the Theme Details, you will notice that all the information you added appears there.
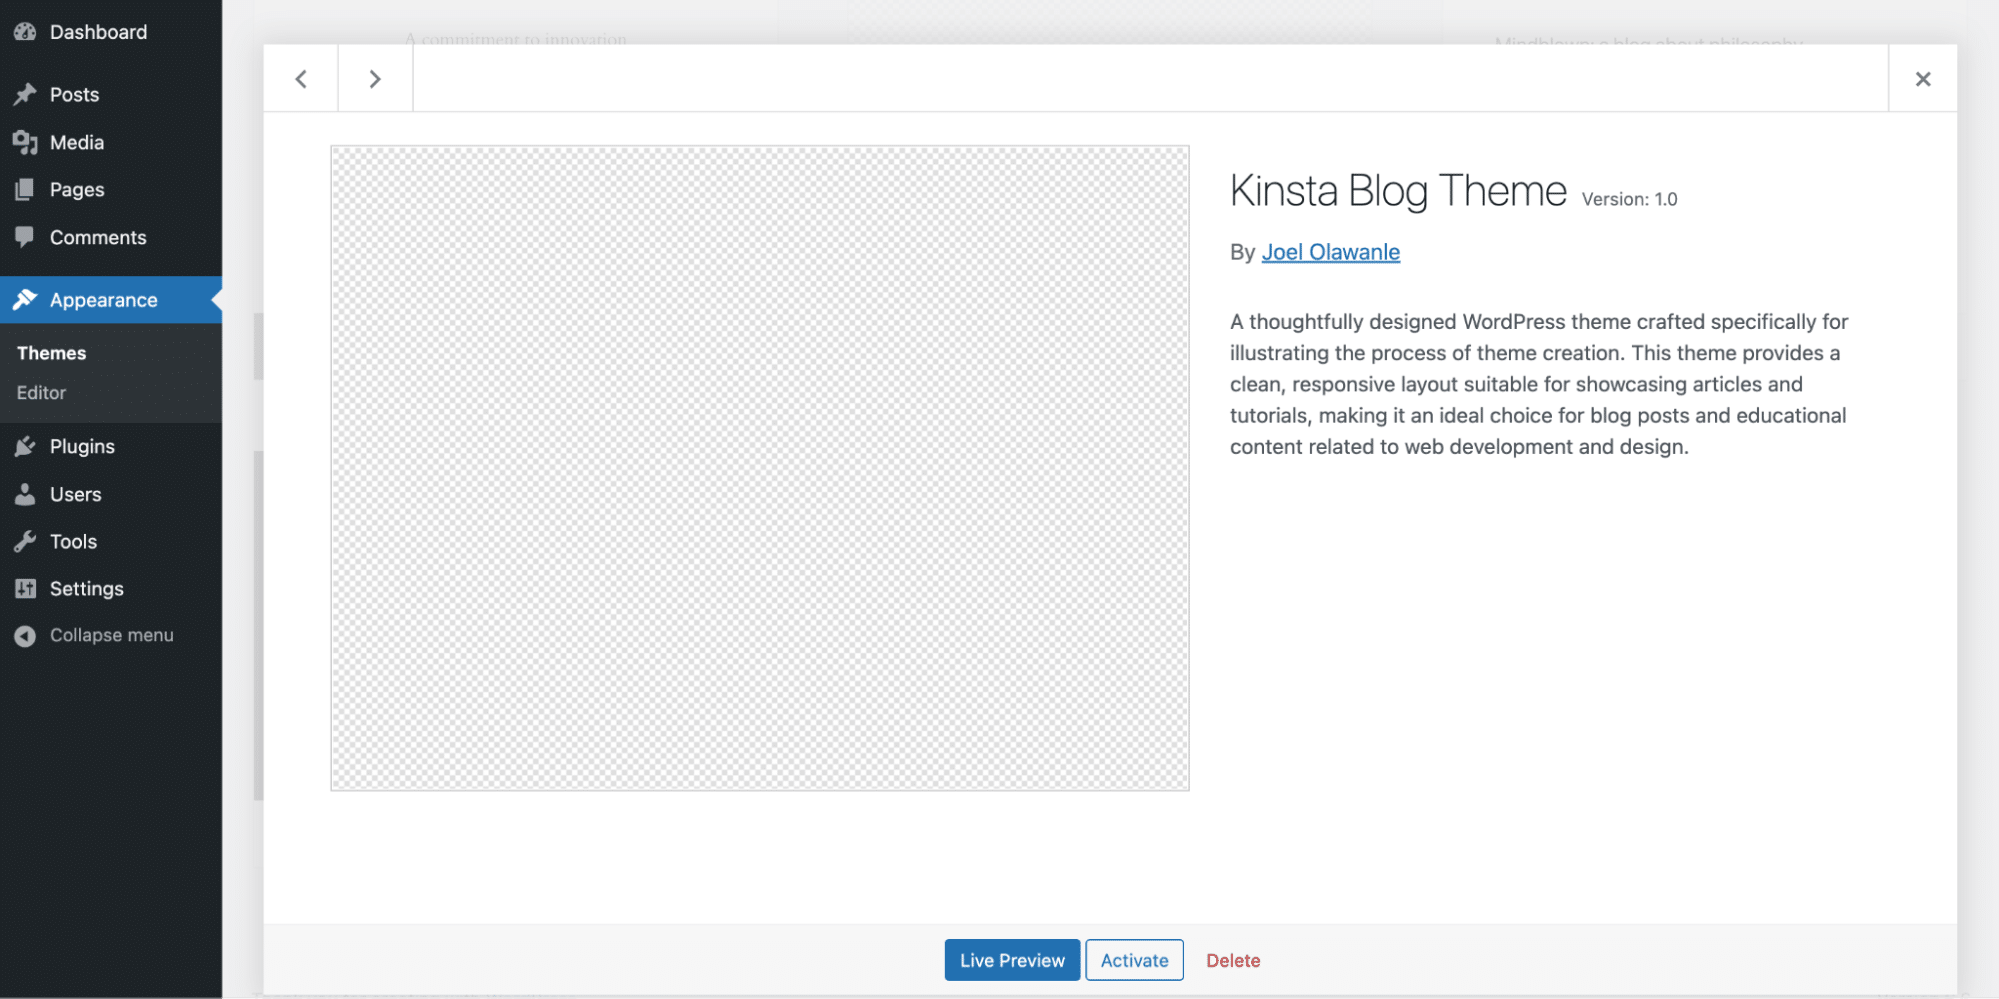
Now that we have the style.css file set up let’s move on to creating the other essential theme files.
Step 3: Create the main template file for your theme
The index.php file serves as the main template file for your theme. Any code you add here is used to display the main content of your site.
For example, if you add some basic HTML code here, everything displays when you activate and preview the theme. However, you want to pull information from your WordPress CMS to display via your theme’s template file, and this is where you use PHP to add WordPress functions.
Here is what the basic structure of the index.php file can look like:
<?php get_header(); ?>
<main>
    <!-- Main content goes here -->
</main>
<?php get_footer(); ?>
In the above structure, get_header() and get_footer() are used to pull the header and footer sections from their respective template files (header.php and footer.php).
We will populate the index.php file with the right code, but let’s first work on the theme’s header and footer sections.
Step 4: Create the header file
The header.php file displays your site’s header section, which typically includes elements like the site logo and navigation menu. It also includes stylesheets, scripts, and meta tags. Here is what our header.php file looks like:
<!DOCTYPE html>
<html <?php language_attributes(); ?>>
<head>
    <meta name="viewport" content="width=device-width, initial-scale=1.0">
    <meta charset="<?php bloginfo('charset'); ?>">
    <?php wp_head(); ?>
</head>

<body <?php body_class(); ?>>
    <header class="header-container">
        <div class="my-logo">
            <?php
            if ( function_exists('the_custom_logo') && has_custom_logo() ) {
                the_custom_logo();
            } else {
                // Fallback image
                ?>
                <a href="<?php echo home_url('/'); ?>">
                    <img src="<?php echo get_template_directory_uri(); ?>/images/dummy-logo.png" alt="<?php bloginfo('name'); ?>" class="custom-logo" width="100px">
                </a>
                <?php
            }
            ?>
        </div>
        <nav>
            <?php wp_nav_menu(array(
                'theme_location' => 'header-menu',
                'menu_class' => 'header-menu'
            )); ?>
        </nav>
    </header>
Let’s break down and explain each part of this file and add the corresponding functions and hooks to functions.php.
Let’s begin with the <head> section. This section includes essential metadata, the site title, character encoding, and the wp_head() function:
<!DOCTYPE html>
<html <?php language_attributes(); ?>>
<head>
    <meta name="viewport" content="width=device-width, initial-scale=1.0">
    <meta charset="<?php bloginfo('charset'); ?>">
    <?php wp_head(); ?>
</head>
The language_attributes(); function sets the language attributes for the HTML document. Then, the wp_head(); function is crucial as it allows WordPress and plugins to insert essential elements into the <head> section, such as stylesheets and scripts.
Enqueue the stylesheet by adding the following to functions.php:
function my_custom_theme_enqueue_styles() {
    // Enqueue the main stylesheet
    wp_enqueue_style('my-custom-theme-style', get_stylesheet_uri());
}

add_action('wp_enqueue_scripts', 'my_custom_theme_enqueue_styles');
The function wp_enqueue_style() adds the main stylesheet to the head section. We prefix the function with my_custom_theme to avoid conflicts with other themes or plugins. You may decide to add this directly to the head tag with the <link> tag.
Similarly, let’s declare a function to add the site title to the head section:
function my_custom_theme_wp_title() {
    add_theme_support('title-tag');
}

add_action('after_setup_theme', 'my_custom_theme_wp_title');
Now, because of the wp_head() function, the style and title tag are added to the header dynamically. You can verify this by inspecting your WordPress site with your browser’s developer tools. In the <head> section, you should see the stylesheet link and the dynamically generated title tag, confirming that they are included.
Next, in the body, we declared the navbar section where we show a dummy logo and ensure an option for using a custom logo when set in the WordPress site identity:
<body>
    <header class="header-container">
        <div class="my-logo">
            <?php
            if ( function_exists('the_custom_logo') && has_custom_logo() ) {
                the_custom_logo();
            } else {
                // Fallback image
                ?>
                <a href="<?php echo home_url('/'); ?>">
                    <img src="<?php echo get_template_directory_uri(); ?>/images/dummy-logo.png" alt="<?php bloginfo('name'); ?>" class="custom-logo" width="100px">
                </a>
                <?php
            }
            ?>
        </div>
The logo section uses the the_custom_logo() function to display a custom logo if one is set. If no custom logo is set, it displays a default image.
To enable custom logo support, add the following code to functions.php:
function my_custom_theme_setup() {
    add_theme_support('custom-logo', array(
        'height'      => 100,
        'width'       => 400,
        'flex-height' => true,
        'flex-width'  => true,
    ));
}

add_action('after_setup_theme', 'my_custom_theme_setup');
This function adds support for a custom logo. Finally, the navigation menu section:
        <nav>
            <?php wp_nav_menu(array(
                'theme_location' => 'header-menu',
                'menu_class' => 'header-menu'
            )); ?>
        </nav>
    </header>
The wp_nav_menu() function displays the navigation menu assigned to the “Header Menu” location. To register the navigation menu, ensure you have this code in functions.php:
register_nav_menus(array(
    'header-menu' => __('Header Menu', 'my-custom-theme'),
));
Here is what your function.php file will look like now:
 100,
        'width'       => 400,
        'flex-height' => true,
        'flex-width'  => true,
    ));
}
add_action('after_setup_theme', 'my_custom_theme_setup');

function my_custom_theme_enqueue_styles() {
    // Enqueue the main stylesheet
    wp_enqueue_style('my-custom-theme-style', get_stylesheet_uri());
}
add_action('wp_enqueue_scripts', 'my_custom_theme_enqueue_styles');

// Function to add the site title to the head section
function my_custom_theme_wp_title() {
    add_theme_support('title-tag');
}
add_action('after_setup_theme', 'my_custom_theme_wp_title');
?>
By following these steps, you ensure that your header supports a custom logo and displays a navigation menu, making it dynamic and easily customizable through the WordPress admin dashboard.
Step 5: Create the footer file
The footer.php file will be responsible for displaying the footer section of your site. For this theme, the footer.php file will only display the copyright year:
<footer>
  <p>Copyright © 2024</p>
</footer>
<?php wp_footer(); ?>
</body>
</html>
In this file, we include the wp_footer() function, similar to how we included wp_head() in the header. The wp_footer() function allows WordPress and plugins to insert essential elements, such as scripts, just before the closing </body> tag. This is crucial for ensuring that all necessary resources are loaded correctly and your site functions as expected.
Step 6: Displaying blog posts with the WordPress loop
Let’s return to the index.php file to explain how to loop through and display posts from your WordPress site using the WordPress loop — a powerful way to display content dynamically. This is what the loop looks like:
<div class="my-posts">
    <?php if ( have_posts() ) : while ( have_posts() ) : the_post(); ?>
        <a href="<?php the_permalink(); ?>" title="<?php the_title_attribute(); ?>">
            <article class="article-loop">
                <?php if ( has_post_thumbnail() ) : ?>
                    <?php the_post_thumbnail(); ?>
                <?php endif; ?>
                <h2><?php the_title(); ?></h2>
                <div class="flex-info">
                    <p>By: <?php the_author(); ?></p>
                    <p><?php the_time('F j, Y'); ?></p>
                </div>
                <?php the_excerpt(); ?>
            </article>
        </a>
    <?php endwhile; else : ?>
        <article>
            <p>Sorry, no posts were found!</p>
        </article>
    <?php endif; ?>
</div>
The code above checks for any posts to display before entering the loop. In the loop, WordPress functions like the_title(), the_author(), the_time('F j, Y'), and the_excerpt() display information about each WordPress post.
The the_post_thumbnail() function is also used to display the thumbnail, but this is wrapped in an if statement, so it only displays when there is a featured image for your post. In the functions.php file, we must add support for post thumbnails with this function so there is an option to upload featured images when you create new posts:
add_theme_support('post-thumbnails');Add this to the my_custom_theme_setup() function we created in the functions.php file. This is what the index.php file now looks like:
<?php get_header(); ?>
<main>
    <div class="hero">
        <h1>Welcome to my blog!</h1>
        <p>Here, you'll find posts on a variety of topics, including programming, web development, and more.</p>
    </div>

    <div class="my-posts">
        <?php if ( have_posts() ) : while ( have_posts() ) : the_post(); ?>
            <a href="<?php the_permalink(); ?>" title="<?php the_title_attribute(); ?>">
                <article class="article-loop">
                    <?php if ( has_post_thumbnail() ) : ?>
                        <?php the_post_thumbnail(); ?>
                    <?php endif; ?>
                    <h2><?php the_title(); ?></h2>
                    <div class="flex-info">
                        <p>By: <?php the_author(); ?></p>
                        <p><?php the_time('F j, Y'); ?></p>
                    </div>
                    <?php the_excerpt(); ?>
                </article>
            </a>
        <?php endwhile; else : ?>
            <article>
                <p>Sorry, no posts were found!</p>
            </article>
        <?php endif; ?>
    </div>
</main>
<?php get_footer(); ?>
You will notice some static code is added, which will be styled as a banner displaying “Welcome to my blog” and a paragraph of text.
Step 7: Creating a single post template
Before we style our theme, let’s define a basic template to display individual blog posts when clicked from any page or post in your theme. To do this, create a single.php file in the root of your theme and add the following code:
<?php get_header(); ?>
<main>
    <section class="single__post">
        <article class="article-full">
          <div class="single__post-header">
            <?php if ( has_post_thumbnail() ) : ?>
              <?php the_post_thumbnail(); ?>
            <?php endif; ?>
            <h2><?php the_title(); ?></h2>
            <p>By: <?php the_author(); ?> on <?php the_time('F j, Y'); ?></p>
          </div>
          <?php the_content(); ?>
        </article>
    </section>
</main>
<?php get_footer(); ?>
In the code above, get_header() and get_footer() include the header and footer. In other parts of the code, WordPress functions display dynamic content.
Step 8: Create a template file for WordPress pages
Just as you created a template for individual WordPress posts, you can create a template to display your WordPress pages. To do this, create a page.php file in the root of your theme folder and add the following code:
<?php get_header(); ?>
<main class="wrap">
  <section class="">
      <article class="article-full">
        <div class="page-header">
          <h1><?php the_title(); ?></h1>
        </div>
        <?php the_content(); ?>
      </article>
  </section>
</main>
<?php get_footer(); ?>
Step 9: Styling your theme
So far, we’ve created some basic templates for our theme. Now, it’s time to add custom styling to make it look great. You can add your styles to the style.css file in your theme folder. To get started, copy the styling from this GitHub gist for the theme example created in this guide.
Step 10: Test and deploy your theme
So far, you’ve successfully built a WordPress theme. Now, it’s time to test and deploy it.
First, ensure your theme is activated by going to the WordPress admin dashboard and selecting Appearance > Themes. If you haven’t already, click on your theme and activate it. You can also click the Customize button to set the site identity, adjust the menu, and tweak other settings to ensure your site displays correctly.
Once you’re satisfied with your theme, you have a couple of options to deploy it:
- Push your local site online: If you’re developing locally with DevKinsta, you can easily push your site to a staging environment. This allows you to test your theme in a live-like setting before pushing it to the live environment. Detailed instructions on how to do this can be found in our DevKinsta documentation.
- Package and upload your theme: Alternatively, you can package your theme into a zipped folder and upload it to an online site. Go to Appearance > Themes > Add New > Upload Theme in the WordPress admin dashboard, and select your zipped theme file to upload.
Testing your theme thoroughly in a staging environment ensures everything works as expected before making it live. This step is crucial to catch potential issues and ensure your site looks and functions perfectly.
Summary
In this article, we’ve created a classic WordPress theme from scratch. We’ve covered setting up essential files, adding custom styling, and creating templates for individual posts and pages.
If you want your site to have the exact functionality and look you desire, developing your WordPress theme is the way to go. However, if you lack the time, skills, or inclination to do so, hiring a professional can help you achieve your vision efficiently.
When you finally have a site that suits your tastes, you’ll want robust hosting to avoid issues like downtime, DDoS attacks, and more. This is where premium hosting providers like Kinsta shine.
Kinsta offers powerful WordPress Hosting with a fully containerized architecture. Contact us to learn more about our superior managed hosting solution.


