
Google Analytics 4 (GA4), the latest iteration in Google’s suite of analytics tools, has been met with mixed reactions due to its revamped interface and features. Many website owners, marketers, and everyone in between who’s accustomed to the familiar comfort of Universal Analytics have encountered several issues with GA4.
And that’s putting it nicely.
Issues have emerged, ranging from extended data delays to a lack of custom report transfers from the old platform.
As a result, many people have had trouble adjusting to GA4’s features, leaving them to seek out alternatives.
So today, we’re covering one such alternative: Matomo.
This GA4 alternative offers a breath of fresh air for those disillusioned by the complex shifts in Google’s analytics tools. We’ll take a look at why it’s a good option, how to set it up, and how to transfer your data from Google Analytics over to this tool.
Why choose Matomo over GA4?
There are four main reasons why Matomo stands out as a GA4 alternative. And it all comes down to how it handles these key areas:
- Privacy and data
- What features come integrated
- Cost
- Flexibility
Privacy and data ownership
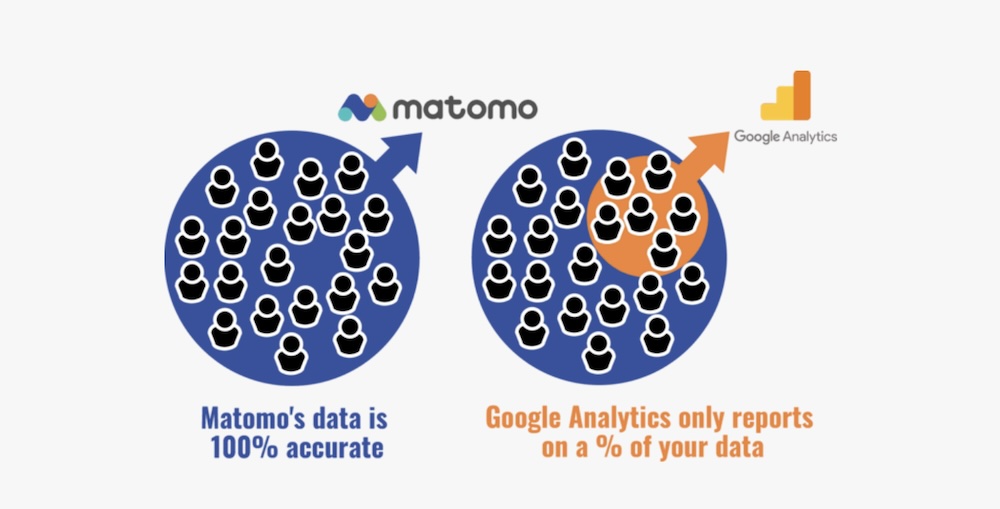
When it comes to privacy and data ownership, Matomo significantly outshines Google Analytics. Matomo provides 100% data ownership, meaning all the data collected through its platform remains solely yours and is not used by any third parties.
This is a stark contrast to GA4, where Google can potentially use data for various purposes, including advertising. Matomo’s approach to data privacy offers a welcomed stark difference, providing features that align with strict data protection laws like GDPR and CCPA like:
- IP anonymization
- Cookieless tracking
These privacy features ensure you can operate without tracking consent in certain jurisdictions, making compliance with these laws much simpler.
Integrated features
Matomo exceeds GA4 in terms of the analytics features it integrates with. It offers standard tools like heatmaps and session recordings without additional tools or subscriptions.
These features make it much easier to gain deeper insights into user behavior on your site. GA4, on the other hand, requires third-party tools for similar analytics, which can lead to additional costs and integration issues.
Cost-effectiveness
Matomo presents a more cost-effective solution, especially considering the hidden costs of GA4. Matomo’s open-source platform means there are no licensing fees, and it offers a free version rich in features.
Sure, GA4 is free, but it’s worth knowing that you need to add paid tools to achieve the same feature set.
Flexibility
For businesses looking for more control and customization over their analytics setup, Matomo also provides an On-Premise option that allows you to host analytics on your own servers.
This would be a great option for those who need to ensure their data never leaves their controlled environment. That alone makes Matomo an excellent choice for organizations that prioritize data sensitivity and compliance above all else.
How to set up Matomo on Your WordPress site
Adding Matomo to your WordPress site in lieu of traditional GA4 analytics is a great way to enhance your data privacy and ownership. It can also give you more in-depth insights into your web traffic without compromising user trust or requiring additional tools.
Prerequisites
Before diving into the installation of Matomo, you need to ensure that your WordPress site is hosted on a compatible platform. Your hosting environment should meet the following requirements:
- PHP 7.2 or greater
- MySQL 5.5 or greater is recommended
- WordPress 4.8 or higher
- At least 128MB of memory. If you have a high-traffic website, more memory may be needed.
Using Matomo for WordPress
For those preferring a hands-off approach, Matomo for WordPress is ideal. It requires minimal setup. If you’re not using WordPress, Matomo Cloud would be better suited for you.
Here’s how to get started:
- Log in to your WordPress admin dashboard.
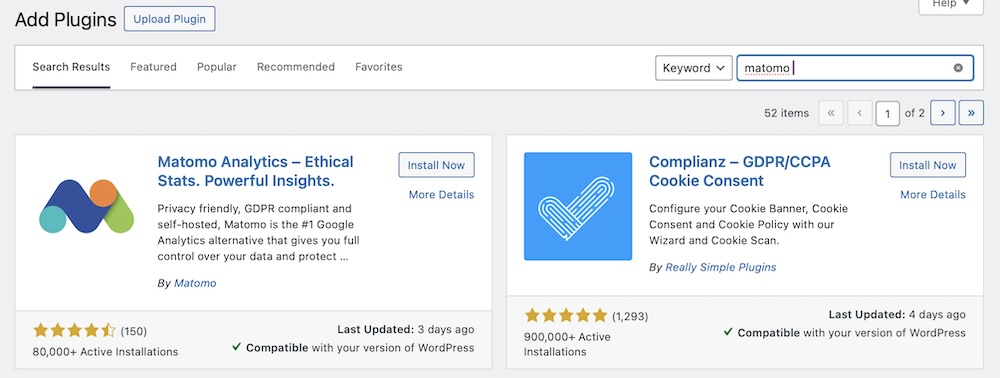
- Goto Plugins and select Add New.
- Search for “Matomo Analytics,” then click Install Now, then Activate.
Once the plugin is activated, go to Matomo Analytics > Get Started in the dashboard, then click Enable tracking now to permit it to start collecting data.
Next, go to Matomo Analytics > Settings in your dashboard to configure your tracking preferences. You can customize the tracking settings, such as enabling or disabling cookies here.
Matomo for WordPress handles all data hosting and maintenance, offering a straightforward setup without the need for server management.
Using Matomo On-Premise
The On-Premise version is the better choice if you require maximum data control. Here’s how to set it up:
To install Matomo On-Premise on your server, follow these steps to get started with a self-hosted analytics platform:
1. Check server requirements
Ensure that your server meets the following minimum requirements:
- PHP version 7.2.5 or greater
- MySQL version 5.5 or greater, or MariaDB
- An HTTP server such as Apache or Nginx
- PHP extensions, including pdo and pdo_mysql, or mysqli, json, and gd
2. Download Matomo
You can download the latest version of Matomo from the official Matomo download page. It is a zipped file containing all necessary files.
3. Upload to your server
Unzip the downloaded file and upload the Matomo folder to your web server’s desired location. This could be your root directory or a subdirectory.
4. Create a MySQL database
Before running the installation script, create a MySQL database and user for Matomo. Note down the database name, the database username, and the password.
5. Run the installation wizard
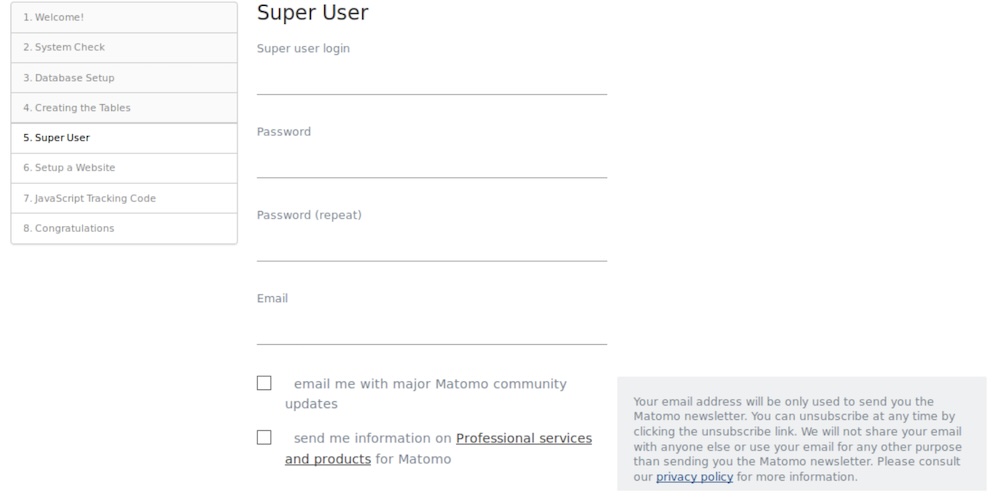
Go to the Matomo directory in your web browser. This will start the installation wizard. Follow the instructions on the screen where you will:
- Confirm system checks
- Set up the database connection using the database details you noted earlier
- Create a superuser account for Matomo administration
- Set up the first website you want to track
- Choose whether to anonymize data for privacy
6. Install tracking code
Once Matomo is installed, you will get a JavaScript tracking code. Embed this code on every website page you wish to track just before the closing </head> tag. We’ll talk about how to do this more efficiently in a moment.
7. Finalize setup
After the tracking code is set up, revisit the Matomo dashboard to verify that it is receiving data. Check your website’s traffic data to ensure everything is tracking correctly.
Enable Matomo On-Premise tracking in WordPress
Matomo actually has a plugin you can use to connect your self-hosted Matomo to your WordPress site. Here’s a quick look at how to set it up:
- Download the Connect Matomo plugin from the WordPress directory or search for it from Plugins > Add New in your WordPress dashboard.
- Select Upload Plugin and select the downloaded file if you’ve chosen that route.
- Otherwise, click Install, then Activate as you would normally.
- Go to Settings > WP-Matomo, then make sure “Self hosted (HTTP API, default)” is selected under the Matomo Mode dropdown.
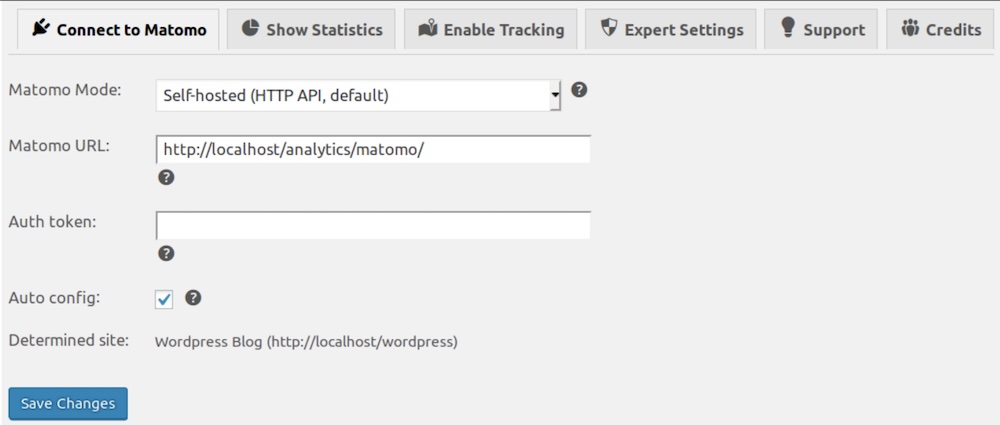
- Be sure to fill in the Auth Token and Auth config fields, then click the Enable Tracking tab. Next to Add tracking code, select Default tracking from the dropdown menu.
- Click Save Changes. Your WordPress site should now have Matomo tracking enabled and the tracking code installed on all pages.
Configuring Matomo for optimal use
To get the most out of Matomo for your WordPress site, focusing on customizing the dashboard and enabling enhanced features can greatly improve your analytical capabilities. Here’s how you can optimize your setup:
Customizing the dashboard
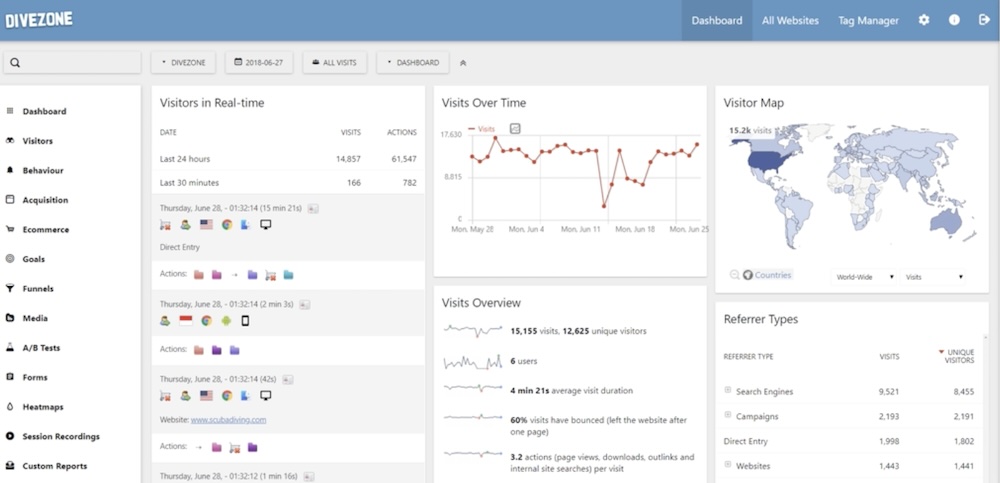
Matomo’s dashboard is highly customizable, allowing you to tailor it to fit your specific tracking needs. Here are some tips on personalizing your dashboard:
- Add widgets: You can add various widgets to your dashboard to monitor different metrics such as visits, behavior insights, conversion rates, etc. This helps you keep the most important statistics front and center for quick assessments.
- Create custom dashboards: You can create multiple dashboards based on your role or the specific insights you need. For example, a marketing team might need a dashboard focused on campaign performance, while a product team might want insights into user behavior.
- Use custom dimensions: Custom dimensions allow you to segment your data more precisely, such as by user type or device. This segmentation can help you analyze specific aspects of your data more effectively.
- Schedule reports: Automate the process of sending reports to save time and ensure stakeholders receive timely updates. You can customize these reports to include specific data points and determine their frequency.
Use enhanced features
Matomo also offers several features that can provide deeper insights than what is typically available with GA4, especially in tracking complex user interactions:
- Automatic form tracking: Matomo can track form submissions without the need for additional plugins or complex configurations. This feature is particularly useful for understanding user engagement and improving conversion rates.
- Event tracking setup: Beyond basic page views, Matomo allows you to set up tracking for various user actions such as downloads, clicks, and video plays. This detailed tracking is manageable through the Matomo Tag Manager, which simplifies the process of creating and managing tags for different events.
- Goal setting and conversion tracking: With Matomo, you can define specific goals to track desired actions on your site, such as form submissions or product purchases. This helps measure your site’s effectiveness and marketing efforts in achieving these goals.
With these tools, you can create a powerful, privacy-compliant analytics framework that provides detailed insights into your website’s performance – without compromising user data.
Transitioning from GA4 to Matomo
Transitioning from GA4 to Matomo involves importing your historical data to ensure continuity in your analytics reporting.
Here’s a detailed guide on how to perform this transition effectively:
1. Prepare for migration
Before starting the migration process, ensure that your Matomo environment is set up correctly and that you have administrative access to your Google Analytics account. Check that Matomo meets all server requirements and that the latest version is installed.
2. Install the Google Analytics Importer plugin
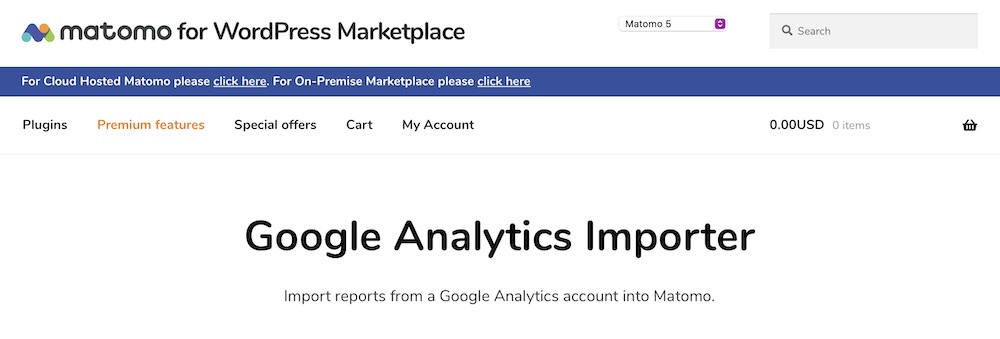
Matomo offers a specific plugin to help with data migration from GA4. This plugin can be found and installed from the Matomo Marketplace. It helps import historical data, including users, sessions, page views, goals, etc.
3. Configure the plugin
After installation, configure the Google Analytics Importer plugin by connecting it to your GA4 account. This typically involves authenticating via OAuth2 and selecting the specific GA4 properties and data streams you wish to import into Matomo.
4. Run the import process
Initiate the import process through the plugin. This can be a lengthy process, depending on the amount of data to be migrated. The plugin allows you to track the progress and troubleshoot any issues that arise during the import.
5. Verify data accuracy
Once the data has been imported, you’ll need to verify its accuracy and completeness. Compare key metrics and data points in Matomo with those in GA4 to ensure consistency and integrity.
6. Final adjustments
After the data has been successfully imported and verified, make any necessary adjustments to your tracking setup in Matomo. This might include configuring additional tracking parameters, setting up custom dimensions, or refining goals and conversions to match your previous setup in GA4.
7. Decommission GA4
Once you are satisfied that Matomo is fully operational and the data is consistent, you can safely decommission your GA4 tracking codes and account. This helps in preventing data duplication and potential privacy issues.
Embracing Matomo as a GA4 alternative
Transitioning to Matomo from traditional platforms like GA4 represents a strategic move towards enhancing privacy, gaining full control over your data, and accessing powerful analytical tools tailored to your specific needs.
With Matomo, you benefit from comprehensive features like real-time data updates, customizable dashboards, and advanced tracking capabilities. These include things like automatic form tracking and event tracking – all set within a GDPR-compliant framework.


